Unique Boots in PoE
Complete List of all Unique Boots in Path of ExileUnique Boots in PoE
Wiki page
Updated for Patch 3.21
In Path of Exile, there are a few types of equipment, Boots are one of them. They don't grant you the most plentiful defensive or offensive stats but are nonetheless very important. You can put on a pair of Boots in the dedicated slot in your character's equipment panel. The most crucial aspect that all the Boots should provide you with is Movement Speed. It should be increased by 20 to 35% with one Prefix. All the items in this category possess their base Defences which are Armour, Evasion, Energy Shield, or any combination of two. There are also Boots with Ward that are rather situational. To wear any of them, you must have a high enough character Level and meet specific Attribute requirements.
Below you will find a list of Unique Boots, all of which can be found in the game. Bury in mind, Unique does not mean better, it merely describes the fact that the modifiers here cannot be swapped, removed, or transferred to other items, thus they often do have a unique effect found nowhere else in the game, which may often be a foundation for a build. The majority of Unique Boots will fit more than one build, but so do Rare Boots. Rare Boots are extremely powerful and so most players tend to wear them instead of a mediocre Unique and only decide to wear Uniques if it's an absolute necessity.
| Strength Boots | |
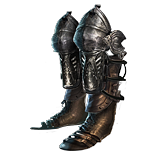
 Stormcharger - Oscilates from extremely bad do relatively good, much like Ventor's Gamble. At its best, it's still not as good as a fine pair of Rares, it has no Maximum Life bonus and only up to 50% Lightning Resistance. Use it as a budget option in any build (it's especially good in Lightning Damage builds) if you happen to have a quality pair. Stormcharger - Oscilates from extremely bad do relatively good, much like Ventor's Gamble. At its best, it's still not as good as a fine pair of Rares, it has no Maximum Life bonus and only up to 50% Lightning Resistance. Use it as a budget option in any build (it's especially good in Lightning Damage builds) if you happen to have a quality pair. |
|
|
Required Level: 23 (77-96) Armour |
|
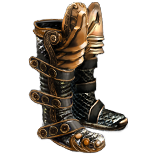
 Windscream - The most important here is the ability to apply one more Curse. It's an uncommon quality that usually cannot be found on any other boots so a lot of players, especially Occultists, use them. They're also good for leveling as every build can benefit from extending the Curse limit from one to two. Windscream - The most important here is the ability to apply one more Curse. It's an uncommon quality that usually cannot be found on any other boots so a lot of players, especially Occultists, use them. They're also good for leveling as every build can benefit from extending the Curse limit from one to two. |
|
|
Required Level: 33 Armour: (163-216) |
|
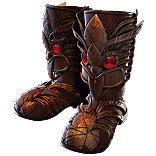 Torchoak Step - It's not good. Totem durability is not something to be concerned about, you can simply place a new Totem if one gets destroyed. You're supposed to be able to do so if you want to clear maps at a reasonable pace. Do they fit any archetype? What comes to our mind is a build like Exploding Totems Saboteur where your Damage is directly tied to Totems' Maximum Life. Torchoak Step - It's not good. Totem durability is not something to be concerned about, you can simply place a new Totem if one gets destroyed. You're supposed to be able to do so if you want to clear maps at a reasonable pace. Do they fit any archetype? What comes to our mind is a build like Exploding Totems Saboteur where your Damage is directly tied to Totems' Maximum Life. |
|
|
Required Level: 37 (219-316) Armour |
|
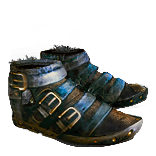
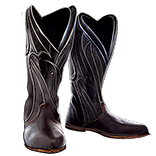
 Redblade Tramplers - Not very good, but they seem like a solid option for leveling. You could buy them for 1c to avoid Abberath's Burning Damage. They're ok but replace them later on. Redblade Tramplers - Not very good, but they seem like a solid option for leveling. You could buy them for 1c to avoid Abberath's Burning Damage. They're ok but replace them later on. |
|
|
Required Level: 46 (377-522) Armour |
|
 Craiceann's Tracks - Aspect of the Crab is a Skill almost no one uses, making these boots mediocre at best. However, if you do decide to implement it into your build, these are actually quite decent if you already have your Resistances sorted out. Craiceann's Tracks - Aspect of the Crab is a Skill almost no one uses, making these boots mediocre at best. However, if you do decide to implement it into your build, these are actually quite decent if you already have your Resistances sorted out. |
|
|
Required Level: 54 (442-585) Armour |
|
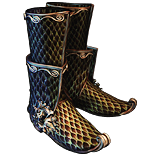
 Dawnstrider - These boots are extremely valuable if you play a ranged Attack build (Melee characters tend to use both Ancestral Totems) that uses a Melee weapon. It doubles the Effect of the Ancestral Totem's Buff. Use it with Ancestral Protector for More Attack Speed, a very rare and powerful stat (it's more, not increased). This Venom Gyre Deadeye is a great example of a build where you could use these boots. Dawnstrider - These boots are extremely valuable if you play a ranged Attack build (Melee characters tend to use both Ancestral Totems) that uses a Melee weapon. It doubles the Effect of the Ancestral Totem's Buff. Use it with Ancestral Protector for More Attack Speed, a very rare and powerful stat (it's more, not increased). This Venom Gyre Deadeye is a great example of a build where you could use these boots. |
|
|
Required Level: 62 (220-253) Armour |
|
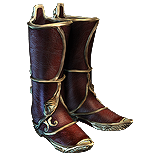
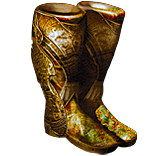
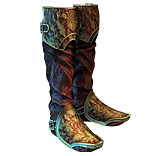
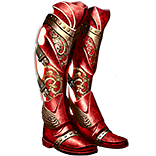
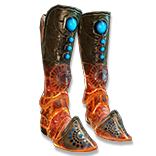
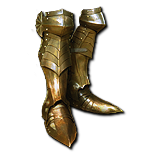
 Doryani's Delusion - The Red variant of this item, it grants Armour. Used for the Level 25 Purity Skills. At such a high Gem Level it grants more Resistance and Maximum Resistance for a specific Element, which pairs well with an increased Aura Effect. Every 20% increased Aura Effect will grant you an extra 1% extra Maximum Res. Check if your build can accommodate this expensive Aura, or if you need it at all. Builds with Melding of the Flesh, or this Fire Conversion Reap Chieftain could make great use of these. Keep in mind that if you strive for the Maximum Resistance, you only need the Purity Skill Gem to be at level 23, 25 is an overkill (Alpha's Howl and a Level 21 Gem are usually preferable). Doryani's Delusion - The Red variant of this item, it grants Armour. Used for the Level 25 Purity Skills. At such a high Gem Level it grants more Resistance and Maximum Resistance for a specific Element, which pairs well with an increased Aura Effect. Every 20% increased Aura Effect will grant you an extra 1% extra Maximum Res. Check if your build can accommodate this expensive Aura, or if you need it at all. Builds with Melding of the Flesh, or this Fire Conversion Reap Chieftain could make great use of these. Keep in mind that if you strive for the Maximum Resistance, you only need the Purity Skill Gem to be at level 23, 25 is an overkill (Alpha's Howl and a Level 21 Gem are usually preferable). |
|
|
Required Level: 68 (482-611) Armour
|
|
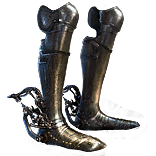
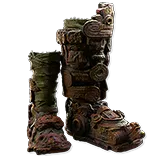
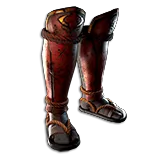
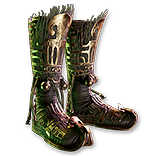
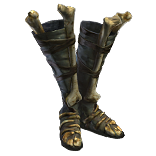
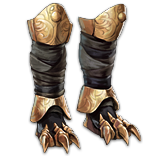
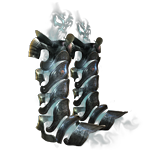
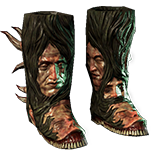
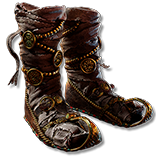
 Kaom's Roots - Don't use them. Despite granting twice as much Maximum Life as the best Rare Boots, there's nothing else here. Not even sockets. If you're desperate for Maximum Life, which is the case in a Blood Sacrament build, only then you may consider equipping them. Kaom's Roots - Don't use them. Despite granting twice as much Maximum Life as the best Rare Boots, there's nothing else here. Not even sockets. If you're desperate for Maximum Life, which is the case in a Blood Sacrament build, only then you may consider equipping them. |
|
|
Required Level: 68 (241-278) Armour |
|
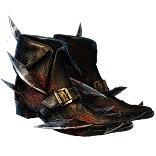
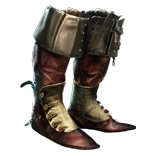
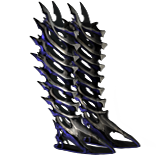
 The Infinite Pursuit - Remarkably bad boots. You have 20% increased Movement Speed and take no extra Bleeding Damage from Moving while Bleeding, but to be afflicted by it you first need to get Hit. Relying on getting Hit to have increased movement speed is inefficient and downright dangerous. The 20% bonus is also not that significant. There's nothing else here, just the bare minimum 20% Movement Speed, Stun, and Poison Immunity (while Bleeding). You should literally get the Seven-League Step for 50% increased Movement Speed and no downside instead. The Infinite Pursuit - Remarkably bad boots. You have 20% increased Movement Speed and take no extra Bleeding Damage from Moving while Bleeding, but to be afflicted by it you first need to get Hit. Relying on getting Hit to have increased movement speed is inefficient and downright dangerous. The 20% bonus is also not that significant. There's nothing else here, just the bare minimum 20% Movement Speed, Stun, and Poison Immunity (while Bleeding). You should literally get the Seven-League Step for 50% increased Movement Speed and no downside instead. |
|
|
Required Level: 68 (241-278) Armour |
|
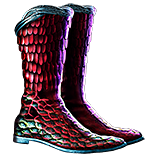
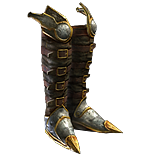
 The Red Trail - There's a lot of Maximum Life and a decent Movement Speed bonus here so that's good. The 10% additional Physical Damage Reduction while Stationary might be fitting in some kind of Stationary build, but these usually prefer Ralakesh's Impatience (note that 3 Endurance Charges from Ralakesh's Impatience would grant you 12% additional Physical Damage Reduction instead of 10% found here). You could maybe use them in a Master Surgeon Forbidden Rite Pathfinder as it could really benefit from that Physical Damage Reduction and Maximum Life. It also makes your character more durable against Bleeding. The Red Trail - There's a lot of Maximum Life and a decent Movement Speed bonus here so that's good. The 10% additional Physical Damage Reduction while Stationary might be fitting in some kind of Stationary build, but these usually prefer Ralakesh's Impatience (note that 3 Endurance Charges from Ralakesh's Impatience would grant you 12% additional Physical Damage Reduction instead of 10% found here). You could maybe use them in a Master Surgeon Forbidden Rite Pathfinder as it could really benefit from that Physical Damage Reduction and Maximum Life. It also makes your character more durable against Bleeding. |
|
|
Required Level: 68 (385-556) Armour |
|
| Replica Red Trail - Again, a lot of Movement Speed and Maximum Life. Here, you gain a Power Charge on Hit while Poisoned, have a 50% chance of getting Poisoned on Spell Hit, and get Chaos Resistance while Stationary. Power Charges are usually very easy to acquire. It may be good when combined with The Golden Rule Jewel if you really can't get these Charges any other way. Not good, Rare Boots would be better in almost any case |
|
|
Required Level: 68 (385-556) Armour |
| Dexterity Boots | ||
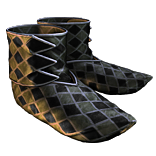
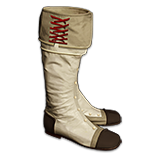
 Seven-League Step - Seve-League Step are the best Leveling boots in the game, a lot of players use them all the way up until level 80 or so due to the immense 50% increased Movement Speed bonus. 35% is the maximum for Rare Boots. Seven-League Step - Seve-League Step are the best Leveling boots in the game, a lot of players use them all the way up until level 80 or so due to the immense 50% increased Movement Speed bonus. 35% is the maximum for Rare Boots. |
||
|
Required Level: 1 (13-18) Evasion |
||
 Abberath's Hooves - The Abberath's Fury Spell is peculiar - it makes you deal Fire Spell Damage each time you take a step, equal to that of a level 6 to 7 Fireball. It's not a lot, but you can make it a good addition to a build since it's free, just socket Support Gems here. It may be beneficial for a low-level Ignite build, but other than that, it has no use since its damage scales with steps you take and there is no easy way to increase it other than to walk faster. Abberath's Hooves - The Abberath's Fury Spell is peculiar - it makes you deal Fire Spell Damage each time you take a step, equal to that of a level 6 to 7 Fireball. It's not a lot, but you can make it a good addition to a build since it's free, just socket Support Gems here. It may be beneficial for a low-level Ignite build, but other than that, it has no use since its damage scales with steps you take and there is no easy way to increase it other than to walk faster. |
||
|
Required Level: 12 (42-54) Evasion |
||
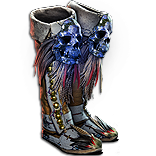
 Victario's Flight - From all the mods occurring on a Quicksilver Flask (besides the base 40% increased Movement Speed) which may benefit your Allies (Players, Minions, Totems, Mirages) are these that increase their Attack or Cast Speed by up to 17%, Crit Chance by 55%, or some defensive ones. It's not much - worth around half of a Support Gem. If your Allies have Frenzy Charges, you can use Rotgut to grant them Onslaught. You may be thinking, these are good on Totem or Minion-oriented characters, but in reality, they're not. There's nothing else of significant value on these Boots other than that last line, so in most cases, they're not worth the price. Victario's Flight are being used by Support characters in a party play, or in Arakaali's Fang Spider Summoner build. Victario's Flight - From all the mods occurring on a Quicksilver Flask (besides the base 40% increased Movement Speed) which may benefit your Allies (Players, Minions, Totems, Mirages) are these that increase their Attack or Cast Speed by up to 17%, Crit Chance by 55%, or some defensive ones. It's not much - worth around half of a Support Gem. If your Allies have Frenzy Charges, you can use Rotgut to grant them Onslaught. You may be thinking, these are good on Totem or Minion-oriented characters, but in reality, they're not. There's nothing else of significant value on these Boots other than that last line, so in most cases, they're not worth the price. Victario's Flight are being used by Support characters in a party play, or in Arakaali's Fang Spider Summoner build. |
||
|
Required Level: 12 (84-135) Evasion |
||
 Deerstalker - Very popular among low-level trappers. A lot of them socket their secondary Trap setup here to create a 5-link Skill - good if you don't have Tabula Rasa yet, or if you need to have two separate Trap setups even at the early stages of the game. A good example of it is a Seismic Trap/Exsanguinate Saboteur. You won't need them later, a 4-link Exsanguinate will be enough to clear maps after investing in more general damage, including the Trap Support Gem. Additionally, Rare Boots can too have the built-in Trap Support as a Shaper's Suffix, level 22 at that. Deerstalker - Very popular among low-level trappers. A lot of them socket their secondary Trap setup here to create a 5-link Skill - good if you don't have Tabula Rasa yet, or if you need to have two separate Trap setups even at the early stages of the game. A good example of it is a Seismic Trap/Exsanguinate Saboteur. You won't need them later, a 4-link Exsanguinate will be enough to clear maps after investing in more general damage, including the Trap Support Gem. Additionally, Rare Boots can too have the built-in Trap Support as a Shaper's Suffix, level 22 at that. |
||
|
Required Level: 22 (192-276) Evasion |
||
 Goldwyrm - These Boots have very little Movement Speed and no Maximum Life whatsoever but are still mandatory in Magic Find builds where you focus on the Item Quantity stat, and the 20% of it found here is a lot. These characters have just enough damage to quickly slay enemies with ranged Skills and should not attempt any end-game aspirational content. Lightning Arrow Deadeye is an example of a build where it would make the most sense. Goldwyrm - These Boots have very little Movement Speed and no Maximum Life whatsoever but are still mandatory in Magic Find builds where you focus on the Item Quantity stat, and the 20% of it found here is a lot. These characters have just enough damage to quickly slay enemies with ranged Skills and should not attempt any end-game aspirational content. Lightning Arrow Deadeye is an example of a build where it would make the most sense. |
||
|
Required Level: 34 (113-126) Evasion |
||
 Orbala's Stand - We see no use for these Boots. There's no Maximum Life, no Resistances, only a bit of Evasion, and a regular Movement Speed bonus. The Stun immunity from Supressed Damage requires you to get Hit by a Spell, and have a high Suppression Chance at that, which these Boots do not provide. Debilitation is not that rare debuff, you can apply it quite easily. Orbala's Stand - We see no use for these Boots. There's no Maximum Life, no Resistances, only a bit of Evasion, and a regular Movement Speed bonus. The Stun immunity from Supressed Damage requires you to get Hit by a Spell, and have a high Suppression Chance at that, which these Boots do not provide. Debilitation is not that rare debuff, you can apply it quite easily. |
||
|
Required Level: 39 (258-370) Evasion |
||
 The Blood Dance - Frenzy-stackers usually go for Darkray Vectors due to the extra Maximum Frenzy Charge, not these. It also reduces your Attack and Cast Speed per Frenzy Charge, which is bad. Don't use them. The Blood Dance - Frenzy-stackers usually go for Darkray Vectors due to the extra Maximum Frenzy Charge, not these. It also reduces your Attack and Cast Speed per Frenzy Charge, which is bad. Don't use them. |
||
|
Required Level: 44 (145-171) Evasion |
||
 Temptation Step - It may make sense to use them with The Golden Rule to easily Poison the character, Maw of Conquest Helmet to be then unaffected by this Poison, and Apep's Slumber Shield for 400 ES Regeneration per second and 3% to all Maximum Elemental Resistances. It would grant you 50% Movement Speed and 75% increased Damage, on top of a generous Evasion bonus and Chaos Resistance. It's not really a meta playstyle, but you can implement listed items into a build that relies on Energy Shield, or one with Chaos Inoculation, it would make you Poison-immune too since Poison is Chaos Damage. Good, but you have to build around them. Temptation Step - It may make sense to use them with The Golden Rule to easily Poison the character, Maw of Conquest Helmet to be then unaffected by this Poison, and Apep's Slumber Shield for 400 ES Regeneration per second and 3% to all Maximum Elemental Resistances. It would grant you 50% Movement Speed and 75% increased Damage, on top of a generous Evasion bonus and Chaos Resistance. It's not really a meta playstyle, but you can implement listed items into a build that relies on Energy Shield, or one with Chaos Inoculation, it would make you Poison-immune too since Poison is Chaos Damage. Good, but you have to build around them. |
||
|
Required Level: 55 (486-756) Evasion |
||
 Three-step Assault - A very popular choice for Shield Throw Raiders with Quartz Infusion Keystone for permanent Phasing and Rapid Assault for permanent Onslaught, or Armour-stacking Champions (Evasion is being converted to Armour via Iron Reflexes). These Boots grant a lot of Evasion, Maximum Life, and a chance to Avoid Elemental Ailments. Great in a build where you need a lot of Evasion as the "100% increased Evasion Rating during Onslaught" is a global modifier, not restricted to these specific Boots. It's hard to find footwear that could get you more Evasion, but Sin Trek can be better in some cases. Three-step Assault - A very popular choice for Shield Throw Raiders with Quartz Infusion Keystone for permanent Phasing and Rapid Assault for permanent Onslaught, or Armour-stacking Champions (Evasion is being converted to Armour via Iron Reflexes). These Boots grant a lot of Evasion, Maximum Life, and a chance to Avoid Elemental Ailments. Great in a build where you need a lot of Evasion as the "100% increased Evasion Rating during Onslaught" is a global modifier, not restricted to these specific Boots. It's hard to find footwear that could get you more Evasion, but Sin Trek can be better in some cases. |
||
|
Required Level: 55 (216-302) Evasion |
||
| Replica Three-step Assault - It creates an impression of being decent for a build that values the Elusive effect, but be aware that you can still obtain up to 17% increased Elusive effect (23% near a Unique enemy, 29% near a Pinnacle Boss) from an Eater's Implicit on any Rare Boots, where you can also get more Maximum Life, more Movement Speed, more Evasion, and Elemental Resistances, which these Boots lack. Don't use them. |
||
|
Required Level: 55 (216-302) Evasion |
||
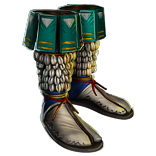
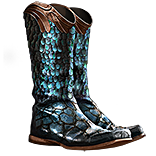 Garukhan's Flight - The best-in-slot item for the majority of Dex-stacking builds due to the Maximum Life bonus. These builds aim for around 2000 Dexterity, which would result in +400 Maximum Life, four times as much as regular Rare Boots can get you. It's also tier-3 flat Dexterity, tons of Evasion, a great Movement Speed bonus, and immunity to various Elemental Ground Effects. Siege Ballista Hierophants or most of the Deadeye builds make great use of this pair of Boots. Garukhan's Flight - The best-in-slot item for the majority of Dex-stacking builds due to the Maximum Life bonus. These builds aim for around 2000 Dexterity, which would result in +400 Maximum Life, four times as much as regular Rare Boots can get you. It's also tier-3 flat Dexterity, tons of Evasion, a great Movement Speed bonus, and immunity to various Elemental Ground Effects. Siege Ballista Hierophants or most of the Deadeye builds make great use of this pair of Boots. |
||
|
Required Level: 62 (880-1113) Evasion |
||
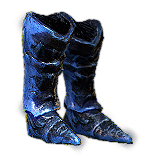
 Atziri's Step - Regular Rare Boots can give you only up to 14% Spell Suppression Chance, so Atziri's Step are definitely better if you need this stat. They have quite good Movement Speed, Maximum Life, and Evasion bonuses. Excellent choice for a lot of builds since Suppression is one of the best defensive layers that nearly every build uses, especially Tricksters with Spellbreaker Keystone. Atziri's Step - Regular Rare Boots can give you only up to 14% Spell Suppression Chance, so Atziri's Step are definitely better if you need this stat. They have quite good Movement Speed, Maximum Life, and Evasion bonuses. Excellent choice for a lot of builds since Suppression is one of the best defensive layers that nearly every build uses, especially Tricksters with Spellbreaker Keystone. |
||
|
Required Level: 69 (688-792) Evasion |
||
 Doryani's Delusion - The green flavour of Doryani's Delusion which grants Evasion. Used for the Level 25 Purity Skills. At such a high Gem Level it grants more Resistance and Maximum Resistance for a specific Element, which pairs well with an increased Aura Effect. Every 20% increased Aura Effect will grant you an extra 1% extra Maximum Res. Check if your build can accommodate this expensive Aura, or if you need it at all. Builds with Melding of the Flesh, or this Fire Conversion Reap Chieftain could make great use of these. Keep in mind that if you strive for the Maximum Resistance, you only need the Purity Skill Gem to be at level 23, 25 is an overkill (Alpha's Howl and a Level 21 Gem are usually preferable). Doryani's Delusion - The green flavour of Doryani's Delusion which grants Evasion. Used for the Level 25 Purity Skills. At such a high Gem Level it grants more Resistance and Maximum Resistance for a specific Element, which pairs well with an increased Aura Effect. Every 20% increased Aura Effect will grant you an extra 1% extra Maximum Res. Check if your build can accommodate this expensive Aura, or if you need it at all. Builds with Melding of the Flesh, or this Fire Conversion Reap Chieftain could make great use of these. Keep in mind that if you strive for the Maximum Resistance, you only need the Purity Skill Gem to be at level 23, 25 is an overkill (Alpha's Howl and a Level 21 Gem are usually preferable). |
||
|
Required Level: 69 (492-622) Evasion
|
||
 Farrul's Chase - We see no use for it. The built-in Intimidating Cry has an 8-second Cooldown so there's nothing bizarre you could do with it by switching between Cat's Stealth/Agility really fast, as was the case with Twisters from Saqawal's Flock. It's bad, use Rare boots with Intimidating Cry Skill Gem instead. Farrul's Chase - We see no use for it. The built-in Intimidating Cry has an 8-second Cooldown so there's nothing bizarre you could do with it by switching between Cat's Stealth/Agility really fast, as was the case with Twisters from Saqawal's Flock. It's bad, use Rare boots with Intimidating Cry Skill Gem instead. |
||
|
Required Level: 69 (516-707) Evasion |
| Intelligence Boots | |||
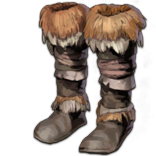
 Wanderlust - The most popular leveling Boots, especially during a league start when the Seven-League Step are still very expensive. The Freeze Immunity is useful during the Yugul fight or in The Brine King's Reef, and 20% Movement Speed is a lot for low-level characters. Use them during the campaign and switch to something better later on. Wanderlust - The most popular leveling Boots, especially during a league start when the Seven-League Step are still very expensive. The Freeze Immunity is useful during the Yugul fight or in The Brine King's Reef, and 20% Movement Speed is a lot for low-level characters. Use them during the campaign and switch to something better later on. |
|||
|
Required Level: 1 (15-27) Energy Shield |
|||
 Wondertrap - Worth consideration if you need various Attributes early on, but equipping the Astramentis is usually the way to approach this issue. Rare Boots could give you more Attributes too. For a Magic Find character, select Goldwyrm Boots instead. We see no practical use for this item. Wondertrap - Worth consideration if you need various Attributes early on, but equipping the Astramentis is usually the way to approach this issue. Rare Boots could give you more Attributes too. For a Magic Find character, select Goldwyrm Boots instead. We see no practical use for this item. |
|||
|
Required Level: 9 (13-41) Energy Shield |
|||
 Bones of Ullr - You can use them in some Minion Builds, increasing the level of Minion Skill Gems is one of the most efficient ways to gain more damage there. It's considered a very weak option, a pair of Rare Boots is generally a favourable pick. Bones of Ullr - You can use them in some Minion Builds, increasing the level of Minion Skill Gems is one of the most efficient ways to gain more damage there. It's considered a very weak option, a pair of Rare Boots is generally a favourable pick. |
|||
|
Required Level: 22 (23-33) Energy Shield |
|||
| Replica Bones of Ullr - You don't really need to refresh the duration of the most expandable Minions, they're cheap and easy to summon. The 10% chance is also very low. Don't use these Boots. |
|||
|
Required Level: 22 (22-33) Energy Shield |
|||
 Shavronne's Pace - There's nothing particularly unique about these Boots, just a lot of Stun and Block Recovery and some extra Movement Speed on Full Life. You may use them for leveling some kind of Energy Shield Character, it can be decent with Ghostwrithe Chest Armour. Shavronne's Pace - There's nothing particularly unique about these Boots, just a lot of Stun and Block Recovery and some extra Movement Speed on Full Life. You may use them for leveling some kind of Energy Shield Character, it can be decent with Ghostwrithe Chest Armour. |
|||
|
Required Level: 32 (46-60) Energy Shield |
|||
 Rainbowstride - What's worth noting here is the major bonus to Spell Block Chance which is hard to get. The 60% Elemental Resistances are definitely a big upside too, but besides that, you might have a hard time defending these Boots while a pair of Rare ones can be much better. You can use them in a Chaos Inoculation build that also needs this tier-3 extra Maximum Mana, some Guardians with Radiant Faith may find them useful. Rainbowstride - What's worth noting here is the major bonus to Spell Block Chance which is hard to get. The 60% Elemental Resistances are definitely a big upside too, but besides that, you might have a hard time defending these Boots while a pair of Rare ones can be much better. You can use them in a Chaos Inoculation build that also needs this tier-3 extra Maximum Mana, some Guardians with Radiant Faith may find them useful. |
|||
|
Required Level: 53 (36-42) Energy Shield |
|||
 Inya's Epiphany - They're not good, the 25% chance to gain more charges is too unreliable, and Power Charges are easy to gain anyway. The Replica version is better in almost any case, as this borderline-useless modifier is replaced with a better one. Inya's Epiphany - They're not good, the 25% chance to gain more charges is too unreliable, and Power Charges are easy to gain anyway. The Replica version is better in almost any case, as this borderline-useless modifier is replaced with a better one. |
|||
|
Required Level: 61 (47-55) Energy Shield |
|||
| Replica Inya's Epiphany - These are actually quite good for a Power Charge-stacking build. With 10 of these Charges, you gain a 50% increased Movement Speed which is a lot. The increase in Intelligence is insignificant, Int-stacking builds tend to use Rare Boots. |
|||
|
Required Level: 61 (47-55) Energy Shield |
|||
 Doryani's Delusion - The blue Doryani's Delusion Boots grant you Energy Shield. Used for the Level 25 Purity Skills. At such a high Gem Level it grants more Resistance and Maximum Resistance for a specific Element, which pairs well with an increased Aura Effect. Every 20% increased Aura Effect will grant you an extra 1% extra Maximum Res. Check if your build can accommodate this expensive Aura, or if you need it at all. Builds with Melding of the Flesh, or this Fire Conversion Reap Chieftain could make great use of these. Keep in mind that if you strive for the Maximum Resistance, you only need the Purity Skill Gem to be at level 23, 25 is an overkill (Alpha's Howl and a Level 21 Gem are usually preferable). Doryani's Delusion - The blue Doryani's Delusion Boots grant you Energy Shield. Used for the Level 25 Purity Skills. At such a high Gem Level it grants more Resistance and Maximum Resistance for a specific Element, which pairs well with an increased Aura Effect. Every 20% increased Aura Effect will grant you an extra 1% extra Maximum Res. Check if your build can accommodate this expensive Aura, or if you need it at all. Builds with Melding of the Flesh, or this Fire Conversion Reap Chieftain could make great use of these. Keep in mind that if you strive for the Maximum Resistance, you only need the Purity Skill Gem to be at level 23, 25 is an overkill (Alpha's Howl and a Level 21 Gem are usually preferable). |
|||
|
Required Level: 67 (127-165) Energy Shield
|
|||
 Skyforth - Regular Rare Boots can only give you up to around 100 Maximum Mana, so these are definitely one of the best choices for a Mana-stacking character. We've used them in this Kinetic Bolt Ballista Totem Hierophant, this ascendancy can reap a lot of benefits from stacking tons of Maximum Mana. It makes your character very hard to Stun, reliably generates Power Charges with enough Crit Chance, and removes the ability to passively Regenerate Life, but you can still Recover it in many other ways. Skyforth - Regular Rare Boots can only give you up to around 100 Maximum Mana, so these are definitely one of the best choices for a Mana-stacking character. We've used them in this Kinetic Bolt Ballista Totem Hierophant, this ascendancy can reap a lot of benefits from stacking tons of Maximum Mana. It makes your character very hard to Stun, reliably generates Power Charges with enough Crit Chance, and removes the ability to passively Regenerate Life, but you can still Recover it in many other ways. |
|||
|
Required Level: 67 (51-59) Energy Shield |
|||
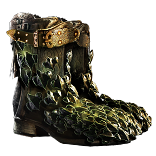
 Steppan Eard - Extremely situational footwear. To activate its bonuses you need to stand on Elemental-afflicted grounds. These bonuses are also quite weak. We see no good use for them unless you use a combination of Skills like Frostblink/Arctic Armour, Fire Trap/Flame Dash, and Vaal Lightning Trap. Even then, they're woeful. Steppan Eard - Extremely situational footwear. To activate its bonuses you need to stand on Elemental-afflicted grounds. These bonuses are also quite weak. We see no good use for them unless you use a combination of Skills like Frostblink/Arctic Armour, Fire Trap/Flame Dash, and Vaal Lightning Trap. Even then, they're woeful. |
|||
|
Required Level: 67 (106-160) Energy Shield |
| Armour/Evasion Boots | |||
 Dusktoe - Low-level Boots which grant very good bonuses during any Flask Effect. The damage bonus is equal to that of a level 7 Added Chaos Damage Support, so quite good for nearly any build during the first few acts, even better if you use some kind of Chaos Damage Skill. We recommend using it in a one or two-Flask setup combined with the Traitor Keystone which you can get from Brutal Restraint Jewel that has no level requirement. This way you're able to have a Flask (preferably Quickcksilver Flask) up at all times. Swap them for some proper Boots and five Flasks later on. Dusktoe - Low-level Boots which grant very good bonuses during any Flask Effect. The damage bonus is equal to that of a level 7 Added Chaos Damage Support, so quite good for nearly any build during the first few acts, even better if you use some kind of Chaos Damage Skill. We recommend using it in a one or two-Flask setup combined with the Traitor Keystone which you can get from Brutal Restraint Jewel that has no level requirement. This way you're able to have a Flask (preferably Quickcksilver Flask) up at all times. Swap them for some proper Boots and five Flasks later on. |
|||
|
Required Level: 18 (54-88) Armour |
|||
 Lioneye's Paws - Absent from any meta build, the level 5 Rain of Arrows deals very low damage. The builds which would benefit from it are ones with high Attack Speed and Crit Chance, you can then use the built-in Rain of Arrows to apply Curses on Hit with Critical Strikes or to trigger other Utility Spells like Flame Wall (it would play the same role as Asenath's Mark Helmet). Even some of the Spell CoC builds might find them suitable. It's great for leveling with a Bow Attack build due to the extra Attributes, added Fire Damage, and damage. Lioneye's Paws - Absent from any meta build, the level 5 Rain of Arrows deals very low damage. The builds which would benefit from it are ones with high Attack Speed and Crit Chance, you can then use the built-in Rain of Arrows to apply Curses on Hit with Critical Strikes or to trigger other Utility Spells like Flame Wall (it would play the same role as Asenath's Mark Helmet). Even some of the Spell CoC builds might find them suitable. It's great for leveling with a Bow Attack build due to the extra Attributes, added Fire Damage, and damage. |
|||
|
Required Level: 30 (55-63) Armour |
|||
| Replica Lioneye's Paws - The difference between the Replica and the original, is that here, instead of Rain of Arrows, it fires Toxic Rain. It makes these Boots much worse. You will fire fewer Arrows and deals less damage, as Toxic Rain scales well with Skill Gem Level. Level-5 Toxic Rain does almost no damage. Don't use it. |
|||
|
Required Level: 30 (55-63) Armour |
|||
 Mutewind Whispersteps - The damage numbers are low, equal to that of a level-7 Added Cold Damage Support, and level 1 to 7 Increased Critical Strikes Support. Mutewind Whispersteps can still be worn by a low-level Hit-based Elemental Spell Damage character, one using skills like Arc or Spark. Note there's no Maximum Life, so replace them later on with something more durable. There's nothing particularly unique about these Boots, just some extra DPS. Mutewind Whispersteps - The damage numbers are low, equal to that of a level-7 Added Cold Damage Support, and level 1 to 7 Increased Critical Strikes Support. Mutewind Whispersteps can still be worn by a low-level Hit-based Elemental Spell Damage character, one using skills like Arc or Spark. Note there's no Maximum Life, so replace them later on with something more durable. There's nothing particularly unique about these Boots, just some extra DPS. |
|||
|
Required Level: 42 (76-90) Armour |
|||
 Saqawal's Talons - These are sometimes used in the Twister build to reduce Avian's Flight Duration, but this mod doesn't reduce Avian's Might Duration - for that, you will also need Saquawal's Wind Gloves. These two items are optional, the build works without them. You can craft the Aspect of the Avian Skill into any Rare Item. The Life regeneration bonus can be useful with Kaom's Spirit Gloves to generate Rage, but Voll's Vision Helmet tends to be the preferable, and far better option to do so. Saqawal's Talons - These are sometimes used in the Twister build to reduce Avian's Flight Duration, but this mod doesn't reduce Avian's Might Duration - for that, you will also need Saquawal's Wind Gloves. These two items are optional, the build works without them. You can craft the Aspect of the Avian Skill into any Rare Item. The Life regeneration bonus can be useful with Kaom's Spirit Gloves to generate Rage, but Voll's Vision Helmet tends to be the preferable, and far better option to do so. |
|||
|
Required Level: 59 (212-305) Armour |
|||
 Annihilation's Approach - Taking 10k of Fire Damage a second is a lot. With around 90% Fire Resistance, a Ruby Flask, Eternal Damnation Amulet, and Soul of Arakaali, it's much less. You'll still need a very good Life Recovery method to withstand the damage - a Vitality Aura and Immortal Flesh Belt may be enough. Another build with ridiculous Life Recovery is Master Surgeon Forbidden Rite Pathfinder which constantly uses a Life Flask to regenerate an incalculable amount of Life/second. The reward for being Flame-Touched is Adrenaline, which increases damage by 100%, Attack, Cast, and Movement Speed by 25%, and provides you with an additional 10% Physical Damage Reduction. It's a high price to pay for such basic stats, but it's a significant boost to damage, mobility, and survivability. Making it work is really hard and requires exceptionally strong character with great Life Recovery, some players consider it worthless due to this huge downside. Annihilation's Approach - Taking 10k of Fire Damage a second is a lot. With around 90% Fire Resistance, a Ruby Flask, Eternal Damnation Amulet, and Soul of Arakaali, it's much less. You'll still need a very good Life Recovery method to withstand the damage - a Vitality Aura and Immortal Flesh Belt may be enough. Another build with ridiculous Life Recovery is Master Surgeon Forbidden Rite Pathfinder which constantly uses a Life Flask to regenerate an incalculable amount of Life/second. The reward for being Flame-Touched is Adrenaline, which increases damage by 100%, Attack, Cast, and Movement Speed by 25%, and provides you with an additional 10% Physical Damage Reduction. It's a high price to pay for such basic stats, but it's a significant boost to damage, mobility, and survivability. Making it work is really hard and requires exceptionally strong character with great Life Recovery, some players consider it worthless due to this huge downside. |
|||
|
Required Level: 65 (193-278) Armour |
|||
 Darkray Vectors - One of the most popular shoes for Frenzy-stacking builds, such as this Flicker Strike Slayer with Masterful Form, or any Raider with Way of the Poacher and Avatar of the Slaughter Keystones. It grants one extra Maximum Frenzy Charge, increases Movement Speed per Charge, and provides you with some Lightning Resistance. The downsides are usually insignificant. Remarkably powerful Boots. Darkray Vectors - One of the most popular shoes for Frenzy-stacking builds, such as this Flicker Strike Slayer with Masterful Form, or any Raider with Way of the Poacher and Avatar of the Slaughter Keystones. It grants one extra Maximum Frenzy Charge, increases Movement Speed per Charge, and provides you with some Lightning Resistance. The downsides are usually insignificant. Remarkably powerful Boots. |
|||
|
Required Level: 65 (169-236) Armour |
|||
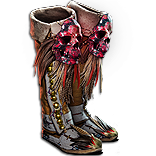
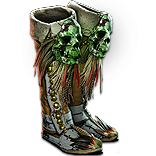
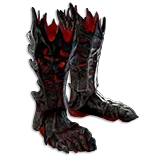
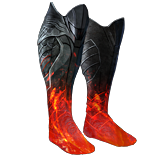
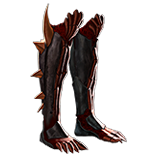
 Legacy of Fury - Possibly the most fashionable footwear as of now, mostly due to the popularity of Righteous Fire builds - Inquisitors as well as Juggernauts. Cold DoT builds with Vortex will also make great use of these, Damage over Time builds cannot penetrate Elemental Resistances with their DoT-type damage, so they tend to value other sources of reduction of enemies' Elemental Resistances much more, such as Scorch from these Boots. The effect of Scorching is also increased by up to 50%. That's not all - the Boots possess a very high chance to cause enemies to "explode" on death, augmenting the clear speed. Note that these qualities are only applied to nearby enemies, making Legacy of Fury useless on any ranged character. A must-have piece of equipment in any Elemental DoT build. Legacy of Fury - Possibly the most fashionable footwear as of now, mostly due to the popularity of Righteous Fire builds - Inquisitors as well as Juggernauts. Cold DoT builds with Vortex will also make great use of these, Damage over Time builds cannot penetrate Elemental Resistances with their DoT-type damage, so they tend to value other sources of reduction of enemies' Elemental Resistances much more, such as Scorch from these Boots. The effect of Scorching is also increased by up to 50%. That's not all - the Boots possess a very high chance to cause enemies to "explode" on death, augmenting the clear speed. Note that these qualities are only applied to nearby enemies, making Legacy of Fury useless on any ranged character. A must-have piece of equipment in any Elemental DoT build. |
|||
|
Required Level: 69 (276-412) Armour |
|||
|
Required Level: 70 (315-580) Armour |
| Armour/Energy Shield Boots | |||
 Wake of Destruction - You may be tempted to wear them due to the significant boost of added Lightning Damage, equal to that of a level 13 Added Lightning Damage Support. Life on Kill and Shocked Ground are definitely useful too, but due to the low Movement Speed, no Max Life, and no Resistances we cannot recommend these for anything other than leveling some type of Elemental Damage build. You can even use Elemental Focus Support Gem combined with a Lightning Skill since Shock is provided here too. Wake of Destruction - You may be tempted to wear them due to the significant boost of added Lightning Damage, equal to that of a level 13 Added Lightning Damage Support. Life on Kill and Shocked Ground are definitely useful too, but due to the low Movement Speed, no Max Life, and no Resistances we cannot recommend these for anything other than leveling some type of Elemental Damage build. You can even use Elemental Focus Support Gem combined with a Lightning Skill since Shock is provided here too. |
|||
|
Required Level: 28 (61-102) Armour |
|||
|
|
|||
|
Required Level: 36 (65-71) Armour |
|||
 Alberon's Warpath - Widely implemented into many Strength-stacking builds where you don't want to deal Chaos Damage, so you can see them often alongside Brutus' Lead Sprinkler. These Boots increase Strength by up to 18%, which is a lot. All the other modifiers are of lesser importance. We've used them in this Ancestral Warchief Totem, Volcanic Fissure Totem, and Consecrated Path Totem Builds. Alberon's Warpath - Widely implemented into many Strength-stacking builds where you don't want to deal Chaos Damage, so you can see them often alongside Brutus' Lead Sprinkler. These Boots increase Strength by up to 18%, which is a lot. All the other modifiers are of lesser importance. We've used them in this Ancestral Warchief Totem, Volcanic Fissure Totem, and Consecrated Path Totem Builds. |
|||
|
Required Level: 49 (268-319) Armour |
|||
| Replica Alberon's Warpath - A foundation of some of the most powerful Strength-stacking builds, simply because of the Added Chaos Damage per 80 Strength. It also restricts all the damage dealt to Chaos Damage. It's often used on Berserkers with Redblade Banner Shield, Battlemage's Cry/Iron Will Keystone, and Crown of Eyes Hamlet. This way, you can benefit from Strength by converting its damage bonus to Spells, and then again to Attacks at a higher value. Check our Strength-stacking Wander Berserker or Venom Gyre Berserker builds to learn more. |
|||
|
Required Level: 49 (268-319) Armour |
|||
 Gang's Momentum - Vey basic and not that good. The increased damage bonus against Burning enemies is really low and the Movement Speed is mediocre. The only significant quality of these Boots is the overabundance of Fire Resistance, but even that can be acquired via Two-Tones Boots and tier-1 Fire Resistance on them. We see no reason to wear them. Gang's Momentum - Vey basic and not that good. The increased damage bonus against Burning enemies is really low and the Movement Speed is mediocre. The only significant quality of these Boots is the overabundance of Fire Resistance, but even that can be acquired via Two-Tones Boots and tier-1 Fire Resistance on them. We see no reason to wear them. |
|||
|
Required Level: 58 (270-336) Armour |
|||
 March of the Legion - A very important piece of equipment in the Armour-stacking builds. It is where your singular focus is to accumulate enormous amounts of Armour, later to be translated into damage with Replica Dreamfeather Sword. The most efficient way to scale Armour is by activating Grace Aura for Evasion, and then converting it to Armour via Iron Reflexes Keystone. The Aura you've socketed in these Boots has its Skill Level increased, and is being Supported by the Level-25 Divine Blessing that increases Aura Effect by 34%. It's a key element of such builds, often irreplaceable. Other builds rarely use this item as having a Divine Blessing temporary Aura requires a lot of unreserved Mana or Eldritch Battery. Sacrificing Boots only for this bonus is often not worth the hassle. March of the Legion - A very important piece of equipment in the Armour-stacking builds. It is where your singular focus is to accumulate enormous amounts of Armour, later to be translated into damage with Replica Dreamfeather Sword. The most efficient way to scale Armour is by activating Grace Aura for Evasion, and then converting it to Armour via Iron Reflexes Keystone. The Aura you've socketed in these Boots has its Skill Level increased, and is being Supported by the Level-25 Divine Blessing that increases Aura Effect by 34%. It's a key element of such builds, often irreplaceable. Other builds rarely use this item as having a Divine Blessing temporary Aura requires a lot of unreserved Mana or Eldritch Battery. Sacrificing Boots only for this bonus is often not worth the hassle. |
|||
|
Required Level: 58 (364-480) Armour |
|||
 Death's Door - The unique selling point of these Boots is an extra Maximum Endurance Charge. There are not that many Endurance-stacking builds, but it is definitely fitting for one. We've used them in a basic Sunder Juggernaut. Discharge builds tend to lean towards Ralakesh's Impatience, Legacy of Fury, or Goldwyrm, but these might be their fourth or fifth choice, especially after a successful Corruption for one more Maximum Endurance Charge. Two Maximum Endurance Charges from a single pair of Boots is a great deal. All the other mods are insignificant. Death's Door - The unique selling point of these Boots is an extra Maximum Endurance Charge. There are not that many Endurance-stacking builds, but it is definitely fitting for one. We've used them in a basic Sunder Juggernaut. Discharge builds tend to lean towards Ralakesh's Impatience, Legacy of Fury, or Goldwyrm, but these might be their fourth or fifth choice, especially after a successful Corruption for one more Maximum Endurance Charge. Two Maximum Endurance Charges from a single pair of Boots is a great deal. All the other mods are insignificant. |
|||
|
Required Level: 64 (363-417) Armour |
|||
|
Required Level: 70 (315-580) Armour |
 Ralakesh's Impatience - Immensely popular footwear for many builds due to the inability to lose Charges and how being Stationary works - the character is Stationary while continuously casting Lightning Warp or Attacking with Flicker Strike. Some builds are simply tanky enough to be Stationary the old-fashioned way - by standing still. You can combine it with other Stationary-related effects like Soul of Tukohama, Arctic Armour, or Nature's Patience. As long as the character is Stationary, it is assigned all the Charges it can possibly have. Even with no investment into extra Maximum Charges, it's good, but most players opt for multiple Charges which you can have as an Occultist/Assassin with Badge of the Brotherhood Amulet. You cannot lose these Charges, so equipping Malachai's Loop Shield for even more of them is a great idea. Finally - you can allocate the Inner Conviction Keystone for more damage per Power Charge. It states that you cannot gain Frenzy Charges, but you still will have them due to how the modifier is worded. We've used it in
| Energy Shield/Evasion Boots | |||
 Nomic's Storm - Very bad, they simultaneously encourage and discourage being of full ES. There's nothing else worth your attention here. Nomic's Storm - Very bad, they simultaneously encourage and discourage being of full ES. There's nothing else worth your attention here. |
|||
|
Required Level: 17 (60-89) Evasion |
|||
 Sundance - Bland, uninspiring. They might be decent for leveling a build that desperately needs extra Attack Speed such as this Toxic Rain Pathfinder Starter. Sundance - Bland, uninspiring. They might be decent for leveling a build that desperately needs extra Attack Speed such as this Toxic Rain Pathfinder Starter. |
|||
|
Required Level: 27 (90-125) Evasion |
|||
 Brinerot Whalers - None of these modifiers here are particularly impactful, but these Boots can be used as a budget option in a Lightning Arrow build. They're not great and you should replace them later with something that has Maximum Life and more Resistances. Brinerot Whalers - None of these modifiers here are particularly impactful, but these Boots can be used as a budget option in a Lightning Arrow build. They're not great and you should replace them later with something that has Maximum Life and more Resistances. |
|||
|
Required Level: 41 (74-85) Evasion |
|||
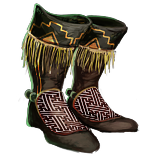
 Corpsewalker - One of the most reliable ways to quickly create Corpses, which are necessary for all Minion Builds to cast Offerings, Spawn Zombies, or cause explosions. It's a big issue during enclosed boss battles where you have to enter an arena, such as Crucible or Shaper's Realm. There are no Minions there so you have to bring your own Corpses with you. They're particularly important in this Detonate Dead Necromancer build where you have to have a lot of Corpses. Use these Boots alongside Desecrate Skill that creates Corpses in a similar manner. Corpswalker Boots also increase your Movement Speed and Life Regeneration per Corpse making them excellent for clearing. Note that Desecrate Skill allows you to spawn up to 10 Corpses, Corpsewalker Boots effectively extend this limit. Corpsewalker - One of the most reliable ways to quickly create Corpses, which are necessary for all Minion Builds to cast Offerings, Spawn Zombies, or cause explosions. It's a big issue during enclosed boss battles where you have to enter an arena, such as Crucible or Shaper's Realm. There are no Minions there so you have to bring your own Corpses with you. They're particularly important in this Detonate Dead Necromancer build where you have to have a lot of Corpses. Use these Boots alongside Desecrate Skill that creates Corpses in a similar manner. Corpswalker Boots also increase your Movement Speed and Life Regeneration per Corpse making them excellent for clearing. Note that Desecrate Skill allows you to spawn up to 10 Corpses, Corpsewalker Boots effectively extend this limit. |
|||
|
Required Level: 55 (178-257) Evasion |
|||
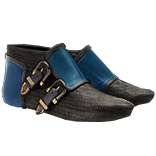
 Dance of the Offered - Quite popular boots in certain builds. They grant the Agnostic Keystone that can quickly regenerate Life by draining your Mana Pool. It also completely removes all Energy Shield from the character. It's often used in builds that have no easy access to this Keystone on the Passive Skill Tree, especially by characters that scale up their Maximum Mana to use with Indigon Helmet. The 50-60 flat Mana and Onslaught while not on Low Mana are also quite nice additions. Dance of the Offered - Quite popular boots in certain builds. They grant the Agnostic Keystone that can quickly regenerate Life by draining your Mana Pool. It also completely removes all Energy Shield from the character. It's often used in builds that have no easy access to this Keystone on the Passive Skill Tree, especially by characters that scale up their Maximum Mana to use with Indigon Helmet. The 50-60 flat Mana and Onslaught while not on Low Mana are also quite nice additions. |
|||
|
Required Level: 55 (99-117) Evasion |
|||
 Omeyocan - The "upgraded" Dance of the Offered. These are actually worse, less valuable. If you want to have an increased Evasion Rating by 100%, use Three-step Assault or Sin Trek and suffer no downsides. If it's the Onslaught you desire, get yourself Rare Boots with Onslaught on Kill, or a Silver Flask. Onslaught is easy to acquire, there are multiple other ways to get it. We see no use for these Boots. Omeyocan - The "upgraded" Dance of the Offered. These are actually worse, less valuable. If you want to have an increased Evasion Rating by 100%, use Three-step Assault or Sin Trek and suffer no downsides. If it's the Onslaught you desire, get yourself Rare Boots with Onslaught on Kill, or a Silver Flask. Onslaught is easy to acquire, there are multiple other ways to get it. We see no use for these Boots. |
|||
|
Required Level: 55 (99-117) Evasion |
|||
 Sin Trek - These will get you mostly tons of Evasion. but if you plan to stack a lot of it, Three-step Assault are better, they grant more Evasion. Sin Trek are preferable in some cases. You don't need Onslaught to benefit from the Evasion bonus, they get you some extra Energy Shield and Intelligence, but no Maximum Life or Resistances. You may see them being used by Aurabots due to the aforementioned virtues, and Dexterity which is needed for Auras. Sin Trek are very cheap, and Corrupting them may yield positive results such as extra Levels to Socketed Gems (Auas). Sin Trek - These will get you mostly tons of Evasion. but if you plan to stack a lot of it, Three-step Assault are better, they grant more Evasion. Sin Trek are preferable in some cases. You don't need Onslaught to benefit from the Evasion bonus, they get you some extra Energy Shield and Intelligence, but no Maximum Life or Resistances. You may see them being used by Aurabots due to the aforementioned virtues, and Dexterity which is needed for Auras. Sin Trek are very cheap, and Corrupting them may yield positive results such as extra Levels to Socketed Gems (Auas). |
|||
|
Required Level: 62 (396-506) Evasion |
|||
 Fenumus' Spinnerets - No one uses these. None of the listed Aspects of the Spider's upgrades are necessary or influential. The additional Web increases enemies' damage taken by 5% and it's not much. Most enemies should be dead before you'll be able to apply all four Webs. The majority of the builds using Aspect of the Spider value mobility so they opt for Rare Boots with Onslaught, Tailwind, or Elusive. They also prioritize Maximum Life over ES, which these Boots do not provide. Fenumus' Spinnerets - No one uses these. None of the listed Aspects of the Spider's upgrades are necessary or influential. The additional Web increases enemies' damage taken by 5% and it's not much. Most enemies should be dead before you'll be able to apply all four Webs. The majority of the builds using Aspect of the Spider value mobility so they opt for Rare Boots with Onslaught, Tailwind, or Elusive. They also prioritize Maximum Life over ES, which these Boots do not provide. |
|||
|
Required Level: 63 (314-417) Evasion |
|||
 The Stampede - These Boots do not increase your Movement Speed directly, but instead, they ensure that you're always at 150% of your base Movement Speed. It makes them extremely good with Cyclone which slows you down. This Energy Blade Inquisitor or Cospri's CoC Ice Spear Occultist are great examples of a Cyclone build. They grant no Maximum Life so we don't recommend using them on a regular Cyclone Shockwave build. Note, that with these you cannot go faster than a certain fixed value, so do not use them with Quicksilver Flask or other mobility-boosting items. Additionally, these Boots increase the Cooldown Recovery Rate for your Travel Skills like Flame Dash, and you can Anoint them as you do with Amulet - it's a big upside. Cyclone is the only Skill that slows you down passively, other Skills are either instant or require you to stop completely to cast them. The Stampede - These Boots do not increase your Movement Speed directly, but instead, they ensure that you're always at 150% of your base Movement Speed. It makes them extremely good with Cyclone which slows you down. This Energy Blade Inquisitor or Cospri's CoC Ice Spear Occultist are great examples of a Cyclone build. They grant no Maximum Life so we don't recommend using them on a regular Cyclone Shockwave build. Note, that with these you cannot go faster than a certain fixed value, so do not use them with Quicksilver Flask or other mobility-boosting items. Additionally, these Boots increase the Cooldown Recovery Rate for your Travel Skills like Flame Dash, and you can Anoint them as you do with Amulet - it's a big upside. Cyclone is the only Skill that slows you down passively, other Skills are either instant or require you to stop completely to cast them. |
|||
|
Required Level: 63 (242-347) Evasion |
|||
| Replica Stampede - Very similar to the original Stampede. Here, instead of having an increased Cooldown Recovery Rate of Travel Skills, Socketed Travel Skills deal 80% more Damage. That's the only difference. Most players use them in the same situations as the original Stampede, and to gain the extra Anointed Notable. You can see them being worn mostly by Arakaali's Spider Summoner Occultists because they're cheaper than The Stampede. |
|||
|
Required Level: 63 (242-347) Evasion |
|||
 Bubonic Trail - Only the variant with 2 Abyssal Sockets is worth anything, it's because they're used in very popular Abyssal-stacking builds where you want to socket as many Abyssal Jewels as you can, so every Abyssal Socket is valuable. You should activate all three bonuses to make them worth their price (the Jewels don't need to be socketed in these Boots specifically, but anywhere on the equipment or Passive Skill Tree). They're also used in regular builds that have only two or three of these types of Jewels, mostly because for the Reservation Efficiency Bonus which is normally unobtainable on any other Boots (besides Skyforth Boots which grant only 12%, half of that found here). You can imagine how popular are they among Aurabots because of that. Bubonic Trail - Only the variant with 2 Abyssal Sockets is worth anything, it's because they're used in very popular Abyssal-stacking builds where you want to socket as many Abyssal Jewels as you can, so every Abyssal Socket is valuable. You should activate all three bonuses to make them worth their price (the Jewels don't need to be socketed in these Boots specifically, but anywhere on the equipment or Passive Skill Tree). They're also used in regular builds that have only two or three of these types of Jewels, mostly because for the Reservation Efficiency Bonus which is normally unobtainable on any other Boots (besides Skyforth Boots which grant only 12%, half of that found here). You can imagine how popular are they among Aurabots because of that. |
|||
|
Required Level: 69 (185-213) Evasion |
|||
|
Required Level: 69 (444-596) Evasion |
|||
|
Required Level: 69 (444-596) Evasion |
|||
 Inextricable Fate - To make use of their unique ability, you have to cause your enemies to be Stationary for at least 1.5 seconds. Then, all your damage can and will cause Poison (normally only Physical and Chaos Damage can Poison). To immobilize an enemy you can use a Bear Trap or simply Stun them, but that's not really reliable. The other bonuses include a huge Maximum Life bonus, 30% increased Movement Speed, Chaos Resistance, and reduced Extra Damage from Critical Strikes by Poisoned Enemies by up to 50%, which is actually a great set of modifiers, good on their own. It's an ok pair of Boots that's often overlooked due to how hard is to immobilize an enemy. You can use them in almost any build as a budget option. Inextricable Fate - To make use of their unique ability, you have to cause your enemies to be Stationary for at least 1.5 seconds. Then, all your damage can and will cause Poison (normally only Physical and Chaos Damage can Poison). To immobilize an enemy you can use a Bear Trap or simply Stun them, but that's not really reliable. The other bonuses include a huge Maximum Life bonus, 30% increased Movement Speed, Chaos Resistance, and reduced Extra Damage from Critical Strikes by Poisoned Enemies by up to 50%, which is actually a great set of modifiers, good on their own. It's an ok pair of Boots that's often overlooked due to how hard is to immobilize an enemy. You can use them in almost any build as a budget option. |
|||
|
Required Level: 70 (112-129) Evasion |
|||
|
Required Level: 70 (315-580) Armour |
| Ward Boots | |||
 Olroth's Charge - It's a source of Adrenaline. One that's much easier to get than that from Annihilation's Approach, you simply need to lose Ward by taking any damage. And yet it is still very bad. It takes 4 seconds to restore Ward, 5 or 6 with these Boots on. You can also instantly gain Ward by using an Iron Flask. If taking damage often, for example by using Boneshatter, you can have this elusive Adrenaline Buff half the total time. Adrenaline is great, but not worth sacrificing a whole pair of Boots over it. Even Wardloop builds (the only types of builds that use Ward as a major defensive layer) have no use for this item, as their Ward never breaks. It's not good. Olroth's Charge - It's a source of Adrenaline. One that's much easier to get than that from Annihilation's Approach, you simply need to lose Ward by taking any damage. And yet it is still very bad. It takes 4 seconds to restore Ward, 5 or 6 with these Boots on. You can also instantly gain Ward by using an Iron Flask. If taking damage often, for example by using Boneshatter, you can have this elusive Adrenaline Buff half the total time. Adrenaline is great, but not worth sacrificing a whole pair of Boots over it. Even Wardloop builds (the only types of builds that use Ward as a major defensive layer) have no use for this item, as their Ward never breaks. It's not good. |
|||
|
Required Level: 48 (93-127) Ward |
|||
 Vorana's March - Last and least - Vorana's March. Probably the worst pair of Boots on this list. Despite the numerous Arbalists mods they see no use in any build. All of these possible combinations of four mods are simply bad. You cannot even Support these Arbalists with Support Gems, these Boots have no Sockets. They will do no damage. There are no stats here, only a measly 100 Ward. Do not use. Vorana's March - Last and least - Vorana's March. Probably the worst pair of Boots on this list. Despite the numerous Arbalists mods they see no use in any build. All of these possible combinations of four mods are simply bad. You cannot even Support these Arbalists with Support Gems, these Boots have no Sockets. They will do no damage. There are no stats here, only a measly 100 Ward. Do not use. |
|||
|
Required Level: 69 (102-117) Ward
|
If you have any other Article requests please leave that in the comments below. We are always open to suggestions and constructive feedback.
Pictures used in this article are the intellectual property of Grinding Gear Games.
