
Righteous Fire Inquisitor Build
The build with excellent survivability and mapping - Righteous Fire Inquisitor. It's affordable and easy to playRighteous Fire
Inquisitor Build
Updated for Patch 3.20
The Best Crafty Guides by Odealo
| Guide notes | |||
| February 06, 2023 -Updated for Patch 3.20 |
|||
| Build overview | |||
| Tags: [CASTER] [ELEMENTAL] [DOT] [HYBRID] | |||
|
Budget: Defenses: |
|
Boss DPS: AoE: |
|
Righteous Fire Inquisitor is one of the tankiest builds in the game, your combined Life and Energy shield should be 8 or even 10k, and with Fire Resistance at 90%, tons of Life and ES Regeneration, Consecrated Ground effect, Armour, Divine Shield, and instant Enduring Cry you can't really die that easily. You won't deal any damage with hits. Your Flame Wall and Righteous Fire deal damage over time, so bury that in mind when linking your Support Gems and looking for mods on your rare gear. This build uses a six-linked Flame Wall as its single-target damage and RF (Righteous Fire) for clearing. With all your Life and Energy Shield the damage of RF will be enough as a four-link Skill but the Helmet mods will provide you with an additional link of Support Skill Gem or two. Inquisitor is the best Ascendancy due to the Pious Path - the effect of the Consecrated Ground you create while standing lingers for four more seconds, meaning that you will regenerate your ES alongside your Life which is great for a Hybrid build with Corrupted Soul Keystone - the only condition is to stand still, use a Flame Wall or even Flame Dash once every four seconds.
Righteous Fire has been increasingly more popular as of late, in Path 3.17 Legacy of Fury Unique Boots have been reworked so it scorches nearby enemies and significantly increase your clear speed, it's a mandatory item now. The new Melding of the Flesh Jewels allows you to increase all of your Maximum Elemental Resistances to 90%, which is a significant boost to your survivability. Patch 3.19 nerfed this build, it deals less damage and its survivability is also reduced due to many direct and indirect nerfs. It's still good, one of the most popular builds in general. Patch 3.20 has nerfed the Pious Path, it no longer has a 50% increased Effect of Consecrated Ground (Life Regen and Curse Effect reduction is lower). It also introduced Rational Doctrine Jewel which makes the Pious Patch effect more accessible to other classes.
You can also check our other Path of Exile builds right over here Odealo's Crafty Guides - Full List
1. Gameplay
It's so safe and easy to run maps with this build you can do it with one hand - you walk and the enemies around you die. Use your Enduring Warcry to regenerate a huge amount of your life in a span of one second and gain some extra damage reduction - be ready to activate it when you expect to take a big hit. To deal with bosses RF will not be enough, that's why you use Flame Wall for it works in a similar fashion to RF - it deals Fire Damage Over Time and doesn't Hit enemies. Additionally, a Curse of Flammability and Elemental Weakness will be applied by a Brand. By standing still you'll create a Consecrated Ground - keep that in mind when you run out of Flask Charges as it is really beneficial with your Piety Path from your ascendancy tree.
|
|
|
|

2. Build's PROS & CONS
| PROS |
|
| CONS |
|
3. Leveling tips
Leveling RF build is slow. You'll lack damage and before you can sustain Righteous Fire you'll need a placeholder Skill. For that, we recommend using Scorching Ray or Flame Wall - these don't deal damage per Hit so your DPS won't be impaired by lack of this type of damage in your tree and gear. You can obtain it as soon as level 12 for Scorching Ray and level 4 for Flame Wall. You'll start your tree by taking Maximum Life and Fire Damage nodes right away and as you progress you'll just take more of them. Around acts 6 to 10, you should be able to sustain RF. Look for Increased Fire Damage and Burning Damage.
Suggested leveling Gem setups:
| Scorching Ray setup | |
 |
Scorching Ray - Use this or  Flame Wall, whichever suits you Flame Wall, whichever suits you |
 |
Elemental Focus Support - for more Elemental Damage |
 |
Efficacy Support - for more Fire Damage Over Time |
 |
Controlled Destruction Support - for More Damage, Over Time type of Damage can't deal Critical Strikes anyway |
| Flame Dash setup | |
 |
Flame Dash - use this Movement Skill to move around |
 |
Arcane Surge Support - Keep it at a level low enough that a single cast of Flame Dash will activate it |
| Arcanis Brand setup | |
 |
Arcanist Brand - Sticks to an enemy and casts linked Spells |
 |
Flammability - a Curse to reduce Fire Resistance on enemies |
Bandits:
Killing all Bandits is the best option
Leveling Skill Trees:
36 Points Skill Tree
Allocate Breath of Flames by taking Life and Elemental Nodes on your way there
67 Points Skill Tree
Grab Acrimony, Divine Judgement, Sovereignty, and more Maximum Life and Armour
Recommended leveling items:
 Le Heup of All - Gives you Elemental Resistances and some damage. Le Heup of All - Gives you Elemental Resistances and some damage. |
|
| Adds 1 to 4 Physical Damage to Attacks +(10-30) to all Attributes (10-30)% increased Damage (10-30)% increased Rarity of Items found +(10-30)% to all Elemental Resistances |
|
 Pyre - Used for more Burning Damage and Cold and Fire Resistances. Pyre - Used for more Burning Damage and Cold and Fire Resistances. |
|
| +(20-30)% to Cold Resistance +(25-35)% to Fire Resistance (60-80)% increased Burning Damage 40% of Cold Damage Converted to Fire Damage 10% increased Light Radius Ignited Enemies you hit are destroyed on Kill |
|
 Doryani's Catalyst - It does require level 75 but even after that you're about to have difficulties finding a better weapon. Doryani's Catalyst - It does require level 75 but even after that you're about to have difficulties finding a better weapon. |
|
| 32% increased Elemental Damage Socketed Gems are Supported by Level 20 Elemental Proliferation Adds (65-85) to (100-160) Physical Damage (11-15)% increased Attack Speed (6-10)% increased Cast Speed (30-40)% increased Global Critical Strike Chance 0.2% of Elemental Damage Leeched as Life (80-100)% increased Elemental Damage |
|
 Springleaf - Available since level 7 this shield grants you a lot of Life Regen so that it's easier to sustain RF, even before act 5 . Springleaf - Available since level 7 this shield grants you a lot of Life Regen so that it's easier to sustain RF, even before act 5 . |
|
| +4% to all Elemental Resistances (80-120)% increased Armour and Energy Shield 50% reduced Freeze Duration on you Regenerate 3% of Life per second Regenerate 3% of Life per second while on Low Life |
|
 Goldrim - A fine Helmet to keep your Elemental Resistances high. Goldrim - A fine Helmet to keep your Elemental Resistances high. |
|
| +(30-50) to Evasion Rating 10% increased Rarity of Items found +(30-40)% to all Elemental Resistances Reflects 4 Physical Damage to Melee Attackers Level Requirement reduced by 100 (Hidden) |
|
 Tabula Rasa - It's good but as you'll start doing maps it is important to find something with mods on it, Life it's really crucial in this build. Tabula Rasa - It's good but as you'll start doing maps it is important to find something with mods on it, Life it's really crucial in this build. |
|
| Item has no level requirement and Energy Shield (Hidden) Item has 6 White Sockets and is fully linked (Hidden) |
|
 Ashcaller - Fire-oriented Wand you can get for 1c, available at level 18, increases your Fire Damage. Ashcaller - Fire-oriented Wand you can get for 1c, available at level 18, increases your Fire Damage. |
|
| (18-22)% increased Spell Damage 10% chance to Trigger Level 8 Summon Raging Spirit on Kill +(15-25)% to Fire Damage over Time Multiplier Adds (4-6) to (7-9) Fire Damage to Spells (20-30)% increased Burning Damage (16-22)% chance to Ignite |
|
4. Final Skill Tree, Ascendancy Points, and Pantheon
Final Skill Tree:
111 Points Final Skill Tree (doesn't include Cluster or Unique Jewels)
123 Points Path of Building (PoB) link
Ascendancy points:
Preferably in that order:
- Sanctuary
- Pious Path
- Augury of Penitence
- Righteous Providence
Pantheon:
Major God: Soul of Arakaali: 10% reduced Damage taken from Damage Over Time, +40% Chaos Resistance against Damage Over Time
Minor God: Soul of Shakari: You cannot be Poisoned while there are at least 3 Poisons on you, 50% less Duration of Poisons on You; 5% reduced Chaos Damage taken, 25% reduced Chaos Damage over Time taken while on Caustic Ground
5. Final Gems links
| [DPS] Righteous Fire setup socketed in Helmet with built-in Support Gems |
|
 |
Righteous Fire - We Recommend using Vaal Righteous Fire for extra damage upon activation, but what's more important is to have this Gem at level 21. |
|
Elemental Focus Support - Increases your damage with no drawbacks, you can swap it for Increased  Area of Effect Support if your damage is already sufficient. Area of Effect Support if your damage is already sufficient. |
 |
Lifetap Support - Increases your Damage, and allows RF to be affected by Swift Affliction, keep it at maximum level. |
 |
Swift Affliction Support - More Damage over Time for Duration Skills. |
| Support Skills you can find as Mods in your helmet | |
 |
Burning Damage Support - Elder Suffix for more Burning Damage. |
 |
Concentrated Effect Support - Elder Prefix for more damage but less AoE. |
 |
Increased Area of Effect Support - Shaper Prefix that increases your Area of Effect. |
| [DPS] Fire Trap setup | |
 |
Fire Trap - The Skill you're using to deal with bosses. Scorching Ray doesn't deal that much damage and requires you to stand still, which is not recommended when fighting bosses. |
|
Burning Damage Support - Use it for more burning damage, use the awakened version for far more damage. |
 |
Trap and Mine Damage Support - For more Trap Damage, there is no better alternative. |
|
Lifetap Support - Combined with level 1 Lifetap on Flame Dash, it will still increase your Damage from Lifetap Buff from Gem on level 20 here, it also allows you to link the Skill with Swift Affliction. |
|
Concentrated Effect Support |
|
Swift Affliction Support - For more Damage over Time with no drawbacks. |
| [UTILITY] Brand setup | |
 |
Armageddon Brand - Will periodically hit enemies, used to apply Curses |
|
Flammability - Your most important curse since you're dealing Fire Damage. |
| Combustion Support - Lowers Fire Resistance of ignited enemies. | |
 |
Hextouch - Used to apply linked Curse as you hit enemies with linked Skill. |
| [UTILITY] Warcry and Guard Spell setup | |
 |
Enduring Cry - Regenerates around 2k of Life in one second, and reduces Physical Damage taken. You can also use  Infernal Cry instead as it covers enemies in Ash and makes them explode on death. You don't need it if your Life Regen is good. Infernal Cry instead as it covers enemies in Ash and makes them explode on death. You don't need it if your Life Regen is good. |
 |
Molten Shell - Guard Spell that reduces the damage you take, it grows more efficient the more Armour you have. |
| [MOBILITY] Flame Dash setup | |
 |
Flame Dash - great movement tool |
|
Lifetap - keep it at level 1 for constant Lifetap Buff for your Flame Wall |
 |
Second Wind Support |
| [UTILITY] Auras setup | |
 |
Malevolence - Aura granting more DoT and Skill Effect Duration, obligatory |
 |
Determination - Aura granting more Armour, great when combined with Divine Shield Keystone |
 |
Enlighten Support - increases Mana Reservation Efficiency for linked Spells |
 |
Purity of Fire - for 4% additional Maximum Fire Resistance, if you can make this gem level 23, the maximum Resistance will be 5%, you can then increase your Aura Efficiency for more Max Res. If your Max Fire Res reaches 90% without it, go for  Purity of Elements instead. If you're using Aegis Aurora, go for Purity of Elements instead. If you're using Aegis Aurora, go for  Purity of Ice instead. Purity of Ice instead. |
| [UTILITY] Stone Golem | |
 |
Summon Stone Golem - you can use it for increased Life Regeneration |
| [UTILITY] Wave of Conviction | |
 |
Wave of Conviction - use it to apply Fire exposure if you have no other way to do so |
| [UTILITY] Tempest Shield | |
 |
Tempest Shield - Very important if you plan to use Aegis Aurora as it increases your Block chance. It makes you Shock immune too. |
|
|
6. Gear Setup
A few Unique Items such as one granting Corrupted Soul and one of the Unique Shields will be really important, your rare gear will generally focus on accumulating as much Maximum Life and Armour as possible. There are a few good mods that will be mentioned, but besides that, the build is pretty basic. Your Fire Resistance should reach the hard cap of 90% - you can then redirect some of the damage you take to take it as Fire Damage via affixes. You will need around 100 Dexterity to run this build, it can be easily found on most Rare Items. Look for Fire Damage, Damage over Time, and Fire Damage over Time. Spell Damage and Ignite Damage will have no effect unless you're using Fire Trap. Fire Trap's DoT is affected by Spell Damage. Also, note that RF does not cost you Mana or Life, so lowering the Cost of Life Skills will not make you take less damage. Chaos Damage is your biggest weakness, but it can also be capped at 75% with the right gear.
Our recommended items will:
- Cap your resistances at 75%, and Fire Resistance at 90%
- Provide you with enough DPS and Life to start mapping
|
Stat priorities on items:
|
 (Helmet) Rare Helmet - One of the most significant parts of your gear, this is where your RF will be linked so having one or two Support Skills you can find in form of Mods in your helmet from section 5 will be important if not mandatory. If you want a non-influenced Helmet to later use Eldritch Embers and Ichors on it, get the "Socketed Gems deal 30% more Elemental Damage" affix. (Helmet) Rare Helmet - One of the most significant parts of your gear, this is where your RF will be linked so having one or two Support Skills you can find in form of Mods in your helmet from section 5 will be important if not mandatory. If you want a non-influenced Helmet to later use Eldritch Embers and Ichors on it, get the "Socketed Gems deal 30% more Elemental Damage" affix. |
|
| Min. requirements: +60 Maximum Life 60% to Elemental Resistances Socketed Gems are Supported by: Increased Area of Effect, Concentrated Effect, or Burning Damage (you won't be able to get all 3) Increased Burning Damage Optional affixes: +# to level fo socketed AoE Gems Socketed Gems deal 30% more Elemental Damage (Essence of Horror) Increased Area of Effect Armour Increased Area Damage |
|
 (Helmet) Crown of the Inward Eye - It offers a lot of Maximum Life, Armour, Energy Shield, and Damage. It's definitely worth considering. (Helmet) Crown of the Inward Eye - It offers a lot of Maximum Life, Armour, Energy Shield, and Damage. It's definitely worth considering. |
|
| 333% increased Armour and Energy Shield (9-21)% increased maximum Life, Mana and Global Energy Shield Transfiguration of Soul Transfiguration of Body Transfiguration of Mind |
|
| Helmet enchantments: increased Flammability Curse Effect increased Righteous Fire Damage increased Righteous Fire Area of Effect Flame Wall deals increased Damage |
|
 (Weapon) Rare Sceptre - It gives you Increased Elemental Damage from its Implicit. Look for offensive mods, such as increased Fire, Burning, Spell, and Over Time Damage. A good way to find a decent Sceptre is to add a pseudo filter "#% increased Burning Damage" on the trading website and sort from highest to lowest. pseudo filter Burning Damage includes Fire Damage, Fire Damage Over Time, Burning Damage, and Elemental Damage. The other very important affixes are ones granting the increased global level to all Fire and/or Spell Skill Gems. (Weapon) Rare Sceptre - It gives you Increased Elemental Damage from its Implicit. Look for offensive mods, such as increased Fire, Burning, Spell, and Over Time Damage. A good way to find a decent Sceptre is to add a pseudo filter "#% increased Burning Damage" on the trading website and sort from highest to lowest. pseudo filter Burning Damage includes Fire Damage, Fire Damage Over Time, Burning Damage, and Elemental Damage. The other very important affixes are ones granting the increased global level to all Fire and/or Spell Skill Gems. |
|
| Min. requirements: 100% Increased Fire Damage +1 to Level of all Fire Skill Gems Optional affixes: Fire Damage Over Time +1 to Level of all Spell Skill Gems Burning Damage Elemental Damage Damage Penetrates Fire Resistance |
|
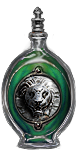
 (Shield) Saffell's Frame - increases your maximum Elemental Resistances by 4%. Other than that, it gives you Increased Spell Damage and a chance to Block Spell Damage. Additional Maximum Fire Resistance is really important. (Shield) Saffell's Frame - increases your maximum Elemental Resistances by 4%. Other than that, it gives you Increased Spell Damage and a chance to Block Spell Damage. Additional Maximum Fire Resistance is really important. |
|
| +4% to all Elemental Resistances (15-20)% Chance to Block Spell Damage (20-30)% increased Spell Damage +10% to all Elemental Resistances +4% to all maximum Resistances Cannot Block Attacks |
|
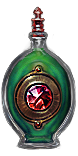
 (Shield) Rise of the Phoenix - +5% to your Maximum Fire Resistance is a lot and it's one of the most important stats. All the other Stats are good too, it adds a lot of Maximum Life and Elemental Resistances. (Shield) Rise of the Phoenix - +5% to your Maximum Fire Resistance is a lot and it's one of the most important stats. All the other Stats are good too, it adds a lot of Maximum Life and Elemental Resistances. |
|
| +8% to all Elemental Resistances (80-100)% increased Armour and Energy Shield +(40-60) to maximum Life Regenerate (15-20) Life per second +5% to maximum Fire Resistance +(20-25)% to Fire Resistance +25% to Fire Resistance while on Low Life 10% increased Movement Speed when on Low Life Cannot be Ignited while on Low Life |
|
 (Shield) Aegis Aurora - if you're using Melding of the Flesh, it’s recommended to use this Shield. The bonus to Maximum Cold Resistance will apply to other Resistances including Fire, and you will also benefit from this shield’s insane energy shield recovery. (Shield) Aegis Aurora - if you're using Melding of the Flesh, it’s recommended to use this Shield. The bonus to Maximum Cold Resistance will apply to other Resistances including Fire, and you will also benefit from this shield’s insane energy shield recovery. |
|
| (300-400)% increased Armour and Energy Shield +10% to all Elemental Resistances +5% to maximum Cold Resistance +6% Chance to Block Replenishes Energy Shield by 2% of Armour when you Block (10-20)% increased Elemental Damage with Attack Skills |
|
 (Body Armour) Rare Armour - The main reason we're not using Kaom's Heart is that we need a 6-link for Fire Trap. Try to make up for Kaom's Huge Life Bonus and look for other valuable mods you can find on a Rare Armour. (Body Armour) Rare Armour - The main reason we're not using Kaom's Heart is that we need a 6-link for Fire Trap. Try to make up for Kaom's Huge Life Bonus and look for other valuable mods you can find on a Rare Armour. |
|
| Min. requirements: +100 Maximum Life 60% to Elemental Resistances Optional affixes: You Can Apply Additional Curse increased Armour Armour Mana Reservation Efficiency Maximum Energy Shield Increased Life Recovery rate #% Physical Damage from Hits taken as Fire Damage |
|
 (Body Armour) The Brass Dome - Tons of Armour and Maximum Elemental Resistances are extremely good. (Body Armour) The Brass Dome - Tons of Armour and Maximum Elemental Resistances are extremely good. |
|
| (350-400)% increased Armour +(1-5)% to all maximum Elemental Resistances Strength provides no bonus to Maximum Life Take no Extra Damage from Critical Strikes |
|
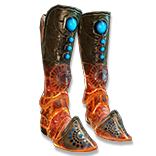 (Boots) Legacy of Fury - These are mandatory as of now, it's a significant boost to your damage and clear speed as Scorched enemies have lowered Elemental Resistance. (Boots) Legacy of Fury - These are mandatory as of now, it's a significant boost to your damage and clear speed as Scorched enemies have lowered Elemental Resistance. |
|
| (200–300)% increased Armour and Evasion 30% increased Movement Speed Nearby Enemies are Scorched (30–50)% increased Effect of Scorch (30–40)% chance when you Kill a Scorched Enemy to Burn Each surrounding Enemy for 4 seconds, dealing 8% of the Killed Enemy's Life as Fire Damage per second |
|
 (Gloves) Rare Gloves - Again, Maximum Life and Elemental Resistances are a priority, also look for Maximum Energy Shields. (Gloves) Rare Gloves - Again, Maximum Life and Elemental Resistances are a priority, also look for Maximum Energy Shields. |
|
| Min. requirements: +70 Maximum Life 60% to Elemental Resistances Optional affixes: Maximum Energy Shield Dexterity +# to Fire Damage Over Time Multiplier +1 to Level of Socketed AoE Gems |
|
 (Belt) Replica Soul Tether - Provides you with ES based on your Maximum Life - around 20% of the value. Half of the Non-Chaos Damage taken now bypasses Energy Shield, you will however regenerate ES at the same rate as Life thanks to Pious Path. (Belt) Replica Soul Tether - Provides you with ES based on your Maximum Life - around 20% of the value. Half of the Non-Chaos Damage taken now bypasses Energy Shield, you will however regenerate ES at the same rate as Life thanks to Pious Path. |
|
| (15-25)% increased Stun and Block Recovery +(20-40) to Strength Gain (4-6)% of Maximum Life as Extra Maximum Energy Shield Corrupted Soul |
|
 (Amulet) Rare Amulet - +1 to Level of all Fire Skill Gems is a really nice mod to have but the usual Life and Resistances will do. If you can afford +2 to Level of Fire Trap (+1 to Fire Skills, +1 to All/Intelligence Skills) here it will boost your damage by a lot. (Amulet) Rare Amulet - +1 to Level of all Fire Skill Gems is a really nice mod to have but the usual Life and Resistances will do. If you can afford +2 to Level of Fire Trap (+1 to Fire Skills, +1 to All/Intelligence Skills) here it will boost your damage by a lot. |
|
| Min. requirements: +60 Maximum Life 80% to Elemental Resistances Optional affixes: Fire Damage Over Time Multiplier +1 to Level of all Intelligence Skill Gems +1 to Level of all Fire Skill Gems Increased Maximum Energy Shield |
|
 (Amulet) Replica Atziri's Foible - Grants you tons of Life and Life Regen, and reduced Attribute Requirements which is also great since you won't need as much Dexterity as you normally would. (Amulet) Replica Atziri's Foible - Grants you tons of Life and Life Regen, and reduced Attribute Requirements which is also great since you won't need as much Dexterity as you normally would. |
|
| Regenerate (1-2)% of Life per second +100 to maximum Life (20-25)% increased Life Recovery rate Items and Gems have 25% reduced Attribute Requirements |
|
| Recommended Anointments: Growth and Decay Written in Blood Arsonist Breath of Flames |
|
 (Ring) Rare Ring - Just look for Elemental Resistances and Life, don't look for Curses on Hit, you have a Brand for that. Opal Rings are offensive options, while Life and Two-Stone Rings are more on the defensive side. (Ring) Rare Ring - Just look for Elemental Resistances and Life, don't look for Curses on Hit, you have a Brand for that. Opal Rings are offensive options, while Life and Two-Stone Rings are more on the defensive side. |
|
| Min. requirements: +70 Maximum Life 60% to Elemental Resistances Optional affixes: Maximum Energy Shield Dexterity Chaos Resistance |
|
| (Ring) Pyre - Pyre is still a good Ring even in the final version of it only because it grants a lot of Burning Damage. |
|
| +(20-30)% to Cold Resistance +(25-35)% to Fire Resistance (60-80)% increased Burning Damage 40% of Cold Damage Converted to Fire Damage 10% increased Light Radius Ignited Enemies Killed by your Hits are destroyed |
|
 (Ring) Death Rush - Your weak spot is Chaos Damage, use this Ring to increase your Chaos Resistance, get some Life, Armour, and Onslaught Buff. (Ring) Death Rush - Your weak spot is Chaos Damage, use this Ring to increase your Chaos Resistance, get some Life, Armour, and Onslaught Buff. |
|
| +(17-23)% to Chaos Resistance +(300-350) to Accuracy Rating +(260-300) to Armour +(40-50) to maximum Life +(15-20)% to Chaos Resistance (0.6-0.8)% of Physical Attack Damage Leeched as Life You gain Onslaught for 4 seconds on Kill |
|
 (Jewel) Rare Jewels - These should provide extra Life and Fire Damage. (Jewel) Rare Jewels - These should provide extra Life and Fire Damage. |
|
|
Recommended affixes: |
|
 (Jewel) Melding of the Flesh - It lowers all your Elemental Resistances by 70 or 80%, but the upside is that your Maximum Resistance for one Elemental Resistance applies to all of the Elemental Resistances - as RF build you can increase only your Max Fire or Cold Res to 90% or close and have all your resistances to be capped at 90% too. (Jewel) Melding of the Flesh - It lowers all your Elemental Resistances by 70 or 80%, but the upside is that your Maximum Resistance for one Elemental Resistance applies to all of the Elemental Resistances - as RF build you can increase only your Max Fire or Cold Res to 90% or close and have all your resistances to be capped at 90% too. |
|
| -(80-70)% to all Elemental Resistances Elemental Resistances are capped by your highest Maximum Elemental Resistance instead -(4-6)% to all Maximum Elemental Resistances |
|
 (Jewel) Glorious Vanity - If you're not using Replica Soul Tether, but a regular Rare Belt with tons of Life and Resistances instead, you still have to have a Corrupted Soul Keystone from Doryani's version and that's another way to get it. (Jewel) Glorious Vanity - If you're not using Replica Soul Tether, but a regular Rare Belt with tons of Life and Resistances instead, you still have to have a Corrupted Soul Keystone from Doryani's version and that's another way to get it. |
|
| Bathed in the blood of (100-8000) sacrificed in the name of Doryani Passives in radius are Conquered by the Vaal Historic |
|
  (Jewel) Forbidden Flame & Flesh - With Searing Purity, you won't need any Chaos Resistance so it's very good. Unwavering Faith, Time of Need, Radiant Crusade, and Bastion of Hope may be great too. (Jewel) Forbidden Flame & Flesh - With Searing Purity, you won't need any Chaos Resistance so it's very good. Unwavering Faith, Time of Need, Radiant Crusade, and Bastion of Hope may be great too. |
|
| Allocates <Random Ascendancy Notable> if you have the matching modifiers on Forbidden Flesh Allocates <Random Ascendancy Notable> if you have the matching modifiers on Forbidden Flame |
|
 (Jewel) Watcher's Eye - The build relies on four Auras - Malevolence, Vitality, Determination, and Purity of Fire or Purity of Elements. There are many great Aura enhancements, especially for Malevolence or Vitality, but the best one you can find is a Purity of Elements mod - it's the one that gives you a lot of Chaos Resistance. (Jewel) Watcher's Eye - The build relies on four Auras - Malevolence, Vitality, Determination, and Purity of Fire or Purity of Elements. There are many great Aura enhancements, especially for Malevolence or Vitality, but the best one you can find is a Purity of Elements mod - it's the one that gives you a lot of Chaos Resistance. |
|
| (4-6)% increased maximum Energy Shield (4-6)% increased maximum Life (4-6)% increased maximum Mana <Two or Three random aura modifiers> |
|
 (Jewel) Large Cluster Jewels - This build uses just one Fire Damage-based Large Cluster Jewel. Look for Notables Listed Here. The most important is to have Burning Bright on both. (Jewel) Large Cluster Jewels - This build uses just one Fire Damage-based Large Cluster Jewel. Look for Notables Listed Here. The most important is to have Burning Bright on both. |
|
| Recommended affixes: 1 Added Passive Skill is Burning Bright 1 Added Passive Skill is Cremator 1 Added Passive Skill is Doryani's Lesson 1 Added Passive Skill is Smoking Remains 1 Added Passive Skill is Widespread Destruction 1 Added Passive Skill is Master of Fire |
|
 (Jewel) Medium Cluster Jewels - Look for Exposure Therapy and Burning Bright on each of the four Medium Cluster Jewels. You might also look for the Unique Megalomaniac Jewels with a lot of extra Maximum Elemental Resistances (from small and medium clusters). (Jewel) Medium Cluster Jewels - Look for Exposure Therapy and Burning Bright on each of the four Medium Cluster Jewels. You might also look for the Unique Megalomaniac Jewels with a lot of extra Maximum Elemental Resistances (from small and medium clusters). |
|
| Recommended affixes: 1 Added Passive Skill is Burning Bright 1 Added Passive Skill is Exposure Therapy 1 Added Passive Skill is Wrapped in Flame 1 Added Passive Skill is Brush with Death 1 Added Passive Skill is Antifreeze (only if using Aegis Aurora) 1 Added Passive Skill is Winter Prowler (only if using Aegis Aurora) |
|
 Jewel) Small Cluster Jewels - Molten's One Mark and Fettle are the best options, but Fettle is significantly more expensive. Jewel) Small Cluster Jewels - Molten's One Mark and Fettle are the best options, but Fettle is significantly more expensive. |
|
| Recommended affixes: 1 Added Passive Skill is Molten's One Mark 1 Added Passive Skill is Fettle 1 Added Passive Skill is Winter Prowler (Max Cold Res) |
|
 (Flask) Rumi's Concoction - The additional Block Chance is really good when you're also using Aegis Aurora. (Flask) Rumi's Concoction - The additional Block Chance is really good when you're also using Aegis Aurora. |
|
| +1500 to Armour +(8-12)% Chance to Block Attack Damage during Flask effect +(4-6)% Chance to Block Spell Damage during Flask effect |
|
|
Other suggested Flasks:
|
|
     |
|
|
If you have any other build requests please leave that in the comments below. We are always open to suggestions and constructive feedback.
Pictures used in this article are the intellectual property of Grinding Gear Games.
