
Heartbound Loop Autobomber Scion Build
One of the fastest Autobomber builds for Ascendant that uses Cast when Damage Taken setupsHeartbound Loop Autobomber
Scion Build
Updated for Patch 3.25
The Best Crafty Guides by Odealo
| Guide notes |
| September 25, 2024 -Updated for Patch 3.25 |
| Build overview | |||
| Tags: [TRIGGER] [ELEMENTAL] [LIFE] | |||
|
Budget: Defenses: |
|
Boss DPS: AoE: |
|
It's a very unique Autobomber build with presumably the highest possible DPS for this type of build. It's based on Infinite Cast when Damage Taken loop and summoning Skeletons with greatly reduced duration, which will expire/die nearly instantly. You then take damage from Heartbound Loop and trigger Summon Skeletons again, a process that will be repeated for as long as you keep your Olroth's Resolve Flask up. In order for it all to work you need a very specific set of Equipment and Gems, and on top of that you need to do some math before setting up your character which makes it quite challenging for a casual PoE player, but at the same time, very intriguing and rewarding. The primary stats you need to take into consideration are:
- The Duration of your Skeletons must match the corresponding Cast when Damage Taken Gem Cooldown. This is something that will be quite hard to do without Path of Building's exact calculations. The base duration of the Skeletons is 20 seconds. Allocate the Window of Opportunity, the small nodes leading to it, and maybe the mastery for a Reduced Duration. Combine it with (variable) To Dust Jewels. You can Reduce Skeleton's Duration by 99%, reaching a minimum of 0.198 seconds. You cannot go lower. We, however, recommend settling on 0.231 seconds because this number cannot be lower than the Cooldown of CwDT, which is much harder to reduce.
The base Cooldown of Cast when Damage Taken is at 0.25s (250m), but with a 9% increased Cooldown Recovery Rate stat (from Boots and a Jewel) you can reduce it to 0.231 seconds. Both values get rounded up to the closest server ticks at 198ms, 231ms, or 264 ms. Both the stats (of the Skeletons and of the CwDT) must be rounded up to the same number, preferably the lowest one for the best Trigger Rate, but reaching this one is hard. If you want to settle on 198ms instead of 231ms, you will need a 27% increased Cooldown Recovery Rate instead of 9% - it's almost impossible to achieve.
You can check The Trigger Rate of a Skill in PoB by selecting Calcs (from the top-left corner). Under View Skill Detail choose one linked with 20/20 CwDT (like Ice Spear), and click on the Trigger Rate Cap in the Attack/Cast Rate table. If you wish to see your Skeletons' Duration, select Summon Skeletons Skill and check the Skill Duration, found in the Skill type-specific Stats table.
Whichever Trigger Rate you choose, we will refer to it as a "cycle" from now on to avoid explaining the same concept each time we want to pertain to the Skeleton's Duration combined with the cooldown of the Cast When Damage Taken Gem.
- The damage you take from Heartbound Loop and Forbidden Rite must exceed the damage threshold on Cast when Damage Taken Gem linked to your Skeletons. We summon 4 Skeletons per cycle, which results in 4x420 (1680 per cycle in total (with no Physical Damage Reduction whatsoever)) Physical Damage Taken thanks to the Ring.
Forbidden Rite is linked to level-12 CwDT, so it will require you to take only 1635 damage to Trigger, meaning each cycle of Skeletons will activate it. It deals 40% of Max Life as Chaos multiplied by Chaos Resistance. If it's too much, you either have too much Maximum Life or too low Chaos Resistance. Either way, it has to deal at least 1310 damage per cast, and to achieve it you will need to have -60% Chaos Resistance more or less 2000 Maximum Life. Better to have a bit more than that just to be sure.
Level 20, 20% Quality CwDT Gem requires 2945 damage to activate per cycle. If you've followed the instructions, you're only required to have one Hearthbound Loop with boosted Quality for Physical Damage, one setup of Skeletons, and one setup of Forbidden Rite. If you don't take enough damage, add another self-damage setup.
To start the rotation, you need two Essence-crafted weapons with Spectral Spirits. You are going to use Olroth's Resolve Flask and then use weapon swap twice to have those Minions summoned and killed instantly. This will trigger the loop. You can stay in your hideout to try out if it will actually work with your given equipment, as you will not die.
You should be able to constantly take enough Damage to feed the maximum level Cast when Damage Taken Gem at its highest Cast rate without taking any real damage. Your Body Armour and two-handed weapon will be a nest for the actual DPS setups, where you can socket any Spells you want. Go for the Annihilating Light Unique Staff - it triples your Elemental Damage. Your ~3k of Maximum Life and permanent Ward are not only able to sustain the damage you deal to yourself, but any damage really - it's a very tanky build that's only vulnerable to one-shots. Without any Armour and Choas Resistance, you're obviously more prone to getting instantly killed. The Recoup mechanics is the one you should make use of - you're constantly taking a lot of damage that will be replenished back to you over 4 seconds. Have the Damage you take be Recouped as Mana for rapid Mana Regeneration, and Life so that you will instantly regenerate missing health. The build is expensive and requires some very specific items, some of which you can make yourself - like the Gems, and some of which have to have a lot of Attributes and Ward making them very pricey and hard to obtain.
3.24 - Since the last update, we've introduced a major overhaul of the build. It no longer uses Crystalised Omniscience. Alternate Gem Quality has been removed from the game so we had to crunch the numbers again. Item stats and descriptions are updated. Gem setups are updated, and so is the Passive Skill Tree. The damage remains more or less the same,
3.25 - You're now able to get more Ward, mostly due to the Ynda's Stand. Orloth's Resolve Flask has been nerfed to re-balance it. We now have to include this Unique Belt, so acquiring more Cooldown Recovery Rate is harder. The good news is we can now get more Maximum Ward than before, even with the nerfed Flask, so the build is more durable, given you can afford a good Body Armour.
You can also check our other Path of Exile builds right over here Odealo's Crafty Guides - Full List
1. Gameplay
It's an Autobomber build so you don't really have to do anything, except pop your Flask and start the Loop by using weapon swap twice. Your only active Skills are Flame Dash and maybe Vaal Righteous Fire. All your Cold Spells will be triggered automatically by level 20 Cast when Damage Taken Setups and are great at dealing with any kind of opponent. This build however can be technically used with any Spells you like, but the ones listed are simply the optimal/best choice. You don't have any free sockets for any more active Skills making it very easy to play as a reward for the painfully complex process of gearing up.
The only thing you must consider when playing this character is getting Flask Charges quickly enough. Usually, this means you will have to progress fast on high-density Areas and teleport back to town quickly after Boss. You could also remove your 4th (or even 3rd) Flask to boost the effect of The Traitor Passive, and that's what we recommend doing. Combine it with the Pathfinder's Ascendancy, Flask Passives, and Flask Cluster Jewels.
|
Full gameplay video:
This video was recorded on a level 96 Ascendant with level 21 Ice Spear, level 20 Freezing Pulse, and the 0.231s "breakpoint". You could quickly boost the damage by simply swapping Quicksilver Flask with Bottled Faith, but we preferred to have more mobility for the videos (the DPS is more than fine regardless) |
|
|

2. Build's PROS & CONS
| PROS |
|
| CONS |
|
3. Leveling tips
There is no way to play it as it is intended until level 90 (more or less) it requires a lot of Ward, Specific Uniques, and Attributes. The best way to level up quickly is to pick the fastest way and respec points later. We recommend using a Projectile Attack - Splitting Steel to deal Physical Damage and make use of the Impale and Bleed Mechanics. Splitting can still be used since level 1. Pick the Deadeye Ascendancy first for more Projectile Damage and permanent Tailwind. Switch to the Automomber only after acquiring all the necessary build components.
Suggested leveling Gem setups:
| Summon Skeletons setup | |
 |
Splitting Steel - an Attack that Fires Projectiles that Splits and Explodes dealing AoE damage |
 |
Chance to Bleed Support - Attack have added, increased Damage, and a chance to cause Bleed on Hit |
 |
Brutality Support - you're dealing more Physical Damage, but no other type of damage |
 |
Faster Attacks Support - allows you to Attack much faster |
 |
Impale Support - You have an increased chance to Impale and increased Impale effectiveness |
 |
Vicious Projectiles Support - more Physical Projectile Damage, but less Projectile Attack Speed |
| Auras | |
 |
Dread Banner - It's the Imaple Banner for more Impale Chance and Imaple Effectiveness, nearby enemies have reduced Accuracy Rating |
 |
Pride - increases the Physical Damage nearby enemies are receiving |
| Totem setup | |
 |
Ancestral Protector - use this Totem for a Buff - more Attack Speed |
 |
Maim Support - Totem Maims on Hit, reducing movement Speed and making Maimed enemies take more Physical Damage |
 |
Culling Strike Support - your Totems will be able to instantly kill enemies below 10% Life |
| Utility Gems | |
 |
Vulnerability - Cursed enemies receive more Physical Damage and have an increased Chance to Bleed when Hit |
 |
Summon Lightning Golem - grants you increased Attack Speed |
Bandits:
Kill all three Bandits for two additional Skill Points
Leveling Skill Trees:
31 Points Skill Tree
Pick Constitution for Maximum Life and go for the Impale and Bleeding Clusters with Crimson Dance
74 Points Skill Tree
As you notice the decrease in your Accuracy Rating, go for the Resolute Technique. Pick Defiance, Master of the Arena, Art of the Gladiator, and Fury Bolts. Then allocate more Maximum Life and Sword Clusters for a massive DPS boost.
Recommended leveling items:
 Tabula Rasa - it can be used to socket a six-link setup from the start Tabula Rasa - it can be used to socket a six-link setup from the start |
|
| Item has no level requirement and Energy Shield (Hidden) Item has 6 White Sockets and is fully linked (Hidden) |
|
 Goldrim - used for its Elemental Resistances Goldrim - used for its Elemental Resistances |
|
| +(30-50) to Evasion Rating 10% increased Rarity of Items found +(30-40)% to all Elemental Resistances Reflects 4 Physical Damage to Melee Attackers |
|
 Wanderlust - immunity to being Frozen, decent Movement Speed, and Mana Regeneration Rate Wanderlust - immunity to being Frozen, decent Movement Speed, and Mana Regeneration Rate |
|
| +5 to Dexterity +(10-20) to maximum Energy Shield (20-40)% increased Mana Regeneration Rate 20% increased Movement Speed Cannot be Frozen |
|
 Karui Ward - Strength, Dexterity, Accuracy Rating, and a lot of Projectile Damage Karui Ward - Strength, Dexterity, Accuracy Rating, and a lot of Projectile Damage |
|
| +(20-30) to Dexterity +(20-30) to Strength +100 to Accuracy Rating 30% increased Projectile Speed 10% increased Movement Speed 30% increased Projectile Damage |
|
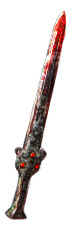 Redbeak - It is the best one-handed Sword to level up with. Later swap it for a Rare Sword with decent stats Redbeak - It is the best one-handed Sword to level up with. Later swap it for a Rare Sword with decent stats |
|
| 40% increased Global Accuracy Rating 100% increased Damage when on Low Life 50% increased Physical Damage Adds 2 to 6 Physical Damage 10% increased Attack Speed +(20-30) to maximum Life +2 Life gained for each Enemy hit by Attacks |
|
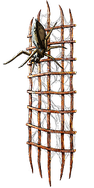 Lycosidae - Use it so that your Attacks won't be Evaded. It's useful before you've allocated Resolute Technique. Lycosidae - Use it so that your Attacks won't be Evaded. It's useful before you've allocated Resolute Technique. |
|
| +(10-20) to maximum Life +(120-160) to Armour +(30-40) to maximum Life Your hits can't be Evaded +(3-5)% Chance to Block Adds 250 to 300 Cold Damage to Counterattacks |
|
4. Final Skill Tree, Ascendancy Points, and Pantheon
Final Skill Tree:
100 Points Final Skill Tree (doesn't include Unique or Cluster Jewels)
127 Points Path of Building (PoB) link
Ascendancy points:
Preferably in that order:
- Pathfinder/Deadeye (depending on what you want to allocate via Forbidden Jewels)
- Elementalist
- Path of The Witch
Pantheon:
Major God: Soul of Lunaris: 1% additional Physical Damage Reduction for each nearby Enemy, up to 8%; 1% increased Movement Speed for each nearby Enemy, up to 8%
Minor God: Soul of Yugul: 50% chance to Reflect Hexes; You and your Minions take 50% reduced Reflected Damage
5. Final Gems links
| [DPS] CwDT Spells | |
| Ice Spear - one of the deadliest Spells in the game, which deals simply massive DPS via multiple projectiles fired. You should use the Anomalous version or at least Aerodynamics Passive for Pierce | |
 |
Empower Support - increases the Level of Active Skill Gems, thus damage. |
 |
Greater Multiple Projectiles Support - linked Spells fire more Projectiles which is one of the best ways to scale Ice Spear DPS |
 |
Elemental Focus Support - linked Ice Spear won't Chill or Freeze, but it grows considerably in damage. It can be replaced with  Added Cold Damage for similar damage output. Both have an awakened version. Added Cold Damage for similar damage output. Both have an awakened version. |
 |
Increased Critical Damage Support - increases Critical Strike Damage, but if your Chance to deal Critical Strikes is low, use  Cold Penetration Support instead Cold Penetration Support instead |
 |
Cast when Damage Taken - keep it at level 20 and 20% Gem Quality. It will now require you to take only 2945 damage to trigger. |
| [DPS] CwDT Spells | |
 |
Freezing Pulse - fires a Projectile that is stronger at the start, it has a high chance to Freeze and pierce all enemies |
 |
Creeping Frost - A Cold Projectile that creates Chilled Ground upon impact, which deals Cold DoT, scalable with Spell Damage. |
| Bonechill Support - increases the Chill effect, and makes you deal more Cold Damage to enemies affected by that Chill | |
|
Added Cold Damage Support - adds Cold Damage to your Spells resulting in a huge DPS increase |
|
Culling Strike Support - Use to Cull bosses an kill them sooner. |
|
Cast when Damage Taken - 20/20 Gem again. |
| [UTILITY] Skeletons and Sniper's Mark setup | |
 |
Summon Skeletons - Skeletons die at the end of their Duration, which should be as low as 0.198 or 0.231 seconds. |
|
Cast when Damage Taken - you need to calculate the damage taken from your Skeletons dying and Forbidden Rite as explained in the first section, then match this Gem's level to have a lower damage threshold than that. |
 |
Sniper's Mark - If you're using Projectiles, then this is the best Mark to use as it makes them deal more damage |
 |
Frostbite - With Whispers of Doom on your Amulet you will be able to apply Frostbite too, it reduces Cold Resistance. |
| [UTILITY] Forbidden Rite and Phase Run setup | |
 |
Forbidden Rite - Keep it at level 1. You will take 40% of your maximum Life as Chaos Damage per Cast. With 2800 of Maximum Life and -60% Chaos Resistance that's 1792 damage which should be included in your calculations as described at the beginning |
 |
Power Charge on Critical - You could use some extra Crit Chance. |
|
Cast When Damage Taken - we used a level 9 Gem here |
 |
Phase Run - increases your Movement Speed, grants you Stealth, and Phasing. |
| [MOBILITY] Flame Dash | |
 |
Flame Dash - a movement Spell you can use to move faster and dodge attacks |
| [UTILITY] Vaal Righteous Fire | |
 |
Vaal Righteous Fire - for a brief moment it increases your Spell Damage, use during boss fights. Do not link it to any CwDT that would trigger it. |
| [UTILITY] Aura setup | |
 |
Hatred - grants you more Cold Damage, it can be exchanged for  Zealotry if you struggle with Critical Strike Chance but in most cases, Hatred will be a better option Zealotry if you struggle with Critical Strike Chance but in most cases, Hatred will be a better option |
 |
Eternal Blessing Support - Hatred Reserves no Mana, but you can't have any other Aura or Blessing at the same time, which is fine since you need all your Mana Pool to be unreserved |
|
|
6. Gear Setup
The most important aspect of the build is to have enough Ward so as to not take any significant Damage from your Forbidden Rite and Heartbound Loop. Ideally, that would be more than 1600, but given the fact that your life is rapidly recouping, it can be as low as 1200. It will cause you to lose a bit of Life, but not much. You should equip Rare Runic base types as your Gloves and Boots. These grant you Ward, so be sure to have them with a lot of Quality. You need to have at least 2000 Maximum Life, preferably no more than -50% Chaos Resistance, and 0 Physical Damage mitigation to properly activate your Cast when Damage Taken Gems. Your Mana Source is any item with an Affix "Damage Recouped as Mana", and Mana Mastery with the same effect. Be sure that your Olroth's Resolve Flask stays up at all times - without it, your character dies instantly. The Cooldown of CwDT can be slightly reduced by "increased Cooldown Recovery Rate" affixes and eldritch Implicits. Keep your Gem Levels at bay - with a too-high level they might not be triggered when you take damage. It's hard and expensive to gear up the character, remember to test the setup in the Hideout and make sure that all the parts of it are in order.
Our recommended items will:
- Cap your resistances at 75%
- Provide you with enough DPS and Life to start mapping
|
Stat priorities on items:
|
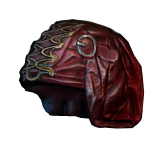
 (Helmet) Faithguard - It grants tons of Ward, especially when combined with Jewels for increased Maximum ES. (Helmet) Faithguard - It grants tons of Ward, especially when combined with Jewels for increased Maximum ES. |
|
| +(20-30) to Intelligence (25-35)% increased Ward (40-60)% faster Restoration of Ward (15-25)% increased Light Radius Increases and Reductions to Maximum Energy Shield instead apply to Ward |
|
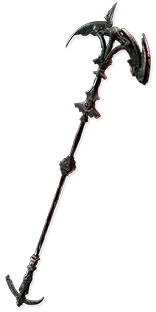 (Weapon) The Annihilating Light - it triples your Damage and allows you for an additional six-link setup, there's no better Staff to use in this build. The missing Resistances can be easily acquired on your Rare Gear and via Omniscience (Weapon) The Annihilating Light - it triples your Damage and allows you for an additional six-link setup, there's no better Staff to use in this build. The missing Resistances can be easily acquired on your Rare Gear and via Omniscience |
|
| +18% Chance to Block Attack Damage while wielding a Staff (60-70)% reduced Elemental Resistances Elemental Skills deal Triple Damage |
|
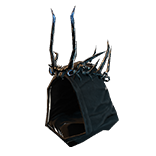
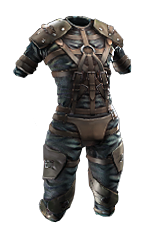 (Body Armour) Rare Body Armour - Syndicate's Garb with high Evasion is better than Conquest Lamellar with high mixed defences, because you don't want any Armour. Just reach for the highest Evasion possible. (Body Armour) Rare Body Armour - Syndicate's Garb with high Evasion is better than Conquest Lamellar with high mixed defences, because you don't want any Armour. Just reach for the highest Evasion possible. |
|
| Min. requirements: 5800 Evasion 9% Spell Suppression Chance Optional affixes: Resistances Additional Physical Damage Reduction |
|
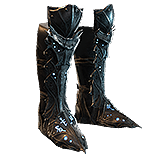 (Boots) Rare Runic Sabatons - besides Ward, look for increased Movement Speed, and increased 8% Cooldown Recovery Rate - it can be done by using Eldritch Ichor (the blue one) (Boots) Rare Runic Sabatons - besides Ward, look for increased Movement Speed, and increased 8% Cooldown Recovery Rate - it can be done by using Eldritch Ichor (the blue one) |
|
| Min. requirements: 400 Ward 25% increased Movement Speed 7 to 8 % increased Cooldown Recovery Rate (Eldritch Implicit) Optional affixes: Attributes Elemental Resistances Maximum Life 100% Chance to avoid being Chilled (crafted) |
|
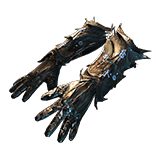 (Gloves) Rare Runic Gauntlets - look for more Ward, Attributes, Life, and Elemental Resistances. For the Eldrtich mods seek Unnerve on Hit and Cold Exposure. (Gloves) Rare Runic Gauntlets - look for more Ward, Attributes, Life, and Elemental Resistances. For the Eldrtich mods seek Unnerve on Hit and Cold Exposure. |
|
| Min. requirements: 500 Ward Elemental Resistances Optional affixes: Attributes Maximum Life |
|
 (Belt) Ynda's Stand - The build uses this Belt to gain a lot of Ward from Body Armour. Boost it up with Catalyst to convert 60% of Evasion to Ward. (Belt) Ynda's Stand - The build uses this Belt to gain a lot of Ward from Body Armour. Boost it up with Catalyst to convert 60% of Evasion to Ward. |
|
| (20-30)% increased Stun Duration on Enemies Regenerate (30-50) Life per second +(20-30)% to Fire Resistance +(20-30)% to Cold Resistance Gain Ward instead of 50% of Armour and Evasion Rating from Equipped Body Armour |
|
 (Amulet) The Pandemonius - It Blinds enemies, grants you a lot of Dexterity, Cold Resistance, and Cold Damage. (Amulet) The Pandemonius - It Blinds enemies, grants you a lot of Dexterity, Cold Resistance, and Cold Damage. |
|
| +(20-30) to Dexterity (20-30)% increased Cold Damage +(35-40)% to Cold Resistance Chill Enemy for 1 second when Hit, reducing their Action Speed by 30% Blind Chilled Enemies on Hit Damage Penetrates 20% Cold Resistance against Chilled Enemies |
|
 (Amulet) Rare Amulet - Gem level for Cold Skills, Maximum Life, Critical Strike mods, Attributes, and Resistances can be found here. Try looking for a Clutching Talisman - it increases Global Defences by up to 25%, which includes Ward. (Amulet) Rare Amulet - Gem level for Cold Skills, Maximum Life, Critical Strike mods, Attributes, and Resistances can be found here. Try looking for a Clutching Talisman - it increases Global Defences by up to 25%, which includes Ward. |
|
| Min. requirements: +1 to all Cold Skill Gems +60 to Maximum Life Critical Strike mods Optional affixes: Attributes Resistances |
|
| Recommended Anointments: Whispers of Doom |
|
 (Ring) Heartbound Loop - It makes you take 420 Physical Damage (with 20% Quality from Noxious Catalysts) on Minion Death. Each batch spawns 4 Skeletons making you take Damage every loop which is just enough to trigger Forbidden Rite to take more damage and keep the loop going (Ring) Heartbound Loop - It makes you take 420 Physical Damage (with 20% Quality from Noxious Catalysts) on Minion Death. Each batch spawns 4 Skeletons making you take Damage every loop which is just enough to trigger Forbidden Rite to take more damage and keep the loop going |
|
| +(15-25) to maximum Energy Shield Regenerate (10-15) Life per second (20-40)% increased Mana Regeneration Rate Minions have 15% increased maximum Life Minions have 10% increased Area of Effect 350 Physical Damage taken on Minion Death |
|
 (Ring) Rare Ring - Resistances and Damage recouped as Mana and Life are the most important stats on a Ring. Attributes and Maximum Life are your top priorities. (Ring) Rare Ring - Resistances and Damage recouped as Mana and Life are the most important stats on a Ring. Attributes and Maximum Life are your top priorities. |
|
| Min. requirements: Attributes Elemental Resistances 6% of Damage taken Recouped as Mana (crafted) Damage taken Recouped as Life Optional affixes: Maximum Life |
|
 (Jewel) Rare Jewels - You will use one such Jewel. It should have 2 or 3% increased Cooldown Recovery Rate and some Resistances. (Jewel) Rare Jewels - You will use one such Jewel. It should have 2 or 3% increased Cooldown Recovery Rate and some Resistances. |
|
| Min. requirements: Maximum Life Elemental Resistances Attributes Critical Strike Multiplier Cooldown Recovery Rate |
|
 (Jewel) To Dust - It can reduce the Skeletons' duration by 10% to 20% each. You want 4 of them to reduce the duration by 74%. Combined with passives for 25%, it will reduce the Skeleton's duration by 99%. That's 0.231 seconds. If you want less, allocate the Duration Mastery for 10% less Duration (it's Less, not Reduced, so it won't bring it down to 0). (Jewel) To Dust - It can reduce the Skeletons' duration by 10% to 20% each. You want 4 of them to reduce the duration by 74%. Combined with passives for 25%, it will reduce the Skeleton's duration by 99%. That's 0.231 seconds. If you want less, allocate the Duration Mastery for 10% less Duration (it's Less, not Reduced, so it won't bring it down to 0). |
|
| (20-10)% reduced Skeleton Duration Minions deal (8-12)% increased Damage (7-10)% increased Skeleton Attack Speed (7-10)% increased Skeleton Cast Speed (3-5)% increased Skeleton Movement Speed |
|
 (Jewel) Brutal Restraint - The Traitor Keystone grants 4 Flask Charges every 5 seconds per empty Flask Slot. Ideally, you want just one empty Flask Slot, but you can have two if it's too hard to gain enough Flask Charges. Socket it near Fervour so that it can reach Acrobatics Keystone. (Jewel) Brutal Restraint - The Traitor Keystone grants 4 Flask Charges every 5 seconds per empty Flask Slot. Ideally, you want just one empty Flask Slot, but you can have two if it's too hard to gain enough Flask Charges. Socket it near Fervour so that it can reach Acrobatics Keystone. |
|
| Denoted service of (500-8000) dekhara in the akhara of Balbala Passives in radius are Conquered by the Maraketh Historic |
|
 (Jewel) Energy From Within - You can socket it near Shaper notable so that it encompasses life passives from the Constitution Cluster. It grants more ES, thus Ward, but reduces Maximum Life. (Jewel) Energy From Within - You can socket it near Shaper notable so that it encompasses life passives from the Constitution Cluster. It grants more ES, thus Ward, but reduces Maximum Life. |
|
| (3-6)% increased maximum Energy Shield Increases and Reductions to Life in Radius are Transformed to apply to Energy Shield |
|
 (Jewel) Sublime Vision - You're using only Zealotry or Hatred. Select the appropriate Sublime Vision for powerful bonuses. (Jewel) Sublime Vision - You're using only Zealotry or Hatred. Select the appropriate Sublime Vision for powerful bonuses. |
|
| Unaffected by Curses while affected by Zealotry Aura Skills other than Zealotry are Disabled Auras from your Skills have (20-40)% increased Effect on you or Always inflict Brittle while affected by Hatred Aura Skills other than Hatred are Disabled Auras from your Skills have (20-40)% increased Effect on you |
|
 (Jewel) Unnatural Instinct - you can put it near Harrier notable. It will overlap with The Light of Meaning and Energy From Within, granting you more Ward, Spell Damage, Movement Speed, and Life. (Jewel) Unnatural Instinct - you can put it near Harrier notable. It will overlap with The Light of Meaning and Energy From Within, granting you more Ward, Spell Damage, Movement Speed, and Life. |
|
| Allocated Small Passive Skills in Radius grant nothing Grants all bonuses of Unallocated Small Passive Skills in Radius |
|
 (Jewel) The Light of Meaning - With Unnatural Instinct it will provide you with tons of increased Maximum Energy Shield, translated to Ward thanks to Faithguard. Socket it near Sentinel and allocate passives nearby, but not these shared with Unnatural Instinct. You can also get the version for Crit Chance and Cold Damage if you don't need that much Ward. (Jewel) The Light of Meaning - With Unnatural Instinct it will provide you with tons of increased Maximum Energy Shield, translated to Ward thanks to Faithguard. Socket it near Sentinel and allocate passives nearby, but not these shared with Unnatural Instinct. You can also get the version for Crit Chance and Cold Damage if you don't need that much Ward. |
|
| Passive Skills in Radius also grant 5% increased Global Critical Strike Chance or Passive Skills in Radius also grant 3% increased Energy Shield or Passive Skills in Radius also grant 6% increased Cold Damage |
|
  (Jewel) Forbidden Flame & Flesh - Go for the Pathfinder, Elementalist, or Deadeye - whichever one is the cheapest. (Jewel) Forbidden Flame & Flesh - Go for the Pathfinder, Elementalist, or Deadeye - whichever one is the cheapest. |
|
| Allocates <Random Ascendancy Notable> if you have the matching modifier on Forbidden Flesh Allocates <Random Ascendancy Notable> if you have the matching modifier on Forbidden Flame |
|
 (Jewel) Watcher's Eye - it's highly optional, as you're only using Hatred or Zealotry, it can increase your Critical Strike Chance, add Cold Damage, or Cold Damage Penetration (Jewel) Watcher's Eye - it's highly optional, as you're only using Hatred or Zealotry, it can increase your Critical Strike Chance, add Cold Damage, or Cold Damage Penetration |
|
| (4-6)% increased maximum Energy Shield (4-6)% increased maximum Life (4-6)% increased maximum Mana <Two or Three random aura modifiers> |
|
 (Jewel) Large Cluster Jewels - It's mainly used to provide more space for Medium Cluster Jewels, but some of the Notables can be very useful (Jewel) Large Cluster Jewels - It's mainly used to provide more space for Medium Cluster Jewels, but some of the Notables can be very useful |
|
| Recommended affixes: 1 Added Passive Skill is Sadist 1 Added Passive Skill is Widespread Destruction 1 Added Passive Skill is Stormrider 1 Added Passive Skill is Corrosive Elements 1 Added Passive Skill is Disorienting Display 1 Added Passive Skill is Prismatic Heart |
|
 (Jewel) Medium Cluster Jewels - you should have at least one (preferably two) Flask-related Medium Cluster Jewel with Fasting, and increased effect of the small passives. You can also use a Projectile Jewel for Pierce, and a Minion Life Cluster Jewel for Blessed Rebirth so that your Skeletons won't accidentally die. (Jewel) Medium Cluster Jewels - you should have at least one (preferably two) Flask-related Medium Cluster Jewel with Fasting, and increased effect of the small passives. You can also use a Projectile Jewel for Pierce, and a Minion Life Cluster Jewel for Blessed Rebirth so that your Skeletons won't accidentally die. |
|
| Recommended affixes: 1 Added Passive Skill is Distilled Perfection (Flask Effect Duration) 1 Added Passive Skill is Fasting (Flask Charges Gained) 1 Added Passive Skill is Aerodynamics (Pierce) 1 Added Passive Skill is Blessed Rebirth |
|
 (Flask) Olroth's Resolve - It has to stay active at all times, you will take a lot of damage but in small quantities, so the Ward won't break. You should be able to get a permanent Flask Effect by investing in a good Rare Belt and one or two Medium Cluster Jewels (Flask) Olroth's Resolve - It has to stay active at all times, you will take a lot of damage but in small quantities, so the Ward won't break. You should be able to get a permanent Flask Effect by investing in a good Rare Belt and one or two Medium Cluster Jewels |
|
| Consumes (56-60) of 60 Charges on use +200 to Ward Restores Ward on use (40–50)% increased Charges used Ward does not Break during Flask effect 70% less Ward during Flask Effect |
|
 (Flask) Dying Sun - the main purpose of this Flask is to grant you two additional Projectiles and extra Fire Resistance (Flask) Dying Sun - the main purpose of this Flask is to grant you two additional Projectiles and extra Fire Resistance |
|
| +50% to Fire Resistance 20% less Fire Damage taken (125-150)% increased Charges per use (60-40)% less Duration (10-20)% increased Area of Effect during Flask Effect Skills fire 2 additional Projectiles during Flask Effect |
|
 (Flask) Bottled Faith - it grants a lot of Damage and Critical Strike Chance (Flask) Bottled Faith - it grants a lot of Damage and Critical Strike Chance |
|
| 40% increased Damage Creates Consecrated Ground on Use (30-15)% reduced Duration Consecrated Ground created by this Flask has Tripled Radius Consecrated Ground created during Effect applies (7-10)% increased Damage taken to Enemies (100-150)% increased Critical Strike Chance against Enemies on Consecrated Ground during Flask effect |
|
|
Other suggested Flasks:
|
|
 |
|
|
If you have any other build requests please leave that in the comments below. We are always open to suggestions and constructive feedback.
Pictures used in this article are the intellectual property of Grinding Gear Games.
