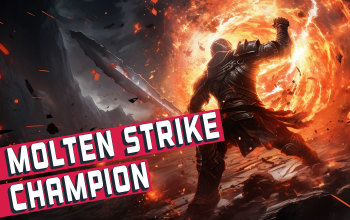
Trinity Molten Strike Champion Build
Molten Strike Build for Champion that uses two-handed Elemental Swords, dealing tons of damage via this iconic Attack skillTrinity Molten Strike
Champion Build
Updated for Patch 3.25
The Best Crafty Guides by Odealo
| Guide notes | |||
| July 30, 2024 -Updated for Patch 3.25 adjusting the build to current Melee changes, and greatly boosting the build's damage and overall performance |
|||
| Build overview | |||
| Tags: [MELEE] [ELEMENTAL] [LIFE] | |||
|
Budget: Defenses: |
|
Boss DPS: AoE: |
|
Molten Strike is a Melee Attack that after a successful Hit creates several Projectiles that slowly fall on the ground, dealing AoE Damage on the impact, and each Projectile can Hit the same target separately, making it one of the highest Damage output Attack Skill in the game. It can be used with any Melee Weapon, which makes it very universal. There are hundreds of viable ways to make a Build with this Skill, but in this variant, we decided to use a Unique 2-handed Elemental Sword called Rakiata's Dance. Attack with this Weapon treats Enemy Resistance values as inverted, which makes most Enemies an easy target against Elemental Damage. You can still Penetrate their Resistances further, but you don't have to worry about Elemental Curses or Exposures. There is an Elemental Mastery that grants you a 25% chance to apply this effect to your Hits with any Weapon, but guaranteeing this effect is always better.
Molten Strike has a great synergy not only with sources of additional Projectiles but also with Returning Projectiles. After the first impact, they will bounce back to you, focusing on a small area, which will simply double your Damage if you stand directly on top of your Enemy. To obtain this Effect you can use either the Nimis Ring or Returning Projectiles Support Gem.
Why Champion and not any other Ascendancy? Is a great defensive-oriented pick for any Attack Build. It grants you permanent 15 stacks of Fortify, a lot of Armour, Adrenaline, and free Banner with increased effect of Skill Auras. It's not a Crit build, but you will need more Accuracy than Maximum Life as you have to allocate the Precise Technique Keystone, which grants you 40% more Attack Damage. The defences are obviously very high as your Chance to Evade is 90%, the same as your Physical Damage mitigation with additional Fortify, Adrenaline, and some Block and Spell Suppression Chance. Your Life oscillates around 4-5k which should be more than enough given your stats, but you will have to be careful around DoTs.
The Patch 3.25 changed Chapion a bit, so you may now consider other ascendancies for it if you don't want its Aura Effect (which now provide less Armour and Evasion), or you can get Forftify some other way. Consider Warden or Gladiator instead. This guide is still for Champion, it has its merits even after the Settlers change. The 3.25 also improved the damage of all Melee Skills including this one, so the build is relatively stronger than it was.
You can also check our other Path of Exile builds right over here Odealo's Crafty Guides - Full List
1. Gameplay
Despite it being a Melee Strike build it's not that bad at clearing maps as you focus more on the Projectile Damage rather than a Strike itself. With additional targeting for Strike Skills and an increased Strike Range, it works quite well. Use Smite - after using it grants you an Aura Buff for added Lightning Damage. There is also a Buff from Ancestral Protector Totem for more Attack Speed you can take advantage of. You can sacrifice your Life Regeneration and turn it into Rage, which you can use to sustain the Berserker Buff. You should have some space left for your mobility skill - Leap Slam is the recommended one thanks to your very high Attack Speed.
|
This video was made with Rakiata's Dance equipped to show the potential of this new interesting Weapon |
|
|

2. Build's PROS & CONS
| PROS |
|
| CONS |
|
3. Leveling tips
You can safely start with Molten Strike at the very beginning of your journey and use it till the end. Sources of additional Strikes are very important for your Clear Speed. You can use any Weapon you will get, you should focus on simply the highest Damage you can get. There are tons of useful Leveling Uniques you can use to significantly boost your Elemental Damage.
Suggested leveling Gem setups:
| Molten Strike setup | |
 |
Molten Strike - a Strike Skill you can use since level 1, it's good to level with right from the start, but you will need sources of additional Strike Targets for good clear. |
 |
Ruthless Support - makes every third Melee Attack more powerful. |
 |
Ancestral Call Support - Strike Skills target additional enemies. |
 |
Faster Attacks Support - improves your Attack Speed. You should swap it to the Multistrike Support when you unlock it. |
 |
Increased Elemental Damage with Attacks Support - improves your Elemental Damage. |
 |
Inspiration Support - lowers your Mana Costs and increases your Elemental Damage. |
| Auras setup | |
 |
Determination - grants you tons of Armour Rating which will make surviving the campaign much easier. |
 |
Precision - it is a very important Aura, as it gives you a lot of Accuracy Rating, which you will need to enable the Precise Technique Keystone. |
| Curses and Leap Slam setup | |
 |
Leap Slam - it's a good mobility Skill, it scales with your Attack Speed. |
|
Faster Attacks Support - makes your Leap Slam much faster to perform. |
 |
Sniper's Mark - it is a Mark Spell that increases the Damage Enemy Takes from Projectile Hits. |
Bandits:
Kill all three bandits for two additional Skill Points
Leveling Skill Trees:
31 Points Passive Tree
We suggest picking up nearby Notables to boost your Damage during the Campaign and respec them later with the Free Respec Points available through Campaign Quests.
Recommended order: 1) Bravery 2)Precise Technique Keystone 3) Thick Skin 4) Point Blank Keystone 5) Adjacent Animosity 6) Entrench
Optional Notables: 1) Fury Bolts 2) Graceful Assault 3) Life and Mana Leech 4) Bladedancer
67 Points Passive Tree
Recommended order: 1) Herbalism 2) Acuity 3) Inveterate 4) Multishot 5) Forces of Nature 6) Revenge of the Hunted 7) Charisma
Recommended leveling items:
 Replica Tasalio's Sign - this Ring gives you an absurd amount of Cold Damage and makes you immune to Chills. Replica Tasalio's Sign - this Ring gives you an absurd amount of Cold Damage and makes you immune to Chills. |
|
| +(20-30)% to Cold Resistance Adds (15-20) to (25-35) Cold Damage to Spells and Attacks +(200-300) to Evasion Rating Your Cold Damage cannot Freeze Immune to Chill Adds 60 to 80 Cold Damage against Chilled Enemies |
|
 Goldrim - a Helmet used mainly for its great Elemental Resistance bonus. Goldrim - a Helmet used mainly for its great Elemental Resistance bonus. |
|
| +(30-50) to Evasion Rating 10% increased Rarity of Items found +(30-40)% to all Elemental Resistances Reflects 4 Physical Damage to Melee Attackers Level Requirement reduced by 100 (Hidden) |
 Tabula Rasa - allows you to six-link a setup from the start. Tabula Rasa - allows you to six-link a setup from the start. |
|
| Item has no level requirement and Energy Shield (Hidden) Item has 6 White Sockets and is fully linked (Hidden) |
|
 Prismweave - another great source of Elemental Damage for your Attacks. It also boosts your Elemental Resistances. Prismweave - another great source of Elemental Damage for your Attacks. It also boosts your Elemental Resistances. |
|
| (12-24)% increased Global Physical DamageAdds (14-16) to (30-32) Fire Damage to Attacks Adds (10-12) to (24-28) Cold Damage to Attacks Adds 1 to (60-68) Lightning Damage to Attacks +(6-15)% to all Elemental Resistances 30% increased Elemental Damage with Attack Skills during any Flask Effect |
|
 Karui Ward - a great leveling Amulet that grants you plenty of Damage. It also boosts your Movement Speed, which is very rare for a slot that is not a Boots. Karui Ward - a great leveling Amulet that grants you plenty of Damage. It also boosts your Movement Speed, which is very rare for a slot that is not a Boots. |
|
| +(20-30) to Strength +100 to Accuracy Rating 30% increased Projectile Speed 10% increased Movement Speed 30% increased Projectile Damage |
|
 Redbeak - one of the best low-level Swords, it can be used with the Petrified Blood Aura to greatly boost your additional Elemental Damage from other sources. Redbeak - one of the best low-level Swords, it can be used with the Petrified Blood Aura to greatly boost your additional Elemental Damage from other sources. |
|
| 40% increased Global Accuracy Rating 100% increased Damage when on Low Life 50% increased Physical Damage Adds 2 to 6 Physical Damage 10% increased Attack Speed +(20-30) to maximum Life +2 Life gained for each Enemy hit by Attacks |
|
 Ewar's Mirage - it grants tons of utility in the form of additional Projectile and Chain. Moreover, it greatly increases your Elemental Damage with Attacks. Ewar's Mirage - it grants tons of utility in the form of additional Projectile and Chain. Moreover, it greatly increases your Elemental Damage with Attacks. |
|
| +25% to Global Critical Strike Multiplier Adds 1 to (45-55) Lightning Damage (16-22)% increased Attack Speed Attacks Chain an additional time when in Main Hand Attacks fire an additional Projectile when in Off Hand (40-55)% increased Elemental Damage with Attack Skills |
|
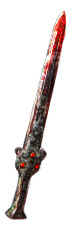
 Rakiata's Dance - your final Weapon of choice can be used halfway through the Campaign, right at the 48 level. Rakiata's Dance - your final Weapon of choice can be used halfway through the Campaign, right at the 48 level. |
|
| 60% increased Global Accuracy Rating Adds (150-200) to (300-350) Cold Damage Adds 1 to (550-600) Lightning Damage (15-20)% increased Attack Speed Treats Enemy Monster Elemental Resistance values as inverted |
|
4. Final Skill Tree, Ascendancy Points, and Pantheon
Final Skill Tree:
103 Points Final Passive Tree (doesn't include Unique Jewels)
118 Points Path of Building (PoB) link
Ascendancy points:
Preferably in that order:
- Unstoppable Hero
- Fortitude
- Inspirational
- First to Strike, Last to Fall
Pantheon:
Major God: Soul of The Brine King: You cannot be Stunned if you've been Stunned or Blocked a Stunning Hit in the past 2 seconds.
Minor God: Soul of Shakari: 50% less Duration of Poisons on You; You cannot be Poisoned while there are at least 3 Poisons on you.
5. Final Gems links
| [UTILITY] Molten Strike setup | |
|
Molten Strike - the main and only damaging ability, it should deal mixed types of Damage to activate Trinity's Resonance mechanics. Most of the Damage comes from the overlapping Projectiles it creates. |
 |
Multistrike Support - allows you to repeat an attack with increased Attack Speed for more DPS. |
|
Elemental Damage with Attacks Support - use it to increase your Elemental Damage with Attacks. |
 |
Trinity Support - if you have at least 2 types of Elemental Damage at a similar level, you will gain Resonance which grants you an Elemental Damage and Penetration bonus. |
 |
Elemental Focus Support - greatly increases your Damage but also disables your ability to inflict Elemental Ailments. You can also use the Inspiration Support instead, which grants less Damage but reduces your Mana Costs. |
 |
Volatility Support - improves your maximum Damage and lowers your Minimum Damage. You can swap it to Ancestral Call Support for much better Map Clear. |
| [UTILITY] Aura setup | |
 |
Petrified Blood - spreads part of the incoming Damage over 4 seconds. It also makes activating Adrenaline from your Ascendency much easier. |
|
Determination - use for increased and additional Armour. A mandatory Aura for this build. |
 |
Grace - use for increased and additional Evasion Rating. Just like Determination, it's mandatory to have it activated at all times. |
 |
Enlighten Support - lowers the amount of Mana Reserved by linked Auras. |
| [UTILITY] Arrogance setup | |
|
Precision - grants you a lot of flat Accuracy Rating. It also reserves a flat value of Mana instead of the usual percentage. |
 |
Vitality - an Aura similar to the Precision, but grants you Life Regeneration. It is very important for your Berserk Skill to have lots of Regeneration. |
 |
Blood and Sand - being in Blood Stance increases your AoE Damage. The Sand Stance grants you a bit more Area of Effect, but it is barely noticeable. |
 |
Arrogance Support - causes linked Auras to Reserve your Life instead of Mana. Thanks to Petrified Blood you don't lose any effective Life. |
| [UTILITY] Mark setup | |
|
Sniper's Mark - Cursed enemies take increased Projectile Damage and it gives you the ability to Split Projectiles on Hit, which causes even more overlaps. |
 |
Mark on Hit Support - linked Mark will be applied on Enemies Hit by your Attacks at a slightly reduced effectiveness. |
 |
Lifetap Support - This skill may to a bit too expensive, so spending Life on it may be preferable. If it's not a big deal, use Enhance Support instead. |
| [MOBILITY] Leap Slam and Smite setup | |
|
Leap Slam - one of the best movement Skills which allows you to jump and move faster. |
 |
Smite - hitting an Enemy with this Attack grants you a temporary bonus in the form of additional Lightning Damage. You can use the Vaal version for more Damage. |
|
Faster Attacks Support - improves the Attack Speed of linked Attacks, making them faster to perform. |
| [UTILITY] Other Utility Skills | |
 |
Berserk - consumes your Rage to grant you a very powerful Buff that increases your Rage effect |
 |
Molten Shell - it's a Guard Spell that is more effective the more Armour you have. It creates a Barrier that absorbs part of the incoming Damage. |
 |
Cast when Damage Taken - you can link these to CwD if you do not wish to press any more buttons than you have to. |
 |
Blood Rage - this Buff grants you plenty of Attack Speed but drains your Life over time. |
|
|
6. Gear Setup
Your primary focus on Rare Items is Defensive modifiers - most of your Damage comes from your Passive Tree and Items. Look for Spell Suppression, maximum Life, sources of Physical Damage mitigation, and obviously Resistances. Life Regeneration is also useful, as it will improve the uptime on your Berserk Buff. The only expensive Unique Item here is the Nimis Ring - it is very powerful, but also not mandatory. You will also need a bit of Attribute to use all your Skills at the highest Gem Levels.
|
Stat priorities on items:
|
 (Helmet) Rare Helmet - it should provide you with Mana Reservation Efficiency, maximum Life, and Resistances. The Molten Strike Enchant for additional Projectile is very impactful on your Damage. (Helmet) Rare Helmet - it should provide you with Mana Reservation Efficiency, maximum Life, and Resistances. The Molten Strike Enchant for additional Projectile is very impactful on your Damage. |
|
| Min. requirements: +70 to maximum Life +50% to Elemental Resistances 10% Mana Reservation Efficiency (Essence + Eldritch Implicit) Optional affixes: Intelligence Attributes Accuracy Rating |
|
| (Weapon) Rakiata's Dance - one of the most powerful Weapons for Elemental Attacks currently. It has decent Base Damage, and turns around the effect of Elemental Resistances, making most Enemies very vulnerable against your Hits. |
|
| Adds (150-200) to (300-350) Cold Damage Adds 1 to (550-600) Lightning Damage (15-20)% increased Attack Speed Treats Enemy Monster Elemental Resistance values as inverted |
|
 (Weapon) Rare Sword - if you can't get the Rakiata's Dance, you can use any high Elemental Damage Rare Sword you can find. You can then use the Elemental Mastery to get a 25% chance to reverse Enemy Elemental Resistances. (Weapon) Rare Sword - if you can't get the Rakiata's Dance, you can use any high Elemental Damage Rare Sword you can find. You can then use the Elemental Mastery to get a 25% chance to reverse Enemy Elemental Resistances. |
|
| Min. requirements: 800+ Elemental DPS Optional affixes: Attacks with this Weapon Penetrate (11-13)% Elemental Resistances Double Damage Chance |
|
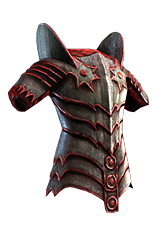 (Body Armour) Rare Body Armour - you can get a lot of Spell Suppression on your Body Armour. It should also provide Physical Damage Reduction and Resistance. You can avoid Life modifiers to activate the Life Mastery for a bonus of 15% maximum Life. With Eldritch Implciits you can boost the Effect of your Auras. Seek bases with high Armour and Evasion Rating. (Body Armour) Rare Body Armour - you can get a lot of Spell Suppression on your Body Armour. It should also provide Physical Damage Reduction and Resistance. You can avoid Life modifiers to activate the Life Mastery for a bonus of 15% maximum Life. With Eldritch Implciits you can boost the Effect of your Auras. Seek bases with high Armour and Evasion Rating. |
|
| Min. requirements: +80% to Elemental Resistances +20% chance to Suppress Spell Damage +150 to maximum Life Optional affixes: % of Physical Damage from Hits taken as Elemental Damage % additional Physical Damage Reduction |
|
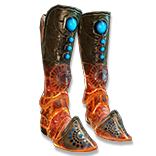
 (Boots) Rare Boots - look mostly for maximum Life and Spell Suppression, with a bit of Resistance on top of it. You can skip Movement Speed modifiers as you will use Leap Slam to move around anyway. (Boots) Rare Boots - look mostly for maximum Life and Spell Suppression, with a bit of Resistance on top of it. You can skip Movement Speed modifiers as you will use Leap Slam to move around anyway. |
|
| Min. requirements: +50% to Elemental Resistances +90 to maximum Life +10% chance to Suppress Spell Damage Optional affixes: Action Speed Ailment Avoidance Life Regeneration Rate |
|
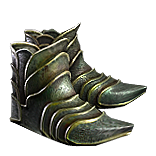
 (Boots) Legacy of Fury - These Boots have no Maximum Life, but high Armour, Evasion, and the powerful Scorch that causes nearby enemies to take increased Elemental Damage, and detonates them on kill. (Boots) Legacy of Fury - These Boots have no Maximum Life, but high Armour, Evasion, and the powerful Scorch that causes nearby enemies to take increased Elemental Damage, and detonates them on kill. |
|
| (200-300)% increased Armour and Evasion 30% increased Movement Speed Nearby Enemies are Scorched (30-50)% increased Effect of Scorch (30-40)% chance when you Kill a Scorched Enemy to Burn Each surrounding Enemy for 4 seconds, dealing 8% of the Killed Enemy's Life as Fire Damage per second |
|
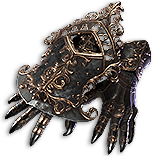
 (Gloves) Admiral's Arrogance - A very basic Unique Gloves that will help you with gaining more Rage. The extra Attack Speed and Level to Molten Strike will increase your DPS. (Gloves) Admiral's Arrogance - A very basic Unique Gloves that will help you with gaining more Rage. The extra Attack Speed and Level to Molten Strike will increase your DPS. |
|
| (6-12)% increased Attack Speed (100-140)% increased Armour (10-20)% chance that if you would gain Rage on Hit, you instead gain up to your maximum Rage +(1-3) to Level of all Melee Skill Gems |
|
 (Gloves) The Celestial Brace - Celestial Brace will get you tons of Attack Speed and extra Maximum Fortification with Fortify on Hit. (Gloves) The Celestial Brace - Celestial Brace will get you tons of Attack Speed and extra Maximum Fortification with Fortify on Hit. |
|
| (80-120)% increased Armour 1% increased Attack Speed per Fortification +(1-10) to maximum Fortification Melee Hits from Strike Skills Fortify |
|
 (Gloves) Rare Gloves - you can also use a pair of Rage Gloves, ideally with Spell Suppression, maximum Life, additional Strike Targets, and Resistance. (Gloves) Rare Gloves - you can also use a pair of Rage Gloves, ideally with Spell Suppression, maximum Life, additional Strike Targets, and Resistance. |
|
| Min. requirements: Strike Skills target 1 additional nearby Enemies +40% to Elemental Resistances +90 to maximum Life Optional affixes: increased Attack Speed increased Damage during any Flask Effect Accuracy Rating |
|
 (Belt) Perseverance - it is a great Belt for most Champion Builds out there. It grants you permanent Onslaught and greatly boosts your Damage with Attacks. (Belt) Perseverance - it is a great Belt for most Champion Builds out there. It grants you permanent Onslaught and greatly boosts your Damage with Attacks. |
|
| +(260-320) to Armour and Evasion Rating (4-8)% increased maximum Life +(20-40)% to Cold Resistance 1% increased Attack Damage per 200 of the lowest of Armour and Evasion Rating Melee Hits which Stun Fortify You have Onslaught while Fortified |
|
 (Amulet) Voice of the Storm - it provides a lot of Damage thanks to the Lucky modifier, which works very well with a wide range of Lightning Damage. With the Precise Technique Keystone, all your Hits will be Non-Critical. (Amulet) Voice of the Storm - it provides a lot of Damage thanks to the Lucky modifier, which works very well with a wide range of Lightning Damage. With the Precise Technique Keystone, all your Hits will be Non-Critical. |
|
| +(20-30) to Intelligence 50% increased Lightning Damage +(10-15) to all Attributes (10-20)% increased maximum Mana Lightning Damage with Non-Critical Strikes is Lucky |
|
| Recommended Anointments: Veteran's Wrath Arcing Blows |
|
 (Ring) Rare Ring - on the Ring you should look for sources of additional or increased Damage with Attacks, maximum Life, Resistance, and Attributes. You can also craft a special modifier that lowers your Mana Costs with Non-Channeling Skills. (Ring) Rare Ring - on the Ring you should look for sources of additional or increased Damage with Attacks, maximum Life, Resistance, and Attributes. You can also craft a special modifier that lowers your Mana Costs with Non-Channeling Skills. |
|
| Min. requirements: +80% to Elemental Resistances +90 to Maximum Life Optional affixes: increased Elemental Damage with Attack Skills Accuracy Rating Non-Channelling Skills have -(7-6) to Total Mana Cost Life Recoup |
|
 (Ring) Nimis - it is an expensive luxury, but it is very much worth it. Molten Strike fires its Projectiles in random directions by default, so this Ring has no downsides. (Ring) Nimis - it is an expensive luxury, but it is very much worth it. Molten Strike fires its Projectiles in random directions by default, so this Ring has no downsides. |
|
| +(20-30)% to Lightning Resistance +(30-50) to Dexterity (25-35)% increased Projectile Damage Projectiles Return to you Projectiles are fired in random directions |
|
 (Jewel) Rare Jewels - you should look for bonuses to your Maximum Life, Attack Speed, lacking Resistances or Attributes, and Accuracy Rating. You can also get a bit of Mana Reservation Efficiency here. (Jewel) Rare Jewels - you should look for bonuses to your Maximum Life, Attack Speed, lacking Resistances or Attributes, and Accuracy Rating. You can also get a bit of Mana Reservation Efficiency here. |
|
|
Recommended affixes: |
|
 (Jewel) Large Cluster Jewel - Feed the Fury is a very powerful Notable as you will always be Leeching due to the Petrified Blood Effect. The Martial Prowess is also great as it improves your Accuracy Rating which you need to fulfil the Precise Technique requirements. The third Notable is the least impactful, but the Calamitous is the best pick in terms of Damage. (Jewel) Large Cluster Jewel - Feed the Fury is a very powerful Notable as you will always be Leeching due to the Petrified Blood Effect. The Martial Prowess is also great as it improves your Accuracy Rating which you need to fulfil the Precise Technique requirements. The third Notable is the least impactful, but the Calamitous is the best pick in terms of Damage. |
|
| 1 Added Passive Skill is Calamitous 1 Added Passive Skill is Feed the Fury 1 Added Passive Skill is Martial Prowess |
|
 (Jewel) Medium Cluster Jewel - those Notables are extremely efficient in terms of boosting your Damage. You should use two of such Clusters for maximum effect. (Jewel) Medium Cluster Jewel - those Notables are extremely efficient in terms of boosting your Damage. You should use two of such Clusters for maximum effect. |
|
| 1 Added Passive Skill is Eye to Eye 1 Added Passive Skill is Repeater |
|
 (Jewel) Watcher's Eye - the only offensive Aura you run is Precision, but you can mix it with other defensive Aura modifiers if your budget allows for it. (Jewel) Watcher's Eye - the only offensive Aura you run is Precision, but you can mix it with other defensive Aura modifiers if your budget allows for it. |
|
| (4-6)% increased maximum Energy Shield (4-6)% increased maximum Life (4-6)% increased maximum Mana <Two or Three random aura modifiers> Recommended modifiers: (40-60)% increased Attack Damage while affected by Precision (10-15)% increased Attack Speed while affected by Precision Gain (20-30) Life per Enemy Hit while affected by Vitality +(12-15)% chance to Suppress Spell Damage while affected by Grace Unaffected by Vulnerability while affected by Determination |
|
 (Jewel) Lethal Pride - it grants you a lot of Strength and can save you a few Suffixes on your Gear. It also can provide very useful bonuses to the Passives you pick anyway, such as Double Damage Chance. (Jewel) Lethal Pride - it grants you a lot of Strength and can save you a few Suffixes on your Gear. It also can provide very useful bonuses to the Passives you pick anyway, such as Double Damage Chance. |
|
| Commanded leadership over (10000-18000) warriors under (Akoya-Kaom-Rakiata) Passives in radius are Conquered by the Karui Historic |
|
 (Flask) Bottled Faith - upon use it creates a very large Consecrated Ground which boosts your Life Regeneration and increases the Damage Enemies Take. (Flask) Bottled Faith - upon use it creates a very large Consecrated Ground which boosts your Life Regeneration and increases the Damage Enemies Take. |
|
| (30-15)% reduced Duration Consecrated Ground created by this Flask has Tripled Radius Consecrated Ground created during Effect applies (7-10)% increased Damage taken to Enemies (100-150)% increased Critical Strike Chance against Enemies on Consecrated Ground during Effect |
|
|
Suggested Flasks:
|
|
    |
|
|
If you have any other build requests please leave that in the comments below. We are always open to suggestions and constructive feedback.
Pictures used in this article are the intellectual property of Grinding Gear Games.
