Consecrated Path Totem Chieftain Build
One of the most effective Totem builds where you spawn several mobile Totems to fight for you with 100% damage converted to FireConsecrated Path Totems
Earthbreaker Chieftain Build
Updated for Patch 3.18
The Best Crafty Guides by Odealo
| Guide notes |
| July 23, 2021 -Build created July 6, 2022 -Updated for Patch 3.18 |
| Build overview | |||
| Tags: [TOTEM] [ELEMENTAL] [LIFE] | |||
|
Budget: Defenses: |
|
Boss DPS: AoE: |
|
With the introduction of Earthbreaker Support Gem in Patch 3.15, Slam Totem is one of the most anticipated build types for the Expedition League. A single Support Gems opens up tons of possibilities for interesting and powerful builds. Also, with the "buffs" to Melee Skills in general, it becomes even more powerful when compared to other types of builds. The most interesting combination appears to be the Consecrated Path Totems, which will jump on nearby enemies greatly increasing the smoothness of this build as you won't have to resummon your Totems on every single pack. As a Chieftain, you will be also able to use various Utility Spells in melee range without having to constantly hide behind your Totems.
The following guide revolves around 100% Physical to Fire conversion which is just natural for a Chieftain character. You will also rely on high Life, Armour Rating, Fortify, Endurance Charges, and extra Block Chance from a Shield to boost your defenses. And thanks to the increased defenses and Fire Conversion bonuses from its class, it's also a great pick for a League Starter build. It's important to note that most of the builds use Brutus' Lead Sprinkler. Stacking Strength gets expensive in a long run, so we included an alternative, cheap version which uses Staves.
You can also check our other Path of Exile builds: Odealo's Crafty Guides - Full List
1. Gameplay
This is a hybrid build that combines the aspects of a typical Melee build and a Totem build. You will be planting your Totems which will jump to nearby enemies, while you yourself are going to apply various debuffs on enemies like a Curse and Fire Exposure. This build offers a more active playstyle than your typical Totem build making it much more fun to play. For mobility, you are going to use Leap Slam with increased Attack Speed, and buffs like Blood Rage, and Molten Shell should be triggered manually whenever needed - it's best to put Molten Shell on your left mouse button so that it's getting activated nearly always when off-cooldown.
|
|
|
|

2. Build's PROS & CONS
| PROS |
|
| CONS |
|
3. Leveling tips
Leveling up this build is easy and enjoyable. Consecrated Path is simply amazing for leveling, as not only does it offer high Area DPS but extra mobility. Initially, you want to use it yourself for that purpose, and support your own Attacks with Totems anytime you want. For the first 28 levels, before Consecrated Path becomes available, simply use any AoE attack that fits your highest DPS weapon - Ground Slam or Sunder will work fine with Staves (or Cleave, Reave, etc, if you are using another weapon type) - anything will work with the recent buffs to Melee skill damage. Initially, you are going to focus on dealing mixed types of damage, so don't specifically look for high Fire DPS on the weapon.
Below you will find the basic leveling Skill Gem setups and some useful Unique Items for this build.
Suggested leveling Gem setups:
| Ground Slam setup | |
 |
Ground Slam - one of the best Slam Attacks that we recommend using during the first 28 levels. It has high base damage, decent AoE, and deals greatly increased damage to nearby enemies |
 |
Melee Physical Damage Support - a great boost to your base Melee Damage |
 |
Added Fire Damage Support - adds Fire Damage to your linked Skills based on the Physical DPS |
 |
Ruthless Support - greatly increased damage dealt by every third Hit. It's available right from the start |
| Consecrated Path setup | |
 |
Consecrated Path - start using it at level 28. You can use it manually at first and when you get Ancestral Bond, solely with Totems |
 |
Earthbreaker Support - allows you to summon Totems that use Consecrated Path for you - mandatory Support when you get Ancestral Bond |
 |
Multiple Totems Support - allows you to summon two extra Totems and two with each cast |
|
Added Fire Damage Support |
 |
Elemental Damage with Attacks Support - one of the core Support Gems for this build which boosts your Elemental DPS directly |
| Utility Gems | |
 |
Anger - the best Aura for this build. It grants a lot of flat Fire Damage to your Attacks, which is then multiplied by Consecrated Path's high damage effectiveness stat |
 |
Herald of Ash- Herald Spell that adds extra Fire Damage and causes AoE explosions when you kill enemies |
 |
Flammability - the best Curse for this build. It can be cast manually on lower levels against Bosses |
 |
Leap Slam - the recommended mobility Skill for this build which allows you to travel faster |
Bandits:
We recommend killing all the Bandits for two additional Passive Points
Leveling Skill Trees:
37 Points Skill Tree
Priorities: 1) Born to Fight 2) Butchery 3) Ancestral Bond 4) One with the River 5) Avatar of Fire
68 Points Skill Tree
Priorities: 1) Discipline and Training 2) Bloodless 3) Lava Lash 4) Versatility 5) Call to Arms
Recommended leveling items:
 Meginord's Girdle - an amazing Belt that grants high bonus Life and flat added Physical Damage to Attacks Meginord's Girdle - an amazing Belt that grants high bonus Life and flat added Physical Damage to Attacks |
|
| +(25-35) to Strength +25 to Strength Adds 5 to 15 Physical Damage to Attacks 10% increased maximum Life +(10-20)% to Cold Resistance 25% increased Flask Life Recovery rate |
|
 Goldrim - one of the best Helmets for Leveling that grants a ton of extra Resistances Goldrim - one of the best Helmets for Leveling that grants a ton of extra Resistances |
|
| +(30-50) to Evasion Rating 10% increased Rarity of Items found +(30-40)% to all Elemental Resistances Reflects 4 Physical Damage to Melee Attackers Level Requirement reduced by 100 (Hidden) |
|
 Tabula Rasa - Body Armour that's the optimal choice to get through the initial stages of the game with. If you are looking to fully socket it, make sure to get Items that increase your Mana/Mana Regen or reduce the Mana Cost (Praxis is the best for the job) Tabula Rasa - Body Armour that's the optimal choice to get through the initial stages of the game with. If you are looking to fully socket it, make sure to get Items that increase your Mana/Mana Regen or reduce the Mana Cost (Praxis is the best for the job) |
|
| Item has no level requirement and Energy Shield (Hidden) Item has 6 White Sockets and is fully linked (Hidden) |
|
|
|
|
| +(20-30) to maximum Mana +(30-60) to maximum Mana Regenerate (3-6) Mana per second -(8-4) to Total Mana Cost of Skills 8% of Damage taken gained as Mana over 4 seconds when Hit |
|
 Praxis - amazing leveling Ring which reduces the flat cost of your Skills which will help you spam abilities Supported by more Gems
4. Final Skill Tree, Ascendancy Points, and Pantheon
Final Skill Tree:
111 Points Final Skill Tree (does not include Cluster Jewels)
122 Points Path of Building (PoB) link
Ascendancy points:
Preferably in that order:
- Arohongui, Moon's Presence
- Ramako, Sun's Light
- Hinekora, Death's Fury
- Ngamahu, Flame's Advance
Pantheon:
Major God: Soul of Lunaris 1% additional Physical Damage Reduction for each nearby Enemy, up to 8%; 1% increased Movement Speed for each nearby Enemy, up to 8%
Minor God: Soul of Gruthkul 1% additional Physical Damage Reduction for each Hit you've taken Recently up to a maximum of 5%
5. Final Gems links
| [DPS] Consecrated Path Totem setup | |
|
Consecrated Path - your primary source of DPS which in this build is used by four Totems. It has 100% damage converted to Fire and makes the Totems swiftly teleport to nearby enemies dealing Area Damage |
|
Earthbreaker Support - summons a Totem that can use a linked Slam Attack which is the core mechanic in this build |
|
Elemental Damage with Attacks Support - grants high increase to your Elemental Damage making it one of the core Gems for this setup |
|
Multiple Totems Support - allows you to summon a total of 4 Totems, and two with each cast, but lowers their damage in the process. |
 |
Elemental Focus Support - it grants you much more Elemental Damage but disables Elemental Ailments for the linked Skills. You can switch to  Inspiration Support or Ruthless Support instead. Inspiration Support or Ruthless Support instead. |
 |
Fire Penetration Support - Damage penetrates more Fire Resistance, which is the only type of resistance to pay attention to |
| [UTILITY] Curse and Exposure setup | |
 |
Wave of Conviction - It unleashes a wave that applies Fire Exposure on Hit. The Ignite nor Wave of Conviction won't deal any damage due to Ancestral Bond Keysonte, but the effects will apply. |
| Combustion Support - increases the Chance to Ignite for Linked Skills and allows you to apply a powerful debuff that reduces Fire Resistance. The Ignite nor Wave of Conviction won't deal any damage due to Ancestral Bond Keysonte, but the effect will apply. | |
|
Flammability - the second-best Curse for this build which reduces the Fire Resistance of the affected enemies. You can also use  Assassin's Mark, which is better, but that requires casting it manually. Assassin's Mark, which is better, but that requires casting it manually. |
 |
Hextouch Support - Flammability is applied on Hit with linked Skills |
| [UTILITY] Auras setup | |
|
Anger - DPS-wise, it's the best Aura for this build which grants a ton of flat added Fire Damage to skills |
 |
Blood and Sand - can increase your Area of Effect during Sand Stance at the cost of Area Damage, and vice versa during Blood Stance |
 |
Determination - use it for an additional and increased Armour Rating |
 |
Enlighten Support - reduces the Mana Reservation cost of linked Auras |
| [UTILITY] Precision | |
 |
Precision - use Precision to increase your Accuracy and Crit. Chance. The level will vary depending on your gear and Mana pool |
| [UTILITY] Leap Slam/Enduring Cry/Blood Rage setup | |
|
Leap Slam - recommended mobility skill for this build |
 |
Enduring Cry - grants instant Life Regeneration and generates Endurance Charges |
 |
Blood Rage - increases your Attack Speed, Physical Damage, and allows you to generate Frenzy Charges. It deals a moderate amount of damage to yourself, but with Endurance Charges it's negligible |
 |
Lifetap Support - makes Leap Slam cost Life instead of Mana |
| [UTILITY] Golem setup | |
 |
Summon Ice Golem - has a similar effect to that of Precision Aura. It's best to link it to CwDT so that it's resummoned automatically |
 |
Cast when Damage Taken Support - will automatically recast your Golem once in a while |
| [UTILITY] Molten Shell | |
 |
Molten Shell - the recommended Guard Spell for this build which grants a protective shield based on your Armour rating. Just like Blood Rage, it has to be cast manually, and it's best to put it under your left mouse button which will trigger it nearly always when off-cooldown |
| [UTILITY] Ancestral Protector | |
 |
Ancestral Protector - Use Phantasmal Ancestral Protector for much more Attack Speed for you and your other Totems |
| [UTILITY] Vaal Ancestral Warchief | |
 |
Vaal Ancestral Warchief - use this Totem for more Attack Damage. The Vaal version of it allows for an additional Totem. |
|
|
5. Gear Setup
Below you will find the recommended gear for our Consecrated Path Totem Chieftain. This build requires literally 0 Unique Items, and the ones listed are completely optional - you do want to get Thread of Hope at some point, but it's not required to have this build running properly. Overall, it's very straightforward and fully viable in a set of random Rares. We tried not to include any end-game specific, heavily crafted, and influenced Items as mandatory ones, but surely all the items listed below can be upgraded in that fashion. The items such as Brutus' Lead Sprinkler, Crown of Eyes, and The Iron Fortress can be included, but doing so will require altering the passive skill tree and removing the Staves nodes.
Using this opportunity, we would love to invite you to visit our Path of Exile Marketplace where you can buy cheap PoE Currency in case you can't afford all the items for your character. You can find the links to this section on top of this page.
Our recommended items will:
- Cap your resistances
- Give you enough DPS/Life to start mapping
|
Stat priorities on items:
|
 (Helmet) Rare Helmet - the most common option. You can start off with a random Rare helmet with defensive stats and get a better one later on when needed (Helmet) Rare Helmet - the most common option. You can start off with a random Rare helmet with defensive stats and get a better one later on when needed |
|
| Min. requirements: 90 maximum Life 350 Accuracy Rating 80% Total Elemental Resistances Optional affixes: Nearby Enemies have -9% to Fire Resistance Melee Strike Range |
|
 (Helmet) Crown of Eyes - Crown of Eyes is a Unique Helmet that translates your Spell Damage into Attack Damage at a higher value. You can gain that spell damage by allocating Iron Will Keystone - modifiers to Attack Damage coming from Strength will apply to Spell Damage as well. Good only when stacking a lot of Strength. (Helmet) Crown of Eyes - Crown of Eyes is a Unique Helmet that translates your Spell Damage into Attack Damage at a higher value. You can gain that spell damage by allocating Iron Will Keystone - modifiers to Attack Damage coming from Strength will apply to Spell Damage as well. Good only when stacking a lot of Strength. |
|
| +(300-350) to Accuracy Rating (120-150)% increased Energy Shield -30% to Fire Resistance (0.4-0.8)% of Attack Damage Leeched as Life (0.2-0.4)% of Attack Damage Leeched as Mana Increases and Reductions to Spell Damage also apply to Attacks at 150% of their value |
|
| Helmet enchantments: 40% increased Consecrated Path Damage |
|
 (Weapon) Rare Staff - simply look for a Staff with the highest base Physical DPS possible. You can also find some extra stats related to Elemental DPS like Penetration or Crit. Multiplier (Weapon) Rare Staff - simply look for a Staff with the highest base Physical DPS possible. You can also find some extra stats related to Elemental DPS like Penetration or Crit. Multiplier |
|
|
Min. requirements: |
|
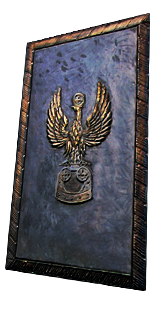
 (Weapon) Hegemony's Era - a cheaper alternative to Rare Staves. It's a solid Physical DPS Staff that should be relatively cheap. It also boosts your Critical Strike Chance and has a high Spell Block Chance (Weapon) Hegemony's Era - a cheaper alternative to Rare Staves. It's a solid Physical DPS Staff that should be relatively cheap. It also boosts your Critical Strike Chance and has a high Spell Block Chance |
|
| +20% Chance to Block Spell Damage while wielding a Staff +6% Chance to Block Attack Damage while wielding a Staff Adds (135-145) to (160-175) Physical Damage (12-16)% increased Attack Speed (10-20)% increased Critical Strike Chance +1 to Maximum Power Charges 10% chance to gain a Power Charge if you Knock an Enemy Back with Melee Damage |
|
 (Weapon) Brutus' Lead Sprinkler - It's the weapon that goes along well with stacking Strength. It is just the best-in-slot one for dealing converted Fire Damage with Attacks. (Weapon) Brutus' Lead Sprinkler - It's the weapon that goes along well with stacking Strength. It is just the best-in-slot one for dealing converted Fire Damage with Attacks. |
|
| 16% increased Elemental Damage 20% increased Physical Damage Adds (8-13) to (26-31) Physical Damage 30% increased Fire Damage (15-20)% increased Attack Speed (30-40)% increased Critical Strike Chance Adds 4 to 7 Fire Damage to Attacks with this Weapon per 10 Strength |
|
 (Off-hand) Rare Shield - Shield plays a vital role in a Strength-stacking version. It allows you to summon one more Totem and increases Mana Reservation Efficiency, these are extremely valuable virtues. (Off-hand) Rare Shield - Shield plays a vital role in a Strength-stacking version. It allows you to summon one more Totem and increases Mana Reservation Efficiency, these are extremely valuable virtues. |
|
| Min. requirements: Socketed Gems have 30% increased Reservation Efficiency 40 Strength +1 to maximum number of Summoned Totems Optional affixes: Maximum Life Elemental Resistances |
|
 (Body Armour) Rare Body Armour - the BiS option that can grant a ton of both defensive and offensive stats. Most importantly look for high Life and possibly Attack Crit. Chance (Body Armour) Rare Body Armour - the BiS option that can grant a ton of both defensive and offensive stats. Most importantly look for high Life and possibly Attack Crit. Chance |
|
| Min. requirements: 100 Maximum Life 60% Total Elemental Resistances Attacks have +#% to Critical Strike Chance Optional affixes: Maximum Life% Avoid Interruption from Stuns while using Socketed Attack Skills Attributes |
|
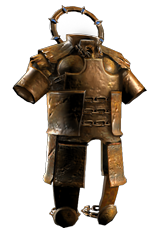
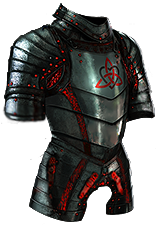 (Body Armour) The Iron Fortress - it's the preferable Body Armour if you're stacking Strength, the bonuses it grants are unmatched by any other Armour. (Body Armour) The Iron Fortress - it's the preferable Body Armour if you're stacking Strength, the bonuses it grants are unmatched by any other Armour. |
|
| +1% Chance to Block Attack Damage per 50 Strength Chance to Block Spell Damage is Unlucky +(60-120) to Strength (80-100)% increased Armour 10% reduced Movement Speed Strength's Damage Bonus instead grants 3% increased Melee Physical Damage per 10 Strength |
|
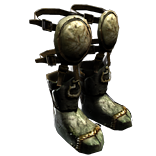 (Boots) Rare Boots - again, mainly defensive stats and a high Movement Speed bonus is preferred here (Boots) Rare Boots - again, mainly defensive stats and a high Movement Speed bonus is preferred here |
|
| Min. requirements: 70 Maximum Life 50% Total Elemental Resistances 30% increased Movement Speed Optional affixes: You cannot be Frozen Chaos Resistance Attributes |
|
| Boot enchantment: 16% increased Attack and Cast Speed if you've Killed Recently |
|
 (Belt) Rare Belt - Look for Hunter's or Redeemer's influence for some unique mods that could be really helpful. A good Stygian Vise could be really expensive but it offers you a lot of flexibility due to the Abyss Jewel slot. (Belt) Rare Belt - Look for Hunter's or Redeemer's influence for some unique mods that could be really helpful. A good Stygian Vise could be really expensive but it offers you a lot of flexibility due to the Abyss Jewel slot. |
|
| Min. requirements: 90 to MaximumLife 80% Increased Elemental Resistances Optional affixes: Maximum Life % Elemental/Fire/Global Physical Damage Gain a Flask Charge when you deal a Critical Strike |
|
 (Amulet) Rare Amulet - you need to cover up all the needs for Dexterity and Intelligence here if needed and grab extra Life and some DPS affixes (Amulet) Rare Amulet - you need to cover up all the needs for Dexterity and Intelligence here if needed and grab extra Life and some DPS affixes |
|
|
Min. requirements: |
|
 (Amulet) Astramentis - This is the amulet you probably want to consider when choosing to stack Strength. (Amulet) Astramentis - This is the amulet you probably want to consider when choosing to stack Strength. |
|
| +(10-16) to all Attributes +(80-100) to all Attributes -4 Physical Damage taken from Attack Hits |
|
| Recommended Anointments: Shaman's Dominion |
|
 (Ring) Rare Rings - basically Life, Resistances, possibly Attributes. You could also grab a Ring with Assassin's Mark if you had the option to inflict an additional Curse on your chest (Ring) Rare Rings - basically Life, Resistances, possibly Attributes. You could also grab a Ring with Assassin's Mark if you had the option to inflict an additional Curse on your chest |
|
| Min. requirements: 70 maximum Life 60% Total Elemental Resistances Added Physical Damage to Attacks Optional affixes: Trigger Level # Assassin's Mark when you Hit a Rare or Unique Enemy Accuracy Rating Attributes |
|
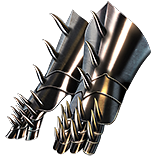 (Gloves) Rare Gloves - Defensive stats are a priority, after that look for some other mods that'd be useful for your build (Gloves) Rare Gloves - Defensive stats are a priority, after that look for some other mods that'd be useful for your build |
|
| Min. requirements: 90 maximum Life 70% Total Elemental Resistances Added Physical Damage to Attacks Optional affixes: Accuracy Rating Attributes |
|
 (Jewels) Rare Jewels - try to get extra Life - 7% increased, and some Damage mods such as Area Damage or Damage with Staves. Try to get one with Corrupted Blood immunity (Jewels) Rare Jewels - try to get extra Life - 7% increased, and some Damage mods such as Area Damage or Damage with Staves. Try to get one with Corrupted Blood immunity |
|
| Recommended affixes: Maximum Life Critical Strike Multiplier Optional affixes: increased Area Damage/Damage with Staves/Physical Damage Elemental Resistances Attributes |
|
 (Jewels) Rare Jewels - you should use at least one Abyssal Jewel in your Belt. Get extra Life and the highest flat added Physical/Fire Damage to Attacks as possible. With the 3.15 Changes, added damage has higher effectiveness (Jewels) Rare Jewels - you should use at least one Abyssal Jewel in your Belt. Get extra Life and the highest flat added Physical/Fire Damage to Attacks as possible. With the 3.15 Changes, added damage has higher effectiveness |
|
| Recommended affixes: Maximum Life Added Fire/Physical Damage to Attacks/Staff Attacks Optional affixes: Critical Strike Multiplier |
|
 (Jewels) Watcher's Eye - look for a Jewel with Anger and Precision mods. It's one of the best Jewels in the game, which is almost a must-have at some point if you want to push your character to the end-game. It's good to get the Flask Charges on Precision, as it helps you sustain the bonuses from them against Bosses. For Anger, most of the Mods work just fine (Jewels) Watcher's Eye - look for a Jewel with Anger and Precision mods. It's one of the best Jewels in the game, which is almost a must-have at some point if you want to push your character to the end-game. It's good to get the Flask Charges on Precision, as it helps you sustain the bonuses from them against Bosses. For Anger, most of the Mods work just fine |
|
| (4-6)% increased maximum Energy Shield (4-6)% increased maximum Life (4-6)% increased maximum Mana <Two or Three random aura modifiers> |
|
 (Jewel) Large Cluster Jewel - using a Fire Damage Cluster Jewel is the easiest way to apply Fire Exposure to enemies which you normally achieve with Wave of Conviction. But since you don't deal damage yourself, it's a bit tricky, so getting Corrosive Elements is the best option (Jewel) Large Cluster Jewel - using a Fire Damage Cluster Jewel is the easiest way to apply Fire Exposure to enemies which you normally achieve with Wave of Conviction. But since you don't deal damage yourself, it's a bit tricky, so getting Corrosive Elements is the best option |
|
| Recommended affixes: 1 Added Passive Skill is Corrosive Elements 1 Added Passive Skill is Cremator 1 Added Passive Skill is Widespread Destruction |
|
 (Jewel) Medium Cluster Jewel - there are three useful Notables on a Medium Totem Cluster Jewel, Sleepless Sentries grants you Onslaught making it one of the best notables there (Jewel) Medium Cluster Jewel - there are three useful Notables on a Medium Totem Cluster Jewel, Sleepless Sentries grants you Onslaught making it one of the best notables there |
|
| Recommended affixes: 1 Added Passive Skill is Ancestral Echo 1 Added Passive Skill is Sleepless Sentries 1 Added Passive Skill is Ancestral Reach |
|
 (Flask) Lion's Roar - grants high Melee Damage multiplier and extra Armour (Flask) Lion's Roar - grants high Melee Damage multiplier and extra Armour |
|
| +1500 to Armour Adds Knockback to Melee Attacks during Flask effect Knocks Back Enemies in an Area when you use a Flask 75% chance to cause Enemies to Flee on use (20-25)% more Melee Physical Damage during effect |
|
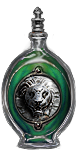
 (Flask) Bottled Faith - one of the Best Flasks in the game for every build that uses Critical Strikes (Flask) Bottled Faith - one of the Best Flasks in the game for every build that uses Critical Strikes |
|
| 40% increased Damage Creates Consecrated Ground on Use (20-40)% increased Duration Consecrated Ground created by this Flask has Tripled Radius Consecrated Ground created during Effect applies (7-10)% increased Damage taken to Enemies (100-150)% increased Critical Strike Chance against Enemies on Consecrated Ground during Flask effect |
|
Other suggested Flasks:
|
|
   |
|
|
If you have any other build requests please leave that in the comments below.
Pictures used in this article are the intellectual property of Grinding Gear Games.
