Boneshatter Juggernaut Marauder Build
Boneshatter Build for Juggernaut with great Survivability, a lot of effective HP, and high Physical DPSBoneshatter
Juggernaut Build
Updated for Patch 3.24
The Best Crafty Guides by Odealo
| Guide notes |
| September 03, 2021 -Build created March 25, 2024 -Updated for Patch 3.24 |
| Build overview | |||
| Tags: [MELEE] [PHYSICAL] [IMPALE] [LIFE] | |||
|
Budget: Defenses: |
|
Boss DPS: AoE: |
|
Boneshatter is a Melee Strike restricted to Axes, Staves, Maces, and Sceptres. It has very high base damage, but the downside is the attacker is also getting hurt in the process, not as much as the enemy, but the damage received will increase for the parties at both ends of the weapon. This status is called Trauma and it lasts for 6 seconds - as the character you're playing is extremely tanky and can mitigate a lot of Physical Damage, you want to increase this bonus to its limit. Juggernaut is the ascendancy that specializes in Physical Damage mitigation and enhancing the Endurance Charge perks. With the proper setup, the character can reach 7 to 10k of Maximum Life, have an additional reduction in Physical, Elemental, and general Damage it takes, and a huge amount of Resistances. with such defenses, the Boneshatter's damage will have little to no effect on you. You can even reserve your Life to reap the benefits of Bloodthirst, but that requires a lot of Maximum Life.
Builds that stack basic Attributes are usually very expensive to min-max. When it comes to stacking Strenght, a lot of best-in-slot items are Uniques which lowers the overall cost of the build quite significantly - your Gloves, Boots, Amulet, Body Armour, and Weapon can be Unique Items that are cheap and common. Having a lot of Strength is particularly useful for this build not only because of its inherent stats - Maximum Life and Melee Physical Damage but also because of the benefits granted by the weapon Pillar of the Caged God - it increases your Physical Weapon Damage by 16% per 10 Strength, meaning 1600% at 1k Str, that's twice the amount of Fecebreaker at its highest roll. With the Iron Fortress, the inherent Strength bonus for Melee Physical Damage is boosted by one-third, and it grants you an additional, substantial layer of defense. Undeniable Notable from your Ascendancy Tree will cover the need for Accuracy Rating. It's a popular build among players valuing survivability.
As of patch 3.18, we introduced numerous minor changes - the build now uses an Anomalous version of Boneshatter which reduces the Stun Threshold, making it possible to permanently Stun any opponent in the game. It comes with some changes to the Skill Tree, Gem setups, and additional gear options, but overall the build remains very similar. It's Still a low-life Strength-stacking build.
For patch 3.20, we added a lot of other options to gear up the character, which includes Precise Technique Keystone and Divergent Boneshatter. We also added a version that puts less emphasis on Strength Stacking, it would allow you to have all your Items of Rare quality, which is a good thing in the long run.
With patch 3.24 we introduced only minor adjustments for both - Strength-stacking and the regular version of the build.
You can also check our other Path of Exile builds right over here Odealo's Crafty Guides - Full List
1. Gameplay
This is the type of Melee build you would normally expect a Juggernaut to be. Kind of slow, but tanky as hell, with tons of Physical Damage mitigation and devastating melee hits. The main idea of this build is to maximize your Physical Damage mitigation so that you can ignore the damage received from Boneshatter's Trauma stacks, which can greatly increase your maximum DPS. In this build, you are also going to play as a Low-Life character with Petrified Blood and Banner/Stance Spells that reserve your Life with Blood Magic notable. Your Life will be capped at around 4,000, but the damage will be greatly reduced by all the buffs and passives, allowing for a very safe playstyle. You are going to cast many of your Spells manually, including Blood Rage, Ancestor Totems, Molten Shell, and AncestralCry, but in most cases, these will be needed only against Bosses. There is also another interesting triggered mechanic. You can use Phantasmal Vengeance linked with Rage Support and Enhance, to generate Rage at a very fast rate, further boosting your damage. In the following setup, the same Vengeance Gem will be used to apply your Curse via Hextouch Support.
|
|
|
|

2. Build's PROS & CONS
| PROS |
|
| CONS |
|
3. Leveling tips
Use our Marauder Leveling Guide. It's all about levelling with a 2-hand weapon using Strikes or Slams Attacks.
Bandits:
you should kill all three Bandits for two additional Skill Points
4. Final Skill Tree, Ascendancy Points, and Pantheon
Final Skill Tree:
110 Points Final Skill Tree (doesn't include Cluster nor Timeless Jewels)
123 Points Path of Building (PoB) link
Ascendancy points:
Preferably in that order:
- Undeniable
- Unbreakable
- Untiring
- Unstoppable
Pantheon:
Major God: Soul of Lunaris: 1% additional Physical Damage Reduction for each nearby Enemy, up to 8%; 1% increased Movement Speed for each nearby Enemy, up to 8%
Minor God: Soul of Gruthkul: 1% additional Physical Damage Reduction for each Hit you've taken Recently up to a maximum of 5%
5. Final Gems links
| [DPS] Boneshatter setup | |
 |
Boneshatter - It's the only DPS skill here, the variety in which you can assemble the Support Gems setup is huge, you can even create two different setups and swap a weapon mid-fight. For leveling you can use Boneshatter of Complex Trauma. |
 |
Brutality Support - With no focus on added Elemental damage and with no conversion, it remains the best Support Gem for such builds. |
 |
Endurance Charge on Melee Stun Support - It's used to gain more Damage per Endurance Charge, generate Endurance Charges, which will be needed at their maximum all the time, reduce Stun Threshold, and increase Stun Duration. If you don't use Endurance Charges (you haven't picked Unflinching), take  Close Combat Support instead. Close Combat Support instead. |
 |
Ruthless Support - Every third Attack is much more powerful, and your base Stun Duration is set at 0.8 seconds, which is good. |
 |
Melee Physical Damage Support - Increases Melee Physical Damage, but reduces Attack Speed. It's still one of the best Gems. |
 |
Fortify Support - Melee Hits Fortify and you gain more Damage. If you already have a different Fortify source, use  Bloodthirst Support as it adds tons of Flat Physical Damage if you're Low on Life (only if you have half your Life Reserved). If you don't have a 100% chance to Impale, pick Bloodthirst Support as it adds tons of Flat Physical Damage if you're Low on Life (only if you have half your Life Reserved). If you don't have a 100% chance to Impale, pick  Impale Support. Impale Support. |
| [MOBILITY] Leap Slam setup | |
 |
Leap Slam - This allows you to jump over obstacles and move around much faster. |
 |
Faster Attacks Support - Increases your mobility when linked with Leap Slam. |
| [UTILITY] Life Reservation setup | |
 |
Precision - Adds Accuracy and increases Critical Strike Chance, both are good in most cases, but with Precise Technique, you won't benefit from Critical Strike Chance. |
 |
War Banner - increases your Accuracy, Physical Damage, and when placed - AoE and Adrenaline. It's a very cost-efficient Skill. |
 |
Arrogance Support - With the two linked Mana-Reserving Skills listed above and the Mastery with Increased Life Reservation Efficiency your life should be always slightly below 50%. If you don't plan to Reserve Life, use only  Vitality instead of these two Spells - it will reserve almost no Life. Vitality instead of these two Spells - it will reserve almost no Life. |
| [UTILITY] Aura setup | |
 |
Pride - Pride increases the Physical Damage your enemies are receiving. |
 |
Determination - Adds and increases your Armour for better Physical Damage mitigation. |
 |
Herald of Purity - It adds extra Physical Damage and creates Minions. |
 |
Enlighten Support - Increases Mana Reservation Efficiency for linked Skills. |
| [UTILITY] Molten Shell | |
 |
Molten Shell - your Guard Spell that's heavily based on your Armour which you should have a lot of |
 |
Cast when Damage Taken - We've used Ancestral Cry as a movement key, so it's good to have Molten Shell cast automatically if that's the case. |
| [UTILITY] Curse setup | |
 |
Warlord's Mark - Mark that reduces Stun Threshold, and grants Endurance Charges, Rage, Mana, and Life Leech.  Vulnerability Hex not as good, but good if yo can apply two Curses (you can get it as a Rare Ring Suffix). Vulnerability Hex not as good, but good if yo can apply two Curses (you can get it as a Rare Ring Suffix). |
 |
Mark on Hit Support - Applies Warlord's Mark on Hit against Rare and Unique enemies. |
| [UTILITY] Arctic Armour | |
 |
Arctic Armour - Makes you take 20% less Fire and Physical Damage while Stationary, which you should be during attacking. It grants Feeze immunity and Chills enemies when Hit. It's optional, you may not have enough Mana for it. |
| [UTILITY] Totems setup | |
 |
Ancestral Warchief - Increases your Melee Damage. |
 |
Ancestral Protector - Increases your Attack Speed. |
 |
Multiple Totems Support - Allows you to summon both Ancestral Totems. |
 |
Maim Support - Maims enemies, reducing their Movement Speed, and making them take more Physical Damage. |
| [UTILITY] Blood Rage | |
 |
Blood Rage - Greatly increases your Attack Speed, Life Leech, and generates Frenzy Charges for you while draining your Life. |
| [UTILITY] Berserk | |
 |
Berserk - Rage accumulated from Vengeance can be spent to increase your Damage, Attack Speed, Movement Speed, and to reduce the damage taken. Rage can be also generated with an Eldritch Implicit on your Rare Gloves. |
|
|
6. Gear Setup
If you're using Pillar of the Caged God, then the build focuses on accumulating as much Strength as possible - to do so several Unique gear pieces are heavily recommended or straight-up mandatory. Your Belt, Helmet, and Rings should be Rare - you can find some very useful mods there, especially when the items are Synthesised. The build follows the usual drill - Maximum Life and Elemental Resistances will be the two main stats to keep your character alive so you should seek these. If you're using a Rare Weapon, you will still want to have some Strength due to the Undeniable Keystone, but don't go out of your way to get it. If you plan to go for the Precise Technique, be sure to have a lot of Accuracy (which is again, sourced from Strength with Undeniable).
Our recommended items will:
- Cap your resistances at 75%
- Provide you with enough DPS and Life to start mapping
|
Stat priorities on items:
|
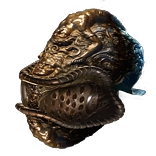
 (Helmet) Rare Helmet - If you're stacking Stregth, there are 2 Affixes from 2 separate influences that could elevate your build to a high tier, but just one should be enough. For Elder mods, get one that makes you take Physical Damage as Elemental Damage and reduced Mana Cost of Attacks or maximum Lightning Resistance. (Helmet) Rare Helmet - If you're stacking Stregth, there are 2 Affixes from 2 separate influences that could elevate your build to a high tier, but just one should be enough. For Elder mods, get one that makes you take Physical Damage as Elemental Damage and reduced Mana Cost of Attacks or maximum Lightning Resistance. |
|
| Min. requirements: Elemental Resistances 8% of Physical Damage from Hits taken as Fire Damage (crafted) + 70 to Maximum Life Optional affixes: Armour Gain Accuracy Rating equal to your Strength (Wardlord Suffix) Nearby Enemies take 9% increased Physical Damage (Elder Suffix) Accuracy Chaos Resistance 1% increased Critical Strike Chance per 10 Strength (Elevated Wardlord Suffix) |
|
 (Helmet) Abyssus - It's not very good as it makes you take increased Physical Damage. Moreover, you probably won't deal Critical Strikes. It's only somewhat good with Pillar of the Caged God as it adds tons of damage. (Helmet) Abyssus - It's not very good as it makes you take increased Physical Damage. Moreover, you probably won't deal Critical Strikes. It's only somewhat good with Pillar of the Caged God as it adds tons of damage. |
|
| +(20-25) to all Attributes Adds 40 to 60 Physical Damage to Attacks +(100-125)% to Melee Critical Strike Multiplier (100-120)% increased Armour (40-50)% increased Physical Damage taken |
|
 (Weapon) Pillar of the Caged God - The build-defining item. With the Strength you've accumulated, it can increase your Damage as no other Weapon would. (Weapon) Pillar of the Caged God - The build-defining item. With the Strength you've accumulated, it can increase your Damage as no other Weapon would. |
|
| +18% Chance to Block Attack Damage while wielding a Staff 1% increased Area of Effect per 20 Intelligence 1% increased Attack Speed per 10 Dexterity 16% increased Physical Weapon Damage per 10 Strength |
|
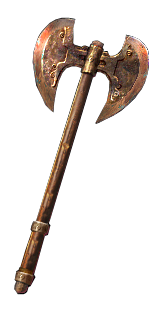 (Weapon) Rare Two-handed Weapon - A two-handed Axe offers the most damage, but a Piledriver Mace could further reduce enemies' Stun Threshold. Aim for simply as much Physical DPS as you can afford. Use it only if you don't plan to stack Strength. (Weapon) Rare Two-handed Weapon - A two-handed Axe offers the most damage, but a Piledriver Mace could further reduce enemies' Stun Threshold. Aim for simply as much Physical DPS as you can afford. Use it only if you don't plan to stack Strength. |
|
| Min. requirements: At least 700 Physical DPS added/increased Physical Attack Damage increased Attack Speed Optional affixes: Chance to Impale Reduced enemy Stun Threshold |
|
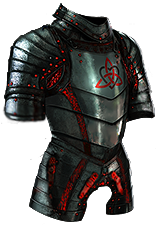
 (Body Armour) Rare Body Armour - Rare Body Armour is superior to any other in terms of flexibility - you can score a lot of Life, Elemental Resistances, and Strength on this slot. For Eldritch mods, increase the effect of your Auras. (Body Armour) Rare Body Armour - Rare Body Armour is superior to any other in terms of flexibility - you can score a lot of Life, Elemental Resistances, and Strength on this slot. For Eldritch mods, increase the effect of your Auras. |
|
| Min. requirements: +120 to Maximum Life +60% to Elemental Resistances 6% of Physical Damage from Hits taken as Fire Damage (crafted) 6% of Physical Damage from Hits taken as Lightning Damage (crafted) Optional affixes: Armour increased Maximum Life You Can Apply Additional Curse additional Physical Damage Reduction Strength Increased Strength |
|
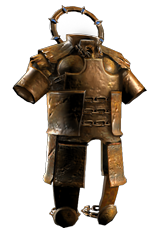
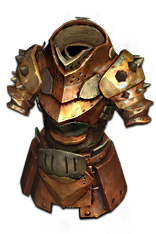
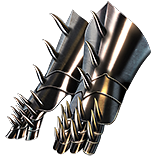
 (Body Armour) The Iron Fortress - It grants a decent amount of Strength and Chance to Block Attack Damage, but no Elemental Resistances nor Maximum Life. It's optional, it will probably increase your overall damage, but compared to a Rare Body Armour it's a more offensive option. Use if in your Strength-stacking version. (Body Armour) The Iron Fortress - It grants a decent amount of Strength and Chance to Block Attack Damage, but no Elemental Resistances nor Maximum Life. It's optional, it will probably increase your overall damage, but compared to a Rare Body Armour it's a more offensive option. Use if in your Strength-stacking version. |
|
| +1% Chance to Block Attack Damage per 50 Strength Chance to Block Spell Damage is Unlucky +(60-120) to Strength (80-100)% increased Armour 10% reduced Movement Speed Strength's Damage Bonus instead grants 3% increased Melee Physical Damage per 10 Strength |
|
 (Body Armour) The Brass Dome - It has simply tons of Armour and extra Maximum Elemental Resistances, but it lowers your Life by denying you the Strength's bonus to it, so if you're stacking Strength, don't take it. (Body Armour) The Brass Dome - It has simply tons of Armour and extra Maximum Elemental Resistances, but it lowers your Life by denying you the Strength's bonus to it, so if you're stacking Strength, don't take it. |
|
| (350-400)% increased Armour +(1-5)% to all maximum Elemental Resistances Strength provides no bonus to Maximum Life Take no Extra Damage from Critical Strikes |
|
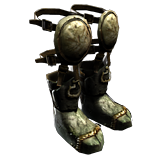
 (Boots) Alberon's Warpath - An 18% increase in Strenght is the reason to incorporate this pair of boots into your final Strength-stacking build. (Boots) Alberon's Warpath - An 18% increase in Strenght is the reason to incorporate this pair of boots into your final Strength-stacking build. |
|
| (15-18)% increased Strength Adds 1 to 80 Chaos Damage to Attacks +(180-220) to Armour +(13-19)% to Chaos Resistance 25% increased Movement Speed Summoned Skeleton Warriors are Permanent and Follow you Summon Skeletons cannot Summon more than 1 Skeleton Warrior |
|
 (Boots) Rare Boots - If you don't stack Strength, pick a pair of Boots with simple Resistances, Maximum Life, and Movement Speed. (Boots) Rare Boots - If you don't stack Strength, pick a pair of Boots with simple Resistances, Maximum Life, and Movement Speed. |
|
| Min. requirements: +60 to Maximum Life +60% to Elemental Resistances 25% increased Movement Speed Optional affixes: Attributes Armour Chaos Resistance |
|
 (Gloves) Rare Gloves - Pick a pair of Gloves with Maximum Life, Resistances, and some offensive bonuses like Attack Speed or Accuracy. You can easily find Dexterity here. For Eldritch mods, get Chance to Impale with Rage on Hit or additional targeting for Strike Skills. (Gloves) Rare Gloves - Pick a pair of Gloves with Maximum Life, Resistances, and some offensive bonuses like Attack Speed or Accuracy. You can easily find Dexterity here. For Eldritch mods, get Chance to Impale with Rage on Hit or additional targeting for Strike Skills. |
|
| Min. requirements: +60 to Maximum Life +60% to Elemental Resistances Optional affixes: Attributes Accuracy Rating Attack Speed Added Physical Damage Chaos Resistance |
|
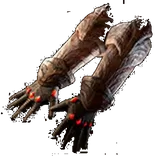 (Gloves) Tanu Ahi - Tanu Ahi Gloves can be good in a build where you often lose some life to instantly leech it all back. You're inflicting damage to yourself with Boneshatter. The reward is Onslaught and Adrenaline buffs. It's unreliable, as the chance to gain these is merely 10%. (Gloves) Tanu Ahi - Tanu Ahi Gloves can be good in a build where you often lose some life to instantly leech it all back. You're inflicting damage to yourself with Boneshatter. The reward is Onslaught and Adrenaline buffs. It's unreliable, as the chance to gain these is merely 10%. |
|
| (8–12)% increased Attack Speed (100–150)% increased Armour and Evasion (2–3)% of Physical Attack Damage Leeched as Life 10% chance to gain Adrenaline for 2 seconds when Leech is removed by filling Unreserved Life 10% chance to gain Onslaught for 4 seconds when Leech is removed by filling Unreserved Life |
|
 (Belt) Rare Belt - The Belt is a simple case, look for the usual Maximum Life and Elemental Resistances, additionally, you can craft Strength. (Belt) Rare Belt - The Belt is a simple case, look for the usual Maximum Life and Elemental Resistances, additionally, you can craft Strength. |
|
| Min. requirements: +100 to Maximum Life +80% to Elemental Resistances +30 to Strength Optional affixes: increased Maximum Life increased Damage Flask modifiers |
|
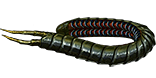 (Belt) Ryslatha's Coil - It's often the best option for any Physical Damage Attack Build since the damage it grants is very high. In this case, it provides a lot of Life on Stun. (Belt) Ryslatha's Coil - It's often the best option for any Physical Damage Attack Build since the damage it grants is very high. In this case, it provides a lot of Life on Stun. |
|
| (20-30)% increased Stun Duration on Enemies +(20-40) to Strength (30-40)% more Maximum Physical Attack Damage (40-30)% less Minimum Physical Attack Damage Adds 1 to (15-20) Physical Damage to Attacks +(80-100) to maximum Life Gain 50 Life when you Stun an Enemy |
|
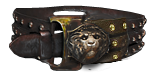 (Belt) The Magnate - Accumulating 400 Strength should make this Belt a very good option. It increases your Damage significantly but grants no Maximum Life. (Belt) The Magnate - Accumulating 400 Strength should make this Belt a very good option. It increases your Damage significantly but grants no Maximum Life. |
|
| (20-30)% increased Stun Duration on Enemies +(40-50) to Strength +(20-25)% to all Elemental Resistances 50% increased Flask Charges gained 10% chance to deal Double Damage while you have at least 200 Strength 5% chance to deal Triple Damage while you have at least 400 Strength |
|
 (Amulet) Astramentis - This Amulet is great for Attributes-stacking builds such as this one, it grants a lot of Strength and other Attributes which will be also needed to some extent. (Amulet) Astramentis - This Amulet is great for Attributes-stacking builds such as this one, it grants a lot of Strength and other Attributes which will be also needed to some extent. |
|
| +(10-16) to all Attributes +(80-100) to all Attributes -4 Physical Damage taken from Attack Hits |
|
 (Amulet) Ashes of the Stars - It can grant a lot of Quality to your Boneshatter, enhancing your build. It results in more Damage per Trauma. (Amulet) Ashes of the Stars - It can grant a lot of Quality to your Boneshatter, enhancing your build. It results in more Damage per Trauma. |
|
| +(10–16) to all Attributes (5–10)% increased Experience Gain of Gems (10–20)% increased Reservation Efficiency of Skills +1 to Level of all Skill Gems +(20–30)% to Quality of all Skill Gems |
|
 (Amulet) Rare Amulet - Rare Amulet is excellent too, it can increase many of your stats, but we recommend getting the most basic Resistances and Attributes in bulk. (Amulet) Rare Amulet - Rare Amulet is excellent too, it can increase many of your stats, but we recommend getting the most basic Resistances and Attributes in bulk. |
|
| Min. requirements: +50 to Maximum Life +50% to Elemental Resistances Attributes Optional affixes: increased Strength increased Attack Speed Accuracy increased Damage per 15 Strength increased Mana Reservation Efficiency of Skills Pride/Determination has increased Mana Reservation Efficiency |
|
| Recommended Anointments: Cruel Preparation Charisma Titanic Impacts Dismembering Panopticon |
|
 (Ring) Rare Rings - The most common slot to fix your Resistances, additionally you should look for Attributes, Maximum Life, and some offensive mods for more damage. (Ring) Rare Rings - The most common slot to fix your Resistances, additionally you should look for Attributes, Maximum Life, and some offensive mods for more damage. |
|
| Min. requirements: +60 to Maximum Life +80% to Elemental Resistances Attributes Non-Channelling Skills have -7 to Total Mana Cost (crafted) Optional affixes: Adds Physical Damage to Attacks Accuracy Rating increased Attack Speed |
|
 (Jewel) Rare Jewels - On your Rare Jewels look for Strength, a 7% increased Maximum Life, and some other modifiers, Elemental Resistances or Attack Speed are preferable. (Jewel) Rare Jewels - On your Rare Jewels look for Strength, a 7% increased Maximum Life, and some other modifiers, Elemental Resistances or Attack Speed are preferable. |
|
| Recommended passives: increased Maximum Life increased Attack Speed Elemental Resistances increased Global Physical Damage Attributes |
|
 (Jewel) Lethal Pride - It's used to upgrade your Notables in Range, the best Socket for that is near Stamina - three Notables can be affected by it. Look for increased Strength or Maximum Life. (Jewel) Lethal Pride - It's used to upgrade your Notables in Range, the best Socket for that is near Stamina - three Notables can be affected by it. Look for increased Strength or Maximum Life. |
|
| Commanded leadership over (10000-18000) warriors under (Akoya-Kaom-Rakiata) Passives in radius are Conquered by the Karui Historic |
|
 (Jewel) Watcher's Eye - Look for Pride modifiers on your Watcher's Eye, especially the one that improves the Impale effect. (Jewel) Watcher's Eye - Look for Pride modifiers on your Watcher's Eye, especially the one that improves the Impale effect. |
|
| (4-6)% increased maximum Energy Shield (4-6)% increased maximum Life (4-6)% increased maximum Mana <Two or Three random aura modifiers> Recommended Aura modifiers: Impales you inflict last 2 additional Hits while using Pride (40-60)% increased Attack Physical Damage while using Pride |
|
 (Jewel) Large Cluster Jewel - Overlord grants Fortify on Hit, Devastator can make enemies explode on Kill, and Martial Prowess is a lot of damage (Jewel) Large Cluster Jewel - Overlord grants Fortify on Hit, Devastator can make enemies explode on Kill, and Martial Prowess is a lot of damage |
|
| Recommended affixes: 1 Added Passive Skill is Overlord 1 Added Passive Skill is Devastator 1 Added Passive Skill is Martial Prowess 1 Added Passive Skill is Master the Fundamentals 1 Added Passive Skill is Battle-Hardened 1 Added Passive Skill is Force Multiplier 1 Added Passive Skill is Master the Fundamentals |
|
 (Jewel) Split Personality - If you're stacking Strength with the Pillar of the Caged God you have to venture up the skill tree for the staves nodes, it's quite a distance from the starting location and you may use it to your advantage by socketing split personality jewels in nearby sockets for more Strength. (Jewel) Split Personality - If you're stacking Strength with the Pillar of the Caged God you have to venture up the skill tree for the staves nodes, it's quite a distance from the starting location and you may use it to your advantage by socketing split personality jewels in nearby sockets for more Strength. |
|
| This Jewel's Socket has 25% increased effect per Allocated Passive Skill between it and your Class' starting location Recommended modifiers: +5 to Strength (obligatory) +40 to Accuracy Rating +5 to maximum Life |
|
 (Flask) Lion's Roar - It increases your Melee Physical Damage, Armour, and adds Knockback to your Melee Attacks. (Flask) Lion's Roar - It increases your Melee Physical Damage, Armour, and adds Knockback to your Melee Attacks. |
|
| +1500 to Armour Adds Knockback to Melee Attacks during Flask effect Knocks Back Enemies in an Area when you use a Flask 75% chance to cause Enemies to Flee on use (7-10)% more Melee Physical Damage during effect |
|
|
Other suggested Flasks:
|
|
    |
|
|
If you have any other build requests please leave that in the comments below. We are always open to suggestions and constructive feedback.
Pictures used in this article are the intellectual property of Grinding Gear Games.
