
Sunder Juggernaut Marauder 2H Build - Odealo's Crafty Guide
Sunder Juggernaut is one of the strongest Melee fighters in Path of Exile. Atziri and Shaper viable BuildSunder
Juggernaut build
Updated for Patch 3.16
The Best Crafty Guides by Odealo
Estimated budget: medium

| Guide notes |
| December 17, 2021 -Updated for Patch 3.16 |
Sunder Juggernaut is one of the most durable Melee builds in the Path of Exile. Extremely high defense combined with high damage allows you to clear all the endgame content. On top of that Sunder deals massive AoE damage in several smaller shockwaves making it very fast in terms of clear speed. Juggernaut, as opposed to other Ascendancy classes, provides excellent Physical Damage mitigation obtained from Endurance Charges, which lets you farm maps and Labyrinths with ease. Investing in end-game equipment like Atziri's Disfavour (or a similar DPS Rare Two-handed Axe) makes it possible to kill the hardest bosses in the game - the Shaper and the Atziri.
You can also find our other Path of Exile builds right over here Odealo's Crafty Guides - Full List
1. Gameplay
The range of Sunder’s seismic waves allows you to decide to fight either from melee or range, depending on the encounter. Thanks to Sunder's high range and Fist of War Support, you can easily position yourself far away from hard Bosses and time fully Exerted/Buffed Attacks to deal massive damage from a medium distance. The high defense will enable you to tank most of the hits in the game, which leads to very active and fast gameplay - dashing between packs and obliterating whole groups of monsters with Sunder's AoE Explosions.
|
|
|
|

2. Build's PROS & CONS
| PROS |
|
| CONS |
|
3. Leveling tips
Leveling as Marauder is one of the easiest in Path of Exile, due to a lot of Life and Strength nodes on the Passive Tree, which let you facetank most of the encounters while leveling. Sunder scales well not only in the endgame but also while leveling, which results in killing Bosses in no time. We recommend using Molten Strike early on and replacing it with Sunder as soon as you kill Merveil in Act 1. Preferably use one or rare Two-Handed Axe with the highest Physical DPS you can find.
Suggested leveling Gem setups:
| Molten Strike setup | |
 |
Molten Strike - one of the first available skills you will get as a quest reward after killing Hillock. It will do great until you reach the Sunder skill Gem |
 |
Added Fire Damage Support - great buff to your DPS, scaling well with Physical Damage |
 |
Ruthless Support - this will make your every 3rd hit much stronger, which helps a lot with killing bosses |
| Sunder setup | |
 |
Sunder - you will get Sunder as a quest reward after killing Merveil. Try to use(and level up) as many support Gems you plan to use later on with this setup. This always makes the transition to your final build much easier |
 |
Melee Physical Damage Support - it's an essential support Gem for Sunder. Buy it in act 2 as soon as you hit level 18 |
 |
Multistrike Support - the second most crucial support Gem that will increase your attack speed by a lot. Available to buy at level 38 or as a reward after killing Malachai |
|
Ruthless Support - combined with Multistrike is a great boost for your damage, especially versus boss encounters |
| Utility Gems | |
 |
Ancestral Warchief - this totem increases your melee damage and deals a lot of damage by itself, which might come in handy versus strong rares or bosses. You can buy it at level 28. You can link Maim, Faster Attacks, and Culling Strike support Gems to increase its damage even more |
 |
Punishment - definitely the best curse for this build, which grants you more melee damage and attack speed when you hit cursed enemies. You can start using it from level 24 |
 |
Herald of Ash - combined with Sunder’s seismic wave it will destroy packs of monsters in no time. It's great for leveling up, as it increases your clear speed significantly |
 |
Leap Slam - this movement skill, linked with Faster Attacks Support allows you to move through locations much faster |
Bandits:
We recommend helping all the Bandits for two additional Passive Points
Leveling Skill Trees:
35 Points Skill Tree
Priorities: 1) Born to Fight 2) Graceful Assault 3) Golem's Blood
68 Points Skill Tree
Priorities: 1) Constitution 2) Slaughter 3) Kinetic Impacts 4) Vigour and Stamina
Recommended leveling items:
 Blackheart - great Phys. DPS leveling Rings. Available as soon as level one will grant you amazing DPS bonuses. It's also very cheap for such a great leveling weapon, and it shouldn't cost more than a Chaos Orb Blackheart - great Phys. DPS leveling Rings. Available as soon as level one will grant you amazing DPS bonuses. It's also very cheap for such a great leveling weapon, and it shouldn't cost more than a Chaos Orb |
|
| Adds 1 to 4 Physical Damage to Attacks 5% increased Physical Damage Adds 1 to 3 Chaos Damage to Attacks +(20-30) to maximum Life (2-4) Life Regenerated per second 10% chance to Cause Monsters to Flee |
|
 Belt of the Deceiver - mighty belt, provides Life, Resistances and Intimidate, which increases damage monsters receive by 10%. Being used in endgame build as well Belt of the Deceiver - mighty belt, provides Life, Resistances and Intimidate, which increases damage monsters receive by 10%. Being used in endgame build as well |
|
| (25-35) to Strength (15-25)% increased Physical Damage You take 30% reduced Extra Damage from Critical Strikes +(30-40) to maximum Life +(10-15)% to all Elemental Resistances Nearby Enemies are Intimidated |
|
|
|
|
| Socketed Gems are Supported by Level 20 Increased Area of Effect (120-160)% increased Physical Damage +10 to Strength +(50-80) to Accuracy Rating +10 Mana gained on Kill +2 to Weapon range |
|
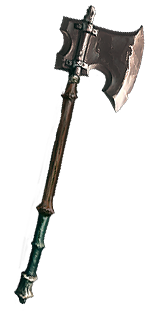
 The Wideswing - the first unique 2-handed Axe you can start using since level 18. It’s recommended to socket Sunder into it which result in increased AoE
|
|
|
| +1 to Level of SocketedStrength Gems (80-100)% increased Physical Damage Adds 5 to 10 Physical Damage Adds (30-40) to (70-80) Physical Damage +(15-30) to Strength Gain 70% of Physical Damage as Extra Fire Damage Culling Strike |
|
 The Cauteriser - this weapon is recommended to use since level 40. Additional fire damage from one of its affixes will increase your damage by a lot
|
|
|
| (160-220)% increased Physical Damage Adds (16-21) to (32-38) Fire Damage +(150-250) to Accuracy Rating +20 Life gained on Kill Culling Strike |
|
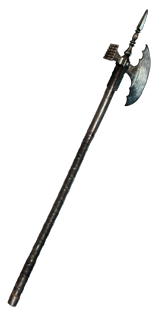
 Kaom’s Primacy - it’s one of the highest physical damage weapons for leveling, available from level 58. This weapon should carry you through most of the white and yellow maps up to the point where you can use Atziri’sDisfavour
4. Final Skill Tree, Ascendancy Points, and Pantheon
Final Skill Tree:
111 Points Final Skill Tree (doesn't include Cluster Jewels)
119 Points Path of Building(PoB) link
Ascendancy points:
Preferably in that order:
- Undeniable
- Unstoppable
- Unflinching
- Unbreakable
Pantheon:
Major God - there are 2 choices depending on whether you are clearing Maps or want to challenge endgame Bosses
For clearing Maps:
Soul of Lunaris 1% additional Physical Damage Reduction for each nearby Enemy, up to 8%; 1% increased Movement Speed for each nearby Enemy, up to 8%
For single-target/Bosses:
Soul of Solaris 6% Physical Damage Reduction if there is only one nearby Enemy; 20% chance to take 50% less Area Damage from Hits
Minor God: Soul of Gruthkul 1% additional Physical Damage Reduction for each Hit you've taken Recently up to a maximum of 5%
5. Final Gems links
| [DPS] Sunder setup (in Body Armour) |
|
 |
Sunder - your main DPS skill. It grants terrific AoE and decent single target DPS with several waves following up your initial Attack |
 |
Melee Physical Damage Support - the most important support Gem for increasing your DPS which also happens to have an Awakened version |
 |
Fortify Support - grants high bonus Melee Damage and the Fortify buff at all times |
 |
Brutality Support - increases Physical Damage but makes Supported Attacks unable to deal Elemental or Chaos Damage. One of the most important Support Gems here. Also has an Awakened variant |
 |
Fist of War Support - a mandatory Support Gem for this setup which was introduced in Patch 3.11 - it causes your Attack when off-cooldown to deal massive damage, which combined with Exert makes your initial Hit one-shot most of the enemies |
 |
Pulverise Support - increases Area Damage at the cost of reducing your Attack Speed. Again, you aim to maximize your upfront damage, not Attack Speed |
| [AURAS] Various Auras (while Socketed in Atziri's Disfavour they will Reserve less Mana) |
|
 |
Blood and Sand - allows you to use the Blood Stance which will greatly increase your Area Damage |
 |
Flesh and Stone - amplifies the bonuses granted by Blood/Sand Stances, increasing your damage further while in Blood Stance |
 |
Pride - greatly increases Physical Damage taken by nearby enemies |
 |
Maim Support - increases the increase to damage taken by enemies Maimed by Flesh and Stone |
 |
War Banner - increases Physical Damage taken by nearby enemies and grants Adrenaline for a short duration when you place your banner, greatly increasing your damage |
 |
Enlighten Support - reduces Mana Reservation Cost of all linked Auras. If you socket this Gem in Atziri's Disfavour, you are left with an even higher Mana Pool |
| [UTILITY] Ancestral Warchief/Blood Rage | |
 |
Ancestral Warchief - summons a Totem which increases your Melee Damage |
 |
Blood Rage - increases your Attack Speed, Life Leech, and what's most important, generates Frenzy Charges to grant you MORE damage dealt. If you have trouble stacking up Dexterity, you can use a lower level Blood Rage Gem |
 |
Cast when Damage Taken Support - auto-cast Blood Rage for you whenever you take a certain amount of damage |
 |
Increased Duration Support |
| [UTILITY] Ice Golem and Molten Shell | |
|
Cast when Damage Taken Support - auto-cast supported spells after you take a certain amount of damage |
 |
Summon Ice Golem - increases your Accuracy Rating allowing you to reach 100% Chance to Hit without Resolute Technique. If you have it anyway, you can go for Lightning or Flame Golem which may grant higher damage bonuses |
 |
Molten Shell - when triggered grants increased Armour and a protective shield that absorbs some of the damage |
|
Increased Duration Support |
| [UTILITY] War Cries/Dash | |
 |
Intimidating Cry - doubles your next Attack's damage and Intimidates nearby enemies for even higher damage taken by them |
 |
Seismic Cry - greatly increases your AoE and Damage |
 |
Dash - mobility Skill recommended for this build. Take Leap Slam if your Warcries can't Exert Travel Skills (Warcry Mastery). |
 |
Second Wind Support - increases the number of charges your War Cries and Dash has, and increases their cooldown recovery speed |
|
|
5. Gear Setup
Sunder Juggernaut is an extremely flexible build. It can be entirely viable even with a very tight budget. While our list of recommended items will include some more expensive gear options, this can always be replaced with cheaper alternatives for the leveling/early mapping phase. If you are looking for a way to get the cheap PoE Currency required to complete this build, we are delighted to invite you to visit the market section on our website.
Our recommended items will:
- Cap your resistances
- Give you enough DPS/Life to start mapping successfully
|
Stat priorities on items:
|
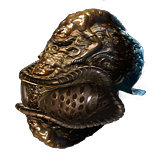 (Helmet) Abyssus - the BiS Helmet for this build. It grants an insane amount of extra DPS and as a Juggernaut, you should still easily reach 90% Physical Damage mitigation (Helmet) Abyssus - the BiS Helmet for this build. It grants an insane amount of extra DPS and as a Juggernaut, you should still easily reach 90% Physical Damage mitigation |
|
| +(20-25) to all Attributes Adds 40 to 60 Physical Damage to Attacks +(100-125)% to Melee Critical Strike Multiplier (100-120)% increased Armour (40-50)% increased Physical Damage taken |
|
| Helmet enchantment: Sunder has 20% reduced delay between Areas in the Wave |
|
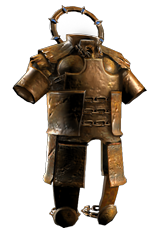
 (Body Armour) Belly of the Beast - a very solid and inexpensive option for the Body Armour slot. It grants an insane amount of Life, but sadly no bonuses to your Damage (Body Armour) Belly of the Beast - a very solid and inexpensive option for the Body Armour slot. It grants an insane amount of Life, but sadly no bonuses to your Damage |
|
| Armour: (685 to 812) (150-200)% increased Armour (30-40)% increased maximum Life +(10-15)% to all Elemental Resistances 50% increased Flask Life Recovery rate Extra gore |
|
 (Body Armour) Rare Body Armour - a Crafted Strength-based Armour is the best choice. Aim to have high Armour Rating for extra defenses (Body Armour) Rare Body Armour - a Crafted Strength-based Armour is the best choice. Aim to have high Armour Rating for extra defenses |
|
| Min. requirements: 100 maximum Life 8% increased maximum Life Optional affixes: High Armour Rating Elemental Resistances Socketed Gems have -15 to Total Mana Cost Enemies you Kill have a chance to Explode, dealing a tenth of their Maximum Life as Physical Damage |
|
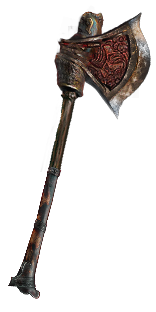
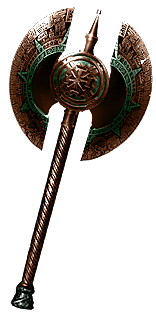 (Weapon) Atziri’s Disfavour - this Weapon has amazing base Physical Damage and increases the level of Supported Socket Gems giving you either higher Sunder DPS or more Mana Pool by increasing the level of your Enlighten Support (Weapon) Atziri’s Disfavour - this Weapon has amazing base Physical Damage and increases the level of Supported Socket Gems giving you either higher Sunder DPS or more Mana Pool by increasing the level of your Enlighten Support |
|
| 25% chance to Maim on Hit +2 to Level of Socketed Support Gems Adds (205-220) to (250-270) Physical Damage (12-16)% increased Attack Speed 25% chance to cause Bleeding on Hit +2 to Weapon Range |
|
 (Boots) Rare Boots - recommended choice, get pair with the highest maximum Life bonus you can afford (Boots) Rare Boots - recommended choice, get pair with the highest maximum Life bonus you can afford |
|
| Min. requirements: 80 maximum Life 25% increased Movement Speed 60% Total Elemental Resistances Min. requirements: +1 to Maximum Endurance Charges |
|
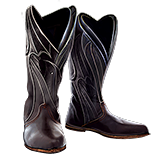 (Boots) Death's Door - one of the best picks for Juggernaut. They grant Bleeding Immunity and additional Endurance Charge for extra defenses and DPS (Boots) Death's Door - one of the best picks for Juggernaut. They grant Bleeding Immunity and additional Endurance Charge for extra defenses and DPS |
|
| +(20-40) to Strength 200% increased Armour and Energy Shield +(10-15)% to all Elemental Resistances 25% increased Movement Speed +1 to Maximum Endurance Charges 50% increased Elemental Ailment Duration on you Bleeding cannot be inflicted on you |
|
| Boot enchantment: 16% increased Attack and Cast Speed if you've Killed Recently |
|
 (Belt) Rare Belt - again, we try to grab one with the highest maximum Life and Elemental Resistances (Belt) Rare Belt - again, we try to grab one with the highest maximum Life and Elemental Resistances |
|
| Min. requirements: 70 maximum Life 75% Total Elemental Resistances Optional affixes: increased Physical Damage |
|
 (Belt) Belt of the Deceiver - despite being very cheap, it’s an extremely powerful belt. It provides extra Life, Physical Damage, and Intimidates enemies, which is a great DPS buff against end-game Bosses (Belt) Belt of the Deceiver - despite being very cheap, it’s an extremely powerful belt. It provides extra Life, Physical Damage, and Intimidates enemies, which is a great DPS buff against end-game Bosses |
|
| (25-35) to Strength (15-25)% increased Physical Damage You take 30% reduced Extra Damage from Critical Strikes +(30-40) to maximum Life +(10-15)% to all Elemental Resistances Nearby Enemies are Intimidated |
|
 (Amulet) Carnage Heart - An extremely powerful Amulet that grants high DPS bonuses when you are leeching. At the same time, it's quite cheap and accessible early in the game (Amulet) Carnage Heart - An extremely powerful Amulet that grants high DPS bonuses when you are leeching. At the same time, it's quite cheap and accessible early in the game |
|
| +(10-16) to all Attributes +(20-40) to all Attributes +(10-20)% to all Elemental Resistances (1.2-2)% of Physical Attack Damage Leeched as Life 50% increased total Recovery per second from Life Leech (30-40)% increased Damage while Leeching Extra gore |
|
 (Amulet) Rare Amulet - the BiS slot option. Can provide high Attribute bonuses which allow you to focus maximum DPS bonuses on other gear slots (Amulet) Rare Amulet - the BiS slot option. Can provide high Attribute bonuses which allow you to focus maximum DPS bonuses on other gear slots |
|
| Min. requirements: 60 maximum Life Adds min. 9 Physical Damage to Attacks 40 Dexterity 40 Intelligence Optional affixes: Elemental Resistances |
|
| Recommended Anointments: Cleaving Martial Experience Discipline and Training |
|
 (Ring) Rare Rings - you should aim to get one Ring with Vulnerability Curse or you will need to find an alternative way to apply it (Ring) Rare Rings - you should aim to get one Ring with Vulnerability Curse or you will need to find an alternative way to apply it |
|
| Min. requirements: 60 maximum Life 75% Total Elemental Resistances Adds min. 14 Physical Damage to Attacks Optional affixes: Curse enemies with level 5 Vulnerability on Hit |
|
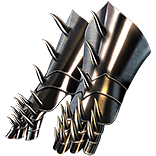 (Gloves) Rare Gloves - mainly for defensive stats and possibly some Added Physical Damage to Attacks (Gloves) Rare Gloves - mainly for defensive stats and possibly some Added Physical Damage to Attacks |
|
| Min. requirements: Added Physical Damage to Attacks 60 maximum Life 25% Fire resistance 25% Lightning resistance 25% Cold resistance Optional affixes: increased Melee Damage |
|
 (Jewels) Large Cluster Jewel - getting a Large Cluster Jewel is the easiest way to get decent Life and Mana Leech in this build (Jewels) Large Cluster Jewel - getting a Large Cluster Jewel is the easiest way to get decent Life and Mana Leech in this build |
|
| Recommended affixes: 2 Added Passive Skills are Jewel Sockets 1 Added Passive Skill is Feed the Fury 1 Added Passive Skill is Fuel the Fight Optional affixes: 1 Added Passive Skill is Smite the Weak 1 Added Passive Skill is Heavy Hitter |
|
 (Jewels) Rare Jewels - these should provide extra Life and damage bonuses (Jewels) Rare Jewels - these should provide extra Life and damage bonuses |
|
| Recommended affixes: increased maximum Life increased Physical/Area/Damage with Axes Optional affixes: Attributes Elemental Resistances |
|
 (Jewels) Rare Abyss Jewel - at least one is recommended, which should grant you a chance to gain the Onslaught buff (Jewels) Rare Abyss Jewel - at least one is recommended, which should grant you a chance to gain the Onslaught buff |
|
| Recommended affixes: maximum Life added Physical Damage to Attacks chance to gain Onslaught for 4 seconds on kill |
|
 (Flask) Lion's Roar - great defensive and offensive utility Flask that is moderately cheap (Flask) Lion's Roar - great defensive and offensive utility Flask that is moderately cheap |
|
| Adds Knockback to Melee Attacks during Flask effect 75% chance to cause Enemies to Flee on use (20-25)% more Melee Physical Damage during effect Knocks Back Enemies in an Area when you use a Flask |
|
|
Other suggested Flasks:
|
|
    |
|
|
If you have any other build requests, please leave that in the comments below.
Pictures used in this article are the intellectual property of Grinding Gear Games.
