
Venom Gyre Deadeye Build
Venom Gyre build for a Deadeye that uses Trinity Support with tons of added Elemental DamageVenom Gyre
Deadeye Build
Updated for Patch 3.22
The Best Crafty Guides by Odealo
| Guide notes |
| December 23, 2022 -Build created November 1, 2023 -Updated for Patch 3.22 |
| Build overview | |||
| Tags: [RANGED] [ELEMENTAL] [LIFE] [STARTER] | |||
|
Budget: Defenses: |
|
Boss DPS: AoE: |
|
Venom Gyre is an increasingly popular Skill - a Projectile Attack to be used with Claws or Daggers that would be simple and straightforward if not for some unique properties. Fired projectiles will always return to the character, piercing all enemies on the way back, and can be caught and stored. You can once more fire the stored projectiles by using a separate movement ability - Whirling Blades. Projectiles fired this way cannot interact with enemies anymore by forking or returning, but can all hit one enemy no matter the quantity. It creates a powerful shotgun effect that allows one to quickly kill bosses by dashing through them a couple of times. You can store up to 30 caught projectiles and have a 40% chance to keep these after using Whirling Blades. This build is one for a Deadeye class due to the obvious synergies with these types of Attacks granted by Richochet, Endless Munitions, and more broad upgrades like Gathering Winds and Focal Point.
Here we don't use the Crystallised Omniscience Amulet because building around it, and the amulet itself, are extremely expensive. It alters the items and skill tree completely, but skill setups and gameplay remain more or less untouched. Despite Venom Gyre having a lot of its base Physical Damage Converted to Chaos, none of these types of damage will be of use. Instead, the build focuses more on Elemental Damage gained via flat, added Fire, Lightning, and Cold Damage that can be found on a Weapon, Jewels, and Jewelry. It has a high Critical Strike Chance with Secrets of Suffering Keystone to Sap, Scorch, and Brittle opponents. For defenses, it utilizes Spell Suppression, Armour, Evasion, and Block Chance on top of around 4 to 5k of Maximum Life. It's not very tanky, but durable enough to withstand most of the attacks. It can be played as a started build.
You can also check our other Path of Exile builds: Odealo's Crafty Guides - Full List
1. Gameplay
Use Venom Gyre to clear maps and deal with bosses, with Fork Support you will always create tons of Projectiles and it is guaranteed to always have a significant amount of them stored up, so frequent usage of Whirling Blades is encouraged. For boss fights use Whirling Blades two to three times in point-blank range, fire Venom Gyre a couple of times to store them again, and repeat the process. Link Whirling Blades with Cast on Critical Strike, Flame Wall, and Tornado. For other offensive buffs, you can use Ancestral Protector, Berserk, and Blood Rage. To apply exposure use Hydrosphere. A Curse we recommend is Sniper's Mark. For Auras - Precision, Determination, and Wrath.
|
|
|
|

2. Build's PROS & CONS
| PROS |
|
| CONS |
|
3. Leveling tips
Venom Gyre requires level 12, before that use Cobra Lash, it's the most similar Skill. It's actually more comfortable to level up with, but that's arguable. Venom Gyre will be good too but bear in mind that you will rely more on Physical and Chaos Damage at first, that is before you acquire a good Claw. As the name of the Skill suggests, we recommend making it a Poison Build. Invest your points into one Poison Cluster, and with Skill Gems, you should be able to have a 100% Chance to Poison. You can then specialize in Claw Damage, Attack Speed, Maximum Life, and Evasion, and so when the time comes to switch to Elemental Damage, you won't need to revert much of your Skill Points. Venom Gyre has Converted 60% of Physical Damage to Chaos, the rest can be Converted via Chaos Mastery.
Suggested leveling Gem setups:
| Venom Gyre setup | |
 |
Venom Gyre - Venom Gyre can be used at level 12, but we recommend making it deal Physical/Poison Damage at the start. |
 |
Chance to Poison Support - Increases Chance to Poison and adds Chaos Damage to Attacks. |
 |
Volley Support - Makes you fire extra Projectile at where you're aiming. Upgrade it later with  Greater Volley Support. Greater Volley Support. |
 |
Vicious Projectiles Support - Lowers Attacks Speed, but grants more Physical and Chaos Damage with Projectiles. |
 |
Void Manipulation Support - You won't be able to deal any Elemental Damage, but your Chaos Damage is greatly increased. |
 |
Withering Touch Support - Attacks will have a chance to apply Wither debuff lowering Chaos Resistance. |
| Utility Gems | |
 |
Whirling Blades - Use it with Venom Gyre to release a bunch of stored Projectiles. |
 |
Clarity - Regenerates Mana, which might be helpful if you're using Tabula Rasa too. |
 |
Herald of Agony - Provides you with an additional chance to Poison. |
 |
Despair - Lowers Chaos Resistance of your opponents. Alternatively, use  Sniper's Mark with Sniper's Mark with  Mark on Hit Support. Mark on Hit Support. |
 |
Steelskin - The most basic Guard Spell that stops Bleeding and mitigates damage. |
Bandits:
We recommend killing all the Bandits for two additional Passive Points
Leveling Skill Trees:
27 Points Skill Tree
Start with Chaos Damage, Chance to Poison, and Maximum Life
66 Points Skill Tree
Go get the Point Blank Keystone, allocate Claw Cluster, more Maximum Life, some Spell Suppression, and Life/Mana Leech
Recommended leveling items:
 Mortem Morsu - Level 34 Claw with a high chance to Poison, base Physical Damage, and Attack Speed. Mortem Morsu - Level 34 Claw with a high chance to Poison, base Physical Damage, and Attack Speed. |
|
| Grants 20 Life per Enemy Hit (75-100)% increased Physical Damage 20% increased Attack Speed 25% increased Critical Strike Chance +40% to Global Critical Strike Multiplier (10-20)% of Physical Damage Converted to Chaos Damage 25% reduced Enemy Stun Threshold with this Weapon 60% chance to Poison on Hit |
|
 Goldrim - The best leveling Helmet to keep your Resistances high. You can use it at level 1. Goldrim - The best leveling Helmet to keep your Resistances high. You can use it at level 1. |
|
| +(30-50) to Evasion Rating 10% increased Rarity of Items found +(30-40)% to all Elemental Resistances Reflects 4 Physical Damage to Melee Attackers Level Requirement reduced by 100 (Hidden) |
|
 Tabula Rasa - Use Tabula Rasa Body Armour to gain six white sockets which are already linked. Tabula Rasa - Use Tabula Rasa Body Armour to gain six white sockets which are already linked. |
|
| Item has no level requirement and Energy Shield (Hidden) Item has 6 White Sockets and is fully linked (Hidden) |
|
|
|
|
| +(20-30) to Dexterity +(20-30) to Strength +100 to Accuracy Rating 30% increased Projectile Speed 10% increased Movement Speed 30% increased Projectile Damage |
|
 Blackheart - Adds tons of Chaos Damage to Attacks, and can be worn as soon as level 1. Blackheart - Adds tons of Chaos Damage to Attacks, and can be worn as soon as level 1. |
|
| Adds 1 to 4 Physical Damage to Attacks Adds (10-15) to (20-25) Chaos Damage to Attacks Regenerate (10-15) Life per second 10% chance to Cause Monsters to Flee |
|
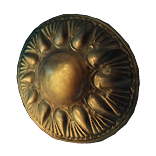
 Karui Ward - Quite a powerful and extremely cheap Amulet, all of the modifiers are very useful.
4. Final Skill Tree, Ascendancy Points, and Pantheon
Final Skill Tree:
115 Points Final Skill Tree(does not include Jewels)
123 Points Path of Building (PoB) link
Ascendancy points:
Preferably in that order:
- Ricochet
- Gathering Winds
- Endless Munitions
- Focal Point
Pantheon:
Major God: Soul of Lunaris: 1% additional Physical Damage Reduction for each nearby Enemy, up to 8%; 1% increased Movement Speed for each nearby Enemy, up to 8%
Minor God: Soul of Garukhan: 60% reduced Effect of Shock on you
5. Final Gems links
| [DPS] Venom Gyre | |
|
Venom Gyre - The main Attack Skill. It fires Projectiles later to be caught, stored, and released again with Whirling Blades. It will deal almost exclusively Elemental Damage. |
 |
Nightblade Support - Increases Critical Strike Chance, grants Elusive buff, and increases Critical Strike Multiplier. |
 |
Fork Support - Projectiles Fork on Hit, doubling the amount of returning Projectiles. Get the awakened version for one more Fork. |
 |
Trinity Support - You should be able to create Resonance stacks by dealing different types of Elemental Damage, it increases your Elemental Damage and Elemental Penetration. |
 |
Elemental Damage with Attacks Support - Increases Elemental Damage with Attacks. |
 |
Inspiration Support - Lowers Mana Cost, increases Critical Strike Chance, and Elemental Damage. |
| [UTILITY] Auras setup | |
 |
Determination - Adds and Increases Armour, a fundamental defensive layer. |
 |
Precision - Adds Accuracy Rating and Increases Critical Strike Chance. |
 |
Wrath - Adds additional Lightning Damage to Attack to increase damage and get Trinity's Resonances. |
 |
Enlighten Support - Increases Mana Reservation Efficiency for linked Skills. |
| [UTILITY] Mark/Exposure setup | |
|
Sniper's Mark - Increases Projectile Damage and Splits Projectile on Impact creating even more Projectiles. |
|
Mark on Hit Support - Sniper's Mark is applied automatically on Hit against thought opponents. |
 |
Hydrosphere - Exposes enemy to Cold and Lightning Damage reducing their Resistance, you can also Hit the Orb to Fork a Projectile. |
 |
Lifetap Support - Linked Skills cost Life instead of Mana. |
| [MOBILITY] Whirling Blades | |
 |
Tornado - Another Orb-type Spell that you can Hit. It hinders enemies and deals some Reflected Damage. |
 |
Flame Wall - Projectiles that pass through Flame Wall deal additional Fire Damage. |
| Cast on Critical Strike - Tornado and Flame Wall will be cast on Critical Strike with Whirling Blades. | |
|
Whirling Blades - Movement Attack you can use with Claws or Dagger. It releases stored Venom Gyre Projectiles. |
| [UTILITY] Berserk/Blood Rage setup | |
 |
Berserk - You should be able to generate Rage with your Gloves - spend it on Berserk for a short-lasting bonus to damage and defense. |
 |
Enhance Support - Increases the Quality of active Skills. |
 |
Blood Rage - Grants Frenzy Charges on Kill, Life Leech, and bonus to Attack Speed. |
| [UTILITY] Ancestral Protector | |
 |
Ancestral Protector - You can deploy this Totem for an extra Attack Speed. |
| [UTILITY] Utility Gems | |
 |
Molten Shell - A Guard Spell that absorbs a portion of incoming Hit Damage for some time. |
|
|
5. Gear Setup
The most efficient setup consists of Rare Items, but there are quite a few popular Uniques you can use too. It makes the build easy to assemble, but expensive to min-max. The most important will be added Elemental Damage and Critical Strike modifiers, most commonly found on a Weapon, Jewels, and Jewelry. You will also need some extra Strength and Intelligence for Gems and Gear. For defensive stats seek Armour, Maximum Life, Resistances, and Spell Suppression Chance. You should be able to achieve a 100% Critical Strike Chance eventually. Aim for around 5000 Maximum Life, getting more would be too difficult.
Our recommended items will:
- Cap your resistances
- Give you enough DPS/Life to start mapping
|
Stat priorities on items:
|
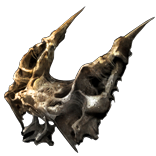
 (Helmet) Voll's Vision - Voll's Vision is only good when all of your Items are not Corrupted, and if you're wearing Kaom's Spirit Gloves to generate Rage. Otherwise, it's quite bad. (Helmet) Voll's Vision - Voll's Vision is only good when all of your Items are not Corrupted, and if you're wearing Kaom's Spirit Gloves to generate Rage. Otherwise, it's quite bad. |
|
| +(260-300) to Armour +(26-32)% to Fire Resistance +(8-16)% to Chaos Resistance 20% increased Light Radius (8-12)% increased Maximum Life if no Equipped Items are Corrupted Regenerate 400 Life per second if no Equipped Items are Corrupted |
|
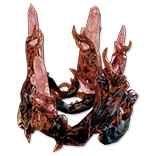 (Helmet) Rare Helmet - We recommend the Blizzard Crown for Added Cold Damage. Modifiers should get you more Life, Resistances, Mana Reservation, Attributes, Spell Suppression, or Accuracy. (Helmet) Rare Helmet - We recommend the Blizzard Crown for Added Cold Damage. Modifiers should get you more Life, Resistances, Mana Reservation, Attributes, Spell Suppression, or Accuracy. |
|
| Min. requirements: 70 Maximum Life 70% Total Elemental Resistances around 10% increased Mana Reservation Efficiency of Skills Optional affixes: Armour and Evasion Attributes Spell Suppression Accuracy Rating chance to gain a Power Charge on Kill |
|
| Helmet enchantments: Venom Gyre deals 40% increased Damage Ancestral Protector Totem grants 18% increased Attack Speed while Active Venom Gyre has a 25% chance to keep caught Projectiles fired by using Whirling Blades |
|
 (Weapon) Rare Claw - It can be very expensive. You will need a Claw with a lot of added Fire, Cold, and Lightning Damage, some Attack Speed, and Critical Strike modifiers if your budget allows you for it. (Weapon) Rare Claw - It can be very expensive. You will need a Claw with a lot of added Fire, Cold, and Lightning Damage, some Attack Speed, and Critical Strike modifiers if your budget allows you for it. |
|
| Recommended affixes: adds Fire Damage adds Cold Damage adds Lightning Damage increased Attack Speed increased Critical Strike Chance increased Critical Strike Multiplier Attacks with this Weapon Penetrate #% Elemental Resistances Accuracy Rating |
|
 (Shield) Rare Shield - Check for Life, Resistances, Attack Speed, Accuracy, Attributes, and Spell Suppression Chance - the qualities of a good Shield. (Shield) Rare Shield - Check for Life, Resistances, Attack Speed, Accuracy, Attributes, and Spell Suppression Chance - the qualities of a good Shield. |
|
| Min. requirements: +70 to maximum Life 50% increased Evasion Rating +50% to Elemental Resistances Optional affixes: Chance to deal Double Damage increased Attack Speed Accuracy Rating Spell Suppression Chance |
|
 (Body Armour) Rare Body Armour - Maximum Life, Resistances, Spell Suppression, and Extra Critical Strike Chance are the best modifiers to seek on a Body Armour. (Body Armour) Rare Body Armour - Maximum Life, Resistances, Spell Suppression, and Extra Critical Strike Chance are the best modifiers to seek on a Body Armour. |
|
| Min. requirements: 70 Maximum Life 70% Total Elemental Resistances Attacks have +1% to Critical Strike Chance Optional affixes: Armour and Evasion Attributes Chance to Suppress Spell Damage increased effect of Non-Curse Auras from your Skills You can apply an additional Curse Socketed Attacks have -15 to Total Mana Cost |
|
 (Body Armour) The Brass Dome - Elemental Resistances and Armour might be a weak spot of the build, if that's the case, get The Brass Dome. (Body Armour) The Brass Dome - Elemental Resistances and Armour might be a weak spot of the build, if that's the case, get The Brass Dome. |
|
| (350-400)% increased Armour +(1-5)% to all maximum Elemental Resistances Strength provides no bonus to Maximum Life Take no Extra Damage from Critical Strikes |
|
 (Boots) Rare Boots - A basic pair of boots with Life, Resistances, Movement Speed, and some Attributes or Spell Suppression will be good. You don't need the Elusive or Tailwind buffs. (Boots) Rare Boots - A basic pair of boots with Life, Resistances, Movement Speed, and some Attributes or Spell Suppression will be good. You don't need the Elusive or Tailwind buffs. |
|
| Min. requirements: 70 Maximum Life 70% Total Elemental Resistances 30% increased Movement Speed Optional affixes: chance to gain Onslaught for 4 seconds on Kill Freeze and Chill immunity chance to Suppress Spell Damage Attributes |
|
 (Boots) Dawnstrider - If you don't need Resistances, These boots are an excellent option to use alongside Ancestral Protector. (Boots) Dawnstrider - If you don't need Resistances, These boots are an excellent option to use alongside Ancestral Protector. |
|
| +(80–100) to maximum Life 30% increased Movement Speed 100% increased Effect of Buffs your Ancestor Totems grant while Active Buffs from Active Ancestor Totems Linger for 4 seconds Maximum 1 Buff from an Active Ancestor Totem at a time |
|
 (Gloves) Rare Gloves - Gloves are mostly used for Added Elemental Damage, Accuracy, and Attack Speed. You should also upgrade your Rare Gloves with an Eldritch Implicit to generate Rage with Hits. (Gloves) Rare Gloves - Gloves are mostly used for Added Elemental Damage, Accuracy, and Attack Speed. You should also upgrade your Rare Gloves with an Eldritch Implicit to generate Rage with Hits. |
|
| Min. requirements: 70 Maximum Life +70% to Elemental Resistances Optional affixes: Accuracy Rating Attack Speed Adds Cold/Fire/Lightning Damage if you've dealt a Critical Strike Recently |
|
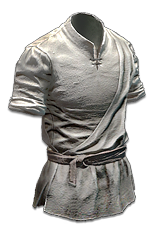
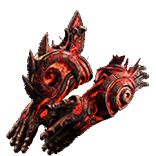 (Gloves) Kaom's Spirit - If you have high Life Regeneration use these Gloves to generate around 5 Rage a second. These also have some Maximum Life and Fire Resistance. (Gloves) Kaom's Spirit - If you have high Life Regeneration use these Gloves to generate around 5 Rage a second. These also have some Maximum Life and Fire Resistance. |
|
| +(50-70) to maximum Life +(20-30)% to Fire Resistance (0.3-0.5)% of Physical Attack Damage Leeched as Life Life Recovery from Regeneration is not applied Regenerate 1 Rage per second for every 100 Life Recovery per second from Regeneration |
|
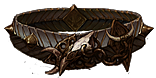 (Belt) Immortal Flesh - This Belt can massively increase your Life Regeneration and Maximum Life, but it only outclasses a good Rare Belt if you're using the Life Regeneration for Rage with Kaom's Spirit Gloves. (Belt) Immortal Flesh - This Belt can massively increase your Life Regeneration and Maximum Life, but it only outclasses a good Rare Belt if you're using the Life Regeneration for Rage with Kaom's Spirit Gloves. |
|
| +(25-40) to maximum Life +(75-100) to maximum Life Regenerate (200-350) Life per second Regenerate (8-10) Mana per second -(25-15)% to all Elemental Resistances -(50-40) Physical Damage taken from Attack Hits 40% increased Armour while not Ignited, Frozen or Shocked |
|
 (Belt) Rare Belt - Rare Belt Like Stygian Vise can get you tons of Life, Resistances, Strength, and increase Elemental Damage with Attacks. (Belt) Rare Belt - Rare Belt Like Stygian Vise can get you tons of Life, Resistances, Strength, and increase Elemental Damage with Attacks. |
|
| Min. requirements: 90 Maximum Life +90% to Elemental Resistances 40% increased Elemental Damage with Attack Skills Optional affixes: Strength increased maximum Life increased Flask Effect Duration |
|
 (Amulet) Rare Amulet - On an Amulet seek modifiers for Added Elemental Damage, Critical Strike mods, and some Maximum Life. You can also stumble upon some rare mods for an increased Mana Reservation Efficiency of your Auras. (Amulet) Rare Amulet - On an Amulet seek modifiers for Added Elemental Damage, Critical Strike mods, and some Maximum Life. You can also stumble upon some rare mods for an increased Mana Reservation Efficiency of your Auras. |
|
| Min. requirements: 60 maximum Life Critical Strike Modifiers Added Elemental Damage to Attacks Optional affixes: Elemental Resistances Accuracy Rating Attributes Chaos Resistance Wrath has (40–50)% increased Mana Reservation Efficiency Determination has (40–50)% increased Mana Reservation Efficiency |
|
| Recommended Anointments: Sovereignty Claws of the Falcon |
|
 (Ring) Rare Ring - Besides Life and Resistances, seek Added Elemental Damage to Attacks, Accuracy, and Attributes. Opal, Vermilion, Two-stone, Amethyst, or Diamond Rings are good bases. (Ring) Rare Ring - Besides Life and Resistances, seek Added Elemental Damage to Attacks, Accuracy, and Attributes. Opal, Vermilion, Two-stone, Amethyst, or Diamond Rings are good bases. |
|
| Min. requirements: 50 maximum Life 30% Total Elemental Resistances Adds Elemental Damage to Attacks Optional affixes: increased Elemental Damage with Attack Skills increased Attack Speed Accuracy Rating Attributes Non-Channelling Skills have -# to Total Mana Cost |
|
 (Ring) Mark of the Elder - If your other Ring is Shaper-influenced, go for Mark of the Elder if you value Cold Damage. It increases your Maximum Life and Elemental Damage significantly. (Ring) Mark of the Elder - If your other Ring is Shaper-influenced, go for Mark of the Elder if you value Cold Damage. It increases your Maximum Life and Elemental Damage significantly. |
|
| Adds (3-4) to (10-14) Physical Damage to Attacks 20% chance to Trigger Level 20 Tentacle Whip on Kill Adds (26-32) to (42-48) Cold Damage to Attacks (6-10)% increased maximum Energy Shield (6-10)% increased maximum Life (60-80)% increased Attack Damage if your other Ring is a Shaper Item Cannot be Stunned by Attacks if your other Ring is an Elder Item |
|
 (Jewels) Rare Jewels - Maximum Life and Mana Reservation Efficiency are the top priority. Later seek Resistances, Attributes, Attack Speed, and Critical Strike modifiers. (Jewels) Rare Jewels - Maximum Life and Mana Reservation Efficiency are the top priority. Later seek Resistances, Attributes, Attack Speed, and Critical Strike modifiers. |
|
| Recommended affixes: increased maximum Life Mana Reservation Efficiency Optional affixes: Elemental Resistances Critical Strike modifiers increased Attack Speed Attributes |
|
 (Jewels) Large Cluster Jewel - Here you can get some potent Notables like Fan of Blades for extra Projectile, Fuel the Fight for Mana Leech, or some general-purpose notables for Elemental Resistances and Damage. (Jewels) Large Cluster Jewel - Here you can get some potent Notables like Fan of Blades for extra Projectile, Fuel the Fight for Mana Leech, or some general-purpose notables for Elemental Resistances and Damage. |
|
| Recommended affixes: 1 Added Passive Skill is Fan of Blades 1 Added Passive Skill is Prismatic Heart 1 Added Passive Skill is Fuel the Fight 1 Added Passive Skill is Disorienting Display 1 Added Passive Skill is Martial Prowess |
|
 (Jewels) The Interrogation - With Secrets of Suffering you will Scorch, Brittle, and Sap on Critical Hit - these are overall better Elemental Ailments than the default ones, which you no longer will be able to inflict. (Jewels) The Interrogation - With Secrets of Suffering you will Scorch, Brittle, and Sap on Critical Hit - these are overall better Elemental Ailments than the default ones, which you no longer will be able to inflict. |
|
| Adds Secrets of Suffering | |
 (Jewels) Lethal Pride - To gain more Strength use Lethal Pride, it's the easiest way to do so as you should have allocated plenty of nodes around the Fervour Notable. There are also various other bonuses you can obtain from this Jewel. (Jewels) Lethal Pride - To gain more Strength use Lethal Pride, it's the easiest way to do so as you should have allocated plenty of nodes around the Fervour Notable. There are also various other bonuses you can obtain from this Jewel. |
|
| Commanded leadership over (10000-18000) warriors under Akoya Passives in radius are Conquered by the Karui Historic |
|
 (Jewels) Watcher's Eye - Wrath's Critical Strike Chance or Precision's modifiers could be extremely good modifiers to get from a Watcher's Eye. (Jewels) Watcher's Eye - Wrath's Critical Strike Chance or Precision's modifiers could be extremely good modifiers to get from a Watcher's Eye. |
|
| (4-6)% increased maximum Energy Shield (4-6)% increased maximum Life (4-6)% increased maximum Mana <Two or Three random aura modifiers> |
|
 (Flask) Bottled Faith - Very expensive Flask, but ultimately the best one for any Critical Strike Build, it simply grants a lot of Damage and creates Consecrated Ground. (Flask) Bottled Faith - Very expensive Flask, but ultimately the best one for any Critical Strike Build, it simply grants a lot of Damage and creates Consecrated Ground. |
|
| 40% increased Damage Creates Consecrated Ground on Use (30-15)% reduced Duration Consecrated Ground created by this Flask has Tripled Radius Consecrated Ground created during Effect applies (7-10)% increased Damage taken to Enemies (100-150)% increased Critical Strike Chance against Enemies on Consecrated Ground during Effect |
|
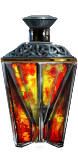 (Flask) Dying Sun - Dying Sun is used only for the two extra Projectiles you can fire during Flask's Effect. (Flask) Dying Sun - Dying Sun is used only for the two extra Projectiles you can fire during Flask's Effect. |
|
| +50% to Fire Resistance 20% less Fire Damage taken (125-150)% increased Charges per use (60-40)% less Duration (10-20)% increased Area of Effect during Effect Skills fire 2 additional Projectiles during Effect |
|
Other suggested Flasks:
|
|
   |
|
|
If you have any other build requests please leave that in the comments below.
Pictures used in this article are the intellectual property of Grinding Gear Games.
