Ignite Vortex Elementalist Build
Unusual build for the Elementalist which uses Vortex to apply an extremely powerful Ignite DoT effectIgnite Vortex
Elementalist Build
Updated for Patch 3.19
The Best Crafty Guides by Odealo
| Guide notes |
| August 26, 2022 -Build created |
| Build Overview | |||
| Tags: [CASTER] [ELEMENTAL] [LIFE] | |||
|
Budget: Defenses: |
|
Boss DPS: AoE: |
|
Vortex is a Cold Spell that deals Damage over Time as well as Hit Damage, but in this build, around half of this Damage is converted to Fire causing Ignite, and resulting in a lot of Damage over Time of both - Cold and Fire damage types. To cause powerful Ignites you will have to use the Cold to Fire Support Gem. Combine it with Shaper of Flames so that each of your Hits no matter the damage type will cause this Ailment to be applied each time. You can even combine it with Replica Emberwake Ring if your gear setup allows for it. As is often the case with Damage over Time, your priority is to make your main Damage Skill Gem to be at the highest possible level by using global and local modifiers. It makes the build expensive in a long run, but don't worry, it's cheap to create the basic form that also works well enough. It requires no unique items after all, that's why it's a good SSF pick or a great league starter.
Elementalist deals a lot of Elemental Damage as you can assume. Mastermind of Discord and Heart of Destruction are the Keystones granting, among other benefits, much more Elemental Damage. Grab the Shaper of Flames and Shaper of Storms. Shaper of Storms is important here because it increases your overall damage significantly. Vortex's damage scales up with Spell Damage so it's really easy to achieve a respectable DPS early on. On your passive skill tree, you can invest in all kinds of damage - Fire, Cold, Over Time, and Ignite as it's all very accessible. Vortex is used because it deals DOT as well as Hit damage so it's able to cause Ignites as well as benefit from all the DOT Elemental modifiers. The enemies you kill should induce an explosion via Obliteration or a Pair of Forbidden Jewels granting Profane Bloom. The build is very tanky with a lot of Armour, Evasion, Spell Suppression, and even Energy Shield on top of your over 5k of Maximum Life. The Mana cost of Skills is often a problem, so you can allocate Eldritch Battery to mitigate it.
You can also check our other Path of Exile builds right over here Odealo's Crafty Guides - Full List
1. Gameplay
Vortex has no cast time, it should be listed under your move button to apply it as often as possible. Because of that, it's really important to have your enemies explode on death, the clear speed with Vortex alone is very poor. For a movement Skill use Frostblink, it can cause your Hits to apply Ignite with Combustion and grant you an Arcane Surge buff. Against bosses, it's recommended to use Arcanist Brand triggering Flammability Curse with Flame Surge for even more DPS. For a Guard Spell, use an automatically-triggered Molten Shell. Shield Charge can be implemented as an alternative movement ability, especially if you're not using Frostblink but Dash or Flame Dash. If you're not using Obliteration, and you don't have Profane Bloom, use Infernal Cry for the explosions and to additionally cover enemies in Ash. For Auras use Grace, Determination, and Defiance Banner. Malevolence is also a very important Aura, but here, it is triggered manually via Divine Blessing so it cost a lot of Mana - that's why Eldritch Battery is a fitting Keystone.
|
This video was recorded on a level 94 Elementalist with a standard Fire DoT Sceptre instead of an Obliteration Wand. We also didn't have Profane Bloom Jewels, so the clear speed was a bit slower than it can potentially be, but the single-target DPS was significantly higher |
|
|

2. Build's PROS & CONS
| PROS |
|
| CONS |
|
3. Leveling tips
Leveling with Elementalist is rather easy, we recommend starting with an Ignite and taking the Shaper of Flames as your first ascendancy. From there on you will allocate the generic Fire/Elemental/Spell Damage from your skill tree. The skill which is at first great for this purpose is Fireball, and after allocating Shaper of Flames it's the Arc, it's very comfortable to clear with. From this point, you can also start using Vortex if you can sustain its Mana drain. Start investing in Damage over Time, and Burning Damage. To finish this build at the later stages prepare a gear that increases the Gem Level of your Vortex.
Suggested leveling Gem setups:
| Fireball setup | |
 |
Fireball (later Arc) - this Spell is supposed to cause a fairly substantial Hit with a somewhat decent area of effect to Ignite its targets |
 |
Burning Damage Support - it simply increases Burning Damage |
| Combustion Support - Ignites caused by Fireball/Arc will reduce Fire Resistance, increases Ignite Chance, and grants more Fire Damage | |
 |
Arcane Surge Support - grants Arcane Surge buff for more Spell Damage and Mana Regeneration |
 |
Efficacy Support - increases Skill Effect Duration and grants more Damage over Time |
| Mana Reservation setup | |
 |
Malevolence - increased Damage over Time and Skill Effect Duration |
 |
Purity of Elements - protects you from Elemental Ailments and grants tons of Resistances, extremely useful during the campaign |
| various Gems | |
 |
Flammability - Curse that simply lowers Fire Resistance |
 |
Arcanist Brand - It sticks to the enemy to trigger all linked Spells one time a second |
 |
Flame Surge - deals Fire Damage, cannot Ignite, creates Burning Grounds with hits against Burning enemies |
Bandits:
you should kill all three Bandits for two additional Skill Points
Leveling Skill Trees:
30 Points Skill Tree
Start with Spell Damage, Fire Damage, Maximum Life, and Elemental Overload
63 Points Skill Tree
Head for more Fire Damage, Elemental Damage, Maximum Life, Damage overTime, and Mana Reservation Efficiency - it's all on the left side of the skill tree
Recommended leveling items:
 Le Heup of All - it's a good Ring for all leveling characters, it grants a lot of Attributes, Damage, and Resistances Le Heup of All - it's a good Ring for all leveling characters, it grants a lot of Attributes, Damage, and Resistances |
| Adds 1 to 4 Physical Damage to Attacks +(10-30) to all Attributes (10-30)% increased Damage (10-30)% increased Rarity of Items found +(10-30)% to all Elemental Resistances |
 Goldrim - offers a lot of Elemental Resistances, which are important Goldrim - offers a lot of Elemental Resistances, which are important |
| +(30-50) to Evasion Rating 10% increased Rarity of Items found +(30-40)% to all Elemental Resistances Reflects 4 Physical Damage to Melee Attackers Level Requirement reduced by 100 (Hidden) |
 Tabula Rasa - use Tabula for the six, white, linked sockets Tabula Rasa - use Tabula for the six, white, linked sockets |
|
| Item has no level requirement and Energy Shield (Hidden) Item has 6 White Sockets and is fully linked (Hidden) |
|
4. Final Skill Tree, Ascendancy Points, and Pantheon
Final Skill Tree:
116 Points Final Skill Tree (doesn't include Cluster or Unique or Cluster Jewels)
123 Points Path of Building (PoB) link
Ascendancy points:
Preferably in that order:
- Shaper of Flames
- Mastermind of Discord
- Heart of Destruction
- Shaper of Storms
Pantheon:
Major God: Soul of Lunaris: 1% additional Physical Damage Reduction for each nearby Enemy, up to 8%; 1% increased Movement Speed for each nearby Enemy, up to 8%
Minor God: Soul of Shakari: You cannot be Poisoned while there are at least 3 Poisons on you; 50% less Duration of Poisons on You
5. Final Gems links
| [DPS] Vortex setup | |
 |
Vortex - Creates an area beneath you that deals initially Cold Hit Damage and then Cold Damage over Time, it's used here to cause Ignites but it deals a fair amount of damage on its own. We recommend the Divergent version. |
 |
Cold to Fire Support - Converts half of your Cold Damage to Fire, and grants extra Cold Damage as Fire, it's an extremely important Support Gem. |
 |
Empower Support - Increases the Gem Level of Vortex which is the best way to increase its damage. |
 |
Cruelty Support - Makes you deal more Damage over Time via Cruelty buff and more Hit Damage for linked Skills. |
 |
Unbound Ailments Support - Increase the duration of Elemental Ailments such as Shock and Ignite, and increases the effectiveness of the non-damaging ones. It also grants more Ignite Damage. |
 |
Inspiration Support - Lowers the Mana Cost of Skills and increases Elemental Damage they deal. If you can somehow withstand the Mana requirements it is possible to swap it for the  Swift Affliction Support. Swift Affliction Support. |
| [UTILITY] Aracanist Brand setup | |
|
Arcanist Brand - A Brand that attaches itself to an enemy and triggers all linked Spells every second. |
|
Flame Surge - Deals Fire Damage, it's especially efficient against Burning enemies for it allows it to create Burning Ground on Hits which deals Fire DOT on top of your Ignite. It cannot Ignite by itself. |
|
Flammability - Reduces the Fire Resistance of your opponent. |
 |
Culling Strike Support - Linked skills instantly kills any enemies below 10% of Maximum Life, it's very useful when fighting the most formidable opponents such as Essence monsters or aggrandized Metamorphs. If you have no other way to cause Exposure, put the  Wave of Conviction here instead. Wave of Conviction here instead. |
| [MOBILITY] Frostblink setup | |
 |
Frostblink - A simple movement Spell that has a lower cooldown the more enemies are around you, you can switch it for any other mobility Spell that Hits. |
| Combustion Support - All Hits with Frostblink will Ignite thanks to the Shaper of Flames Keystone, causing Combustion debuff which reduces Fire Resistance. | |
|
Arcane Surge Support - Grants you an Arcane Surge Buff for an increased Mana Regeneration and more Spell Damage, but keep it at a low level so that each cast of Frostblink will cause it. |
| [UTILITY] Malevolence setup | |
|
Malevolence - Malevolence makes you deal more Damage over Time and increases Skill effect duration. You can replace it with any other Aura, but your other Auras are defensively-oriented, and it's better to have these up at all times. |
 |
Divine Blessing Support - Malevolence becomes a temporary Aura that does not reserve Mana, but its Mana cost will have to be paid once in a while to trigger it. |
|
Inspiration Support - Reduces Mana cost of Divinely Blessed Malevolence, we recommend the Divergent version to make it cost less Mana. |
 |
Increased Duration Support - Increases the Duration of Maleveolnce, it's the least important Support Gem. |
| [UTILITY] Mana-reserving Spells linked with Enlighten Support or socketed in a Shield with local Mana Reservation Efficiency |
|
 |
Grace - Increases and adds Evasion Rating. |
 |
Determination - Increases and adds Armour Rating. |
 |
Defiance Banner - Increases both - Evasion and Armour, while also reducing nearby monsters' Critical Strike Chance. |
| [UTILITY] Molten Shell setup | |
 |
Molten Shell - A Guard Spell that mitigates a portion of the incoming Hit Damage for some time. It scales up with your Armour. |
 |
Cast when Damage Taken - Linked Molten Shell will be triggered after you take a certain amount of damage. |
| [UTILITY] Infernal Cry | |
 |
Infernal Cry - A Warcry that you can use to Cover enemies in Ash and to cause them to explode on death, it's not obligatory, but increases your damage nonetheless. |
| [UTILITY] Shield Charge | |
 |
Shield Charge - You can use it to dash forward, useful when your Frostblink is unavailable or when using a movement Spell that doesn't Hit. |
|
|
6. Gear Setup
It's an Elemental Damage over Time type build which also sources a portion of its damage from Spell Damage. The most important will be mods increasing the Gem Level of Vortex and the Damage over Time mods. Reducing Mana Cost of Skills is also very useful, it allows you to not only comfortably cast Vortex, but with proper investment, you won't need to allocate Eldritch Battery to cast the Blessed Malevolence. Ignite/Burning Damage is great, that's around half of your total damage, but remember about your Cold Damage over Time - you should generally focus more on Elemental Damage type than the specific Cold/Fire/Burning one. On your Defensive gear seek Spell Suppression Chance, Evasion Rating, and Armour. Energy Shield is not as important, but there's nothing stopping you from making it a hybrid or even full-on Energy Shield build, especially with high Armour/Evasion and Divine Shield/Ghost Dance. Maximum Life and Elemental Resistances are basic and the most reliable defensive layers. You won't need any Cast Speed or Critical Strike mods. You will need extra Dextrairty and possibly Strength.
Our recommended items will:
- Cap your resistances at 75%
- Provide you with enough DPS and Life to start mapping
|
Stat priorities on items:
|
 (Helmet) Rare Helmet - Seek a Helmet with high bonuses to Maximum Life and Elemental Resistances. Spell Suppression Chance is a big plus if you manage to get some. (Helmet) Rare Helmet - Seek a Helmet with high bonuses to Maximum Life and Elemental Resistances. Spell Suppression Chance is a big plus if you manage to get some. |
|
| Min. requirements: +70 to Maximum Life +70% to Elemental Resistances Nearby Enemies have -9% to Cold/Fire Resistance Optional affixes: Attributes Spell Suppression Chance Evasion/Armour |
|
 (Helmet) The Vertex - Vertex is only good when you have a lot of Energy Shield you don't want to spend on Eldritch Battery - you can socket your Divine Malevolence here to make it cost less. (Helmet) The Vertex - Vertex is only good when you have a lot of Energy Shield you don't want to spend on Eldritch Battery - you can socket your Divine Malevolence here to make it cost less. |
|
| +1 to Level of Socketed Gems Socketed Gems have 50% reduced Mana Cost (245-280)% increased Evasion and Energy Shield +(30-40) to maximum Energy Shield +(24-30)% to Chaos Resistance Enemies Cannot Leech Mana From you |
|
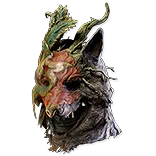 (Helmet) Elevore - Very good Helmet for when you need more Spell Suppression and a reliable way to recover Life. It increases Evasion and grants some extra chance to avoid Elemental Ailments. (Helmet) Elevore - Very good Helmet for when you need more Spell Suppression and a reliable way to recover Life. It increases Evasion and grants some extra chance to avoid Elemental Ailments. |
|
| +(20-25)% chance to Suppress Spell Damage (60-100)% increased Evasion Rating (20-25)% chance to Avoid Elemental Ailments Recover (100-200) Life when you Suppress Spell Damage |
|
| Helmet enchantments: Vortex enchantment |
|
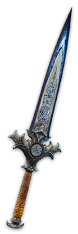
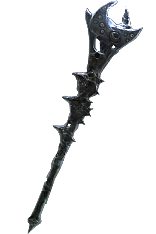 (Weapon) Rare Wand/Sceptre - It's worth picking up a Rare Weapon only if you have the modifier increasing the Gem Level of the Vortex with some extra damage modifier on top of that. (Weapon) Rare Wand/Sceptre - It's worth picking up a Rare Weapon only if you have the modifier increasing the Gem Level of the Vortex with some extra damage modifier on top of that. |
|
| Min. requirements: +1 to Level of all Fire Spell Skill Gems Recommended affixes: +1 to Level of all Spell Skill Gems Fire Damage over Time Multiplier increased Damage over Time increased Burning Damage increased Fire Damage increased Elemental Damage |
|
 (Weapon) Obliteration - A very cheap Unique Weapon that makes your enemies explode on death, this damage is able to Ignite due to Shaper of Flames Keystone. (Weapon) Obliteration - A very cheap Unique Weapon that makes your enemies explode on death, this damage is able to Ignite due to Shaper of Flames Keystone. |
|
| (31-35)% increased Spell Damage Gain (30-40)% of Physical Damage as Extra Chaos Damage Enemies you Kill have a 20% chance to Explode, dealing a quarter of their maximum Life as Chaos Damage |
|
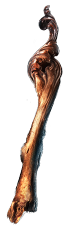
 (Weapon) Replica Cold Iron Point - If you value raw damage go ahead and equip one or even two Replica Cold Iron Point Daggers, it's the best-in-slot damage-dealing weapon you can get at this price, but be careful, you will need to convert the remaining Cold Damage to Fire via Avatar of Fire. (Weapon) Replica Cold Iron Point - If you value raw damage go ahead and equip one or even two Replica Cold Iron Point Daggers, it's the best-in-slot damage-dealing weapon you can get at this price, but be careful, you will need to convert the remaining Cold Damage to Fire via Avatar of Fire. |
|
| 30% increased Global Critical Strike Chance +3 to Level of all Cold Spell Skill Gems Deal no Cold Damage |
|
 (Off-Hand) Rare Shield - A Shield should provide you with the basic defensive stats such as Life and Resistances, but if you have troubles with Mana Reservation, check the ones with a Shaper's mod for its Efficiency. (Off-Hand) Rare Shield - A Shield should provide you with the basic defensive stats such as Life and Resistances, but if you have troubles with Mana Reservation, check the ones with a Shaper's mod for its Efficiency. |
|
| Min. requirements: +70 to maximum Life +60% to Elemental Resistances Optional affixes: Socketed Gems have increased Reservation Efficiency Attributes Spell Suppression Chance |
|
 (Body Armour) Skin of the Lords - The best Armour you can hope for, unfortunately, it's also very expensive and cannot be modified in any way. You would benefit from all of its stats. (Body Armour) Skin of the Lords - The best Armour you can hope for, unfortunately, it's also very expensive and cannot be modified in any way. You would benefit from all of its stats. |
|
| Item has no level requirement and Energy Shield (Hidden) Sockets cannot be modified +2 to Level of Socketed Gems 100% increased Global Defences You can only Socket Corrupted Gems in this item Item has 6 Sockets and is fully linked (Hidden) <Random Keystone> |
|
 (Body Armour) Rare Body Armour - Rare Body Armour should be a transitional one before you can afford the already mentioned Skin of the Lords, seek the basic Life and Resistances modifiers. (Body Armour) Rare Body Armour - Rare Body Armour should be a transitional one before you can afford the already mentioned Skin of the Lords, seek the basic Life and Resistances modifiers. |
|
| Min. requirements: +90 to maximum Life +60% to Elemental Resistances Optional affixes: Armour Attributes Spell Suppression Chance Chaos Resistance increased maximum Life |
|
 (Boots) Rare Boots - Once again seek Life, Resistances, and the extra Movement Speed bonus that's found only here. You should also try to gain Spell Suppression Chance and Onslaught on Kill modifiers. (Boots) Rare Boots - Once again seek Life, Resistances, and the extra Movement Speed bonus that's found only here. You should also try to gain Spell Suppression Chance and Onslaught on Kill modifiers. |
|
| Min. requirements: 25% increased Movement Speed +60 to maximum Life +50% to Elemental Resistances Optional affixes: Spell Suppression Chance chance to gain Onslaught for 4 seconds on Kill |
|
 (Gloves) Rare Gloves - There are not many fancy and expensive modifiers, get the basic Life, Resistances, and Spell Suppression Chance. (Gloves) Rare Gloves - There are not many fancy and expensive modifiers, get the basic Life, Resistances, and Spell Suppression Chance. |
|
| Min. requirements: +80 to maximum Life +70% to Elemental Resistances Chance to Suppress Spell Damage Optional affixes: Fire Damage over Time Multiplier Attributes Armour/Evasion |
|
 (Belt) Rare Belt - A very barren in useful modifiers type of Jewelry. Besides Life and Resistances seek also Strength as it's easy to get here. (Belt) Rare Belt - A very barren in useful modifiers type of Jewelry. Besides Life and Resistances seek also Strength as it's easy to get here. |
|
| Min. requirements: +90 to Maximum Life +80% to Elemental Resistances Strength Optional affixes: increased Maximum Life |
|
 (Amulet) Rare Amulet - The most important are the modifiers for an increased Gem Level of Vortex, it would be expensive to get the +2 or even +1, so the next best mods are Life, Resistances, Reduced Mana Cost of Skills, and Attributes. (Amulet) Rare Amulet - The most important are the modifiers for an increased Gem Level of Vortex, it would be expensive to get the +2 or even +1, so the next best mods are Life, Resistances, Reduced Mana Cost of Skills, and Attributes. |
|
| Min. requirements: +60 Maximum Life +70% to Elemental Resistances +1 to Level of all Skill/Cold Skill Gems Optional affixes: Attributes Non-Channelling Skills have -7 to Total Mana Cost Mana Reservation Efficiency |
|
| Recommended Anointments: Dirty Techniques Ash, Frost and Storm |
|
 (Ring) Rare Rings - Rings can roll a lot of modifiers similar to ones on the Amulet. Your objective is to craft the reduced Mana Cost on one or two, and getting Life, Resistances, and Attributes. (Ring) Rare Rings - Rings can roll a lot of modifiers similar to ones on the Amulet. Your objective is to craft the reduced Mana Cost on one or two, and getting Life, Resistances, and Attributes. |
|
| Min. requirements: +50 to Maximum Life +80% to Elemental Resistances Optional affixes: Non-Channelling Skills have -7 to Total Mana Cost (crafted) Curse Enemies with Flammability on Hit Damage over Time Multiplier Attributes |
|
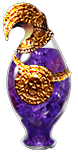
 (Ring) Replica Emberwake - increases Fire Damage, Fire Resistance, and makes your Ignites last for a very short time, but in return increases their damage significantly. (Ring) Replica Emberwake - increases Fire Damage, Fire Resistance, and makes your Ignites last for a very short time, but in return increases their damage significantly. |
|
| +(20-30)% to Fire Resistance (30-40)% increased Fire Damage (5-10)% increased Cast Speed 90% reduced Ignite Duration on Enemies 10% chance to Ignite Ignites you inflict deal Damage (35-45)% faster |
|
 (Ring) Berek's Respite - Use Berek's Respite to spread your Ignite and Shock Ailments with ease, it's a great improvement to your clear speed, but rather unnecessary if you already can explode enemies on kill. (Ring) Berek's Respite - Use Berek's Respite to spread your Ignite and Shock Ailments with ease, it's a great improvement to your clear speed, but rather unnecessary if you already can explode enemies on kill. |
|
| +(12-16)% to Fire and Lightning Resistances Adds (20-25) to (30-50) Fire Damage to Spells and Attacks (25-30)% increased Lightning Damage +(30-40) to maximum Mana When you Kill a Shocked Enemy, inflict an equivalent Shock on each nearby Enemy When you Kill an Ignited Enemy, inflict an equivalent Ignite on each nearby Enemy |
|
 (Jewel) Rare Jewels - Jewels can be used to fix your Resistances, Attributes, to gain even more Maximum Life, and even some damage modifiers if you can afford ones. (Jewel) Rare Jewels - Jewels can be used to fix your Resistances, Attributes, to gain even more Maximum Life, and even some damage modifiers if you can afford ones. |
|
| Recommended affixes: increased maximum Life Attributes Damage over Time Multiplier Elemental Damage Elemental Resistances Damaging Ailments deal damage faster |
|
 (Jewel) Careful Planning - Socket it near Instability Notable to get a lot of extra Dexterity, it will be needed in huge quantities anyway. (Jewel) Careful Planning - Socket it near Instability Notable to get a lot of extra Dexterity, it will be needed in huge quantities anyway. |
|
| +(16-24) to Dexterity Intelligence from Passives in Radius is Transformed to Dexterity |
|
 (Jewel) Replica Conqueror's Efficiency - It reduces the Mana Cost of Skills, very important in this build, but the Jewel itself is not mandatory. (Jewel) Replica Conqueror's Efficiency - It reduces the Mana Cost of Skills, very important in this build, but the Jewel itself is not mandatory. |
|
| 4% increased Skill Effect Duration +5 to Maximum Rage Non-Channelling Skills have -9 to Total Mana Cost |
|
  (Jewel) Forbidden Flame & Forbidden Flesh - The Keystone you strive for is Profane Bloom, it explodes the enemies you kill. With these Jewels you won't need Obliteration Wand or Infernal Cry Skill, it's very handy. (Jewel) Forbidden Flame & Forbidden Flesh - The Keystone you strive for is Profane Bloom, it explodes the enemies you kill. With these Jewels you won't need Obliteration Wand or Infernal Cry Skill, it's very handy. |
|
| Allocates <<Random Ascendancy Notable>> if you have the matching modifiers on Forbidden Flesh Allocates <<Random Ascendancy Notable>> if you have the matching modifiers on Forbidden Flame |
|
 (Jewel) Watcher's Eye - Look for Determination, Grace, or Malevolence Modifiers. Determination and Grace offer only defensive mods, Malevolence is great for the extra Damage over Time Multiplier. (Jewel) Watcher's Eye - Look for Determination, Grace, or Malevolence Modifiers. Determination and Grace offer only defensive mods, Malevolence is great for the extra Damage over Time Multiplier. |
|
| (4-6)% increased maximum Energy Shield (4-6)% increased maximum Life (4-6)% increased maximum Mana <Two or Three random aura modifiers> |
|
 (Jewel) Large Cluster Jewel - As you know, you will apply Shock, Chill, and Ignite rather effortlessly in this build, that's why the best notables on a Large Cluster Jewel is Sadist. Almost all of the other ones found on the Elemental Damage Cluster Jewels are good too. (Jewel) Large Cluster Jewel - As you know, you will apply Shock, Chill, and Ignite rather effortlessly in this build, that's why the best notables on a Large Cluster Jewel is Sadist. Almost all of the other ones found on the Elemental Damage Cluster Jewels are good too. |
|
| Recommended affixes: 1 Added Passive Skill is Sadist 1 Added Passive Skill is Corrosive Elements 1 Added Passive Skill is Doryani's Lesson 1 Added Passive Skill is Prismatic Heart |
|
 (Jewel) Medium Cluster Jewel - Fan the Flames is the best Notable, it makes your Ignite spread to nearby enemies massively increasing your clear speed. (Jewel) Medium Cluster Jewel - Fan the Flames is the best Notable, it makes your Ignite spread to nearby enemies massively increasing your clear speed. |
|
| Recommended affixes: 1 Added Passive Fan the Flames |
|
 (Flask) Atziri's Promise - A flask granting you some extra Chaos Resistance and extra Chaos Damage sourced from your Elemental Damage. (Flask) Atziri's Promise - A flask granting you some extra Chaos Resistance and extra Chaos Damage sourced from your Elemental Damage. |
|
| +35% to Chaos Resistance 2% of Chaos Damage Leeched as Life during Flask effect Gain (5-8)% of Physical Damage as Extra Chaos Damage during effect Gain (5-8)% of Elemental Damage as Extra Chaos Damage during effect |
|
|
Other suggested Flasks:
|
|
    |
|
|
If you have any other build requests please leave that in the comments below. We are always open to suggestions and constructive feedback.
Pictures used in this article are the intellectual property of Grinding Gear Games.
