Venom Gyre Berserker Build
Strength-stacking Berserker build that uses Venom Gyre to deal massive Chaos DamageVenom Gyre
Berserker Build
Updated for Patch 3.24
The Best Crafty Guides by Odealo
| Guide notes |
| May 16, 2024 -Updated for Patch 3.24 |
| Build overview | |||
| Tags: [RANGED] [CHAOS] [LIFE] | |||
|
Budget: Defenses: |
|
Boss DPS: AoE: |
|
Venom Gyre offers one of the most unique gameplay experiences. It's a Projectile Attack that returns to you at the end of its lifespan, and if you catch it, you can store and then "re-cast" it in a new way by using Whirling Blades - you can hold up to 30 Projectiles this way. The Skill directly synergizes with Whirling Blades specifically, the Projectiles which are fired by this movement Attack behave differently, as they don't return and travel in a different pattern. It results in a rapid movement of the character in order to release the stored Projectiles systematically, but in such a predictable pattern to catch them again, making it a slightly more difficult build to play when compared to other similar builds. Venom Gyre has the inherent property of converting 60% of its Physical Damage to Chaos and having a 40% Chance of Poisoning on Hit. It's all irrelevant here for we focus on dealing Chaos Hit Damage with a high Critical Strike Chance, by using Replica Alberon's Warpath Unique Boots. These add flat Chaos Damage to Attack per Strength, and the base damage of your Skill or Weapon pales in comparison to the damage sourced from these Boots.
A good way to improve the DPS of any Attack build is to play as a Berserker, pick the Flawless Savagery for Critical Strikes with added Damage, Blitz for a dynamic Attack Speed bonus, War Bringer to gain Rage, and Aspect of Carnage for simply more damage. Your most important objective will be to stack Strength - with this Attribute comes a lot of flat Damage via the previously mentioned Boots. Another important component will be to increase the existing damage. To do so you will use Iron Will to gain Spell Damage sourced from Strength, and Battlemage's Cry which temporarily makes increases to Spell Damage apply to Attack Damage. By using two Forbidden Jewels you can allocate Juggernaut's Undeniable Keystone for more Attacks Speed sourced, again, from your Strength. For defenses, the built uses its vast Life Pool, Fortify, high Armour, Evasion Rating, Block Chance, and Spell Suppression Chance. With the Purity of Elements, the character is also immune to Elemental Ailments.
For the 3.24 update, we've adjusted Items and Gem setups to include new Support Gems such as Volatility. The build remains mostly unchanged.
You can also check our other Path of Exile builds right over here Odealo's Crafty Guides - Full List
1. Gameplay
The attack pattern differentiates depending on the content you're running. When mapping just use Whirling Blades regularly to move forward while attacking with Venom Gyre as you see any opponent - your Projectiles will Chain and Fork, reaching all the enemies with ease. During Boss fights, you will rapidly dash forward and backward with Whirling Blades - the stored Projectiles are able to "shotgun" an enemy if you stand really close to it. With Sniper's Mark, Fork, and Chain (from Divergent Venom Gyre), you will create more Projectiles. The number of Projectiles, especially the returning ones is very important for single-target DPS. Tornado will help you with bosses too, your Projectiles will Chain off of the Tornado and Hit the target. It should be cast automatically. Use Battlemage's Cry, Ancestral Protector, Blood Rage, and Berserk for a damage boost. To apply Withered debuff it is recommended to have an Anomalous Withering Step. For a Guard Spell use Molten Shell, and for Auras - Determination, Grace, and Purity of Elements.
|
This video was recorded on a level 94 Berserker with slightly over 2100 Strength, just one Fan of Blades Passives from Cluster Jewels, and a really mediocre Claw that was taken from our previous Poison-based build |
|
|

2. Build's PROS & CONS
| PROS |
|
| CONS |
|
3. Leveling tips
It's not recommended to level up with Venom Gyre as it's only good later on when you're able to quickly and consistently use it with Whirling Blades and generate tons of Projectiles. Your final Skill Tree is also very distinctive, unlike any other build. We recommend an Attack that would take advantage of the nodes usually found at the bottom of your Skill Tree, which would minimize the number of Orbs of Regrets you will have to use later. Splitting Steel is the most preferable Skill - it's a Projectile Attack that can Impale and has great AoE. Use it with a Redbeak Sword to deal Physical Damage. It's one of the best leveling setups in the game. You will switch to Venom Gyre at around Yellow Maps and 1000 Strength, and with all the mandatory Items already in your stash - Replica Alberon's Warpath and Redblade Banner.
Suggested leveling Gem setups:
| Splitting Steel setup | |
 |
Splitting Steel - Use it alongside Call of Steel to recover shards. Try to gather as many Physical Damage bonuses as you can for more Impale Damage. |
 |
Impale Support - increases Chance to Imaple and its effectiveness. |
 |
Brutality Support - grants more Physical Damage, but disables other types of Damage. |
 |
Vicious Projectiles Support - less Attack Speed, but more Projectile Damage. |
 |
Maim Support - more Physical Damage, and the ability to Maim on Hit - it reduces the movement speed of your targets. |
| Mana Reservation setup | |
 |
Precision - an Aura for more Accuracy and increased Critical Strike Chance |
 |
War Banner - Banner that grants Accuracy Rating and Physical Damage |
 |
Herald of Purity - it's used mostly for the Physical Damage bonus, but the Minions can be useful too |
| various Gems | |
 |
Sniper's Mark - Target receives more Projectile Damage and makes the Projectiles Split on impact |
 |
Mark on Hit Support - It has to be linked with Sniper's Mark to apply it automatically with Hits against notable enemies |
 |
Ancestral Protector - a Totem you can deploy for more Attack Speed |
 |
Enduring Cry - use it after equipping Redblade Banner and allocating War Bringer, it will grant you a lot of Rage and regenerate Life |
Bandits:
you should kill all three Bandits for two additional Skill Points
Leveling Skill Trees:
33 Points Skill Tree
Go for the nearby Life and Accuracy nodes, the head for Art of the Gladiator and Blade of Cunning
72 Points Skill Tree
Allocate Graceful Assault for Onslaught, the pick Point Blank and Call to Arms. Find more Maximum Life, Attack, and Projectile Damage nodes.
Recommended leveling items:
 Karui Ward - It grants Attributes, Accuracy, Projectile Damage, and Movement Speed Karui Ward - It grants Attributes, Accuracy, Projectile Damage, and Movement Speed |
|
| +(20-30) to Dexterity +(20-30) to Strength +100 to Accuracy Rating 30% increased Projectile Speed 10% increased Movement Speed 30% increased Projectile Damage |
|
 Le Heup of All - it's a generally good Ring for all leveling characters, it grants a lot of useful stats Le Heup of All - it's a generally good Ring for all leveling characters, it grants a lot of useful stats |
|
| Adds 1 to 4 Physical Damage to Attacks +(10-30) to all Attributes (10-30)% increased Damage (10-30)% increased Rarity of Items found +(10-30)% to all Elemental Resistances |
|
 Goldrim - it offers a lot of Elemental Resistances, which are required Goldrim - it offers a lot of Elemental Resistances, which are required |
|
| +(30-50) to Evasion Rating 10% increased Rarity of Items found +(30-40)% to all Elemental Resistances Reflects 4 Physical Damage to Melee Attackers Level Requirement reduced by 100 (Hidden) |
|
 Tabula Rasa - use Tabula for an optimal leveling experience Tabula Rasa - use Tabula for an optimal leveling experience |
|
| Item has no level requirement and Energy Shield (Hidden) Item has 6 White Sockets and is fully linked (Hidden) |
|
 Redbeak - one of the best leveling Swords in the game, available at level 1 Redbeak - one of the best leveling Swords in the game, available at level 1 |
|
| 40% increased Global Accuracy Rating 100% increased Damage when on Low Life 50% increased Physical Damage Adds 2 to 6 Physical Damage 10% increased Attack Speed +(20-30) to maximum Life +2 Life gained for each Enemy hit by Attacks |
|
 Meginord's Girdle - another great leveling item, especially for Physical Attack builds such as this one Meginord's Girdle - another great leveling item, especially for Physical Attack builds such as this one |
|
| +(25-35) to Strength +25 to Strength Adds 5 to 15 Physical Damage to Attacks 10% increased maximum Life +(10-20)% to Cold Resistance 25% increased Flask Life Recovery rate |
|
4. Final Skill Tree, Ascendancy Points, and Pantheon
Final Skill Tree:
107 Points Final Skill Tree (doesn't include Cluster or Unique Jewels)
123 Points Path of Building (PoB) link
Ascendancy points:
Preferably in that order:
- War Bringer
- Flawless Savagery
- Accept of Carnage
- Blitz
Pantheon:
Major God: Soul of Lunaris: 1% additional Physical Damage Reduction for each nearby Enemy, up to 8%; 1% increased Movement Speed for each nearby Enemy, up to 8%
Minor God: Soul of Ryslatha: Life Flasks gain 3 Charges every 3 seconds if you haven't used a Life Flask Recently
5. Final Gems links
| [DPS] Venom Gyre setup | |
 |
Venom Gyre - This Attack fires Projectiles that you will later catch. During boss fights try to use only the ones stored and released via Whirling Blades, and try to have 30 of them at all times. Use the Divergent version for extra Chain. |
 |
Increased Critical Damage Support - increases Critical Strike Damage, it will be very high by default. |
 |
Increased Critical Strikes Support - increases Critical Strike Chance, it's very important due to the Blitz Keystone. |
 |
Fork Support - Projectiles Fork on impact, doubling the number of ones that will return to you. |
 |
Void Manipulation Support - you will deal more Chaos Damage, but no Elemental Damage, it's a great deal. |
 |
Nightblade Support - grants a very effective Elusive Buff on Critical Strike and increased Critical Strike Chance. If your Crit Chance is already capped, which it should be at some point, replace it with  Volatility. Volatility. |
| [UTILITY] Auras setup | |
 |
Purity of Elements - an Aura you should use for a complete immunity against all Elemental Ailments and a lot of Elemental Resistances. |
 |
Grace - use for more and increased Evasion Rating. |
 |
Determination - grants you more and increased Armour. |
 |
Enlighten Support - increased Mana Reservation Efficiency for all linked Skills. |
| [MOBILITY] Whirling Blades setup | |
 |
Whirling Blades - Whirling Blades is a movement Attack but its primary role is to release the stored Projectiles that you've caught. Use it in close proximity to the target. |
| Cast on Critical Strike Support - Whirling Blades will trigger a Tornado on Critical Strike. | |
 |
Tornado - To create a target that your Projectiles can Split, Chain, and Fork off of, use Tornado. |
 |
Fortify Support - Fortify prevents a portion of incoming Hit Damage from reaching you, but you have to use Whirling Blades on enemies often for it to work. |
| [UTILITY] Sniper's Mark setup | |
|
Sniper's Mark - Sniper's Mark is very important, it will cause your Projectile to Split on its initial impact creating four additional Projectiles. It also increases Projectile Damage against the marked enemy. You may need to link it with Lifetap as it's quite an expensive spell. |
|
Mark on Hit Support - Sniper's Mark will be activated after you Hit a Rare or Unique enemy with any Attack. |
| [UTILITY] various Gems | |
|
Ancestral Protector - use the Phantasmal version of Ancestral Protector to gain tons of extra Attack Speed. |
 |
Blood Rage - Blood Rage drains your Life, but in return, it provides you with Attack Speed and Life Leech, its duration will reset after each kill. |
 |
Withering Step - Inflicts 8 stacks of Withered debuff on an enemy, grants Phasing, and refreshes your Elusive Buff. You can use the Anomalous version to inflict extra Withered per 10% Quality. |
| [UTILITY] Berserk | |
 |
Berserk - After you've used a Warcry you will have a lot of Rage, you can spend it on Berserk for extra Attack Speed, Movement Speed, more Damage, and less Damage taken. |
| [UTILITY] Battlemage's Cry | |
 |
Battlemage's Cry - It grants an increased Attack Damage equal to 150% of Spell Damage which is sourced from Iron Will, which provides you with Spell Damage sourced from Strength, which generally gives you only melee physical damage. It's also a 30% increase in Critical Strike Chance. |
 |
Call to Arms Support - Uses Battlemage's Cry for you whenever it's off-cooldown. |
| [UTILITY] Molten Shell | |
 |
Molten Shell - This Guard Spell reduces the Damage you take from Hits for a short time, the amount of damage it can prevent scales up with your Armour. |
|
|
6. Gear Setup
It's a Strength-stacking build, you will need a lot of it, up to around 2000. Strength will grant you more Block Chance, Damage, Maximum Life, and some other bonuses depending on your gear. You can get the increased Strength Implicit modifier on all of your Synthesised Jewelry, which makes the build potentially very expensive. Attack Speed and Critical Strike modifiers are also very impactful. For defenses seek Maximum Life and Spell Suppression Chance - you can also stack up some extra Dexterity due to Magebane's effect. Also, try to gain some Armour and Evasion Rating, the Auras alone won't grant you much of it. The build uses many Unique Jewels and three Unique gear pieces - Redblade Banner, The Iron Fortress, and Replica Alberon's Warpath. The Boots are very expensive so make sure you can afford them. A Pair of Forbidden Jewels for Undeniable is heavily recommended, it grants a lot of Attack Speed and Accuracy, which otherwise you would have to gain by other means. You will probably need to craft the reduced Mana Cost of Skills modifier into your Amulet and Rings, as it will be a major issue. Gathering enough Attributes shouldn't be an issue, but keep in mind that the build requires 111 Intelligence.
Our recommended items will:
- Cap your resistances at 75%
- Provide you with enough DPS and Life to start mapping
|
Stat priorities on items:
|
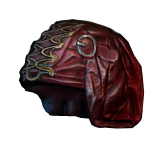
 (Helmet) Rare Helmet - There's an Elevated Warlord's Suffix you want to have, it grants increased Critical Strike Chance per Strength, and it's an expensive one. A regular version of it is used for an extra Accuracy Rating equal to your Strength. One of Hunter's Suffixes reduces Chaos Resistance of nearby enemies. (Helmet) Rare Helmet - There's an Elevated Warlord's Suffix you want to have, it grants increased Critical Strike Chance per Strength, and it's an expensive one. A regular version of it is used for an extra Accuracy Rating equal to your Strength. One of Hunter's Suffixes reduces Chaos Resistance of nearby enemies. |
|
| Min. requirements: +70 to Maximum Life +50% to Elemental Resistances Nearby Enemies have -9% to Chaos Resistance Strength Optional affixes: Gain Accuracy Rating equal to your Strength 1% increased Critical Strike Chance per 10 Strength Accuracy Rating Elemental Resistances |
|
| Helmet enchantments: Venom Gyre enchantment |
|
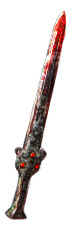
 (Weapon) Rare Claw - A good Claw is extremely expensive. There are a lot of beneficial mods, but the most important are increased Attack Speed, added Chaos Damage, and some other mods for Critical Strike Chance and Damage, or Chaos Resistance Penetration. Spell Damage is also good due to Battlemage's Cry. (Weapon) Rare Claw - A good Claw is extremely expensive. There are a lot of beneficial mods, but the most important are increased Attack Speed, added Chaos Damage, and some other mods for Critical Strike Chance and Damage, or Chaos Resistance Penetration. Spell Damage is also good due to Battlemage's Cry. |
|
| Min. requirements: 25% increased Attack Speed around 100 added Chaos Damage 70% increased Spell Damage Optional affixes: Attacks with this Weapon Penetrate #% Chaos Resistance Critical Strike mods Strength and Intelligence |
|
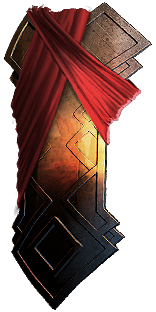 (Off-Hand) Redblade Banner - This shield ensures that your Warcries are at maximum power, combined with War Bringer it will generate a lot of Rage. All the other mods are great too. (Off-Hand) Redblade Banner - This shield ensures that your Warcries are at maximum power, combined with War Bringer it will generate a lot of Rage. All the other mods are great too. |
|
| +(20-30) to maximum Life (80-100)% increased Armour +(50-60) to maximum Life 20% increased Taunt Duration +5% Chance to Block 50% increased Warcry Cooldown Recovery Rate Warcries have infinite Power |
|
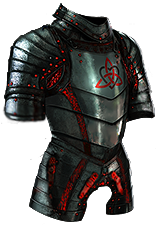 (Body Armour) The Iron Fortress - It's unmatched in terms of Defences it grants basically capped Block Chance, Extra Strength, and more Damage from Strength's inherent bonus. It might be hard to get one with the right socket colors. (Body Armour) The Iron Fortress - It's unmatched in terms of Defences it grants basically capped Block Chance, Extra Strength, and more Damage from Strength's inherent bonus. It might be hard to get one with the right socket colors. |
|
| +1% Chance to Block Attack Damage per 50 Strength Chance to Block Spell Damage is Unlucky +(60-120) to Strength (80-100)% increased Armour 10% reduced Movement Speed Strength's Damage Bonus instead grants 3% increased Melee Physical Damage per 10 Strength |
|
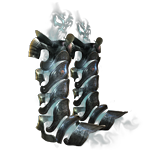 (Boots) Replica Alberon's Warpath - Use these overly expensive boosts to gain extra flat Chaos Damage per Strength, and to increase your Strength by up to 18%. (Boots) Replica Alberon's Warpath - Use these overly expensive boosts to gain extra flat Chaos Damage per Strength, and to increase your Strength by up to 18%. |
|
| (15-18)% increased Strength +(180-220) to Armour +(9-12)% to Chaos Resistance 20% increased Movement Speed Cannot deal non-Chaos Damage Adds 1 to 80 Chaos Damage to Attacks per 80 Strength |
|
 (Gloves) Rare Gloves - Besides Maximum Life and Resistances, Gloves offer Accuracy Rating, Attack Speed, Spell Suppression Chance, and Strength. For Eldritch mods get increased damage per Strength and chance to Intimidate on Hit. (Gloves) Rare Gloves - Besides Maximum Life and Resistances, Gloves offer Accuracy Rating, Attack Speed, Spell Suppression Chance, and Strength. For Eldritch mods get increased damage per Strength and chance to Intimidate on Hit. |
|
| Min. requirements: +50 to maximum Life +70% to Elemental Resistances Strength Optional affixes: increased Attack Speed Spell Suppression Chance Accuracy Rating increased Damage while Leeching (crafted) |
|
 (Belt) Rare Belt - A Belt is good for Maximum Life, Elemental Resistances, and Strength. A Belt with Synthesised Implicit can increase your Strength, other than that use a Stygian Vise or Heavy Belt. (Belt) Rare Belt - A Belt is good for Maximum Life, Elemental Resistances, and Strength. A Belt with Synthesised Implicit can increase your Strength, other than that use a Stygian Vise or Heavy Belt. |
|
| Min. requirements: +90 to Maximum Life +80% to Elemental Resistances Strength Optional affixes: increased Maximum Life increased Strength |
|
 (Amulet) Rare Amulet - It's mostly used to gain Strength and other Attributes, a Synthesised one can grant you an increased Strength which is really good. Try to craft the reduced Mana Cost of Skills and score some mods with Maximum Life and Elemental Resistances. (Amulet) Rare Amulet - It's mostly used to gain Strength and other Attributes, a Synthesised one can grant you an increased Strength which is really good. Try to craft the reduced Mana Cost of Skills and score some mods with Maximum Life and Elemental Resistances. |
|
| Min. requirements: +60 Maximum Life +70% to Elemental Resistances Non-Channelling Skills have -7 to Total Mana Cost Strength Optional affixes: Attributes increased Strength Mana Reservation Efficiency |
|
| Recommended Anointments: Claws of the Hawk Claws of the Falcon |
|
 (Ring) Rare Rings - Again, try to get one with increased Strength and Reduced Mana Cost of Skills. After that, focus on Attributes, Elemental Resistances, and Maximum Life. (Ring) Rare Rings - Again, try to get one with increased Strength and Reduced Mana Cost of Skills. After that, focus on Attributes, Elemental Resistances, and Maximum Life. |
|
| Min. requirements: +50 to Maximum Life +80% to Elemental Resistances Optional affixes: increased Strength increased Attack Speed Attributes |
|
 (Jewel) Lethal Pride - Lethal Pride enhances all nodes in its Radius to grant more Strength, the Notables are affected too but in a unique way, it may result in even more Strength. Socket it near Vigour and Savagery. (Jewel) Lethal Pride - Lethal Pride enhances all nodes in its Radius to grant more Strength, the Notables are affected too but in a unique way, it may result in even more Strength. Socket it near Vigour and Savagery. |
|
| Commanded leadership over (10000-18000) warriors under (Akoya-Kaom-Rakiata) Passives in radius are Conquered by the Karui Historic |
|
 (Jewel) Split Personality - The two modifiers should be Strength and Dexterity, socket two of these Jewels in the outer Jewel Socket of one of your Cluster Jewels nearer Point Blank Keystone. (Jewel) Split Personality - The two modifiers should be Strength and Dexterity, socket two of these Jewels in the outer Jewel Socket of one of your Cluster Jewels nearer Point Blank Keystone. |
|
| This Jewel's Socket has 25% increased effect per Allocated Passive Skill between it and your Class' starting location <Two random modifiers> |
|
 (Jewel) Inertia - This Jewel transmogrifies Dexterity into Strength in a Large Radius, use two of them where the Dexterity is the most abundant. (Jewel) Inertia - This Jewel transmogrifies Dexterity into Strength in a Large Radius, use two of them where the Dexterity is the most abundant. |
|
| +(16-24) to Strength Dexterity from Passives in Radius is Transformed to Strength |
|
 (Jewel) Emperor's Might - An expensive Jewel used for its increased Damage and increased Strength bonuses. (Jewel) Emperor's Might - An expensive Jewel used for its increased Damage and increased Strength bonuses. |
|
| 10% increased Damage 3% increased Character Size (4-6)% increased Strength |
|
  (Jewel) Forbidden Flame & Forbidden Flesh - The best Keystone is Undeniable, it increases the character's performance significantly by providing it with an increased Attack Speed and Accuracy Rating. (Jewel) Forbidden Flame & Forbidden Flesh - The best Keystone is Undeniable, it increases the character's performance significantly by providing it with an increased Attack Speed and Accuracy Rating. |
|
| Allocates <<Random Ascendancy Notable>> if you have the matching modifiers on Forbidden Flesh Allocates <<Random Ascendancy Notable>> if you have the matching modifiers on Forbidden Flame |
|
 (Jewel) Watcher's Eye - Look for Determination, Grace, or Purity of Elements modifiers. Chaos Resistance from Purity is probably the best mod here. (Jewel) Watcher's Eye - Look for Determination, Grace, or Purity of Elements modifiers. Chaos Resistance from Purity is probably the best mod here. |
|
| (4-6)% increased maximum Energy Shield (4-6)% increased maximum Life (4-6)% increased maximum Mana <Two or Three random aura modifiers> |
|
 (Jewel) Large Cluster Jewel - Use two of these Jewels, seek the notables such as Fan of Blades for an extra Projectile, sources of Life and mana Leech, and Martial Prowess. (Jewel) Large Cluster Jewel - Use two of these Jewels, seek the notables such as Fan of Blades for an extra Projectile, sources of Life and mana Leech, and Martial Prowess. |
|
| Recommended affixes: 1 Added Passive Skill is Fan of Blades 1 Added Passive Skill is Feed the Fury 1 Added Passive Skill is Fuel the Fight 1 Added Passive Skill is Martial Prowess |
|
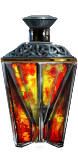
 (Flask) Bottled Faith - It's the best flask in terms of DPS, especially for the builds relying on Critical Strikes. It's worth its price. (Flask) Bottled Faith - It's the best flask in terms of DPS, especially for the builds relying on Critical Strikes. It's worth its price. |
|
| 40% increased Damage Creates Consecrated Ground on Use (30-15)% reduced Duration Consecrated Ground created by this Flask has Tripled Radius Consecrated Ground created during Effect applies (7-10)% increased Damage taken to Enemies (100-150)% increased Critical Strike Chance against Enemies on Consecrated Ground during Flask effect |
|
 (Flask) Dying Sun - It's used only for the two additional Projectiles you fire during its duration. (Flask) Dying Sun - It's used only for the two additional Projectiles you fire during its duration. |
|
| +50% to Fire Resistance 20% less Fire Damage taken (125-150)% increased Charges per use (60-40)% less Duration (10-20)% increased Area of Effect during Flask Effect Skills fire 2 additional Projectiles during Flask Effect |
|
|
Other suggested Flasks:
|
|
   |
|
|
If you have any other build requests please leave that in the comments below. We are always open to suggestions and constructive feedback.
Pictures used in this article are the intellectual property of Grinding Gear Games.
