Volcanic Fissure Totem Chieftain Build
Become a mighty walking Volcano that destroys everything in its sight with a massive eruption of Projectiles!Volcanic Fissure Totem
Chieftain Build
Updated for Patch 3.20
The Best Crafty Guides by Odealo
| Guide notes |
| December 08, 2022 -Build created |
| Build overview | |||
| Tags: [TOTEM] [ELEMENTAL] [STRENGTH] [LIFE] | |||
|
Budget: Defenses: |
|
Boss DPS: AoE: |
|
Volcanic Fissure is a brand new Attack Skill introduced to Path of Exile in Patch 3.20. It slams the ground, creating a fiery fissure that travels towards a specified location, where it erupts to release many Projectiles into the air that slowly falls down, damaging any enemy standing in their radius. It also converts over half of your Physical Damage into the Fire type. The similarities to the old-school Molten Strike Skill cannot be ignored, but there are a few key differences between those two Skills. First of all, Volcanic fissure is a Slam ability, which unlocks new possibilities to build your character. The second important difference is the range in which you can use this ability. Fissures can travel quite long distances, avoiding many obstacles on their way.
Another key factor why this Skill stands out is the Slam tag, and the possibility to use it with Earthbreaker Support Gem, which is the main interaction we are using for this Build. Totems have many advantages, such as immunity to Reflect, greater AoE cover, and better Damage uptime. After summoning your Totems, you are free to dodge any incoming attack, which works great in the newest League content, the Forbidden Sanctum. As for every Totem Build, you will want to use a Shield with additional summoned Totem, which leaves us with only one choice: 1-hand Weapons. Brutus' Lead Sprinkler is possibly one of the strongest unique Weapons in the game, with the correct circumstances. It scales very well with every 10 points of Strength you have, to turn that into over 1k eDPS Weapon you only need 1300 of that Attribute. Sounds like a lot? Worry not, you will be easily able to reach 1500 with a moderate budget, and over 2000 if you really invest in your Items.
Stacking Strength has other benefits too. for every 2 points of Strength, you will be granted 1 maximum Life, and for every 5 points, you will get 1% increased Melee Physical Damage. Physical is not really our type, so we have to use a workaround. Iron Will Keystone makes so it applies to all types of Spells as well, while Crown of Eyes applies Spell Damage increases to your Attacks at 150% effectiveness. Thanks to this combination, Strength is a very valuable Attribute that greatly improves your Damage, and makes you more tanky.
Having a very high Maximum Life pool is useful, but not enough in the current state of the game to stay alive. To further boost your survivability, we use Determination Aura which gives tons of Armour, and a lot of Block Chance coming from our Shield and Iron Fortress Armour. Thanks to the Chieftain Ascendancy, your Totems will Leech Life back to you, giving you a steady source of Life Recovery.
This Build is very cheap to get going, as you will need only a few key Unique Items, but as an Attribute stacking Build, the sky is the limit. You can upgrade it almost indefinitely, and you will feel the impact of every new upgrade as you go.
You can also check our other Path of Exile builds right over here Odealo's Crafty Guides - Full List
1. Gameplay
During Mapping, you will use Leap Slam to quickly move around and put your Totems to do the rest. For Bosses and other tough enemies, you have plenty of options to boost your Damage. Firstly, use the Ancestral Totems that grant you powerful buffs, Mark your enemy, and cast Wave of Conviction to apply Fire Exposure.
|
|
|
|

2. Build's PROS & CONS
| PROS |
|
| CONS |
|
3. Leveling tips
Leveling with this Skill is a bit slow. You can equip your End-game very quickly, but it takes plenty of Strength to truly shine. You can use the Volcanic Fissure even earlier, but turning it into Totem requires a bit of setup. In meantime, you can use Ancestral Warchief to aid your single-target Damage. You can also use Facebreaker Gloves or utilize Hollow Palm Technique and go unarmed.
Suggested leveling Gem setups:
| Volcanic Fissure setup | |
 |
Volcanic Fissure - creates a fissure that travels to the chosen location to erupt. All Projectiles can hit the same target. |
 |
Added Fire Damage Support - adds a decent amount of your Physical Damage as a Fire Damage |
 |
Ruthless Support - every third Slam deals significantly more Damage. |
 |
Melee Physical Damage Support - improves your Physical Damage. If you use pure Elemental, use Elemental Damage with Attacks Support instead. |
| Ancestral Warchief setup | |
 |
Ancestral Warchief - active Warchief grants your a solid Damage bonus to your Attacks. It also deals decent Damage on its own. |
|
Melee Physical Damage Support - improves Physical Damage dealt by your Totem. |
 |
Pulverise Support - improves Damage and Area of Effect of your Totem, but lowers its Attack Speed. |
 |
Concentrated Effect Support - reduces the AoE but improves the Damage significantly. |
| Auras setup | |
 |
Determination - gives a lot of Armour, which is very important during leveling. |
 |
Blood and Sand - gives you a lot of Damage or AoE depending on the stance you are currently being on. |
 |
Clarity - adds a bit of Mana Regeneration. Try to keep it on a low level. |
| Leap Slam and Steelskin | |
 |
Leap Slam - a quick leap that allows you to pass the terrain gaps. The first use is instant. |
 |
Steelskin - gives you a protective buff that absorbs part of incoming Damage. |
| Curse setup | |
 |
Assassin's Mark - improves your Critical Strike Chance against a marked target and adds a bunch of Damage to your Critical Strikes. |
Bandits:
Kill all three bandits to get two additional Passive Skill Points
Leveling Skill Trees:
34 Points Passive Tree
Suggested order of allocation: 1) Born to Fight 2) Lava Lash 3) Panopticon 4) Golem's Blood 5) Bloodless
60 Points Passive Tree
Suggested order of allocation: 1) Ancestral Bond 2) Primal Manifestation 3) Pain Forger 4) Galvanic Hammer 5) Purity of Flesh
Recommended leveling items:
 Le Heup of All - adds the very needed Attributes and Resistances. Also improves your Damage. Le Heup of All - adds the very needed Attributes and Resistances. Also improves your Damage. |
|
| Adds 1 to 4 Physical Damage to Attacks +(10-30) to all Attributes (10-30)% increased Damage (10-30)% increased Rarity of Items found +(10-30)% to all Elemental Resistances |
|
 Goldrim - this Helmet is available since level 1 and provides a lot of Elemental Resistances. Goldrim - this Helmet is available since level 1 and provides a lot of Elemental Resistances. |
|
| +(30-50) to Evasion Rating 10% increased Rarity of Items found +(30-40)% to all Elemental Resistances Reflects 4 Physical Damage to Melee Attackers Level Requirement reduced by 100 (Hidden) |
 Tabula Rasa - by using this Armour, you can have a 6-link setup straight from the go. Tabula Rasa - by using this Armour, you can have a 6-link setup straight from the go. |
|
| Item has no level requirement and Energy Shield (Hidden) Item has 6 White Sockets and is fully linked (Hidden) |
|
 Perandus Blazon - it also gives all Attributes, and make your Flask last longer. Perandus Blazon - it also gives all Attributes, and make your Flask last longer. |
|
| (15-25)% increased Stun and Block Recovery +(20-30) to all Attributes (6-8)% increased Quantity of Items found +20% to Fire Resistance 20% increased Flask Effect Duration -2 Physical Damage taken from Attack Hits |
|
 String of Servitude - this Belt has many variants, but the important one here adds a lot of elemental Resistances. String of Servitude - this Belt has many variants, but the important one here adds a lot of elemental Resistances. |
|
| <(1-2) Random corrupted implicit modifiers> Implicit Modifier magnitudes are tripled Desired modifier: 48% to All Elemental Resistances |
|
 Astramentis - this Amulet gives a lot of Attributes. It's not only Strenght - you will also need some Dex and Int for your Gem requirements! Astramentis - this Amulet gives a lot of Attributes. It's not only Strenght - you will also need some Dex and Int for your Gem requirements! |
|
| +(80-100) to all Attributes -4 Physical Damage taken from Attack Hits |
|
 Brutus' Lead Sprinkler - you can use your End-game Weapons since level 28. They require a bit of Strength to be good, so make sure you have plenty of Attribute Items ready. Brutus' Lead Sprinkler - you can use your End-game Weapons since level 28. They require a bit of Strength to be good, so make sure you have plenty of Attribute Items ready. |
|
| 20% increased Physical Damage Adds (8-13) to (26-31) Physical Damage 30% increased Fire Damage (15-20)% increased Attack Speed (30-40)% increased Critical Strike Chance Adds 4 to 7 Fire Damage to Attacks with this Weapon per 10 Strength |
|
 Facebreaker - instead of using a Weapon, you can use your fists alone. By stacking flat sources of Physical Damage, you can out-DPS real Weapons pretty easily. Facebreaker - instead of using a Weapon, you can use your fists alone. By stacking flat sources of Physical Damage, you can out-DPS real Weapons pretty easily. |
|
| +30% to Global Critical Strike Multiplier 10% reduced Enemy Stun Threshold (600-800)% more Physical Damage with Unarmed Attacks Extra gore |
|
 One with Nothing - the Damage will fall off pretty quickly since you don't have that much Dexterity in your Passive Tree, but it's still enough to carry you through the first few Acts. One with Nothing - the Damage will fall off pretty quickly since you don't have that much Dexterity in your Passive Tree, but it's still enough to carry you through the first few Acts. |
|
| Adds Hollow Palm Technique | |
 Wanderlust - those give you Immunity to Freeze, a bit of Movement Speed, and Mana Regeneration. Wanderlust - those give you Immunity to Freeze, a bit of Movement Speed, and Mana Regeneration. |
|
| +5 to Dexterity +(10-20) to maximum Energy Shield (20-40)% increased Mana Regeneration Rate 20% increased Movement Speed Cannot be Frozen |
|
4. Final Skill Tree, Ascendancy Points, and Pantheon
Final Skill Tree:
118 Points Final Passive Tree (doesn't include Cluster or Unique Jewels)
118 Points Path of Building (PoB) link
Ascendancy points:
Preferably in that order:
- Tukohama, War's Herald
- Arohongui, Moon's Presence
- Ramako, Sun's Light
- Hinekora, Death's Fury
Pantheon:
Major God: Soul of the Brine King: You cannot be Stunned if you've been Stunned or Blocked a Stunning Hit in the past 2 seconds; Cannot be Frozen
Minor God: Soul of Shakari: You cannot be Poisoned while there are at least 3 Poisons on you; 50% less Duration of Poisons on You
5. Final Gems links
| [DPS] Volcanic Fissure setup | |
|
Volcanic Fissure - fissure erupts in the targeted location, releasing many Projectiles. Anomalous Quality adds 1 extra Projectile. |
 |
Earthbreaker Support - summons a Totem that uses linked Slam Skill instead. In this Build, you can have up to 3 Totems active at once. |
 |
Multistrike Support - causes additional repeats of Supported Attack with vastly improved Attack Speed. |
 |
Elemental Damage with Attacks Support - improves your Elemental Damage. The Awakened version grants immunity to Elemental Reflect. |
 |
Lifetap Support - makes you pay your Skill Costs with Life instead of Mana. |
 |
Increased Critical Damage Support - grants a lot of Critical Strike Multiplier. Can be swapped to Increased Critical Strikes Support if your Crit. Chance is still low. |
| [UTILITY] Ancestral Totems Setup | |
 |
Ancestral Protector - being nearby this Totem grants you a lot of Attack Speed. |
 |
Multiple Totems Support - used to increase the maximum limit of Summoned Totems. |
|
Ancestral Warchief - similarly to Protector, it grants you a lot of Melee Damage. |
| [UTILITY] Auras | |
|
Determination - improves your Armour Rating, and grants some flat Armour. Very important Aura for your defense. |
 |
Anger - adds Fire Damage to all your Attacks. |
|
Blood and Sand - depending on stance, it gives a lot of Damage or AoE for your Attacks. |
 |
Enlighten Support - reduces the Mana Reservation on Skills |
| [UTILITY] Precision setup | |
 |
Precision - gives a lot of Accuracy and Critical Strike Chance. It reserves a flat amount of Mana |
 |
Arrogance Support - it's best to reserve Life instead of Mana with this Aura. |
| [UTILITY] Curse setup | |
 |
Assassin's Mark - improves your Critical Strike Chance against the marked enemy. Unfortunately, you won't get Power Charges from your Totem's kills. |
| [UTILITY] Wave of Conviction setup | |
 |
Wave of Conviction - applies Fire exposure on enemies if the highest Damage type it deals is also Fire. |
 |
High-Impact Mine Support - you can't deal Damage directly because of Ancestral Bond Keystone, so you will have to use Mines. |
 |
Charged Mines Support - if the Mine triggers at the enemy, you have a high chance to gain Frenzy Charge. |
| [MOBILITY] Movement setup | |
|
Leap Slam - quickly moves you to the targeted location. Leap Slamming on enemies with Full Life will always apply Stun to them. |
| [UTILITY] Molten Shell | |
 |
Molten Shell - creates a protective shield around you that reduces incoming Damage and grants additional Armour. |
| [UTILITY] Blood Rage | |
 |
Blood Rage - you can't gain Frenzy Charges that way, but the Buff itself gives plenty of Attack Speed. Try to have it active at all times. |
| [UTILITY] Summon Ice Golem | |
 |
Summon Ice Golem - improves your Accuracy and Critical Strike Chance. Only important if you are not Accuracy capped. |
|
|
6. Gear Setup
The most important piece of Gear for this Build is the Weapon. Brutus' Lead Sprinkler adds a bit of Fire Damage to Attacks with that Weapon for every 10 points of Strength you have. All your remaining Items are used to boost your Strength to maximum, and of course to give you a bit of defense. Another very important Item is your Shield, as Shaper Influenced Bases can have a modifier that adds 1 additional Totem to your limits, increasing your Damage by 1/3. Crown of Eyes is another vital part of your Equipment, as it will add a tremendously high amount of increased Damage to your Attacks. You will want Strength on every Rare Item you can get, the regular Increases to Damage are minuscule compared to the synergy you have with that Attribute. However, you should get a bit of Accuracy Rating and Critical Strike Multiplier to further boost your Damage. You can enhance your Jewelry with Intrinsic Catalyst to improve its Attribute bonuses. The rest is pretty typical - you still want plenty of Maximum Life and Resistances. If you have a ring with Flammability on Hit you can anoint Whispers of Doom on your Amulet, otherwise it's hard to fit another Gem into your Gear.
|
Stat priorities on items:
|
 (Helmet) Crown of Eyes - combined with Iron Will Keystone, it turns your Malee Physical Damage bonus from Strength into a generic Attack Bonus with higher effectiveness. (Helmet) Crown of Eyes - combined with Iron Will Keystone, it turns your Malee Physical Damage bonus from Strength into a generic Attack Bonus with higher effectiveness. |
|
| +(300-350) to Accuracy Rating (120-150)% increased Energy Shield -30% to Fire Resistance (0.4-0.8)% of Attack Damage Leeched as Life (0.2-0.4)% of Attack Damage Leeched as Mana Increases and Reductions to Spell Damage also apply to Attacks at 150% of their value |
|
| (Weapon) Brutus' Lead Sprinkler - it's the main feature of this Build. It adds a bit of Fire Damage for every 10 points of Strength you have. You can try to get the Increased Attack Speed Corrupted Implicit, as the Weapon is pretty cheap. |
|
| 20% increased Physical Damage Adds (8-13) to (26-31) Physical Damage 30% increased Fire Damage (15-20)% increased Attack Speed (30-40)% increased Critical Strike Chance Adds 4 to 7 Fire Damage to Attacks with this Weapon per 10 Strength |
|
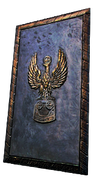 (Off-hand) Rare Shield - use the Shaper Influence Base to get additional Totem. Other than that, try to get Strength, maximum Life, or Elemental Resistances. You can also get a modifier that applies Shock to enemies if you blocked their Hit. (Off-hand) Rare Shield - use the Shaper Influence Base to get additional Totem. Other than that, try to get Strength, maximum Life, or Elemental Resistances. You can also get a modifier that applies Shock to enemies if you blocked their Hit. |
|
| Min. requirements: +1 to maximum number of Summoned Totems Optional affixes: Maximum Life Strength to All Elemental Resistances Maximum Elemental Resistances chance to Shock Attackers for 4 seconds on Block Chaos Resistance |
|
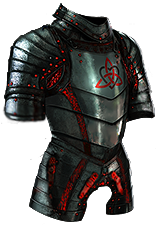 (Body Armour) Iron Fortress - a very strong Unique Armour for a build that utilizes Strength. It grants you a lot of Strength and boosts your Block Chance and Melee Damage based on your total Strength. (Body Armour) Iron Fortress - a very strong Unique Armour for a build that utilizes Strength. It grants you a lot of Strength and boosts your Block Chance and Melee Damage based on your total Strength. |
|
| +1% Chance to Block Attack Damage per 50 Strength Chance to Block Spell Damage is Unlucky +(60-120) to Strength (80-100)% increased Armour 10% reduced Movement Speed Strength's Damage Bonus instead grants 3% increased Melee Physical Damage per 10 Strength |
|
 (Belt) Rare Belt - your Belt can also provide a lot of Strength. Try to get the Synthesis Implicit that increases your Strength by up to 15%! Other than that, look for just regular Attribute, Life, and Resistance modifiers. (Belt) Rare Belt - your Belt can also provide a lot of Strength. Try to get the Synthesis Implicit that increases your Strength by up to 15%! Other than that, look for just regular Attribute, Life, and Resistance modifiers. |
|
| Min. requirements: +70 to maximum Life +30% to Elemental Resistances +40 to Strength Optional affixes: 15% increased Strength |
|
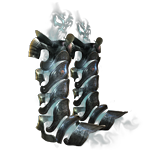 (Boots) Alberon's Warpath - this cheap pair of Boots can give you a lot of Attributes. Additional Chaos Resistances and Movement Speed are also quite useful. (Boots) Alberon's Warpath - this cheap pair of Boots can give you a lot of Attributes. Additional Chaos Resistances and Movement Speed are also quite useful. |
|
| (15-18)% increased Strength Adds 1 to 80 Chaos Damage to Attacks +(180-220) to Armour +(13-19)% to Chaos Resistance 25% increased Movement Speed Summoned Skeleton Warriors are Permanent and Follow you |
|
 (Gloves) Rare Gloves - there are many useful modifiers on your Gloves. Strength, Attack Speed, and Accuracy Rating are all very good for this Build. You can get Intimidate Chance thanks to the Eldritch Influences. (Gloves) Rare Gloves - there are many useful modifiers on your Gloves. Strength, Attack Speed, and Accuracy Rating are all very good for this Build. You can get Intimidate Chance thanks to the Eldritch Influences. |
|
| Min. requirements: +60 to maximum Life +40 to Strength Optional affixes: 15% increased Attack Speed +400 to Accuracy Rating chance to Intimidate Enemies for 4 seconds on Hit Elemental Resistances |
|
| (Amulet) Astramentis - is very good and cheap unique that adds a lot of all Attributes. It's a great starting point for every Attribute Build. |
|
| +(10-16) to all Attributes +(80-100) to all Attributes -4 Physical Damage taken from Attack Hits |
|
 (Amulet) Rare Amulet - with high enough investment, Rare Amulets outperform Astramentis. You will need a percentage Increase and flat values of Strength to achieve that. (Amulet) Rare Amulet - with high enough investment, Rare Amulets outperform Astramentis. You will need a percentage Increase and flat values of Strength to achieve that. |
|
| Min. requirements: +50 to maximum Life 15% increased Strength +60 to Strength Optional affixes: Elemental Resistances Critical Strike Multiplier |
|
| Recommended Anointments: Lethality Shaman's Dominion Whispers of Doom |
|
 (Ring) Rare Ring - you will have to get a lot of Elemental Resistances on your Rings, but you can't forget about Strength or maximum Life. You can get Implicit that boost your Strength, but it's not as strong as it is for Amulet or Belt. You can also get Flammability on Hit if you got a source of additional Curse. (Ring) Rare Ring - you will have to get a lot of Elemental Resistances on your Rings, but you can't forget about Strength or maximum Life. You can get Implicit that boost your Strength, but it's not as strong as it is for Amulet or Belt. You can also get Flammability on Hit if you got a source of additional Curse. |
|
| Min. requirements: +80% to Elemental Resistances +60 to Maximum Life +40 Strength Optional affixes: % increased Strength Curse Enemies with Flammability on Hit |
|
 (Jewel) Rare Jewels - Jewels are very useful in this Build as they can grant you a lot of Life and Critical Multiplier, or stats you lack on the rest of your Gear such as Resists. (Jewel) Rare Jewels - Jewels are very useful in this Build as they can grant you a lot of Life and Critical Multiplier, or stats you lack on the rest of your Gear such as Resists. |
|
|
Recommended affixes: |
|
 (Jewel) Large Cluster Jewels - provides 2 very strong Passives for Attacks with Maces. 3rd option is quite good, but not mandatory. (Jewel) Large Cluster Jewels - provides 2 very strong Passives for Attacks with Maces. 3rd option is quite good, but not mandatory. |
|
| Min. requirements: Weight Advantage Feed the Fury Optional affixes: Martial Prowess |
|
 (Jewel) Medium Cluster Jewels - it's a great place to get permanent Onslaught for your Build thanks to the Sleepless Sentry Notable. The second Notable is not that important. (Jewel) Medium Cluster Jewels - it's a great place to get permanent Onslaught for your Build thanks to the Sleepless Sentry Notable. The second Notable is not that important. |
|
| Min. requirements: Sleepless Sentry Optional affixes: Ancestral Guidance |
|
 (Jewel) Watcher's Eye - this Jewel has very potent Aura modifiers for our Setup. Fire Penetration from Anger is the most valuable one. (Jewel) Watcher's Eye - this Jewel has very potent Aura modifiers for our Setup. Fire Penetration from Anger is the most valuable one. |
|
| (4-6)% increased maximum Energy Shield (4-6)% increased maximum Life (4-6)% increased maximum Mana <Two or Three random aura modifiers> Recommended Aura mods: Damage Penetrates 15% Fire Resistance while affected by Anger |
|
 (Flask) Bottled Faith - this Flask provides an amazing Damage bonus for this build, but it's quite expensive and hard to get. (Flask) Bottled Faith - this Flask provides an amazing Damage bonus for this build, but it's quite expensive and hard to get. |
|
| (30-15)% reduced Duration Consecrated Ground created by this Flask has Tripled Radius Consecrated Ground created during Effect applies (7-10)% increased Damage taken to Enemies (100-150)% increased Critical Strike Chance against Enemies on Consecrated Ground during Effect |
|
 (Flask) Dying Sun - this Flask is far more accessible, and also provides an amazing Damage bonus in form of additional Projectiles. (Flask) Dying Sun - this Flask is far more accessible, and also provides an amazing Damage bonus in form of additional Projectiles. |
|
| (125-150)% increased Charges per use (60-40)% less Duration (10-20)% increased Area of Effect during Effect Skills fire 2 additional Projectiles during Effect |
|
|
Suggested Flasks:
|
|
   |
|
|
If you have any other build requests please leave that in the comments below. We are always open to suggestions and constructive feedback.
Pictures used in this article are the intellectual property of Grinding Gear Games.
