
Master Surgeon Forbidden Rite Pathfinder Build
Forbidden Rite build for a Pathfinder that revolves around Master Surgeon Keystone and a Life FlaskMaster Surgeon Forbidden Rite
Pathfinder Build
Updated for Patch 3.21
The Best Crafty Guides by Odealo
| Guide notes | |||
| June 05, 2023 -Build created |
|||
| Build overview | |||
| Tags: [CASTER] [CHAOS] [LIFE] [POISON] | |||
|
Budget: Defenses: |
|
Boss DPS: AoE: |
|
Master Surgeon Keystone is a very powerful addition to any build that uses a Life Flask - the effect of it will last for the full Flask duration even if your Life is Full. Here the build is centred around this small change. It will be important to have this Life Flask of Perenniality up at all times - you will have to drink it each time it's close to the end of its effect, and as it may sound discouraging, it's really not that debilitating once you run a few maps. Now that you Recover incalculable amounts of Life a second, permanently, you might as well regenerate this much Energy Shield too. We don't recommend using Supreme Decadence Keystone. Instead, choose a Replica Sorrow of the Divine Flask for a better Recovery and Eldritch Battery. With Eldritch Battery you won't have to worry about Mana, but you've just lost a potent defensive layer. To make another use of Energy Shield you could either allocate MoM or equip Mahuxotl's Machination for permanent +5% to all Maximum Resistances. We recommend the latter. Mitigating tons of Elemental and Chaos Damage is not enough, you need to take Physical Damage into account too. There are many ways to solve this problem. The most efficient route is to equip The Fourth Vow and accumulate a lot of Armour from other items. Add to that Endurance Charges or Chaos Golem. We've also included Frost Shield, Enfeeble Curse, Petrified Blood, Nature's Patience, and Progenesis Flask. Your character is now extremely durable.
As you've selected Pathfinder, we recommend a Poison build. There is no better Skill to use than Forbidden Rite. It makes you deal Chaos Damage to yourself, but with 85% Chaos Resistance and superb Recovery, it's nothing. The multiple Projectiles of this Spell can all deal damage to a single enemy so it's quite good against a single target too. Poison Damage will be upgraded by Master Toxicist and Nature's Reprisal Keystones. You can also allocate Chaos Mastery for an extra Gem Level of all Skill Gems as the extra damage is, again, insignificant.
You can also check our other Path of Exile builds right over here Odealo's Crafty Guides - Full List
1. Gameplay
The build is very simple to navigate. It uses a Guard Spell - Molten Shell, Mobility Skill - Dash or Flame Dash, and Forbidden Rite to do all the heavy lifting. Other Skills are linked with Cast when Damage Taken because you're dealing a lot of it to yourself. These are three Curses, Frost Shield, and Chaos Golem. For Auras we've used Grace, Determination, Malevolence, Herald of Agony, and Petrified Blood. We've managed to fit them all and reserve 100% of the Mana Pool, but if you don't have that good Reservation Efficiency, you can link up Malevolence to Divine Blessing Support.
|
|
|
|

2. Build's PROS & CONS
| PROS |
|
| CONS |
|
3. Leveling tips
To level up efficiently, use our Ranger Leveling Guide with Bows/DoT. The finished build will function properly only after being able to have all the flasks up at all times, which is unachievable for a low-level character. Only after allocating most of the Flask nodes and gearing up, you will be able to switch. We recommend levelling up with Toxic Rain up to level 80 or so, it's very good.
Bandits:
Kill all three bandits and be rewarded with two additional Skill Points
Leveling Skill Trees:
33 Points Passive Tree
Start with the nodes near your starting location - Maximum Life and Chaos Damage.
70 Points Passive Tree
Allocate more Maximum Life, Bow/Attack Speed, Chaos, and Duration nodes.
4. Final Skill Tree, Ascendancy Points, and Pantheon
Final Skill Tree:
109 Points Final Passive Tree (doesn't include Cluster or Unique Jewels)
123 Points Path of Building (PoB) link
Ascendancy points:
Preferably in that order:
- Nature's Reprisal
- Nature's Adrenaline
- Master Surgeon
- Master Toxicist
Pantheon:
Major God: Soul of Solaris: 6% additional Physical Damage Reduction while there is only one nearby Enemy; 20% chance to take 50% less Area Damage from Hits
Minor God: Soul of Ryslatha: Life Flasks gain 3 Charges every 3 seconds if you haven't used a Life Flask Recently; 60% increased Life Recovery from Flasks used when on Low Life
5. Final Gems links
| [DPS] Forbidden Rite setup | |
 |
Forbidden Rite - It has a great base Spell Chaos Damage and can shotgun single targets. It will cause you to suffer a bit of Chaos Damage, but in this build it won't be a big deal. Use it to inflict Poison. |
 |
Deadly Ailments Support - Less Damage with Hits, but more Damage over Time, that is Poison here. |
 |
Void Manipulation Support - Makes you unable to deal Elemental Damage, but grants more Chaos Damage. |
 |
Spell Echo Support - Spell is being repeated resulting in faster Cast Speed. It slightly lowers damage. |
 |
Unbound Ailments Support - Increased Poison Duration and more Poison Damage. |
 |
Greater Multiple Projectiles Support - Fires extra Projectiles. It's the only Support Gem in this setup that's better if it's not Awakened - more Projectiles results in a larger spread, thus it's harder to hit one target with all of them. |
| [UTILITY] CwDT setup | |
 |
Frost Shield - Grants you a bit of extra Crit Chance, which is actually good with Careful Conservationist Notable, but the most important feature is the Reduced Damage Taken, especially from enemies outside of the bubble. It drains your ES, but you have an excellent ES Recovery. Get a Divergent version if you can. |
 |
Void Sphere - Hits Enemies with high frequency to keep Withered stacks from Nature's Reprisal, Hinders them to increase your DPS, and pulls enemies so they're easier to Hit. The phantasmal one would be the best. |
 |
Summon Chaos Golem - Use it for an Additional Physical Damage Reduction, and get an Anomalous variant. |
 |
Cast when Damage Taken - Keep it at level 20. It will trigger all the linked to it Spells once you take some damage. |
| [UTILITY] Auras setup | |
 |
Grace - Adds and increases Evasion Rating for a chance to avoid Attacks. You may be tempted to replace it with level-21  Purity of Fire which is equally good, if not better. Purity of Fire which is equally good, if not better. |
 |
Determination - Adds and Increases Armour to Mitigate incoming Physical Damage. Use a Divergent Version if you can afford it. |
 |
Malevolence - Increases Skill Effect Duration, Poison Damage, and Damage over Time. It's very important for your DPS, but if you can't afford Mana for it, link it with  Divine Blessing Support. The Divergent variant is excellent here. Divine Blessing Support. The Divergent variant is excellent here. |
 |
Enlighten Support - Linked Spells Reserve less Mana. Try to get Level 4 of such a Gem if you can. |
| [UTILITY] Mana-Reserving setup | |
 |
Herald of Agony - The Skill Tree Alone won't get you enough Poison Chance. Use Divergent Herald of Agony for a 40% Chance of Poisoning. It should add up to 100%. It also grants more Poison Damage. |
 |
Arctic Armour - Arctic Armour will make you take less Physical and Fire Damage while stationary, making it an excellent addition. A Divergent variant is even better for the extra 1% less damage. |
|
Enlighten Support |
| [UTILITY] Dash and Molten Shell | |
 |
Dash - Use it to simply Dash from place to place. You may want to replace it with  Flame Dash, whichever you prefer. Flame Dash, whichever you prefer. |
 |
Molten Shell - Soaks up some of the incoming Physical Damage, the more Armour you have the more efficient it is. |
 |
Lifetap Support - Level 1 Lifetap would be great if you can spare a socket for it. It's optional, but the Lifetap buff grants you a bit of extra Life Recovery from Flasks. |
| [UTILITY] Petrfied Blood setup | |
 |
Petrified Blood - With Petrified Blood, you prevent 40% of incoming Hit Damage, and then you take it as DoT over the next 4 seconds. This effect affects only the lower half of your Life Pool, but you're on Low Life constantly. The Anomalous version is better. It prevents more Hit Damage but makes you take more Damage over Time instead, which is not a problem due to your high Life Recovery. |
 |
Arrogance Support - Petrified Blood Reserves slightly over half of your Life. It may sound bad but isn't - due to the Petrified Blood itself. Anomalous type is preferable, it increases Life Reservation Efficiency. |
| [UTILITY] CwDT Curses setup | |
 |
Enfeeble - Cursed enemy deals less Damage and has a reduced Accuracy Rating. "Enfeeble on Hit" can be gained as a Corrupted Gloves Implicit. It's good for survivability, but if you want damage you might want to replace it with  Punishment. Punishment makes Cursed Enemy receive increased Damage if they're on low Life. Punishment. Punishment makes Cursed Enemy receive increased Damage if they're on low Life. |
 |
Despair - Cursed foes have reduced Chaos Resistance, which makes them take more Poison Damage. Anomalous Despair is the best one as it specifically improves DoT. "Despair on Hit" can be gained as a Rare Ring Affix. |
 |
Temporal Chains - This is the Curse that makes Poison last longer and reduces enemies' Action Speed. You won't have enough sockets for all of these Curses so we've used Asenath's Gentle Touch to apply this one. |
|
Cast when Damage Taken - All of the above-mentioned Curses can be applied automatically, so the whole setup may be redundant. |
| [UTILITY] Haste setup | |
 |
Haste - If you have two free sockets left because you don't need them for Curses, use Haste as a temporary Aura. It increases Cast Speed resulting in more damage. |
|
Divine Blessing Support - Haste becomes a temporary Aura that you can cast by spending Energy Shield due to Eldritch Battery. |
|
|
6. Gear Setup
As is the case with all Poison builds, you will need a 100% Poison Chance, but it should be covered by Skill Tree and Divergent Herald of Agony. For Damage, seek modifiers like increases to Forbidden Rite Gem Level, Chaos DoT Multiplier, increased DoT or Poison Damage, and Ailment Damage or Duration. Cast Speed is important too, usually present on a weapon. For defences seek Armour, Maximum Life, Fire and Chaos Resistances, and Spell Suppression. With Lethal Pride's Tempered by War, no Lightning or Cold damage will be taken, you won't need these types of Resistances. Energy Shield is also not important at all. You will have around 4 Jewel Sockets to patch up the Attributes and Resistances. Other important stats are Mana Reservation Efficiency from Amulet, Jewels, or Helmet, and Attributes - Strength and Intelligence. You can make great use of multiple Unique items, but only some of them are mandatory. Mahuxotl's Machination is one of them, this Shield will get you extra Resistances. Anathema Ring and Asenath's Gentle Touch are extremely good. For Body Armour, you can use Doppelgänger Guise, but The Fourth Vow seems like the best option if you have a lot of Armour.
Our recommended items will:
- Cap your resistances at 75%
- Provide you with enough DPS and Life to start mapping
|
Stat priorities on items:
|
 (Helmet) Rare Helmet - The Helmet is an extremely important piece. Here you will need to craft the mod that redirects Physical Damage to be taken as Fire and get some Reservation Efficiency, up to 20% is a reasonable assumption. It can be gained as an Essence's Suffix and The Eater of World's Implicit. (Helmet) Rare Helmet - The Helmet is an extremely important piece. Here you will need to craft the mod that redirects Physical Damage to be taken as Fire and get some Reservation Efficiency, up to 20% is a reasonable assumption. It can be gained as an Essence's Suffix and The Eater of World's Implicit. |
|
| Min. requirements: 8% of Physical Damage from Hits taken as Fire Damage (crafted) 17% increased Mana Reservation Efficiency of Skill +60 to maximum Life Optional affixes: Fire Resistance Chaos Resistance Spell Suppression Chance Attributes Armour |
|
| Helmet enchantments: 40% increased Forbidden Rite Damage |
|
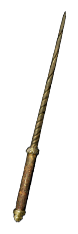 (Weapon) Rare Wand / Dagger - Try to get a weapon that increases the Gem Level of Forbidden Rite by 2. Add to that other various modifiers, mostly for Chaos or Poison Damage over Time. (Weapon) Rare Wand / Dagger - Try to get a weapon that increases the Gem Level of Forbidden Rite by 2. Add to that other various modifiers, mostly for Chaos or Poison Damage over Time. |
|
| Min. requirements: +1 to Level of all Chaos Spell Skill Gems 100% increased Chaos/Poison/DOT Damage Optional affixes: +1 to Level of all Intelligence Spell Skill Gems Damage over Time Multiplier Chaos Damage over Time Multiplier increased Damage with Poison Cast Speed |
|
 (Weapon) Apep's Rage - Apep's Rage is actually very good - use it until you can afford a better rare Weapon, which will be undoubtedly much more expensive. The mana loss does nothing as you use ES to cast Spells. (Weapon) Apep's Rage - Apep's Rage is actually very good - use it until you can afford a better rare Weapon, which will be undoubtedly much more expensive. The mana loss does nothing as you use ES to cast Spells. |
|
| (27-31)% increased Spell Damage Adds (90-130) to (140-190) Chaos Damage to Spells (25-30)% increased Cast Speed +(5-10)% to Chaos Resistance Lose 40 Mana when you use a Skill Poisons you inflict deal Damage (30-50)% faster |
|
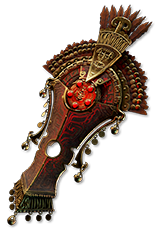 (Off-hand) Mahuxotl's Machination - It has a lot of Keystones - makes your ES useless, but if you manage to fill the ES Pool at least once every 4 seconds, it grants 5% Extra Maximum Resistances permanently. Half of Elemental Damage is taken as Chaos. You can't Regenerate or Recharge Life or ES, but you still can Recover it with Flasks, which is a key to survival. (Off-hand) Mahuxotl's Machination - It has a lot of Keystones - makes your ES useless, but if you manage to fill the ES Pool at least once every 4 seconds, it grants 5% Extra Maximum Resistances permanently. Half of Elemental Damage is taken as Chaos. You can't Regenerate or Recharge Life or ES, but you still can Recover it with Flasks, which is a key to survival. |
|
| Corrupted Soul Divine Flesh Eternal Youth Everlasting Sacrifice Immortal Ambition Vaal Pact |
|
 (Body Armour) The Fourth Vow - With this Armour on, Armour also applies to Chaos Damage taken from Hits. It's important, as half of the Elemental Damage taken is actually Chaos Damage due to the Divine Flesh, and your Chaos Resistance is at 85%. It is basically responsible for half of your overall durability. (Body Armour) The Fourth Vow - With this Armour on, Armour also applies to Chaos Damage taken from Hits. It's important, as half of the Elemental Damage taken is actually Chaos Damage due to the Divine Flesh, and your Chaos Resistance is at 85%. It is basically responsible for half of your overall durability. |
|
| Physical Damage taken bypasses Energy Shield (150-250)% increased Armour and Energy Shield +(17-29)% to Chaos Resistance Regenerate 3% of Life per second Armour also applies to Chaos Damage taken from Hits |
|
 (Body Armour) Doppelgänger Guise - The "40% less Physical and Chaos Damage taken while Sane" line is extremely impactful. Use it if you struggle with Physical Damage, it's as good as The Fourth Vow. (Body Armour) Doppelgänger Guise - The "40% less Physical and Chaos Damage taken while Sane" line is extremely impactful. Use it if you struggle with Physical Damage, it's as good as The Fourth Vow. |
|
| Grants Level 20 Unhinge Skill (40-60)% more Critical Strike Chance while Insane Enemies Killed by your Hits are destroyed while Insane (40-30)% less Physical and Chaos Damage Taken while Sane Regenerate 10% Life over one second when Hit while Sane |
|
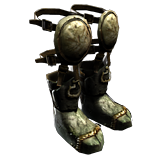 (Boots) Rare Boots - Keep Boots simple. Get at least 25% increased Movement Speed, Maximum Life, some Fire and Chaos Resistance, and maybe even Spell Suppression or Attributes. (Boots) Rare Boots - Keep Boots simple. Get at least 25% increased Movement Speed, Maximum Life, some Fire and Chaos Resistance, and maybe even Spell Suppression or Attributes. |
|
| Min. requirements: +50 to maximum Life +30% Fire Resistance +15% Chaos Resistance 25% increased Movement Speed Optional affixes: Spell Suppression Chance Attributes |
|
 (Gloves) Rare Gloves - Gloves are straightforward as well. Focus on Resistances, Maximum Life, maybe Cast Speed, and Suppression or Attributes. (Gloves) Rare Gloves - Gloves are straightforward as well. Focus on Resistances, Maximum Life, maybe Cast Speed, and Suppression or Attributes. |
|
| Min. requirements: +60 to Maximum Life +30% Fire Resistance +15% Chaos Resistance Optional affixes: Attributes Cast Speed increased Damage over Time Spell Suppression Chance increased Damage during any Flask Effect (crafted) |
|
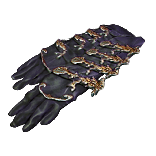 (Gloves) Asenath's Gentle Touch - These Gloves are our pick. It inflicts Temporal Chains on Hit, saving you a socket, grants Intelligence, Maximum Life, Blinds most of the foes, and explodes enemies enhancing your clear speed. (Gloves) Asenath's Gentle Touch - These Gloves are our pick. It inflicts Temporal Chains on Hit, saving you a socket, grants Intelligence, Maximum Life, Blinds most of the foes, and explodes enemies enhancing your clear speed. |
|
| +(20-30) to Intelligence +(60-80) to maximum Life +(60-80) to maximum Mana Curse Enemies with Temporal Chains on Hit Non-Aura Curses you inflict are not removed from Dying Enemies Enemies near corpses affected by your Curses are Blinded Enemies Killed near corpses affected by your Curses explode, dealing 3% of their Life as Physical Damage |
|
 (Belt) Rare Belt - The Belt is yet another opportunity to acquire Maximum Life, Fire, and Chaos Resistance. You should also get mods for increased Flask Charges Gained, reduced Flask Charges Used, Flask Effect, Life Flask Recovery Rate, or increased Flask Effect Duration. The Recovery Rate mod may be the best one, but it also lowers Life Flask Duration, so be careful with it. (Belt) Rare Belt - The Belt is yet another opportunity to acquire Maximum Life, Fire, and Chaos Resistance. You should also get mods for increased Flask Charges Gained, reduced Flask Charges Used, Flask Effect, Life Flask Recovery Rate, or increased Flask Effect Duration. The Recovery Rate mod may be the best one, but it also lowers Life Flask Duration, so be careful with it. |
|
| Min. requirements: +70 to maximum Life +30% Fire Resistance +15% Chaos Resistance Optional affixes: Strength various Flask mods Intelligence |
|
 (Amulet) Rare Amulet - On the Amulet try to increase your Forbidden Rite Skill Level by one or two. Get some Maximum Life and Intelligence. Shaper's Suffix for Reservation Efficiency for all Skills, or other Reservation Efficiency Suffixes for Specific Auras are recommended. (Amulet) Rare Amulet - On the Amulet try to increase your Forbidden Rite Skill Level by one or two. Get some Maximum Life and Intelligence. Shaper's Suffix for Reservation Efficiency for all Skills, or other Reservation Efficiency Suffixes for Specific Auras are recommended. |
|
| Min. requirements: +50 to Maximum Life +1 to Level of all Chaos Skill Gems Intelligence Optional affixes: +#% to Chaos Damage over Time Multiplier increased Mana Reservation Efficiency of Skills +1 to Level of all Skill Gems Attributes Fire or Chaos Resistance |
|
 (Amulet) Ashes of the Stars - Ashes of the Stars is our pick. It grants you the necessary Attributes, up to 20% increased Reservation Efficiency, +1 to Level of all Skill Gems, and 30% Quality of all Skill Gems, all of it extremely good. (Amulet) Ashes of the Stars - Ashes of the Stars is our pick. It grants you the necessary Attributes, up to 20% increased Reservation Efficiency, +1 to Level of all Skill Gems, and 30% Quality of all Skill Gems, all of it extremely good. |
|
| +(10-16) to all Attributes (5-10)% increased Experience Gain of Gems (10-20)% increased Reservation Efficiency of Skills +1 to Level of all Skill Gems +(20-30)% to Quality of all Skill Gems |
|
| Recommended Anointments: Sovereignty Cleansed Thoughts Dirty Techniques |
|
 (Ring) Rare Ring - Rings are excellent for gathering Resistances and Attributes from their Suffixes, and Maximum Life From the Prefix. Focus on Chaos Resistance as you will need a lot of it. You may also be interested in Despair Curse on Hit as Hunter's Suffix. (Ring) Rare Ring - Rings are excellent for gathering Resistances and Attributes from their Suffixes, and Maximum Life From the Prefix. Focus on Chaos Resistance as you will need a lot of it. You may also be interested in Despair Curse on Hit as Hunter's Suffix. |
|
| Min. requirements: +50 to maximum Life +40% Fire Resistance +30% Chaos Resistance Intelligence or Strength Optional affixes: Curse Enemies with Despair on Hit |
|
 (Ring) Anathema - Every Poison Build must be able to apply at least two Curses. Three Curses is even better, and this Ring allows you to do so without Whispers of Doom. The 15% increased Cast Speed and up to 40 Intelligence is also desirable. (Ring) Anathema - Every Poison Build must be able to apply at least two Curses. Three Curses is even better, and this Ring allows you to do so without Whispers of Doom. The 15% increased Cast Speed and up to 40 Intelligence is also desirable. |
|
| +(15-25) to maximum Energy Shield +(30-40) to Intelligence (10-15)% increased Cast Speed (10-20)% chance to gain a Power Charge when you Cast a Curse Spell Your Curse Limit is equal to your maximum Power Charges |
|
 (Jewel) Rare Jewels - If you already have all the Resistances, Attributes, and enough Mana for all the Mana-reserving Spells, get Damage with Poison and Flask Effect Duration from your regular Jewels. (Jewel) Rare Jewels - If you already have all the Resistances, Attributes, and enough Mana for all the Mana-reserving Spells, get Damage with Poison and Flask Effect Duration from your regular Jewels. |
|
| Recommended affixes: Maximum Life Fire and Chaos Resistance Mana Reservation Efficiency Attributes increased Damage with Poison increased Flask Effect Duration |
|
 (Jewel) Large Cluster Jewel - Large Cluster Jewel with Chaos-related Notables and 8 passives is what you're looking for. You don't really need Touch of Cruelty as you Hinder with Void Sphere already. (Jewel) Large Cluster Jewel - Large Cluster Jewel with Chaos-related Notables and 8 passives is what you're looking for. You don't really need Touch of Cruelty as you Hinder with Void Sphere already. |
|
| Recommended affixes: 1 Added Passive Skill is Touch of Cruelty 1 Added Passive Skill is Unholy Grace 1 Added Passive Skill is Wicked Pall 1 Added Passive Skill is Unwaveringly evil |
|
 (Jewel) Medium Cluster Jewel - One or two Medium Cluster Jewels will be needed. The most important is one Spiked Concoction Notable which grants a permanent Alchemist's Genius for 20% increased Flask Charges gained, and 20% increased Flask Effect. Mender's Wellspring grants more Life Flask Charges, Peak Vigour - Maximum Life, and Brewed for Potency increased DoT and Flask Charges Gained. All of these also increase Life Recovery from Life Flask. (Jewel) Medium Cluster Jewel - One or two Medium Cluster Jewels will be needed. The most important is one Spiked Concoction Notable which grants a permanent Alchemist's Genius for 20% increased Flask Charges gained, and 20% increased Flask Effect. Mender's Wellspring grants more Life Flask Charges, Peak Vigour - Maximum Life, and Brewed for Potency increased DoT and Flask Charges Gained. All of these also increase Life Recovery from Life Flask. |
|
| Recommended affixes: 1 Added Passive Skill is Spiked Concoction 1 Added Passive Skill is Brewed for Potency 1 Added Passive Skill is Peak Vigour 1 Added Passive Skill is Mender's Wellspring |
|
 (Jewel) Small Cluster Jewel - Born of Chaos Notable grants an extra 3% Maximum Chaos Resistance resulting in 88% total Chaos Resistance. Enduring Composure is used for Endurance Charges that reduce Physical Damage Taken. Both are extremely good. (Jewel) Small Cluster Jewel - Born of Chaos Notable grants an extra 3% Maximum Chaos Resistance resulting in 88% total Chaos Resistance. Enduring Composure is used for Endurance Charges that reduce Physical Damage Taken. Both are extremely good. |
|
| Recommended affixes: 1 Added Passive Skill is Born of Chaos 1 Added Passive Skill is Enduring Composure |
|
 (Jewel) Natural Affinity - As you're extremely durable already, standing still won't emaciate you in any way. After 5 seconds of doing so, you will take 10% less Damage due to the Grasping Vines from Nature's Patience. (Jewel) Natural Affinity - As you're extremely durable already, standing still won't emaciate you in any way. After 5 seconds of doing so, you will take 10% less Damage due to the Grasping Vines from Nature's Patience. |
|
| Adds Nature's Patience | |
 (Jewel) Lethal Pride - Rakiata variant of Lethal Pride will get you the Tempered by War Keystone. With it, you will take no Cold or Lightning Damage - it will all be taken as Fire Damage instead when combined with Divine Flesh. Half of that Fire Damage will be taken as Chaos, and that's even better. The additional Strenght is a welcome addition. (Jewel) Lethal Pride - Rakiata variant of Lethal Pride will get you the Tempered by War Keystone. With it, you will take no Cold or Lightning Damage - it will all be taken as Fire Damage instead when combined with Divine Flesh. Half of that Fire Damage will be taken as Chaos, and that's even better. The additional Strenght is a welcome addition. |
|
| Commanded leadership over (10000-18000) warriors under Rakiata Passives in radius are Conquered by the Karui Historic |
|
  (Jewel) Forbidden Flame & Flesh - Gathering Winds Keystone would improve your Damage and mobility with Tailwind and Gale Force stacks. (Jewel) Forbidden Flame & Flesh - Gathering Winds Keystone would improve your Damage and mobility with Tailwind and Gale Force stacks. |
|
| Allocates <Random Ascendancy Notable> if you have the matching modifiers on Forbidden Flesh Allocates <Random Ascendancy Notable> if you have the matching modifiers on Forbidden Flame |
|
 (Jewel) Watcher's Eye - You're using Grace, Determination, and Malevolence. Maybe Purity of Fire. On a Watcher's Eye, Pick Malevolence's extra DoT Multiplier, or 10% of Physical Damage taken as Fire Damage from Purity of Fire. Other good mods are an increased Recovery rate of Life and Energy Shield while affected by Malevolence, and up to 70% increased Life Recovery from Flasks while affected by Vitality. Use level-1 Vitality if you want the latter. (Jewel) Watcher's Eye - You're using Grace, Determination, and Malevolence. Maybe Purity of Fire. On a Watcher's Eye, Pick Malevolence's extra DoT Multiplier, or 10% of Physical Damage taken as Fire Damage from Purity of Fire. Other good mods are an increased Recovery rate of Life and Energy Shield while affected by Malevolence, and up to 70% increased Life Recovery from Flasks while affected by Vitality. Use level-1 Vitality if you want the latter. |
|
| (4-6)% increased maximum Energy Shield (4-6)% increased maximum Life (4-6)% increased maximum Mana <Two or Three random aura modifiers> |
|
 (Flask) Progenesis - The best Flask for a build that has insane recovery, such as this one. It works quite similarly to Petrified Blood. (Flask) Progenesis - The best Flask for a build that has insane recovery, such as this one. It works quite similarly to Petrified Blood. |
|
| +35% to Chaos Resistance (20-10)% reduced Charges per use (-35-35)% increased Duration When Hit during effect, 25% of Life loss from Damage taken occurs over 4 seconds instead |
|
 (Flask) Replica Sorrow of the Divine - Life Recovery from Flasks will apply to Energy Shield which is a core feature of this build. Eldritch Battery will make you able to Cast Spells, as you have no Mana, and your Energy Shield is useless for mitigating damage anyway. Add the "Reused at the end of this Flask's effect" Implicit with Instilling Orb. (Flask) Replica Sorrow of the Divine - Life Recovery from Flasks will apply to Energy Shield which is a core feature of this build. Eldritch Battery will make you able to Cast Spells, as you have no Mana, and your Energy Shield is useless for mitigating damage anyway. Add the "Reused at the end of this Flask's effect" Implicit with Instilling Orb. |
|
| 40% increased Damage Creates Consecrated Ground on Use (25-50)% increased Duration Eldritch Battery during Effect Life Recovery from Flasks also applies to Energy Shield during Effect |
|
|
Suggested Flasks:
|
|
   |
|
|
If you have any other build requests please leave that in the comments below. We are always open to suggestions and constructive feedback.
Pictures used in this article are the intellectual property of Grinding Gear Games.
