Lightning Conduit Trickster Build
One of the tankiest builds for a Trickster that uses Lightning Conduit with Orb of StormsLightning Conduit
Trickster Build
Updated for Patch 3.24
The Best Crafty Guides by Odealo
| Guide notes |
| April 5, 2024 -Updated for Patch 3.24 |
| Build Overview | |||
| Tags: [CASTER] [ELEMENTAL] [ENERGY SHIELD] | |||
|
Budget: Defenses: |
|
Boss DPS: AoE: |
|
Lightning Conduit is a quite new Spell added back in Patch 3.19. It deals Lightning Damage only to Shocked enemies, which also removes the Shock from them, but it can not inflict Shock by itself. It requires a second Spell to Shock its targets, preferably one that can do it very efficiently so as not to slow you down - Orb of Storms is the best pick. Orb of Storms casts a Chaining Arc-like beam every 3 or so seconds or each time you Cast another Lighting Spell yourself when in its range. It results in a synergistic sequence of two-buttons-based playstyle. Lightning Conduit deals more damage per effect of Shock on its target. The effect of Shock can be enhanced by another Gem - Overcharge Support. It allows low-damage Skills to Shock enemies with much greater efficiency, which is exactly what the build needs. The effect of Shock is also increased by the Unique Thunderfist Gloves. Besides that, the build relies heavily on Charges, especially Power Charges. It's tanky enough to gain these Charges by being stationary via Ralakesh's Impatience and withstanding all the attacks. It's able to do so by Leeching Energy Shield with the new Trickster's Soul Drinker Ascendancy Keystone and standing within his Frost Shield dome. You're capable of reaching around 2mil DPS, which is not very high, it's around the same value as Righteous Fire/Fire Trap Inquisitor, and the durability is also quite similar.
The build uses many Unique Items that synergize well with Power Charges such as Void Battery, The Ephemeral Bond, and Malachai's Loop. Some of these items are not commonly used because the drawback of quickly losing these Charges is too debilitating, but since this build is tanky enough to stand still and deal damage for long periods of time, these are great picks. The durability is sourced here only from the high Energy Shield pool that is gained back via Leeching and Recovering (via Ghost Dance). Recharging or Regenerating is almost non-existent, so it creates another great synergy with Shavronne's Revelation Ring on your left side and a Ghost Reaver Keystone. Soul Drinker enables the long-term ES Leech much like Slayer's Brutal Fervour, keeping you safe even after you stop dealing damage to make a dodge. Escape Artist grants a lot of Energy Shield, given you have Body Armour with a lot of Evasion Rating. If you're using Vertex Helmet, it also provides you with around 10k Evasion Rating in total. It's one of the tankiest builds for a Trickster.
You can also check our other Path of Exile builds right over here Odealo's Crafty Guides - Full List
1. Gameplay
To deal damage, first cast the Orb of Storms, and immediately after Lightning Conduit. Your Orb of Storm should be able to Shock reliably many targets each cast due to its splitting beam and Chain Support. To move around and not lose any charges use Lightning Warp, it can teleport you over a distance and you still count as stationary. For boss fights deeply the Frost Shield, you should be easily able to out-leech the ES drain. It mitigates a big portion of incoming Hit damage. Use Arcanist's Brand that will trigger Assassin's Mark, Wave of Conviction, and grant the Arcane Surge buff. For a Guard Spell use a low-level Immortal Call triggered via Cast when Damage Taken. For Auras, we recommend Discipline, Purity of Elements, and Arctic Armour. Wrath is a temporary Aura that you can enable during boss fights, it's linked with a Divine Blessing, socketed in the Vertex.
|
|
|
|
2. Build's PROS & CONS
| PROS |
|
| CONS |
|
3. Leveling tips
Lightning Conduit Requires Level 28, but you can begin with a Lighting Spell for a smooth transition later on. Start with Spark at level 1 and switch to Arc at level 12. You should immediately head for the big Lightning Damage Cluster at the top of your Skill Tree, the intake Polymath ascendancy, and start allocating many different Masteries. From this point on you can start focusing more on Energy Shield, but don't take Chaos Innoculation until you have enough ES, most likely no sooner than before allocating the Escape Artist. Ralakesh's Impatience are a bit expensive right now, but necessary for this build to function properly. Don't equip them unless you've taken the Soul Drinker, your build has to be tanky to make any use of this pair of boots. Critical Strike and Spell Suppression-related nodes are the last ones to be picked from the Skill Tree.
Suggested leveling Gem setups:
| Arc setup | |
 |
Arc - Lightning Spell that Chains multiple times hitting several enemies |
 |
Added Lightning Damage Support - adds Lightning Damage to linked Skill |
 |
Inspiration Support - lowers Mana Cost, increases Elemental Damage, and Critical Strike Chance |
 |
Arcane Surge Support - grants a buff for more Spell Damage and Mana Regeneration |
 |
Spell Echo Support - Spell repeat additional times granting much more Cast Speed, but lowering damage |
| Arc setup | |
 |
Orb of Storms - Lightning Orb Spell that is used later to apply potent Shock, but during the leveling it is also a great source of secondary DPS |
 |
Added Lightning Damage Support - adds Lightning Damage to linked Skill |
 |
Inspiration Support |
 |
Chain Support - increases the number of enemies hit by Orb of Storms |
| Mana Reservation setup | |
 |
Wrath - use it for more Spell Damage |
 |
Purity of Elements - Grants a lot of Elemental Resistances and protects you from Elemental Ailments |
 |
Clarity - increases Mana Regeneration Rate which might be useful |
| Utility Gems | |
 |
Conductivity - lowers Lightning Resistance of affected enemies |
Bandits:
you should kill all three Bandits for two additional Skill Points
Leveling Skill Trees:
38 Points Skill Tree
Make your way for the big Lightning Cluster at the top as shown
73 Points Skill Tree
At this point, you should've allocated Polymath. Start taking different Masteries. Seek more Maximum Life, Extra Power Charges, and Lightning Spell Damage
Recommended leveling items:
 Le Heup of All - Use it for more Attributes, Damage, and Resistances. Le Heup of All - Use it for more Attributes, Damage, and Resistances. |
| Adds 1 to 4 Physical Damage to Attacks +(10-30) to all Attributes (10-30)% increased Damage (10-30)% increased Rarity of Items found +(10-30)% to all Elemental Resistances |
 Goldrim - Offers a lot of Elemental Resistances which are important. Goldrim - Offers a lot of Elemental Resistances which are important. |
| +(30-50) to Evasion Rating 10% increased Rarity of Items found +(30-40)% to all Elemental Resistances Reflects 4 Physical Damage to Melee Attackers Level Requirement reduced by 100 (Hidden) |
 Praxis - One of the best leveling Rings for most of the characters. Praxis - One of the best leveling Rings for most of the characters. |
| +(20-30) to maximum Mana +(30-60) to maximum Mana Regenerate (3-6) Mana per second -(8-4) to Total Mana Cost of Skills 8% of Damage taken Recouped as Mana |
 Lifesprig - An amazing level-1 leveling weapon for spell-casters. Lifesprig - An amazing level-1 leveling weapon for spell-casters. |
| (8-12)% increased Spell Damage +1 to Level of Socketed Spell Gems (20-28)% increased Spell Damage (5-8)% increased Cast Speed +(15-20) to maximum Life +(15-20) to maximum Mana Regenerate (6-8) Life over 1 second when you Cast a Spell |
 Atziri's Foible - An Amulet that grants a lot of Mana, Mana Regeneration, and reduces Attribute Requirements Atziri's Foible - An Amulet that grants a lot of Mana, Mana Regeneration, and reduces Attribute Requirements |
| (20-30)% increased Mana Regeneration Rate +100 to maximum Mana (16-24)% increased maximum Mana (80-100)% increased Mana Regeneration Rate Items and Gems have 25% reduced Attribute Requirements |
 Storm Prison - Use Strom Prison after allocating two extra Maximum Power Charges for much more damage. Storm Prison - Use Strom Prison after allocating two extra Maximum Power Charges for much more damage. |
| (11-15)% increased Spell Damage (40-60)% increased Physical Damage Adds 1 to (35-45) Lightning Damage (15-25)% increased Mana Regeneration Rate +1 to Maximum Power Charges (25-35)% chance to gain a Power Charge on Kill |
 Tabula Rasa - Use Tabula for the six, white, linked sockets. Tabula Rasa - Use Tabula for the six, white, linked sockets. |
|
| Item has no level requirement and Energy Shield (Hidden) Item has 6 White Sockets and is fully linked (Hidden) |
|
4. Final Skill Tree, Ascendancy Points, and Pantheon
Final Skill Tree:
119 Points Final Skill Tree (doesn't include Cluster or Unique or Cluster Jewels)
119 Points Path of Building (PoB) link
Ascendancy points:
Preferably in that order:
- Polymath
- Escape Artist
- Soul Drinker
- One Step Ahead
Pantheon:
Major God: Soul of the Brine King: You cannot be Stunned if you've been Stunned or Blocked a Stunning Hit in the past 2 seconds
Minor God: Soul of Ralakesh: Moving while Bleeding doesn't cause you to take extra Damage; 25% reduced Physical Damage over Time taken while moving
5. Final Gems links
| [DPS] Lightning Conduit setup | |
 |
Lightning Conduit - Deals Lightning Damage to the enemies in the targeted location. It cannot Shock, but can Hit only Shocked enemies, and scales up its damage with the Effect of Shock. |
 |
Energy Leech Support - It allows your Lightning Conduit to Leech a lot of Energy Shield and grants more Damage. Especially good with Soul Drinker Keystone. |
 |
Lightning Penetration Support - Damage penetrates Lightning Resistance, get the awakened version of it, it's quite cheap but impactful. |
 |
Elemental Focus Support - Grants more Elemental Damage but disables the ability to cause Elemental Ailments you could apply with Conduit, but you can't Shock with it anyway. |
 |
Power Charge on Critical Support - More Damage per Power Charge and increased Critical Strike Chance. |
 |
Inspiration Support - Lowers Mana Cost, increases Elemental Damage, and Critical Strike Chance. It can be replaced with  Increased Critical Damage Support. Increased Critical Damage Support. |
| [UTILITY] Orb of Storms setup socketed in Thunderfist |
|
 |
Orb of Storms - Orb of Storm is used to cause Shock, it fires up a chaining beam each time you cast a Spell while standing in its AoE. It also deals some damage on its own. |
 |
Overcharge Support - Shock caused by Orb of Storms is much more powerful, easily reaching the maximum possible Shock effect even with relatively low damage. |
 |
Lightning Penetration Support |
 |
Chain Support - Orb of Storm fires a beam that chains once, but with this Support Gem it can Chain additional times. It can be replaced with  Increased Area of Effect Support, especially when fighting pinnacle bosses. Increased Area of Effect Support, especially when fighting pinnacle bosses. |
| Support Gem granted by Thunderfist | |
 |
Added Lightning Damage Support - it's a level 30 Support Gem, it adds a lot of Lightning Damage to your Spell |
| [UTILITY] Aracanist Brand setup | |
 |
Arcanist Brand - The Brand will cast all linked Spells every second while attached. |
 |
Assassin's Mark - Greatly increases your Critical Strike Chance and Critical Strike Damage against Marked enemy. |
 |
Wave of Conviction - Causes Lightning Exposure, lowering Lightning Resistance. |
 |
Arcane Surge Support - Grants the Arcane Surge Buff for more Spell Damage and an increased Mana Regeneration Rate. Keep it at a low level. |
| [UTILITY] Immortal Call setup | |
 |
Immortal Call - A Guard Spell that reduces Elemental and Physical Damage Taken, it lasts longer the more Endurance Charges you spent on it, which is three. Keep it at level 3. |
 |
Cast when Damage Taken - Keep it at level 1, it will automatically trigger Immortal Call after you take damage. |
| [UTILITY] Wrath setup socketed in The Vertex |
|
 |
Wrath - Use this Aura for over 20% more Lightning Spell Damage. |
 |
Divine Blessing Support - Wrath becomes a temporary Aura, you don't have enough Reservation Efficiency to have it up permanently, and your damage should be enough to kill most of the enemies without it anyway. |
 |
Inspiration Support - Wrath Costs Less Mana, use the Divergent version to reduce the cost even more. |
| [UTILITY] Mana-reserving Spells | |
 |
Discipline - Discipline is used only for its additional Energy Shield bonus. |
 |
Purity of Elements - Grants extra Elemental Resistances and complete immunity to all Elemental Ailments like Chill or Ignite. |
 |
Arctic Armour - With this Spell on, you take over 20% less Physical and Elemental Damage while stationary. It Chills your foes on Hit. |
| [MOBILITY] Lightning Warp | |
 |
Lightning Warp - Lightning Warp keeps you stationary after use so that you don't lose your Charges. |
| [UTILITY] Frost Shield | |
 |
Frost Shield - Frost Shield drains your Energy Shield while you're inside of it, it then mitigates incoming Damage and grants you an additional Critical Strike Chance. |
|
|
6. Gear Setup
There are a lot of mandatory Unique Items here, and most of them are very cheap. Only your Body Armour, one Ring, and a Belt are of Rare quality. It shouldn't be a problem to gather all the necessary Elemental Resistances from just these three gear pieces, especially with Purity of Elements on. There's not much to look for on your Rare Items as the general defensive modifiers are usually enough. Remember that with Chaos Inoculation you don't need any Life or Chaos Resistance.
Our recommended items will:
- Cap your resistances at 75%
- Provide you with enough DPS and Life to start mapping
|
Stat priorities on items:
|
 (Helmet) The Vertex - Vertex makes it really easy to cast the Wrath supported by Divine Blessing, there's no substitute to this Helmet if you want to use this Aura. It has decent stats. (Helmet) The Vertex - Vertex makes it really easy to cast the Wrath supported by Divine Blessing, there's no substitute to this Helmet if you want to use this Aura. It has decent stats. |
|
| +1 to Level of Socketed Gems Socketed Gems have 50% reduced Mana Cost (245-280)% increased Evasion and Energy Shield +(30-40) to maximum Energy Shield +(24-30)% to Chaos Resistance Enemies Cannot Leech Mana From you |
|
| Helmet enchantments: Lightning Conduit enchantment |
|
 (Weapon) Void Battery - With over nine Power Charges, the Void Battery becomes an unmatched source of damage in these types of builds. (Weapon) Void Battery - With over nine Power Charges, the Void Battery becomes an unmatched source of damage in these types of builds. |
|
| (36-40)% increased Spell Damage 80% reduced Spell Damage (10-20)% increased Cast Speed (50-65)% increased Global Critical Strike Chance +(40-50) to maximum Mana +1 to Maximum Power Charges 25% increased Spell Damage per Power Charge |
|
 (Off-Hand) Malachai's Loop - Grants two extra Maximum Power Charges, increased Damage per Charge, and Energy Shield. The two of its big downsides are not affecting this build at all. (Off-Hand) Malachai's Loop - Grants two extra Maximum Power Charges, increased Damage per Charge, and Energy Shield. The two of its big downsides are not affecting this build at all. |
|
| (10-15)% increased Spell Damage (210-250)% increased Energy Shield +2 to Maximum Power Charges 20% chance to gain a Power Charge on Hit (12-16)% increased Spell Damage per Power Charge Lose all Power Charges on reaching Maximum Power Charges Shocks you when you reach Maximum Power Charges |
|
 (Body Armour) Rare Body Armour - Try to gather as much Evasion Rating as you can, it will affect your maximum Energy Shield via Escape Artist. We recommend an Evasion/ES base because you'll need 5 or 6 blue sockets. (Body Armour) Rare Body Armour - Try to gather as much Evasion Rating as you can, it will affect your maximum Energy Shield via Escape Artist. We recommend an Evasion/ES base because you'll need 5 or 6 blue sockets. |
|
| Min. requirements: around 2000 Evasion Rating +100% to Elemental Resistances Energy Shield Optional affixes: Attributes +#% to Spell Critical Strike Chance |
|
 (Boots) Ralakesh's Impatience - The core element of the build are these Boots. You will fight enemies while standing still in your Frost Shield and you don't need a lot of Movement Speed anyway. (Boots) Ralakesh's Impatience - The core element of the build are these Boots. You will fight enemies while standing still in your Frost Shield and you don't need a lot of Movement Speed anyway. |
|
| +(15-25)% to Cold Resistance +(15-25)% to Chaos Resistance Count as having maximum number of Endurance Charges Count as having maximum number of Frenzy Charges Count as having maximum number of Power Charges |
|
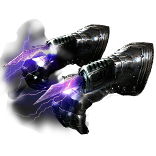 (Gloves) Thunderfist - These Gloves increase the effect of Shock by 100%, grant Evasion, Energy Shield, and a lot of Damage for the Orb of Storms, which should be socketed here. (Gloves) Thunderfist - These Gloves increase the effect of Shock by 100%, grant Evasion, Energy Shield, and a lot of Damage for the Orb of Storms, which should be socketed here. |
|
| Socketed Gems are Supported by Level 30 Added Lightning Damage 100% increased effect of Lightning Ailments 10% increased Attack Speed (150-200)% increased Evasion and Energy Shield |
|
 (Belt) Rare Belt - Resistances, Strength, and Energy Shield are to be looked for on a Belt. Stygian Vise or Crystal Belt are good candidates for a base. (Belt) Rare Belt - Resistances, Strength, and Energy Shield are to be looked for on a Belt. Stygian Vise or Crystal Belt are good candidates for a base. |
|
| Min. requirements: +50 to Maximum Energy Shield Strength +80% to Elemental Resistances Optional affixes: increased Maximum Energy Shield Evasion Rating |
|
 (Amulet) The Ephemeral Bond - This Amulet is one we recommend, it gives you Elemental Resistances, Critical Strike Multiplier, Mana Regeneration Rate, and adds a lot of Lightning Damage per Power Charge. The only downside of reduced Charges Duration is non-existent. (Amulet) The Ephemeral Bond - This Amulet is one we recommend, it gives you Elemental Resistances, Critical Strike Multiplier, Mana Regeneration Rate, and adds a lot of Lightning Damage per Power Charge. The only downside of reduced Charges Duration is non-existent. |
|
| +(20-30) to Intelligence (25-40)% increased Mana Regeneration Rate +(15-25)% to all Elemental Resistances +(30-40)% to Critical Strike Multiplier if you've gained a Power Charge Recently (1-2) to (36-40) Lightning Damage per Power Charge 90% less Power Charge Duration |
|
 (Amulet) Badge of the Brotherhood - If you have a way to become Elusive and you want the six extra Maximum Frenzy Charges, use this Amulet. It grants no Elemental Resistances. (Amulet) Badge of the Brotherhood - If you have a way to become Elusive and you want the six extra Maximum Frenzy Charges, use this Amulet. It grants no Elemental Resistances. |
|
| +(16-24) to Dexterity and Intelligence (7-10)% increased Cooldown Recovery Rate of Travel Skills per Frenzy Charge (7-10)% increased Effect of Elusive on you per Power Charge (20-25)% chance to lose a Frenzy Charge when you use a Travel Skill (20-25)% chance to lose a Power Charge when you gain Elusive Your Maximum Frenzy Charges is equal to your Maximum Power Charges |
|
| Recommended Anointments: Overcharge |
|
 (Ring) Rare Rings - Focus mostly on Resistances and missing Attributes. For an upgrade try to get a Ring with an extra Maximum Power Charge or added Damage per Power Charge, these might be very expensive. (Ring) Rare Rings - Focus mostly on Resistances and missing Attributes. For an upgrade try to get a Ring with an extra Maximum Power Charge or added Damage per Power Charge, these might be very expensive. |
|
| Min. requirements: +30 to Maximum Energy Shield +90% to Elemental Resistances Optional affixes: Attributes Lightning Damage per Power Charge +1 to Maximum Power Charges Evasion Rating |
|
 (Ring) Shavronne's Revelation - You can socket it in your Left Ring Slot for a huge bonus to Energy Shield and Mana Regeneration rate, but be careful, you won't be able to recharge ES. It's very good, as long as you're fighting an opponent that has no long invulnerability phases while also dealing a lot of damage, like Exarch's Rolling Meteor Wall. (Ring) Shavronne's Revelation - You can socket it in your Left Ring Slot for a huge bonus to Energy Shield and Mana Regeneration rate, but be careful, you won't be able to recharge ES. It's very good, as long as you're fighting an opponent that has no long invulnerability phases while also dealing a lot of damage, like Exarch's Rolling Meteor Wall. |
|
| +(15-25) to maximum Energy Shield +(60-75) to Intelligence Right ring slot: You cannot Regenerate Mana Right ring slot: Regenerate 6% of Energy Shield per second Right ring slot: +250 to maximum Mana Left ring slot: You cannot Recharge or Regenerate Energy Shield Left ring slot: Regenerate 40 Mana per Second Left ring slot: +250 to maximum Energy Shield |
|
 (Jewel) Militant Faith - Transmogrify your Doomsday Keystone into Inner Conviction. You will still be able to gain Frenzy Charges so it just grants you over 27% more Spell Damage with no downside. (Jewel) Militant Faith - Transmogrify your Doomsday Keystone into Inner Conviction. You will still be able to gain Frenzy Charges so it just grants you over 27% more Spell Damage with no downside. |
|
| Carved to glorify (2000-10000) new faithful converted by High Templar Dominus Passives in radius are Conquered by the Templars Historic <two random mods of devotion> |
|
 (Jewel) Energy From Within - Place this Jewel near Infused Notable, it grants around 500 extra Energy Shield (Jewel) Energy From Within - Place this Jewel near Infused Notable, it grants around 500 extra Energy Shield |
|
| (3-6)% increased maximum Energy Shield Increases and Reductions to Life in Radius are Transformed to apply to Energy Shield |
|
  (Jewel) Forbidden Flame & Flesh - If you're using Badge of the Brotherhood, Mistwalker is a great Keystone you can get from Forbidden Jewels, otherwise Deadly or Unstable Infusion is what to look for, depending on your critical chance. (Jewel) Forbidden Flame & Flesh - If you're using Badge of the Brotherhood, Mistwalker is a great Keystone you can get from Forbidden Jewels, otherwise Deadly or Unstable Infusion is what to look for, depending on your critical chance. |
|
| Allocates <<Random Ascendancy Notable>> if you have the matching modifiers on Forbidden Flesh Allocates <<Random Ascendancy Notable>> if you have the matching modifiers on Forbidden Flame |
|
 (Jewel) Watcher's Eye - Wrath, Discipline, and Purity of Elements are your Auras. We recommend Wrath's Lightning Penetration. You might also want to include Clarity at level one for its modifier that reduced the Mana Cost of Skills. (Jewel) Watcher's Eye - Wrath, Discipline, and Purity of Elements are your Auras. We recommend Wrath's Lightning Penetration. You might also want to include Clarity at level one for its modifier that reduced the Mana Cost of Skills. |
|
| (4-6)% increased maximum Energy Shield (4-6)% increased maximum Life (4-6)% increased maximum Mana <Two or Three random aura modifiers> |
|
 (Flask) Rotgut - Use this Flask for an increased Movement Speed, its grants Onslaught and has increased Duration per Frenzy Charge consumed, which it won't do, but the effect will apply anyway (Flask) Rotgut - Use this Flask for an increased Movement Speed, its grants Onslaught and has increased Duration per Frenzy Charge consumed, which it won't do, but the effect will apply anyway |
|
| 40% increased Movement Speed 50% chance to gain a Flask Charge when you deal a Critical Strike Consumes Frenzy Charges on use Gain Onslaught for 3 seconds per Frenzy Charge on use (30-50)% increased Duration |
|
 (Flask) Bottled Faith - An expensive Flask, but it's worth its price. It improves your Damage, Critical Strike Chance, and Multiplier (Flask) Bottled Faith - An expensive Flask, but it's worth its price. It improves your Damage, Critical Strike Chance, and Multiplier |
|
| 40% increased Damage Creates Consecrated Ground on Use (30-15)% reduced Duration Consecrated Ground created by this Flask has Tripled Radius Consecrated Ground created during Effect applies (7-10)% increased Damage taken to Enemies (100-150)% increased Critical Strike Chance against Enemies on Consecrated Ground during Flask effect |
|
|
Other suggested Flasks:
|
|
     |
|
|
If you have any other build requests please leave that in the comments below. We are always open to suggestions and constructive feedback.
Pictures used in this article are the intellectual property of Grinding Gear Games.


