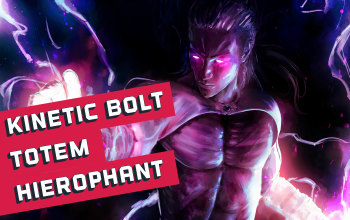
Kinetic Bolt Ballista Totem Hierophant Build
A Hierophant build that uses Arcane Cloak with Indigon to increase the Attack Damage of Ballista Totems that fires Kinetic BoltsKinetic Bolt Ballista Totem
Hierophant build
Updated for Patch 3.14
The Best Crafty Guides by Odealo
Estimated budget: medium

| Guide notes |
| June 29, 2021 -Build created July 5, 2021 -Added gameplay video |
This is one of the most interesting builds we've been working on so far. You play as Hierophant placing Ballista Totems shooting Kinetic Bolts supported by Barrage. To increase the damage of Kinetic Bolt - an Attack Skill that increases its damage as you increase your Spell Damage with twice as much potency - you use Indigon Unique Helmet - it increases your Spell Damage as you spend more and more Mana, and this is why a Hierophant is such a fitting ascendancy for this build. The Skill this build uses doesn't cost much mana compared to your giant Mana pool, so to actually spend the highest amount of Mana in the Shortest amount of time this build uses Arcane Cloak Spell, it spends about 64% of the current Mana - around 4000 in the later stages of the game with one click of a button. that's a 500% increase in Spell Damage thus a 1000% increase in Attack Damage of the Kinetic Bolt.
The Ballista Totems that do all the Damage in this build don't cost that much Mana, so to make them of any use you need to use Arcane Cloak whenever you can. Your damage will be increased by Indigon for the next four seconds after casting Arcane Cloak, which you can cast 3 seconds after it wears off, with the base duration of 3 seconds. The Arcane Cloak itself grants you another 700 or something added Lightning Damage if cast at full Mana. You can also place a lot of Ballista Totems to have Indigon's increase in damage, but it takes some time. What it all means is that the damage will be extremely inconsistent, but devastating at its full potential. Note that after casting Arcane Cloak you won't be able to place Ballista Totems so that's an inconvenience.
Your offenses will consist of Indigon, Arcane Cloak synergy, and increased value of Spell Damage for Kinetic Bolt. Your skill tree is set up in such a way to accumulate a lot of Mana which play a role of both - offensive and defensive statistic. You don't take Agnostic Keystone - this way you can have Energy Shield which a lot of you can get for free from your gear and it's close to Mana and Lightning nodes on the Skill Tree. Your Life should be around 2k and ES around 5 to even 8k. Much of the Damage will be nullified by your Guard Spell - Arcane Cloak. Hierophant ascendancy will grant you a lot of Mana, portion of damage taken from Mana before Life, Transfiguration of mind (increases in Mana will increase the damage as well at 30% of the value), insane Totem buffs, and permanent four Endurance and Power Charges
You can also check our other Path of Exile builds right over here Odealo's Crafty Guides - Full List
1. Gameplay
The build requires some time to get used to. You kill enemies with stationary Totems which you can only place after Indigon's Mana penalty wears off. That's why it is important to place Ballista Totems first and then Use Arcan Cloak. Another utility Spell is Sigil of Power, you can create a zone to stand in that will increase the Area of Effect and adds some Lighning Damage, during longer boss fights you might activate all four stages for additional defense benefits. You manually cast Wave of Conviction to increase the effectiveness of your Lighting Damage by decreasing enemies' resistance to it. Use Flame Dash to move around and dodge Hits.
|
|
|
|

2. Build's PROS & CONS
| PROS |
|
| CONS |
|
3. Leveling tips
You can start by using Totems, Holy Flame Totem seeps to be the best option since you can get it early on. At some point, you'll have to switch to the Kinetic Bolt with Ballista Totems, we recommend doing so after you acquire 6-linked Ivory Tower and Prism Guardian Unique Shield, after that, you'll be in a much better position to invest more into Energy Shield and Damage with Wands. Take MoM after you can afford to lose Mana when you take damage.
Suggested leveling Gem setups:
| Holy Flame Totem setup | |
 |
Holy Flame Totem - One of the best Totems for leveling with. It's easy to find Support Gems that will work well with it early on. |
 |
Elemental Focus Support - more Spell Damage at the cost of the inability to cause Burning |
 |
Multiple Totems Support - you'll be able to place more Totems |
 |
Added Fire Damage Support - Physical Damage gained as extra Fire Damage, which is good because Holy Flame Totem deals Physical Damage |
| Flame Dash setup | |
 |
Flame Dash - Flame Dash allows you to instantly dash, it's a good mobility Skill |
 |
Second Wind Support - it will grant an extra charge to use with Flame Dash |
| Utility Gems | |
 |
Flammability - a curse that reduces enemies Fire Resistance |
 |
Arcane Surge Support - a buff that grants spell damage, cast speed, and mana regeneration after you spend a certain amount of mana on linked Skills |
Bandits:
You can kill all the Bandits if you want two Passive Skill Points, or Help Alira - for Mana Regeneration, Critical Strike Multiplier, and Elemental Resistances.
Leveling Skill Trees:
31 Points Skill Tree
Priorities: 1) Ancestral Bond 2) Shaman's Dominion
65 Points Skill Tree
Go for more Maximum Life, Mana, and Totem/Fire Damage
Recommended leveling items:
 Le Heup of All - a cheap and common Unique ring with useful stats Le Heup of All - a cheap and common Unique ring with useful stats |
|
| (10-30)% increased Damage +(10-30) to all Attributes (10-30)% increased Rarity of Items found +(10-30)% to all Elemental Resistances |
|
 Goldrim - due to Elemental Resistances, it is considered the best Unique leveling Helmet Goldrim - due to Elemental Resistances, it is considered the best Unique leveling Helmet |
|
| +(30-50) to Evasion Rating 10% increased Rarity of Items found +(30-40)% to all Elemental Resistances Reflects 4 Physical Damage to Melee Attackers Level Requirement reduced by 100 (Hidden) |
|
 Tabula Rasa - really cheap Body Armour that grants nothing but six white sockets, all linked Tabula Rasa - really cheap Body Armour that grants nothing but six white sockets, all linked |
|
| Item has no level requirement and Energy Shield (Hidden) Item has 6 White Sockets and is fully linked (Hidden) |
|
|
|
|
| (130-150)% increased Armour +(40-60) to maximum Life 0.5% of Life Regenerated per second 15% increased Area of Effect for Skills used by Totems 0.5% of Damage dealt by your Totems is Leeched to you as Life |
|
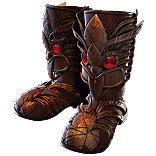 Torchoak Step - a cheap pair of boots that can be somewhat useful for Totem Builds like this one Torchoak Step - a cheap pair of boots that can be somewhat useful for Totem Builds like this one |
|
| (80-120)% increased Armour (30-50)% increased Totem Life 25% increased Movement Speed (30-50)% increased Totem Placement speed Totems Reflect 25% of their maximum Life as Fire Damage to nearby Enemies when Hit |
|
 Trolltimber Spire
4. Final Skill tree, Ascendancy Points, and Pantheon
Final Skill Tree:
122 Points Final Skill Tree (doesn't include Cluster Jewels)
122 Points Path of Building(PoB) link
Ascendancy points:
Preferably in that order:
- Pursuit of Faith
- Ritual of Awakening
- Divine Guidance
- Conviction of Power
Pantheon:
Major God: Soul of Lunaris 1% additional Physical Damage Reduction for each nearby Enemy, up to 8%; 1% increased Movement Speed for each nearby Enemy, up to 8%
Minor God: Soul of Shakari 5% reduced Chaos Damage taken; 25% reduced Chaos Damage over Time taken while on Caustic Ground
5. Final Gems links
| [DPS] Kinetic Bolt Ballista Totem setup | |
 |
Kinetic Bolt - using this instead of Kinetic Blast grants the character Attack Damage based on Spell Damage, which will be increased a lot thanks to Indigon |
 |
Ballista Totem Support - casting it by yourself would be incredibly hard since Totems can stay firing while you'd be unable to due to ramped-up Mana Cost |
 |
Elemental Focus Support - more Elemental Damage at the cost of forfeiting Elemental Ailments, which is not a problem as long as Skitterbots are active |
 |
Inspiration Support - more Critical Strike Chance and Elemental Damage for Supported Skills |
 |
Lightning Penetration Support - due to many factors, the main damage dealing by this build is Lightning, use Lightning Penetration Support for more damage |
 |
Barrage Support - Projectiles will be fired one after the other in a sequence, that will increase the damage output |
| [UTILITY] Curse setup | |
 |
Wave of Conviction - it will apply Exposure, lowering Lightning Resistance of opponents it hits |
 |
Awakened Hextouch Support - Awakened version of Hextouch allows you to apply two Curses instead of just one, if you don't have it Culling Strike or Increased Area of Effect will do just fine |
 |
Conductivity - A curse that lower the Lightning Resistance, it will be applied to enemies hit with Wave of Conviction |
 |
Elemental Weakness - A curse that lower the Elemental Resistance, it will be applied to enemies hit with Wave of Conviction |
| [MOBILITY] Flame Dash and Arcane Cloak setup | |
|
Flame Dash - this build uses Flame Dash as the main mobility Skill, it's instant and allows you to traverse precipices and cliffs |
|
Second Wind Support - Flame Dash will store an additional charge, increasing your mobility |
 |
Arcane Surge Support - More Spell Damage, more Mana Regeneration, and more Cast Speed after you spend a certain amount of Mana. Link it with Arcan Cloak for it consumes a lot of Mana. |
 |
Arcane Cloak - Spent a majority of your current Mana to create a defensive layer blocking 75% of incoming damage from hits. Very important Guard Spell that his build can't work without. |
| [UTILITY] Auras setup | |
 |
Clarity - an Aura that regenerates your Mana, it doesn't reserve much mana since the amount is not based on your Maximum Mana but it's a fixed number - around 300 |
 |
Precision - an Aura that increases Critical Strike Chance and gives additional Accuracy Rating. It reserves a flat amount of Mana as well as Clarity. |
 |
Empower - this Support Gem increases Gem Level of Clarity and Precision by one, two, or three |
 |
Enlighten - it lowers the reservation cost of Linked Skills, in this case, Clarity and Precision |
| [UTILITY] CwDT setup | |
 |
Tempest Shield - increases the chance to Block Attack and Spell Hits, it deals Lightning Damage on Block and refreshes its duration |
 |
Cast when Damage Taken - Tempest Shield will be activated automatically after taking damage. Both Gems in this setup can be level 20. |
| [UTILITY] Sigil of Power setup | |
 |
Sigil of Power - Sigil of Power is rarely useful, it requires you to stay for a long time in an area and spend Mana while there. It increases Area of Effect and adds Lightning Damage. At four stages, the enemies standing there will deal less damage. |
| [UTILITY] Auras and Minion setup (to be placed in Prism Guardian Unique Shield) |
|
 |
Summon Skitterbots - Skitterbots Chills and Shock nearby enemies which is useful since your main DPS Skill can not do any of those |
 |
Wrath - an Aura that adds Lightning Damage to Attacks and increases Spell Lightning Damage |
 |
Vaal Discipline - Discipline grants more ES and ES recharge rate. use Vaal version that can be activated to prevent delays in recharge caused by receiving damage. |
|
|
5. Gear Setup
Below you will find all the recommended and required gear for this build. Some of these items are absolutely mandatory such as Indigon and a few are heavily recommended, like Skyforth for example. Your main objective is to gain a lot of Mana, Energy Shield, and Critical Strike Chance/Multiplier. Capping your Elemental Resistance at 75% is important to start mapping beyond white maps.
Our recommended items will:
- Cap your resistances
- Give you enough DPS/Life to start mapping successfully
|
Stat priorities on items:
|
 (Helmet) Indigon - Indingon increases your Damage after you spent Mana, it's an obligatory item for this build (Helmet) Indigon - Indingon increases your Damage after you spent Mana, it's an obligatory item for this build |
|
| (150-180)% increased Energy Shield (6-10)% increased maximum Mana Recover (8-10)% of Life when you use a Mana Flask Non-instant Mana Recovery from Flasks is also Recovered as Life (50-60)% increased Mana Cost of Skills for each 200 total Mana you have Spent Recently (20-25)% increased Spell Damage for each 200 total Mana you have Spent Recently, up to 2000% |
|
| Helmet enchantments: Kinetic Bolt has 15% increased Attack Speed Kinetic Bolt changes direction 2 additional times Kinetic Bolt has 30% increased Projectile Speed |
|
 (Weapon) Rare Wand - Look for Spell Damage and stats scaling with Intelligence. Attack Speed, Critical Strike, and Projectile Damage are popular choices as well (Weapon) Rare Wand - Look for Spell Damage and stats scaling with Intelligence. Attack Speed, Critical Strike, and Projectile Damage are popular choices as well |
|
|
Min. requirements: |
|
 (Shield) Prism Guardian - by reserving your Life you're capable of having more Auras, and by equipping The Ivory Tower, the reserved Life does not go to waste (Shield) Prism Guardian - by reserving your Life you're capable of having more Auras, and by equipping The Ivory Tower, the reserved Life does not go to waste |
|
| +12% to all Elemental Resistances +2 to Level of Socketed Aura Gems Socketed Gems Cost and Reserve Life instead of Mana Socketed Gems have 25% reduced Reservation +(20-30) to Dexterity +25% to all Elemental Resistances |
|
 (Body Armour) The Ivory Tower - mandatory Body Armour. Each mod gives you an enormous benefit, especially when combined with Prism Guardian (Body Armour) The Ivory Tower - mandatory Body Armour. Each mod gives you an enormous benefit, especially when combined with Prism Guardian |
|
| +(40-70) to Intelligence +30 to maximum Energy Shield per 100 Reserved Life +(80-100) to maximum Mana Regenerate 2% of Energy Shield per second Chaos Damage is taken from Mana before Life |
|
 (Boots) Skyforth - use Skyforth for more Mana, less Reserved Mana, and significantly increased Stun Threshold (Boots) Skyforth - use Skyforth for more Mana, less Reserved Mana, and significantly increased Stun Threshold |
|
| +(60-120) to maximum Mana 30% increased Movement Speed 25% chance to gain a Power Charge on Critical Strike 6% reduced Mana Reserved You have no Life Regeneration Stun Threshold is based on 500% of your Mana instead of Life |
|
| Boot enchantment: 16% increased Attack and Cast Speed if you've Killed Recently 70% increased Mana Regeneration Rate if you've cast a Spell Recently |
|
| Min. requirements: 40 Maximum Energy Shield 70 Maximum Mana 70% Total Elemental Resistances Optional affixes: Critical Strike Chance #% of Physical Damage Converted to Lightning Damage Spell Damage |
|
 (Belt) Rare Belt - Stygian Vise or Crystal Belt are two equally good options to choose from here. Use Crystal Belt if you need more ES than anything else (Belt) Rare Belt - Stygian Vise or Crystal Belt are two equally good options to choose from here. Use Crystal Belt if you need more ES than anything else |
|
| Min. requirements: 40 Maximum Energy Shield 60 Maximum Mana 70% Total Elemental Resistances Optional affixes: #% increased Mana Recovery rate Energy Shield % #% increased Energy Shield from Body Armour #% increased Spell Damage during any Flask Effect |
|
 (Amulet) Atziri's Foible - This Amulet provides you with a lot of Mana, which is a statistic you should seek. It's cheap and available at low levels (Amulet) Atziri's Foible - This Amulet provides you with a lot of Mana, which is a statistic you should seek. It's cheap and available at low levels |
|
| (20-30)% increased Mana Regeneration Rate +100 to maximum Mana (16-24)% increased maximum Mana (80-100)% increased Mana Regeneration Rate Items and Gems have 25% reduced Attribute Requirements |
|
| Recommended Anointments: Mind Drinker Arcane Swiftness |
|
 (Ring) Rare Ring - Rings are supposed to increase your Mana, Intelligence, and Elemental Resistances. There are many offensive mods such as Accuracy Rating, or Critical Strike Chance you can get as well (Ring) Rare Ring - Rings are supposed to increase your Mana, Intelligence, and Elemental Resistances. There are many offensive mods such as Accuracy Rating, or Critical Strike Chance you can get as well |
|
| Min. requirements: 60 Intelligence 80% Total Elemental Resistances 50 Maximum Mana Optional affixes: Maximum Energy Shield Increased Damage Increased Mana Regeneration Rate |
|
 (Jewel) Rare Jewels - look for Spell Damage and Critical Strike related mods, eventually try to get one of these with Corrupted Blood Immunity (Jewel) Rare Jewels - look for Spell Damage and Critical Strike related mods, eventually try to get one of these with Corrupted Blood Immunity |
|
| Recommended affixes: increased Spell Damage increased Global Critical Strike Multiplier increased Intelligence increased Maximum Energy Shield increased Maximum Mana |
|
 (Jewel) Unnatural Instinct - an expensive optional jewel you can use for extra Mana, Elemental Damage, Minion Damage, and Energy Shield by placing it in the socket on the right to Witch's starting location (Jewel) Unnatural Instinct - an expensive optional jewel you can use for extra Mana, Elemental Damage, Minion Damage, and Energy Shield by placing it in the socket on the right to Witch's starting location |
|
| Allocated Small Passive Skills in Radius grant nothing Grants all bonuses of Unallocated Small Passive Skills in Radius |
|
 (Jewel) Watcher's Eye - "Gain #% of Maximum Mana as Extra Maximum Energy Shield while affected by Clarity" is probably the best mod you can get (Jewel) Watcher's Eye - "Gain #% of Maximum Mana as Extra Maximum Energy Shield while affected by Clarity" is probably the best mod you can get |
|
| (4-6)% increased maximum Energy Shield (4-6)% increased maximum Life (4-6)% increased maximum Mana <Two or Three random aura modifiers> |
|
 (Jewel) Large Cluster Jewel - just one of these is enough, look for Lightning Damage or Totems as a base and try to get recommended Notables (Jewel) Large Cluster Jewel - just one of these is enough, look for Lightning Damage or Totems as a base and try to get recommended Notables |
|
| Recommended affixes: 1 Added Passive Skill is Ancestral Inspiration 1 Added Passive Skill is Practiced Caster 1 Added Passive Skill is Scintillating Idea 1 Added Passive Skill is Storm Drinker 1 Added Passive Skill is Widespread Destruction |
|
 (Jewel) Medium Cluster Jewel - you can use two Medium Cluster Jewels and we recommend getting the Totem-related Passives that give you utility bonuses like Totem Cast Speed, Onslaught, Totem Placement Speed, and Elemental or Cold Damage (Jewel) Medium Cluster Jewel - you can use two Medium Cluster Jewels and we recommend getting the Totem-related Passives that give you utility bonuses like Totem Cast Speed, Onslaught, Totem Placement Speed, and Elemental or Cold Damage |
|
| Recommended affixes: 1 Added Passive Skill is Ancestral Inspiration 1 Added Passive Skill is Ancestral Echo 1 Added Passive Skill is Ancestral Reach 1 Added Passive Skill is Sleepless Sentries 1 Added Passive Skill is First Among Equals 1 Added Passive Skill is Precise Commander 1 Added Passive Skill is Astonishing Allfilction |
|
 (Jewel) Small Cluster Jewel - Small Cluster Jewels are a good opportunity to gain some Mana and Energy Shield (Jewel) Small Cluster Jewel - Small Cluster Jewels are a good opportunity to gain some Mana and Energy Shield |
|
| Recommended affixes: 1 Added Passive Skill is Scintillating Idea 1 Added Passive Skill is Will Shaper |
|
 (Flask) Dying Sun - use it for more Projectiles, more AoE, and an extra defense against Fire Damage (Flask) Dying Sun - use it for more Projectiles, more AoE, and an extra defense against Fire Damage |
|
| +50% to Fire Resistance 20% less Fire Damage taken (-10-10)% increased Charges used Skills fire 2 additional Projectiles during Flask Effect (15-25)% increased Area of Effect during Flask Effect |
|
| Creates Consecrated Ground on Use (30-50)% increased Duration Consecrated Ground created by this Flask has Tripled Radius +(1-2)% to Critical Strike Chance against Enemies on Consecrated Ground during Effect Consecrated Ground created during Effect applies (7-10)% increased Damage taken to Enemies |
|
 (Flask) Rumi's Concoction - great flask for when you need your Armour and Chance to Block Spell and Attack Hits increased (Flask) Rumi's Concoction - great flask for when you need your Armour and Chance to Block Spell and Attack Hits increased |
|
| +3000 to Armour +(14-20)% Chance to Block Attack Damage during Flask effect +(6-10)% Chance to Block Spell Damage during Flask effect |
|
|
Other suggested Flasks:
|
|
   |
|
|
If you have any other build requests please leave that in the comments below. We are always open to suggestions and constructive feedback.
Pictures used in this article are the intellectual property of Grinding Gear Games.
