
Ice Shot Raider speed-farming Build
Very fast Deadeye bow wielder using Ice Shot specialized for smooth mapping experienceIce Shot
Deadeye build
Updated for Patch 3.21
The Best Crafty Guides by Odealo
| Guide notes |
| April 6, 2023 -Updated for Patch 3.21 |
| Build overview | |||
| Tags: [BOW] [ELEMENTAL] [CRITICAL] [LIFE] | |||
|
Budget: Defenses: |
|
Boss DPS: AoE: |
|
Ice Shot Deadeye is currently one of the fastest Map farming Builds which allows smooth end-game progression at a reasonable budget. This Build offers very high Damage with no specific or very expensive Unique Items required, but of course, there are some that are very handy for us. Thanks to the Items like Voidfletcher or Hyrri's Ire you can significantly improve your Damage in a very efficient manner. Thanks to the changes made in 3.21 Path the Bow playstyle looks extremely promising for both new and experienced players. Historically, Bow Builds usually struggled in the early game, but the Additional Projectiles that can be now found on Passive Tree are going to make a very significant difference in that regard, while still improving the end-game variations as well. This build falls entirely in the Glass Cannon category, but if you are looking for the fastest Map farming build, this is something you definitely have to check out!
Playing as a Deadeye and dealing Elemental Damage with an Attack Skill while possessing high Crit Chance and Crit Multiplier might be the most efficient way to get through the game content with ease if you don't mind the occasional death here and there. Thanks to the constant Freeze and Chill applied to Enemies, high Evasion Rating, and very fast Movement Speed you will be able to easily outmaneuver your opponents, and capped Spell Suppression should keep you alive in most situations. At higher investment levels you can reach out for sources of Physical Damage taken as Elemental too.
You can also check our other Path of Exile builds right over here Best PoE Builds by Odealo
1. Gameplay
Ice Shot Deadeye is a typical Bow Build that allows insanely fast Map farming and offers high single-target DPS with Barrage. Thanks to the Mirage Archer you don't need to worry about occasional strugglers. The Damage and clear speed are very high even on a reasonable budget. For Bosses and other tough encounters, it is recommended to use the Ice Shot with the Barrage Support setup, which greatly scales with your bonus Projectiles. The Tornado and Hydrosphere are your utility Spells that can boost your single-target potential even more.
|
This gameplay footage is outdated and will be updated for Patch 3.121 shortly |
|
|

2. Build's PROS & CONS
| PROS |
|
| CONS |
|
3. Leveling tips
Thanks to the changes to Passive Tree you will be able to easily pick up additional Projectiles for your Attacks, allowing you to skip the Lesser Multiple Projectile Support Gem and its Damage penalty. Try to avoid relying on sockets in your Bow so you can always change it for something better as soon as you find an upgrade to your current one. High DPS on your Bow is all that matter, you don't need a particular Critical Strike Chance or specific Elemental type. The rest of the Gear should be focused on capping your Resistances, so you don't need to waste your time kiting away needlessly dangerous enemies. If you manage to get enough DPS and make your Mirage Archer one-shot normal enemies, leveling will be extremely fast. Below you will find several extremely useful Uniques for the level part and basic Gem setups.
For the smoother Leveling we suggest to pick up some additional Notables and refund them later when you reach Maps.
Suggested leveling Gem setups:
| Ice Shot setup | |
 |
Ice Shot - primary Skill used in this build. It's best to use it for the leveling part as well to have it leveled up when we reach Maps. Ice Shot itself deals decent damage to your target and creates a cone of Ice behind it slowing enemies and dealing extra damage. |
 |
Lesser Multiple Projectiles Support - adds 2 additional Projectiles for your Ice Shot for far greater screen coverage. You should stop using it once you get additional Projectiles from your Passive Tree. |
 |
Added Cold Damage Support - grants a very high bonus Cold Damage to your Attacks. |
 |
Added Cold Damage Support - just like the previous one, only this time it adds Lightning Damage instead. Make sure to have enough Intelligence to level it up! |
 |
Elemental Damage with Attacks Support - greatly increases Elemental Damage dealt by Supported Attacks. |
| Utility Gems | |
 |
Herald of Ice - grants extra Cold Damage to your Attacks and causes AoE Explosions when you kill Frozen enemies. |
 |
Grace - at lower levels using this Aura makes you very hard to Hit by enemies. |
 |
Steelskin - reduces the Damage you take and disables Bleeds. |
 |
Sniper's Mark - now available in Act 1, this Mark greatly improves your Damage with Projectiles. |
 |
Blink Arrow - the recommended Mobility Skill used in this build |
Bandits:
We recommend killing all the Bandits for two additional Passive Points.
Leveling Skill Trees:
36 Points Skill Tree
Priorities: 1) Finesse 2) Revenge of the Hunted 3) Multishot 4) Master Fletcher 5) Force of Nature
Additional optional Notables: 1) Aspect of the Eagle 2) One with Nature 3) Quickstep
69 Points Skill Tree
Priorities: 1) Thick Skin 2) Clever Thief 3) Blood Drinker 4) Inveterate 5) Acuity
Additional optional Notables: 1) Precise Technique 2) Depth Perception (and Mastery)
Recommended leveling items:
 Le Heup of All - these Rings provide all the important stats for lower-level characters and can be used even on lower-tier Maps. Le Heup of All - these Rings provide all the important stats for lower-level characters and can be used even on lower-tier Maps. |
|
| (10-30)% increased Damage +(10-30) to all Attributes (10-30)% increased Rarity of Items found +(10-30)% to all Elemental Resistances |
 Goldrim - one of the best leveling Helmets which grants sufficient Elemental Resistances for most of the leveling process. Goldrim - one of the best leveling Helmets which grants sufficient Elemental Resistances for most of the leveling process. |
|
| +(30-50) to Evasion Rating 10% increased Rarity of Items found +(30-40)% to all Elemental Resistances Reflects 4 Physical Damage to Melee Attackers Level Requirement reduced by 100 (Hidden) |
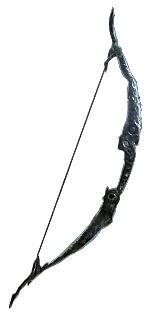
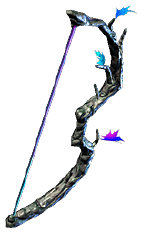 Silverbranch - one of the first Unique Bows available in Path of Exile which offers high base DPS and extra Mana gained on kill which helps greatly during the leveling phase. Silverbranch - one of the first Unique Bows available in Path of Exile which offers high base DPS and extra Mana gained on kill which helps greatly during the leveling phase. |
|
| +1 to Level of Socketed Bow Gems (80-100)% increased Physical Damage 10% increased Attack Speed +10 Mana gained on Kill +30 to Accuracy Rating |
 Storm Cloud - another great Bow for leveling, you can use it for a very long time. It has one of the best Base Attack Speeds in the game, which is a very efficient way to scale Added Damage. Storm Cloud - another great Bow for leveling, you can use it for a very long time. It has one of the best Base Attack Speeds in the game, which is a very efficient way to scale Added Damage. |
|
| No Physical Damage Adds 1 to 85 Lightning Damage (36-50)% increased Attack Speed |
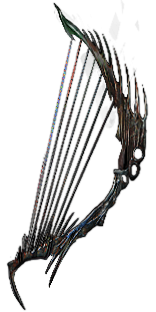 Death's Harp - a Physical-based Bow. Its Damage is not that great, but Additonal Arrows for your Attacks can make up for that. Critical Strike Multiplier is also useful if you invest into Critical Strike Chance early on. Death's Harp - a Physical-based Bow. Its Damage is not that great, but Additonal Arrows for your Attacks can make up for that. Critical Strike Multiplier is also useful if you invest into Critical Strike Chance early on. |
|
| (90-105)% increased Physical Damage 10% increased Attack Speed +50% to Global Critical Strike Multiplier Bow Attacks fire 2 additional Arrows |
|
 Prismweave - this Belts provides an amazing amount of Damage for early Leveling. It also boots your Elemental Resistances. Prismweave - this Belts provides an amazing amount of Damage for early Leveling. It also boots your Elemental Resistances. |
|
| Adds (14-16) to (30-32) Fire Damage to Attacks Adds (10-12) to (24-28) Cold Damage to Attacks Adds 1 to (60-68) Lightning Damage to Attacks +(6-15)% to all Elemental Resistances 30% increased Elemental Damage with Attack Skills during any Flask Effect |
|
 Karui Ward - a very cheap and powerful leveling Amulet for Rangers. You can also Anoint Graceful Assult to get Onslaught petty often. Karui Ward - a very cheap and powerful leveling Amulet for Rangers. You can also Anoint Graceful Assult to get Onslaught petty often. |
|
| +(20-30) to Dexterity +(20-30) to Strength +100 to Accuracy Rating 30% increased Projectile Speed 10% increased Movement Speed 30% increased Projectile Damage |
|
4. Final Skill Tree, Ascendancy Points, and Pantheon
Final Skill Tree:
119 Points Final Skill Tree (doesn't include Unique Jewels)
119 Points Path of Building(PoB) link
Ascendancy points:
Preferably in that order:
- Ricochet
- Endless Munitions
- Gathering Winds
- Focal Point
Pantheon:
Major God: Soul of the Brine King: You cannot be Stunned if you've been Stunned or Blocked a Stunning Hit in the past 2 seconds; 100% chance to Avoid being Frozen
Minor God: Soul of Shakari +50% less Duration of Poisons on You; You cannot be Poisoned while there are at least 3 Poisons on you
5. Final Gems links
| [DPS] AoE Ice Shot | |
 |
Ice Shot - the primary Attack used in this build will Chain to nearby enemies and have massive area coverage and very high Damage. The Vaal Shot Gem should be socketed in your AoE Setup. |
|
Elemental Damage with Attacks Support - grants very high bonus Elemental Damage, and the Awakened version also grant Immunity to Elemental Reflect. |
 |
Cold Penetration Support - allows you to shred through the monster Resistances. If you deal a similar amount of Cold and Lightning Damage, use the Trinity Support instead. |
 |
Increased Critical Damage Support - grants a lot of Critical Strike Multiplier. Use the Increased Critical Strikes Support if you have a low Critical Strike Chance. |
 |
Mirage Archer Support - creates a Mirage Archer that uses your Skills to attack nearby enemies. |
 |
Inspiration Support - increases Elemental Damage and Crit. Chance of your Ice Shot, while reducing its Total Mana Cost. |
| [DPS] Single-target Ice Shot | |
 |
Ice Shot - your Single-target setup uses the Barrage Support, which puts a heavy penalty on your Damage but adds many Projectiles in return. The Vaal Ice Shot can't get additional Arrows, resulting in a net loss of Damage if they were used here. |
|
Elemental Damage with Attacks Support - improves the Elemental Damage you deal with your Attacks. |
|
Cold Penetration Support - this Skill is used mostly against Rare and Unique enemies, which tend to have raised Resistance values. Use Trinity Support if your Cold and Lightning Damage is on a similar level. |
|
Increased Critical Damage Support - improves the Damage of your Critical Strikes, use the Increased Critical Strikes Support if your Critical Strike Chance is not high enough. |
|
Barrage Support - adds many Projectiles and changes their behavior, so they all can Hit the same target many times. |
|
Inspiration Support - grants a bit of Critical Strike Chance but also improves the Damage and lowers Mana Costs. |
| [UTILITY] Aura setup | |
 |
Hatred - grants bonus Cold Damage, and if you manage to get the recommended Watcher's Eye, it will also increase your Critical Strike Chance. |
|
Herald of Ice - grants extra Cold Damage and causes AoE explosions on killing Frozen enemies. |
 |
Precision - increases our Critical Strike Chance and Accuracy Rating. More Accuracy Rating on your Gear allows lowering the Gem Level so it doesn't reserve too much Mana. |
|
Grace - grants a massive bonus to your flat Evasion Rating and also gives More Multiplier to scale Evasion you got from your equipment. |
 |
Enlighten Support - reduces the Mana Reservation cost of all Supported Spells. It has to be level 2 or higher to have any effect. |
| [UTILITY] Hydrosphere, Tornado | |
 |
Hydrosphere - Creates a sphere of water that applies Exposure. It can be Hit to make your projectiles Chain and Fork off of it. Keep at level 1 so it won't increase the Intelligence Requirements for the whole build and cost less mana. |
 |
Tornado - creates a Tornado that slowly moves around. Hitting it with Projectiles will add a portion of that Damage to the Tornado. It also allows for more Chain reactions. |
 |
Arcanist Brand - with a single Cast of this Brand you will be able to keep your other Spells active on the enemy. |
 |
Lifetap Support - it might be needed if you have a very low amount of Mana after Reservations. |
| [UTILITY] Sniper's Mark | |
|
Sniper's Mark - increases the Damage you deal to the target with your Projectiles. It also splits your Projectiles for even better pack clear. |
 |
Mark on Hit Support - applies your Mark to every Rare and Unique enemy automatically when you Hit them with your Attacks. |
| [UTILITY] Other Utility Skills | |
 |
Blink Arrow - the recommended mobility Skill used in this build, it teleports you to the location you choose. |
|
Steelskin - your Guard Spell which is the optimal option to reduce the damage you take and disable Bleeds. |
 |
Blood Rage - increases your Attack Speed and generates Frenzy Charges for an even higher DPS bonus. |
 |
Berserk - spends your rage at a very fast rate to grant you massive Damage and Speed bonuses. it also reduces the Damage you Take. You will need the Kaom's Spirit setup to make good use of it. |
|
|
5. Gear Setup
Below you will find the recommended gear for our Ice Shot Deadeye build. A good Bow is very important for this Build, but thankfully it's quite easy to craft a decent one to use as you work towards a perfect one. The most important stats to boost your Damage are added Cold or Lightning Damage, Critical Strike Chance and Multiplier, additional Arrows for Bow Attacks, increased Elemental Damage, Attack Speed, and Accuracy Rating. By having a bit of Lightning Damage you will be able to inflict Shock on most Enemies. Defensively you want to focus mostly on maximum Life, capped Elemental Resistances, and Spell Suppression. At higher investment levels you might add some sources of Physical Damage taken as Elemental. A Rare Helmet can greatly improve your Mana Reservation Efficiency, but Asenath's Mark can also be used if you prefer more automated Setups. Accuracy Rating on your Gear is also very important in terms of your Mana, as Precision Aura can be very deceitful. You will also need hefty amount of Attributes for your Gem requirements.
Our recommended items will:
- Cap your Elemental Resistances
- Give you enough DPS/Life to start mapping successfully
|
Stat priorities on items:
|
 (Helmet) Asenath's Mark - It automatically triggers socketed Spells at a high rate with some other additional stats improvements. The automatization is very comfortable but the lack of proper stats is very noticeable. (Helmet) Asenath's Mark - It automatically triggers socketed Spells at a high rate with some other additional stats improvements. The automatization is very comfortable but the lack of proper stats is very noticeable. |
|
| Trigger a Socketed Spell when you Attack with a Bow, with a 0.3 second Cooldown (10-15)% increased Attack Speed +(30-50) to maximum Energy Shield 30% increased Mana Regeneration Rate (30-60)% increased Spell Damage |
|
| Helmet enchantments: Barrage fires an additional Projectile Hatred/Grace Reservation Efficiency |
|
 (Helmet) Fractal Thoughts - a quite cheap Unique Helmet that grants a lot of Damage and some maximum Life. (Helmet) Fractal Thoughts - a quite cheap Unique Helmet that grants a lot of Damage and some maximum Life. |
|
| (140-180)% increased Evasion and Energy Shield +(25-40)% to Critical Strike Multiplier if Dexterity is higher than Intelligence 15% increased Dexterity if Strength is higher than Intelligence 1% increased Elemental Damage per 10 Dexterity +2 to Maximum Life per 10 Intelligence |
|
 (Helmet) Rare Helmet - on a Rare Helmet you can obtain a lot of Mana Reservation Efficiency and other valuable stats such as Life, Resistances, Spell Suppression, or Accuracy Rating. You can also get a bit of automatization if you use the Focus modifier, but it has a much longer Cooldown than Asenath's Mark. (Helmet) Rare Helmet - on a Rare Helmet you can obtain a lot of Mana Reservation Efficiency and other valuable stats such as Life, Resistances, Spell Suppression, or Accuracy Rating. You can also get a bit of automatization if you use the Focus modifier, but it has a much longer Cooldown than Asenath's Mark. |
|
| Min. requirements: +60 to maximum Life 50% Elemental Resistances Optional affixes: increased Mana Reservation Efficiency of Skills (Essence + Eldritch Implicit) Trigger Socketed Spells when you Focus Accuracy Rating chance to Suppress Spell Damage |
|
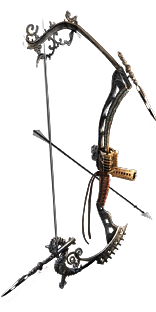
 (Weapon) Rare Bow - high Critical Strike Chance is very impactful on your total DPS output. Other than that, simply look for the highest Elemental DPS you can find. The popular method of crafting such a Bow is to use the Fractured Base and spam Essences. Additional Arrows are also very good, but it is a luxury option that will cost you a lot of resources. (Weapon) Rare Bow - high Critical Strike Chance is very impactful on your total DPS output. Other than that, simply look for the highest Elemental DPS you can find. The popular method of crafting such a Bow is to use the Fractured Base and spam Essences. Additional Arrows are also very good, but it is a luxury option that will cost you a lot of resources. |
|
| Min. requirements: 8% Base Critical Strike Chance 600+ Elemental DPS Optional affixes: Bow Attacks fire 2 additional Arrows Increased Elemental Damage with Attacks Damage Penetrates #% Elemental Resistances Chance to deal Double Damage increased Attack Speed Critical Strike Multiplier |
|
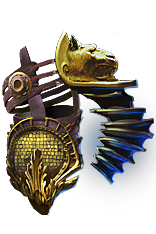
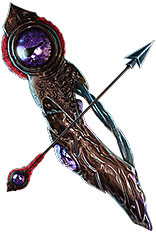 (Quiver) Voidfletcher - it's a very strong Quiver for the early progression. The Void Shot adds substantial Damage against Bosses. It will eventually be outscaled by proper Rare Quiver later on. (Quiver) Voidfletcher - it's a very strong Quiver for the early progression. The Void Shot adds substantial Damage against Bosses. It will eventually be outscaled by proper Rare Quiver later on. |
|
| Consumes a Void Charge to Trigger Level 20 Void Shot when you fire Arrows with a Non-Triggered Skill Adds (30-40) to (80-100) Cold Damage to Attacks +(80-120) to maximum Energy Shield +(20-30)% to Cold Resistance Gain (20-40) Mana per Enemy Killed 30% increased Projectile Speed 5 Maximum Void Charges Gain a Void Charge every 0.5 seconds |
|
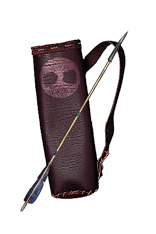 (Quiver) Rare Quiver - Quivers have a lot of very useful modifiers available to them, but it's not an easy task to get one. You should look for Additional Arrows, Attack Speed, Accuracy Rating, or Increased Damage here. Projectile Speed can also be useful thanks to the new Mastery that can convert it to Damage for your Projectiles. (Quiver) Rare Quiver - Quivers have a lot of very useful modifiers available to them, but it's not an easy task to get one. You should look for Additional Arrows, Attack Speed, Accuracy Rating, or Increased Damage here. Projectile Speed can also be useful thanks to the new Mastery that can convert it to Damage for your Projectiles. |
|
| Min. requirements: +50 to maximum Life Bow Attacks fire an additional Arrow Optional affixes: Elemental Resistances Accuracy Rating increased Attack Speed increased Damage with Bow Skills increased Projectile Speed |
|
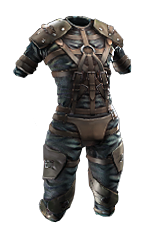
 (Body Armour) Hyrri's Ire - it can be quite expensive, but the cost is easily justified. It grants an enormous amount of Cold Damage and Spell Suppression Chance. (Body Armour) Hyrri's Ire - it can be quite expensive, but the cost is easily justified. It grants an enormous amount of Cold Damage and Spell Suppression Chance. |
|
| +(40-50) to Dexterity (140-220)% increased Evasion Rating 25% increased Chill Duration on Enemies (105-145) to (160-200) Added Cold Damage with Bow Attacks +30% chance to Suppress Spell Damage |
|
 (Body Armour) Rare Armour - at first you can use just a Rare Armour with some useful modifiers for maximum Life, Spell Suppression, and Resistances. Eldritch Implicits that boost the effect of your Auras can be a cheap way to get some Damage on top of that. Elder's influence allows for a special modifier that improves the base Critical Strike Chance, but it works only on the socketed Setup. (Body Armour) Rare Armour - at first you can use just a Rare Armour with some useful modifiers for maximum Life, Spell Suppression, and Resistances. Eldritch Implicits that boost the effect of your Auras can be a cheap way to get some Damage on top of that. Elder's influence allows for a special modifier that improves the base Critical Strike Chance, but it works only on the socketed Setup. |
|
| Min. requirements: +90to maximum Life Optional affixes: Elemental Resistances Attacks have +1.5% to Critical Strike Chance chance to Suppress Spell Damage Hatred has increased Aura Effect % of Physical Damage from Hits taken as Cold/Lightning Damage |
|
 (Boots) Rare Boots - just grab the highest possible Life, Resistances, and Movement Speed you can afford. Spell Suppression and Attributes can also come in handy. You can get a bit of bonus Action Speed thanks to the Searing Exarch Influence (Boots) Rare Boots - just grab the highest possible Life, Resistances, and Movement Speed you can afford. Spell Suppression and Attributes can also come in handy. You can get a bit of bonus Action Speed thanks to the Searing Exarch Influence |
|
| Min. requirements: 70 maximum Life 30% Movement Speed Optional affixes: Chance to Suppress Spell Damage Chance to gain Elusive on Critical Strike Attributes Elemental Resistances Chance to gain Onslaught for 4 seconds on Kill |
|
 (Gloves) Rare Gloves - you can get a lot of Damage in this slot, but Defensive modifiers should come in first. If you have your Spell Suppression and resistance sorted out, you can look for special Alva's modifiers against Chilled enemies, bonus Accuracy, or Attack Speed. Eldritch Implicits are also very important here, as they can generate your Rage and boost the effectiveness of your Marks. (Gloves) Rare Gloves - you can get a lot of Damage in this slot, but Defensive modifiers should come in first. If you have your Spell Suppression and resistance sorted out, you can look for special Alva's modifiers against Chilled enemies, bonus Accuracy, or Attack Speed. Eldritch Implicits are also very important here, as they can generate your Rage and boost the effectiveness of your Marks. |
|
| Min. requirements: 60 maximum Life 40% Total Elemental Resistances Optional affixes: Chance to Suppress Spell Damage Attack Speed increased Damage with Hits against Chilled Enemies increased Damage during any Flask Effect Accuracy Rating |
|
 (Gloves) Kaom's Spirit - this pair of Gloves changes your Life Regeneration into Rage. It allows you to have pretty high uptime on the Berserk buff, which grants you Damage, Movement Speed, and some mitigation during its Duration. You will need lots of Life Regeneration on your remaining Gear to make it worth it. (Gloves) Kaom's Spirit - this pair of Gloves changes your Life Regeneration into Rage. It allows you to have pretty high uptime on the Berserk buff, which grants you Damage, Movement Speed, and some mitigation during its Duration. You will need lots of Life Regeneration on your remaining Gear to make it worth it. |
|
| +(50-70) to maximum Life +(20-30)% to Fire Resistance (0.3-0.5)% of Physical Attack Damage Leeched as Life Life Recovery from Regeneration is not applied Regenerate 1 Rage per second for every 100 Life Recovery per second from Regeneration |
|
 (Belt) Immortal Flesh - it can be used if you can't get Life Regeneration on your other Gear pieces. Thanks to the Life Catalysts you can have more than 400 Life Regeneration from this single Item. (Belt) Immortal Flesh - it can be used if you can't get Life Regeneration on your other Gear pieces. Thanks to the Life Catalysts you can have more than 400 Life Regeneration from this single Item. |
|
| (75-100) to maximum Life Regenerate (200-350) Life per second Regenerate (8-10) Mana per second -(25-15)% to all Elemental Resistances -(50-40) Physical Damage taken from Attack Hits 40% increased Armour while not Ignited, Frozen or Shocked |
|
 (Belt) Rare Stygian Vise - this base is the best option for the Belt as it offers an additional Abyssal Socket. For its modifiers, you should aim for maximum Life, Resistances, Attributes, Life Regeneration, and Elemental Damage. (Belt) Rare Stygian Vise - this base is the best option for the Belt as it offers an additional Abyssal Socket. For its modifiers, you should aim for maximum Life, Resistances, Attributes, Life Regeneration, and Elemental Damage. |
|
| Min. requirements: 70 maximum Life 90% to Elemental Resistances 35% Increased Elemental Damage with Attacks Optional affixes: Strength Regenerate 70+ Life per second |
|
 (Jewel) Abyss Jewel - to make proper use of your Belt you should aim for Abyss Jewel which grants you many useful modifiers such as maximum Life, Attack Speed, Critical Strike Multiplier, or Phasing. Additional Resistances and Attributes are also quite useful. (Jewel) Abyss Jewel - to make proper use of your Belt you should aim for Abyss Jewel which grants you many useful modifiers such as maximum Life, Attack Speed, Critical Strike Multiplier, or Phasing. Additional Resistances and Attributes are also quite useful. |
|
| Recommended affixes: maximum Life Added Cold Damage to Bow Attacks Optional affixes: Increased Global Critical Strike Multiplier Resistances Attributes chance to gain Phasing for 4 seconds on Kill increased Attack Speed if you've dealt a Critical Strike Recently |
|
 (Amulet) The Pandemonius - the best Amulets for this build which increases your Cold DPS, as well as, grants some insane defensive utility by Blinding enemies when you Hit them. It can be quite hard to obtain due to changes to Breach. (Amulet) The Pandemonius - the best Amulets for this build which increases your Cold DPS, as well as, grants some insane defensive utility by Blinding enemies when you Hit them. It can be quite hard to obtain due to changes to Breach. |
|
| +(20-30) to Dexterity (20-30)% increased Cold Damage +(35-40)% to Cold Resistance Chill Enemy for 1 second when Hit Blind Chilled Enemies on Hit Damage Penetrates 20% Cold Resistance against Chilled Enemies |
|
Recommended Anointments:
|
|
 (Amulet) Yoke of Suffering - allows all your Damage to inflict Shock, so you don't need to have Lightning Damage on your Bow. It's most likely the cheaper option and has the potential to grant more Damage than the previous Amulet, but ensuring the max Shock on end-game Bosses is not an easy task. On most Maps, you should be easily able to inflict 50% Shock on all enemies, but you still lose out on the defensive aspect of the Blind. (Amulet) Yoke of Suffering - allows all your Damage to inflict Shock, so you don't need to have Lightning Damage on your Bow. It's most likely the cheaper option and has the potential to grant more Damage than the previous Amulet, but ensuring the max Shock on end-game Bosses is not an easy task. On most Maps, you should be easily able to inflict 50% Shock on all enemies, but you still lose out on the defensive aspect of the Blind. |
|
| +(10-20)% to Fire Resistance +(10-20)% to Cold Resistance +(20-40)% to Lightning Resistance 30% reduced Duration of Ailments on Enemies (5-10)% chance to Shock Enemies take 5% increased Damage for each type of Ailment you have inflicted on them Your Elemental Damage can Shock |
|
 (Amulet) Hyrri's Truth - grants tons of Accuracy and some Critical Strike Multiplier, which can be further improved with Catalysts. Using this one will free up lots of modifiers on your remaining Gear, which can be very important at the early stages of progression. (Amulet) Hyrri's Truth - grants tons of Accuracy and some Critical Strike Multiplier, which can be further improved with Catalysts. Using this one will free up lots of modifiers on your remaining Gear, which can be very important at the early stages of progression. |
|
| Grants Level 30 Precision Skill +(40-80) to Dexterity Bow Attacks have Culling Strike +(25-50)% to Global Critical Strike Multiplier Precision has 100% increased Mana Reservation Efficiency |
|
 (Ring) Rare Rings - those can cover your lacking Resistances and Attributes, and provide you with some maximum Life and Damage modifiers. Accuracy Rating and reduced Mana Costs can be also very useful. (Ring) Rare Rings - those can cover your lacking Resistances and Attributes, and provide you with some maximum Life and Damage modifiers. Accuracy Rating and reduced Mana Costs can be also very useful. |
|
| Min. requirements: 50 maximum Life 40% Total Elemental Resistances Optional affixes: Elemental Damage with Attacks adds Cold Damage Attributes Accuracy Rating Non-Channelling Skills have -(7-6) to Total Mana Cost |
|
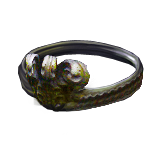
 (Ring) Mark of the Elder - this Ring grants a lot of increased Attack Damage and flat Cold Damage, which can e further enhanced with proper Catalysts. It limits your choice for your second Ring, as it would need to be a Shaper base. (Ring) Mark of the Elder - this Ring grants a lot of increased Attack Damage and flat Cold Damage, which can e further enhanced with proper Catalysts. It limits your choice for your second Ring, as it would need to be a Shaper base. |
|
| Adds (3-4) to (10-14) Physical Damage to Attacks 20% chance to Trigger Level 20 Tentacle Whip on Kill Adds (26-32) to (42-48) Cold Damage to Attacks (6-10)% increased maximum Energy Shield (6-10)% increased maximum Life (60-80)% increased Attack Damage if your other Ring is a Shaper Item Cannot be Stunned by Attacks if your other Ring is an Elder Item |
|
 (Ring) The Taming - it lacks maximum Life, but it's abundant in modifiers that boost your Damage and Resistances. (Ring) The Taming - it lacks maximum Life, but it's abundant in modifiers that boost your Damage and Resistances. |
|
| 20% increased Damage with Hits and Ailments per Freeze, Shock or Ignite on Enemy +(20-30)% to all Elemental Resistances 30% increased Elemental Damage 10% chance to Freeze, Shock and Ignite 30% increased Elemental Damage with Attack Skills |
|
 (Jewel) Large Cluster Jewel - a very good Cluster Jewel Setup can be used for this Build, but it would require good Gear and careful planning as you would have to refund some Passive Points. (Jewel) Large Cluster Jewel - a very good Cluster Jewel Setup can be used for this Build, but it would require good Gear and careful planning as you would have to refund some Passive Points. |
|
| Recommended Notables: 1 Added Passive Skill is Martial Prowess 1 Added Passive Skill is Calamitous 1 Added Passive Skill is Fuel the Fight |
|
 (Jewel) Medium Cluster Jewel - in such Setup you would want to use Medium Cluster Jewels that boost your Critical Strikes or Projectile Damage. Again, it is not recommended without a proper budget. (Jewel) Medium Cluster Jewel - in such Setup you would want to use Medium Cluster Jewels that boost your Critical Strikes or Projectile Damage. Again, it is not recommended without a proper budget. |
|
| 1 Added Passive Skill is Basics of Pain 1 Added Passive Skill is Pressure Points 1 Added Passive Skill is Eye to Eye 1 Added Passive Skill is Repeater |
|
 (Jewel) Watcher's Eye - It's optimal to get one with extra base Crit. Chance while affected by Hatred, but the other options for Hatred or Precision are also good enough. (Jewel) Watcher's Eye - It's optimal to get one with extra base Crit. Chance while affected by Hatred, but the other options for Hatred or Precision are also good enough. |
|
| Recommended affixes: +(1.2-1.8)% to Critical Strike Chance while affected by Hatred (40-60)% increased Cold Damage while affected by Hatred (40-60)% increased Attack Damage while affected by Precision +(30-50)% to Critical Strike Multiplier while affected by Precision |
|
 (Jewel) Lioneye's Fall - socketing it near Claw and Dagger Cluster is a very efficient way to get tons of Critical Strike and Damage modifiers. (Jewel) Lioneye's Fall - socketing it near Claw and Dagger Cluster is a very efficient way to get tons of Critical Strike and Damage modifiers. |
|
| Melee and Melee Weapon Type modifiers in Radius are Transformed to Bow Modifiers | |
 (Jewel) Lethal Pride - just socketing this Jewel in the proper position will grant you 90 Strength which makes your Gearing much easier. Later on, you can look for one with useful modifiers such as Double Damage Chance, maximum Life, or Endurance Charge on Kill. (Jewel) Lethal Pride - just socketing this Jewel in the proper position will grant you 90 Strength which makes your Gearing much easier. Later on, you can look for one with useful modifiers such as Double Damage Chance, maximum Life, or Endurance Charge on Kill. |
|
| Commanded leadership over (10000-18000) warriors under (Akoya-Kaom-Rakiata) Passives in radius are Conquered by the Karui Historic |
|
 (Flask) Dying Sun - increases the number of our projectiles by two making it an exceptional Flask for Bow builds. It will boost your Clear Speed and Damage against Bosses. (Flask) Dying Sun - increases the number of our projectiles by two making it an exceptional Flask for Bow builds. It will boost your Clear Speed and Damage against Bosses. |
|
| +50% to Fire Resistance 20% less Fire Damage taken (125-150)% increased Charges used (40-60)% reduced Duration (10-20)% increased Area of Effect during Flask Effect Skills fire 2 additional Projectiles during Flask Effect |
|
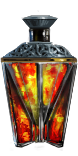
 (Flask) Bottled Faith - one of the best Utility Flasks in Path of Exile for all Crit-based builds. It gives you a very high bonus Crit. and Damage against enemies that are within the Consecrated Ground it creates. (Flask) Bottled Faith - one of the best Utility Flasks in Path of Exile for all Crit-based builds. It gives you a very high bonus Crit. and Damage against enemies that are within the Consecrated Ground it creates. |
|
| (30-15)% reduced Duration Consecrated Ground created by this Flask has Tripled Radius Consecrated Ground created during Effect applies (7-10)% increased Damage taken to Enemies (100-150)% increased Critical Strike Chance against Enemies on Consecrated Ground during Flask effect |
|
 (Flask) Progenesis - it's a very expensive Flask that offers an insane amount of Defense by spreading out 25% of initial Damage over the course of 4 seconds. (Flask) Progenesis - it's a very expensive Flask that offers an insane amount of Defense by spreading out 25% of initial Damage over the course of 4 seconds. |
|
| (20-10)% reduced Charges per use (-35-35)% increased Duration When Hit during effect, 25% of Life loss from Damage taken occurs over 4 seconds instead |
|
Other suggested Flasks:
|
|
   |
|
|
If you have any other build requests please leave that in the comments below. We are always open to suggestions and constructive feedback.
Pictures used in this article are the intellectual property of Grinding Gear Games
