Siege Ballista Hierophant Build
Attack Totem build for Hierophant that stacks Dexterity to increase the damage and number of Siege BallistasSiege Ballista
Hierophant Build
Updated for Patch 3.21
The Best Crafty Guides by Odealo
| Guide notes | |||
| December 08, 2021 -Build created May 17, 2022 -Updated for Patch 3.21 |
|||
| Build overview | |||
| Tags: [TOTEM] [ELEMENTAL] [LIFE] | |||
|
Budget: Defenses: |
|
Boss DPS: AoE: |
|
Hierophant's Siege Ballistas are extremely powerful Totems when played with the right gear. It's a Dexterity-Stacking build that among many other Unique items that scale with Dexterity uses Iron Commander. This Bow extends the maximum number of Siege Ballista Totems you can have summoned at once - one per 200 Dexterity. You will deal converted Cold Damage that you can source from Hyrri's Demise and Passives. Hierophant's Ascendancy offers two great keystones for such build - Pursuit of Faith and Ritual of Awakening, especially the latest - it's a complete game-changer since it regenerates your Mana, Life, and adds Damage per Summoned Totem, which can be safely assumed you will have 15 of at the same time.
It's a Life build, but your Life pool is rather small - 4 to 5k, but because of the totemic nature of the gameplay, it's actually really safe. Add to that over 20k Armour with Iron Reflexes, 100% Chance to Suppress Spell Damage with Magebane, and rapid Life Regen with Ritual of Awakening - with that, you're most vulnerable to Attack Hits that could deal a lot of Chaos or Elemental Damage with a single blow since your Resistances are capped at a standard 75%. Your Ballistas fires many Projectiles when used with Rain of Splinters Jewel and Anomalous Gem Quality. Crit Chance should be very high, combined with various other Gems to increase the DPS, it can be safely said that it's a boss-killer build.
You can also check our other Path of Exile builds right over here Odealo's Crafty Guides - Full List
1. Gameplay
When mapping it plays like a regular ranged-totem build where you place your Ballistas ahead of you to clear the way, while during bossing it is possible to use the build to its full potential - when there's a setup phase take your time to place as many Totems as you can, and as the boss becomes targetable you can use your second six-link setup to apply Sniper's Mark, Frost Bomb and hit him With Frenzy supported by Bonechill, then apply Ensnaring Arrow. After that, your target will take incalculable amounts of damage. Use Blood Rage to fasten your pace, Precision, Hatred, and Skitterbots. Your mobility skill could be Dash or Flame Dash, while your Guard Spell should be definitely Molten Shell.
|
Full gameplay video:
This video was recorded on a level 95 Hierophant with approx. 1800 Dexterity, resulting in a total of 15 Siege Ballistas that you can have summoned simultaneously. We also used the new Sentinel Boots with added Cold Damage per Dexterity, resulting in quite a low Life pool. The damage output is simply insane, sadly without Garukhan's Flight, it gets tricky to deal with the New Uber Bosses; without enough experience that would allow you to avoid most of the incoming damage, you will simply die rather quickly. |
|
|

2. Build's PROS & CONS
| PROS |
|
| CONS |
|
3. Leveling tips
During the first few levels use Ancestral Protector or Warchief, and before you finish the Final Act, you should be able to use most of the core Unique Items and Ballista Totems. Start using Ballista Totems around the same time you allocate Rain of Splinters Jewel, Panopticon, or Watchtowers Passives. After equipping Hyrri's Demise and Fractal Thoughts focus primarily on Cold Damage. Dexterity should be the last of your priorities, first, cap your Resistances and get all the Unique items except Belt, Gloves, and Rings.
Suggested leveling Gem setups:
| Totem setup | |
 |
Ancestral Protector - a standard Melee Totem that uses Slam-type Attacks and boosts your damage |
 |
Ruthless Support - makes every third Melee Attack significantly more powerful |
 |
Multiple Totems Support - summon more Totems to deal more damage |
 |
Inspiration Support - more Crit Chance and Elemental Damage while the cost of Skill gets lower |
| Auras setup | |
 |
War Banner - great for when the majority of your Damage is Physical and you lack Accuracy Rating |
 |
Clarity - Clarity is used for Mana Regeneration |
 |
Precision - higher Accuracy Rating and Crit Chance to improve your DPS |
| Curses and Dash setup | |
 |
Dash - Dash doesn't require any specific weapon and it requires Dexterity which you should have some of |
 |
Vulnerability - Curse to improve your Physical Damage and grant a chance to inflict Bleeding debuff on Hit |
Bandits:
Kill all three bandits and be rewarded with two additional Skill Points
Leveling Skill Trees:
34 Points Passive Tree
Allocate Precision, Discipline and Training, Constitution, Graceful Assault, and Totemic Zeal
66 Points Passive Tree
Go for the Totem Clusters, more Maximum Life from Masteries, and Bow Cluster with Totem-related Mastery
Recommended leveling items:
 Le Heup of All - more Damage, Attributes, and Elemental Resistances Le Heup of All - more Damage, Attributes, and Elemental Resistances |
|
| Adds 1 to 4 Physical Damage to Attacks +(10-30) to all Attributes (10-30)% increased Damage (10-30)% increased Rarity of Items found +(10-30)% to all Elemental Resistances |
|
 Goldrim - a Helmet to give you a lot of Resistances Goldrim - a Helmet to give you a lot of Resistances |
|
| +(30-50) to Evasion Rating 10% increased Rarity of Items found +(30-40)% to all Elemental Resistances Reflects 4 Physical Damage to Melee Attackers Level Requirement reduced by 100 (Hidden) |
 Tabula Rasa - allows you to six-link a setup from the start Tabula Rasa - allows you to six-link a setup from the start |
|
| Item has no level requirement and Energy Shield (Hidden) Item has 6 White Sockets and is fully linked (Hidden) |
|
4. Final Skill Tree, Ascendancy Points, and Pantheon
Final Skill Tree:
98 Points Final Passive Tree (doesn't include Cluster Jewels nor Thread of Hope)
115 Points Path of Building (PoB) link
Ascendancy points:
Preferably in that order:
- Pursuit of Faith
- Ritual Awakening
- Conviction of Power
- Divine Guidance (optional)
Pantheon:
Major God: Soul of The Brine King: 1% You cannot be Stunned if you've been Stunned or Blocked a Stunning Hit in the past 2 seconds
Minor God: Soul of Abberath: 60% less Duration of Ignite on You
5. Final Gems links
| [DPS] Siege Ballista setup | |
 |
Siege Ballista - a simple Attack totem that fires Piercing Projectiles upon enemies |
 |
Cold Penetration Support - use Cold Penetration Support to deal more Cold Damage |
 |
Added Cold Damage Support - adds Cold Damage to Attacks increasing your Cold Damage, you can alternatively use  Increased Critical Damage Support if your Critical Strike Chance is high enough to make it a better pick Increased Critical Damage Support if your Critical Strike Chance is high enough to make it a better pick |
|
Inspiration Support - your linked Skill cost Less Mana, deals more Elemental Damage, and has a higher Crit Chance as you keep using it |
 |
Elemental Damage with Attacks Support - Linked Attack deals more Elemental Damage |
 |
Barrage Support - Barrage makes your projectiles that would normally fire all at once to be released one after another in a straight line - it's vital against the bosses but you can give it up when clearing to replace it with another Gem or to save Mana |
| [UTILITY] Frenzy setup | |
 |
Frenzy - a simple Attack with great base stats that grants you Frenzy Charge increasing your Attack Speed and Damage - use only against tough opponents |
| Cast on Critical Strike - with your Crit Chance high use it to reliably cast linked Spells on use | |
 |
Ensnaring Arrow - Enemies hit by it have less Movement Speed and take more Projectile Damage so it's great against bosses, and stacks up to three times. Note that you don't want to Pierce bosses with this Projectile. |
 |
Frost Bomb - applies Cold Exposure lowering Cold Resistance and reducing Life Regen for enemies |
 |
Culling Strike Support - Use Culling Strike to instantly kill bosses which very low Life. Alternatively use Increased  Critical Strike Chance Support if your Crit. Chance is too low Critical Strike Chance Support if your Crit. Chance is too low |
 |
Greater Multiple Projectiles Support - more Projectiles make it easier to hit your enemy with Critical Strike |
| [UTILITY] Aura setup | |
 |
Hatred - a standard aura for Cold Damage builds that increases your Cold Damage and grants more of it based on your Physical Damage |
 |
Summon Skitterbots - summons invulnerable Minions that Chill and Shock opponents with increased effectiveness |
| Bonechill Support - makes Chill much more effective and increases your Damage, it will increase the Mana cost of Skitterbots, so if it's too high, put it in the setup with Frost Bomb instead. | |
 |
Enlighten - Enlighten makes the setup Reserve less Mana so that you're able to have a higher Gem Level of Precision |
| [UTILITY] Precision | |
|
Precision - use for Accuracy Rating and Crit Chance, don't level it all the way up to level 20 or put it on at all if you don't need it as you will need a lot of unreserved Mana |
| [UTILITY] Molten Shell | |
 |
Molten Shell - with the high amount of Armour you should have, this Guard Spell seems like the best option as it can absorb more Damage the more Armour you have |
| [UTILITY] Flame Dash | |
 |
Flame Dash - Movement Spell to increase your mobility by allowing you to quickly dash |
| [UTILITY] Blood Rag | |
 |
Blood Rage - increases your Attack Speed and Life Leech but drains your Life |
| [UTILITY] Mark setup | |
 |
Sniper's Mark - Curse that makes opponent significantly more vulnerable to Projectiles, Split Projectiles on Hit, and grants Flask Charges |
 |
Mark on Hit Support - Applies Sniper's Mark with each Hit against Rare or Unique enemies automatically |
| [UTILITY] Frostbite | |
 |
Frostbite - If you have a way to apply more than one Curse by anointing an Amulet or by Ring Affix, use Frostbite to reduce the Cold Resistance of your enemies |
|
|
6. Gear Setup
You will stack Dexterity. Only a few of the items are Rare - your Gloves, Rings, and possibly Belt and Amulet. These items should not only provide you with a lot of Dexterity but also cap your Resistances and ideally grant some Extra Maximum Life and damage stats. As for the Unique Items, most of them are cheap, and even the most expensive ones cost next to nothing when compared to the Rare ones - ideally, you want a Shythesised Implicit modifier with a percentage increase in Dexterity - especially Belt as it can offer up to 18% increased Dexterity. For your other Attributes - you will need 155 of Strength and Intelligence for your Gems. Remember to use Intirincic Catalysts on your Jewelry for more potent Attribute modifiers.
Our recommended items will:
- Cap your resistances at 75%
- Provide you with enough DPS and Life to start mapping
|
Stat priorities on items:
|
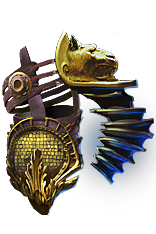
 (Helmet) Fractal Thoughts - Evasion Rating, Critical Strike Multiplier, Elemental Damage, and Maximum Life. You have to keep your Strength higher than your Intelligence for more Dexterity. (Helmet) Fractal Thoughts - Evasion Rating, Critical Strike Multiplier, Elemental Damage, and Maximum Life. You have to keep your Strength higher than your Intelligence for more Dexterity. |
|
| (140-180)% increased Evasion and Energy Shield +(25-40)% to Critical Strike Multiplier if Dexterity is higher than Intelligence 15% increased Dexterity if Strength is higher than Intelligence 1% increased Elemental Damage per 10 Dexterity +2 to Maximum Life per 10 Intelligence |
|
| Helmet enchantments: Siege Ballista enchantment mods |
|
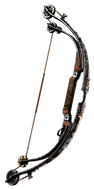 (Weapon) Iron Commander - the most important stats here are the ones that scale with Dexterity, it's a core item for the build as it allows you to put up a lot of Totems all at once. (Weapon) Iron Commander - the most important stats here are the ones that scale with Dexterity, it's a core item for the build as it allows you to put up a lot of Totems all at once. |
|
| (30-50)% increased Critical Strike Chance Adds (8-12) to (16-24) Physical Damage (14-20)% increased Attack Speed (14-20)% increased Totem Life (14-20)% increased Totem Placement speed Siege Ballista has +1 to maximum number of Summoned Totems per 200 Dexterity Adds 1 to 3 Physical Damage to Attacks per 25 Dexterity |
|
 (Weapon) The Poised Prism - The Hyrri's Demise is no longer an option, this Quiver grants similar stats, the most important of which, is Cold Damage per Dexterity. (Weapon) The Poised Prism - The Hyrri's Demise is no longer an option, this Quiver grants similar stats, the most important of which, is Cold Damage per Dexterity. |
|
| (20-30)% increased Elemental Damage with Attack Skills +(15-25) to Fire Resistance +(15-25) to Cold Resistance +(15-25) to Lightning Resistance Adds 1 to 2 Cold Damage to Attacks per 10 Dexterity Adds 1 to 2 Fire Damage to Attacks per 10 Strength Adds 0 to 3 Lightning Damage to Attacks per 10 Intelligence |
|
 (Body Armour) Hyrri's Ire - this Body Armour is a great fit for the build as it gives you a lot of Evasion Rating, Spell Suppression, Dexterity, and Damage, but Wildwrap is overall a better option (Body Armour) Hyrri's Ire - this Body Armour is a great fit for the build as it gives you a lot of Evasion Rating, Spell Suppression, Dexterity, and Damage, but Wildwrap is overall a better option |
|
| +(40-50) to Dexterity (140-220)% increased Evasion Rating 25% increased Chill Duration on Enemies (105-145) to (160-200) Added Cold Damage with Bow Attacks +30% chance to Suppress Spell Damage |
|
 (Body Armour) Wildwrap - It's comparable to Hyrri's Ire in terms of price, damage, and defensive capabilities. Use it if you lack Cold Resistance, or if you prioritize damage over Armour. (Body Armour) Wildwrap - It's comparable to Hyrri's Ire in terms of price, damage, and defensive capabilities. Use it if you lack Cold Resistance, or if you prioritize damage over Armour. |
|
| 10% increased Attack Speed +(600-700) to Evasion Rating +(30-40)% to Cold Resistance 5% increased Movement Speed (20-25)% increased Mana Recovery from Flasks 15% increased Dexterity 1% increased Damage per 15 Dexterity |
|
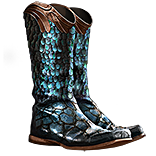
 (Boots) Rare Boots - Rare Boots can be equally good as the Unique ones if you manage to get the necessary requirements which are Dexterity, Maximum Life, and Movement Speed. The new Sentinel mod that adds damage based on Dexterity can easily double your damage, but such a pair can be very expensive (Boots) Rare Boots - Rare Boots can be equally good as the Unique ones if you manage to get the necessary requirements which are Dexterity, Maximum Life, and Movement Speed. The new Sentinel mod that adds damage based on Dexterity can easily double your damage, but such a pair can be very expensive |
|
| Min. requirements: +40 to Dexterity +60 to Maximum Life 25% increased Movement Speed Optional affixes: Adds # Cold Damage per 10 Dexterity Elemental Resistances |
|
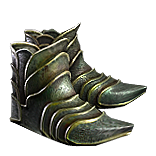
 (Boots) Garukhan's Flight - another heavily recommended Unique that grants you a lot of Life based on your Dexterity, Life Regeneration, and immunity to various ground effects (Boots) Garukhan's Flight - another heavily recommended Unique that grants you a lot of Life based on your Dexterity, Life Regeneration, and immunity to various ground effects |
|
| +(30-40) to Dexterity (300-340)% increased Evasion Rating 30% increased Movement Speed Immune to Burning Ground, Shocked Ground and Chilled Ground Regenerate 100 Life per second while moving +2 to Maximum Life per 10 Dexterity |
|
 (Gloves) Rare Gloves - you can get a percentage increase in Dexterity on Hunter-influenced Gloves, look for more Dexterity and Elemental Resistances (Gloves) Rare Gloves - you can get a percentage increase in Dexterity on Hunter-influenced Gloves, look for more Dexterity and Elemental Resistances |
|
| Min. requirements: +50 to Dexterity 10% increased Dexterity +50% to Elemental Resistances Optional affixes: increased Evasion Rating Maximum Life increased Attack Speed |
|
 (Belt) Rare Belt - acquiring a Belt with the right Synthesised Implicit is expensive, but ultimately worth it as it can provide you with unmatched amounts of Dexterity and other useful mods such as Life and Resistances (Belt) Rare Belt - acquiring a Belt with the right Synthesised Implicit is expensive, but ultimately worth it as it can provide you with unmatched amounts of Dexterity and other useful mods such as Life and Resistances |
|
| Min. requirements: 15% increased Dexterity (Synthesised Implicit) +55 Dexterity +50% to Elemental Resistances Optional affixes: Elemental Damage with Attacks increased Damage Elemental Resistances |
|
 (Belt) Cyclopean Coil - this Belt is worse than a Rare, but it should be sufficient until you can afford a Rare Belt that would meet your needs as it too offers a lot of Attributes (Belt) Cyclopean Coil - this Belt is worse than a Rare, but it should be sufficient until you can afford a Rare Belt that would meet your needs as it too offers a lot of Attributes |
|
| +(25-40) to maximum Life +(60-80) to maximum Life (5-15)% increased Attributes Cannot be Frozen if Dexterity is higher than Intelligence Cannot be Ignited if Strength is higher than Dexterity Cannot be Shocked if Intelligence is higher than Strength 1% increased Damage per 5 of your lowest Attribute |
|
 (Amulet) Astramentis - a standard choice for all Attributes-stacking builds as no other Amulet can give you this much of these as this one (Amulet) Astramentis - a standard choice for all Attributes-stacking builds as no other Amulet can give you this much of these as this one |
|
| +(10-16) to all Attributes +(80-100) to all Attributes -4 Physical Damage taken from Attack Hits |
|
| Recommended Anointments: Shaman's Dominion Whispers of Doom |
|
 (Ring) Rare Ring - This is where most of your Resistances should reside, as, besides these stats, the only other options worth seeking are more Life and Dexterity. If you can apply more than one Curse, seek the Frostbite on Hit. Remember to Craft reduced Mana Cost of Skills on both Rings, it's the best way to improve your Mana sustain. (Ring) Rare Ring - This is where most of your Resistances should reside, as, besides these stats, the only other options worth seeking are more Life and Dexterity. If you can apply more than one Curse, seek the Frostbite on Hit. Remember to Craft reduced Mana Cost of Skills on both Rings, it's the best way to improve your Mana sustain. |
|
| Min. requirements: +55 Dexterity +90% to Elemental Resistances Non-Channelling Skills have -7 to Total Mana Cost (crafted) Optional affixes: Maximum Life increased Elemental Damage with Attack Skills Frostbite Curse on Hit |
|
 (Jewel) Rare Jewels - you won't have many free Jewel Sockets, but one or two of these should grant you more Resistances, Life, and Dexterity (Jewel) Rare Jewels - you won't have many free Jewel Sockets, but one or two of these should grant you more Resistances, Life, and Dexterity |
|
|
Recommended affixes: |
|
  (Jewel) Forbidden Flame & Forbidden Flesh - Righteous Providence is heavily recommended, but not mandatory. It will increase your Critical Strike Chance resulting in around 20% more total DPS. (Jewel) Forbidden Flame & Forbidden Flesh - Righteous Providence is heavily recommended, but not mandatory. It will increase your Critical Strike Chance resulting in around 20% more total DPS. |
|
| Allocates <<Random Ascendancy Notable>> if you have the matching modifiers on Forbidden Flame Allocates <<Random Ascendancy Notable>> if you have the matching modifiers on Forbidden Flesh |
|
 (Jewel) Thread of Hope - A Thread of Hope with a Massive Ring allocated next to the Supreme Ego has big potential - you can use it to allocate Blood Siphon, Will of Blades, Forces of Nature, Aspect of the Lynx, Weapon Artistry, Quickstep, Path of the Hunter, Harrier, and Leadership. Some of them are located within the radius of Brutal Restraint. (Jewel) Thread of Hope - A Thread of Hope with a Massive Ring allocated next to the Supreme Ego has big potential - you can use it to allocate Blood Siphon, Will of Blades, Forces of Nature, Aspect of the Lynx, Weapon Artistry, Quickstep, Path of the Hunter, Harrier, and Leadership. Some of them are located within the radius of Brutal Restraint. |
|
| Only affects Passives in <size> Ring Passives in Radius can be Allocated without being connected to your tree -(20-10)% to all Elemental Resistances |
|
 (Jewel) Brawn - increases Dexterity which is obviously good but it also helps you make your Strength to be higher than Intelligence so that your Fractal Thoughts activate its second trait (Jewel) Brawn - increases Dexterity which is obviously good but it also helps you make your Strength to be higher than Intelligence so that your Fractal Thoughts activate its second trait |
|
| (4-6)% increased Dexterity (4-6)% increased Strength (15-10)% reduced Intelligence |
|
 (Jewel) Fluid Motion - it's obligatory to place it in the socket close to your starting location to transform Strength into Dexterity (Jewel) Fluid Motion - it's obligatory to place it in the socket close to your starting location to transform Strength into Dexterity |
|
| +(16-24) to Dexterity Strength from Passives in Radius is Transformed to Dexterity |
|
 (Jewel) Rain of Splinters - another mandatory Jewel, this one is used to increase your number of Projectiles while its side effect reduces Totem's Damage (Jewel) Rain of Splinters - another mandatory Jewel, this one is used to increase your number of Projectiles while its side effect reduces Totem's Damage |
|
| (50-30)% reduced Totem Damage Totems fire 2 additional Projectiles |
|
 (Jewel) Brutal Restraint - it's a potentially great Jewel - you just need to roll a good mod of your Notables in Radius to give you more Dexterity or increase your Dexterity. You won't need its Keystone so place it between Vigour and Savagery (Jewel) Brutal Restraint - it's a potentially great Jewel - you just need to roll a good mod of your Notables in Radius to give you more Dexterity or increase your Dexterity. You won't need its Keystone so place it between Vigour and Savagery |
|
| Denoted service of (500-8000) dekhara in the akhara of Nasima-Asenath-Balbala Passives in radius are Conquered by the Maraketh Historic |
|
 (Jewel) Split Personality - The list of random modifiers is pretty short and the only good ones are Dexterity, Maximum Life, and Strength if you need it to be higher than Intelligence. Plac it in the Cluster Jewel's Socket near Perfect Agony. (Jewel) Split Personality - The list of random modifiers is pretty short and the only good ones are Dexterity, Maximum Life, and Strength if you need it to be higher than Intelligence. Plac it in the Cluster Jewel's Socket near Perfect Agony. |
|
| This Jewel's Socket has 25% increased effect per Allocated Passive Skill between it and your Class' starting location <Two random modifiers> |
|
 (Jewel) Watcher's Eye - any Hatred and most of Precision's mod should be sufficient to make this Jewels worth buying (Jewel) Watcher's Eye - any Hatred and most of Precision's mod should be sufficient to make this Jewels worth buying |
|
| (4-6)% increased maximum Energy Shield (4-6)% increased maximum Life (4-6)% increased maximum Mana <Two or Three random aura modifiers> |
|
 (Jewel) Large Cluster Jewels - Blanketed Snow is good, and if you need Resistances try to get Prismatic Heart. It's completely optional to use Large Cluster Jewels, in most Cases Medium Cluster Jewel is more preferable. (Jewel) Large Cluster Jewels - Blanketed Snow is good, and if you need Resistances try to get Prismatic Heart. It's completely optional to use Large Cluster Jewels, in most Cases Medium Cluster Jewel is more preferable. |
|
| Recommended affixes: 1 Added Passive Skill is Blanketed Snow 1 Added Passive Skill is Widespread Destruction 1 Added Passive Skill is Prismatic Heart 1 Added Passive Skill is Disorienting Display |
|
 (Jewel) Medium Cluster Jewels - with Sleepless Sentries you will have guaranteed Onslaught at all times, so you can respec Graceful Assault after allocating it for extra Passive Skill Points (Jewel) Medium Cluster Jewels - with Sleepless Sentries you will have guaranteed Onslaught at all times, so you can respec Graceful Assault after allocating it for extra Passive Skill Points |
|
| Recommended affixes: 1 Added Passive Skill is Sleepless Sentries 1 Added Passive Skill is Ancestral Echo |
|
 (Flask) Bottled Faith - this pricey Flask is optional but it provides you with a lot of increases to your effective DPS (Flask) Bottled Faith - this pricey Flask is optional but it provides you with a lot of increases to your effective DPS |
|
| 40% increased Damage Creates Consecrated Ground on Use (30-15)% reduced Duration Consecrated Ground created by this Flask has Tripled Radius Consecrated Ground created during Effect applies (7-10)% increased Damage taken to Enemies (100-150)% increased Critical Strike Chance against Enemies on Consecrated Ground during Flask effect |
|
 (Flask) Dying Sun - it has its minor defensive virtues, but the main aspect of it is the ability to fire 2 additional Projectiles during the effect of this Flask (Flask) Dying Sun - it has its minor defensive virtues, but the main aspect of it is the ability to fire 2 additional Projectiles during the effect of this Flask |
|
| +50% to Fire Resistance 20% less Fire Damage taken (125-150)% increased Charges per use (40-60)% reduced Duration (10-20)% increased Area of Effect during Flask Effect Skills fire 2 additional Projectiles during Flask Effect |
|
|
Suggested Flasks:
|
|
    |
|
|
If you have any other build requests please leave that in the comments below. We are always open to suggestions and constructive feedback.
Pictures used in this article are the intellectual property of Grinding Gear Games.
