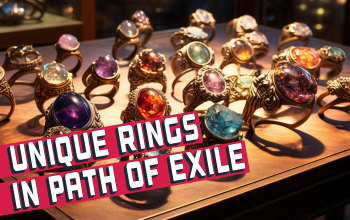
Unique Rings in PoE
Complete List of all Unique Rings in Path of Exile - one of the two main Jewelry typesUnique Rings in PoE
Wiki page
Updated for Patch 3.22
Path of Exile offers a multitude of Unique Rings to choose from. Each character is limited to only two such pieces of Jewelry (the only exception being Thief's Torment). Their role is rarely to provide any meaningful defensive stats. Their primary objective depends on your builds, but it's usually to grant you around 80 Maximum Life with their Prefix, and Attributes or Elemental Resistances via their Suffixes. Other noteworthy basic Prefixes are increased or added damage of various kinds to Attacks, and so these are of no particular value to Spellcasters. Influenced Rare Rings can also be powerful with mods that will apply a specific Curse on Hit, add Damage per Frenzy Charge, or be a source of Life or Mana recovery. Attribute-stacking builds almost always tend to use Synthesised Rare Rings with exotic Implicits for increased Strength, Dexterity, or Intelligence.
Unique Rings are very common in a lot of builds - for example, Deadeyes can be often seen wearing the Mark of the Elder or Ventor's Gamble. Projectile builds are prompted to consider Nimis for a major damage boost. Polaric Devastation is excellent in almost any build that dabbles in Fire Damage. The most extreme example of a Ring that suits any build is Kalandra's Touch, one of the most expensive items in the game. There's almost always a Unique Ring that will grab your attention, no matter how niche your build is. We've arranged all of the obtainable Rings in this list, so that they may inspire you to create your own build or so that you can simply learn more about them. We've placed links to the builds made by our team beforehand that are the best examples of the correct usage of such Rings.
| Rings | |
 Blackheart - For a level-1 Ring that cost almost nothing, it's very good. It adds relatively a lot of damage to Attacks so we recommend it to all starting Attack-based Characters. Abandon it later for a Ring with Maximum Life and Resistances, or when you start specializing in non-Chaos Damage with Support Gems like Trinity or Brutality. Blackheart - For a level-1 Ring that cost almost nothing, it's very good. It adds relatively a lot of damage to Attacks so we recommend it to all starting Attack-based Characters. Abandon it later for a Ring with Maximum Life and Resistances, or when you start specializing in non-Chaos Damage with Support Gems like Trinity or Brutality. |
|
|
Required Level: 1 Adds 1 to 4 Physical Damage to Attacks |
|
 Doedre's Damning - The ability to apply two Curses instead of one is great in any build, as all of them can benefit from casting an additional Punishment or Enfeeble, but this ability is especially prized in Poison Builds to cast Despair and Temporal Chains which both increases Poison's DPS. It's one of the best level-1 Rings if you have a way to effectively apply Curses on Hit. There are a lot of builds that will continue using this Ring due to this virtue combined with Resistances, Intelligence, and Mana on Kill, but keep in mind there are other options to apply extra Curse like Whispers of Doom notable or Anathema Ring that extend this limit to 3 instead of 2. Doedre's Damning - The ability to apply two Curses instead of one is great in any build, as all of them can benefit from casting an additional Punishment or Enfeeble, but this ability is especially prized in Poison Builds to cast Despair and Temporal Chains which both increases Poison's DPS. It's one of the best level-1 Rings if you have a way to effectively apply Curses on Hit. There are a lot of builds that will continue using this Ring due to this virtue combined with Resistances, Intelligence, and Mana on Kill, but keep in mind there are other options to apply extra Curse like Whispers of Doom notable or Anathema Ring that extend this limit to 3 instead of 2. |
|
|
Required Level: 1 +(20-30) to maximum Mana |
|
| Replica Doedre's Damning - As the default Curse Limit is 1, to benefit from it you have to already have an increased Curse Limit. It can be done in various ways, even by equipping Doedre's Damning, but selecting Occultist's Unholy Authority seems like the best solution. This Ring increases the effect of Curses by up to 20% which is good, but sacrificing a Ring slot (and one Maximum Curse) for it is often not worth the price. It may be good in a build where you really want to increase Curse's effect. |
|
|
Required Level: 1 +(20-30) to maximum Mana |
|
 Kalandra's Touch - One of the most expensive items in the game. It duplicates your other Ring, so to benefit from it you have to already have a really good Ring on your other finger. It's used in any build with a Rare Ring (because there is no other Unique Ring worth duplicating with this overly expansive one) that you wish to have another copy of, but buying it is impossible or inefficient. Kalandra's Touch - One of the most expensive items in the game. It duplicates your other Ring, so to benefit from it you have to already have a really good Ring on your other finger. It's used in any build with a Rare Ring (because there is no other Unique Ring worth duplicating with this overly expansive one) that you wish to have another copy of, but buying it is impossible or inefficient. |
|
|
Required Level: 1 Reflects your other Ring |
|
 Kaom's Sign - Its only notable feature is +1 to Maximum Endurance Charges, and even that can be achieved with Precursor's Emblem (on top of other boons). It's rarely used as Endurance-stacking is not very popular to begin with. You can use it for leveling a Juggernaut with Unflinching passive, but there are other, better options. Kaom's Sign - Its only notable feature is +1 to Maximum Endurance Charges, and even that can be achieved with Precursor's Emblem (on top of other boons). It's rarely used as Endurance-stacking is not very popular to begin with. You can use it for leveling a Juggernaut with Unflinching passive, but there are other, better options. |
|
|
Required Level: 1 +(20-30) to maximum Life |
|
 Perandus Signet - It's used to level up quicker due to the increased Experience gain. We would recommend wearing it only when getting carried, as you can more efficiently level up by yourself by simply equipping a good ring and dealing more damage or dying less often with a Ring that has some Maximum Life on it. Other modifiers are insignificant. Perandus Signet - It's used to level up quicker due to the increased Experience gain. We would recommend wearing it only when getting carried, as you can more efficiently level up by yourself by simply equipping a good ring and dealing more damage or dying less often with a Ring that has some Maximum Life on it. Other modifiers are insignificant. |
|
|
Required Level: 1 +(20-30) to maximum Mana |
|
 Malachai's Artifice - Its purpose is to provide you with a lot of Fire, Cold, or Lightning Resistance. It may be used to level up an RF build. You can gain tons of Fire Resistance after combining it with Fire Mastery for Life Regeneration based on the character's Fire Resistance, and to mitigate RF's self-inflicted damage. Another reason to equip it is to lower your own Lightning Resistance and deal more damage with Doryani's Prototype Armour. It's not the best Ring for that type of build (Ventor's Gamble can be better), but it is the cheapest. Elemental Equilibrium can be used to apply powerful Exposure with the right Gem. Malachai's Artifice - Its purpose is to provide you with a lot of Fire, Cold, or Lightning Resistance. It may be used to level up an RF build. You can gain tons of Fire Resistance after combining it with Fire Mastery for Life Regeneration based on the character's Fire Resistance, and to mitigate RF's self-inflicted damage. Another reason to equip it is to lower your own Lightning Resistance and deal more damage with Doryani's Prototype Armour. It's not the best Ring for that type of build (Ventor's Gamble can be better), but it is the cheapest. Elemental Equilibrium can be used to apply powerful Exposure with the right Gem. |
|
|
Required Level: 5 Has 1 Socket |
|
| Replica Malachai's Artifice - It is the same as the regular Malachai's Artifice, but instead of granting Elemental Equilibrium to socketed Gems, it grants Secrets of Suffering. It can be used to Scorch, Sap, and Brittle if you manage to deal a Critical Strike with the socketed here Skill, but the effect of these Ailments will be very low. It's not worth equipping. |
|
|
Required Level: 5 Has 1 Socket |
|
 Pyre - It is used to increase Burning Damage or to convert Cold Damage to Fire. With it, you can use any Cold Skill to Ignite after combining it with Cold to Fire Support Gem for a 100% conversion with minimal effort. The Burning Damage bonus is so high that the Ring is often used in any build that deals primarily Burning Damage. It has decent Resistances but no Maximum Life. Pyre - It is used to increase Burning Damage or to convert Cold Damage to Fire. With it, you can use any Cold Skill to Ignite after combining it with Cold to Fire Support Gem for a 100% conversion with minimal effort. The Burning Damage bonus is so high that the Ring is often used in any build that deals primarily Burning Damage. It has decent Resistances but no Maximum Life. |
|
|
Required Level: 11 +(20-30)% to Cold Resistance |
|
 Call of the Void - It is often implemented into the builds that cannot Chill due to their lack of Cold Damage but would like to do so to benefit from Yoke of Suffering, Saboteur's Explosive Expert passive, or simply to slow down enemies. To fully appreciate this Ring, you have to be immune to Chill, or better yet, benefit from it by wearing the Winterweave Ring and damaging yourself. It's a great Ring in certain builds, one of the most popular ones in the self-chill achetypes. Call of the Void - It is often implemented into the builds that cannot Chill due to their lack of Cold Damage but would like to do so to benefit from Yoke of Suffering, Saboteur's Explosive Expert passive, or simply to slow down enemies. To fully appreciate this Ring, you have to be immune to Chill, or better yet, benefit from it by wearing the Winterweave Ring and damaging yourself. It's a great Ring in certain builds, one of the most popular ones in the self-chill achetypes. |
|
|
Required Level: 16 +(20-30)% to Cold Resistance |
|
 Emberwake - Emberwake lessens Burning Damage by 40% but allows for an additional Ignite to be applied. It's a very unique feature. With two such Rings, you can even apply 3 Ignites in total, but they would deal almost no damage. It may be good if you apply Ignites at least twice as fast as they last, so you have to have a good Cast/Attack rate. It's not widely used as most Ignite builds simply reduce Ignite Duration to make it deal more damage using tools like Swift Affliction and "Ignite deals damage faster" mods. It's not needed there. Emberwake - Emberwake lessens Burning Damage by 40% but allows for an additional Ignite to be applied. It's a very unique feature. With two such Rings, you can even apply 3 Ignites in total, but they would deal almost no damage. It may be good if you apply Ignites at least twice as fast as they last, so you have to have a good Cast/Attack rate. It's not widely used as most Ignite builds simply reduce Ignite Duration to make it deal more damage using tools like Swift Affliction and "Ignite deals damage faster" mods. It's not needed there. |
|
|
Required Level: 16 +(20-30)% to Fire Resistance |
|
| Replica Emberwake - Reduces Ignite Duration and makes it deal damage faster, making enemies experience the whole Ignite duration almost instantly. As was the case with regular Emberwake, it works great if you plan to apply a lot of Ignites with your extremely high Cast/Attack rate, however, you need to be careful - the reduced Ignite Duration reduces its potential damage by 90%. It's not an issue if you plan to instantly apply the next Ignite anyway, making it great in very specific builds. We've used it in the Ignite Vortex Elementalist and Detonate Dead Ignite Elementalist. |
|
|
Required Level: 16 +(20-30)% to Fire Resistance |
|
 Mokou's Embrace - This Ring can be used to easily inflict Ignite upon your character. It also comes with two reasons to do so - Increased Attack and Cast Speed. Other items that could enhance your performance while Ignited are the Eye of Innocence Amnulet or Leper's Alms Shield. The bonuses present here are quite high so it is often enough, especially if you're wearing two of these, and you can reliably self-inflict Ignite. Wilma's Requital Helmet may be excellent with these Rings as you can benefit from both - Attack and Cast Speed. Forbidden Rite or Boneshatter could be used to hit yourself. Obviously, be sure that the self-inflicted Ignite won't kill you. Mokou's Embrace - This Ring can be used to easily inflict Ignite upon your character. It also comes with two reasons to do so - Increased Attack and Cast Speed. Other items that could enhance your performance while Ignited are the Eye of Innocence Amnulet or Leper's Alms Shield. The bonuses present here are quite high so it is often enough, especially if you're wearing two of these, and you can reliably self-inflict Ignite. Wilma's Requital Helmet may be excellent with these Rings as you can benefit from both - Attack and Cast Speed. Forbidden Rite or Boneshatter could be used to hit yourself. Obviously, be sure that the self-inflicted Ignite won't kill you. |
|
|
Required Level: 16 +(20-30)% to Fire Resistance |
|
 Andvarius - It's bad. The "Rarity of Items found" is not a good modifier, even for MF builds as they tend to prioritize Item Quantity, which is present on other Rings. Andvarius - It's bad. The "Rarity of Items found" is not a good modifier, even for MF builds as they tend to prioritize Item Quantity, which is present on other Rings. |
|
|
Required Level: 20 (6-15)% increased Rarity of Items found |
|
 Berek's Grip - There is hardly anything Unique about this Ring, it grants some basic Resistances, Maximum Life, added Lightning Damage, and Life/ES Leech against Shocked/Frozen enemies. Rare Rings would be better in most cases unless you have no other way to Leech Life. It's decent for leveling up most builds. Berek's Grip - There is hardly anything Unique about this Ring, it grants some basic Resistances, Maximum Life, added Lightning Damage, and Life/ES Leech against Shocked/Frozen enemies. Rare Rings would be better in most cases unless you have no other way to Leech Life. It's decent for leveling up most builds. |
|
|
Required Level: 20 +(12-16)% to Cold and Lightning Resistances |
|
 Berek's Pass - It is too a quite generic Ring. It increases Fire Resistance, Fire Damage while Ignited, grants some ES, and Cold Damage. The extra Armour while Frozen is not that good as being immune to Freeze is simply better. It's, again, a good leveling Ring. Berek's Pass - It is too a quite generic Ring. It increases Fire Resistance, Fire Damage while Ignited, grants some ES, and Cold Damage. The extra Armour while Frozen is not that good as being immune to Freeze is simply better. It's, again, a good leveling Ring. |
|
|
Required Level: 20 +(12-16)% to Fire and Cold Resistances |
|
 Berek's Respite - The most popular Berek's Ring. It is used for its Ignite and Shock proliferation - great in Ignite builds with poor clear speed. We've used it in the Death Wish Elementailst. The other bonuses are great as well. It's also good with Elementalist's Shaper of Storms to inflict Shock with Igniting Hits. Berek's Respite - The most popular Berek's Ring. It is used for its Ignite and Shock proliferation - great in Ignite builds with poor clear speed. We've used it in the Death Wish Elementailst. The other bonuses are great as well. It's also good with Elementalist's Shaper of Storms to inflict Shock with Igniting Hits. |
|
|
Required Level: 20 +(12-16)% to Fire and Lightning Resistances |
|
 Call of the Brotherhood - Its most prominent feature is Lightning to Cold Conversion. With two of these Rings (and with proper Catalysts in them) you can Convert 98% of your Lightning Damage to Cold. After Converting damage, you will still benefit from both modifiers to the increased Cold and Lightning Damage you deal. It's even better with Heatshiver Helmet, as Cold Damage can Freeze, and that will add the same amount of Fire Damage to your Skills. We've used it in our Spark Inquisitor Build. Call of the Brotherhood - Its most prominent feature is Lightning to Cold Conversion. With two of these Rings (and with proper Catalysts in them) you can Convert 98% of your Lightning Damage to Cold. After Converting damage, you will still benefit from both modifiers to the increased Cold and Lightning Damage you deal. It's even better with Heatshiver Helmet, as Cold Damage can Freeze, and that will add the same amount of Fire Damage to your Skills. We've used it in our Spark Inquisitor Build. |
|
|
Required Level: 20 +(12-16)% to Cold and Lightning Resistances |
|
 Heartbound Loop - Used in one type of builds - the Heartbound Loop Autobomber, often called Wardloop too. The only valuable modifier is its downside - the damage taken on Minion Death, it fuels Cast when Damage Taken Support Gems. Heartbound Loop - Used in one type of builds - the Heartbound Loop Autobomber, often called Wardloop too. The only valuable modifier is its downside - the damage taken on Minion Death, it fuels Cast when Damage Taken Support Gems. |
|
|
Required Level: 20 +(15-25) to maximum Energy Shield |
|
 Kikazaru - It regenerates a lot of Life and reduces Curses' Effect on you. It's very popular for leveling up an RF build because it needs a lot of Life Regeneration, or in Soul Mantle builds to reduce Curse Effects to 0%. It's a very useful feature in any character that creates Consecrated Ground. These effects are not that important in the later stages of the game to make this Ring a good option. Kikazaru - It regenerates a lot of Life and reduces Curses' Effect on you. It's very popular for leveling up an RF build because it needs a lot of Life Regeneration, or in Soul Mantle builds to reduce Curse Effects to 0%. It's a very useful feature in any character that creates Consecrated Ground. These effects are not that important in the later stages of the game to make this Ring a good option. |
|
|
Required Level: 20 +(20-30)% to Lightning Resistance |
|
 Rigwald's Crest - It summons Wolves on Kill. These Minions add damage to your own Attacks, last 30 seconds, and you can have up to 10 of them. It's very good for leveling any Attack build, but quickly becomes redundant. We recommend trying it out. These Minions won't help you much during boss fights as there often won't be many opportunities to trigger this on-kill effect. Rigwald's Crest - It summons Wolves on Kill. These Minions add damage to your own Attacks, last 30 seconds, and you can have up to 10 of them. It's very good for leveling any Attack build, but quickly becomes redundant. We recommend trying it out. These Minions won't help you much during boss fights as there often won't be many opportunities to trigger this on-kill effect. |
|
|
Required Level: 20 +(12-16)% to Fire and Cold Resistances |
|
 Tasalio's Sign - It adds quite a lot of Cold Damage, even more against Chilled enemies. It's excellent for leveling any hit-based Cold Damage build like Frost Blades Trickster or Ice Shot Deadeye. In the later stages replace it with a better Rare or Unique Ring. Tasalio's Sign - It adds quite a lot of Cold Damage, even more against Chilled enemies. It's excellent for leveling any hit-based Cold Damage build like Frost Blades Trickster or Ice Shot Deadeye. In the later stages replace it with a better Rare or Unique Ring. |
|
|
Required Level: 20 +(20-30)% to Cold Resistance |
|
| Replica Tasalio's Sign - It's not as useful as the original, as it prohibits you from Freezing. Most low-level builds that deal Cold Damage with Hits want to Freeze to benefit from Heatshiver or to Shatter via Herald of Ice. In turn, instead of granting you a 50% chance to avoid Freezing, the Replica version makes you immune to Chill. It's not worth it, the Tasalio's Sign is better in almost any case. |
|
|
Required Level: 20 +(20-30)% to Cold Resistance |
|
 Praxis - One of the most popular leveling Rings, especially when your Spells are expensive. It reduces their cost so that you won't need to use Mana Flask. A very useful piece of jewelry. Praxis - One of the most popular leveling Rings, especially when your Spells are expensive. It reduces their cost so that you won't need to use Mana Flask. A very useful piece of jewelry. |
|
|
Required Level: 22 +(20-30) to maximum Mana |
|
 Dream Fragments - It provides you with a lot of Cold Resistance, more than any other Ring in the game. Combined with Chill and Freeze immunity, it makes it great in certain areas like during the Brine King fight or in The High Gardens. You may keep using it if you lack specifically Cold Resistance on your gear, but do replace it later. Dream Fragments - It provides you with a lot of Cold Resistance, more than any other Ring in the game. Combined with Chill and Freeze immunity, it makes it great in certain areas like during the Brine King fight or in The High Gardens. You may keep using it if you lack specifically Cold Resistance on your gear, but do replace it later. |
|
|
Required Level: 24 +(20-30)% to Cold Resistance |
|
 Le Heup of All - Another very popular leveling Ring - it fits almost any low-level build. It grants Attributes, Damage, and Elemental Resistances. These are often needed at all stages of the game, but what makes this Ring so great is its price and low level requirement. Le Heup of All - Another very popular leveling Ring - it fits almost any low-level build. It grants Attributes, Damage, and Elemental Resistances. These are often needed at all stages of the game, but what makes this Ring so great is its price and low level requirement. |
|
|
Required Level: 24 Adds 1 to 4 Physical Damage to Attacks |
|
 Mark of Submission - Applying a powerful Curse on Hit is definitely useful, but because the Ring grants nothing else at all, it's rarely used. We recommend it for leveling only. Mark of Submission - Applying a powerful Curse on Hit is definitely useful, but because the Ring grants nothing else at all, it's rarely used. We recommend it for leveling only. |
|
|
Required Level: 24 Has 1 Socket |
|
 Winterweave - It reverses the effect of Chill on you, making it great with the already-mentioned Call of the Void. Chill normally slows you down (reduces Action Speed) by up to 30%. If you can effectively Chill yourself, it's great. Action Speed is extremely good in most builds as it speeds up every action. Winterweave - It reverses the effect of Chill on you, making it great with the already-mentioned Call of the Void. Chill normally slows you down (reduces Action Speed) by up to 30%. If you can effectively Chill yourself, it's great. Action Speed is extremely good in most builds as it speeds up every action. |
|
|
Required Level: 24 +(20-30) to maximum Life |
|
 Timeclasp - It increases Attack Speed, Cast Speed, and hopefully Skill Effect Duration. All three of these stats are immensely beneficial in a Toxic Rain build that uses Wilma's Requital. It could also reduce Skill Effect Duration which is often hindering, but one or two builds may find it useful. Life Recoup and being Unaffected by Temporal Chains is great, but as stated already, the Ring is only useful if you plan to benefit from Attack/Cast Speed and Skill Effect Duration. Timeclasp - It increases Attack Speed, Cast Speed, and hopefully Skill Effect Duration. All three of these stats are immensely beneficial in a Toxic Rain build that uses Wilma's Requital. It could also reduce Skill Effect Duration which is often hindering, but one or two builds may find it useful. Life Recoup and being Unaffected by Temporal Chains is great, but as stated already, the Ring is only useful if you plan to benefit from Attack/Cast Speed and Skill Effect Duration. |
|
|
Required Level: 25 +(15-25) to maximum Energy Shield |
|
 Gifts from Above - The Consecrate Skill present here simply creates Consecrated Ground beneath you. All the other mods are rather unimpressive. The damage, Crit Cance, Attack Block Chance, and Item Rarity bonuses are low. Even if you want to be constantly on Consecrated Ground, this Ring won't help you as the Skill has a 5-second Cooldown. Gifts from Above - The Consecrate Skill present here simply creates Consecrated Ground beneath you. All the other mods are rather unimpressive. The damage, Crit Cance, Attack Block Chance, and Item Rarity bonuses are low. Even if you want to be constantly on Consecrated Ground, this Ring won't help you as the Skill has a 5-second Cooldown. |
|
|
Required Level: 28 (20-30)% increased Global Critical Strike Chance |
|
 Ngamahu's Sign - It can be used with the Eye of Innocence Amulet to instantly recover Life upon Igniting an enemy, thus receiving little to no damage from it. It could be somewhat good in a low-level Ignite Build to quickly recover Life, but it's not as useful later on. Ngamahu's Sign - It can be used with the Eye of Innocence Amulet to instantly recover Life upon Igniting an enemy, thus receiving little to no damage from it. It could be somewhat good in a low-level Ignite Build to quickly recover Life, but it's not as useful later on. |
|
|
Required Level: 28 +(20-30)% to Fire Resistance |
|
 Death Rush - Adrenaline is very hard to get unless you wear this Ring - here you simply get it on kill for up to 3 seconds. For that reason, it is not good against end-game bosses, or any boss you plan to fight for longer than a few seconds, but there are a lot of builds that will make great use of it, mostly speed-oriented glass-canon builds. Adrenaline grants 100% increased Damage, 25% increased Attack, Cast, and Movement Speed, and 10% additional Physical Damage Reduction. Death Rush - Adrenaline is very hard to get unless you wear this Ring - here you simply get it on kill for up to 3 seconds. For that reason, it is not good against end-game bosses, or any boss you plan to fight for longer than a few seconds, but there are a lot of builds that will make great use of it, mostly speed-oriented glass-canon builds. Adrenaline grants 100% increased Damage, 25% increased Attack, Cast, and Movement Speed, and 10% additional Physical Damage Reduction. |
|
|
Required Level: 30 +(17-23)% to Chaos Resistance |
|
 Lori's Lantern - It's rarely used. Only as you're permanently on Low Life the bonuses to Movement Speed, Chaos Resistance, and being Hit with only Unlucky Hits are applicable. The damage hitting you being Unlucky is a great defensive layer (mostly against Lightning Damage), but it is often better to go for a Ring with more basic Maximum Life or Resistances instead. Lori's Lantern - It's rarely used. Only as you're permanently on Low Life the bonuses to Movement Speed, Chaos Resistance, and being Hit with only Unlucky Hits are applicable. The damage hitting you being Unlucky is a great defensive layer (mostly against Lightning Damage), but it is often better to go for a Ring with more basic Maximum Life or Resistances instead. |
|
|
Required Level: 30 +(8-10)% to all Elemental Resistances |
|
 Shavronne's Revelation - This Ring is the single best source of Maximum Mana or Maximum ES, depending on the Ring Slot it is in. The caveat is, that you cannot Regenerate Mana if you want more Mana, and you cannot Recharge or Regenerate ES if you want the ES. You can still Leech ES (or Mana from Attacks), Recover Mana from Flasks, or from "gain on hit" effects, so if this is how you recover these resources anyway, it can be quite good. You can also Recover Energy Shield with a Life Flask if you have Supreme Decadence Keystone, Sorrow of the Divine, or its Replica version. We've used the Ring in this Lightning Conduit Trickster Build to get more ES (Tricksters are great at Leeching ES), or in this Manaforged Burning Arrow & Indigon Deadeye Build, as most Mana-stacking build will find it great. Shavronne's Revelation - This Ring is the single best source of Maximum Mana or Maximum ES, depending on the Ring Slot it is in. The caveat is, that you cannot Regenerate Mana if you want more Mana, and you cannot Recharge or Regenerate ES if you want the ES. You can still Leech ES (or Mana from Attacks), Recover Mana from Flasks, or from "gain on hit" effects, so if this is how you recover these resources anyway, it can be quite good. You can also Recover Energy Shield with a Life Flask if you have Supreme Decadence Keystone, Sorrow of the Divine, or its Replica version. We've used the Ring in this Lightning Conduit Trickster Build to get more ES (Tricksters are great at Leeching ES), or in this Manaforged Burning Arrow & Indigon Deadeye Build, as most Mana-stacking build will find it great. |
|
|
Required Level: 30 +(15-25) to maximum Energy Shield |
|
 The Taming - The Taming and Yoke of Suffering is an exceptionally good combination of items in any hit-based Elemental Damage Build, but the Ring is great on its own in such cases as well. It simply increases Damage by up to 90% if you regularly Freeze, Shock, and Ignite, which you can accomplish by Striking Critically with the respective type of Elemental Damage. Additionally, it grants a lot of Elemental Resistances. We used it in this Frost Blades Trickster Build. The Taming - The Taming and Yoke of Suffering is an exceptionally good combination of items in any hit-based Elemental Damage Build, but the Ring is great on its own in such cases as well. It simply increases Damage by up to 90% if you regularly Freeze, Shock, and Ignite, which you can accomplish by Striking Critically with the respective type of Elemental Damage. Additionally, it grants a lot of Elemental Resistances. We used it in this Frost Blades Trickster Build. |
|
|
Required Level: 30 +(8-10)% to all Elemental Resistances |
|
 The Warden's Brand - It does add quite a lot of Physical Damage to Attacks and can generate Frenzy Charges, but at the same time severely reduces Attack Speed making it borderline useless. The Warden's Brand - It does add quite a lot of Physical Damage to Attacks and can generate Frenzy Charges, but at the same time severely reduces Attack Speed making it borderline useless. |
|
|
Required Level: 30 Adds 1 to 4 Physical Damage to Attacks |
|
 Thief's Torment - It can be used for leveling an Attack character as it recovers a lot of Life and Mana on Hit while also granting a lot of Resistances. If it's only the Reduced Effect of Curses you strive for, we recommend Kikazaru instead. You cannot use other Rings and it is a big downside. Thief's Torment - It can be used for leveling an Attack character as it recovers a lot of Life and Mana on Hit while also granting a lot of Resistances. If it's only the Reduced Effect of Curses you strive for, we recommend Kikazaru instead. You cannot use other Rings and it is a big downside. |
|
|
Required Level: 30 +(8-10)% to all Elemental Resistances |
|
 Angler's Plait - One of the rarest items in the game. It's excellent if you plan to catch Corrupted Fish. Angler's Plait - One of the rarest items in the game. It's excellent if you plan to catch Corrupted Fish. |
|
|
Required Level: 38 You can catch Corrupted Fish |
|
 Essence Worm - It's excellent if you want to have only one Aura, and still keep all your Mana Pool unreserved. Another use for it is with Blood Magic Keystone, as in this setting an Aura would Reserve your Life. It's commonly used in Blood Sacrament builds, or worn by Mana-stacking characters. Consider using Blessing-type Auras instead of wearing this Ring - you can link your Aura skills to a Divine Blessing or Eternal Blessing Support Gems. Essence Worm - It's excellent if you want to have only one Aura, and still keep all your Mana Pool unreserved. Another use for it is with Blood Magic Keystone, as in this setting an Aura would Reserve your Life. It's commonly used in Blood Sacrament builds, or worn by Mana-stacking characters. Consider using Blessing-type Auras instead of wearing this Ring - you can link your Aura skills to a Divine Blessing or Eternal Blessing Support Gems. |
|
|
Required Level: 38 Has 1 Socket |
|
 Fated End - It makes your Hexes stronger the longer they affect an enemy, but these Hexes will expire upon reaching a certain threshold of Curse Effect. It's great if you want your Curses to have increased effectiveness and if you have a way to cast them constantly, as they will probably last around 5 seconds. All the modifiers to extend Curse Duration become useless with it, including Hex Master Keystone, as the base duration of Curses is 12 seconds at level 21, which is already high enough. If your Curse Duration is reduced, they can expire before reaching the 180-220% base Effect, so be sure that is not the case. It can be good if you're using Hextouch Support to apply Hexes every 5 or so seconds, but using a Rare Ring is usually preferred. Fated End - It makes your Hexes stronger the longer they affect an enemy, but these Hexes will expire upon reaching a certain threshold of Curse Effect. It's great if you want your Curses to have increased effectiveness and if you have a way to cast them constantly, as they will probably last around 5 seconds. All the modifiers to extend Curse Duration become useless with it, including Hex Master Keystone, as the base duration of Curses is 12 seconds at level 21, which is already high enough. If your Curse Duration is reduced, they can expire before reaching the 180-220% base Effect, so be sure that is not the case. It can be good if you're using Hextouch Support to apply Hexes every 5 or so seconds, but using a Rare Ring is usually preferred. |
|
|
Required Level: 38 +(20-30) to maximum Mana |
|
 Valako's Sign - It can be used in Spark builds given your Spark's Lightning Damage remains unconverted, or can at least Shock. It's not particularly good there but provides Life Leech, which you may often lack in such a build. It's also good for leveling most Lightning Damage builds. Valako's Sign - It can be used in Spark builds given your Spark's Lightning Damage remains unconverted, or can at least Shock. It's not particularly good there but provides Life Leech, which you may often lack in such a build. It's also good for leveling most Lightning Damage builds. |
|
|
Required Level: 38 +(20-30)% to Lightning Resistance |
|
 Valyrium - It's not a popular choice, even among ES-based characters. Stuns can be dealt with by allocating Unwavering Stance, from Brine King's boon, or Immutable Force Jewel. The Ring offers nothing else of significant value, just a bunch of ES, Fire Resistance, and negative Cold Resistance, which is bad. Valyrium - It's not a popular choice, even among ES-based characters. Stuns can be dealt with by allocating Unwavering Stance, from Brine King's boon, or Immutable Force Jewel. The Ring offers nothing else of significant value, just a bunch of ES, Fire Resistance, and negative Cold Resistance, which is bad. |
|
|
Required Level: 38 +(15-25) to maximum Energy Shield |
|
 Astral Projector - It's used almost exclusively in Shockwave Totems builds despite there being 11 Nova-type Spells in the game. It allows the Totem to target enemies further away, which massively enhances its clear speed. Other Nova Skills are rarely used, and even if they are, their AoE is usually good enough so this precise targeting is not needed. Astral Projector - It's used almost exclusively in Shockwave Totems builds despite there being 11 Nova-type Spells in the game. It allows the Totem to target enemies further away, which massively enhances its clear speed. Other Nova Skills are rarely used, and even if they are, their AoE is usually good enough so this precise targeting is not needed. |
|
|
Required Level: 40 +(20-30)% to Lightning Resistance |
|
 Warrior's Legacy - Not a good choice. While the extra targeting for Strike Skills may sound good, you can get a similar modifier on any Rare Gloves via Eldritch modifier, Ancestral Call Support Gem, or from an Attack Mastery. It lowers your Attack Speed which is very bad in every Attack build. Warrior's Legacy - Not a good choice. While the extra targeting for Strike Skills may sound good, you can get a similar modifier on any Rare Gloves via Eldritch modifier, Ancestral Call Support Gem, or from an Attack Mastery. It lowers your Attack Speed which is very bad in every Attack build. |
|
|
Required Level: 40 +(20-30)% to Fire Resistance |
|
 Brinerot Mark - It's supposed to make one of your Golems stronger, more durable, and increase its Buff Effect. The fact that it's a Ring means you won't be able to link your Golem Skill Gem with anything else, so if these buffs are not good or unique, which they are not, it's not worth sacrificing your Ring slot for it. Instead, get the Anomalous version of the Golem Skill Gem or allocate Golem Commander notable. Brinerot Mark - It's supposed to make one of your Golems stronger, more durable, and increase its Buff Effect. The fact that it's a Ring means you won't be able to link your Golem Skill Gem with anything else, so if these buffs are not good or unique, which they are not, it's not worth sacrificing your Ring slot for it. Instead, get the Anomalous version of the Golem Skill Gem or allocate Golem Commander notable. |
|
|
Required Level: 44 Has 1 Socket |
|
 Mutewind Seal - It's not good. If you plan to make any use of your Golem, other than to provide you a buff, it should be linked to various Support Gems, which you cannot do when the Golem Skill Gem is on a Ring. Mutewind Seal - It's not good. If you plan to make any use of your Golem, other than to provide you a buff, it should be linked to various Support Gems, which you cannot do when the Golem Skill Gem is on a Ring. |
|
|
Required Level: 44 Has 1 Socket |
|
 Redblade Band - As was the case with the other two rings that upgrade your Golems mentioned above, it's not good. A Rare Ring will be significantly better. You can put your Golem Skill Gem somewhere else. Redblade Band - As was the case with the other two rings that upgrade your Golems mentioned above, it's not good. A Rare Ring will be significantly better. You can put your Golem Skill Gem somewhere else. |
|
|
Required Level: 44 Has 1 Socket |
|
 Soulbound - Links are used in a party-play, rarely with Minions. It's a good Ring in this type of build - Linked Targets cannot die for 2 seconds after you die, and you lose no experience when your Linked Target dies. It can be good if you plant it Link yourself with a glass cannon build. Soulbound - Links are used in a party-play, rarely with Minions. It's a good Ring in this type of build - Linked Targets cannot die for 2 seconds after you die, and you lose no experience when your Linked Target dies. It can be good if you plant it Link yourself with a glass cannon build. |
|
|
Required Level: 44 +(20-30) to maximum Mana |
|
 Tawhanuku's Timing - This Ring can be a source of Energy Shield, which may be good if you cannot Leech or recover it any other way. It doesn't specify if the Cost has to be paid in Mana, meaning it can be used with Skills that cost Life or Energy Shield (with Eldritch Battery). Archmage or Lifetap Support Gems have very high cost multiplier so you may consider implementing them. It's not very useful as there are already multiple, more efficient ways to recover Energy Shield, but you might be able to find a niche in which this Ring is good. Tawhanuku's Timing - This Ring can be a source of Energy Shield, which may be good if you cannot Leech or recover it any other way. It doesn't specify if the Cost has to be paid in Mana, meaning it can be used with Skills that cost Life or Energy Shield (with Eldritch Battery). Archmage or Lifetap Support Gems have very high cost multiplier so you may consider implementing them. It's not very useful as there are already multiple, more efficient ways to recover Energy Shield, but you might be able to find a niche in which this Ring is good. |
|
|
Required Level: 44 +(15-25) to maximum Energy Shield |
|
 The Highwayman - Its notable feature is the ability to steal Charges off of enemies, so it's only good if you can actually provide your enemies with these charges first, as they rarely have them by default. It can be done with the Supreme Grandstanding Keystone, which makes nearby enemies share Charges with you, so if you start with one Charge, you can continue to steal it indefinitely, that is until you reach your Maximum Charges limit. It also provides your enemies with Charges so it's not particularly great. It's hard to find a good use for this Ring. The Highwayman - Its notable feature is the ability to steal Charges off of enemies, so it's only good if you can actually provide your enemies with these charges first, as they rarely have them by default. It can be done with the Supreme Grandstanding Keystone, which makes nearby enemies share Charges with you, so if you start with one Charge, you can continue to steal it indefinitely, that is until you reach your Maximum Charges limit. It also provides your enemies with Charges so it's not particularly great. It's hard to find a good use for this Ring. |
|
|
Required Level: 44 (6-15)% increased Rarity of Items found |
|
 Sibyl's Lament - It's not a good Ring. It can help you with completely disabling Reflected Damage taken, but most players simply avoid maps where monsters Reflect Damage. In no other case taking Reflected Damage is an issue. Sibyl's Lament - It's not a good Ring. It can help you with completely disabling Reflected Damage taken, but most players simply avoid maps where monsters Reflect Damage. In no other case taking Reflected Damage is an issue. |
|
|
Required Level: 45 +(20-30) to maximum Life |
|
 Vivinsect - It is where you can socket an Aura Skill - It will Reserve more Mana than it normally would and will have increased Gem Level by 5. The best use for it is to socket a Vaal Aura Spell here, it will reserve no Mana at all. Another valuable upside of this Ring is the ability to lower Mana Cost of all your Skill if you're wearing Corrupted Items, which is easy to accomplish with Unique Items - because of that it's even used with no Aura Skill in it. It grants some Attributes and one Veiled Suffix. It's overall a very good, but situational Ring. Vivinsect - It is where you can socket an Aura Skill - It will Reserve more Mana than it normally would and will have increased Gem Level by 5. The best use for it is to socket a Vaal Aura Spell here, it will reserve no Mana at all. Another valuable upside of this Ring is the ability to lower Mana Cost of all your Skill if you're wearing Corrupted Items, which is easy to accomplish with Unique Items - because of that it's even used with no Aura Skill in it. It grants some Attributes and one Veiled Suffix. It's overall a very good, but situational Ring. |
|
|
Required Level: 45 Has 1 Socket |
|
 Voideye - You might find it useful to upgrade Auras or Curses as these skills scale up really well with Gem Level and often do not need Support Gems. Aura-stacking builds tend to use Rare Rings or Vivinsect, so it's rarely used. Voideye - You might find it useful to upgrade Auras or Curses as these skills scale up really well with Gem Level and often do not need Support Gems. Aura-stacking builds tend to use Rare Rings or Vivinsect, so it's rarely used. |
|
|
Required Level: 45 Has 1 Socket |
|
| Replica Voideye - You can put an Empower, Enlighten, or Enhance Support Gems to increase their Experience gained by up to 50%. Get the Omen of Bequethal and die while doing so to quickly level up these Gems. |
|
|
Required Level: 45 Has 1 Socket |
|
 Nimis - Nimis is one of the best Rings in the game. The Return of Projectiles it causes allows you to Hit one enemy twice with the same Skill. Use it in a build where randomizing the direction of your Projectiles is not a big deal - it's usually when you fire a lot of them, or where each causes an AoE effect on impact. Use it in builds such as CoC KB Fireball Deadeye, Strength-stacking Wander Berserker, or Icicle Mine Deadeye. The Ring is full of intricate interactions with various Skills, to see how they all perform, check our video on this topic. Nimis - Nimis is one of the best Rings in the game. The Return of Projectiles it causes allows you to Hit one enemy twice with the same Skill. Use it in a build where randomizing the direction of your Projectiles is not a big deal - it's usually when you fire a lot of them, or where each causes an AoE effect on impact. Use it in builds such as CoC KB Fireball Deadeye, Strength-stacking Wander Berserker, or Icicle Mine Deadeye. The Ring is full of intricate interactions with various Skills, to see how they all perform, check our video on this topic. |
|
|
Required Level: 48 +(20-30)% to Lightning Resistance |
|
   Ahkeli's Meadow, Mountain, and Valley - They're bad on their own but can be used to craft a better Ring, the Precursor's Emblem. Ahkeli's Meadow is the most valuable Ring in this set. Ahkeli's Meadow, Mountain, and Valley - They're bad on their own but can be used to craft a better Ring, the Precursor's Emblem. Ahkeli's Meadow is the most valuable Ring in this set. |
|
|
Required Level: 49 +(20-30)% to Fire Resistance |
|
   Putembo's Meadow, Mountain, and Valley - They're bad on their own but can be used to craft a better Ring, the Precursor's Emblem. Putembo's Mountain is the most valuable Ring in this set. Putembo's Meadow, Mountain, and Valley - They're bad on their own but can be used to craft a better Ring, the Precursor's Emblem. Putembo's Mountain is the most valuable Ring in this set. |
|
|
Required Level: 49 +(20-30)% to Lightning Resistance |
|
   Uzaza's Meadow, Mountain, and Valley - They're bad on their own but can be used to craft a better Ring, the Precursor's Emblem. Uzaza's Valley is the most valuable Ring in this set. Uzaza's Meadow, Mountain, and Valley - They're bad on their own but can be used to craft a better Ring, the Precursor's Emblem. Uzaza's Valley is the most valuable Ring in this set. |
|
|
Required Level: 49 +(20-30)% to Cold Resistance |
|
       Precursor's Emblems - Depending on the component Rings (Meadow, Mountain & Valley) you've used to create Precursor's Emblem, it will look different and have varied modifiers related to Charges. The Precursor's Emblem you've created (by selling three Component Rings to a vendor - one Meadow, one Mountain, and one Valley) will have three random modifiers on top of their basic stats like Resistances and Attributes. Red Rings are associated with Endurance Charge modifiers, Strength, and Fire Resistance, Green - Frenzy Charges, Dexterity, and Cold Resistance, and Blue - Power Charges, Intelligence, and Lightning Resistance. The best modifier you can roll on such a Ring is "+1 to Maximum [type of charge] Charges". It's worth noting, that if you want this modifier, you must include Ahkeli's Meadow (for +1 Endurance Charge), Putembo's Mountain (for +1 Power Charge), or Uzaza's Valley (for +1 Frenzy Charge) in your recipe. If you're playing a character that stacks these types of Charges, definitely check if these Rings have any good modifiers you can benefit from. See our Frenzy Ballistas Chargestacker Trickster Build to get an idea of how such builds function. Precursor's Emblems - Depending on the component Rings (Meadow, Mountain & Valley) you've used to create Precursor's Emblem, it will look different and have varied modifiers related to Charges. The Precursor's Emblem you've created (by selling three Component Rings to a vendor - one Meadow, one Mountain, and one Valley) will have three random modifiers on top of their basic stats like Resistances and Attributes. Red Rings are associated with Endurance Charge modifiers, Strength, and Fire Resistance, Green - Frenzy Charges, Dexterity, and Cold Resistance, and Blue - Power Charges, Intelligence, and Lightning Resistance. The best modifier you can roll on such a Ring is "+1 to Maximum [type of charge] Charges". It's worth noting, that if you want this modifier, you must include Ahkeli's Meadow (for +1 Endurance Charge), Putembo's Mountain (for +1 Power Charge), or Uzaza's Valley (for +1 Frenzy Charge) in your recipe. If you're playing a character that stacks these types of Charges, definitely check if these Rings have any good modifiers you can benefit from. See our Frenzy Ballistas Chargestacker Trickster Build to get an idea of how such builds function. |
|
|
Required Level: 49 various Resistances |
|
 Anathema - An extremely useful Ring. With no prior setup, it allows you to apply three curses instead of one, and this limit can be very easily increased by picking up extra Maximum Power Charges from the Skill Tree. It's useful in many builds as Hexes like Punishment or Enfeeble can benefit every character. We've used it in our Freezing Pulse Totem "Low Life" Hierophant among many other builds. For example - Poison builds will use Temporal Chains, Despair, Punishment, and Enfeeble. Builds that deal Elemental Damage of all types may use it to inflict Elemental Weakness, Frostbite, Conductivity, and Flammability. Note that extending your Curse Limit with tools like Whispers of Doom or Doedre's Daming will have no effect. Anathema - An extremely useful Ring. With no prior setup, it allows you to apply three curses instead of one, and this limit can be very easily increased by picking up extra Maximum Power Charges from the Skill Tree. It's useful in many builds as Hexes like Punishment or Enfeeble can benefit every character. We've used it in our Freezing Pulse Totem "Low Life" Hierophant among many other builds. For example - Poison builds will use Temporal Chains, Despair, Punishment, and Enfeeble. Builds that deal Elemental Damage of all types may use it to inflict Elemental Weakness, Frostbite, Conductivity, and Flammability. Note that extending your Curse Limit with tools like Whispers of Doom or Doedre's Daming will have no effect. |
|
|
Required Level: 49 +(15-25) to maximum Energy Shield |
|
 Blackflame - It works pretty much like Damage Conversion, but only for Ignite Damage to Chaos Damage, and is in fact, not Conversion - it's a "damage taken as" effect applied to the enemies you Ignite. It is often used by Elementalists, as they are the best class for Ignite builds with their Shaper of Flames passive, Occultists - due to how efficient they are with Chaos Damage and Power Charges, or by Necromancers because of the popularity of Detonate Dead Skill. The reason you would want to deal Chaos Damage with your Ignites is the effect of Wither that won't expire, and the fact that you can still benefit from modifiers that increase your Burnign Damage as well as your Chaos Damage/Chaos DoT. You can also use items that grant you Elemental/Fire Damage as extra Chaos Damage - such is the case with Incandescent Heart Body Armour or Atziri's Promise Flask. Blackflame - It works pretty much like Damage Conversion, but only for Ignite Damage to Chaos Damage, and is in fact, not Conversion - it's a "damage taken as" effect applied to the enemies you Ignite. It is often used by Elementalists, as they are the best class for Ignite builds with their Shaper of Flames passive, Occultists - due to how efficient they are with Chaos Damage and Power Charges, or by Necromancers because of the popularity of Detonate Dead Skill. The reason you would want to deal Chaos Damage with your Ignites is the effect of Wither that won't expire, and the fact that you can still benefit from modifiers that increase your Burnign Damage as well as your Chaos Damage/Chaos DoT. You can also use items that grant you Elemental/Fire Damage as extra Chaos Damage - such is the case with Incandescent Heart Body Armour or Atziri's Promise Flask. |
|
|
Required Level: 49 +(17-23)% to Chaos Resistance |
|
 Honoured Alliance - With this Ring you can summon the Karui Warriors from the Halls of the Dead. These are Ikiaho, Tawhanuku, Utula, Kaom, Ahuana, Kahuturoa, Rakiata, Maata, Akoya, and Kiloava. They grant you a buff. The effect of these buffs scales up with the number of Tattoos of a proper tribe - every such Tattoo increases this buff effect by 20%. This Trigger Skill has a Cooldown of 20 seconds, which is quite a long time, and you won't be able to have these Spirits on your side most of the time. It's not a very useful Ring since you can summon these Spirits with one Loyalty Tattoo. It's only good if you want more than one buff from them, or if you cannot summon them via the Loyalty Tattoo. One of the best ancestors to summon is the Akoya - it generates 5 Rage a second, and activating it via a Tattoo would require you to get 50 Rage first. Honoured Alliance - With this Ring you can summon the Karui Warriors from the Halls of the Dead. These are Ikiaho, Tawhanuku, Utula, Kaom, Ahuana, Kahuturoa, Rakiata, Maata, Akoya, and Kiloava. They grant you a buff. The effect of these buffs scales up with the number of Tattoos of a proper tribe - every such Tattoo increases this buff effect by 20%. This Trigger Skill has a Cooldown of 20 seconds, which is quite a long time, and you won't be able to have these Spirits on your side most of the time. It's not a very useful Ring since you can summon these Spirits with one Loyalty Tattoo. It's only good if you want more than one buff from them, or if you cannot summon them via the Loyalty Tattoo. One of the best ancestors to summon is the Akoya - it generates 5 Rage a second, and activating it via a Tattoo would require you to get 50 Rage first. |
|
|
Required Level: 49 +(20-30) to maximum Life |
|
 Icefang Orbit - A good Ring for Poison builds, especially if you lack Chance to Poison or clear speed. It Chills enemies you Poison and Shatters them on Kill, much like with Herald of Ice. A lot of Poison builds don't need these qualities, and the Ring can often be replaced by a better Rare, but the Doom Blast build is the case where it makes the most sense to use it. Icefang Orbit - A good Ring for Poison builds, especially if you lack Chance to Poison or clear speed. It Chills enemies you Poison and Shatters them on Kill, much like with Herald of Ice. A lot of Poison builds don't need these qualities, and the Ring can often be replaced by a better Rare, but the Doom Blast build is the case where it makes the most sense to use it. |
|
|
Required Level: 49 Adds 1 to 4 Physical Damage to Attacks |
|
 Venopuncture - It's very similar to Icefang Oribt, but it is associated with Bleed instead of Poison. It Chills Bleeding enemies and Shatters them on Kill while granting you 25% chance to cause Bleeding on Hit. It's not very useful, as Bleed builds are often excellent at clearing maps with skills like Split Arrow. Venopuncture - It's very similar to Icefang Oribt, but it is associated with Bleed instead of Poison. It Chills Bleeding enemies and Shatters them on Kill while granting you 25% chance to cause Bleeding on Hit. It's not very useful, as Bleed builds are often excellent at clearing maps with skills like Split Arrow. |
|
|
Required Level: 49 Adds 1 to 4 Physical Damage to Attacks |
|
 Circle of Anguish - It's great for a majority of builds using Herald of Ash, this Ngamahu's Flame Cyclone Chieftain is a good example of one. Its modifiers may increase the Herald's Buff Effect, Reservation Efficiency, Maximum Fire Resistance, Fire Resistance, or increased Fire Damage. Circle of Anguish - It's great for a majority of builds using Herald of Ash, this Ngamahu's Flame Cyclone Chieftain is a good example of one. Its modifiers may increase the Herald's Buff Effect, Reservation Efficiency, Maximum Fire Resistance, Fire Resistance, or increased Fire Damage. |
|
|
Required Level: 52 <One to three random Synthesis implicit modifiers> |
|
 Circle of Fear - This ring is affiliated with the Herald of Ice Skill, making it good in builds that need some extra flat Cold Damage, like in this Frost Blades Trickster. Its modifiers may increase the Herald's Buff Effect, Reservation Efficiency, Maximum Cold Resistance, Cold Resistance, or increased Cold Damage. Circle of Fear - This ring is affiliated with the Herald of Ice Skill, making it good in builds that need some extra flat Cold Damage, like in this Frost Blades Trickster. Its modifiers may increase the Herald's Buff Effect, Reservation Efficiency, Maximum Cold Resistance, Cold Resistance, or increased Cold Damage. |
|
|
Required Level: 52 <One to three random Synthesis implicit modifiers> |
|
 Circle of Guilt - This one can upgrade your Herald of Purity, so it's good in Physical Damage builds. You can use it in builds such as Corrupting Fever/Reap Champion or Domination Blow Herald of Purity Guardian. Its modifiers may increase the Herald's Buff Effect, Reservation Efficiency, additional Physical Damage Reduction, Sentinel's Damage, or increased Physical Damage. Circle of Guilt - This one can upgrade your Herald of Purity, so it's good in Physical Damage builds. You can use it in builds such as Corrupting Fever/Reap Champion or Domination Blow Herald of Purity Guardian. Its modifiers may increase the Herald's Buff Effect, Reservation Efficiency, additional Physical Damage Reduction, Sentinel's Damage, or increased Physical Damage. |
|
|
Required Level: 52 <One to three random Synthesis implicit modifiers> |
|
 Circle of Nostalgia - It enhances your Herald of Agony, making it great in Herald of Agony Juggernaut, or any other Poison build, as the Herald of Agony grants you more Poison Damage. Its modifiers may increase the Herald's Buff Effect, Reservation Efficiency, Chaos Resistance, Crawler's Damage, or increased Chaos Damage. Circle of Nostalgia - It enhances your Herald of Agony, making it great in Herald of Agony Juggernaut, or any other Poison build, as the Herald of Agony grants you more Poison Damage. Its modifiers may increase the Herald's Buff Effect, Reservation Efficiency, Chaos Resistance, Crawler's Damage, or increased Chaos Damage. |
|
|
Required Level: 52 <One to three random Synthesis implicit modifiers> |
|
 Circle of Regret - Herald of Thunder adds Lightning Damage, but it's rarely used in Lightning Damage builds since it has to compete with Auras like Wrath and Zealorty. Builds that use Herald of Thunder as the main damage source also tend to pick Storm Secret Rings. Its modifiers may increase the Herald's Buff Effect, Reservation Efficiency, Maximum Lightning Resistance, Lightning Resistance, or increased Lightning Damage. Circle of Regret - Herald of Thunder adds Lightning Damage, but it's rarely used in Lightning Damage builds since it has to compete with Auras like Wrath and Zealorty. Builds that use Herald of Thunder as the main damage source also tend to pick Storm Secret Rings. Its modifiers may increase the Herald's Buff Effect, Reservation Efficiency, Maximum Lightning Resistance, Lightning Resistance, or increased Lightning Damage. |
|
|
Required Level: 52 <One to three random Synthesis implicit modifiers> |
|
 Original Sin - One of the best Rings for any Chaos or Poison build. It Converts all Elemental Damage to Chaos making it good in build which cannot do that. It's also great in builds where you cannot penetrate Resistances effectively as with this Ring enemies' Chaos Resistance is always 0. It is a very expensive Ring. Original Sin - One of the best Rings for any Chaos or Poison build. It Converts all Elemental Damage to Chaos making it good in build which cannot do that. It's also great in builds where you cannot penetrate Resistances effectively as with this Ring enemies' Chaos Resistance is always 0. It is a very expensive Ring. |
|
|
Required Level: 52 +(17-23)% to Chaos Resistance |
|
 Profane Proxy - Your Skitterbots normally Chill and Shock, but with these Rings, they will apply any Hex Curse instead. It's great if you don't need them to Chill and Shock, but you still want to keep them due to their other bonuses, mostly Mine or Trap-related. It's great in this Hexblast Miner Saboteur build. Profane Proxy - Your Skitterbots normally Chill and Shock, but with these Rings, they will apply any Hex Curse instead. It's great if you don't need them to Chill and Shock, but you still want to keep them due to their other bonuses, mostly Mine or Trap-related. It's great in this Hexblast Miner Saboteur build. |
|
|
Required Level: 52 Has 1 Socket |
|
 Rotblood Promise - While it does allow you to have one Blasphomous Curse on for free, it also makes this Curse affect your Character. It may be good if you're Hexproof, Immune to Curses, or if the specific Curse won't really affect you. It may be used with Atziri's Reflection, Kikazaru, passives like Asylum, and Tattoos to reduce the Curses' Effect or embrace the reduction of Lightning Resistance with Conductivity and Doryani's Prototype. It's not a popular Ring since there's not much else on it. Rotblood Promise - While it does allow you to have one Blasphomous Curse on for free, it also makes this Curse affect your Character. It may be good if you're Hexproof, Immune to Curses, or if the specific Curse won't really affect you. It may be used with Atziri's Reflection, Kikazaru, passives like Asylum, and Tattoos to reduce the Curses' Effect or embrace the reduction of Lightning Resistance with Conductivity and Doryani's Prototype. It's not a popular Ring since there's not much else on it. |
|
|
Required Level: 56 Has 1 Socket |
|
 Storm Secret - This one is excellent in Herald of Thunder Auto-Bomber or Crest of Desire's Herald of Thunder Autobomber build. It is where you rely mostly on Herald of Thunder to deal damage. It creates storms every time you Shock an enemy and increases hit Frequency with this Skill. It also damages your character so to cope with that get high Lightning Resistance and Life/ES Leech/good recovery. It should be enough to survive, but it can also be employed to trigger CwDT setups to cast many other Spells. Storm Secret - This one is excellent in Herald of Thunder Auto-Bomber or Crest of Desire's Herald of Thunder Autobomber build. It is where you rely mostly on Herald of Thunder to deal damage. It creates storms every time you Shock an enemy and increases hit Frequency with this Skill. It also damages your character so to cope with that get high Lightning Resistance and Life/ES Leech/good recovery. It should be enough to survive, but it can also be employed to trigger CwDT setups to cast many other Spells. |
|
|
Required Level: 56 +(20-30)% to Lightning Resistance |
|
 Romira's Banquet - It's not very good, mostly because it makes you lose all Power Charges on Critical Strike. Most builds want Power Charges because they grant an increased Crit Chance. It also seems to be aimed at Physical Attack-based characters. It may be useful in a build with Willclash or The Aylardex as these items attach other bonuses to Power Charges. You can also consider using it alongside Graven's Secret, as you won't lose your Absorption Charges. Romira's Banquet - It's not very good, mostly because it makes you lose all Power Charges on Critical Strike. Most builds want Power Charges because they grant an increased Crit Chance. It also seems to be aimed at Physical Attack-based characters. It may be useful in a build with Willclash or The Aylardex as these items attach other bonuses to Power Charges. You can also consider using it alongside Graven's Secret, as you won't lose your Absorption Charges. |
|
|
Required Level: 60 (20-30)% increased Global Critical Strike Chance |
|
 The Pariah - The Pariah is a good starting point for MF builds if it has a White Socket. In no other case you should wear it - you can get more Life or Mana from a Rare Ring with proper modifiers, and more ES from Shavronne's Revelation. It should later be replaced with a Ventor's Gamble. The Pariah - The Pariah is a good starting point for MF builds if it has a White Socket. In no other case you should wear it - you can get more Life or Mana from a Rare Ring with proper modifiers, and more ES from Shavronne's Revelation. It should later be replaced with a Ventor's Gamble. |
|
|
Required Level: 60 Has 1 Socket |
|
 Triumvirate Authority - The version with three random modifiers drops from Atziri, Uber Atzirti drops a version with 4 mods. It upgrades your socketed Vaal Skill with powerful modifiers such as "Socketed Vaal Skills deal 150% more Damage" or "Hits from Socketed Vaal Skills ignore Enemy Monster Resistances". Aura-stacking builds seem to be the best-suited for this Ring if it has the "Socketed Vaal Skills have 50% increased Aura Effect" mod. Triumvirate Authority - The version with three random modifiers drops from Atziri, Uber Atzirti drops a version with 4 mods. It upgrades your socketed Vaal Skill with powerful modifiers such as "Socketed Vaal Skills deal 150% more Damage" or "Hits from Socketed Vaal Skills ignore Enemy Monster Resistances". Aura-stacking builds seem to be the best-suited for this Ring if it has the "Socketed Vaal Skills have 50% increased Aura Effect" mod. |
|
|
Required Level: 64 Has 1 Socket |
|
 Ventor's Gamble - The value of this item highly depends on its rolls. It can potentially grant you tons of Maximum Life and Resistances, but combined with a high roll on Item Quantity it may be worth a small fortune. Item Rarity is less important, but shouldn't be too low. Having only good Resistances and Maximum Life is not enough, a good Rare Ring will give you these. It's probably the most popular Ring for MF characters. It can be also great in a Doryani's Prototype build, it's one of the few items that can lower your Lightning Resistance. Ventor's Gamble - The value of this item highly depends on its rolls. It can potentially grant you tons of Maximum Life and Resistances, but combined with a high roll on Item Quantity it may be worth a small fortune. Item Rarity is less important, but shouldn't be too low. Having only good Resistances and Maximum Life is not enough, a good Rare Ring will give you these. It's probably the most popular Ring for MF characters. It can be also great in a Doryani's Prototype build, it's one of the few items that can lower your Lightning Resistance. |
|
|
Required Level: 65 (6-15)% increased Rarity of Items found |
|
 Snakepit - It's used to make your Spell Projectiles Fork or Chain an extra time, but also disables Pierce. We've used it in our Icicle Mine Deadeye build, and it would be great in an EK build. Forking is better if your Projectiles cannot Chain anyway because this way you end up with two Projectiles. Use it in a build where Piercing is not mandatory, it's a very cheap Ring that enhances your clear speed. Snakepit - It's used to make your Spell Projectiles Fork or Chain an extra time, but also disables Pierce. We've used it in our Icicle Mine Deadeye build, and it would be great in an EK build. Forking is better if your Projectiles cannot Chain anyway because this way you end up with two Projectiles. Use it in a build where Piercing is not mandatory, it's a very cheap Ring that enhances your clear speed. |
|
|
Required Level: 68 +(20-30)% to Cold Resistance |
|
 Ming's Heart - One of the most powerful Rings in terms of damage, used predominantly with Physical Spells with high base Physical Damage, such as Seismic Trap, Blade Vortex, or Exsanguinate. Both Physical and Chaos Damage can cause Poison, so no Damage Conversion is needed if you plan to use it in a Poison build, which most players do. The loss of Maximum Life and Maximum ES is a pretty big downside in nearly any build. Only by having a lot of Evasion Rating one can reasonably mitigate this drawback, but it will make your build very fragile anyway. Ming's Heart - One of the most powerful Rings in terms of damage, used predominantly with Physical Spells with high base Physical Damage, such as Seismic Trap, Blade Vortex, or Exsanguinate. Both Physical and Chaos Damage can cause Poison, so no Damage Conversion is needed if you plan to use it in a Poison build, which most players do. The loss of Maximum Life and Maximum ES is a pretty big downside in nearly any build. Only by having a lot of Evasion Rating one can reasonably mitigate this drawback, but it will make your build very fragile anyway. |
|
|
Required Level: 69 +(17-23)% to Chaos Resistance |
|
 The Hungry Loop - With this Ring, you can create a 5-link setup by only spending one socket. It's not enough for a main damaging setup, as weapons and body armours offer 6 sockets. It can be great if you need a supplementary Skill with 4 links, which is often the case in Minion builds where you need to have Zombies, Spectres, Animate Guardian, and Golems. It's the most often used in regular Zombie builds. The Hungry Loop - With this Ring, you can create a 5-link setup by only spending one socket. It's not enough for a main damaging setup, as weapons and body armours offer 6 sockets. It can be great if you need a supplementary Skill with 4 links, which is often the case in Minion builds where you need to have Zombies, Spectres, Animate Guardian, and Golems. It's the most often used in regular Zombie builds. |
|
|
Required Level: 70 Has 1 Socket |
|
 Mark of the Elder - It adds a lot of Cold Damage to your Attacks, while also increasing your Maximum Life and ES. You should wear it alongside a Shaper Ring to gain even more damage. Use it in any Deadeye build which can benefit from this added Cold Damage. It doesn't grant a lot of Life and no Resistances at all, so most players tend to use it in their glass cannon builds. The Tentacle Whip doesn't do much damage. Mark of the Elder - It adds a lot of Cold Damage to your Attacks, while also increasing your Maximum Life and ES. You should wear it alongside a Shaper Ring to gain even more damage. Use it in any Deadeye build which can benefit from this added Cold Damage. It doesn't grant a lot of Life and no Resistances at all, so most players tend to use it in their glass cannon builds. The Tentacle Whip doesn't do much damage. |
|
|
Required Level: 80 Adds (3-4) to (10-14) Physical Damage to Attacks |
|
 Mark of the Shaper - It's very similar to Mark of the Elder, but it adds Lightning Damage to Spells instead of Cold Damage to Attacks. It's great in most Inquisitor builds as they can often benefit from the increase to Maximum Life and Energy Shield due to their Pious Path. These builds will also benefit from any type of extra Elemental Damage with their Inevitable Judgement. We've used it, among many other similar builds, in our Armageddon Brand Inquisitor. Wear it with an Elder Item in your other Ring Slot for increased damage. The Volatile Anomaly doesn't do much damage. Mark of the Shaper - It's very similar to Mark of the Elder, but it adds Lightning Damage to Spells instead of Cold Damage to Attacks. It's great in most Inquisitor builds as they can often benefit from the increase to Maximum Life and Energy Shield due to their Pious Path. These builds will also benefit from any type of extra Elemental Damage with their Inevitable Judgement. We've used it, among many other similar builds, in our Armageddon Brand Inquisitor. Wear it with an Elder Item in your other Ring Slot for increased damage. The Volatile Anomaly doesn't do much damage. |
|
|
Required Level: 80 (15-25)% increased Elemental Damage |
|
 Polaric Devastation - An excellent Ring for any Fire or Cold Damage build. It grants tons of Resistances, and covers nearby enemies in Frost or Ash. Such enemies take 20% increased Cold or Fire Damage and move slower. It's very popular among Ethereal Knives Ignite Elementalists or Explosive Arrow Ballista Totem Elementalists. These builds usually lack the modifiers that make your enemy take increased damage but are great when it comes to reducing their Elemental Resistances. Polaric Devastation - An excellent Ring for any Fire or Cold Damage build. It grants tons of Resistances, and covers nearby enemies in Frost or Ash. Such enemies take 20% increased Cold or Fire Damage and move slower. It's very popular among Ethereal Knives Ignite Elementalists or Explosive Arrow Ballista Totem Elementalists. These builds usually lack the modifiers that make your enemy take increased damage but are great when it comes to reducing their Elemental Resistances. |
|
|
Required Level: 80 (15-25)% increased Elemental Damage |
|
 Stormfire - Stormfire is not a popular Ring. It increases your Burning Damage by up to 120% if you manage to apply Shock to non-Shocked enemies around 10 times in four seconds, and it adds Lighting Damage to Hits against Ignited enemies. In addition to that, it causes your Lightning Damage to Ignite. It could work with an Elementalist that has Shaper of Flames, or any build with a high Critical Strike Chance for his Lighting Spell (Elemental Ailments such as Ignite are applied with Critical Strikes), and one that specializes in Burning Damage with a high chance to Ignite. There are very few such builds, as Burning Damage and Critical Strikes are incompatible - Ignite Damage won't be higher if it comes from a Critical Strike. It also requires you to Shock a Non-Shocked enemy many times over, and as Shock's duration is 2 seconds, you will need to remove it and apply it once again when fighting bosses. It can be used with Lightning Conduit/Orb of Storms combo, but this potential is yet to be explored. Stormfire - Stormfire is not a popular Ring. It increases your Burning Damage by up to 120% if you manage to apply Shock to non-Shocked enemies around 10 times in four seconds, and it adds Lighting Damage to Hits against Ignited enemies. In addition to that, it causes your Lightning Damage to Ignite. It could work with an Elementalist that has Shaper of Flames, or any build with a high Critical Strike Chance for his Lighting Spell (Elemental Ailments such as Ignite are applied with Critical Strikes), and one that specializes in Burning Damage with a high chance to Ignite. There are very few such builds, as Burning Damage and Critical Strikes are incompatible - Ignite Damage won't be higher if it comes from a Critical Strike. It also requires you to Shock a Non-Shocked enemy many times over, and as Shock's duration is 2 seconds, you will need to remove it and apply it once again when fighting bosses. It can be used with Lightning Conduit/Orb of Storms combo, but this potential is yet to be explored. |
|
|
Required Level: 80 (15-25)% increased Elemental Damage |
If you have any other Article requests please leave that in the comments below. We are always open to suggestions and constructive feedback.
Pictures used in this article are the intellectual property of Grinding Gear Games.
