
Doom Blast Occultist Build
A very powerful Occultist Build that uses newly reworked Curses to deal tremendously high amounts of Poison DamagePoison Impending Doom / Doom Blast
Occultist Build
Updated for Patch 3.20
The Best Crafty Guides by Odealo
| Guide notes |
| January 26, 2023 -Build created |
| Build overview | |||
| Tags: [CASTER] [CHAOS] [LIFE] [POISON] | |||
|
Budget: Defenses: |
|
Boss DPS: AoE: |
|
In Path 3.20 we saw a major overhaul to the Curse Skills. As the result, the Doom mechanic was removed, but all Curse-related Skills got a massive Buff. One such skill, Impending Doom is a topic of today's Build. It's a Support Gem that triggers a Doom Blast on the enemy when the associated Hex ends, and we can force that by overwriting it with a different Hex and exceeding the Curse Limit. You easily automate it with the use of Vixen's Entrapment. With just a single button press, you will cast 4 different Hexes, each accompanied by their repeats from Spell Cascade. It's important to note that only 3 Curses will actually affect monsters, one is here just to force early explosions. The essential detail here is that Hexes from your Gloves are Cast instantly when you start Casting your Curse Skill, so they are applied first, and their order is based on the Socket they are put in. Since Hexes usually are not meant to be spammed, they have pretty high Mana Cost which puts severe stress on your Sustain in this case. To counter that, we use Eldritch Battery with a high Energy Shield Recharge ratio.
Poison is a stacking Ailment that deals Chaos Damage over Time and has a natural synergy with Chaos Damage and Curses, so we decided to scale the Damage that way. With a little bit of ramp-up, you will be able to reach absurd amounts of Damage. Temporal Chains and Despair are a great way to improve your Damage, and you can decide to use either Punishment or Enfeeble as your third Curse depending on whether you want more defense or offense.
Since this Setup is based on Skills with Cooldowns, it's quite important to get some Cooldown Recovery on your gear. Fortunately, you don't need to stress over getting specific breakpoints, since Doom Blast can have up to 3 charges stored at once, so you won't "waste" it without a specific trigger rate. As a rule of thumb, just getting any Cooldowns and Cast Speed will improve your total Damage.
The Build is not particularly tanky. You can easily achieve a decent amount of Maximum Life and Evasion Rating while also capping Spell Suppression, but it's prone to Physical Damage. Defensive Curses are a great way to improve that aspect, but they can be a bit unreliable.
This Build works very well without any expensive Items and scales very well with your investments. Vixen's Entrapments are necessary to automate this setup, but they are very accessible even at the start of the new league.
You can also check our other Path of Exile builds right over here Odealo's Crafty Guides - Full List
1. Gameplay
You will be Shield Charging through the Map and exploding whole packs of monsters with a single cast of your Curse thanks to the Profane Bloom from Occultist Ascendency. On Bosses, you will have to aim a bit to overlap your Curses, but thanks to the very big AoE you don't have to be very precise. Wither applied by Totems and passively through your Ascendency is a great way to improve your single-target Damage.
|
|
|
|

2. Build's PROS & CONS
| PROS |
|
| CONS |
|
3. Leveling tips
You could start using this Setup very early, but getting enough Mana Sustain and Poison Chance at that point is quite hard to manage. We recommend leveling using Bane or Soulrend and transitioning to the final version when you get close to the Maps. If you do so, you can skip the Poison Passives and allocate some generic Chaos or Spell Damage Notables and respec them later for a smoother experience.
Suggested leveling Gem setups:
| Bane setup | |
 |
Bane - applies linked Hexes and Chaos Damage over Time effect on all enemies in a radius. Deals More Damage per each Curse it applies. |
 |
Despair - lowers Chaos Resistances of Hexed Foes. |
 |
Punishment - enemies at Low Life status take much more Damage. Low Life is applied below 50% of maximum Life. |
 |
Void Manipulation Support - improves Chaos Damage dealt with linked Skills. |
 |
Controlled Destruction Support - grants a lot of Spell Damage at the cost of Critical Strike Chance. |
 |
Efficacy Support - improves the Duration and Damage dealt by DoTs. |
| Soulrend setup | |
|
Soulrend - as your secondary Spell you can use any other Chaos DoT, but we find Soulrend to work the best. It deals heavy Chaos Damage over a short time. |
|
Void Manipulation Support - improves the Damage dealt with Chaos Skills. |
|
Controlled Destruction Support - Critical Strike doesn't affect DoTs, so it's the best pick here too. |
|
Efficacy Support - original duration of Soulrend is quite low, so improving it alongside its Damage is really beneficial. |
| Auras setup | |
 |
Clarity - grants a lot of Mana Regeneration to sustain your casts. |
 |
Grace - Evasion Rating will be your main defensive layer later on. You can start using it quite early to have smoother leveling. |
| Utility | |
 |
Flame Dash - a basic movement Skill that teleports you in a short distance. |
 |
Steelskin - absorbs part of the incoming Damage and removes Bleeds. |
Bandits:
Kill all three bandits to get two additional Passive Skill Points
Leveling Skill Trees:
We suggest skipping Poison in the early game and opting for more Chaos or Spell Damage Notables, and refunding them once you reach Maps.
35 Points Passive Tree
Suggested order of allocation: 1) Heart and Soul 2) Coordination 3) Whispers of Doom
Optional Notables for leveling: 1) Entropy 2) Fangs of the Viper 3) Atrophy
67 Points Passive Tree
Suggested order of allocation: 1) Wasting 2) Revenge of the Hunted 3) Inveterate 4) Blood Drinker 5) Instinct 6) Written in Blood 7) Influence
Recommended leveling items:
 Le Heup of All - 2 of those Rings will greatly help capping your Resistances and Attribute Requirements for the whole campaign Le Heup of All - 2 of those Rings will greatly help capping your Resistances and Attribute Requirements for the whole campaign |
|
| Adds 1 to 4 Physical Damage to Attacks +(10-30) to all Attributes (10-30)% increased Damage (10-30)% increased Rarity of Items found +(10-30)% to all Elemental Resistances |
|
 Goldrim - another useful Item to cap your resistances. Can be worn at level 1. Goldrim - another useful Item to cap your resistances. Can be worn at level 1. |
|
| +(30-50) to Evasion Rating 10% increased Rarity of Items found +(30-40)% to all Elemental Resistances Reflects 4 Physical Damage to Melee Attackers Level Requirement reduced by 100 (Hidden) |
|
 Rare Wand - there is only one Wand that can greatly improve your Damage - a Rare one with global modifiers to your Skill Gem' levels. Rare Wand - there is only one Wand that can greatly improve your Damage - a Rare one with global modifiers to your Skill Gem' levels. |
|
| Minimum Requirements: # to Level of all Chaos Spell Skill Gems Optional affixes: Spell Damage Damage over Time Multiplier |
|
 Tabula Rasa - having this Armour will greatly speed up your leveling process by improving your Damage significantly Tabula Rasa - having this Armour will greatly speed up your leveling process by improving your Damage significantly |
|
| Item has no level requirement and Energy Shield (Hidden) Item has 6 White Sockets and is fully linked (Hidden) |
|
 Perandus Blazon - pair it with at least 2 Quicksilver Flasks to have near-permanent sustain on them. Perandus Blazon - pair it with at least 2 Quicksilver Flasks to have near-permanent sustain on them. |
|
| (15-25)% increased Stun and Block Recovery +(20-30) to all Attributes (6-8)% increased Quantity of Items found +20% to Fire Resistance 20% increased Flask Effect Duration -2 Physical Damage taken from Attack Hits |
|
 Wanderlust - you won't have to worry about Freezes with those Boots. They also boost your Mana Regeneration and Movement Speed. Wanderlust - you won't have to worry about Freezes with those Boots. They also boost your Mana Regeneration and Movement Speed. |
|
| +5 to Dexterity +(10-20) to maximum Energy Shield (20-40)% increased Mana Regeneration Rate 20% increased Movement Speed Cannot be Frozen |
|
4. Final Skill Tree, Ascendancy Points, and Pantheon
Final Skill Tree:
102 Points Final Passive Tree (doesn't include Cluster or Unique Jewels)
119 Points Path of Building (PoB) link
Ascendancy points:
Preferably in that order:
- Void Beacon
- Withering Presence
- Vile Bastion
- Profane Bloom
Pantheon:
Major God: Soul of Lunaris: 1% additional Physical Damage Reduction for each nearby Enemy, up to 8%; 1% increased Movement Speed for each nearby Enemy, up to 8%
Minor God: Soul of Ralakesh: 25% reduced Physical Damage over Time taken while moving; Moving while Bleeding doesn't cause you to take extra Damage
5. Final Gems links
| [DPS] Impending Doom Setup | |
 |
Temporal Chains - to activate Doom Blast, you have to Curse your enemies first. Temporal Chains is ideal Curse for that as it slows your enemies and benefits from Balance of Terror Jewel. |
 |
Impending Doom Support - triggers Doom Blast when linked Curse ends. The Doom Blast is not affected by most gem Level modifiers as it isn't an Active Gem. |
 |
Unbound Ailments Support - increases the Duration and Damage dealt by your Poisons. |
|
Void Manipulation Support - improves your Chaos Damage dealt. You can use Divergent Quality to get some Leech. |
 |
Spell Cascade Support - creates copies of your Spells with slight delay around the target. The Awakened version allows for additional overlaps. |
 |
Deadly Ailments Support - significantly improves your DoT but lowers the initial Hit. You can however use Divergent Quality to lessen the drawback if you use the Life Leech strategy. |
| [DPS] Curse Setup socket in your Gloves |
|
|
Punishment - one of the Curses from this Setup is used purely to Trigger your Doom Blast and won't be affecting your enemies at all. It should be socketed in a top left socket in your Gloves. This Curse increases the Damage enemies take once they fall below 50% of maximum Life. |
 |
Enfeeble - if you prefer more Defense, use this Curse instead. It significantly lowers the Damage dealt by cursed foes. |
|
Despair - this Curse lowers the monster's Chaos Resistances. It should be included in every setup. |
|
Spell Cascade Support - you will need this Support here as well as in your Main link to keep triggering Doom Blast with a single cast. |
| [UTILITY] Aura Setup | |
|
Grace - a very important Aura to keep you safe. It adds a lot of Evasion Rating. |
 |
Discipline - improves your Energy Shield and its Recovery Rate. Use it only if you can't sustain casting otherwise. If that's not a problem, use Summon Skitterbots to apply Chill and Shock on your enemies. |
 |
Purity of Elements - improves your Elemental Resistances and grants Immunity to all Elemental Ailments. |
 |
Enlighten Support - lowers the Mana Reservation of linked Auras. |
| [UTILITY] Aura Setup | |
 |
Herald of Agony - improves your Damage and grants a lot of Chance to Poison. Use the Divergent Quality to improve that chance even more. Enlighten Support would be very useful here as well if you can manage to get a free Socket. |
| [UTILITY] Wither Setup | |
 |
Wither - a very powerful debuff that increases Chaos Damage taken by the enemies. You can accumulate up to 15 stacks on the enemy. |
 |
Spell Totem Support - puts a Totem that cast Wither for you. |
 |
Multiple Totems Support - more Totems means better uptime on maximum Wither stacks. |
| [UTILITY] Divine Blessing Setup | |
 |
Malevolence - this Aura greatly improves the Damage dealt by your Poisons. |
 |
Divine Blessing Support - turns your permanent Aura into a temporary Buff which can be cast with your Energy Shield instead of Reserving Mana. |
| [UTILITY] Guard Setup | |
 |
Molten Shell - improves your Armour and absorbs incoming Damage. |
| [UTILITY] Movement Setup | |
 |
Shield Charge - your main movement Skill, it's a quick charge that scales with your Attack Speed and Movement Speed. |
 |
Faster Attacks Support - improves the Speed of your Shield Charge. |
|
Flame Dash - a secondary Movement Skill used to quickly dodge incoming attacks or cross terrain gaps. |
|
|
6. Gear Setup
The gearing choice is a healthy mix of Rare and Unique Items. The only Unique you truly need is the Vixen Entrapment Gloves, but there are a few Uniques that are quite cheap and extremely effective. The most important stats are the defensive ones - maximum Life, Spell Suppression, and Elemental Resistances should be your priority. Having a bit of extra Life Regeneration is also very useful. It's best to use Evasion and Energy Shield bases, as those are your main resources. As for Damage, your should mostly look for Cooldown Recovery Rate, Cast Speed and Chaos Damage. Ideally, you would want to get over 50% Cooldown Recovery Rate and 5 Casts per second, but any bit counts. Overinvesting in one category while neglecting the other part is not worthwhile. Curse Effect is a very valuable stat but its sources are very limited.
|
Stat priorities on items:
|
 (Helmet) Rare Helmet - proper Enchant and Eldritch Implicits are very effective ways to improve your Damage. You should also get Mana Reservation Efficiency here. Other than that, focus on Life, Resistances, and optional Spell Suppression. (Helmet) Rare Helmet - proper Enchant and Eldritch Implicits are very effective ways to improve your Damage. You should also get Mana Reservation Efficiency here. Other than that, focus on Life, Resistances, and optional Spell Suppression. |
|
| Min. requirements: 20% increased Mana Reservation Efficiency of Skills (Implicit + Essence) 20% increased Temporal Chains Curse Effect (Enchant + Implicit) +60 to maximum Life +30% total Elemental Resistances Optional affixes: chance to Suppress Spell Damage Attributes |
|
|
|
|
| Adds (90-130) to (140-190) Chaos Damage to Spells (25-30)% increased Cast Speed +(5-10)% to Chaos Resistance Lose 40 Mana when you use a Skill Poisons you inflict deal Damage (30-50)% faster |
|
 (Weapon) Rare Wand - to get better single-target Damage, you can use a rare Wand with tons of DoT Multiplier, Cast Speed, or increases to Chaos Damage. With this option, your Poisons will deal more Damage per stack but at a slower rate. (Weapon) Rare Wand - to get better single-target Damage, you can use a rare Wand with tons of DoT Multiplier, Cast Speed, or increases to Chaos Damage. With this option, your Poisons will deal more Damage per stack but at a slower rate. |
|
| Min. requirements: +20% to Damage over Time Multiplier +20% to Chaos Damage over Time Multiplier 20% increased Cast Speed Optional affixes: Chaos Damage Adds Chaos Damage to Spells |
|
 (Off-hand) Rare Shield - use this piece to get a lot of Spell Suppression and other defensive modifiers such as maximum Life or Elemental Resistances. (Off-hand) Rare Shield - use this piece to get a lot of Spell Suppression and other defensive modifiers such as maximum Life or Elemental Resistances. |
|
| Min. requirements: +15% chance to Suppress Spell Damage +70 to maximum Life +50% total Elemental Resistances Optional affixes: Regenerate Life per second increased Effect of your Curses (crafted) |
|
 (Off-hand) Atziri's Reflection - this powerful Shield doesn't provide any Spell Suppression but makes you immune to Curses and significantly boosts the effect of your Curses. (Off-hand) Atziri's Reflection - this powerful Shield doesn't provide any Spell Suppression but makes you immune to Curses and significantly boosts the effect of your Curses. |
|
| +(40-60) to Intelligence (180-200)% increased Evasion Rating +(180-200) to maximum Energy Shield +(20-30)% to all Elemental Resistances Hex Reflection Unaffected by Curses (15-20)% increased Effect of your Curses |
|
 (Body Armour) Skin of the Lords - it boosts all Socketed Gems, so it works on your Impending Doom Support Gem as well. It also improves your Evasion and Energy Shield. (Body Armour) Skin of the Lords - it boosts all Socketed Gems, so it works on your Impending Doom Support Gem as well. It also improves your Evasion and Energy Shield. |
|
| Sockets cannot be modified +2 to Level of Socketed Gems 100% increased Global Defences You can only Socket Corrupted Gems in this item Item has 6 Sockets and is fully linked (Hidden) |
|
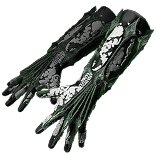 (Gloves) Vixen's Entrapment - those are necessary to automate your Curses. It Triggers them instantly when you begin Casting, so they will apply first. Your "wasted" Curse should be socketed in the top left socket to be triggered first. (Gloves) Vixen's Entrapment - those are necessary to automate your Curses. It Triggers them instantly when you begin Casting, so they will apply first. Your "wasted" Curse should be socketed in the top left socket to be triggered first. |
|
| Trigger Socketed Curse Spell when you Cast a Curse Spell, with a 0.25 second Cooldown +(50-90) to maximum Energy Shield 0.2% of Spell Damage Leeched as Energy Shield for each Curse on Enemy You can apply an additional Curse Curse Skills have (10-20)% increased Cast Speed |
|
 (Belt) Rare Belt - it's a great piece to get some Cooldown Recovery Rate. Other than that, just look for maximum Life and Resistances. (Belt) Rare Belt - it's a great piece to get some Cooldown Recovery Rate. Other than that, just look for maximum Life and Resistances. |
|
| Min. requirements: +80 maximum Life +100% total Elemental Resistances 15% increased Cooldown Recovery Rate Optional affixes: Life Regeneration % increased maximum Life Regenerate 150 Energy Shield per second while a Rare or Unique Enemy is Nearby Chaos Damage |
|
 (Abyss Jewel) Rare Jewel - those should be used mostly for defensive modifiers such as maximum Life and Resistances. You can get a bit of Cooldowns here, but the amount is pretty minuscule. (Abyss Jewel) Rare Jewel - those should be used mostly for defensive modifiers such as maximum Life and Resistances. You can get a bit of Cooldowns here, but the amount is pretty minuscule. |
|
| Min. requirements: +30 maximum Life Optional affixes: Elemental Resistances Attributes Cooldown Recovery Rate Ailment Avoidance Life/Energy Shield Regeneration |
|
 (Amulet) Rare Amulet - you can acquire a lot of DoT Multiplier here, but remember that Gem Level modifiers only affect Active Gems which Impending Doom isn't. You can also get a lot of Attributes, Resistances, and maximum Life here. (Amulet) Rare Amulet - you can acquire a lot of DoT Multiplier here, but remember that Gem Level modifiers only affect Active Gems which Impending Doom isn't. You can also get a lot of Attributes, Resistances, and maximum Life here. |
|
| Min. requirements: +60 maximum Life 20% Damage over Time Multiplier Optional affixes: 20% Chaos Damage over Time Multiplier Elemental Resistances Attributes Recommended Anoint: Skittering Runes |
|
 (Amulet) The Eternal Struggle - you can obtain valuable Eldritch Implicits and 15% Culling Strike here, but it's pretty tough to find the correct one. (Amulet) The Eternal Struggle - you can obtain valuable Eldritch Implicits and 15% Culling Strike here, but it's pretty tough to find the correct one. |
|
| +(20-50) to Strength +(20-50) to Dexterity +(20-50) to Intelligence (10-15)% increased Global Defences Critical Strikes inflict Malignant Madness if The Eater of Worlds is dominant Kill Enemies that have 15% or lower Life on Hit if The Searing Exarch is dominant Optional Implicit: increased Effect of your Curses Spell Suppression Chance |
|
 (Ring) Circle of Nostalgia - this Ring provides a lot of Damage if you get the correct Herald modifiers. The Buff effect is especially important if you lack Poison Chance. You can boost it up with cheap Catalysts too. (Ring) Circle of Nostalgia - this Ring provides a lot of Damage if you get the correct Herald modifiers. The Buff effect is especially important if you lack Poison Chance. You can boost it up with cheap Catalysts too. |
|
| +(10-20) to all Attributes Adds (15-20) to (21-30) Chaos Damage +(17-23)% to Chaos Resistance (40-60)% increased Chaos Damage while affected by Herald of Agony Herald of Agony has (40-60)% increased Buff Effect |
|
 (Ring) Icefang Orbit - this Ring is not as good but it's much more accessible. You can get useful Corrupt Implicits or boost the base stats with Catalyst. (Ring) Icefang Orbit - this Ring is not as good but it's much more accessible. You can get useful Corrupt Implicits or boost the base stats with Catalyst. |
|
| +(20-30) to Dexterity 25% chance to Poison on Hit (40-60)% increased Damage with Poison You are Chilled when you are Poisoned Non-Chilled Enemies you Poison are Chilled Poisoned Enemies you Kill with Hits Shatter |
|
 (Ring) Rare Ring - provides less Damage, but much more Defensive values, such as maximum Life or Resistances. You can still get a bunch of Damage, just not as much as on mentioned Uniques. (Ring) Rare Ring - provides less Damage, but much more Defensive values, such as maximum Life or Resistances. You can still get a bunch of Damage, just not as much as on mentioned Uniques. |
|
| Min. requirements: +60% to Elemental Resistances +60 to Maximum Life Optional affixes: Chaos Damage Attributes Damage over Time Multiplier |
|
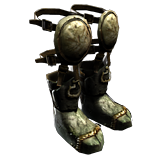 (Boots) Rare Boots - it's also a great source of Cooldown Recovery Rate. You can opt for Influenced modifier which grants much higher values or simply go with Eldritch Implicits which provides slightly less of that stat, but it's much more accessible when paired with other modifiers. (Boots) Rare Boots - it's also a great source of Cooldown Recovery Rate. You can opt for Influenced modifier which grants much higher values or simply go with Eldritch Implicits which provides slightly less of that stat, but it's much more accessible when paired with other modifiers. |
|
| Min. requirements: +60% to Elemental Resistances +60 to Maximum Life 30% increased Movement Speed Optional affixes: chance to Suppress Spell Damage increased Cooldown Recovery Rate increased Action Speed |
|
 (Jewel) Rare Jewels - use Rare Jewels to get some maximum Life and other useful modifiers like Resistance or Poison Damage and Duration. (Jewel) Rare Jewels - use Rare Jewels to get some maximum Life and other useful modifiers like Resistance or Poison Damage and Duration. |
|
|
Recommended affixes: |
|
 (Jewel) Large Cluster Jewels - Cluster Jewels are great source od Damage for this Build. Try to get the least amount of added Passive Skills to not waste any points on traveling. (Jewel) Large Cluster Jewels - Cluster Jewels are great source od Damage for this Build. Try to get the least amount of added Passive Skills to not waste any points on traveling. |
|
| Recommended affixes: 1 Added Passive Skill is Touch of Cruelty 1 Added Passive Skill is Unholy Grace 1 Added Passive Skill is Unwaveringly Evil |
|
 (Jewel) Medium Cluster Jewels - those can provide even more Damage, and some maximum Life alongside it too. (Jewel) Medium Cluster Jewels - those can provide even more Damage, and some maximum Life alongside it too. |
|
| Recommended affixes: 1 Added Passive Skill is Circling Oblivion 1 Added Passive Skill is Flow of Life |
|
 (Jewel) Balance of Terror - you can get a lot of Cooldown Recovery with this Jewel. Optionally, you can automate applying Wither by using the version with Despair, but it's less favorable. (Jewel) Balance of Terror - you can get a lot of Cooldown Recovery with this Jewel. Optionally, you can automate applying Wither by using the version with Despair, but it's less favorable. |
|
|
+(10-15)% to all Elemental Resistances |
|
 (Jewel) Brutal Restraint - the Traitor Notable allows much better Flasks sustain, while the randomized bonuses on nearby passives can be pretty useful. (Jewel) Brutal Restraint - the Traitor Notable allows much better Flasks sustain, while the randomized bonuses on nearby passives can be pretty useful. |
|
| Denoted service of (500-8000) dekhara in the akhara of Balbala Passives in radius are Conquered by the Maraketh Historic |
|
 (Jewel) Watcher's Eye - provides an amazing boost depending on the mods you can acquire. The best one would be DoT Multiplier while using Malevolence, but defensive ones are pretty useful too. (Jewel) Watcher's Eye - provides an amazing boost depending on the mods you can acquire. The best one would be DoT Multiplier while using Malevolence, but defensive ones are pretty useful too. |
|
| (4-6)% increased maximum Energy Shield (4-6)% increased maximum Life (4-6)% increased maximum Mana <Two or Three random aura modifiers> Recommended Aura mods: +(18-22)% to Damage over Time Multiplier while affected by Malevolence Damaging Ailments you inflict deal Damage (10-15)% faster while affected by Malevolence +(12-15)% chance to Suppress Spell Damage while affected by Grace |
|
|
Suggested Flasks:
|
|
    |
 (Weapon) Apep's Rage - it's a great Weapon that works very well with Doom Blast's high Damage Effectiveness. Mana loss is not a problem since you use Eldritch Battery anyway.
 |
|
If you have any other build requests please leave that in the comments below. We are always open to suggestions and constructive feedback.
Pictures used in this article are the intellectual property of Grinding Gear Games.
