Poison Seismic Trap Saboteur Build
One of the best Trap Builds out there, perfectly suitable to kill the strongest Bosses on minimal investmentsSeismic Trap Poison
Saboteur Build
Updated for Patch 3.20
The Best Crafty Guides by Odealo
| Guide notes |
| December 08, 2022 -Build created |
| Build overview | |||
| Tags: [TRAP] [POISON] [PHYSICAL] [LIFE] | |||
|
Budget: Defenses: |
|
Boss DPS: AoE: |
|
Seismic Trap is one of the signature Trap Skills that have a Cooldown. When it's triggered, it pulses with powerful explosions all around itself for a limited duration. You can't spam with this Skill all the time, as you will quickly run out of charges. This downtime gives you an excellent opportunity to focus on dodging and repositioning during the Boss fights, which is where the build shines the most.
Seismic Trap is well known in the Path of Exile' community for being one of the strongest Spells out there when it comes to single-target damage. Many players were cautious about this Skill when it got a significant nerf in Patch 3.19, but as it turned out, it's still very good. In this iteration of the build, we are recommending the Poison variant. Poison is a damaging Ailment that deals Damage over time based on the Physical and Chaos Damage, which this Trap has plenty of. It also works very well with multiple Hits, as every explosion will apply yet another stack of Poison. The final result is a massive Damage over Time effect that ramps up pretty quickly, at a minimal effort and gear investment. Due to being Cooldown-based, it would be unwise to rely on it for both single-target and Map Clear. To help with that, you should use Exsanguinate paired with Trap Support. Tendrils created by that Spell can very easily cover great areas to quickly kill all weak monsters in sight, and you can spam this Skill to your heart's content.
The defensive side of this build is also nothing to be shy about. Thanks to the Grace, Determination, and Saboteur's Blind aura, you will be very safe against all Attacks, while easy access to high Spell Suppression will take care of rest. Furthermore, you will be immune to most Ailments without any effort. The Trap playstyle is very safe by itself, as you won't be locked in place for a long time.
The build is very affordable, as most of the Damage comes from the Skill mechanics itself. It has a pretty clear upgrade path, so you can easily become stronger and stronger with every investment you make.
You can also check our other Path of Exile builds right over here Odealo's Crafty Guides - Full List
1. Gameplay
For your regular Mapping, you will be quickly moving around the Map with Whirling Blades and killing whole packs of monsters with Exsanguinate Traps. Thanks to their autotargeting, you don't even need to aim too much, just enough to trigger at least one Trap. When encountering Bosses or other tough enemies, use your Seismic Trap to take them down in the blink of an eye! Wither cast by your Totems will dramatically increase the Damage they take, and you can automate your Curse setup via Arcanist Brand or your Gear itself.
|
|
|
|

2. Build's PROS & CONS
| PROS |
|
| CONS |
|
3. Leveling tips
Going through the campaign is a very easy task when playing with Traps. At first, you might want to stick to Elemental Traps and switch to Seismic Trap once you have a high enough level to properly support that playstyle. Lightning Trap and Ice Trap are both very good and scale with all the Trap Passives you will be taking in the Passive Tree anyway.
Suggested leveling Gem setups:
| Lightning Trap setup | |
 |
Lightning Trap - when triggered it shoots lightning-based Projectiles in every direction. |
 |
Added Lightning Damage Support - adds a decent amount of Lightning Damage to your Traps |
 |
Multiple Traps Support - lowers the Damage of individual Trap but you will throw 3 Traps at once. Switch to Cluster Traps Support once you unlock that Gem. |
 |
Controlled Destruction Support - grants more Spell Damage while significantly lowering Critical Strike Chance. |
| Ice Trap setup | |
 |
Ice Trap - it has stronger Single-target Damage but lower AoE coverage. Thanks to the initial Cold Damage, it will Freeze monsters quite often. |
 |
Added Cold Damage Support - adds quite a lot of Cold Damage to your Traps. |
 |
Trap and Mine Damage Support - increases all Damage dealt by your Traps. |
|
Controlled Destruction Support - lowers Critical Strike Chance but improves your Damage a lot. |
| Auras setup | |
 |
Grace - one defensive Aura is very important during leveling, you will have plenty of Damage anyway. |
 |
Clarity - to comfortably spam with your Skills, you will need Clarity Aura |
| Flame Dash and Steelskin | |
 |
Flame Dash - a quick teleport in a specific direction, very useful to move faster and cross gaps. |
 |
Steelskin - gives you a protective buff that absorbs part of incoming Damage. |
| Curse setup | |
 |
Elemental Weakness - lowers all Elemental Resistances of affected foes. Swap to Despair once you start using Seismic Trap. |
Bandits:
Kill all three bandits to get two additional Passive Skill Points
Leveling Skill Trees:
34 Points Passive Tree
Suggested order of allocation: 1) Entropy 2) Blood Siphon 3) Resourcefulness 4) Expeditious Munitions 5) Written in Blood 6) Instinct 7) Blood Drinker
65 Points Passive Tree
Suggested order of allocation: 1) Master Sapper 2) Overprepared 3) Influence 4) Fatal Toxins 5) Serpentine Spellslinger 6) Atrophy 7) Whispers of Doom
Recommended leveling items:
 Le Heup of All - this Ring covers your Resistances and Attributes, while also Increases your Damage Le Heup of All - this Ring covers your Resistances and Attributes, while also Increases your Damage |
|
| Adds 1 to 4 Physical Damage to Attacks +(10-30) to all Attributes (10-30)% increased Damage (10-30)% increased Rarity of Items found +(10-30)% to all Elemental Resistances |
|
 Goldrim - a very good Helmet to give yourself plenty of Resistances early on Goldrim - a very good Helmet to give yourself plenty of Resistances early on |
|
| +(30-50) to Evasion Rating 10% increased Rarity of Items found +(30-40)% to all Elemental Resistances Reflects 4 Physical Damage to Melee Attackers Level Requirement reduced by 100 (Hidden) |
 Tabula Rasa - having a 6-link setup in the early-game is a huge boost to your Damage. Tabula Rasa - having a 6-link setup in the early-game is a huge boost to your Damage. |
|
| Item has no level requirement and Energy Shield (Hidden) Item has 6 White Sockets and is fully linked (Hidden) |
|
 Perandus Blazon - gives you all Attributes and makes your Flaks last for a longer duration Perandus Blazon - gives you all Attributes and makes your Flaks last for a longer duration |
|
| (15-25)% increased Stun and Block Recovery +(20-30) to all Attributes (6-8)% increased Quantity of Items found +20% to Fire Resistance 20% increased Flask Effect Duration -2 Physical Damage taken from Attack Hits |
|
 String of Servitude - with a specific Implicit modifier, it can give you a lot of Elemental Resistances. String of Servitude - with a specific Implicit modifier, it can give you a lot of Elemental Resistances. |
|
| <(1-2) Random corrupted implicit modifiers> Implicit Modifier magnitudes are tripled Desired modifier: 48% to All Elemental Resistances |
|
 Rare Wand or Sceptre- even low-level Wands can have a modifier that boosts Levels of your Gems. Use the one matching your Main Setup. Rare Wand or Sceptre- even low-level Wands can have a modifier that boosts Levels of your Gems. Use the one matching your Main Setup. |
|
|
+1 to Level of all Lightning/Cold/Physical Spell Skill Gems |
|
 Doedre's Tenure - Cast Speed doesn't affect your Trap throwing Time, but the massive Spell Damage increase sure does! Doedre's Tenure - Cast Speed doesn't affect your Trap throwing Time, but the massive Spell Damage increase sure does! |
|
| +(20-50) to Intelligence 100% increased Spell Damage (25-15)% reduced Cast Speed |
|
 Wanderlust - very good Boots that give you immunity to Freeze Ailment and a bit of Mana Regeneration. Wanderlust - very good Boots that give you immunity to Freeze Ailment and a bit of Mana Regeneration. |
|
| +5 to Dexterity +(10-20) to maximum Energy Shield (20-40)% increased Mana Regeneration Rate 20% increased Movement Speed Cannot be Frozen |
|
4. Final Skill Tree, Ascendancy Points, and Pantheon
Final Skill Tree:
119 Points Final Passive Tree (doesn't include Cluster or Unique Jewels)
119 Points Path of Building (PoB) link
Ascendancy points:
Preferably in that order:
- Perfect Crime
- Chain Reaction
- Born in the Shadows
- Pyromaniac
Pantheon:
Major God: Soul of the Brine King: You cannot be Stunned if you've been Stunned or Blocked a Stunning Hit in the past 2 seconds; Cannot be Frozen
Minor God: Soul of Shakari: You cannot be Poisoned while there are at least 3 Poisons on you; 50% less Duration of Poisons on You
5. Final Gems links
| [DPS] Seismic Trap setup | |
 |
Seismic Trap - when triggered, it creates a series of small explosions all around itself for a limited Duration. A short Cooldown prevents throwing large quantities of Traps at once. |
 |
Deadly Ailments Support - increases the Damage of Poisons while lowering the Hit portion. |
|
Void Manipulation Support - increases Chaos Damage of the supported Skill. In this case, it refers to Poison Damage. |
 |
Unbound Ailments Support - increases the Damage of your Poisons a bit, but also improves their Duration a lot. |
| Advanced Traps Support - improves Cooldown Recovery of your Traps, allowing you to use it more often. | |
|
Trap and Mine Damage Support - improves all Damage dealt by your Traps, including Poisons. |
| [DPS] Exsanguinate socket it in your Boots/Gloves with the Trap Support |
|
 |
Exsanguinate - fires a series of Tendrils at all nearby enemies, inflicting Poisons and Physical DoT. Sources of additional Chains also affect Tendrils. |
 |
Cluster Traps Support - adds additional Traps every time you Throw that Skill. |
 |
Chain Support - the easiest source of additional Chains. Awakened versions add additional Chain, improving your Clear significantly. |
|
Trap and Mine Damage Support - again, best Support Gem for every Trap or Mine Setup. |
 |
Trap Support - converts any self-cast Spell into a Trap Skill. Use it only if you don't have a Gear piece with a built-in Support Gem. |
| [UTILITY] Auras | |
 |
Grace - gives a lot of flat Evasion Rating and More Evasion Multiplier. Use Vaal version for temporary Buff. |
 |
Determination - this Aura works just like Grace, only this time it adds Armour Rating. You will need The Devouring Diadem to use both of those Auras while keeping the offensive ones. |
 |
Herald of Agony - grants you a lot of Poison Chance with your Skills. Use Divergent Quality to boost that chance even further. |
 |
Summon Skitterbots - very strong Aura that improves your Trap Damage and applies Shock and Chill on your enemies. |
| [UTILITY] Malevolance setup | |
 |
Malevolence - this Aura gives an enormous bonus to your Damage over Time effects. |
 |
Divine Blessing Support - thanks to this Support Gem you can turn permanent Aura into short Buff without Reserving your Mana. |
| [UTILITY] Curse setup | |
 |
Despair - significantly lowers Chaos Resistances of affected foes, increasing your Poison Damage. |
 |
Temporal Chains - lowers the Action Speed of your enemies and makes our Poisons last longer. |
 |
Arcanist Brand - this Brand will cast both linked Curses. Alternatively, you can use Bane or cast them yourself, saving you 1 Gem Socket. |
| [UTILITY] Wither setup | |
 |
Wither - applies a very strong debuff that increases Chaos Damage Taken by your enemies. |
 |
Spell Totem Support - you will summon Totems that cast that Spell for you. |
 |
Multiple Totems Support - summons more Totems, so they can apply maximum stacks faster. |
| [MOBILITY] Movement setup | |
 |
Whirling Blades - quickly moves you in a short distance. Scales very well with your Attack Speed and has no Cooldown. You can also use Flame Dash instead |
| [UTILITY] Molten Shell | |
 |
Molten Shell - adds a lot of Armour for a duration and absorbs part of incoming Damage. Vaal version offers even stronger absorption. |
|
|
6. Gear Setup
To begin with this Build you need literally no Gear at all. All the initial power comes from your Skill Gems and Passive Tree. Of course, that doesn't mean you won't equip anything at all. There are plenty of very strong Unique Items that boost your Damage to absurd numbers, such as Cold Iron Point or Ming's Heart. The very first Unique you should aim for is The Devouring Diadem. Thanks to this Helmet, you can use additional Aura in your setup and save a few Passive Points in your Passive Tree. In the meantime, you can try to obtain Deerstalker Boots that will grant you a pseudo 5-link setup for your Exsanguinate. You will probably want to replace it later on with a pair of Rare Gloves that also has a built-in Trap Support, but you don't need to hurry with that. The rest of your Gear should be focused on maximizing your defenses. Getting Life, Attributes, Resistances and a bit of Spell Suppression shouldn't be a hard task, as you don't need to worry about Damage affixes in most cases. Getting a bit of Life Regeneration is also very useful, as you can't Leech, but it's not that important.
|
Stat priorities on items:
|
 (Helmet) Devouring Diadem- thanks to this Helmet you will be able to use your second defensive Aura. Getting a modifier that increases the Duration of Ailments while Focused would be ideal. (Helmet) Devouring Diadem- thanks to this Helmet you will be able to use your second defensive Aura. Getting a modifier that increases the Duration of Ailments while Focused would be ideal. |
|
| +1 to Level of Socketed Gems Socketed Gems have 25% increased Reservation Efficiency Trigger Level 15 Feast of Flesh every 5 seconds (180-220)% increased Energy Shield 10% chance for Energy Shield Recharge to start when you use a Skill Eldritch Battery |
|
 (Helmet) Rare Helmet - at first, you can use a regular Rare Helmet with Life, Resistances, or Attributes. (Helmet) Rare Helmet - at first, you can use a regular Rare Helmet with Life, Resistances, or Attributes. |
|
| Min. requirements: +60 to maximum Life +70% total Elemental Resistances Optional affixes: +10% chance to Suppress Spell Damage increased Mana Reservation Efficiency of Skills Regenerate 50+ Life per second |
|
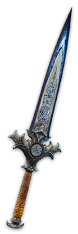 (Weapon) Cold Iron Point - this Dagger is definitely our Best-in-slot Item when it comes to Damage. For maximum effect, you can Dual Wield them but you will notice a drop in your survivability. (Weapon) Cold Iron Point - this Dagger is definitely our Best-in-slot Item when it comes to Damage. For maximum effect, you can Dual Wield them but you will notice a drop in your survivability. |
|
| +3 to Level of all Physical Spell Skill Gems Deal no Elemental Damage |
|
 (Weapon) Rare Wand - before you acquire that Dagger, use a Rare Wand that boosts your Gems Levels, or provide a lot of Damage over Time Multiplier (Weapon) Rare Wand - before you acquire that Dagger, use a Rare Wand that boosts your Gems Levels, or provide a lot of Damage over Time Multiplier |
|
|
Min. requirements: |
|
 (Weapon) Obliteration - another great option to use is this Unique Wand. It grants you a lot of Chaos Damage based on your Physical Damage, and since DoT's kills count as yours, it will trigger a lot of explosions. (Weapon) Obliteration - another great option to use is this Unique Wand. It grants you a lot of Chaos Damage based on your Physical Damage, and since DoT's kills count as yours, it will trigger a lot of explosions. |
|
| (31-35)% increased Spell Damage Gain (30-40)% of Physical Damage as Extra Chaos Damage Enemies you Kill have a 20% chance to Explode, dealing a quarter of their maximum Life as Chaos Damage |
|
 (Off-hand) Rare Shield - use this slot to improve your defenses a lot. Try to get a lot of Life, Spell suppression, or Elemental Reistances. You can also try to get additional Levels for your Spells, but you would have to trade your Spell Suppression Chance for that. (Off-hand) Rare Shield - use this slot to improve your defenses a lot. Try to get a lot of Life, Spell suppression, or Elemental Reistances. You can also try to get additional Levels for your Spells, but you would have to trade your Spell Suppression Chance for that. |
|
| Min. requirements: +60 to maximum Life +10% chance to Suppress Spell Damage +50% total Elemental Resistances Optional affixes: +1 to Level of all Chaos Spell Skill Gems Regenerate 100+ Life per second Maximum Elemental Resistances Chaos Resistance |
|
 (Body Armour) Skin of the Lords - a very strong Unique Armour that grants insane amounts of Damage, if you manage to find one with appropriate Socket Colours. (Body Armour) Skin of the Lords - a very strong Unique Armour that grants insane amounts of Damage, if you manage to find one with appropriate Socket Colours. |
|
| Item has no level requirement and Energy Shield (Hidden) Sockets cannot be modified +2 to Level of Socketed Gems 100% increased Global Defences You can only Socket Corrupted Gems in this item Item has 6 Sockets and is fully linked (Hidden) <Random Keystone> |
|
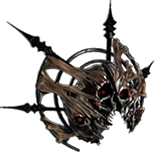
 (Body Armour) Tinkerskin - quite useful Armour for all Trap setups. Life and Energy Shield recovery is not that great in this setup, as Traps triggered by Chain Reactions do not work with that modifier. (Body Armour) Tinkerskin - quite useful Armour for all Trap setups. Life and Energy Shield recovery is not that great in this setup, as Traps triggered by Chain Reactions do not work with that modifier. |
|
| (140-170)% increased Evasion and Energy Shield +(60-90) to maximum Life (10-15)% increased Cooldown Recovery Rate for throwing Traps 15% chance to gain a Frenzy Charge when your Trap is triggered by an Enemy 30% chance to gain Phasing for 4 seconds when your Trap is triggered by an Enemy Recover 100 Life when your Trap is triggered by an Enemy Recover 50 Energy Shield when your Trap is triggered by an Enemy |
|
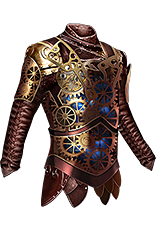
 (Body Armour) Dendrobate - another great alternative for your Armour. It helps with Poison Chance and grants a lot of damage if you have enough Attributes. (Body Armour) Dendrobate - another great alternative for your Armour. It helps with Poison Chance and grants a lot of damage if you have enough Attributes. |
|
| Socketed Gems are Supported by Level 10 Chance to Poison (130-150)% increased Evasion and Energy Shield +40 to maximum Energy Shield +(15-25)% to all Elemental Resistances (75-100)% increased Damage with Poison if you have at least 300 Dexterity (15-25)% increased Poison Duration if you have at least 150 Intelligence |
|
 (Body Armour) Rare Body Armour - it's actually your best option if you want to improve your survivability. Aim for high Life, Spell Suppression, and Resistances. You can improve your Physical mitigation by crafting specific veiled modifier. (Body Armour) Rare Body Armour - it's actually your best option if you want to improve your survivability. Aim for high Life, Spell Suppression, and Resistances. You can improve your Physical mitigation by crafting specific veiled modifier. |
|
|
Min. requirements: |
|
 (Belt) Rare Belt - in your Belt slot you can acquire a large amount of Life and Resistances. You can also get some useful Flask modifiers. (Belt) Rare Belt - in your Belt slot you can acquire a large amount of Life and Resistances. You can also get some useful Flask modifiers. |
|
| Min. requirements: +100 to maximum Life +60% to Elemental Resistances Optional affixes: Attributes Regenerate 70+ Life per second % increased maximum Life increased Flask Effect Duration |
|
 (Belt) Olesya's Delight - this Unique Belt converts your Frenzy Chagres into Affliction Charges. They grant more Damage than regular Frenzy but do not provide Cast Speed, which is not required by Traps anyway. (Belt) Olesya's Delight - this Unique Belt converts your Frenzy Chagres into Affliction Charges. They grant more Damage than regular Frenzy but do not provide Cast Speed, which is not required by Traps anyway. |
|
| +(600-700) to Evasion Rating +(40-60)% to Cold Resistance (8-12)% increased Movement Speed +1 to Maximum Frenzy Charges Modifiers to Minimum Frenzy Charges instead apply to Minimum Affliction Charges Maximum Affliction Charges is equal to Maximum Frenzy Charges Gain Affliction Charges instead of Frenzy Charges |
|
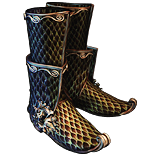 (Boots) Deerstalker - with those Boots you will have easy access to 5-link setup for your Exsanguinate Trap, as well as decent Movement Speed since you will be Throwing Traps all the time. (Boots) Deerstalker - with those Boots you will have easy access to 5-link setup for your Exsanguinate Trap, as well as decent Movement Speed since you will be Throwing Traps all the time. |
|
| Socketed Gems are Supported by Level 15 Trap (160-200)% increased Evasion Rating 15% increased Movement Speed (14-18)% increased Trap Throwing Speed 15% increased Movement Speed for 9 seconds on Throwing a Trap |
|
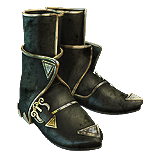 (Boots) Rare Boots - once you get gloves with Trap Support, you can use Rare Boots with Life, Resistance,s and solid Movement Speed. (Boots) Rare Boots - once you get gloves with Trap Support, you can use Rare Boots with Life, Resistance,s and solid Movement Speed. |
|
| Min. requirements: +80 to maximum Life +60% to Elemental Resistances +30% Movement Speed Optional affixes: Attributes +10% chance to Suppress Spell Damage Chance to Avoid Elemental Ailments Cannot be Chilled |
|
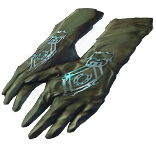
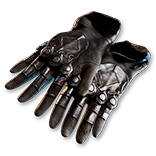 (Gloves) Rare Gloves - you can get a lot of useful modifiers on your Gloves. Obviously, get high Maximum Life, but apart from that, try to get DoT Multiplier, Curse on Hit, or Trap Throwing Speed. You can also get built-in Trap Support, but it's quite expensive if you want to combine all those modifiers in one Item. (Gloves) Rare Gloves - you can get a lot of useful modifiers on your Gloves. Obviously, get high Maximum Life, but apart from that, try to get DoT Multiplier, Curse on Hit, or Trap Throwing Speed. You can also get built-in Trap Support, but it's quite expensive if you want to combine all those modifiers in one Item. |
|
| Min. requirements: +60 to maximum Life +10% chance to Suppress Spell Damage +40% to Elemental Resistances Optional affixes: Socketed Gems are Supported by Level # Trap Support increased Trap Throwing Speed +1 to Maximum Frenzy Charges Chaos Damage over Time Multiplier Eldritch Implicits: +(10-20)% to Chaos Damage over Time Multiplier (Searing Exarch) +(5-10)% chance to Suppress Spell Damage (Eater of Worlds) |
|
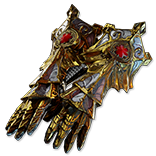 (Gloves) Hands of the High Templar - those are quite tricky to get right, but the possibilities are endless. The most useful Corrupted Implicits are Curse on Hit and additional Frenzy Charges. (Gloves) Hands of the High Templar - those are quite tricky to get right, but the possibilities are endless. The most useful Corrupted Implicits are Curse on Hit and additional Frenzy Charges. |
|
| Can be modified while Corrupted Can have up to 5 Implicit Modifiers while Item has this Modifier (150-200)% increased Armour and Energy Shield (7-12)% increased maximum Life +(20-30)% to Fire and Lightning Resistances |
|
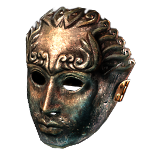
 (Gloves) Asenath's Gentle Touch - another great alternative for your Glove slot. They automate one of your Curses and additional explosions improve your Clear a bit. (Gloves) Asenath's Gentle Touch - another great alternative for your Glove slot. They automate one of your Curses and additional explosions improve your Clear a bit. |
|
| +(20-30) to Intelligence +(60-80) to maximum Life +(60-80) to maximum Mana Curse Enemies with Temporal Chains on Hit, with 40% increased Effect Non-Aura Curses you inflict are not removed from Dying Enemies Enemies near corpses affected by your Curses are Blinded Enemies Killed near corpses affected by your Curses explode, dealing 3% of their Life as Physical Damage |
|
 (Amulet) Rare Amulet - very impactful on your Damage. Try to get additional Levels for your Gems and relevant DoT Multiplier. Other than that, regular Life and Resistances are good enough. (Amulet) Rare Amulet - very impactful on your Damage. Try to get additional Levels for your Gems and relevant DoT Multiplier. Other than that, regular Life and Resistances are good enough. |
|
| Min. requirements: +50 to maximum Life Optional affixes: +1 to Level of all Skill Gems +1 to Level of all Physical Skill Gems +(15–26)% to Damage over Time Multiplier +(15–26)% to Chaos Damage over Time Multiplier Attributes Elemental Resistances |
|
| Recommended Anointments: Dirty Techniques Toxic Strikes (without Divergent Herald of Agony) |
|
 (Ring) Ming's Heart - a very powerful Ring with an impactful drawback. It grants you tons of damage at the cost of your maximum Life. Use Noxious Catalyst to boost Chaos-related modifiers, such as Extra Damage. (Ring) Ming's Heart - a very powerful Ring with an impactful drawback. It grants you tons of damage at the cost of your maximum Life. Use Noxious Catalyst to boost Chaos-related modifiers, such as Extra Damage. |
|
| +(17-23)% to Chaos Resistance 25% reduced maximum Energy Shield 25% reduced maximum Life +(40-50)% to Chaos Resistance Gain (40-60)% of Physical Damage as Extra Chaos Damage |
|
 (Ring) Rare Ring - if you want the more defensive option, simply use a Rare Ring with Life, Resistances, and Attributes. You can also get the Despair on Hit to automate your setup or craft DoT Multiplier with Essences. (Ring) Rare Ring - if you want the more defensive option, simply use a Rare Ring with Life, Resistances, and Attributes. You can also get the Despair on Hit to automate your setup or craft DoT Multiplier with Essences. |
|
| Min. requirements: +80% to Elemental Resistances +60 to Maximum Life Optional affixes: +(12-15)Damage over Time Multiplier Curse Enemies with Despair on Hit Attributes |
|
 (Jewel) Rare Jewels - try to get increased Life and some other useful modifiers on your Jewels, such as Resistances, Attributes, and Poison Damage. You can also get some Poison Chance if you still lack it. (Jewel) Rare Jewels - try to get increased Life and some other useful modifiers on your Jewels, such as Resistances, Attributes, and Poison Damage. You can also get some Poison Chance if you still lack it. |
|
|
Recommended affixes: |
|
 (Jewel) Watcher's Eye - there are plenty of useful modifiers for your Auras on this Jewel. DoT Multiplier from the Malevolence provides the most Damage, but defensive modifiers are also useful. (Jewel) Watcher's Eye - there are plenty of useful modifiers for your Auras on this Jewel. DoT Multiplier from the Malevolence provides the most Damage, but defensive modifiers are also useful. |
|
| (4-6)% increased maximum Energy Shield (4-6)% increased maximum Life (4-6)% increased maximum Mana <Two or Three random aura modifiers> Recommended Aura mods: (18-22)% Damage over Time multiplied while affected by Malevolence Damaging Ailments you inflict deal Damage (10-15)% faster while affected by Malevolence |
|
 (Flask) Sin's Rebirth - Unholy Might granted by this Flask is a very potent damage boost for this Build. Additional Evasion is also always useful. (Flask) Sin's Rebirth - Unholy Might granted by this Flask is a very potent damage boost for this Build. Additional Evasion is also always useful. |
|
| Gain Unholy Might during Flask Effect Immunity to Ignite during Flask effect Removes Burning on use |
|
|
Suggested Flasks:
|
|
    |
|
|
If you have any other build requests please leave that in the comments below. We are always open to suggestions and constructive feedback.
Pictures used in this article are the intellectual property of Grinding Gear Games.
