 Buy/Sell
 Log in


Icicle Mine Deadeye
Glass cannon build that uses Icicle Mines to deal tons of Cold DamageIcicle Mine of Fanning
Deadeye Build
Updated for Patch 3.29
The Best Crafty Guides by Odealo
| Guide notes | |||
| July 24, 2026 -Included the new Pact Skills and adjusted for the Buffed Critical Strike Chance, gaining lots of Damage as a result |
|||
| Build overview | |||
| Tags: [MINE] [RANGED] [ELEMENTAL] [LIFE] [STARTER] | |||
|
Budget: Defenses: |
|
Boss DPS: AoE: |
|


The Deadeye Ascendancy is rarely associated with Mine or Spell Builds, but it suits the Icicle Mine Skill perfectly thanks to the Projectile playstyle. It fires multiple Projectiles when detonated, which deal Cold Spell Damage. The Transfigured Icicle Mine of Fanning simply deals more Damage and fires Projectiles in a specific direction, making it an obvious upgrade that does not impact the way you build your Character. Due to the stackable Mine's Aura, which increases Critical Strike Chance per Mine, it's worth expanding on the idea of Critical Strikes. Besides the inherent damage bonus they gain, they will also apply the Elemental Ailments they're associated with - Freeze in this case. By efficiently Freezing bosses, you can reduce their Action Speed, and with the Heatshiver Helmet on, you can also inflict lots of extra Fire Damage on them. This Build can utilise multiple cheap Uniques thanks to their powerful interactions, including additional Skill Levels for Auras, since Mines count as them, making it a popular league starter.
The Arkhon's Tools cause your Skitterbots to apply Scorch and increase all Ailments they inflict. We combine it with Bonechill Support to also increase the Cold Damage taken by enemies. However, it also applies those Ailments onto you, so you will need a total Ailment Avoidance. At first it should be sourced from Purity of Elements, but later on it can be obtained via Rare Gear pieces. Since you are applying 5 Ailments, the Taming Ring grants you over 200% increased Damage, and you can equip two of them.
Mines are peculiar; they Reserve your Mana as they stay armed to inflict a Debuff Aura onto nearby Enemies, in this case, the additional Critical Strike Chance against them. You can have more of them at any time if you lower their Mana Cost and increase your own Mana Reservation Efficiency, which we recommend doing. The Deadeye grants you additional Projectiles and causes them to Chain, which makes your AoE Coverage much stronger. It also grants you Tailwind for a generic Speed improvement, including the Throwing Speed. It will also serve as a defensive layer against Hits that bypass your Evasion and Block.
You can also check our other Path of Exile builds right over here Odealo's Crafty Guides - Full List
1. Gameplay
Throw Mines in the general direction of your Enemies; they will automatically detonate and aim at your foes. To fight bosses, use Arcanist Brand to activate both Curses. For your movement, you should use Shield Charge supplemented by Frostblink.
|
|
|
|


2. Build's PROS & CONS
| PROS |
|
| CONS |
|
3. Leveling tips
Start with any Projectile; you will specialize in Cold Spell Mine Damage shortly after. Bow works the best at first. Icicle Mine can be used at level 12, but it is not included in Ranger's Quest rewards, so you will have to buy one from other players or wait until Act 3. You can swap as soon as you obtain the Gem, or wait until you acquire the March of the Legion boots for the massive power spike granted by 5 additional Skill Levels for your main Spell.
Bandits:
Kill all Bandits or help Alira to ease early progression.
Leveling Skill Trees:
36 Points Passive Tree
Start with the generic Projectile Nodes, optionally pick the nearby Bow Nodes too. Once you swap to Mines, drop them in favour of Mine Notables.
83 Points Passive Tree
Pick the remaining Mine and Crit Notables. To improve your survivability, pick Life and Suppression. You will also need Mana Mastery and Aura Notables to get enough Reservation Efficiency.
4. Final Skill Tree, Ascendancy Points, and Pantheon
Final Skill Tree:
100 Points Final Passive Tree (doesn't include Cluster Jewels)
122 Points Path of Building (PoB) link
Ascendancy points:
Preferably in that order:
- Ricochet
- Gathering Winds
- Endless Munitions
- Wind Ward/Focal Point
Pantheon:
Major God: Soul of Arakaali: 10% reduced Damage taken from Damage Over Time; +40% Chaos Resistance against Damage Over Time
Minor God: Soul of Ralakesh: 25% reduced Physical Damage over Time taken while moving; Moving while Bleeding doesn't cause you to take extra Damage
5. Final Gems links
| [DPS] Icicle Mine setup | |
 |
Icicle Mine of Fanning - fires Projectiles in a specific direction; thanks to extra Chaining and a high amount of Projectiles, you will easily cover the entire screen with them. Each Mine also increases your Critical Strike Chance. |
 |
Increased Critical Strikes Support |
 |
Increased Critical Damage Support |
 |
Trap and Mine Damage Support |
 |
Minefield Support |
 |
Charged Mines Support |
| [UTILITY] Mana-reserving setup | |
 |
Purity of Elements - at first you will need this Aura to deal with the self-inflicting Ailments from the Arkhon's Tools. You should aim to replace it with Grace once you get total Ailment Avoidance from gear. |
 |
Zealotry - Grants more Spell Damage and increases Spell Critical Strike Chance. |
 |
Enlighten Support |
| [UTILITY] Mana-reserving setup | |
 |
Summon Skitterbots - improve your Mines and apply Shock and Chill. With the Arkhon's Tools Belt, they will also inflict Scorch. |
 |
Bonechill Support - Chill inflicted by Skitterbots will increase all Cold Damage taken by Enemies. Keep in mind it also raises the Reservation costs. |
 |
Unbound Ailments Support |
| [MOBILITY] Mobility setup | |
 |
Shield Charge - your main Movement Skill. Keep it on a low level to avoid high Attribute costs. |
 |
Faster Attacks Support |
 |
Frostblink - allows you to traverse through terrain gaps instantly. You can also use it to apply the Bonechill effect if you lack Reservation Efficiency. |
| [UTILITY] Curse setup | |
 |
Sniper's Mark - greatly increases the Projectile Damage Taken by Marked Enemies. You can also pick the Focal Point Ascendency Notable to boost its effect and Blind nearby foes. |
 |
Elemental Weakness - With Heatshiver, you will deal extra Fire Damage, so you will need to lower all Resistances. If you don't use this Helmet, the Frostbite is slightly better. |
 |
Arcanist Brand - All the linked Spells will be cast with a single press of a button with Arcanist Brand. |
| [UTILITY] Automation setup | |
 |
Immortal Call - lowers incoming Damage for a few seconds. It is the only Guard Skill that performs well without lots of Strength. |
 |
Detonate Mines - as the name suggests, this Skill is used to trigger your Mines once they are armed and ready to fire. |
 |
Automation - triggers linked Instant Skills as soon as they are ready to be used. |
| [UTILITY] Bear Trap setup | |
 |
Bear Trap - a Trap Skill that applies a powerful Debuff that increases all Trap and Mine Damage taken by caught enemies. |
 |
More Duration Support |
|
|
6. Gear Setup
The Build can utilise many Unique Items, but none of them is truly mandatory for functionality. It is a Cold Spell with an Aura tag, which allows you to very efficiently raise your Skill levels via cheaper methods, such as March of the Legion Boots or cheap Corruption outcomes on the Victario's Influence Armour. You will still need the usual Spell Damage and Crit modifiers, supplemented by Mine Throwing Speed, which is mostly sourced from Cluster Jewels. Your defense stems from high maximum Life, Evasion Rating, and Suppression Chance. Make sure to reach total Ailment Immunity.
|
Stat priorities on items:
|
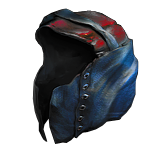 (Helmet) Heatshiver - this Helmet grants you up to 60% Extra Fire Damage, given you can Freeze your Enemies, which you should achieve with no problems. (Helmet) Heatshiver - this Helmet grants you up to 60% Extra Fire Damage, given you can Freeze your Enemies, which you should achieve with no problems. |
|
| (80-100)% increased Evasion Rating 60% increased Mana Regeneration Rate +(20-30)% to Fire Resistance +(20-30)% to Cold Resistance Gain 1% of Cold Damage as Extra Fire Damage per 1% Chill Effect on Enemy Gain 30% of Cold Damage as Extra Fire Damage against Frozen Enemies |
|
 (Weapon) Divinarius - a simple option that grants tons of Spell Damage and Critical Strike Multiplier. Since all your Damage is dealt by Mines, you do not get benefits from on-kill effects. (Weapon) Divinarius - a simple option that grants tons of Spell Damage and Critical Strike Multiplier. Since all your Damage is dealt by Mines, you do not get benefits from on-kill effects. |
|
| (40-45)% increased Global Critical Strike Chance (150-200)% increased Spell Damage Gain (100-200) Life per Enemy Killed Gain (50-100) Mana per Enemy Killed 30% increased Area of Effect (200-250)% increased Critical Strike Chance for Spells if you've Killed Recently +(60-100)% to Critical Strike Multiplier for Spells if you haven't Killed Recently |
|
 (Weapon) Rare Wands or Scepters - a rare Wand can provide tons of Spell Damage, Critical Strikes, and raise your Skill levels. You should use a Crafting Bench to improve your Mine Throwing Speed as well. (Weapon) Rare Wands or Scepters - a rare Wand can provide tons of Spell Damage, Critical Strikes, and raise your Skill levels. You should use a Crafting Bench to improve your Mine Throwing Speed as well. |
|
| Min. requirements: 80% Increased Spell/Cold Damage +1 to level of all Cold Spell Skill Gems 100% increased Spell Critical Strike Chance Optional affixes: #% to Global Critical Strike Multiplier +1 to level of all Skill Gems % increased Mine Throwing Speed |
|
 (Off-hand) Rare Shield - you will need a Rare Shield to cap your Ailment Avoidance. It should also provide high Block, Evasion, and Suppression. You can get a bit of Damage via Critical Strike Chance for Spells. (Off-hand) Rare Shield - you will need a Rare Shield to cap your Ailment Avoidance. It should also provide high Block, Evasion, and Suppression. You can get a bit of Damage via Critical Strike Chance for Spells. |
|
| Min. requirements: 30% chance to Avoid Elemental Ailments +20% chance to Suppress Spell Damage 100% increased Spell Critical Strike Chance Optional affixes: % increased Chance to Block % Chance to Block Spell Damage +# to maximum Life |
|
 (Body Armour) Victario's Influence - This is where you can socket your main Icicle setup. Mines count as Aura Gems, so this Body Armour will increase their Gem Level. You can also Corrupt it since it's an inexpensive Armour; some of the Corrupted Implicits are great. (Body Armour) Victario's Influence - This is where you can socket your main Icicle setup. Mines count as Aura Gems, so this Body Armour will increase their Gem Level. You can also Corrupt it since it's an inexpensive Armour; some of the Corrupted Implicits are great. |
|
| +1 to Level of Socketed Aura Gems Socketed Gems are Supported by Level 30 Generosity Socketed Gems have 45% increased Reservation Efficiency (120-150)% increased Evasion and Energy Shield (20-40)% increased Area of Effect of Aura Skills (10-15)% increased effect of Non-Curse Auras from your Skills |
|
 (Boots) Rare Boots - your Boots should always improve your Movement Speed. They can also grant you Ailment Avoidance via Eldritch Implicits and Crafted Modifier. Other than that, look for usual defensive mods. (Boots) Rare Boots - your Boots should always improve your Movement Speed. They can also grant you Ailment Avoidance via Eldritch Implicits and Crafted Modifier. Other than that, look for usual defensive mods. |
|
| Min. requirements: 30% increased Movement Speed +80% to Elemental Resistances +100 to Maximum Life Optional affixes: #% chance to Avoid Elemental Ailments +#% chance to Suppress Spell Damage Regenerate # Life per second |
|
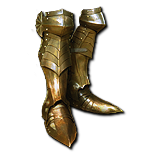 (Boots) March of the Legion - It is where you can socket your main setup. As was the case with Victario's Influence, these will increase the Gem Level of your Mines by up to 5, which is a lot. You can use only 3 Support Gems, so it's not as good as a six-link despite the extra Levels for Icicle Mine, but you will definitely use it for leveling. (Boots) March of the Legion - It is where you can socket your main setup. As was the case with Victario's Influence, these will increase the Gem Level of your Mines by up to 5, which is a lot. You can use only 3 Support Gems, so it's not as good as a six-link despite the extra Levels for Icicle Mine, but you will definitely use it for leveling. |
|
| +(3-5) to Level of Socketed Aura Gems Socketed Gems are Supported by Level 25 Divine Blessing (250-300)% increased Armour and Energy Shield +(12-18)% to all Elemental Resistances (20-30)% increased Movement Speed |
|
 (Gloves) Rare Gloves - at first keep it simple with the usual defensive modifiers. Later on, you should include a special Temple modifier to boost your Damage against Chilled Enemies, and add Eldritch Implicits for Unnerve and Exposure Debuffs. (Gloves) Rare Gloves - at first keep it simple with the usual defensive modifiers. Later on, you should include a special Temple modifier to boost your Damage against Chilled Enemies, and add Eldritch Implicits for Unnerve and Exposure Debuffs. |
|
| Min. requirements: +100 to Maximum Life +80% to Elemental Resistances Optional affixes: #% chance to Unnerve Enemies for 4 seconds on Hit Inflict Cold Exposure on Hit, applying -#% to Cold Resistance #% increased Damage with Hits against Chilled Enemies % increased Damage during any Flask Effect |
|
 (Belt) The Arkhon's Tools - improves your Reservation Efficiency and Throwing Speed, as well as adds Scortching Debuff to your Skitterbots and increases the Effect of all Ailments they inflict. Those bonuses are very hard to obtain elsewhere. (Belt) The Arkhon's Tools - improves your Reservation Efficiency and Throwing Speed, as well as adds Scortching Debuff to your Skitterbots and increases the Effect of all Ailments they inflict. Those bonuses are very hard to obtain elsewhere. |
|
| (15-25)% increased Stun and Block Recovery +(20-30) to Dexterity and Intelligence (10-20)% increased Mana Reservation Efficiency of Skills (15-25)% increased Trap and Mine Throwing Speed Summon Skitterbots also summons a Scorching Skitterbot Summoned Skitterbots' Auras affect you as well as Enemies (50-75)% increased Effect of Non-Damaging Ailments inflicted by Summoned Skitterbots |
|
 (Amulet) Replica Dragonfang's Flight - the best Amulet for most Spell users, it provides a large amount of Damage via additional Skill levels but also improves your Reservation Efficiency and eases the Attribute Requirements. (Amulet) Replica Dragonfang's Flight - the best Amulet for most Spell users, it provides a large amount of Damage via additional Skill levels but also improves your Reservation Efficiency and eases the Attribute Requirements. |
|
| +(10-16) to all Attributes +3 to Level of all <Random Skill> Gems +(5-10)% to all Elemental Resistances (5-10)% increased Reservation Efficiency of Skills Items and Gems have (10-5)% reduced Attribute Requirements |
|
 (Amulet) The Pandemonius - at first you can use this Amulet to inflict Blind and Penetrate Cold Resistance on your Enemies. It is not very good, but its price makes it a worthy pick during the first days of your journey. (Amulet) The Pandemonius - at first you can use this Amulet to inflict Blind and Penetrate Cold Resistance on your Enemies. It is not very good, but its price makes it a worthy pick during the first days of your journey. |
|
| +(20-30) to Dexterity (20-30)% increased Cold Damage +(35-40)% to Cold Resistance Chill Enemy for 1 second when Hit, reducing their Action Speed by 30% Blind Chilled Enemies on Hit Damage Penetrates 20% Cold Resistance against Chilled Enemies |
|
 (Ring) The Taming - you will apply 5 Ailment types, which makes this Ring insanely valuable. You should raise the Damage bonus even further with Elemental Catalysts. It also provides tons of Elemental Resistance, making it easier to gear up. (Ring) The Taming - you will apply 5 Ailment types, which makes this Ring insanely valuable. You should raise the Damage bonus even further with Elemental Catalysts. It also provides tons of Elemental Resistance, making it easier to gear up. |
|
| +(8-10)% to all Elemental Resistances (30-40)% increased Elemental Damage with Hits and Ailments for each type of Elemental Ailment on Enemy +(20-30)% to all Elemental Resistances 10% chance to Freeze, Shock and Ignite |
|
 (Ring) Profane Proxy - you can use this Ring to apply your Curse automatically. Keep in mind it doesn't pair well with the Bonechill Setup, so you should use it only in the early progression while you don't have enough Mana Reservation for it anyway. (Ring) Profane Proxy - you can use this Ring to apply your Curse automatically. Keep in mind it doesn't pair well with the Bonechill Setup, so you should use it only in the early progression while you don't have enough Mana Reservation for it anyway. |
|
| Has 1 Socket +3 to Level of Socketed Curse Gems +(20-30)% to Cold Resistance +(20-30)% to Lightning Resistance Left Ring Slot: Your Chilling Skitterbot's Aura applies Socketed Hex Curse instead Right Ring Slot: Your Shocking Skitterbot's Aura applies Socketed Hex Curse instead |
|
 (Ring) Rare Rings - during the early progression, simply pick Rings with defensive modifiers. The more expensive variants should include Critical Strike Multiplier or Minimum Endurance Charges, but it shouldn't be your final choice. (Ring) Rare Rings - during the early progression, simply pick Rings with defensive modifiers. The more expensive variants should include Critical Strike Multiplier or Minimum Endurance Charges, but it shouldn't be your final choice. |
|
| Min. requirements: 80 Maximum Life +50% Total Elemental Resistances Optional affixes: Chaos Resistance Attributes +1 to Minimum Endurance Charge |
|
 (Jewel) Rare Jewels - your Jewels should provide you with tons of Critical Strike Multiplier and improve your maximum Life. Alternatively, they can improve your Reservation Efficiency or speed up your Mine Throwing. (Jewel) Rare Jewels - your Jewels should provide you with tons of Critical Strike Multiplier and improve your maximum Life. Alternatively, they can improve your Reservation Efficiency or speed up your Mine Throwing. |
|
| Recommended affixes: Maximum Life Mana Reservation Efficiency Critical Strike Multiplier % increased Mine Throwing Speed |
|
 (Jewel) Large Cluster Jewel - We recommend getting two of these Cluster Jewels at some point. Aim to have one Blast-Freeze to proliferate Freeze, and Blanketed Snow to Penetrate Cold Resistances. (Jewel) Large Cluster Jewel - We recommend getting two of these Cluster Jewels at some point. Aim to have one Blast-Freeze to proliferate Freeze, and Blanketed Snow to Penetrate Cold Resistances. |
|
| Recommended affixes: 1 Added Passive Skill is Blanketed Snow 1 Added Passive Skill is Disorienting Display 1 Added Passive Skill is Blast-Freeze 1 Added Passive Skill is Prismatic Heart |
|
 (Jewel) Medium Cluster Jewel - the Expert Sabotage and Guerilla Tactics are the best combination, but you can also include Surprise Sabotage. Try to get a bit of extra Attributes or Resistances on small Passives. (Jewel) Medium Cluster Jewel - the Expert Sabotage and Guerilla Tactics are the best combination, but you can also include Surprise Sabotage. Try to get a bit of extra Attributes or Resistances on small Passives. |
|
| Recommended affixes: 1 Added Passive Skill is Expert Sabotage 1 Added Passive Skill is Guerilla Tactics 1 Added Passive Skill is Surprise Sabotage |
|
 (Jewel) Lethal Pride - it is used mostly to gain tons of Strength to satisfy your Attribute Requirements, but it can also provide a bit of extra Life or Double Damage Chance. (Jewel) Lethal Pride - it is used mostly to gain tons of Strength to satisfy your Attribute Requirements, but it can also provide a bit of extra Life or Double Damage Chance. |
|
| Commanded leadership over (10000-18000) warriors under (Akoya-Kaom-Rakiata) Passives in radius are Conquered by the Karui Historic |
|
 (Jewel) Light of Meaning - you can use this Jewel to improve your Cold Damage by a great bit, but getting Chaos Resistance will usually be more useful to have in the endgame. (Jewel) Light of Meaning - you can use this Jewel to improve your Cold Damage by a great bit, but getting Chaos Resistance will usually be more useful to have in the endgame. |
|
| Passive Skills in Radius also grant +4% to Chaos Resistance Passive Skills in Radius also grant 6% increased Cold Damage |
|
 (Jewel) Ancestral Vision - this Jewel improves your Ailment Avoidance based on your Suppression Chance, which you should stack up anyway. It is very hard to reach the cap without it. (Jewel) Ancestral Vision - this Jewel improves your Ailment Avoidance based on your Suppression Chance, which you should stack up anyway. It is very hard to reach the cap without it. |
|
| +(5-10) to Dexterity Modifiers to Chance to Suppress Spell Damage also apply to Chance to Avoid Elemental Ailments at 50% of their Value |
|
 (Jewel) Watcher's Eye - try to combine at least one useful offensive and defensive modifier for your Auras, depending on your budget and Aura Setup. (Jewel) Watcher's Eye - try to combine at least one useful offensive and defensive modifier for your Auras, depending on your budget and Aura Setup. |
|
| (4-6)% increased maximum Energy Shield (4-6)% increased maximum Life (4-6)% increased maximum Mana <Two or Three random aura modifiers> Critical Strikes Penetrate (8-10)% of Enemy Elemental Resistances while affected by Zealotry +(30-50)% to Chaos Resistance while affected by Purity of Elements +(5-8)% chance to Evade Attack Hits while affected by Grace +(12-15)% chance to Suppress Spell Damage while affected by Grace (10-15)% increased Movement Speed while affected by Grace |
|
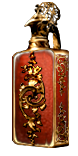
 (Flask) Bottled Faith - Bottled Faith is pricey, but a lot of builds use it due to the Critical Strike Chance and Damage. Consecrated Ground reduces Curses' Effect and Regenerates your Life. (Flask) Bottled Faith - Bottled Faith is pricey, but a lot of builds use it due to the Critical Strike Chance and Damage. Consecrated Ground reduces Curses' Effect and Regenerates your Life. |
|
| 40% increased Damage Creates Consecrated Ground on Use (30-15)% reduced Duration Consecrated Ground created by this Flask has Tripled Radius Consecrated Ground created during Effect applies (7-10)% increased Damage taken to Enemies (100-150)% increased Critical Strike Chance against Enemies on Consecrated Ground during Effect |
|
|
Suggested Flasks:
|
|
    |
| Alternative Endgame Lifestacker setup | |
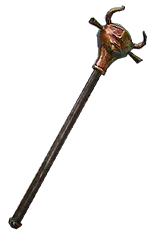 (Weapon) Rare Sceptre - a powerful source of Gem Levels, Spell Damage, Critical Strike Multiplier, and Mine Throwing Speed. Prioritise high Spell Damage and +1 to Cold or all Spell Skill Gems, while additional Spell Critical Strike Chance and another Gem Level provide strong Endgame upgrades. (Weapon) Rare Sceptre - a powerful source of Gem Levels, Spell Damage, Critical Strike Multiplier, and Mine Throwing Speed. Prioritise high Spell Damage and +1 to Cold or all Spell Skill Gems, while additional Spell Critical Strike Chance and another Gem Level provide strong Endgame upgrades. |
|
| Min. requirements: 80% Increased Spell +1 to level of all Cold Spell Skill Gems/All Spell Skill Gems 25% to Global Critical Strike Multiplier 15% increased Mine Throwing Speed Optional affixes: 100% increased Spell Critical Strike Chance +1 to level of all Skill Gems |
|
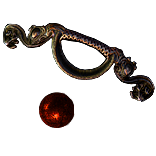 (Shield) Rathpith Globe - one of the core items of the Lifestacking setup, converting our massive Maximum Life pool directly into Spell Damage and Spell Critical Strike Chance. The Life sacrifice from casting Spells is an important part of the setup. Note that in 3.29 the Life-based Damage and Critical Strike modifiers were reduced to 3% per 100 Maximum Life. (Shield) Rathpith Globe - one of the core items of the Lifestacking setup, converting our massive Maximum Life pool directly into Spell Damage and Spell Critical Strike Chance. The Life sacrifice from casting Spells is an important part of the setup. Note that in 3.29 the Life-based Damage and Critical Strike modifiers were reduced to 3% per 100 Maximum Life. |
|
| (10—15)% Chance to Block Spell Damage (120—160)% increased Energy Shield 10% increased maximum Life Sacrifice 10% of your Life when you Use or Trigger a Spell Skill 3% increased Spell Critical Strike Chance per 100 Player Maximum Life 3% increased Spell Damage per 100 Player Maximum Life |
|
 (Shield) Shroud of the Lightless - the foundation of our Abyss Jewel stacking strategy, providing an Abyssal Socket and scaling Maximum Life, Mana, and Elemental Penetration with every Abyss Jewel affecting you. The more powerful Abyss Jewels you equip, the stronger this Armour becomes, making it a perfect fit for the build's Lifestacking approach. (Shield) Shroud of the Lightless - the foundation of our Abyss Jewel stacking strategy, providing an Abyssal Socket and scaling Maximum Life, Mana, and Elemental Penetration with every Abyss Jewel affecting you. The more powerful Abyss Jewels you equip, the stronger this Armour becomes, making it a perfect fit for the build's Lifestacking approach. |
|
| Has 1 Abyssal Sockets 20% chance to Trigger Level 20 Shade Form when you Use a Socketed Skill (160—180)% increased Evasion and Energy Shield 3% increased Maximum Life per Abyss Jewel affecting you 3% increased Maximum Mana per Abyss Jewel affecting you Penetrate 4% Elemental Resistances per Abyss Jewel affecting you |
|
 (Helmet) Archdemon Crown - a powerful offensive Helmet for the build, providing a large amount of Maximum Life while granting our socketed Mines built-in Trap and Mine Damage and Hypothermia Supports. Additional +1 to AoE Gems is a valuable upgrade, while the 30% More Elemental Damage modifier from Horror Essence can provide a significant boost to our overall Damage. (Helmet) Archdemon Crown - a powerful offensive Helmet for the build, providing a large amount of Maximum Life while granting our socketed Mines built-in Trap and Mine Damage and Hypothermia Supports. Additional +1 to AoE Gems is a valuable upgrade, while the 30% More Elemental Damage modifier from Horror Essence can provide a significant boost to our overall Damage. |
|
| Min. requirements: +120 to Maximum Life Socketed Gems are supported by level 16 Trap and Mine Damage Socketed Gems are supported by level 16 Hypothermia Optional affixes: +1 to level of socketed AoE Gems Socketed Gems deal 30% more Elemental Damage |
|
 (Gloves) Rare Gloves - at first keep it simple with the usual defensive modifiers. Later on, you should include a special Temple modifier to boost your Damage against Chilled Enemies, and add Eldritch Implicits for Unnerve and Exposure Debuffs. Just like in the default setup, but prioritise Life. (Gloves) Rare Gloves - at first keep it simple with the usual defensive modifiers. Later on, you should include a special Temple modifier to boost your Damage against Chilled Enemies, and add Eldritch Implicits for Unnerve and Exposure Debuffs. Just like in the default setup, but prioritise Life. |
|
| Min. requirements: +120 to Maximum Life +80% to Elemental Resistances Optional affixes: #% chance to Unnerve Enemies for 4 seconds on Hit Inflict Cold Exposure on Hit, applying -#% to Cold Resistance #% increased Damage with Hits against Chilled Enemies % increased Damage during any Flask Effect |
|
| (Boots) Rare Boots - your Boots should always improve your Movement Speed. They should ideally also have 1 Abyssal Socket so we can fit one more Abyss Jewel for our setup. |
|
| Min. requirements: 30% increased Movement Speed Has 1 Abyssal Socket +40% to Elemental Resistances +120 to Maximum Life Optional affixes: +#% chance to Suppress Spell Damage Regenerate # Life per second Elemental Resistances Evasion |
|
| (Belt) The Arkhon's Tools - improves your Reservation Efficiency and Throwing Speed, as well as adds Scortching Debuff to your Skitterbots and increases the Effect of all Ailments they inflict. Those bonuses are very hard to obtain elsewhere. |
|
| (15-25)% increased Stun and Block Recovery +(20-30) to Dexterity and Intelligence (10-20)% increased Mana Reservation Efficiency of Skills (15-25)% increased Trap and Mine Throwing Speed Summon Skitterbots also summons a Scorching Skitterbot Summoned Skitterbots' Auras affect you as well as Enemies (50-75)% increased Effect of Non-Damaging Ailments inflicted by Summoned Skitterbots |
|
 (Amulet) Rare Amulet - provides a combination of Gem Levels, Critical Strike Multiplier, Maximum Life, and Attributes, making it an important offensive and defensive upgrade. Prioritise +1 to Cold or All Skill Gems, high Life, and Attributes, with additional Resistances being useful if needed (Amulet) Rare Amulet - provides a combination of Gem Levels, Critical Strike Multiplier, Maximum Life, and Attributes, making it an important offensive and defensive upgrade. Prioritise +1 to Cold or All Skill Gems, high Life, and Attributes, with additional Resistances being useful if needed |
|
| Min. requirements: +30% to Global Critical Strike Multiplier +120 to Maximum Life +1 to level of All Cold Skill Gems/All Skill Gems +40 Attributes Optional affixes: +1 to level of All Cold Skill Gems/All Skill Gems Attributes Elemental Resistances |
|
 (Amulet) Vermillion Ring - both Rings should ideally be Vermillion Rings to maximise our Maximum Life, which directly scales our Damage through Rathpith Globe. Look for high Life and Attributes, while Redeemer-influenced Rings are preferred for additional modifiers and further Damage scaling. (Amulet) Vermillion Ring - both Rings should ideally be Vermillion Rings to maximise our Maximum Life, which directly scales our Damage through Rathpith Globe. Look for high Life and Attributes, while Redeemer-influenced Rings are preferred for additional modifiers and further Damage scaling. |
|
|
Min. requirements: |
|
 (Jewel) Hypnotic Eye Jewel - a valuable Abyss Jewel that provides a combination of Maximum Life, Critical Strike Multiplier, and Flat Spell Damage, further scaling both our Damage and Life-based mechanics. Chance to Avoid being Poisoned is also useful for improving our overall defensive reliability. Socket similar Abyss Jewels everywhere you can. (Jewel) Hypnotic Eye Jewel - a valuable Abyss Jewel that provides a combination of Maximum Life, Critical Strike Multiplier, and Flat Spell Damage, further scaling both our Damage and Life-based mechanics. Chance to Avoid being Poisoned is also useful for improving our overall defensive reliability. Socket similar Abyss Jewels everywhere you can. |
|
| Recommended affixes: Maximum Life Critical Strike Multiplier Added Flat Spell Damage Chance to Avoid being Poisoned |
|
| (Jewel) Large Cluster Jewel - we recommend getting two of these Cluster Jewels and later 3 to fit additional Abyss Jewels. Aim to have one Blast-Freeze to proliferate Freeze, and Blanketed Snow to Penetrate Cold Resistances. |
|
| Recommended affixes: 1 Added Passive Skill is Blanketed Snow 1 Added Passive Skill is Disorienting Display 1 Added Passive Skill is Blast-Freeze 1 Added Passive Skill is Prismatic Heart |
|
| (Jewel) Medium Cluster Jewel - the Expert Sabotage and Guerilla Tactics are the best combination, but you can also include Surprise Sabotage. Try to get a bit of extra Life, Attributes or Resistances on small Passives. |
|
| Recommended affixes: 1 Added Passive Skill is Expert Sabotage 1 Added Passive Skill is Guerilla Tactics 1 Added Passive Skill is Surprise Sabotage |
|
 (Jewel) Dissolution of the Flesh - a core part of the Lifestacking setup, removing Energy Shield and causing Damage taken to reserve Life instead. Its increased Maximum Life is especially valuable, as it directly scales our Damage through Rathpith Globe. (Jewel) Dissolution of the Flesh - a core part of the Lifestacking setup, removing Energy Shield and causing Damage taken to reserve Life instead. Its increased Maximum Life is especially valuable, as it directly scales our Damage through Rathpith Globe. |
|
| Removes all Energy Shield Life that would be lost by taking Damage is instead Reserved until you take no Damage to Life for 2 seconds (20—30)% more Maximum Life |
|
 (Jewel) Stormshroud - provides a way to become immune to all Elemental Ailments by stacking enough Chance to Avoid being Shocked. This is particularly important with The Arkhon's Tools, helping us stay safe and consistent during difficult encounters. (Jewel) Stormshroud - provides a way to become immune to all Elemental Ailments by stacking enough Chance to Avoid being Shocked. This is particularly important with The Arkhon's Tools, helping us stay safe and consistent during difficult encounters. |
|
| +(10—15)% to Lightning Resistance Modifiers to Chance to Avoid being Shocked apply to all Elemental Ailments |
|
 (Jewel) Impossible Escape - allows us to allocate powerful Passive Skills within the Ghost Reaver radius without needing to connect them to our Passive Tree. This provides efficient access to valuable notables while saving Passive Points for other parts of the build. (Jewel) Impossible Escape - allows us to allocate powerful Passive Skills within the Ghost Reaver radius without needing to connect them to our Passive Tree. This provides efficient access to valuable notables while saving Passive Points for other parts of the build. |
|
| Passive Skills in Radius of Ghost Reaver can be Allocated without being connected to your tree Passage |
Final Skill Tree:
123 Points Final Passive Tree (Lifestacking Endgame Setup)
|
|
If you have any other build requests please leave that in the comments below. We are always open to suggestions and constructive feedback.
Pictures used in this article are the intellectual property of Grinding Gear Games.
