Shockwave Totem Hierophant Build
A Lightning Conversion Build that uses Astral Projector to increase the damage and AoE of your Shockwave Totems Shockwave Totem
Hierophant build
Updated for Patch 3.28
The Best Crafty Guides by Odealo
| Guide notes | |||
| February 27, 2026 -Updated for Patch 3.28 |
|||
| Build overview | |||
| Tags: [TOTEM] [ELEMENTAL] [LIFE] | |||
|
Budget: Defenses: |
|
Boss DPS: AoE: |
|
Shockwave Totem is one of the simplest Totem Skills in the game. It summons a Totem that deals Physical Spell Damage in the form of a Nova around it. As it is common for most of the Totem builds, the best choice is to pick the Hierophant Class with Pursuit of Faith and Ritual Awakening - two immensely beneficial Totem Ascendancy Keystones. Another Hierophant's Passives worth picking are Conviction of Power for extra permanent Charges and Arcane Blessing to get a 100% uptime Arcane Surge buff. The build is very simple and offers a lot of elbow room when putting it together.
The Shockwave Totem initially deals Physical Damage, but after conversion, it should be pure Cold Damage, with Extra Damage of other Elements granted by certain Unique Items, such as Balance of Terror Jewel. Chilling and Freezing enemies is also a powerful defensive bonus, but you will also be able to apply powerful Shocks once you equip the Yoke of Suffering. Astral Projector Ring has a big impact on the build playstyle, as it causes your Totems to create a Nova directly on top of enemies. It can be played without it, but the built-in knockback makes it quite annoying.
Freeze is not your only way of survival. On top of a decent Health pool, which easily reaches 4 to 5k, you will have a lot of Energy Shield and tons of Regeneration for both resources. Your biggest defense is the Totems themselves - not taking the Hits directly is the greatest form of mitigation available in the game.
You can also find our other Path of Exile builds right over here Odealo's Crafty Guides - Full List
1. Gameplay
It's a default Totem build - you have to place Totems ahead of you, these will target and kill enemies with a little help from Astral Projector. There is a bit more to do during boss encounters, as you will have to cast your Curses once. Other than that, you just have to move around using Shield Charge and Frostblink.
|
|
|
|

2. Build's PROS & CONS
| PROS |
|
| CONS |
|
3. Leveling tips
We recommend starting with an Elemental Spell Totem, Holy Flame Totem is a perfect candidate as it's available since level 4. You can reach 100% Physical Conversion by equipping Hrimsorrows, which are your end-game Gloves anyway. Continue leveling with Holy Flame Totem until you reach level 40, which is the minimum level to equip the Astral Projector, then you can switch to Shockwave Totems. You can also use it right at level 28, but you will have to play around the knockback more.
For more in-depth tips for leveling with this build you can check out our Leveling Guide using Totems
Bandits:
We recommend killing all the Bandits for one additional Passive Point or helping Alira to ease progression.
4. Final Skill Tree, Ascendancy Points, and Pantheon
Final Skill Tree:
107 Points Final Skill Tree (doesn't include Unique or Cluster Jewels)
122 Points Path of Building (PoB) link
Ascendancy points:
Preferably in that order:
- Pursuit of Faith
- Ritual Awakening
- Conviction of Power
- Arcane Blessing
Pantheon:
Major God: Soul of Arakaali: 10% reduced Damage taken from Damage Over Time, Debuffs on you expire 20% faster
Minor God: Soul of Ralakesh: 25% reduced Physical Damage over Time taken while moving, Moving while Bleeding doesn't cause you to take extra Damage
5. Final Gems links
| [DPS] Shockwave Totem setup | |
 |
Shockwave Totem - It's your main DPS Skill. A Totem that casts a Nova Spell dealing Physical Damage in the targeted area. It has low Added Damage Effectiveness but very good Cast Speed. |
 |
Multiple Totems Support |
 |
Cold Penetration Support |
 |
Increased Critical Damage Support - |
 |
Concentrated Effect Support |
 |
Empower Support |
| [UTILITY] Aura setup | |
 |
Zealotry - an Aura that increases Critical Strike Chance for Spells and grants more Spell Damage. Unfortunately, Totems cannot create Consecrated Ground. |
 |
Hatred - grants a lot of Extra Cold Damage and enables powerful Watcher's Eye modifiers. |
 |
Herald of Purity - improves your Physical Damage with Spells and Attacks. |
 |
Enlighten Support |
| [UTILITY] Curse setup | |
 |
Elemental Weakness - lowers all Elemental Resistances of affected foes. Use it manually to activate the Balance of Terror boons. |
 |
Faster Casting Support |
| [UTILITY] CwDT setup | |
 |
Assassin Mark - You have increased Critical Strike and Multiplier against the Marked enemy. |
 |
Frost Shield - absorbs incoming Damage and significantly boosts your Critical Strike Chance. |
 |
Summon Lightning Golem - greatly improves your Cast Speed. |
 |
Cast when Damage Taken Support - automates your utility Spells but it is less reliable. You can also opt for the Trigger when Focused modifier on your Helmet instead. |
| [UTILITY] Guard setup | |
 |
Immortal Call - a Guard Skill that reduces the Damage you take during its duration. You can also opt for the Steelskin that provides large absorption instead. |
|
Cast when Damage Taken Support |
| [MOBILITY] Shield Charge setup | |
 |
Shield Charge - performs a charge that scales very well with your Movement Speed and Attack Speed. |
 |
Faster Attacks Support |
| [MOBILITY] Flame Dash | |
 |
Frostblink - a simple Movement Spell that allows you to skip terrain gaps. |
|
|
5. Gear Setup
What you're looking for is primarily the Critical Strike Chance and Multiplier for Spells, Cast Speed, Increased or Added Spell, Elemental, or Physical Damage, and the Gem Level of Shockwave Totem. There are plenty of cheap Unique Items that provide amazing DPS boosts, such as Heatshiver or Yoke of Suffering. The Magnate also provides an excellent Damage boost, but puts a heavy strain on your Attribute Requirements. There are 3 ways to convert to pure Cold Damage, and using Hrimsorrows is by far the cheapest and easiest. Using Rare Gloves for that purpose yields better results, but dramatically increases the costs. You can mix them with Watcher Eye's Cold Conversion modifier, but both ways are quite costly. As for the defensives, aim mostly for high Maximum Life, Resistances, and some Evasion with Spell Suppression bases.
|
Stat priorities on items:
|
 (Helmet) Heatshiver - You simply can't get a better Helmet on a Cold-based Build. You can get up to 60% of your Cold Damage as Extra Fire Damage if you can Freeze your opponents reliably. (Helmet) Heatshiver - You simply can't get a better Helmet on a Cold-based Build. You can get up to 60% of your Cold Damage as Extra Fire Damage if you can Freeze your opponents reliably. |
|
| (80-100)% increased Evasion Rating 60% increased Mana Regeneration Rate +(20-30)% to Fire Resistance +(20-30)% to Cold Resistance Gain 1% of Cold Damage as Extra Fire Damage per 1% Chill Effect on Enemy Gain 30% of Cold Damage as Extra Fire Damage against Frozen Enemies |
|
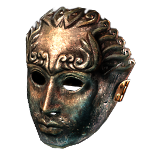 (Helmet) Rare Helmet - you can also choose to pick a more defensive approach by wearing a Helmet that provides basic necessities. It can also automate your utility Skills. (Helmet) Rare Helmet - you can also choose to pick a more defensive approach by wearing a Helmet that provides basic necessities. It can also automate your utility Skills. |
|
| Min. requirements: +100 to maximum Life +60% to Elemental Resistances Optional affixes: Chaos Resistance % chance to Suppress Spell Damage Trigger Socketed Spells when you Focus, with a 0.25 second Cooldown |
|
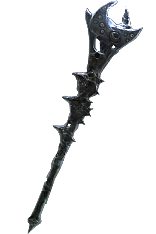 (Weapon) Rare Wand or Sceptre - The best weapon should have two modifiers increasing the Gem Level of your Shockwave Totem and some other offensive mods such as Increased Spell or Elemental Damage, Cast Speed, or Critical Strike Chance and Multiplier. (Weapon) Rare Wand or Sceptre - The best weapon should have two modifiers increasing the Gem Level of your Shockwave Totem and some other offensive mods such as Increased Spell or Elemental Damage, Cast Speed, or Critical Strike Chance and Multiplier. |
|
| Min. requirements: +1 to Level of all Spell or Physical Skill Gems increased Spell or Elemental Damage 20% increased Cast Speed Optional affixes: +1 to Level of all Spell or Physical Skill Gems Global Critical Strike Multiplier increased Critical Strike Chance for Spells |
|
 (Off-hand) Rare Shield - You will need a Shaper-influenced Base to get an Additional Summoned Totem Limit. Other than that, look for Cast Speed, Critical Strike for Spells, or more defensive modifiers such as maximum Life, Elemental Resistances, or Block Chance. (Off-hand) Rare Shield - You will need a Shaper-influenced Base to get an Additional Summoned Totem Limit. Other than that, look for Cast Speed, Critical Strike for Spells, or more defensive modifiers such as maximum Life, Elemental Resistances, or Block Chance. |
|
| Min. requirements: +1 to maximum number of Summoned Totems (Shaper's Prefix) Optional affixes: +1 to Level of all Physical Spell Skill Gems maximum Life Elemental Resistances increased Spell or Elemental Damage increased Critical Strike Chance for Spells |
|
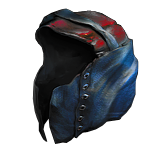
 (Body Armour) Doppelgänger Guise - the best defensive Armour that provides tons of Damage mitigation and solid Recovery. You can also switch to the offensive boost against Bosses if you are sure to avoid their attacks. (Body Armour) Doppelgänger Guise - the best defensive Armour that provides tons of Damage mitigation and solid Recovery. You can also switch to the offensive boost against Bosses if you are sure to avoid their attacks. |
|
| Grants Level 20 Unhinge Skill (40-60)% more Critical Strike Chance while Insane Enemies Killed by your Hits are destroyed while Insane (40-30)% less Physical and Chaos Damage Taken while Sane Regenerate 10% Life over one second when Hit while Sane |
|
 (Gloves) Hrimsorrow - The easiest way to convert your Damage into Cold. You can get useful Corrupted Implicits like Cast Speed or base Critical Strike Chance for Spells. (Gloves) Hrimsorrow - The easiest way to convert your Damage into Cold. You can get useful Corrupted Implicits like Cast Speed or base Critical Strike Chance for Spells. |
|
| +(20-30) to Strength +(40-50) to Evasion Rating +(20-30)% to Cold Resistance 100% of Physical Damage Converted to Cold Damage Reflects 100 Cold Damage to Melee Attackers |
|
 (Boots) Rare Boots - Boots should increase your Movement Speed, Life, and Resistances. You can also get Elemental Avoidance here, eventually leading to total Ailment immunity. (Boots) Rare Boots - Boots should increase your Movement Speed, Life, and Resistances. You can also get Elemental Avoidance here, eventually leading to total Ailment immunity. |
|
| Min. requirements: +60 to maximum Life 25% increased Movement Speed +60% to Elemental Resistances Optional affixes: Chaos Resistance % chance to Avoid Elemental Ailments % chance to Suppress Spell Damage |
|
 (Belt) Rare Belt - Try to get as much Maximum Life and Resistances as you can afford. There isn't much to look for so just focus on the basic mods. (Belt) Rare Belt - Try to get as much Maximum Life and Resistances as you can afford. There isn't much to look for so just focus on the basic mods. |
|
| Min. requirements: +100 maximum Life +70% to Total Elemental Resistances Optional affixes: increased Damage Life Regeneration increased Maximum Life Flask modifiers |
|
 (Amulet) Yoke of Suffering - This Amulet provides up to 50% increased Damage Taken on your enemies by allowing you to Shock, and another 10% for each Ailment you inflict. Its only downside is the lack of maximum Life. (Amulet) Yoke of Suffering - This Amulet provides up to 50% increased Damage Taken on your enemies by allowing you to Shock, and another 10% for each Ailment you inflict. Its only downside is the lack of maximum Life. |
|
| +(10-16) to all Attributes +(10-20)% to Fire Resistance +(10-20)% to Cold Resistance +(20-40)% to Lightning Resistance 30% reduced Duration of Ailments on Enemies (5-10)% chance to Shock Enemies take (5-10)% increased Damage for each type of Ailment you have inflicted on them Your Elemental Damage can Shock |
|
 (Amulet) Replica Dragonfang's Flight - It's quite good; the extra levels will result in tons of extra damage. Other modifiers here are obviously very useful as well. (Amulet) Replica Dragonfang's Flight - It's quite good; the extra levels will result in tons of extra damage. Other modifiers here are obviously very useful as well. |
|
| +(10-16) to all Attributes +3 to Level of all <Random Skill> Gems +(10-15)% to all Elemental Resistances (10-15)% increased Reservation Efficiency of Skills Items and Gems have (15-10)% reduced Attribute Requirements |
|
| Recommended Anointments: Charisma Whispers of Doom |
|
 (Ring) Rare Ring - Maximum Life and Elemental Resistances are the most important modifiers. You can also get offensive modifiers such as Cast Speed or Elemental Damage here. (Ring) Rare Ring - Maximum Life and Elemental Resistances are the most important modifiers. You can also get offensive modifiers such as Cast Speed or Elemental Damage here. |
|
| Min. requirements: +80 maximum Life +80% to Total Elemental Resistances Optional affixes: increased Cast Speed Attributes |
|
 (Ring) Astral Projector - It's one of the mandatory items, mostly because of its unique property, which makes your Nova Spells cast at the targeted location. Totem will aim automatically at the enemies, making it especially beneficial. (Ring) Astral Projector - It's one of the mandatory items, mostly because of its unique property, which makes your Nova Spells cast at the targeted location. Totem will aim automatically at the enemies, making it especially beneficial. |
|
| +(20-30)% to Lightning Resistance +(30-50) to Intelligence (20-25)% increased Spell Damage 30% chance to Avoid Elemental Ailments Nova Spells have 20% less Area of Effect Nova Spells deal 30% less Damage to Players Nova Spells Cast at the targeted location instead of around you |
|
 (Jewel) Watcher's Eye - Increased Cold Damage from Hatred is the best Damage boost here, but you can also use the Conversion one if you want to use Rare Gloves. (Jewel) Watcher's Eye - Increased Cold Damage from Hatred is the best Damage boost here, but you can also use the Conversion one if you want to use Rare Gloves. |
|
| (4-6)% increased maximum Energy Shield (4-6)% increased maximum Life (4-6)% increased maximum Mana <Two or Three random aura modifiers> |
|
 (Jewel) Rational Doctrine - this Jewel can provide you with massive Regeneration, which is very useful for Builds with no access to Leech. (Jewel) Rational Doctrine - this Jewel can provide you with massive Regeneration, which is very useful for Builds with no access to Leech. |
|
| You have Consecrated Ground around you while stationary if Strength is your highest Attribute 25% chance to create Profane Ground on Critical Strike if Intelligence is your highest Attribute Effects of Consecrated Ground you create Linger for 4 seconds Effects of Profane Ground you create Linger for 4 seconds |
|
  (Jewel) Forbidden Flesh & Flame - you can apply the benefits of the Consecrated Ground to your Energy Shield as well by borrowing the Pious Patch Notable. The Templar has many other useful modifiers to choose from as well. (Jewel) Forbidden Flesh & Flame - you can apply the benefits of the Consecrated Ground to your Energy Shield as well by borrowing the Pious Patch Notable. The Templar has many other useful modifiers to choose from as well. |
|
| Allocates <Random Ascendancy Notable> if you have the matching modifiers on Forbidden Flesh/Flame | |
 (Jewel) Militant Faith - this Jewel can provide 15% More Damage for free, as the Build has no access to Frenzy Charges anyway. (Jewel) Militant Faith - this Jewel can provide 15% More Damage for free, as the Build has no access to Frenzy Charges anyway. |
|
| Carved to glorify (2000-10000) new faithful converted by High Templar <Avarius • Dominus • Maxarius> Passives in radius are Conquered by the Templars Historic |
|
 (Jewel) The Balance of Terror - provides a massive boost to your overall Damage if you use the Elemental Weakness Curse every 10 seconds. (Jewel) The Balance of Terror - provides a massive boost to your overall Damage if you use the Elemental Weakness Curse every 10 seconds. |
|
| +(10-15)% to all Elemental Resistances Gain (30-40)% of Physical Damage as a Random Element if you've cast Elemental Weakness in the past 10 seconds |
|
 (Jewel) Rare Jewels - use your Rare Jewels to get some maximum Life and Resistances or Attributes if needed. Other than that, look for Critical Strike Multiplier for Spells. (Jewel) Rare Jewels - use your Rare Jewels to get some maximum Life and Resistances or Attributes if needed. Other than that, look for Critical Strike Multiplier for Spells. |
|
| Recommended affixes: increased maximum Life Attributes Resistances Cast Speed Critical Strike Multiplier |
|
 (Jewel) Large Cluster Jewel - Physical Damage modifiers are the best ones here, as they have significantly higher values than Elemental modifiers. (Jewel) Large Cluster Jewel - Physical Damage modifiers are the best ones here, as they have significantly higher values than Elemental modifiers. |
|
| Recommended affixes: 1 Added Passive Skill is Battle-Hardened 1 Added Passive Skill is Iron Breaker 1 Added Passive Skill is Furious Assault |
|
 (Jewel) Medium Cluster Jewel - Sleepless Sentries Notable will grant you a nearly permanent Onslaught Buff. Supplement it with any useful Totem Notable. For your second Cluster Jewel, use the Critical Strike one. (Jewel) Medium Cluster Jewel - Sleepless Sentries Notable will grant you a nearly permanent Onslaught Buff. Supplement it with any useful Totem Notable. For your second Cluster Jewel, use the Critical Strike one. |
|
| Recommended affixes: 1 Added Passive Skill is Basics of Pain 1 Added Passive Skill is Pressure Points 1 Added Passive Skill is Sleepless Sentries 1 Added Passive Skill is Snaring Spirits |
|
 (Flask) Bottled Faith - increases your Damage, Critical Strike Chance, and creates a massive Consecrated Ground. You can enchant it for Increased Effect since you need it only on Bosses. (Flask) Bottled Faith - increases your Damage, Critical Strike Chance, and creates a massive Consecrated Ground. You can enchant it for Increased Effect since you need it only on Bosses. |
|
| (30-15)% reduced Duration Consecrated Ground created by this Flask has Tripled Radius Consecrated Ground created during Effect applies (7-10)% increased Damage taken to Enemies (100-150)% increased Critical Strike Chance against Enemies on Consecrated Ground during Effect |
|
|
Other suggested Flasks:
|
|
    |
|
|
If you have any other build requests, please leave that in the comments below.
Pictures used in this article are the intellectual property of Grinding Gear Games.
