
Explosive Arrow Ballista Totem Elementalist Starter Build
Elementalist build that is widely considered to be the best Starters in Path of ExileExplosive Arrow Ballista Totem
Elementalist Build
Updated for Patch 3.24
The Best Crafty Guides by Odealo
| Guide notes | |||
| July 9, 2024 -Updated for Patch 3.24 |
|||
| Build overview | |||
| Tags: [TOTEM] [ELEMENTAL] [IGNITE] [LIFE] [STARTER] | |||
|
Budget: Defenses: |
|
Boss DPS: AoE: |
|
The Explosive Arrow is a Bow Attack that sticks the fired Arrow to an enemy and after a short delay, or after it reaches the maximum of 20 stacks of Arrows attached to a single target - it explodes dealing AoE Fire Damage, and all the remaining Explosive Arrows are consumed. The more stacks you have, the higher the damage of the Final Explosion is, so prioritizing the rate at which you can Attack is very important. The usual way to achieve it is to get more Attack Speed, but the most efficient way is to use multiple Ballista Totems. What you have to keep in mind is that you have approximately 1.6 seconds to apply 20 Stacks of Explosive Arrows before they Explode automatically - you can inflict only one instance of Ignite on the enemy, so you have to make sure it is the strongest one possible.
Elementalist is the go-to Ascendancy for Ignite builds - you have massively increased Ignite Damage and Chance to Ignite by Shaper of Flames, Mastermind of Discord, and Heart of Destruction. The Passives you want to allocate on your Passive Skill Tree are all over the place - you need Ancestral Bond on the top left, Dirty Techniques with Panopticon on the bottom, and somehow fit in the whole Large Cluster Jewel setup. You also use a lot of useful Keystones such as Elemental Overload, Elemental Equilibrium, or Magebane. The most important one is the Ancestral Bond Keystone which raises your Totem limit but disables your direct Damage. To inflict the Combustion Debuff which lowers the Fire Resistance of Ignited enemies you will have to use a Trap Skill which bypasses that restriction. On your Gear, you should get some generic defensive stats such as Life, Armour, and Spell Suppression. To get more Damage look for Attack Speed, Fire Damage over Time Multipliers, and Fire or Elemental Damage with Attack modifiers.
For patch, 3.24 we have adjusted item descriptions, Passkive Skill Tree, and Gem setups. We have added some cheap items to the list as this is supposed to be a starter build. There have been no major changes since 3.20.
You can also check our other Path of Exile builds right over here Odealo's Crafty Guides - Full List
1. Gameplay
Use your Totems to deal Ignite Damage - there is a small delay as you have to wait for Totems to start shooting and then for your Arrows to Explode. Apply a Flammability and Elemental Weakness Curse to lower Fire Resistance and use the Frenzy Attack from time to time to keep maximum Frenzy Charges. To apply Combustion against more resilient opponents use Traps that don't deal Fire Damage - for example, a Lightning Spire Trap. Use Auras such as Precision for more Accuracy Rating, and a combination of Grace with Determination for massive protection against Attacks. Malevolence increases your Ignite Damage and gives you more time to apply all 20 Stacks.
|
Full gameplay video: |
|
|
2. Build's PROS & CONS
| PROS |
|
| CONS |
|
3. Leveling tips
You will have to wait until Act 3 or even 4 before you should start using the Explosive Arrow Balistas, as without the Shaper of Flames Ascendency Notable you won't have much Ignite Chance. To start, you can simply use the Flame Wall and Freezing Pulse and level as a regular Spell Caster. Do not pick up the Ancestral Bond Keystone before you are fully ready for the transition. By that time, you should have plenty of Fire Damage, Maximum Life, and Damage over Time Multiplier Passives allocated on your Passive Tree. Use a very fast-hitting Bow, as all your Damage comes from the Explosive Arrow Gem itself.
You can also check out our Witch Leveling Guide using Ignite for more tips!
Suggested leveling Gem setups:
| Freezing Pulse setup | |
 |
Freezing Pulse - a very strong early-game Spell that deals Cold Damage and Pierces all enemies. It deals more Damage at a close distance. |
 |
Arcane Surge Support - grants a bit of Spell Damage and Mana Regeneration. |
 |
Added Cold Damage Support - adds plenty of Cold Damage for your Spells. |
 |
Controlled Destruction Support - grants a lot of Damage but basically disables Critical Strikes. |
| Flame Wall setup | |
 |
Flame Wall - inflict strong Burning debuff on enemies who pass through the Flame Wall, or are Hit by a Projectile that passed the Wall. |
 |
Arcane Surge Support - improves the Damage of Flame Wall. |
 |
Efficacy Support - improves the Damage and Duration of this Spell. |
 |
Controlled Destruction Support - improves the Damage of Flame Wall without any downside. |
| Explosive Arrow setup | |
 |
Explosive Arrow - Start using it after completing the Labirynth and link it with Ballistas after allocating the Ancestral Bond. |
 |
Ballista Totem Support - Explosive Arrows are fired by Ballistas. |
 |
Efficacy Support - increases your Damage over Time. |
 |
Faster Attacks Support - allows you to get more stacks which is one of the best ways to increase your DPS. |
 |
Deadly Ailments Support - lowers your Hit Damage but greatly improves your Ignite Damage. |
 |
Ignite Proliferation Support - improves your Damage and allows your Ignite to proliferate to nearby enemies. |
| Auras, Curses, and Flame Dash setup | |
 |
Flammability - Curse that lowers the Fire Resistance of your enemies |
 |
Determination - grants a lot of Flat Armour Rating which is hard to come by during the Leveling. |
 |
Flame Dash - instantly teleports you over a short distance |
Bandits:
Kill all three bandits for two additional Skill Points
Leveling Skill Trees:
38 Points Passive Tree
We recommend this order:
1) Arcanist Dominion (remove it later) 2) Ash, Frost and Storm 3) Constitution 4) Elemental Overload 5) Holy Fire 6) Acrimony 7) Sovereignty 8) Purity of Flesh
72 Points Passive Tree
We recommend this order:
1) Ancestral Bond 2) Totemic Zeal 3) Profane Chemistry 4) Panopticon 5) Dirty Techniques
Recommended leveling items:
 Le Heup of All - grants more Damage, Attributes, and Elemental Resistances. Le Heup of All - grants more Damage, Attributes, and Elemental Resistances. |
|
| Adds 1 to 4 Physical Damage to Attacks +(10-30) to all Attributes (10-30)% increased Damage (10-30)% increased Rarity of Items found +(10-30)% to all Elemental Resistances |
|
 Goldrim - a Helmet to give you tons of Elemental Resistances and has no level restrictions. Goldrim - a Helmet to give you tons of Elemental Resistances and has no level restrictions. |
|
| +(30-50) to Evasion Rating 10% increased Rarity of Items found +(30-40)% to all Elemental Resistances Reflects 4 Physical Damage to Melee Attackers Level Requirement reduced by 100 (Hidden) |
 Tabula Rasa - you can six-link a setup from the start. Tabula Rasa - you can six-link a setup from the start. |
|
| Item has no level requirement and Energy Shield (Hidden) Item has 6 White Sockets and is fully linked (Hidden) |
|
 Berek's Respite - useful Ring that enhances your Clear Speed by spreading Ignites. It will be very expensive early in the league. Do not equip it after allocating Elemental Equilibrium. Berek's Respite - useful Ring that enhances your Clear Speed by spreading Ignites. It will be very expensive early in the league. Do not equip it after allocating Elemental Equilibrium. |
|
| +(12-16)% to Fire and Lightning Resistances Adds (20-25) to (30-50) Fire Damage to Spells and Attacks (25-30)% increased Lightning Damage +(30-40) to maximum Mana When you Kill a Shocked Enemy, inflict an equivalent Shock on each nearby Enemy When you Kill an Ignited Enemy, inflict an equivalent Ignite on each nearby Enemy |
|
 Lifesprig - the best level one weapon for Spell-casters, but it becomes useless after level 28. Lifesprig - the best level one weapon for Spell-casters, but it becomes useless after level 28. |
|
| (8-12)% increased Spell Damage +1 to Level of Socketed Spell Gems (20-28)% increased Spell Damage (5-8)% increased Cast Speed +(15-20) to maximum Life +(15-20) to maximum Mana Regenerate (6-8) Life over 1 second when you Cast a Spell |
|
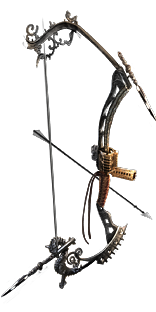 Storm Cloud - it has a lot of Attack Speed, and that's all that matters here Storm Cloud - it has a lot of Attack Speed, and that's all that matters here |
|
| No Physical Damage Adds 1 to 85 Lightning Damage (36-50)% increased Attack Speed |
|
4. Final Skill Tree, Ascendancy Points, and Pantheon
Final Skill Tree:
108 Points Final Passive Tree (doesn't include Cluster Jewels)
121 Points Path of Building (PoB) link
Ascendancy points:
Preferably in that order:
- Shaper of Flames
- Mastermind of Discord
- Heart of Destruction
- Shaper of Storms
Pantheon:
Major God: Soul of The Brine King: 1% You cannot be Stunned if you've been Stunned or Blocked a Stunning Hit in the past 2 seconds
Minor God: Soul of Shakari: 50% less Duration of Poisons on You; You cannot be Poisoned while there are at least 3 Poisons on you
5. Final Gems links
| [DPS] Explosive Arrow setup | |
 |
Explosive Arrow - The primary damage source - it fires an Arrow that attaches to an enemy or a wall and then Explodes dealing Fire Damage and causing Ignite. |
 |
Ballista Totem Support - It makes you summon a Totem that uses a linked Attack instead of you using it. |
 |
Empower Support - raises the Level of supported Active Gem. If you don't have it at level 3, use the Inspiration Support instead. |
 |
Elemental Damage with Attacks Support - one of the best ways to increase your DPS is to simply increase the Elemental Damage with Attacks. |
 |
Burning Damage Support - significantly improves the Damage you deal with an Ignite. |
 |
Deadly Ailments Support - significantly improves the Damage you deal with Ailments, but lowers the Hit Damage. |
| Situational Support Gems | |
 |
Efficacy Support - increases Skill Effect Duration of DoT effects and the Damage of it, use it if you have a low Attack Speed. |
 |
Ignite Proliferation Support - it spreads the Ignite you caused to nearby enemies so it's mandatory when clearing maps, use it if you don't have a source of it on your Gear. |
 |
Lifetap Support - Skills cost Life instead of Mana and deal slightly more Damage - great if you don't have enough Mana and good enough Damage. |
 |
Faster Attacks Support - use it when can't get all the 20 stacks on a single enemy before they explode automatically, or when you can't get off-color sockets on your Bow. |
| [UTILITY] Aura setup | |
 |
Grace - one of your defensive Auras, grants a lot of Evasion Rating and allows you to scale it further. |
 |
Determination - this one increases your Armour Rating which is undoubtedly important as you don't have much protection against Physical Damage otherwise. |
 |
Malevolence - increased Skill Effect Duration and Damage over Time. |
 |
Enlighten Support - lowers the Reservation required by linked Auras. |
| [UTILITY] Arrogance Aura setup | |
 |
Precision - grants a lot of Accuracy Rating and a bit of Critical Strike Chance. It has a flat Mana Reservation instead of the usual percentage. |
 |
Arrogance Support - allows you to Reserve Life instead of Mana and improves the effectiveness of linked Auras. |
| [UTILITY] Flame Dash | |
 |
Flame Dash - it is your main traveling Skill used to move from pack to pack and dodge incoming Attacks. |
| [UTILITY] Combustion setup | |
 |
Lightning Spire Trap - You have to cause ignite indirectly - due to Ancestral Bond you can't deal damage by self-casting, and you already use Totems. Keep in mind Elemental Equilibrium too. Lightning Spire Trap seems to have good AoE, it doesn't deal inherently Fire Damage, and should easily Ignite enemies. |
| Combustion Support - if you Ignite an enemy with a linked Skill its Fire Resistance gets reduced by 10%. | |
| [UTILITY] Frenzy setup | |
 |
Frenzy - hitting an enemy with this Attack will grant you a Frenzy Charge. Use it from time to time to significantly boost your Ballista's Damage. |
 |
Greater Multiple Projectiles Support - adds additional Projectiles so you don't have to aim too precisely. |
 |
Culling Strike Support - kills any enemy under the 10% of maximum Life, even if you can't deal any Damage due to Ancestral Bond Keystone. |
 |
Lifetap Support - spend Life instead of Mana to use this Skill. |
| [UTILITY] Arcanist Brand setup | |
 |
Flammability - it is a Curse that lowers the Fire Resistance of enemies, definitely the best one you can use. |
 |
Elemental Weakness - lowers all Elemental Resistances, but by slightly less than the previous one. You will need sources of additional Curses to apply them both. |
 |
Flame Surge - if it Hits an Ignited enemy, it will create a Burning Ground that deals 25% of the Ignite Damage per second. |
 |
Arcanist Brand - this Brand will cast all Spells linked with it. You will still have to pay the Mana Cost of each Spell. |
| [UTILITY] Molten Shell | |
 |
Molten Shell - mitigates a portion of incoming damage when active; it is more effective the more Armour you have. You may want to link it with  Automation given the opportunity. Automation given the opportunity. |
|
|
6. Gear Setup
Thanks to the Increased Duration of effect from the Malovelanca Aura you will have about 1.6 seconds to apply all 20 Stacks on the enemy for maximum Ignite. Getting enough Attack Speed to do that is the most crucial goal to achieve in terms of Damage. Additional Gem Level affixes will greatly improve the Damage of your explosions - you should aim to get those modifiers on your Bow and Amulet at all costs. After that look for Fire Damage over Time Multipliers and Elemental Damage with Attacks. Do not add flat Fire Damage to your Attack as it would ruin your Elemental Equilibrium as the Arrows deal no Fire Damage, only the explosion they cause does. Instead, get a small amount of added Cold or Lightning Damage that can be found on many gear pieces and Jewels. Maximum Life, Armour, and Spell Suppression are your main lines of defense. You will need plenty of Mana Reservation Efficiency to use all your Auras. To comfortably use your Balistas you should have Reduced Mana costs crafted on all your Jewelry - without it, you will have to use the Mana Flask or Lifetap Support.
|
Stat priorities on items:
|
 (Helmet) Rare Helmet - a Helmet with high Maximum Life and Elemental Resistances is good for a start, but you should look for Mana Reservation Efficiency rather quickly. (Helmet) Rare Helmet - a Helmet with high Maximum Life and Elemental Resistances is good for a start, but you should look for Mana Reservation Efficiency rather quickly. |
|
| Min. requirements: +60 to maximum Life +60% to Elemental Resistances Optional affixes: increased Mana Reservation Efficiency of Skills Accuracy Rating % of Physical Damage from Hits taken as Elemental Damage |
|
 (Helmet) The Devouring Diadem - A lot of players use it for the Eldritch Battery, which allows you to Reserve all your Mana and lets you use a Divinely Blessed Aura. (Helmet) The Devouring Diadem - A lot of players use it for the Eldritch Battery, which allows you to Reserve all your Mana and lets you use a Divinely Blessed Aura. |
|
| +1 to Level of Socketed Gems Socketed Gems have 25% increased Reservation Efficiency Trigger Level 15 Feast of Flesh every 5 seconds (180-220)% increased Energy Shield 10% chance for Energy Shield Recharge to start when you use a Skill Eldritch Battery Veiled Suffix |
|
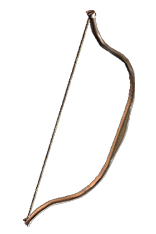 (Weapon) Rare Bow - a good base is very important as it affects your Attack Speed and Socket colours - the Short Bow is the best here. As for its modifiers, you should look for Gem Levels, DoT Multipliers, and even more Attack Speed. (Weapon) Rare Bow - a good base is very important as it affects your Attack Speed and Socket colours - the Short Bow is the best here. As for its modifiers, you should look for Gem Levels, DoT Multipliers, and even more Attack Speed. |
|
| Min. requirements: +2 to Level of Socketed Bow Gems +20 % To Fire Damage over Time Multiplier Optional affixes: +1 to Level of Socketed Gems +20 % To Damage over Time Multiplier Attack Speed |
|
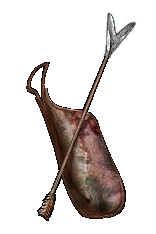 (Weapon) Rare Quiver - Two-Point Arrow Quiver and Artillery Quiver are the best bases. You should get some Accuracy Rating, Life, DoT Multiplier, and Attack Speed here. (Weapon) Rare Quiver - Two-Point Arrow Quiver and Artillery Quiver are the best bases. You should get some Accuracy Rating, Life, DoT Multiplier, and Attack Speed here. |
|
| Min. requirements: +60 to maximum Life +15% to Damage over Time Multiplier with Attack Skills Optional affixes: increased Attack Speed Accuracy Rating increased Elemental Damage with Attack Skills |
|
 (Body Armour) Kaom's Heart - it is a good option at the start if you simply want a lot of maximum Life. It doesn't provide much else, so it should eventually be replaced by a Rare Armour. (Body Armour) Kaom's Heart - it is a good option at the start if you simply want a lot of maximum Life. It doesn't provide much else, so it should eventually be replaced by a Rare Armour. |
|
| Has no Sockets (20-40)% increased Fire Damage +500 to maximum Life |
|
 (Body Armour) Rare Armour - a decent Rare Armour can give you tons of defensive value through maximum Life, Spell Suppression Chance, or Aura Effectiveness which would also boost your offense. (Body Armour) Rare Armour - a decent Rare Armour can give you tons of defensive value through maximum Life, Spell Suppression Chance, or Aura Effectiveness which would also boost your offense. |
|
| Min. requirements: +80 to maximum Life +80% Total Elemental Resistances Optional affixes: chance to Suppress Spell Damage % increased Maximum Life increased effect of Non-Curse Auras from your Skills % of Physical Damage from Hits taken as Elemental Damage |
|
 (Boots) Rare Boots - focus on Maximum Life, Elemental Resistances, and increased Movement Speed. Eldritch Implicits are also useful, as Action Speed will boost your Attack Speed too. (Boots) Rare Boots - focus on Maximum Life, Elemental Resistances, and increased Movement Speed. Eldritch Implicits are also useful, as Action Speed will boost your Attack Speed too. |
|
| Min. requirements: +60 to maximum Life +60% Total Elemental Resistances 20% increased Movement Speed Optional affixes: increased Effect of Non-Damaging Ailments chance to Suppress Spell Damage Ignites you inflict deal Damage faster increased Action Speed |
|
 (Gloves) Rare Gloves - Besides Life and Resistances look for Attack Speed and Accuracy Rating. With Eldritch Implicits you can boost your Fire DoT Multiplier or get the Proliferation effect. (Gloves) Rare Gloves - Besides Life and Resistances look for Attack Speed and Accuracy Rating. With Eldritch Implicits you can boost your Fire DoT Multiplier or get the Proliferation effect. |
|
| Min. requirements: +60 to maximum Life +60% to Elemental Resistances +300 Accuracy Rating Optional affixes: Fire Damage over Time Multiplier Attack Speed Ignites you inflict spread to other Enemies within a Radius of 15 |
|
 (Belt) Dyadian Dawn - it's a nice boost to your Life, Strength, Resistances, and most importantly - your Ignites deal Damage much faster. (Belt) Dyadian Dawn - it's a nice boost to your Life, Strength, Resistances, and most importantly - your Ignites deal Damage much faster. |
|
| +(25-35) to Strength +(70-85) to maximum Life +(20-40)% to Fire Resistance +(20-40)% to Cold Resistance 1% of Attack Damage Leeched as Life against Chilled Enemies Ignites you inflict with Attacks deal Damage 35% faster Deal no Physical Damage |
|
 (Amulet) Rare Amulet - You can get the increased Level of Fire, Dexterity, or all Skill gems here. Try to pair it up with some maximum Life and DoT Multipliers. If possible, craft the Mana Costs modifiers. (Amulet) Rare Amulet - You can get the increased Level of Fire, Dexterity, or all Skill gems here. Try to pair it up with some maximum Life and DoT Multipliers. If possible, craft the Mana Costs modifiers. |
|
| Min. requirements: +50 to maximum Life +50% to Elemental Resistances +1 to Level of all Fire Skill Gems Optional affixes: +20% to (Fire) Damage over Time Multiplier +1 to Level of all Skill Gems +1 to Level of all Dexterity Skill Gems Non-Channelling Skills have -7 to Total Mana Cost (crafted) |
|
 (Amulet) The Eternal Struggle - It's an excellent low-budged Amulet with tons of Attributes, global Defences, and some exotic stats with Eldritch Implicits that may be very good. (Amulet) The Eternal Struggle - It's an excellent low-budged Amulet with tons of Attributes, global Defences, and some exotic stats with Eldritch Implicits that may be very good. |
|
| <<Random Searing Exarch implicit>> <<Random Eater of Worlds implicit>> +(20-50) to Strength +(20-50) to Dexterity +(20-50) to Intelligence (10-15)% increased Global Defences Critical Strikes inflict Malignant Madness if The Eater of Worlds is dominant Kill Enemies that have 15% or lower Life on Hit if The Searing Exarch is dominant |
|
| Recommended Anointments: Whispers of Doom |
|
 (Ring) Rare Ring - it's easy to get some Accuracy Rating here as well as more Life and Resistances, you should also look out for missing Attributes. Crafting reduced Mana Costs here will be also useful. (Ring) Rare Ring - it's easy to get some Accuracy Rating here as well as more Life and Resistances, you should also look out for missing Attributes. Crafting reduced Mana Costs here will be also useful. |
|
| Min. requirements: +60 to maximum Life +60% to Elemental Resistances +200 Accuracy Rating Optional affixes: increased Fire Damage with Attacks Adds # to # Lightning or Cold Damage to Attacks Non-Channelling Skills have -7 to Total Mana Cost (crafted) |
|
 (Ring) Polaric Devastation - if you use this Ring in your left slot you will Cover enemies in Ash, which slows them down and increase the Fire Damage they take. (Ring) Polaric Devastation - if you use this Ring in your left slot you will Cover enemies in Ash, which slows them down and increase the Fire Damage they take. |
|
| (15-25)% increased Global Critical Strike Chance +(20-40)% to Fire Resistance +(20-40)% to Cold Resistance (10-20)% increased Duration of Ailments on Enemies Left Ring slot: Cover Enemies in Ash for 5 seconds when you Ignite them Right Ring slot: Cover Enemies in Frost for 5 seconds when you Freeze them |
|
 (Ring) The Taming - It's simple and effective. There's just a lot of damage and Resistances here. (Ring) The Taming - It's simple and effective. There's just a lot of damage and Resistances here. |
|
| +(8-10)% to all Elemental Resistances 20% increased Damage with Hits and Ailments per Freeze, Shock or Ignite on Enemy +(20-30)% to all Elemental Resistances 30% increased Elemental Damage 10% chance to Freeze, Shock and Ignite 30% increased Elemental Damage with Attack Skills |
|
 (Jewel) Rare Jewels - increase your Maximum Life, get missing Attributes, Resistances, Attack Speed, Totem Damage, Accuracy Rating, and for Damage prioritize "Damaging Ailments deal damage faster". You can also get a bit of Mana Reservation Efficiency here if you can't use all your Auras yet. (Jewel) Rare Jewels - increase your Maximum Life, get missing Attributes, Resistances, Attack Speed, Totem Damage, Accuracy Rating, and for Damage prioritize "Damaging Ailments deal damage faster". You can also get a bit of Mana Reservation Efficiency here if you can't use all your Auras yet. |
|
|
Recommended affixes: |
|
 (Jewel) Rain of Splinters - increased number of Projectiles is always good for your clear speed, but it is not mandatory at all. (Jewel) Rain of Splinters - increased number of Projectiles is always good for your clear speed, but it is not mandatory at all. |
|
| (50-30)% reduced Totem Damage Totems fire 2 additional Projectiles |
|
 (Jewel) Lethal Pride - this Jewel can grant you a lot of useful modifiers, but it is very random and not always worth it. You can use Path of Building to look for the good one. (Jewel) Lethal Pride - this Jewel can grant you a lot of useful modifiers, but it is very random and not always worth it. You can use Path of Building to look for the good one. |
|
| Commanded leadership over (10000-18000) warriors under (Akoya-Kaom-Rakiata) Passives in radius are Conquered by the Karui Historic |
|
 (Jewel) Watcher's Eye - you can get a lot of Damage with this Jewel if you use relevant Malevolance or Precision Aura modifiers. You can also opt for more defensive ones, such as Spell Suppression or Block Chance. (Jewel) Watcher's Eye - you can get a lot of Damage with this Jewel if you use relevant Malevolance or Precision Aura modifiers. You can also opt for more defensive ones, such as Spell Suppression or Block Chance. |
|
| (4-6)% increased maximum Energy Shield (4-6)% increased maximum Life (4-6)% increased maximum Mana Recommended Modifiers: +(18-22)% to Damage over Time Multiplier while affected by Malevolence Damaging Ailments you inflict deal Damage (10-15)% faster while affected by Malevolence +(12-15)% chance to Suppress Spell Damage while affected by Grace |
|
 (Jewel) Large Cluster Jewel - you can use a Large Cluster Jewel that would boost your Bow or Fire Damage, as both of them are decent. (Jewel) Large Cluster Jewel - you can use a Large Cluster Jewel that would boost your Bow or Fire Damage, as both of them are decent. |
|
| 1 Added Passive Skill is Calamitous 1 Added Passive Skill is Martial Prowess 1 Added Passive Skill is Prismatic Heart |
|
 (Jewel) Medium Cluster Jewel - there are 2 different Cluster Jewels you are aiming for: one with Totem modifiers that will grant you almost permanent Onslaught, and one that will simply boost your Damage with Ignites. (Jewel) Medium Cluster Jewel - there are 2 different Cluster Jewels you are aiming for: one with Totem modifiers that will grant you almost permanent Onslaught, and one that will simply boost your Damage with Ignites. |
|
| Recommended affixes: 1 Added Passive Skill is Ancestral Echo 1 Added Passive Skill is Sleepless Sentries 1 Added Passive Skill is Fan the Flames 1 Added Passive Skill is Wasting Affliction 1 Added Passive Skill is Smoking Remains |
|
 (Flask) Bottled Faith - this flask will create a large Consecrated Ground that increases the damage monsters take from you. this flask is useful purely against tough enemies, so you can apply an enchant that will increase its effectiveness in those crucial moments. (Flask) Bottled Faith - this flask will create a large Consecrated Ground that increases the damage monsters take from you. this flask is useful purely against tough enemies, so you can apply an enchant that will increase its effectiveness in those crucial moments. |
|
| (30-15)% reduced Duration Consecrated Ground created by this Flask has Tripled Radius Consecrated Ground created during Effect applies (7-10)% increased Damage taken to Enemies (100-150)% increased Critical Strike Chance against Enemies on Consecrated Ground during Effect |
|
 (Flask) Cinderswallow Urn - For its veiled modifier try to look for reduced Mana Cost of Skills during Flask Effect. It's a source of Onslaught and additional Damage against Ignited enemies. (Flask) Cinderswallow Urn - For its veiled modifier try to look for reduced Mana Cost of Skills during Flask Effect. It's a source of Onslaught and additional Damage against Ignited enemies. |
|
| Onslaught +90 to Maximum Charges Recharges 5 Charges when you Consume an Ignited corpse (175-200)% increased Charges per use Enemies Ignited by you during Flask Effect take (7-10)% increased Damage Veiled Suffix <One of the three modifiers> |
|
|
Suggested Flasks:
|
|
     |
|
|
If you have any other build requests please leave that in the comments below. We are always open to suggestions and constructive feedback.
Pictures used in this article are the intellectual property of Grinding Gear Games.


