Frenzy Ballistas Chargestacker Trickster Build
A very interesting Trickster Build that uses Spell Damage, Abyss Jewels, and 2 kinds of Charges to scale Attack DPS with Ballista TotemsFrenzy Totem Ballista
Trickster Build
Created for Patch 3.21
The Best Crafty Guides by Odealo
| Guide notes |
| June 22, 2023 -Build created |
| Build Overview | |||
| Tags: [ATTACK] [ELEMENTAL] [LIFE] [CRIT] | |||
|
Budget: Defenses: |
|
Boss DPS: AoE: |
|
Frenzy is usually an Attack Skill used only to generate Frenzy Charges to boost your other Skill. In this Build, however, we utilize its powerful scaling to make it a proper standalone Skill. On top of regular Frenzy Charge bonuses, it gains an additional 5% More Damage and Attack Speed per Frenzy Charge, which can quickly add up if you have lots of them. In our case, you can easily get 11 Charges, but if you are willing to invest some Currency you can easily reach 13 of them. The best way to acquire so many Frenzy Charges is to actually invest in Power Charges instead, and thanks to the Badge of Brotherhood you will have the same amount of additional Frenzy Charges as well. To use our Attack we use Ballista Totems, which usually offer a much higher Damage output ceiling and a comfy playstyle.
Another unusual thing about this Build is the Weapon of choice. The Void Battery is usually associated with Casters, but due to the powerful nature of Charge stacking, it is also BiS for this Attack Build. It grants us additional Power Charge, but also greatly improves Spell Damage which we can convert into Attack Damage through the Wand Mastery. Fortunately, Frenzy is a very universal Skill that can be used with all Weapon types.
Another important Item for this Character is Wilma's Requital Helmet, which can boost your Attack Speed via the Cast Speed modifiers, and grants Ancestral Bond Keystone to raise the Totem limit. All mentioned mechanics offer amazing scaling opportunities, but you also have to take care of Base Damage. We can get tons of Lightning Damage through the Abyss Jewels, Thunderfist Gloves, and Shroud of the Lightless Body Armour. The Wrath Aura is also an important source of Flat Damage, and so is the Haste Aura that grants tons of Attack Speed, especially when you factor in the aforementioned Helmet.
There are 2 ways to generate so many Charges, and both of them have their pros and cons. If you simply use the Ralakesh's Impatience Boots you will have all your Charges whenever you stop moving, but will lose them as soon as you take a step. You can bypass that problem with the Lightning Warp which is ultra-fast in this setup but takes a while to get used to. You can also use regular Rare Boots and use Lightning Traps to generate Charges and inflict Lightning Exposure. Additionally, you can use Stormblast Mines to get free Increased Damage Taken Aura on Enemies, but admittedly it takes much more effort to play this way, so it should be considered only against Pinnacle content.
You can also check our other Path of Exile builds right over here Odealo's Crafty Guides - Full List
1. Gameplay
Fundamentally it is a Totem Build, meaning all you have to do is to deploy your Totems and watch as all nearby Enemies die effortlessly. To move around it is best to use a Lightning Warp, as it is nearly instant teleport. Occasionally you will have to use the Sniper's Mark to increase the Projectile Damage enemies Take from your Totems. Vaal Haste is a great boost to your Clear Speed and Single-target Damage, so use it freely. If you really need to boost your Damage, throw out Stormblast Mines, but do not detonate them. Each Mine applies a 3% Damage Taken debuff on nearby Enemy, up to a maximum of 150%.
|
|
|
|

2. Build's PROS & CONS
| PROS |
|
| CONS |
|
3. Leveling tips
The final version of this Build requires many End-game Unique Items, so it doesn't work well during leveling. It is much better to level us as a regular Spell Caster. We recommend our Leveling Guide for Lightning Spell Caster Builds to see more Leveling Tips.
Suggested leveling Gem setups:
| Freezing Pulse setup | |
 |
Freezing Pulse - creates an icy Projectile that Pierces through all Enemies, dealing Cold Damage to every Enemy Hit. |
 |
Added Cold Damage Support - improves the Cold Damage of Freezing Pulse. |
 |
Increased Critical Strikes Support - grants lots of Critical Strike Chances. |
 |
Increased Critical Damage Support - greatly increases your Critical Strike Multiplier. |
 |
Faster Casting Support - improves your Cast time. You can swap it for Spell Echo Support once you acquire it. |
 |
Inspiration Support - grants a decent amount of Damage, Critical Strike Chance, and lowers Mana Costs. |
| Aura setup | |
 |
Petrified Blood - you can spend some additional Passive Skill Points in your Tree to take the Pain Attunement Keystone, which would turn this decent defensive Aura into a powerful offensive one. |
 |
Clarity - grants tons of Mana Regeneration. Can be used with the Arrogance Support if you have Petrified Blood. |
 |
Grace - at lower levels Defensive Auras are very powerful. They grant you all Evasion or Armour ratings you would ever want. |
| Utility setup | |
 |
Flame Dash - good mobility Skill to perform a dash. |
 |
Assassin's Mark - Enemies marked by this Skill are more likely to be Hit with a Critical Strike. |
 |
Steelskin - grants you a protective barrier and disables Bleeding effects. |
Bandits:
Kill all Bandits to get additional 2 Passive Tree Skill Points
Leveling Skill Trees:
35 Points Passive Tree
We recommend this order:
1) Coldhearted Calculations 2) Resourcefulness 3) Infused 4) Blood Drinker 5) Written in Blood 6) Influence
65 Points Passive Tree
Allocate:
1) Disciple of the Forbidden 2) Instability 3) Cruel Preparations
Optional Notables for leveling: 1) Pain Attunement 2) Heart of Ice 3) Breath of Rime
After your first Labirynth, you can pick up any Notable Masteries just to get a Damage bonus from the Polymath.
Recommended leveling items:
 Replica Tasalio's Sign - grants an insane amount of Cold Damage for your Spells. Replica Tasalio's Sign - grants an insane amount of Cold Damage for your Spells. |
|
| +(20-30)% to Cold Resistance Adds (15-20) to (25-35) Cold Damage to Spells and Attacks +(200-300) to Evasion Rating Your Cold Damage cannot Freeze Immune to Chill Adds 60 to 80 Cold Damage against Chilled Enemies |
|
 Praxis - if you can't sustain Mana, with this Ring you will no longer have this problem. Praxis - if you can't sustain Mana, with this Ring you will no longer have this problem. |
|
| +(20-30) to maximum Mana +(30-60) to maximum Mana Regenerate (3-6) Mana per second -(8-4) to Total Mana Cost of Skills 8% of Damage taken Recouped as Mana |
|
 Axiom Perpetuum - best leveling Weapon for Crit Spell Casters. They grant an insane amount of Critical Strike Chance and some Flat Damage for Spells. Axiom Perpetuum - best leveling Weapon for Crit Spell Casters. They grant an insane amount of Critical Strike Chance and some Flat Damage for Spells. |
|
| Adds (2-3) to (5-6) Fire Damage to Spells Adds (2-3) to (5-6) Cold Damage to Spells Adds 1 to (10-12) Lightning Damage to Spells (4-6)% increased Cast Speed (100-140)% increased Critical Strike Chance for Spells |
|
 Tabula Rasa - thanks to this Armour you can cheaply use a six-link setup right from the start. Tabula Rasa - thanks to this Armour you can cheaply use a six-link setup right from the start. |
|
| Item has no level requirement and Energy Shield (Hidden) Item has 6 White Sockets and is fully linked (Hidden) |
|
 Goldrim - a famous leveling Helmet that grants tons of Elemental Resistances. Goldrim - a famous leveling Helmet that grants tons of Elemental Resistances. |
|
| +(30-50) to Evasion Rating 10% increased Rarity of Items found +(30-40)% to all Elemental Resistances Reflects 4 Physical Damage to Melee Attackers Level Requirement reduced by 100 (Hidden) |
|
 Perandus Blazon - decent opinion if you lack Attributes and want your Quicksilvers to last longer. Perandus Blazon - decent opinion if you lack Attributes and want your Quicksilvers to last longer. |
|
| (15-25)% increased Stun and Block Recovery +(20-30) to all Attributes (6-8)% increased Quantity of Items found +20% to Fire Resistance 20% increased Flask Effect Duration -2 Physical Damage taken from Attack Hits |
|
 Karui Ward - a very good Amulet, it grants some Damage but most importantly it improves your Movement Speed. Karui Ward - a very good Amulet, it grants some Damage but most importantly it improves your Movement Speed. |
|
| +(20-30) to Dexterity +(20-30) to Strength +100 to Accuracy Rating 30% increased Projectile Speed 10% increased Movement Speed 30% increased Projectile Damage |
|
 Wanderlust - grants Mana Regeneration and total Freeze avoidance. Wanderlust - grants Mana Regeneration and total Freeze avoidance. |
|
| +5 to Dexterity +(10-20) to maximum Energy Shield (20-40)% increased Mana Regeneration Rate 20% increased Movement Speed Cannot be Frozen |
|
4. Final Skill Tree, Ascendancy Points, and Pantheon
Final Skill Tree:
102 Points Final Passive Tree (doesn't include Cluster or Unique Jewels)
118 Points Path of Building (PoB) link
Ascendancy points:
Preferably in this order:
- Polymath
- One Step Ahead
- Escape Artists
- Spellbreaker
Pantheon:
Major God: Soul of Arakaali: 10% reduced Damage taken from Damage Over Time; +40% Chaos Resistance against Damage Over Time
Minor God: Soul of Shakari: 50% less Duration of Poisons on You, You cannot be Poisoned while there are at least 3 Poisons on you
5. Final Gems links
| [DPS] Frenzy setup Socket in Thunderfist Gloves |
|
 |
Frenzy - the main theme of this Build. A simple ranged Attack that shoots a Projectile. It gains 5% More Attack Speed and Damage per Frenzy Charge. Anomalous Quality adds extra Projectile. |
 |
Ballista Totem Support - summons a Totem that uses Ranged Attacks for you. You can have up to 5 Totems at once. |
 |
Power Charge on Critical Support - grants 4% More Damage per Power Charge, which makes this the most powerful Support Gem in the Game for this Build. |
|
Increased Critical Damage Support - provides tons of Critical Strike Damage. You should have a 100% Critical Strike Chance. |
| [UTILITY] Aura setup | |
 |
Haste - grants lots of Cast Speed and Attack Speed. The Wilma's Requital Helmet converts the Cast Speed into even more Attack Speed. If you prefer a more defensive setup, you can use Grace for a massive Evasion Rating bonus. |
 |
Wrath - provides tons of Lightning Damage for your Attacks. It also unlocks very powerful Watcher Eye modifiers. |
 |
Precision - another important Aura, it grants tons of Accuracy Rating and Critical Strike Chance. |
 |
Enlighten Support - you don't need it, but you would have an uncomfortably low Mana Pool to use your Skills without it. |
| [UTILITY] Lightning Warp setup | |
 |
Lightning Warp - with enough Cast Speed and Reduced Duration, it is nearly instant teleport. Moving that way won't remove Charges if you use Ralakash Impatience Boots. |
 |
Less Duration Support - greatly Reduces the Duration of your Lightning Warp, which makes it faster to perform. |
|
Faster Casting Support - Cast Speed is another way to speed up your Lightning Warp. |
 |
Swift Affliction Support - this also Reduces the Duration of supported Skills, although not as impactful as remaining Supports. You can also use the Lifetap Support if you don't want to use Mana Flask, as it is the only reason to use that Flask over the regular Utility one. |
| [UTILITY] Stormblast Mine setup | |
 |
Stormblast Mine - a Mine Skill that applies 3% Damage Taken debuff on nearby Enemies, stacking up to 150%. Use it after Placing Totems and Marking Enemies, as you will have nothing else to do anyway. |
 |
Minefield Support - reduces the Throwing Speed in half, but you will Throw 5 Mines at once. |
 |
Charged Mines Support - grants tons of Throwing Speed, and can be used to generate Charges if you use Rare Boots. |
| [UTILITY] Lightning Trap setup | |
 |
Lightning Trap - with the Ancestral Bond Keystone you can't deal Damage directly, so you have to resort to using Traps. You can pick any Trap you want, but Lightning Trap seems to be the best DPS-wise, and you can use Vaal Version to guarantee Shock. |
|
Awakened Lightning Penetration Support - Awakened version of this Gem grants you a 10% chance to inflict Lightning Expsure on Hit. |
 |
Charged Traps Support - similarly to the previous Setup, this Gem grants you a chance to generate Charges, and vastly improve Throwing Speed for each Frenzy Charge you have. |
| [UTILITY] Other Utility setups | |
 |
Sniper's Mark - very powerful Mark for all Projectile Builds, it grants tons of Damage and Splits Projectiles when they Hit your target. |
 |
Summon Lightning Golem - in this Setup, it grants tons of Attack Speed. It also provides some Cast Speed for your Lightning Warp. |
 |
Steelskin - grants you a protective Buff that absorbs some of the incoming Damage and disables Bleeding. |
|
|
6. Gear Setup
This Build uses a lot of Unique Items, which makes buying Gear significantly easier. There are many useful Corruptions you can try to get, but they are not required. The only Rare Items you need are Jewelry: Rings, Belt, and Jewels. There you should look for maximum Life, lots of Elemental Resistances, and sources of Flat and Increased Elemental Damage. Accuracy is quite important too, but one or two modifiers should be enough to get a 100% Hit Chance. Optionally you can use Rare Boots too if you dislike the Movement restriction of Ralakesh Impatience, although you will have to put much more effort into generating all those Charges.
|
Stat priorities on items:
|
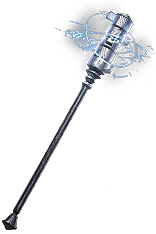
 (Weapon) Void Battery - grants you additional Power Charge, which makes it automatically BiS Item. Spell Damage bonus can be converted into Attack Damage through the Wand Mastery. Try to get useful Corruption or Crucible Tree here for a free Damage bonus. (Weapon) Void Battery - grants you additional Power Charge, which makes it automatically BiS Item. Spell Damage bonus can be converted into Attack Damage through the Wand Mastery. Try to get useful Corruption or Crucible Tree here for a free Damage bonus. |
|
| (36-40)% increased Spell Damage 80% reduced Spell Damage (10-20)% increased Cast Speed (50-65)% increased Global Critical Strike Chance +(40-50) to maximum Mana +1 to Maximum Power Charges 25% increased Spell Damage per Power Charge |
|
 (Shield) Malachai's Loop - you can Dual-wield Wands, or use this Shield. It grants one Power Charge more than Void Battery, but Shocks you when you gain a Maximum amount of Power Charges. (Shield) Malachai's Loop - you can Dual-wield Wands, or use this Shield. It grants one Power Charge more than Void Battery, but Shocks you when you gain a Maximum amount of Power Charges. |
|
| (10-15)% increased Spell Damage (210-250)% increased Energy Shield +2 to Maximum Power Charges 20% chance to gain a Power Charge on Hit (12-16)% increased Spell Damage per Power Charge Lose all Power Charges on reaching Maximum Power Charges Shocks you when you reach Maximum Power Charges |
|
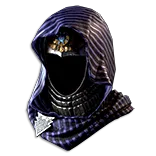 (Helmet) Wilma's Requital - grants Ancestral Bond Keystone which raises your maximum Totem Limit. It also greatly improves your Attack Speed and Accuracy Rating. Try to get a Corrupted modifier that increases your maximum Power Charges. (Helmet) Wilma's Requital - grants Ancestral Bond Keystone which raises your maximum Totem Limit. It also greatly improves your Attack Speed and Accuracy Rating. Try to get a Corrupted modifier that increases your maximum Power Charges. |
|
| +(300-500) to Accuracy Rating (200-250)% increased Energy Shield Increases and Reductions to Cast Speed apply to Attack Speed (20-30)% increased Elemental Damage with Attack Skills Ancestral Bond |
|
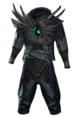 (Body Armour) Shroud of the Lightless - grants additional Abyss Jewel Sockets and greatly rewards you for using them by increasing your Maximum Life and Elemental Penetration. (Body Armour) Shroud of the Lightless - grants additional Abyss Jewel Sockets and greatly rewards you for using them by increasing your Maximum Life and Elemental Penetration. |
|
| Has (1-3) Abyssal Sockets Penetrate 4% Elemental Resistances per Abyss Jewel affecting you 20% chance to Trigger Level 20 Shade Form when you Use a Socketed Skill (160-180)% increased Evasion and Energy Shield 1% increased Maximum Life per Abyss Jewel affecting you 1% increased Maximum Mana per Abyss Jewel affecting you |
|
 (Boots) Ralakesh's Impatience - standing still will automatically grant you all your Charges, but you will lose them as soon as you make a step. (Boots) Ralakesh's Impatience - standing still will automatically grant you all your Charges, but you will lose them as soon as you make a step. |
|
| +(15-25)% to Cold Resistance +(15-25)% to Chaos Resistance 30% increased Movement Speed Lose all Frenzy, Endurance, and Power Charges when you Move Minimum Endurance Charges equal to Maximum while stationary Minimum Frenzy Charges equal to Maximum while stationary Minimum Power Charges equal to Maximum while stationary |
|
 (Boots) Rare Boots - optionally you can use Rare Boots that grant you Life, Movement Speed, Resistances, and Ailment Avoidance. By doing so you will have to generate Charges manually, but you won't lose your Damage while Moving or dodging. (Boots) Rare Boots - optionally you can use Rare Boots that grant you Life, Movement Speed, Resistances, and Ailment Avoidance. By doing so you will have to generate Charges manually, but you won't lose your Damage while Moving or dodging. |
|
| Min. requirements: +70 to maximum Life 30% increased Movement Speed Optional affixes: Action Speed Chaos Resistance Attributes Ailment Avoidance Resistances |
|
 (Gloves) Thunderfist - those grants you tons of Lightning Damage and improve your Shocks to increase your Damage even more. Aim to get Attack Speed or Additional Critical Strike Chance for your Attacks through the Corrupted Implicit. (Gloves) Thunderfist - those grants you tons of Lightning Damage and improve your Shocks to increase your Damage even more. Aim to get Attack Speed or Additional Critical Strike Chance for your Attacks through the Corrupted Implicit. |
|
| Socketed Gems are Supported by Level 30 Added Lightning Damage 100% increased Effect of Lightning Ailments 10% increased Attack Speed (150-200)% increased Evasion and Energy Shield |
|
 (Belt) Rare Belt - Stygian Vise grants you an additional Abyss Jewel Socket, and you can get many useful modifiers like maximum Life, Elemental Damage, or Resistances here. (Belt) Rare Belt - Stygian Vise grants you an additional Abyss Jewel Socket, and you can get many useful modifiers like maximum Life, Elemental Damage, or Resistances here. |
|
| Min. requirements: +70 to maximum Life +60% to Elemental Resistances Optional affixes: Elemental Damage Chaos Resistances Attributes |
|
 (Amulet) Badge of the Brotherhood - another core Item necessary for this Build. Thanks to this Amulet you can invest massively only into Power Charges and you will gain an equal amount of Frenzy Charges as well. (Amulet) Badge of the Brotherhood - another core Item necessary for this Build. Thanks to this Amulet you can invest massively only into Power Charges and you will gain an equal amount of Frenzy Charges as well. |
|
| +(16-24) to Dexterity and Intelligence (7-10)% increased Cooldown Recovery Rate of Travel Skills per Frenzy Charge (7-10)% increased Effect of Elusive on you per Power Charge (20-25)% chance to lose a Frenzy Charge when you use a Travel Skill (20-25)% chance to lose a Power Charge when you gain Elusive Your Maximum Frenzy Charges is equal to your Maximum Power Charges |
|
| Recommended Anoint: Overcharge |
|
 (Ring) Rare Ring - you can get tons of useful modifiers on your Ring. Maximum Life, Resistances, Damage, or Accuracy Rating can be easily acquired here. If you have lots of Currency, you can get +1 to Maximum Power Charge here, which will dramatically improve your Damage. (Ring) Rare Ring - you can get tons of useful modifiers on your Ring. Maximum Life, Resistances, Damage, or Accuracy Rating can be easily acquired here. If you have lots of Currency, you can get +1 to Maximum Power Charge here, which will dramatically improve your Damage. |
|
| Min. requirements: +60 to maximum Life +60% to Elemental Resistances Optional affixes: +1 to Maximum Power Charge Accuracy Rating Added Lightning Damage to Attacks Increased Elemental Damage Chaos Resistances Attributes |
|
 (Jewel) Rare Abyss Jewels - you have a lot of flexibility here. You can get maximum Life, flat Lightning Damage for your Wand Attacks, Critical Strike Multiplier, Accuracy Rating, or even Elemental Resistances. (Jewel) Rare Abyss Jewels - you have a lot of flexibility here. You can get maximum Life, flat Lightning Damage for your Wand Attacks, Critical Strike Multiplier, Accuracy Rating, or even Elemental Resistances. |
|
| Min. requirements: increased maximum Life Recommended affixes: # Added Lightning Damage with Wand Attacks Adds # to # Lightning Damage to Attacks Critical Strike Multiplier Resistances Accuracy Rating |
|
 (Jewel) Large Cluster Jewel - on Cluster Jewel you can get many useful Notables, try to get at least Prismatic Heart and Scintillating Idea as those are the best out there. (Jewel) Large Cluster Jewel - on Cluster Jewel you can get many useful Notables, try to get at least Prismatic Heart and Scintillating Idea as those are the best out there. |
|
| Recommended affixes: 1 Added Passive Skill is Disorienting Display 1 Added Passive Skill is Prismatic Heart 1 Added Passive Skill is Scintillating Idea |
|
 (Jewel) Medium Cluster Jewel - thanks to the Sleepless Sentries Notable you will have a permanent Onslaught Buff for additional Attack Speed. The second Notable is less important, but Ancestral Echo seems to be the best as it grants Totem Placement Speed which is a great Quality of Life upgrade. (Jewel) Medium Cluster Jewel - thanks to the Sleepless Sentries Notable you will have a permanent Onslaught Buff for additional Attack Speed. The second Notable is less important, but Ancestral Echo seems to be the best as it grants Totem Placement Speed which is a great Quality of Life upgrade. |
|
| Recommended affixes: 1 Added Passive Skill is Ancestral Echo 1 Added Passive Skill is Sleepless Sentries |
|
  (Jewel) Forbidden Flame&Flesh - you can get additional Power Charge by borrowing the Notable from Assassin's Ascendency. It is only marginally better than well-rolled pair of Abyss Jewels. (Jewel) Forbidden Flame&Flesh - you can get additional Power Charge by borrowing the Notable from Assassin's Ascendency. It is only marginally better than well-rolled pair of Abyss Jewels. |
|
| Allocates Unstable Infusion if you have the matching modifiers on Forbidden Flesh/Flame | |
 (Jewel) Watcher's Eye - you can get very powerful bonuses from this Jewel. Wrath and Precision offer valuable offensive modifiers, while Grace or Haste offer mostly utility options. (Jewel) Watcher's Eye - you can get very powerful bonuses from this Jewel. Wrath and Precision offer valuable offensive modifiers, while Grace or Haste offer mostly utility options. |
|
| (4-6)% increased maximum Energy Shield (4-6)% increased maximum Life (4-6)% increased maximum Mana <Two or Three random aura modifiers> Recommended Aura mods: (40-60)% increased Attack Damage while affected by Precision Damage Penetrates (10-15)% Lightning Resistance while affected by Wrath |
|
|
|
|
| Only affects Passives in Large Ring Passives in Radius can be Allocated without being connected to your tree -(20-10)% to all Elemental Resistances |
|
 (Flask) Bottled Faith - powerful Flask that grants you tons of Damage and a Critical Strike Chance against Enemies standing in the Consecrated Ground it creates. (Flask) Bottled Faith - powerful Flask that grants you tons of Damage and a Critical Strike Chance against Enemies standing in the Consecrated Ground it creates. |
|
| (30-15)% reduced Duration Consecrated Ground created by this Flask has Tripled Radius Consecrated Ground created during Effect applies (7-10)% increased Damage taken to Enemies (100-150)% increased Critical Strike Chance against Enemies on Consecrated Ground during Effect |
|
|
Suggested Flasks:
|
|
    |
 (Jewel) Thread of Hope - thanks to this Jewel you can pick up many powerful Passives and save tons of Points on traveling.
 |
|
If you have any other build requests please leave that in the comments below. We are always open to suggestions and constructive feedback.
Pictures used in this article are the intellectual property of Grinding Gear Games.
