Blade Vortex Poison Assassin Build
Complete guide on one of the deadliest Assassin builds in PoEPoison Blade Vortex
Assassin Build
Updated for Patch 3.29
The Best Crafty Guides by Odealo
| Guide notes |
| July 24, 2026 -Included the new Pact Skills and adjusted for the Buffed Critical Strike Chance, gaining lots of Damage as a result |
| Build overview | |||
| Tags: [STARTER] [POISON] [LIFE] | |||
|
Budget: Defenses: |
|
Boss DPS: AoE: |
|
Blade Vortex is a Physical Spell that creates multiple ethereal blades that orbit around your character, dealing massive Damage based on the number of blades spawned. At maximum efficiency, they hit over 8 times per second, which is great for inflicting massive amounts of Poison stacks on your Enemies. As an Assassin, you get increased Poison Duration for every Poison inflicted recently, which is a very strong method of improving your total DPS. You can also scale them through Critical Strikes, which is rather unusual for DoT Builds.
The recent Buffs for all Physical Spells are very good for Blade Vortex. It now has a 10% base Critical Strike Chance, making it very easy to scale your Damage through Perfect Agony Keystone. It converts your Critical Strike Multiplier to a Damage over time Multiplier, but any non-Critical Strikes won't be able to Poison at all. DoT Multiplier is a much scarcer modifier to obtain, making it a great deal if you can solve the Critical Strike Chance. Fortunately, the Knife in the Back doubles your Critical Chance against Enemies that are not on Low Life, making it nearly guaranteed for the first half of the combat. Once the enemy loses 50% of their maximum Life, you will gain Critical Strike Multiplier instead. To still land Critical Strikes against such foes, you will have Assassin's Mark and Power Charges at your disposal. This playstyle also enables the Overwhelming Malice Notable, which grants you an Unholy Might Buff for a few seconds. It is a great and automatic source of Withered Debuff, which greatly improves your Damage output.
The Shadowed Blood Notable makes you Unaffected to Damaging Ailments. They can be inflicted on you, but won't deal any Damage to you. You can combine it with the Golden Rule Jewel to reflect your own Poisons onto you, which grants you up to 99% Chaos Resistance, and enables another powerful Unique Item, the Apep's Slumber. This Shield grants you 400 Energy Shield Regeneration per second and 3% to all Maximum Resistances. Combined with the Doppelganger Guise Armour, you will reach excellent Damage mitigation and Recovery at the same time.
You can also check our other Path of Exile builds right over here Odealo's Crafty Guides - Full List
1. Gameplay
You will need to recast your Blades every few seconds, more frequently against Bosses. In the meantime, you can freely run past your Enemies, inflicting heavy Poison Damage. The Plague Bearer enforces this playstyle further and takes only a few Hits to fully charge. Occasionally, you will have to use your second Curse or drop an Arcanist Brand with even more Curses. To move around, you should use Shield Charge supplemented by Frostblink. If you already have Vaal Blade Vortex, you should include the Pact of K'Tash to make it stronger and usable more times during a single fight.
|
|
|
|

2. Build's PROS & CONS
| PROS |
|
| CONS |
|
3. Leveling tips
You can level up this character easily with Blade Vortex. The Poison will start a bit slow at first, as you will lack both Poison Chance and Damage over Time Multiplier, but it will ramp up quickly as you raise your level. You will probably need the Chance to Poison Support and Herald of Agony to reach the Poison Cap. Do not pick up the Perfect Agony Keystone until you reach 90% Crit Chance against Enemies on Low Life.
Bandits:
Kill all three bandits to get an additional Passive Skill Point or help Alira.
Leveling Skill Trees:
35 Points Passive Tree
Pick Notables that boost both your Chaos and Physical Damage. Rush the Poison Chance Notables and use the related Support Gem as well.
78 Points Passive Tree
Pick the remaining Poison and Chaos Notables. Respecing with Gold is very cheap at lower levels, so don't worry about saving Points for Cluster Jewels yet.
4. Final Skill Tree, Ascendancy Points, and Pantheon
Final Skill Tree:
112 Points Final Passive Tree (doesn't include Cluster or Unique Jewels)
119 Points Path of Building (PoB) link
Ascendancy points:
Preferably in that order:
- Toxic Delivery
- Knife in the Back
- Opportunistic
- Shadowed Blood
Pantheon:
Major God: Soul of the Brine King: You cannot be Stunned if you've been Stunned or Blocked a Stunning Hit in the past 2 seconds; Cannot be Frozen
Minor God: Soul of Yugul: 30% reduced Effect of Curses on uou
5. Final Gems links
| [DPS] Blade Vortex setup | |
 |
Blade Vortex - summons up to 10 Blades orbiting around you, dealing more Physical Damage for each Blade you have summoned. You should also use the Vaal Version, which summons an independent Vortex of Blades. |
 |
Unleash Support |
 |
Unbound Ailments Support |
 |
Efficacy Support |
 |
Deadly Ailments Support |
 |
Void Manipulation Support |
| [UTILITY] Auras | |
 |
Flesh and Stone - lowers the Damage you take from nearby Enemies. |
 |
Herald of Agony - grants you Poison Chance and improves your Damage with Poisons. |
 |
Clarity - provides Mana Regeneration necessary to Cast your Spells. |
 |
Malevolence - the best Aura for DoT builds, which increases your Damage over Time and prolongs the Duration of your Blades. |
| [UTILITY] Utility Spells setup Socket in the Helmet |
|
 |
Despair - lowers the Chaos Resistances of affected foes, which increases the Poison Damage they take as a result. |
 |
Enfeeble - A defensive Curse that you can use if wearing Anathema. |
 |
Assassin's Mark - Crit Chance and Crit Multiplier for more Poison Damage. Use it with Anathema, or else you won't fit it. |
 |
Frost Shield - creates a frosty dome that absorbs incoming Damage and boosts your Critical Strike Chance. |
| [DPS] Plague Bearer setup | |
 |
Plague Bearer - stores part of your Poison Damage up to a limit. You can release it to deal a fixed amount of Damage around your character within a few seconds. Its damage can't be improved with most Support Gems. |
 |
Increased Area of Effect Support |
 |
Empower Support |
| [UTILITY] Mobility setup | |
 |
Shield Charge - a fast Charge towards the targeted location; it has no Cooldown. |
 |
Frostblink - an instant teleport that can be used without interrupting other actions. It is limited by a short Cooldown. |
 |
Faster Attacks Support |
| [GUARD] Guard setup | |
 |
Immortal Call - reduces the Damage you take for a short time, greatly reducing incoming bursts. |
 |
Cast when Damage Taken Support |
| [PACT] Pact setup | |
 |
Pact of K'Tash - empowers your Vaal Blade Vortex and allows you to keep it up indefinitely by recovering consumed Souls. |
 |
Cooldown Recovery Support |
 |
Second Wind Support |
|
|
6. Gear Setup
There are a lot of Unique Items you can use with this Build. Most of them will greatly improve your Damage in the early stages, but some are great all the way to the end-game. You should look for useful Corrupted Implicits on them, especially on the cheapest ones. They cover most of your offensive power, so most of your Rare Items will be focused on getting the basic Defenses, maximum Life, and capping Resistances. The Rare Jewels are the best source of Critical Strike Multiplier, which will be converted to Damage over Time Multiplier thanks to the Perfect Agony Keystone. Cluster Jewels are much more efficient than the regular Passive Tree for all Poison Builds, so you will want to get them eventually. Try to include extra Attributes or Resistances there as well.
|
Stat priorities on items:
|
 (Weapon) Obliteration - the best Weapon for this Build, it provides tons of Damage and reliable explosions. You should Corrupt it to get Power Charge generation. (Weapon) Obliteration - the best Weapon for this Build, it provides tons of Damage and reliable explosions. You should Corrupt it to get Power Charge generation. |
|
| (33-37)% increased Spell Damage Gain (30-40)% of Physical Damage as Extra Chaos Damage Enemies you Kill have a 20% chance to Explode, dealing a quarter of their maximum Life as Chaos Damage |
|
 (Weapon) Apep's Slumber - this Shield provides 3% to all maximum Resistances and great ES Regeneration. You can also dual-wield Wands for maximum Damage. (Weapon) Apep's Slumber - this Shield provides 3% to all maximum Resistances and great ES Regeneration. You can also dual-wield Wands for maximum Damage. |
|
| Adds (50-55) to (72-80) Chaos Damage +(80-100) to maximum Energy Shield +25% chance to be Poisoned +3% to all maximum Resistances while Poisoned Regenerate 80 Energy Shield per Second per Poison on you, up to 400 per second Poisons on you expire 50% slower |
|
 (Helmet) Rare Helmet - use Helmet with the Trigger modifier to automate your Curses. This Craft can be unlocked in the Campaign. You should get Mana Reservation Efficiency here as well. (Helmet) Rare Helmet - use Helmet with the Trigger modifier to automate your Curses. This Craft can be unlocked in the Campaign. You should get Mana Reservation Efficiency here as well. |
|
| Min. requirements: +100 to maximum Life 50% to Elemental Resistance Trigger Socketed Spells when you Focus, with a 0.25 second Cooldown Optional affixes: Mana Reservation Efficiency (Exarch Implicit + Essence) |
|
 (Body Armour) Doppelgänger Guise - the best defensive Armour in the game, it provides lots of Recovery, Damage Reduction for Chaos and Physical Damage, and plenty of Energy Shield. You can also use the Insane Stance to guarantee Critical Strike Chance against Bosses if you are sure to avoid their Attacks manually. (Body Armour) Doppelgänger Guise - the best defensive Armour in the game, it provides lots of Recovery, Damage Reduction for Chaos and Physical Damage, and plenty of Energy Shield. You can also use the Insane Stance to guarantee Critical Strike Chance against Bosses if you are sure to avoid their Attacks manually. |
|
| Grants Level 20 Unhinge Skill (40-60)% more Critical Strike Chance while Insane Enemies Killed by your Hits are destroyed while Insane (40-30)% less Physical and Chaos Damage Taken while Sane Regenerate 10% Life over one second when Hit while Sane |
|
 (Belt) Rare Belt - here you can get tons of Life and Resistances. You can also get some Chaos Damage bonus. It should always be a Stygian Vise base, as it allows you to use an extra Abyss Jewel. (Belt) Rare Belt - here you can get tons of Life and Resistances. You can also get some Chaos Damage bonus. It should always be a Stygian Vise base, as it allows you to use an extra Abyss Jewel. |
|
| Min. requirements: +100 to maximum Life +80% to Elemental Resistance Optional affixes: Attributes % increased Life increased Chaos Damage Flask and Flask Charges modifiers |
|
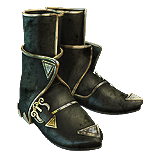 (Boots) Rare Boots - primarily look for high bonus Life and Movement Speed, then just try to add missing Resistances and possibly Chaos Resistance. (Boots) Rare Boots - primarily look for high bonus Life and Movement Speed, then just try to add missing Resistances and possibly Chaos Resistance. |
|
| Min. requirements: +100 to maximum Life 30% increased Movement Speed Optional affixes: 5% increased Action Speed (Searing Exarch Implicit) Chance to gain Onslaught on Kill Attributes Resistance |
|
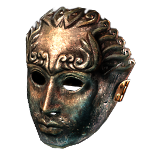
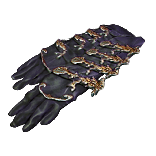 (Gloves) Asenath's Gentle Touch - the BiS pair of gloves. It automatically applies the Temporal Chains Curse, Blinds enemies, and causes corpses to explode for extra Damage. Later on, try to get a Corrupted version that boosts your Crit Chance for Spells. (Gloves) Asenath's Gentle Touch - the BiS pair of gloves. It automatically applies the Temporal Chains Curse, Blinds enemies, and causes corpses to explode for extra Damage. Later on, try to get a Corrupted version that boosts your Crit Chance for Spells. |
|
| +(20-30) to Intelligence +(60-80) to maximum Life +(60-80) to maximum Mana Curse Enemies with Temporal Chains on Hit Non-Aura Curses you inflict are not removed from Dying Enemies Enemies near corpses affected by your Curses are Blinded Enemies Killed near corpses affected by your Curses explode, dealing 3% of their Life as Physical Damage |
|
 (Amulet) Ungil's Harmony - grants absurd amounts of Critical Strike Chance, and the downside doesn't affect this Build in the slightest. You can use Critical Catalysts to push the Crit Chance up to 420%. (Amulet) Ungil's Harmony - grants absurd amounts of Critical Strike Chance, and the downside doesn't affect this Build in the slightest. You can use Critical Catalysts to push the Crit Chance up to 420%. |
|
| (250-350)% increased Global Critical Strike Chance Your Critical Strikes do not deal extra Damage +(30-50) to maximum Life +(30-50) to maximum Mana 40% increased Stun and Block Recovery Recommended Anointments: Arcane Potency |
|
 (Amulet) Marylene's Fallacy - once you accumulate a large amount of Critical Strike Chance, you can switch to this Amulet to gain an insane amount of DoT Multiplier. Make sure you are still Crit Capped to keep gameplay smooth. (Amulet) Marylene's Fallacy - once you accumulate a large amount of Critical Strike Chance, you can switch to this Amulet to gain an insane amount of DoT Multiplier. Make sure you are still Crit Capped to keep gameplay smooth. |
|
| +(20-30) to Intelligence +(80-120) to Accuracy Rating +(210-240)% to Global Critical Strike Multiplier +(80-100) to Evasion Rating (10-15)% increased Light Radius 40% less Critical Strike Chance Critical Strikes have Culling Strike |
|
 (Ring) Rare Ring - you can get plenty of Crit Multiplier with Essences. Other than that, it should provide plenty of Resistance and Attributes, although it can fix your Mana sustain as well. (Ring) Rare Ring - you can get plenty of Crit Multiplier with Essences. Other than that, it should provide plenty of Resistance and Attributes, although it can fix your Mana sustain as well. |
|
| Min. requirements: +60% to Elemental Resistances +70 to Maximum Life Optional affixes: % increased Chaos Damage Non-Channelling Skills have -(7-6) to Total Mana Cost Attributes % to Global Critical Strike Multiplier |
|
 (Ring) Anathema - this Ring allows you to use 4 Curses almost for free, which translates to a massive amount of Damage and survivability. You can get a Corrupted version that provides some Resistances too. (Ring) Anathema - this Ring allows you to use 4 Curses almost for free, which translates to a massive amount of Damage and survivability. You can get a Corrupted version that provides some Resistances too. |
|
| +(15-25) to maximum Energy Shield +(30-40) to Intelligence (10-15)% increased Cast Speed (10-20)% chance to gain a Power Charge when you Cast a Curse Spell Your Curse Limit is equal to your maximum Power Charges |
|
 (Jewel) Rare Jewels - at first, you can use Jewels to cap your Poison Chance. Once you switch to the Perfect Agony setup, you should get lots of Crit Multiplier here. (Jewel) Rare Jewels - at first, you can use Jewels to cap your Poison Chance. Once you switch to the Perfect Agony setup, you should get lots of Crit Multiplier here. |
|
|
Recommended affixes: |
|
 (Jewel) Large Cluster Jewels - the Physical Clusters have a very limited variety. You will always want the Grim Oath and the Masters of Fundamentals, while the third Notable is flexible. (Jewel) Large Cluster Jewels - the Physical Clusters have a very limited variety. You will always want the Grim Oath and the Masters of Fundamentals, while the third Notable is flexible. |
|
| Recommended affixes: Grim Oath Masters of Fundamentals Battle-Hardened |
|
 (Jewel) Medium Cluster Jewels - you will need one Jewel with the Overwhelming Malice, but the remaining Jewels should always grant you the Circling Oblivion Notable, ideally paired up with the Flow of Life. (Jewel) Medium Cluster Jewels - you will need one Jewel with the Overwhelming Malice, but the remaining Jewels should always grant you the Circling Oblivion Notable, ideally paired up with the Flow of Life. |
|
| Recommended affixes: 1 Added Passive Skill is Circling Oblivion 1 Added Passive Skill is Flow of Life 1 Added Passive Skill is Basics of Pain 1 Added Passive Skill is Overwhelming Malice |
|
 (Jewel) The Golden Rule - you can easily apply 100 stacks of Poison on yourself, which will deal no Damage thanks to the Shadowed Blood Notable. In return, you gain 100% Chaos Resistance and enable the Apep's Slumber Shield. (Jewel) The Golden Rule - you can easily apply 100 stacks of Poison on yourself, which will deal no Damage thanks to the Shadowed Blood Notable. In return, you gain 100% Chaos Resistance and enable the Apep's Slumber Shield. |
|
| (30-40)% increased Armour while Bleeding Bleeding you inflict is Reflected to you +1% to Chaos Resistance per Poison on you Poison you inflict is Reflected to you if you have fewer than 100 Poisons on you |
|
 (Jewel) Brutal Restraint - by default, it gives you plenty of Dexterity, and with the correct seed, it can grant you tons of useful modifiers such as maximum Life, Poison Damage, Onslaught on Kill, or better Flask sustain. (Jewel) Brutal Restraint - by default, it gives you plenty of Dexterity, and with the correct seed, it can grant you tons of useful modifiers such as maximum Life, Poison Damage, Onslaught on Kill, or better Flask sustain. |
|
| Denoted service of (500-8000) dekhara in the akhara of (Asenath-Balbala-Nasima) Passives in radius are Conquered by the Maraketh Historic |
|
|
Suggested Flasks:
|
|
     |
|
|
If you have any other build requests please leave that in the comments below. We are always open to suggestions and constructive feedback.
Pictures used in this article are the intellectual property of Grinding Gear Games.
