Unique Shields in PoE
Complete List of all Unique Shields in Path of ExileUnique Shields in PoE
Wiki page
Updated for Patch 3.22
In Path of Exile, there are tons of Unique Shields. These are often used to enhance the character's survivability as their key feature is granting you extra Attack Block Chance, around 25% of it. Blocking is really powerful. It's one of the most important defensive layers, you can get up to a 75% chance of receiving no Hit Damage at all. Note that Spell Damage is not native to any Shield, it is usually much harder to get because of that (Spell Suppression alone is a more common solution to combat Spell Hit Damage). Besides that, all the other stats may vary depending on the type of your build. The most popular modifiers here are Maximum Life as a Prefix, Resistances, Maximum Resistances, Spell Suppression, instant Life gain on Block, or Block Chance as Suffixes. Totem builds often pick a Shaper's Shield for the "+1 to maximum number of Summoned Totems" Prefix. Minion or Spell Damage builds favour a Rare Intelligence Shield with "+1 to Level of all [Physical, Fire, Cold, Lightning, or Chaos] Spell Skill Gems" so that they don't need to pick a second Wand or a Sceptre. Another popular Prefix to have on a Rare Shield is Shaper's/Hunter's "Socketed Gems have 30% increased Reservation Efficiency". Most of the builds that can put on a Shield in their off-hand will do so as these defences are quite important. Only the most offensively oriented Spell Damage builds will go for the dual-wield configuration.
Some of the Shields listed here are universally suitable and will fit a lot of builds, such is the case with Aegis Aurora that's bad only if you don't have any significant amount of Armour or Energy Shield. Other Shields are very niche and require building your whole character around it, Dawnbreaker being an example of one. Be sure that if you don't really need any of the Unique Shields listed here, it's probably better to go for a Rare one.
| Strength Shields | |
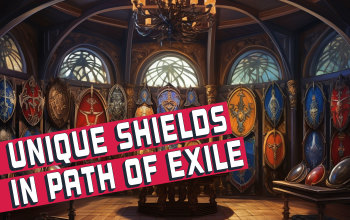
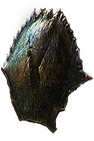
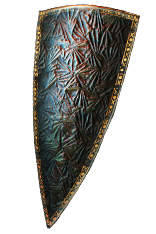
 Lycosidae - It's good on low-level Attack characters because it guarantees that your Hits will not be Evaded no matter how low your Accuracy Rating is. The damage added to Couterattacks is not influential as they don't usually do much. Lycosidae - It's good on low-level Attack characters because it guarantees that your Hits will not be Evaded no matter how low your Accuracy Rating is. The damage added to Couterattacks is not influential as they don't usually do much. |
|
|
Required Level: 11 (173-226) Armour |
|
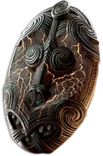
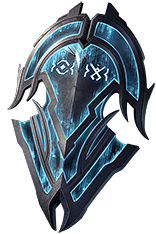
 Trolltimber Spire - Life Regeneration is not a particularly powerful way to Recover your Life, but combined with Life Leech from Totems it significantly enhances your durability, especially if you're using four or more Totems that deal Hit damage. It's good for leveling using Totems. Trolltimber Spire - Life Regeneration is not a particularly powerful way to Recover your Life, but combined with Life Leech from Totems it significantly enhances your durability, especially if you're using four or more Totems that deal Hit damage. It's good for leveling using Totems. |
|
|
Required Level: 17 Armour: (216-282) |
|
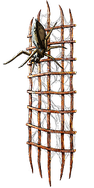
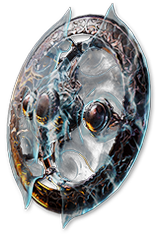
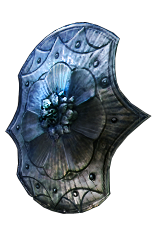
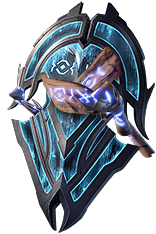
 Titucius' Span - It grants an additional chance of Blocking Projectile Attacks, but it doesn't matter if your general Attack Block Chance is already capped at 75%. It also protects you from Physical Hits caused by Projectiles and Projectile Attacks, but it's not much. A Rare Shield would be much better. Titucius' Span - It grants an additional chance of Blocking Projectile Attacks, but it doesn't matter if your general Attack Block Chance is already capped at 75%. It also protects you from Physical Hits caused by Projectiles and Projectile Attacks, but it's not much. A Rare Shield would be much better. |
|
|
Required Level: 30 (379-468) Armour |
|
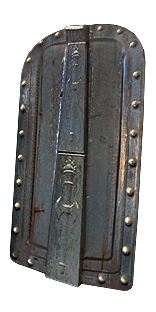
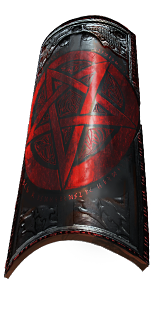
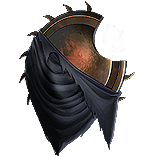
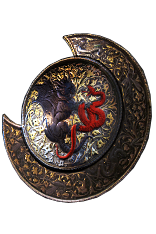
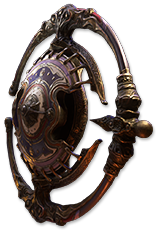
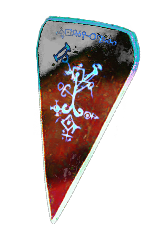
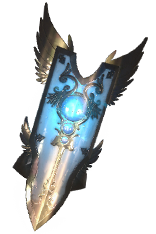
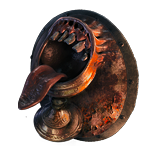
 Redblade Banner - One of the most popular Shields in the game. It's used for its infinite Warcry Power (Warcries will perform as there are a lot of enemies around you) and increased Warcry Cooldown Recovery Rate. It's excellent with Berserker's Warbinger passive to quickly and frequently generate a lot of Rage. It's often used in, for example, General's Cry BF Berserker or Venom Gyre Berserker builds. Redblade Banner - One of the most popular Shields in the game. It's used for its infinite Warcry Power (Warcries will perform as there are a lot of enemies around you) and increased Warcry Cooldown Recovery Rate. It's excellent with Berserker's Warbinger passive to quickly and frequently generate a lot of Rage. It's often used in, for example, General's Cry BF Berserker or Venom Gyre Berserker builds. |
|
|
Required Level: 35 (338-432) Armour |
|
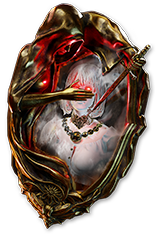
 Chernobog's Pillar - It's bad. Its only notable features are some Damage Conversion and a chance to Curse with Enfeeble on Hit. Conversion is often easy to get, especially Physical to Fire. Enfeeble is not a first choice for a Curse in any build. The basic stats like Life and Armour can be acquired from a Rare Shield. You may consider it if you really need this Conversion and you can apply more than one Curse. Chernobog's Pillar - It's bad. Its only notable features are some Damage Conversion and a chance to Curse with Enfeeble on Hit. Conversion is often easy to get, especially Physical to Fire. Enfeeble is not a first choice for a Curse in any build. The basic stats like Life and Armour can be acquired from a Rare Shield. You may consider it if you really need this Conversion and you can apply more than one Curse. |
|
|
Required Level: 61 (785-1027) Armour |
|
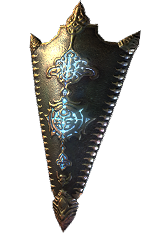
 Tukohama's Fortress - It grants you Blood Magic which is undesirable in almost any build as you can no longer host any Auras without lowering your Maximum Life. It lets you summon one extra Totem, but that can be acquired from a Shaper Prefix on a Rare Shield. Life-stacking Builds that need Blood Magic can get it from the Skill Tree. It's used only in some very specific Totem builds. Tukohama's Fortress - It grants you Blood Magic which is undesirable in almost any build as you can no longer host any Auras without lowering your Maximum Life. It lets you summon one extra Totem, but that can be acquired from a Shaper Prefix on a Rare Shield. Life-stacking Builds that need Blood Magic can get it from the Skill Tree. It's used only in some very specific Totem builds. |
|
|
Required Level: 61 (357-411) Armour |
|
| Replica Tukohama's Fortress - This version also gives you Blood Magic but increases your Brand Damage and Crit Chance. It's bad, the Mana is needed in such builds, and the damage boost is a minor one. |
|
|
Required Level: 61 (357-411) Armour |
|
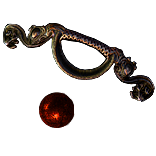
 The Anticipation - It's not good, but still valuable as it's required to make The Surrender. It grants you a lot of Armour for 4 seconds after Blocking and Intimidates enemies on Block. It's remotely good in the same niche as its upgraded version, so that's what we would recommend. The Anticipation - It's not good, but still valuable as it's required to make The Surrender. It grants you a lot of Armour for 4 seconds after Blocking and Intimidates enemies on Block. It's remotely good in the same niche as its upgraded version, so that's what we would recommend. |
|
|
Required Level: 64 (824-948) Armour |
|
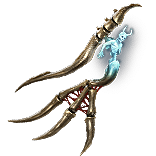
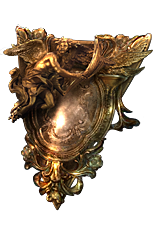
 The Surrender - It's good because it instantly Recovers up to 500 Life on Block. Even if you have a high Blok Chance, a series of multiple rapid Hits can eventually kill your character. It won't happen when you have this instant Recovery on Block. It's excellent on tanky characters that cannot be killed by one big Hit, and ones that don't have a lot of Energy Shield (unless they also use Divine Flesh or Eldritch Battery). A Rare Shield can recover only up to a fifth of what this Shield offers. The Surrender - It's good because it instantly Recovers up to 500 Life on Block. Even if you have a high Blok Chance, a series of multiple rapid Hits can eventually kill your character. It won't happen when you have this instant Recovery on Block. It's excellent on tanky characters that cannot be killed by one big Hit, and ones that don't have a lot of Energy Shield (unless they also use Divine Flesh or Eldritch Battery). A Rare Shield can recover only up to a fifth of what this Shield offers. |
|
|
Required Level: 68 (1091-1445) Armour |
|
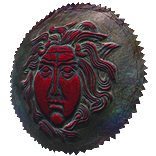
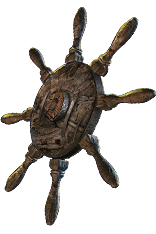
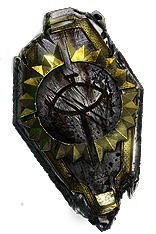
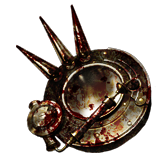
 Ahn's Heritage - It's not very useful, as the only upside is +2% to all Maximum Resistances if you have no Endurance Charges, and Onslaught if you have all Endurance Charges you can get. The "+2% to all maximum Resistances" can be acquired as a Suffix on a regular Shield. Onslaught is also easy to find. It lowers your Maximum Chance to Block which is bad. We would not recommend it. Ahn's Heritage - It's not very useful, as the only upside is +2% to all Maximum Resistances if you have no Endurance Charges, and Onslaught if you have all Endurance Charges you can get. The "+2% to all maximum Resistances" can be acquired as a Suffix on a regular Shield. Onslaught is also easy to find. It lowers your Maximum Chance to Block which is bad. We would not recommend it. |
|
|
Required Level: 67 (783-1202) Armour |
|
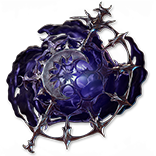
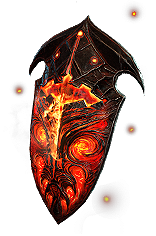 Dawnbreaker - It's a great source of "damage taken as" mods which can be a foundation of an extremely durable build. It allows you to focus only on a few selected defensive layers (notably Fire Resistance) instead of other Resistances and Armour. This Shield makes it possible to take no Lightning, Cold, or even Physical Damage at all. You can see how it can be done in this Fire Conversion Reap Chieftain build, or in some Pathfinder builds that use Lightning Coil and Taste of Hate. Dawnbreaker - It's a great source of "damage taken as" mods which can be a foundation of an extremely durable build. It allows you to focus only on a few selected defensive layers (notably Fire Resistance) instead of other Resistances and Armour. This Shield makes it possible to take no Lightning, Cold, or even Physical Damage at all. You can see how it can be done in this Fire Conversion Reap Chieftain build, or in some Pathfinder builds that use Lightning Coil and Taste of Hate. |
|
|
Required Level: 67 (1305-2103) Armour |
|
 Lioneye's Remorse - It's rather generic, gives you a lot of Maximum Life and reduces Physical Projectile Attack Damage taken by 25. The abundance of Maximum Life is not enough to make it better than a Rare Shield with other modifiers like Resistances or Spell Suppression. Lioneye's Remorse - It's rather generic, gives you a lot of Maximum Life and reduces Physical Projectile Attack Damage taken by 25. The abundance of Maximum Life is not enough to make it better than a Rare Shield with other modifiers like Resistances or Spell Suppression. |
|
|
Required Level: 70 (1307-1718) Armour |
| Dexterity Shields | ||
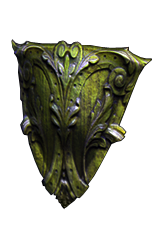
 Crest of Perandus - For a Shield that you can wear as soon as level 8, it is great. It's not very unique but has all the basic stats that you will need early in the game, especially when you play a Physical Attack Damage build. Crest of Perandus - For a Shield that you can wear as soon as level 8, it is great. It's not very unique but has all the basic stats that you will need early in the game, especially when you play a Physical Attack Damage build. |
||
|
Required Level: 8 (51-66) Evasion |
||
 Kaltenhalt - It des grants you a fraction of your Physical Damage as Extra Cold Damage, so it can be good on a Phys to Cold build like Frost Blades or Glacial Hammer, but only in the very early stages of the game. It should be replaced later. Kaltenhalt - It des grants you a fraction of your Physical Damage as Extra Cold Damage, so it can be good on a Phys to Cold build like Frost Blades or Glacial Hammer, but only in the very early stages of the game. It should be replaced later. |
||
|
Required Level: 16 (196-308) Evasion |
||
 Mutewind Pennant - Call to Arms is often desirable, but usually players using Warcries have easy access to it on a Skill Tree. It's also not that important to equip this Shield only to acquire this Keystone as it doesn't offer much else. Onslaught is also easily obtainable. Mutewind Pennant - Call to Arms is often desirable, but usually players using Warcries have easy access to it on a Skill Tree. It's also not that important to equip this Shield only to acquire this Keystone as it doesn't offer much else. Onslaught is also easily obtainable. |
||
|
Required Level: 142 (559-698) Evasion |
||
 Great Old One's Ward - It has good enough stats to consider it for a low-budget Physical Attack Build. It's better the more you need the flat Physical Damage, which is often the case in a Facebreaker build. A good Rare Shield is better in most cases. Great Old One's Ward - It has good enough stats to consider it for a low-budget Physical Attack Build. It's better the more you need the flat Physical Damage, which is often the case in a Facebreaker build. A good Rare Shield is better in most cases. |
||
|
Required Level: 46 (227-272) Evasion |
||
 Kiloava's Bluster - It's good if you don't have any better way to increase your default 75% Resistance Cap. It still requires a high Life Pool to not get overwhelmed by a barrage of Hits that just so happened to treat your Resistanaces as you have them, not as they would be 90%. It's a nice alternative to the high Max Elemental Resistances that are always required in tanky builds. It's a bit unreliable and has no Maximum Life or regular Elemental Resistance, so not many players use it. Kiloava's Bluster - It's good if you don't have any better way to increase your default 75% Resistance Cap. It still requires a high Life Pool to not get overwhelmed by a barrage of Hits that just so happened to treat your Resistanaces as you have them, not as they would be 90%. It's a nice alternative to the high Max Elemental Resistances that are always required in tanky builds. It's a bit unreliable and has no Maximum Life or regular Elemental Resistance, so not many players use it. |
||
|
Required Level: 57 (654-962) Evasion |
||
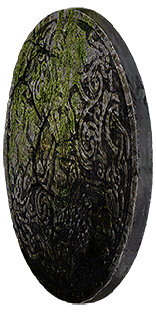
 Mistwall - It's fine with high enough Evasion or Dodge Chance. If you don't get Hit often (Block requires being Hit first) it keeps you at your Maximum Attack Block Chance. If you have Blocked recently, it gives you Phasing. It has no Maximum Life which emphasises the importance of high Evasion that's needed in a build that can benefit from this Shield. Blocking a Spell Hit will also put the Attack Block Chance bonus on Cooldown which is undesirable. In most cases, a Rare Shield will be better. Mistwall - It's fine with high enough Evasion or Dodge Chance. If you don't get Hit often (Block requires being Hit first) it keeps you at your Maximum Attack Block Chance. If you have Blocked recently, it gives you Phasing. It has no Maximum Life which emphasises the importance of high Evasion that's needed in a build that can benefit from this Shield. Blocking a Spell Hit will also put the Attack Block Chance bonus on Cooldown which is undesirable. In most cases, a Rare Shield will be better. |
||
|
Required Level: 60 (1049-1372) Evasion |
||
| Replica Mistwall - It's very similar to Mistwall but works on Spells instead of Attacks. With regular Mistwall you would mitigate Spell Damage with Spell Suppression, so Spell Block Chance wasn't needed there (it was undesirable). With the Replica Version, Blocking a Hit from an Attack (which you have at least a 24% chance of doing) will disable the "+75% Chance to Block Spell Damage" bonus, so it's not as good. It also requires high Evasion or Dodge because it grants no Maximum Life. It can still be good in a build that has no Spell Block Chance, and one that doesn't get Hit often. |
||
|
Required Level: 60 (1049-1372) Evasion |
||
 Thousand Teeth Temu - It's bad. Relying on Physical Damage Reflected to the Attacker is hard to execute in a fast-paced environment and unreliable against non-physical enemies. Some of them don't even use Attacks. It's also bad against end-game bosses as you don't want to get Hit by them at all, and the damage Reflected is low and hard to scale up. There is nothing else worth your attention on this Shield. Thousand Teeth Temu - It's bad. Relying on Physical Damage Reflected to the Attacker is hard to execute in a fast-paced environment and unreliable against non-physical enemies. Some of them don't even use Attacks. It's also bad against end-game bosses as you don't want to get Hit by them at all, and the damage Reflected is low and hard to scale up. There is nothing else worth your attention on this Shield. |
||
|
Required Level: 63 (660-833) Evasion |
| Intelligence Shields | |||
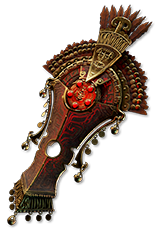
 Brinerot Flag - Spell Casters rarely use Warcries, and these Skills usually don't need to be scaled up with Gem Level to be effective. Arcane Surge can be easily gained with passives or a Support gem. We see no use for this Shield. Brinerot Flag - Spell Casters rarely use Warcries, and these Skills usually don't need to be scaled up with Gem Level to be effective. Arcane Surge can be easily gained with passives or a Support gem. We see no use for this Shield. |
|||
|
Required Level: 23 (91-115) Energy Shield |
|||
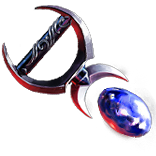 Light of Lunaris - It can be good enough in an Energy Shield Cold Damage Crit Spell build, such as this Spark Inquisitor, but a lot of such builds tend to use a second weapon or a Staff as it often gives you much more damage. A Rare Shield is still a better option in almost any case. Light of Lunaris - It can be good enough in an Energy Shield Cold Damage Crit Spell build, such as this Spark Inquisitor, but a lot of such builds tend to use a second weapon or a Staff as it often gives you much more damage. A Rare Shield is still a better option in almost any case. |
|||
|
Required Level: 28 (143-203) Energy Shield |
|||
 Sentari's Answer - It can be used to apply Curses on enemies whose Hits you have Blocked. These ignore the Curse Limit and are generally beneficial in any Elemental Damage build. Most players, however, are more interested in the increased Quantity of Items found present here which is popular among MF characters. It's not useful beyond this one niche. It's better to kill an enemy before it hits you. Sentari's Answer - It can be used to apply Curses on enemies whose Hits you have Blocked. These ignore the Curse Limit and are generally beneficial in any Elemental Damage build. Most players, however, are more interested in the increased Quantity of Items found present here which is popular among MF characters. It's not useful beyond this one niche. It's better to kill an enemy before it hits you. |
|||
|
Required Level: 33 (35-40) Energy Shield |
|||
 Kongming's Stratagem - It's not useful at all. It grants no Block Chance and only a bit of ES. It's supposed to be used in a Trap build to Blind enemies and receive reduced Spell Damage from them. It fails to protect you from any Attacks, and it's better to just invest in Spell Suppression Chance at this point. Blind is easy to get too. Rare Shield or a second Weapon is better in most cases. Kongming's Stratagem - It's not useful at all. It grants no Block Chance and only a bit of ES. It's supposed to be used in a Trap build to Blind enemies and receive reduced Spell Damage from them. It fails to protect you from any Attacks, and it's better to just invest in Spell Suppression Chance at this point. Blind is easy to get too. Rare Shield or a second Weapon is better in most cases. |
|||
|
Required Level: 45 (133-180) Energy Shield |
|||
 The Eternal Apple - It can be used to automatically Trigger Warcries socketed here. It has a Cooldown, and the Cooldown of Warcries has to be accounted for too. It disables Block which is bad. In almost any case it is better to manually use a Warcry, the only exception being when you have a lot of them and cannot be bothered to press multiple buttons. It may be the case when you're using the Echoes of Creation Helmet. Very situational Shield. The Eternal Apple - It can be used to automatically Trigger Warcries socketed here. It has a Cooldown, and the Cooldown of Warcries has to be accounted for too. It disables Block which is bad. In almost any case it is better to manually use a Warcry, the only exception being when you have a lot of them and cannot be bothered to press multiple buttons. It may be the case when you're using the Echoes of Creation Helmet. Very situational Shield. |
|||
|
Required Level: 49 (42-48) Energy Shield |
|||
 The Scales of Justice - It isn't good. It has no ES, which is not great in most cases, especially as it is an Intelligence Shield. The most important features here are added Fire Damage per Life or Mana, whichever is lower. It also makes you unaffected by Ignite and Shock if your Life and Mana are somewhat balanced. Let's assume you have 8k Maximum Life and Mana (which is hard to achieve) - it would grant you 320 to 640 added Fire Damage, which is around the same as the level-30 Added Chaos Damage from The Covenant (but comparing Fire Damage to Chaos damage may be misleading). However, it requires too much tinkering with the build and the reward is not worth it. Most Mana-stacking builds pick a 2-hand Staff or a Shield with Mana on it. It may be good if you somehow ended up having a lot of Mana as well as Life on your Fire Damage/Inquisitor build. The Scales of Justice - It isn't good. It has no ES, which is not great in most cases, especially as it is an Intelligence Shield. The most important features here are added Fire Damage per Life or Mana, whichever is lower. It also makes you unaffected by Ignite and Shock if your Life and Mana are somewhat balanced. Let's assume you have 8k Maximum Life and Mana (which is hard to achieve) - it would grant you 320 to 640 added Fire Damage, which is around the same as the level-30 Added Chaos Damage from The Covenant (but comparing Fire Damage to Chaos damage may be misleading). However, it requires too much tinkering with the build and the reward is not worth it. Most Mana-stacking builds pick a 2-hand Staff or a Shield with Mana on it. It may be good if you somehow ended up having a lot of Mana as well as Life on your Fire Damage/Inquisitor build. |
|||
|
Required Level: 49 0 Energy Shield |
|||
 Manastorm - It's not a popular Shield. It sacrifices all of your Mana each time you cast a Spell leaving you with no Mana quite often (you can still use ES from Eldritch Battery, set up Totems to use skills for you, throw Traps, use Attacks, or have your Skills cost no Mana). It can be implemented into Mana-stacking builds to gain tons of added Lightning Damage. With 8k of Mana sacrificed you would get 2k flat added damage. It can double or triple your base damage. We recommend using it with Attacks as you won't lose all your Mana each time you Attack. Most Mana-stacking builds use Indigon or Archmage Support which requires you to have not only a lot of Maximum Mana, but the actual Mana you can spend, making it not a good choice there. Manastorm - It's not a popular Shield. It sacrifices all of your Mana each time you cast a Spell leaving you with no Mana quite often (you can still use ES from Eldritch Battery, set up Totems to use skills for you, throw Traps, use Attacks, or have your Skills cost no Mana). It can be implemented into Mana-stacking builds to gain tons of added Lightning Damage. With 8k of Mana sacrificed you would get 2k flat added damage. It can double or triple your base damage. We recommend using it with Attacks as you won't lose all your Mana each time you Attack. Most Mana-stacking builds use Indigon or Archmage Support which requires you to have not only a lot of Maximum Mana, but the actual Mana you can spend, making it not a good choice there. |
|||
|
Required Level: 56 (84-121) Energy Shield |
|||
 Apep's Slumber - Can be used in a self-poison build to Regenerate a lot of Energy Shield and to gain +3% to all Maximum Resistances. To do so you would need The Golden Rule to reflect Poisons back to your character, or any self-inflicted Chaos/Poison Damage (like Trauma or Forbidden Rite). It also adds a lot of Chaos Damage to your Hits. To benefit from it you will need to mitigate the effects of self-poison. A popular choice is the Tainted Pact Amulet. Chaos DoT from Poison would now Heal you instead, as long as you're Leeching Life. It can be used in builds that use Energy Shield and don't stop Leeching even when their Life is Full. There are not a lot of such builds. Apep's Slumber - Can be used in a self-poison build to Regenerate a lot of Energy Shield and to gain +3% to all Maximum Resistances. To do so you would need The Golden Rule to reflect Poisons back to your character, or any self-inflicted Chaos/Poison Damage (like Trauma or Forbidden Rite). It also adds a lot of Chaos Damage to your Hits. To benefit from it you will need to mitigate the effects of self-poison. A popular choice is the Tainted Pact Amulet. Chaos DoT from Poison would now Heal you instead, as long as you're Leeching Life. It can be used in builds that use Energy Shield and don't stop Leeching even when their Life is Full. There are not a lot of such builds. |
|||
|
Required Level: 62 (136-164) Energy Shield |
|||
 Apep's Supremacy - It's an upgraded version of Apep's Slumber. It makes Poison on you expire Slowe, not Faster. It doesn't regenerate your ES and makes Bleeding Damage on you deal Chaos Damage instead, so it's even better with Tainted Pact and The Golden Rule. It can also be great when combined with Replica Soul Tether, The Red Trail, or Temptation Step. The +3% all max res is good, but the "+2% to all maximum Resistances" can be found on Rare Shields, so it's not worth getting all this setup only for this stat. Apep's Supremacy - It's an upgraded version of Apep's Slumber. It makes Poison on you expire Slowe, not Faster. It doesn't regenerate your ES and makes Bleeding Damage on you deal Chaos Damage instead, so it's even better with Tainted Pact and The Golden Rule. It can also be great when combined with Replica Soul Tether, The Red Trail, or Temptation Step. The +3% all max res is good, but the "+2% to all maximum Resistances" can be found on Rare Shields, so it's not worth getting all this setup only for this stat. |
|||
|
Required Level: 62 (136-164) Energy Shield |
|||
|
Required Level: 62 (151-211) Energy Shield |
|||
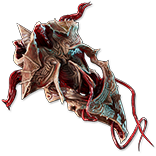
 Esh's Visage - It's one of the very few ways to make Chaos Damage not bypass ES. It's used in this Blade Trap Trickster build to do exactly that - the character has a very low Life pool but tons of ES. You could also take Chaos Inoculation, but you wouldn't be able to Reserve half of your Life and benefit from additional Auras this way. You could also use Coruscating Elixir, but it would force you to use only three Flasks with the Traitor Keystone to have it up permanently. It has great basic stats and it reflects Shock applied to you. Esh's Visage - It's one of the very few ways to make Chaos Damage not bypass ES. It's used in this Blade Trap Trickster build to do exactly that - the character has a very low Life pool but tons of ES. You could also take Chaos Inoculation, but you wouldn't be able to Reserve half of your Life and benefit from additional Auras this way. You could also use Coruscating Elixir, but it would force you to use only three Flasks with the Traitor Keystone to have it up permanently. It has great basic stats and it reflects Shock applied to you. |
|||
|
Required Level: 62 (190-230) Energy Shield |
|||
 Matua Tupuna - It's a popular Shield among Aurabots. It increases the effect of Auras from your Skills, which affects your party members. It's sometimes used in Minion builds too, especially if you have a lot of Auras your Minions can benefit from. Matua Tupuna - It's a popular Shield among Aurabots. It increases the effect of Auras from your Skills, which affects your party members. It's sometimes used in Minion builds too, especially if you have a lot of Auras your Minions can benefit from. |
|||
|
Required Level: 63 (29-45) Energy Shield |
|||
 Malachai's Loop - One of the most popular Shields for a Stationary-type build with Ralakesh's Impatience as it doesn't allow you to lose the Power Charges. It may albo be good with Graven's Secret because you won't lose the Absorption Charges. You may also be able to set up your Maximum Power Charges and Minimum Power Charges to be the same number using Grand Spectrum Jewels. The Shield is only good when you can circumvent the downside as it is very debilitating, the +2 to Maximum Power Charges is an extremely powerful addition to any build using them. We have used it in Lightning Conduit Trickster and Black Zenith Winter Orb Occultist builds. Malachai's Loop - One of the most popular Shields for a Stationary-type build with Ralakesh's Impatience as it doesn't allow you to lose the Power Charges. It may albo be good with Graven's Secret because you won't lose the Absorption Charges. You may also be able to set up your Maximum Power Charges and Minimum Power Charges to be the same number using Grand Spectrum Jewels. The Shield is only good when you can circumvent the downside as it is very debilitating, the +2 to Maximum Power Charges is an extremely powerful addition to any build using them. We have used it in Lightning Conduit Trickster and Black Zenith Winter Orb Occultist builds. |
|||
|
Required Level: 65 (179-231) Energy Shield |
|||
 Bitterbind Point - One of the least used Shields. Arcane Surge is easy to gain with Arcane Capacitor passive or Arcane Surge Support Gem. The Shield upgrades your Spectres with more Life and Arcane Surge for extra Cast Speed and increases your Crit Chance per Spectre. It's supposed to be used in a build that wants to use Spectres to enhance the character's Crit Chance. Most builds don't need that - a good Rare Shield is better in most cases. Bitterbind Point - One of the least used Shields. Arcane Surge is easy to gain with Arcane Capacitor passive or Arcane Surge Support Gem. The Shield upgrades your Spectres with more Life and Arcane Surge for extra Cast Speed and increases your Crit Chance per Spectre. It's supposed to be used in a build that wants to use Spectres to enhance the character's Crit Chance. Most builds don't need that - a good Rare Shield is better in most cases. |
|||
|
Required Level: 68 (187-246) Energy Shield |
|||
 Rathpith Globe - One of the most popular Shields in the game. It makes you lose Life each time you Cast or Trigger any Spell, but with Dissolution of the Flesh it won't happen and the downside has no effect. In turn, it increases Spell Damage and Crit Chance per Maximum Life, making it popular among Life-stacking characters. We have used it in our Blood Sacrament Chieftain. It's also great in any non-ES Spell build with Dissolution of the Flesh after you adjust your build to a unique playstyle imposed by this Jewel. Another case in which this Shield is good is when all of your Life is already Reserved and you're using Energy Shield to protect your character from all types of damage. This Energy Blade "Jedi Master" Inquisitor is an example of such a build. Rathpith Globe - One of the most popular Shields in the game. It makes you lose Life each time you Cast or Trigger any Spell, but with Dissolution of the Flesh it won't happen and the downside has no effect. In turn, it increases Spell Damage and Crit Chance per Maximum Life, making it popular among Life-stacking characters. We have used it in our Blood Sacrament Chieftain. It's also great in any non-ES Spell build with Dissolution of the Flesh after you adjust your build to a unique playstyle imposed by this Jewel. Another case in which this Shield is good is when all of your Life is already Reserved and you're using Energy Shield to protect your character from all types of damage. This Energy Blade "Jedi Master" Inquisitor is an example of such a build. |
|||
|
Required Level: 68 (147-200) Energy Shield |
| Armour/Evasion Shields | |||
 Wheel of the Stormsail - It can be used on low-level characters to get tons of Lightning Resistance. It has no other use. Wheel of the Stormsail - It can be used on low-level characters to get tons of Lightning Resistance. It has no other use. |
|||
|
Required Level: 5 (33-58) Armour |
|||
 The Deep One's Hide - It is not good. It can be used on low-level characters to get some Fire Resistance. The Deep One's Hide - It is not good. It can be used on low-level characters to get some Fire Resistance. |
|||
|
Required Level: 20 (87-133) Armour |
|||
 Shattershard - The Shiled Shatters when you Block dealing a lot of Physical Damage based on the Shield's Quality. After it Shatters you cannot Block and the Shield grants no Armour or Evasion, but adds Physical Damage to your Spells. After four seconds, it is re-armed. The bonus to damage and the damage itself is quite high, but it's impossible to trigger it on command (you cannot Block self-inflicted damage). It's too unreliable for most players. Shattershard - The Shiled Shatters when you Block dealing a lot of Physical Damage based on the Shield's Quality. After it Shatters you cannot Block and the Shield grants no Armour or Evasion, but adds Physical Damage to your Spells. After four seconds, it is re-armed. The bonus to damage and the damage itself is quite high, but it's impossible to trigger it on command (you cannot Block self-inflicted damage). It's too unreliable for most players. |
|||
|
Required Level: 49 (341-445) Armour |
|||
 Daresso's Courage - It is an exceptionally good Shield if you receive a lot of Attack and Spell Hits and cannot cap your Block Chance with passives. It's hard to predict what type of damage you will be Hit with, but if you know that the content you're running contains enemies using Spells and Attacks, and you're getting Hit once every 4 seconds, it's one way to cap your Block Chances and get some Elemental Resistances on top of that. Daresso's Courage - It is an exceptionally good Shield if you receive a lot of Attack and Spell Hits and cannot cap your Block Chance with passives. It's hard to predict what type of damage you will be Hit with, but if you know that the content you're running contains enemies using Spells and Attacks, and you're getting Hit once every 4 seconds, it's one way to cap your Block Chances and get some Elemental Resistances on top of that. |
|||
|
Required Level: 54 (366-490) Armour |
|||
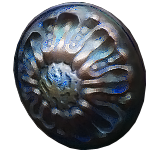
 The Ghastly Theatre - Physical Aegis it grants protects you from Physical Hit Damage and is similar to other Aegis Skills. It can absorb 1000 Damage. It's a basic Shield with some minor offensive stats and a 100% chance to Avoid Bleeding. It has no Life or Resistances so not many players use it. The Ghastly Theatre - Physical Aegis it grants protects you from Physical Hit Damage and is similar to other Aegis Skills. It can absorb 1000 Damage. It's a basic Shield with some minor offensive stats and a 100% chance to Avoid Bleeding. It has no Life or Resistances so not many players use it. |
|||
|
Required Level: 58 (524-730) Armour |
|||
 Vix Lunaris - It grants Cold Aegis that protect the character from Cold Hit Damage. It can absorb 1000 Damage. Freeze immunity and Maximum Life are nice additions, but a good Rare Shield is still better in almost any case. The +2 to Level of socketed Gems can be used to upgrade Auras. Vix Lunaris - It grants Cold Aegis that protect the character from Cold Hit Damage. It can absorb 1000 Damage. Freeze immunity and Maximum Life are nice additions, but a good Rare Shield is still better in almost any case. The +2 to Level of socketed Gems can be used to upgrade Auras. |
|||
|
Required Level: 66 (627-840) Armour |
|||
 The Oppressor - It provides you with tons of Spell Suppression Chance but makes it worse at mitigating damage. It also makes your Block worse as you take 20% of Damage from Blocked Hits, despite grating a relatively high Block Chance. It's bad unless you plan to transform your Spell Suppression Chance into Dodge with Acrobatics Keystone, and if you Recover Life or ES on Block to negate both downsides. The Oppressor - It provides you with tons of Spell Suppression Chance but makes it worse at mitigating damage. It also makes your Block worse as you take 20% of Damage from Blocked Hits, despite grating a relatively high Block Chance. It's bad unless you plan to transform your Spell Suppression Chance into Dodge with Acrobatics Keystone, and if you Recover Life or ES on Block to negate both downsides. |
|||
|
Required Level: 70 (444-595) Armour |
|||
 The Squire - One of the most powerful and expensive Shields in the game. You can use it to create a 12-link setup, which is way better than the regular six. It requires a good weapon with built-in Support Gems - two or three of those. We have used it in our Rolling Magma Inquisitor Build. It's very basic and can be used as a template. It is also good in builds where our main-hand weapon has a powerful built-in Skill, as is the case with Arakaali's Fang. It can be used to create some of the most devastating builds, but it also requires a very expensive weapon. The Squire - One of the most powerful and expensive Shields in the game. You can use it to create a 12-link setup, which is way better than the regular six. It requires a good weapon with built-in Support Gems - two or three of those. We have used it in our Rolling Magma Inquisitor Build. It's very basic and can be used as a template. It is also good in builds where our main-hand weapon has a powerful built-in Skill, as is the case with Arakaali's Fang. It can be used to create some of the most devastating builds, but it also requires a very expensive weapon. |
|||
|
Required Level: 70 (296-425) Armour |
| Armour/Energy Shield Shields | |||
 Springleaf - It regenerates relatively a lot of Life if you use it at a low level. It makes it good in RF builds at early stages. Later on, you should replace it with something like Aegis Aurora or other Shields with Maximum Resistance. Springleaf - It regenerates relatively a lot of Life if you use it at a low level. It makes it good in RF builds at early stages. Later on, you should replace it with something like Aegis Aurora or other Shields with Maximum Resistance. |
|||
|
Required Level: 7 (32-55) Armour |
|||
|
|
|||
|
Required Level: 46 (1606-1837) Armour |
|||
 Mahuxotl's Machination - It's a complex item, it grants you 6 Keystones. Some of them are obtainable only with Glorious Vanity or Unique Items, but the most important Everlasting Sacrifice is found only here - it's what makes this Shield useful. The purpose of this Shield is to grant you 5% extra Maximum Resistances after you fulfil a certain condition that is reaching Maximum Energy Shield at least once every 4 seconds. After that, all ES is sacrificed and you have to regain it. Note that you cannot Recharge or Regenerate ES with this Shield, so you have to Leech, gain ES on Hit (or generally use items that give you ES as is the case with Demon Stitcher Gloves), or use Flasks. The extra Resistances it gives you are a very powerful addition to a build that doesn't normally use Energy Shield (it doesn't stop any damage due to Divine Flesh), but it requires you to cap your Chaos Resistance as you will take a lot of Elemental Damage as Chaos Damage. We have used it in Doryani's Touch Berserker where after combining it with Tempered by War Keystone, you take no Cold or Lightning Damage at all. It's also great in this Master Surgeon Forbidden Rite Pathfinder where you use Life Flask and Replica Sorrow of the Divine Flask for an insane Recovery Rate of both Life and Energy Shield. Mahuxotl's Machination - It's a complex item, it grants you 6 Keystones. Some of them are obtainable only with Glorious Vanity or Unique Items, but the most important Everlasting Sacrifice is found only here - it's what makes this Shield useful. The purpose of this Shield is to grant you 5% extra Maximum Resistances after you fulfil a certain condition that is reaching Maximum Energy Shield at least once every 4 seconds. After that, all ES is sacrificed and you have to regain it. Note that you cannot Recharge or Regenerate ES with this Shield, so you have to Leech, gain ES on Hit (or generally use items that give you ES as is the case with Demon Stitcher Gloves), or use Flasks. The extra Resistances it gives you are a very powerful addition to a build that doesn't normally use Energy Shield (it doesn't stop any damage due to Divine Flesh), but it requires you to cap your Chaos Resistance as you will take a lot of Elemental Damage as Chaos Damage. We have used it in Doryani's Touch Berserker where after combining it with Tempered by War Keystone, you take no Cold or Lightning Damage at all. It's also great in this Master Surgeon Forbidden Rite Pathfinder where you use Life Flask and Replica Sorrow of the Divine Flask for an insane Recovery Rate of both Life and Energy Shield. |
|||
|
Required Level: 46 (146-167) Armour |
|||
 Victario's Charity - This Shield is used to support your Minions or party members. It has some good basic stats, it increases AoE for Auras, and generates Charges for your Allies on Kill and Hit. It requires your character to Hit and Kill to get Charges, which is not how things work in a Minion build. You must either allocate Necromantic Aegis Keystone to make bonuses of this Shield apply to your Minions, or wear Gravebind Gloves. It's very often used with Chains of Command Armour to animate a weapon of your Animated Guardian - this Minion can deal all kinds of damage and will benefit from various Auras and Charges. Victario's Charity - This Shield is used to support your Minions or party members. It has some good basic stats, it increases AoE for Auras, and generates Charges for your Allies on Kill and Hit. It requires your character to Hit and Kill to get Charges, which is not how things work in a Minion build. You must either allocate Necromantic Aegis Keystone to make bonuses of this Shield apply to your Minions, or wear Gravebind Gloves. It's very often used with Chains of Command Armour to animate a weapon of your Animated Guardian - this Minion can deal all kinds of damage and will benefit from various Auras and Charges. |
|||
|
Required Level: 50 (113-133) Armour |
|||
| Replica Victario's Charity - The Replica version of Victario's Charity. It increases the effect of Auras instead of their radius, and grants Endurance Charges instead of Power Charges. In most cases, it is worse than the original Shield as Power Charges are much more valuable on your expendable Minions. If you want to boost your Minions with Auras, use Matua Tupuna instead. |
|||
|
Required Level: 50 (113-133) Armour |
|||
 Saffell's Frame - It's a popular Shield as it gives you +4% to all maximum Resistances, regular Elemental Resistances, and a lot of Spell Block Chance. You can see it often on RF characters and Corrupting Fever/Reap Champions. These builds need the extra Resistances a lot, and due to the overabundance of Armour and good Life Recovery, they don't really need that Attack Block Chance. Saffell's Frame - It's a popular Shield as it gives you +4% to all maximum Resistances, regular Elemental Resistances, and a lot of Spell Block Chance. You can see it often on RF characters and Corrupting Fever/Reap Champions. These builds need the extra Resistances a lot, and due to the overabundance of Armour and good Life Recovery, they don't really need that Attack Block Chance. |
|||
|
Required Level: 59 (186-208) Armour |
|||
 Aegis Aurora - The most popular Unique Shield, good in any build that has a lot of Energy Shield, Block Chance, and Armour. It not only grants a lot Armour, ES, tons of Block Chance, and +5% to Maximum Cold Resistance, but it also instantly recovers ES on Block. You can even allocate Glancing Blows to double your Block Chance with no drawback, as long as your Armour is high it will render you practically immune to Hits that normally would chip away all your life pool given enough time. With 50k of Armour, which is easy to achieve, it will instantly recover 1000 Energy Shield on Block. Such a great source of Recovery is excellent in combination with high Block Chance. The extra Maximum Cold Resistance is good on its own, but a lot of builds use it with Melding of the Flesh to make the most use of it. 5% is a lot after all. We have used it in Wintertide Brand Low-Life Occultist, Righteous Fire Inquisitor, Poison Summon Raging Spirits Necromancer, and many other builds from the upper half of the passive skill tree. Aegis Aurora - The most popular Unique Shield, good in any build that has a lot of Energy Shield, Block Chance, and Armour. It not only grants a lot Armour, ES, tons of Block Chance, and +5% to Maximum Cold Resistance, but it also instantly recovers ES on Block. You can even allocate Glancing Blows to double your Block Chance with no drawback, as long as your Armour is high it will render you practically immune to Hits that normally would chip away all your life pool given enough time. With 50k of Armour, which is easy to achieve, it will instantly recover 1000 Energy Shield on Block. Such a great source of Recovery is excellent in combination with high Block Chance. The extra Maximum Cold Resistance is good on its own, but a lot of builds use it with Melding of the Flesh to make the most use of it. 5% is a lot after all. We have used it in Wintertide Brand Low-Life Occultist, Righteous Fire Inquisitor, Poison Summon Raging Spirits Necromancer, and many other builds from the upper half of the passive skill tree. |
|||
|
Required Level: 62 (860-1235) Armour |
|||
 Rise of the Phoenix - Used mostly for the +5% to maximum Fire Resistance. It is good with the Chieftain's Valako Keystone as it affects your Cold and Lightning Resistances too. The bonus to Life Regeneration combined with this high Fire Resistance may be good for a Righteous Fire build to combat the self-inflicted damage. Rise of the Phoenix - Used mostly for the +5% to maximum Fire Resistance. It is good with the Chieftain's Valako Keystone as it affects your Cold and Lightning Resistances too. The bonus to Life Regeneration combined with this high Fire Resistance may be good for a Righteous Fire build to combat the self-inflicted damage. |
|||
|
Required Level: 62 (499-676) Armour |
|||
 Broken Faith - It's not a good Shield. It allows you to create Profane Ground that reduces Resistances by 10% and increases the likelihood of being Hit with a Critical Strike by 100%. Unholy Might grants 30% of physical damage as extra chaos damage. You may be tempted to use it in a build that has no Energy Shield at all, one that can benefit from Critical Strikes, Resistance Reduction, and deals base Physical Damage. Some kind of Conversion build with The Agnostic Keystone may find it good. This Fire Blade Vortex Assassin is a good candidate for such a Shield, but in most cases, a second weapon would be a much better offensive tool. This Shield has almost no defensive stats and a very low Block Chance. Broken Faith - It's not a good Shield. It allows you to create Profane Ground that reduces Resistances by 10% and increases the likelihood of being Hit with a Critical Strike by 100%. Unholy Might grants 30% of physical damage as extra chaos damage. You may be tempted to use it in a build that has no Energy Shield at all, one that can benefit from Critical Strikes, Resistance Reduction, and deals base Physical Damage. Some kind of Conversion build with The Agnostic Keystone may find it good. This Fire Blade Vortex Assassin is a good candidate for such a Shield, but in most cases, a second weapon would be a much better offensive tool. This Shield has almost no defensive stats and a very low Block Chance. |
|||
|
Required Level: 68 (156-179) Armour |
|||
 Invictus Solaris - Rarely used - it blocks incoming Fire Damage, protects you from Ignite, and increases socketed Gem's Level by 2. The Gem Levels seem to be the most impactful mods on this otherwise mediocre Shield - you can socket your Minions or Auras here. Invictus Solaris - Rarely used - it blocks incoming Fire Damage, protects you from Ignite, and increases socketed Gem's Level by 2. The Gem Levels seem to be the most impactful mods on this otherwise mediocre Shield - you can socket your Minions or Auras here. |
|||
|
Required Level: 68 (468-626) Armour |
|||
 Prism Guardian - A common Shield in Low-Life builds or builds that don't use their Life at all to rely fully on Energy Shield instead. Such builds often go for Chaos Inoculation, but by not doing so they miss on having extra Auras. With this Shield on and the Reservation Mastery for 20% increased Life Reservation Efficiency, you can host three additional Auras that normally would reserve 50% of your Mana Pool, such as Pride, Hatred, or Determination. It only requires you to stop Chaos Damage from bypassing your ES which it normally does - try using Coruscating Elixir, Shavronne's Wrappings, or Solaris Lorica. This Shield increases the Level and Reservation Efficiency of socketed Auras. You also don't need to use Arrogance Support. We have used it in our Zombie Baron Guardian or Pyroclast Mine ES/Low-Life Saboteur. Prism Guardian - A common Shield in Low-Life builds or builds that don't use their Life at all to rely fully on Energy Shield instead. Such builds often go for Chaos Inoculation, but by not doing so they miss on having extra Auras. With this Shield on and the Reservation Mastery for 20% increased Life Reservation Efficiency, you can host three additional Auras that normally would reserve 50% of your Mana Pool, such as Pride, Hatred, or Determination. It only requires you to stop Chaos Damage from bypassing your ES which it normally does - try using Coruscating Elixir, Shavronne's Wrappings, or Solaris Lorica. This Shield increases the Level and Reservation Efficiency of socketed Auras. You also don't need to use Arrogance Support. We have used it in our Zombie Baron Guardian or Pyroclast Mine ES/Low-Life Saboteur. |
|||
|
Required Level: 68 (156-179) Armour |
|||
 The Unshattered Will - It has some basic stats like Maximum Life and Resistances, but its key feature is the Harbinger of Focus that can bestow you with some buffs while you're Channeling. It's Immunity to Status Ailments, Stun Immunity, and 20% Damage Reduction. This buff last for 4 seconds and you can get one only once every 8 seconds. It's too unreliable so not a lot of players use it, but it may play a role in a Channeling build such as this Cyclone Champion. The Unshattered Will - It has some basic stats like Maximum Life and Resistances, but its key feature is the Harbinger of Focus that can bestow you with some buffs while you're Channeling. It's Immunity to Status Ailments, Stun Immunity, and 20% Damage Reduction. This buff last for 4 seconds and you can get one only once every 8 seconds. It's too unreliable so not a lot of players use it, but it may play a role in a Channeling build such as this Cyclone Champion. |
|||
|
Required Level: 68 (156-179) Armour |
|||
 The Immortal Will - It's an upgraded version of The Unshattered Will. On top of the aforementioned buffs, it also renders your character Curse-immune. It's still not very popular as not a lot of builds use Channeling Skills with a free off-hand slot. The buff is also not permanent which creates temporal windows where it grants you only some Life, Block Chance, and Resistances. The Immortal Will - It's an upgraded version of The Unshattered Will. On top of the aforementioned buffs, it also renders your character Curse-immune. It's still not very popular as not a lot of builds use Channeling Skills with a free off-hand slot. The buff is also not permanent which creates temporal windows where it grants you only some Life, Block Chance, and Resistances. |
|||
|
Required Level: 68 (156-179) Armour |
|||
 Unyielding Flame - It's not good. The Commandment of Inferno, which is supposed to be the selling point of this Shield, is bad. It's a Skill with a 3-second Cooldown that deals low Fire Damage. Other stats can be found on a cheap Rare Shield. Unyielding Flame - It's not good. The Commandment of Inferno, which is supposed to be the selling point of this Shield, is bad. It's a Skill with a 3-second Cooldown that deals low Fire Damage. Other stats can be found on a cheap Rare Shield. |
|||
|
Required Level: 68 (156-179) Armour |
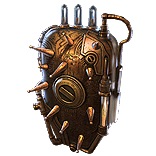
 Emperor's Vigilance - It has tons of Armour and Energy Shield. The amount of Armour is comparable to that of the best Rare Shields one is able to craft, that's why it is often used in Shield Crush/Shield Throw builds where this Armour translates into damage. We have used it in
| Energy Shield/Evasion Shields | |||
 Chalice of Horrors - It's fine for a low-level Chaos DoT Character that casts their Curse manually, but the damage it deals is very low. We wouldn't recommend it in any other case. Chalice of Horrors - It's fine for a low-level Chaos DoT Character that casts their Curse manually, but the damage it deals is very low. We wouldn't recommend it in any other case. |
|||
|
Required Level: 29 (219-291) Evasion |
|||
 Maligaro's Lens - It makes no sense to wear it without Necromantic Aegis Keystone. It can be good if you put it on your Minions, especially if they die often - that would be a good source of Life Recovery. The reduced Elemental Resistance would make them take more Fire Damage from Infernal Legion Support, triggering Minion Instability very quickly. That's how most Exploding Summon Raging Spirit builds operate, but you can use any Minions with this Shield. It is not very good, other Shields can be much better. Maligaro's Lens - It makes no sense to wear it without Necromantic Aegis Keystone. It can be good if you put it on your Minions, especially if they die often - that would be a good source of Life Recovery. The reduced Elemental Resistance would make them take more Fire Damage from Infernal Legion Support, triggering Minion Instability very quickly. That's how most Exploding Summon Raging Spirit builds operate, but you can use any Minions with this Shield. It is not very good, other Shields can be much better. |
|||
|
Required Level: 45 (122-144) Evasion |
|||
 Zeel's Amplifier - To make use of this Shield you will need to kill a lot of enemies very quickly - it will increase your AoE. Almost all of these fast-paced builds use either a Bow or a Wand to fire Kinetic Blast. This Shield can be worn alongside Wands and it may be quite good in this one scenario. Other stats present here are fine, but the Shield lacks Resistances. Zeel's Amplifier - To make use of this Shield you will need to kill a lot of enemies very quickly - it will increase your AoE. Almost all of these fast-paced builds use either a Bow or a Wand to fire Kinetic Blast. This Shield can be worn alongside Wands and it may be quite good in this one scenario. Other stats present here are fine, but the Shield lacks Resistances. |
|||
|
Required Level: 49 (111-131) Evasion |
|||
 Qotra's Regulator - It can be acceptable in some kind of Damage over Time builds that sometimes Hit with a Critical Strike. It is somewhat similar to Elemental Overload that grants more Elemental Damage. You can benefit from both on an Ignite build, but these types of builds often struggle with Life or ES Recovery and they tend to just use Aegis Aurora or The Surrender instead for this very reason. DoT builds can't Leech a lot of Life or ES after all. You may use it in most Poison builds - the usual 5 to 7% Chance of dealing Critical Strike won't hurt you too much. You may also select it for Arakaali's Spider Summoner build with Necromantic Aegis Keystone instead of The Squire. Qotra's Regulator - It can be acceptable in some kind of Damage over Time builds that sometimes Hit with a Critical Strike. It is somewhat similar to Elemental Overload that grants more Elemental Damage. You can benefit from both on an Ignite build, but these types of builds often struggle with Life or ES Recovery and they tend to just use Aegis Aurora or The Surrender instead for this very reason. DoT builds can't Leech a lot of Life or ES after all. You may use it in most Poison builds - the usual 5 to 7% Chance of dealing Critical Strike won't hurt you too much. You may also select it for Arakaali's Spider Summoner build with Necromantic Aegis Keystone instead of The Squire. |
|||
|
Required Level: 54 (507-697) Evasion |
|||
 Perepiteia - It has a wide range of possible rolls on top of one to three random Implicit mods, but even in the best-case scenario, there are not a lot of builds that would use it. It does grant a lot of Movement Speed and Attack/Cast Speed, which is uncommon on a Shield, but at the same time, it grants no Life or Resistances. Only builds that heavily value Movement Speed may find it useful. Perepiteia - It has a wide range of possible rolls on top of one to three random Implicit mods, but even in the best-case scenario, there are not a lot of builds that would use it. It does grant a lot of Movement Speed and Attack/Cast Speed, which is uncommon on a Shield, but at the same time, it grants no Life or Resistances. Only builds that heavily value Movement Speed may find it useful. |
|||
|
Required Level: 62 (724-1045) Evasion |
|||
 Font of Thunder - It is often combined with Lightning Coil, Mind of the Council, Sublime Vision for Purity of Lightning, Divine Flesh, and a lot of Mana. This way you can redirect half of the Physical Damage and all Fire and Cold Damage to be taken as Lightning and Chaos Damage. With Mind over Matter and Hierophant's Divine Guidance, 80% of Lightning Damage and half of Chaos Damage will be taken from Mana before Life. It can be a foundation of a very tanky build given you have high Maximum Lightning and Chaos Resistance, a lot of Maximum Mana, and Mana Recovery. It's not good in any other case. Font of Thunder - It is often combined with Lightning Coil, Mind of the Council, Sublime Vision for Purity of Lightning, Divine Flesh, and a lot of Mana. This way you can redirect half of the Physical Damage and all Fire and Cold Damage to be taken as Lightning and Chaos Damage. With Mind over Matter and Hierophant's Divine Guidance, 80% of Lightning Damage and half of Chaos Damage will be taken from Mana before Life. It can be a foundation of a very tanky build given you have high Maximum Lightning and Chaos Resistance, a lot of Maximum Mana, and Mana Recovery. It's not good in any other case. |
|||
|
Required Level: 66 (755-1044) Evasion |
|||
 Leper's Alms - Shared Suffering is one of the most unique modifiers in the game. It allows you to apply any Elemental Ailment your character is suffering from (Chill, Freeze, Shock, Ignite, Sap, Scorch, and Brittle) on Hit against enemies. It also removes them from your character. The type of damage does not matter either, it's similar to a Conflux in this regard. The problem is, that you need to be constantly under the effect of the Ailment(s) you want to apply which is easier said than done. There are a lot of items that allow you to inflict self-chill, self-ignite, and self-shock, but the builds utilizing this mechanic often don't want to remove these Ailments. You can also easily Shock with items like Echoforge, Voidforge, Starforge, Voltaxic Rift, or Yoke of Suffering. You can Chill with Skills that create Chilled Ground, Icefang Orbit, or Venopuncture. Ignite builds just go for Elementalist's Shaper of Flames to Ignite with every Hit using any type of damage. There are not a lot of builds that can use this Shield, but it still can be considered to protect the character from Elemental Ailments. Leper's Alms - Shared Suffering is one of the most unique modifiers in the game. It allows you to apply any Elemental Ailment your character is suffering from (Chill, Freeze, Shock, Ignite, Sap, Scorch, and Brittle) on Hit against enemies. It also removes them from your character. The type of damage does not matter either, it's similar to a Conflux in this regard. The problem is, that you need to be constantly under the effect of the Ailment(s) you want to apply which is easier said than done. There are a lot of items that allow you to inflict self-chill, self-ignite, and self-shock, but the builds utilizing this mechanic often don't want to remove these Ailments. You can also easily Shock with items like Echoforge, Voidforge, Starforge, Voltaxic Rift, or Yoke of Suffering. You can Chill with Skills that create Chilled Ground, Icefang Orbit, or Venopuncture. Ignite builds just go for Elementalist's Shaper of Flames to Ignite with every Hit using any type of damage. There are not a lot of builds that can use this Shield, but it still can be considered to protect the character from Elemental Ailments. |
|||
|
Required Level: 66 (906-1218) Evasion |
|||
 Atziri's Reflection - It is very good. It renders your character unaffected by Curses, grants Hex Reflection, increases the Effect of your Curses, provides a lot of Elemental Resistances, and Intelligence. Struggling with Intelligence is enough of a reason to choose this Shield. Your character is often exposed to Curses when running maps which can be deadly. The increased effect of Curses is also good in any build as all of them use at least one Curse. We have used it in our CI Int-stacker Kinetic Blast Wander Deadeye, Poisonous Concoction Pathfinder, or any Totem build with Soul Mantle where you don't want to use Viridi's Veil. Atziri's Reflection - It is very good. It renders your character unaffected by Curses, grants Hex Reflection, increases the Effect of your Curses, provides a lot of Elemental Resistances, and Intelligence. Struggling with Intelligence is enough of a reason to choose this Shield. Your character is often exposed to Curses when running maps which can be deadly. The increased effect of Curses is also good in any build as all of them use at least one Curse. We have used it in our CI Int-stacker Kinetic Blast Wander Deadeye, Poisonous Concoction Pathfinder, or any Totem build with Soul Mantle where you don't want to use Viridi's Veil. |
|||
|
Required Level: 68 (991-1221) Evasion |
|||
 Jaws of Agony - It is supposed to be used to generate Power Charges and have a Bear Trap Skill in your Trap build. It's pointless since most Trap builds use Bear Trap Skill Gem and Charged Traps or Power Charge on Critical Strike Support Gems to generate Power Charges. All the other mods are mediocre. Jaws of Agony - It is supposed to be used to generate Power Charges and have a Bear Trap Skill in your Trap build. It's pointless since most Trap builds use Bear Trap Skill Gem and Charged Traps or Power Charge on Critical Strike Support Gems to generate Power Charges. All the other mods are mediocre. |
|||
|
Required Level: 70 (242-278) Evasion |
| Armour, Evasion & Energy Shield Shields | |||
 Magna Eclipsis - It grants you the Elemental Aegis which is quite similar to Elementalist's Primal Aegis. It has a lot of Maximum Life, some Armour, Evasion, Energy Shield, and increases the level of socketed Gems by two. It's not particularly unique, but it's fine for most builds. The modifier to increase the level of socketed Gems is good for Auras or Minions, but it can also be acquired by Corrupting a Rare Shield, which we recommend switching to at some point. Magna Eclipsis - It grants you the Elemental Aegis which is quite similar to Elementalist's Primal Aegis. It has a lot of Maximum Life, some Armour, Evasion, Energy Shield, and increases the level of socketed Gems by two. It's not particularly unique, but it's fine for most builds. The modifier to increase the level of socketed Gems is good for Auras or Minions, but it can also be acquired by Corrupting a Rare Shield, which we recommend switching to at some point. |
|||
|
Required Level: 70 (1307-1718) Armour |
If you have any other Article requests please leave that in the comments below. We are always open to suggestions and constructive feedback.
Pictures used in this article are the intellectual property of Grinding Gear Games.
