Pyroclast Mine ES/Low-Life Saboteur Build
An alternative approach to the Miner/Saboteur archetype based on Pyroclast Mine Spell and Shavronne's WrappingsPyroclast Mine
Energy Shield/Low-Life
Saboteur Build
Updated for Patch 3.17
The Best Crafty Guides by Odealo
| Guide notes | |||
| June 24, 2020 -Updated for Patch 3.11 March 2, 2022 -Updated for Patch 3.17 |
|||
| Build overview | |||
| Tags: [MINE] [ELEMENTAL] [LOW LIFE] | |||
|
Budget: Defenses: |
|
Boss DPS: AoE: |
|
Pyroclast Mine is one of the Mines introduced in Patch 3.8 which offers very high damage and wide area coverage with multiple Fire Projectiles covering your screen in chaotic explosions. Pyroclast Mine is actually a Nova Spell, the fiery Projectiles are cast outward of the Mine's location. With that in mind, you can equip Astral Projector Unique Ring - the Ring makes "Nova Spells Cast at the targeted location instead of around you". In the case of your Mines, the Target Location is an enemy, so all the Projectiles created by the Mine will land on an enemy. It's an exceptionally good Skill to deal with bosses. You can use Skitterbots to automatically activate Mines you throw.
This build is based on Low-Life/Energy Shield variation based on Shavronne's Wrappings Unique Body Armour, Prism Guardian, and Presence of Chayula so that you can use extra Auras to boost your damage and defenses. Obviously, you are picking up the Saboteur Class, which is heavily oriented on Mines and Traps, and its Passives increase Mines Damage, Throwing, and Detonating frequency.
You may also want to check our other Path of Exile builds here: Best PoE Builds by Odealo
1. Gameplay
As a Miner you will throw Mines that once detonated, will trigger powerful Spells. When using this build, you will also Summon Skitterbots, which will periodically detonate your Mines for extra Casts since Mines Detonated by Skitterbots will automatically rearm. This build is based on Pyroclast Mine which fires multiple projectiles that deal very high Fire Damage in an Area. This is your primary Spell used on most occasions. Your Passive Skills are Skitterbots, Discipline, Determination, Anger, Zealotry, Clarity, and Herald of Ash. For boss fights use Arcanist Brand to cause Combustion, and Bear Trap to immobilize the target and increase its received damage. You can also use a Golem, like for example a Chaos Golem for better defensives. for a Curse use Sniper's Mark - it increases the Projectile Damage.
For the defenses, this build utilizes several defensive mechanics which include high Maximum Energy Shield, undisturbed Energy Shield Regeneration thanks to Wicked Ward, and reduced damage dealt by enemies with the use of Destructive Apparatus Passive.
|
Full gameplay video:
|
|
|

2. Build's PROS & CONS
| PROS |
|
| CONS |
|
3. Leveling tips
When it comes to dealing damage, Saboteurs are extremely powerful. Your damage will come mainly from Passives and Skill Gems, so, for the most part, you will have to focus on defensive Rare gear when leveling, which will help you stay alive. Also, Mana Management may be a little bit harsh early on, so it's recommended to get some of the Uniques listed which helps greatly. However, you will be required to level up your character based on Life or hybrid Life/Energy Shield during the questing part. It's recommended to stick mainly to Life equipment until you can afford Shavronne's Wrappings and respec around level 70. We have included two Passive Trees at level 68, one before, and another after the respec. Below you will find the base Gem setups for the leveling part, obviously, if you reach higher levels and get more Sockets in your Items, just fill them in with appropriate Support Gems.
Suggested leveling Gem setups:
| Stormblast Mine | |
 |
Stormblast Mine - the first Mine Spell which becomes available for the Saboteur Class. Since Pyroclast Mine requires level 28 to use, we will stick to this Spell for the first levels |
 |
Added Lightning Damage Support - adds extra flat Lighting Damage to Supported Spells |
 |
Swift Assembly Support - gives you a chance to Throw additional Mines with each cast. It's also one of the Support Gems used in the final build so it's a good idea to start leveling it up early |
 |
Trap and Mine Damage Support - increases the damage of your Mines |
| Pyroclast Mine setup | |
 |
Pyroclast Mine - primary Spell used in this build. It deals massive Fire/Projectile Damage when detonated |
 |
Inspiration Support - I have found this Support Gem extremely useful during the leveling since on top of increasing your DPS, it reduces the Mana Cost of Supported Skills. After switching to the final build just link this Gem to Icicle Mines |
|
Trap and Mine Damage Support - increases the damage of your Mines |
 |
Controlled Destruction Support - greatly increases Spell Damage at the cost of slightly reducing your Critical Hit Chance |
| Utility Gems | |
 |
Clarity - increases your Mana Regenerated per second which is extremely important for Saboteurs |
 |
Summon Skitterbots - mandatory Skill in this build. Skitterbots will help Detonate Mines and increase your Mine Damage. They also Chill and Shock nearby enemies |
 |
Herald of Ice - will add Cold Damage to your Spells and cause AoE explosions when you kill Frozen enemies. On lower levels, you won't have enough Mana to sustain both Heralds so it's much better to use the Ice one for the amazing clear speed bonus |
Bandits:
We recommend killing all the Bandits for two extra Passives
Leveling Skill Trees:
33 Points Skill Tree
Priorities: 1) Blood Siphon 2) Saboteur 3) Elemental Focus 4) Soul Siphon 5) Successive Detonations 6) the Mine Cluster
63 Points Skill Tree
Priorities: 1) Soul Thief 2) Blood Drinker 3) Melding 4) Cruel Preparation 5) Influence
Below you will find two Passive Trees for around level 70 characters, before and after transitioning into full Energy Shield
77 Points Skill Tree (Hybrid's "final moment")
Priorities: 1) Destructive Apparatus 2) Arcane Potency 3) Purity of Flesh 4) Sovereignty
86 Points Skill Tree (Energy Shield transition)
Recommended leveling items:
 Lifesprig - very popular leveling Wand which grants a high Spell Damage bonus and increases your Life and Mana Lifesprig - very popular leveling Wand which grants a high Spell Damage bonus and increases your Life and Mana |
|
| (8-12)% increased Spell Damage +1 to Level of Socketed Spell Gems (20-28)% increased Spell Damage (5-8)% increased Cast Speed +(15-20) to maximum Life +(15-20) to maximum Mana Regenerate (6-8) Life over 1 second when you Cast a Spell |
|
 Axiom Perpetuum - one of the best leveling weapons for Spell Casters which will work wonders for at least 20 levels Axiom Perpetuum - one of the best leveling weapons for Spell Casters which will work wonders for at least 20 levels |
|
| 12% increased Elemental Damage Adds (2-3) to (5-6) Fire Damage to Spells Adds (2-3) to (5-6) Cold Damage to Spells Adds 1 to (10-12) Lightning Damage to Spells (4-6)% increased Cast Speed (100-140)% increased Critical Strike Chance for Spells |
 Praxis - helps with Mana Management. If you can afford it, make sure to get one as soon as you can equip it Praxis - helps with Mana Management. If you can afford it, make sure to get one as soon as you can equip it |
|
| +(20-25) to maximum Mana +(30-60) to maximum Mana (3-6) Mana Regenerated per second -(8-4) to Mana Cost of Skills 8% of Damage taken gained as Mana over 4 seconds when Hit |
 Victario's Flight - this pair of Boots grant a high Movement Speed bonus and an efficient Mana Recovery mechanic Victario's Flight - this pair of Boots grant a high Movement Speed bonus and an efficient Mana Recovery mechanic |
|
| +15 to Dexterity +15 to Intelligence (100-150)% increased Evasion Rating 15% increased Movement Speed (5-10)% of Damage taken gained as Mana over 4 seconds when Hit 10% increased Movement Speed for you and nearby Allies |
4. Final Skill tree, Ascendancy Points, and Pantheon
Final Skill Tree:
88 Points Final Skill Tree
115 Points Path of Building (PoB) link
Ascendancy points:
Preferably in that order:
- Bomb Specialist
- Explosives Expert
- Pyromaniac
- Demolitions Specialist
Pantheon:
Major God: Soul of Lunaris 1% additional Physical Damage Reduction for each nearby Enemy, up to 8%, 1% increased Movement Speed for each nearby Enemy, up to 8%
Minor God: Soul of Shakari You cannot be Poisoned while there are at least 3 Poisons on you, 50% less Duration of Poisons on You
5. Final Gems links
| [DPS] Pyroclast Mine setup | |
|
Pyroclast Mine - primary Spell used in this build. It offers insane burst damage with a decent AoE |
 |
Mine and Trap Damage Support - grants a very high bonus to Trap and Mine Damage |
 |
Minefield Support - makes you throw extra Mines with each Cast |
 |
Increased Critical Strikes Support - increases your Critical Strike Chance |
|
Inspiration Support - reduces the Mana Cost of your Mines and increases their Elemental Damage and Critical Strike Chance |
 |
Fire Penetration Support - you deal more Fire Damage by Penetrating Fire Resistance, use Awakened Version to inflict Exposure |
| [UTILITY] Flame Dash | |
 |
Flame Dash - the best Spell Caster Movement Skill which will also grant Arcane Surge buff with each Cast |
 |
Arcane Surge Support - grants a buff that increases your Spell Damage and Mana Regeneration Rate with each cast - just make sure to stop upgrading this Gem at level 7 |
| [UTILITY] Auras setup | |
|
Summon Skitterbots - a mandatory addition to this build. Skitterbots will increase your DPS output by occasionally detonating Mines for additional explosions |
 |
Enlighten Support - increases Mana Reservation Efficiency for linked Spells |
 |
Discipline - increases your maximum Energy Shield. You can also use Vaal Gem for some extra defensive utility |
 |
Determination - increases and adds more Armour |
| [UTILITY] Life-Reserving Auras setup to be socketed in Prism Guardian |
|
 |
Zealotry - grants increased Spell Damage and Critical Strike Chance |
|
Clarity - increases Mana Regeneration Rate |
 |
Anger - adds Fire Damage to Attack and Spells |
| [UTILITY] Herald of Ash | |
 |
Herald of Ash - it helps with clearing maps, as the enemies you kill Explode causing other opponents to burn, it also grants you more, and increased Fire Damage |
| [UTILITY] Bear Trap | |
 |
Bear Trap - enemies that are affected by it take increased Mine Damage, and are slowed down by 75% after being locked down in place |
| [UTILITY] Sniper's Mark setup | |
 |
Arcanist's Brand - cast all the linked Spells while being attached to an enemy |
 |
Sniper's Mark - Grants Flask Charges, increases Projectile Damage the enemies receive, and the projectiles are split into four |
| Combustion Support - enemies that are Ignited by the linked Spells have reduced Fire Resistance | |
| [UTILITY] CwDT setup | |
 |
Molten Shell - a Guard Spell that reduces the damage you take for a while |
 |
Summon Chaos Golem - you can use almost any Golem, the Chaos one grants you Physical Damage Reduction |
 |
Cast when Damage Taken - linked Spells will activate once you take a certain amount of damage |
|
|
5. Gear Setup
In this section, you will find all the required and recommended Items for this Pyroclast Mine Saboteur Build. Unlike other typical Miner/Saboteur builds (for example our Icicle Mine Saboteur Build) this one has slightly higher item requirements. Luckily enough, this doesn't significantly increase this build's budget, but certainly makes it less viable for a League Starter or Solo Self Found mode.
|
Stat priorities on items:
|
 (Helmet) Rare Helmet - primarily you should aim at high defensive bonuses, but the extra damage is also nice which can be achieved by reducing Fire Resistance of nearby enemies (Helmet) Rare Helmet - primarily you should aim at high defensive bonuses, but the extra damage is also nice which can be achieved by reducing Fire Resistance of nearby enemies |
|
| Min. requirements: 140 maximum Energy Shield 60% Total Elemental Resistances Optional affixes: Nearby enemies have -#% to Fire Resistance Adds Fire Damage to Spells Socketed Gems are Supported by level # Trap and Mine Damage Attributes |
|
| Helmet enchantment: Pyroclast Mine fires 2 additional Projectiles Pyroclast Mine deals 40% increased Damage |
|
 (Body Armour) Shavronne's Wrapping - the only must-have item in this build, and also most likely the most expensive one. It is the foundation of all Low-Life builds, causing Chaos Damage to not bypass Energy Shield (Body Armour) Shavronne's Wrapping - the only must-have item in this build, and also most likely the most expensive one. It is the foundation of all Low-Life builds, causing Chaos Damage to not bypass Energy Shield |
|
| (3-10)% increased Spell Damage (100-150)% increased Energy Shield 10% faster start of Energy Shield Recharge +(30-40)% to Lightning Resistance Reflects 1 to 250 Lightning Damage to Melee Attackers Chaos Damage does not bypass Energy Shield |
|
|
|
|
| Min. requirements: 60% increased Fire Spell Damage 90% increased Critical Strike Chance for Spells 25 added Fire Damage to Spells Optional affixes: Attacks with this Weapon Penetrate #% Fire Resistance increased Mine Throwing Speed |
|
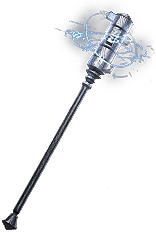
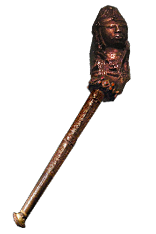 (Weapon) Doryani's Catalyst - this will work just fine in this build giving us all the important stats (Weapon) Doryani's Catalyst - this will work just fine in this build giving us all the important stats |
|
| 32% increased Elemental Damage Socketed Gems are Supported by Level 20 Elemental Proliferation Adds (65-85) to (100-160) Physical Damage (11-15)% increased Attack Speed (6-10)% increased Cast Speed (30-40)% increased Global Critical Strike Chance 0.2% of Elemental Damage Leeched as Life (80-100)% increased Elemental Damage |
|
 (Shield) Prism Guardian - you can sockets your Auras here, these will Reserve your Life instead of Mana, but you won't need it anyway (Shield) Prism Guardian - you can sockets your Auras here, these will Reserve your Life instead of Mana, but you won't need it anyway |
|
| +12% to all Elemental Resistances +2 to Level of Socketed Aura Gems Socketed Gems Cost and Reserve Life instead of Mana Socketed Gems have 30% increased Reservation Efficiency +(20-30) to Dexterity +25% to all Elemental Resistances |
|
 (Boots) Rare Boots - again, aim for high Movement Speed and defensive stats (Boots) Rare Boots - again, aim for high Movement Speed and defensive stats |
|
| Min. requirements: 120 maximum Energy Shield 70% Total Elemental Resistances 25% increased Movement Speed Optional affixes: Attributes |
|
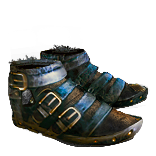
 (Boots) Sin Trek - a great option with high Base Energy Shield, extra Dexterity, and unique affix that makes enemies unable to Leech Mana from us (Boots) Sin Trek - a great option with high Base Energy Shield, extra Dexterity, and unique affix that makes enemies unable to Leech Mana from us |
|
| +(20-30) to Dexterity +(20-30) to Intelligence (80-100)% increased Evasion Rating +(100-150) to maximum Energy Shield 30% increased Movement Speed Enemies Cannot Leech Life From you |
|
| Boot enchantment: Adds 45 to 68 Fire Damage if you've Killed Recently |
|
 (Belt) Rare Belt - you can use any base, but Stygian Vise with the extra Abyssal Socket will be the best option. For more defenses, you can also use Crystal Belt (possibly with 100+ Maximum Energy Shield). (Belt) Rare Belt - you can use any base, but Stygian Vise with the extra Abyssal Socket will be the best option. For more defenses, you can also use Crystal Belt (possibly with 100+ Maximum Energy Shield). |
|
| Min. requirements: 50 maximum Life 50 maximum Energy Shield 80% Total Elemental Resistances Optional affixes: increased Damage Strength |
|
 (Amulet) Rare Amulet - will do just fine until you can afford the Presence of Chayula (Amulet) Rare Amulet - will do just fine until you can afford the Presence of Chayula |
|
| Min. requirements: 35 Energy Shield 15% maximum Energy Shield 30% increased Global Critical Strike Multiplier Optional affixes: Spell Damage Elemental Resistances Attributes |
|
 (Amulet) Presence of Chayula - The BiS Amulet we can use for this build. It grants a very high bonus Energy Shield and gives us permanent Stun Immunity. (Amulet) Presence of Chayula - The BiS Amulet we can use for this build. It grants a very high bonus Energy Shield and gives us permanent Stun Immunity. |
|
| +(10-16) to all Attributes 30% increased Rarity of Items found +60% to Chaos Resistance Cannot be Stunned 20% of Maximum Life Converted to Energy Shield |
|
| Amulet anointment: Efficient Explosives Charisma |
|
 (Ring) Rare Ring - Most bases will do depending on what you want to maximize. Moonstone Rings will provide the highest ES, Diamond/Opal can give you some extra damage. (Ring) Rare Ring - Most bases will do depending on what you want to maximize. Moonstone Rings will provide the highest ES, Diamond/Opal can give you some extra damage. |
|
| Min. requirements: 50 maximum Energy Shield 40 maximum Mana 35 Strength/Dexterity Optional affixes: Elemental Resistances |
|
 (Ring) Astral Projector - this Ring is very important, the Pyroclast explosions will be created directly at the enemy location, allowing significantly more projectiles to hit your target (Ring) Astral Projector - this Ring is very important, the Pyroclast explosions will be created directly at the enemy location, allowing significantly more projectiles to hit your target |
|
| +(20-30)% to Lightning Resistance +(30-50) to Intelligence (20-25)% increased Spell Damage 30% chance to Avoid Elemental Ailments Nova Spells have 20% less Area of Effect Nova Spells deal 30% less Damage to Players Nova Spells Cast at the targeted location instead of around you |
|
 (Ring) Circle of Anguish - it can be used to boost your damage by enhancing the Herald of Ash, try to get one increasing the Buff Effect (Ring) Circle of Anguish - it can be used to boost your damage by enhancing the Herald of Ash, try to get one increasing the Buff Effect |
|
| <One to three random Synthesis implicit modifiers> +(20-30) to Strength Adds (20-25) to (26-35) Fire Damage +(20-30)% to Fire Resistance <Two Random Herald of Ash modifier> |
|
 (Gloves) Rare Gloves - prioritize defensive stats including high Energy Shield and Elemental Resistances (Gloves) Rare Gloves - prioritize defensive stats including high Energy Shield and Elemental Resistances |
|
| Min. requirements: 140 Energy Shield 80% Total Elemental Resistances Optional affixes: Spell Damage (Fingerless Silk Gloves only) Damage during any Flask Effect |
|
 (Jewel) Large Cluster Jewel - these are used mainly to fit more Medium Cluster Jewels into your build, but some to the Notables are still good nonetheless (Jewel) Large Cluster Jewel - these are used mainly to fit more Medium Cluster Jewels into your build, but some to the Notables are still good nonetheless |
|
| 1 Added Passive Skill is Corrosive Elements 1 Added Passive Skill is Doryani's Lesson 1 Added Passive Skill is Prismatic Heart 1 Added Passive Skill is Sadist 1 Added Passive Skill is Widespread Destruction |
|
 (Jewel) Medium Cluster Jewel - Cluster Jewel offers some nice Passives related to Mines which can't be obtained otherwise. It's recommended to use three or four of these in this build. (Jewel) Medium Cluster Jewel - Cluster Jewel offers some nice Passives related to Mines which can't be obtained otherwise. It's recommended to use three or four of these in this build. |
|
| Recommended affixes: 1 Added Passive Skill is Surprise Sabotage 1 Added Passive Skill is Expert Sabotage 1 Added Passive Skill is Expendability 1 Added Passive Skill is Guerilla Tactics |
|
 (Jewel) Rare Jewels - should also provide increases to Energy Shield and Damage (Jewel) Rare Jewels - should also provide increases to Energy Shield and Damage |
|
| Recommended affixes: maximum Energy Shield Mine/Projectile Damage Critical Strike Multiplier Attributes |
|
 (Jewel) Energy from Within - socket it below the Melding Passive to give us approximately 20% increased maximum Energy Shield (Jewel) Energy from Within - socket it below the Melding Passive to give us approximately 20% increased maximum Energy Shield |
|
| (3-6)% increased maximum Energy Shield Increases and Reductions to Life in Radius are Transformed to apply to Energy Shield |
|
 (Jewel) Watcher's Eye - you're using a lot of Auras so there is a lot of mods to choose from, look at the available options and get these you need the most (Jewel) Watcher's Eye - you're using a lot of Auras so there is a lot of mods to choose from, look at the available options and get these you need the most |
|
| (4-6)% increased maximum Energy Shield (4-6)% increased maximum Life (4-6)% increased maximum Mana <Two or Three random aura modifiers> |
|
 (Flask) Atziri's Promise - grants a very high DPS bonus and it's pretty much the most cost-effective Flask in the game (Flask) Atziri's Promise - grants a very high DPS bonus and it's pretty much the most cost-effective Flask in the game |
|
| +35% to Chaos Resistance 2% of Chaos Damage Leeched as Life during Flask effect Gain (5-8)% of Physical Damage as Extra Chaos Damage during effect Gain (5-8)% of Elemental Damage as Extra Chaos Damage during effect |
|
 (Flask) Kiara's Determination - use it for a complete Immunity to many Ailments and Curses (Flask) Kiara's Determination - use it for a complete Immunity to many Ailments and Curses |
|
| Immune to Freeze, Chill, Curses and Stuns during Flask Effect (80-60)% reduced Duration |
|
 (Flask) Rumi's Concoction - use it for more Armour and Block Chance against Attacks and Spells (Flask) Rumi's Concoction - use it for more Armour and Block Chance against Attacks and Spells |
|
| +1500 to Armour +(8-12)% Chance to Block Attack Damage during Flask effect +(4-6)% Chance to Block Spell Damage during Flask effect |
|
 (Flask) Dying Sun - it's used for the "Skills fire 2 additional Projectiles during Flask Effect" line, one of the best Flasks to have (Flask) Dying Sun - it's used for the "Skills fire 2 additional Projectiles during Flask Effect" line, one of the best Flasks to have |
|
| +50% to Fire Resistance 20% less Fire Damage taken (125-150)% increased Charges per use (60-40)% less Duration (10-20)% increased Area of Effect during Flask Effect Skills fire 2 additional Projectiles during Flask Effect |
|
Other suggested Flasks:
|
|
 |
 (Weapon) Rare Spectre or Wand - aim for high Fire/Spell Damage bonus, Spell Crit. Chance, and Added Fire Damage to Spells. The higher stats combined the better.
|
|
We hope that you will enjoy playing our Pyroclast Mine Saboteur build, and as always, we are looking forward to your feedback. We would love to hear your suggestions about which build should we work on next. Let us know in the comments below.
Pictures used in this article are the intellectual property of Grinding Gear Games
