
Blade Trap Trickster Build
A very basic Chaos Inoculation Starter Build for Trickster based on Blade TrapBlade Trap
Trickster Build
Updated for Patch 3.22
The Best Crafty Guides by Odealo
| Guide notes |
| October 16, 2022 -Build created September 18, 2023 -Updated for Patch 3.22 |
| Build Overview | |||
| Tags: [TRAP] [ELEMENTAL] [ENERGY SHIELD] [STARTER] | |||
|
Budget: Defenses: |
|
Boss DPS: AoE: |
|
Trickster is an ascendancy poorly defined by its offensive abilities, but one with much more pronounced defenses. It can be used to create some unique builds that need to be tanky due to their delay in damage delivery or close range. By utilizing Evasion Rating, Spell Suppression, and Energy Shield, any build contoured for a direct confrontation with opponents is potentially much more viable even if its premise seems downright ill-suited. Such is the case with Blade Trap, the only Attack Trap in the game. We recommend picking up Polymath and Swift Killer to magnify the damage. Blade Trap is chosen because of its ramping up damage which can be expressed by continuously throwing more and more Traps, it's a feat not achievable for a glass canon build. Trap builds often struggle with the fact that the damage is not delivered fast enough so the enemies in proximity might have a chance to attack and kill the character - it's not happening here. The Damage of these Traps is directly correlated with the weapon but doesn't benefit from Attack Speed as their Attack Rate is fixed.
Blade Traps deal almost solely Lightning Damage with a medium to high Critical Strike Chance here. We've settled on Lightning Damage over other types due to the choice of Unique Weapon and the proximity to Lightning Damage nodes like Arcing Blows. As a Polymath, the majority of your damage is sourced from different Masteries, so choosing a different damage type is something the build can be adapted to with ease. The protective layers are a very high Evasion Rating, a 100% Chance to Suppress Spell Damage, Phasing, and tons of Energy Shield. It may only struggle with ES recovery/recharge.
For patch 3.20 we've expanded the durability aspect of the build - Ephemeral Edge adds Lightning Damage to your Attacks sourced directly from Energy Shield, which in turn justifies accumulating enormous quantities of this resource, over 10,000.
With Path 3.22, we added Volatility Support that adds 70% more Maximum Damage with basically no downside. We've also selected many more Unique items as core elements of the build, making it cheaper and more accessible. Only Forbidden Jewels are now very pricey. This patch also introduced Tattoos that increase your global defenses, such as Energy Shield.
You can also check our other Path of Exile builds right over here Odealo's Crafty Guides - Full List
1. Gameplay
It's a build similar to a Trap build, throw the Blade Traps to kill enemies around you. The Damage can be supported by Bear Trap which also immobilizes the target. You're able to apply up to five Curses after allocating two Maximum Power Charges while wearing Anathema, it can be done automatically via Implicit modifiers or Ring Affixes, or by a Skill with Hextouch Support. To move around use Flame Dash. Withering Step is also great for a passive Movement Speed bonus and Phasing with Elusive. For Auras use Arctic Armour, Wrath, Grace, Discipline, Skitterbots, Vitality, Clarity, Precision, and Aspect of Spider.
|
|
|
|

2. Build's PROS & CONS
| PROS |
|
| CONS |
|
3. Leveling tips
Start with an Explosive Trap, the first skill points you will allocate are Trap-related. Blade Trap is available at level 12, but don't use it too soon as it won't be good if you don't have a good weapon. Use Spell Traps first. These won't require Accuracy or a weapon with high base damage. Your first Ascendancy Keystone is Polymath - try to get some different Masteries right from the start. On the passive skill tree, allocate only Maximum Life, Trap, and Mana Reservation nodes at first. Later find some more space for Critical Strike modifiers and Energy Shield. Then go for the Lightning Damage, Accuracy Rating, and Sword Damage. As you already have a gear plentiful with Energy Shield, relocate some of the Maximum Life skill points into Energy Shield.
Suggested leveling Gem setups:
| Explosive Trap initial setup | |
 |
Explosive Trap - It's extremely powerful early on due to many Support Gems and unique items fitting this Spell. It deals Physical Damage, half of which is converted to Fire. |
 |
Swift Assembly Support - Your chance of throwing more Traps at once is higher. |
 |
Added Fire Damage Support - adds Fire Damage sourced from Physical Damage. |
| Explosive Trap setup | |
|
Explosive Trap |
|
Swift Assembly Support |
|
Added Fire Damage Support |
 |
Trap and Mine Damage Support - Simply increases Trap Damage at the cost of lower Throwing Speed. |
 |
Charged Traps Support - Grants Frenzy and Power Charges when triggered, these charges have a bonus effect on the Skill. |
 |
Cluster Traps Support - More Traps are being thrown, but each deals less damage. |
| Mana Reservation setup | |
 |
Herald of Ash - It's very good with Fire and Physical to Fire skills, adds a lot of damage, and increases clear speed by a lot. |
 |
Summon Skitterbots - Skitterbots grant more Trap Damage, Chill, and Shock your foes. |
 |
Clarity - You can use it to regenerate your Mana faster. |
| various Gems | |
 |
Flammability - A Curse that reduces Fire Resistance resulting in more Fire Damage dealt. |
Bandits:
you should kill all three Bandits for two additional Skill Points
Leveling Skill Trees:
37 Points Skill Tree
Head for the big Trap cluster by taking some useful nodes on your way there.
71 Points Skill Tree
You now have the Polymath Keysteon so start gathering Masteries. Head for the big Fire Cluster and pick its Mastery for Damage conversion.
Recommended leveling items:
 Le Heup of All - It grants a lot of Attributes, Damage, and Resistances. Very good Ring. Le Heup of All - It grants a lot of Attributes, Damage, and Resistances. Very good Ring. |
| Adds 1 to 4 Physical Damage to Attacks +(10-30) to all Attributes (10-30)% increased Damage (10-30)% increased Rarity of Items found +(10-30)% to all Elemental Resistances |
 Ashcaller - One of the best Wands for leveling Spell Fire Damage builds. Ashcaller - One of the best Wands for leveling Spell Fire Damage builds. |
| (18-22)% increased Spell Damage 25% chance to Trigger Level 10 Summon Raging Spirit on Kill Adds (20-24) to (38-46) Fire Damage Adds (20-24) to (38-46) Fire Damage to Spells 10% chance to Cover Enemies in Ash on Hit |
 Goldrim - This Unique Helmet offers a lot of Elemental Resistances, which are important. Goldrim - This Unique Helmet offers a lot of Elemental Resistances, which are important. |
| +(30-50) to Evasion Rating 10% increased Rarity of Items found +(30-40)% to all Elemental Resistances Reflects 4 Physical Damage to Melee Attackers Level Requirement reduced by 100 (Hidden) |
 Tabula Rasa - Use Tabula for the six, white, linked sockets. Tabula Rasa - Use Tabula for the six, white, linked sockets. |
|
| Item has no level requirement and Energy Shield (Hidden) Item has 6 White Sockets and is fully linked (Hidden) |
|
4. Final Skill Tree, Ascendancy Points, and Pantheon
Final Skill Tree:
106 Points Final Skill Tree (doesn't include Cluster or Unique Jewels)
117 Points Path of Building (PoB) link
Ascendancy points:
Preferably in that order:
- Polymath
- Swift Killer
- Heartstopper
- One Step Ahead
Pantheon:
Major God: Soul of Arakaali: 10% reduced Damage taken from Damage Over Time
Minor God: Soul of Garukhan: 60% reduced Effect of Shock on you
5. Final Gems links
| [DPS] Blade Trap setup | |
 |
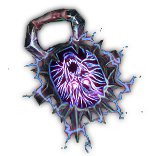
Blade Trap - A spinning Trap that can Hit 8 times and lasts 4 seconds. Its damage is based on that of your weapon. |
 |
Volatility Support - Your Minimum Damage is extremely low anyway, so this Gem will simply grant you much more Maximum Damage with no real downside. |
|
Charged Traps Support - Generates Power and Frenzy Charges, your Throwing Speed and Critical Multiplier grow along with these Charges. |
 |
Elemental Focus Support - You will deal more Elemental Damage, but the Skill won't be able to Shock - not a problem, you have Skitterbots for that. |
 |
Lightning Penetration Support - Use it to penetrate Lightning Resistance. |
 |
Inspiration Support - Less Mana Cost, increased Critical Strike Chance, and Elemental Damage. |
| [UTILITY] Arcanist Brand setup | |
 |
Arcanist Brand - It will trigger all linked Spells once attached to an enemy. Use it during boss fights. |
 |
Conductivity - This Curse lowers the Lightning Resistance of your opponents. |
 |
Temporal Chains - It slows down your enemies. You may also use Curses like  Punishment, Punishment,  Enfeeble, or Enfeeble, or  Elemental Weakness here instead. Elemental Weakness here instead. |
 |
Assassin's Mark - Increases Critical Strike Chance and Multiplier against Marked enemy. |
| [UTILITY] Arctic Armour setup | |
 |
Arctic Armour - Makes you take less Physical and Fire Damage while Stationary. You're tanky and you can afford to be stationary most of the time during boss fights. |
 |
Arrogance Support - You don't really use your Life, you have around 400 of it, so you may as well spend it on Auras. |
| [UTILITY] Steelskin | |
 |
Steelskin - Steelskin is the only suitable Guard Spell here, it reduces Damage taken for a short time and stops Bleeding. |
| [UTILITY] Mana Reservation setup | |
 |
Grace - Grace adds and increases your Evasion Rating. |
 |
Discipline - Grants you more Energy Shield and a faster Recovery Rate. |
|
Summon Skitterbots - Skitterbots, besides applying Chill and Shock to enemies, also grants you more Trap Damage. |
 |
Enlighten Support - Lowers Mana Reservation Cost of linked Skills. |
| [UTILITY] Mana Reservation setup | |
 |
Wrath - In this build, it adds Lightning Damage to Attacks. |
 |
Precision - Use Precision for more Accuracy Rating and increased Critical Strike Chance. |
|
Enlighten Support |
| [UTILITY] Mana Reservation setup | |
 |
Vitality - Use level-1 Vitality for the bonus from Reservation Mastery. |
|
Clarity - Use level-1 Clarity for the bonus from Reservation Mastery. You can also link these two Auras to Arrogance. |
| [UTILITY] Bear Trap | |
 |
Bear Trap - Use one Bear Trap during boss fights, enemies affected by it take increased Trap Damage and have greatly reduced Movement Speed. |
| [MOBILITY] Leap Slam setup | |
 |
Flame Dash - Flame Dash can be used to improve your mobility, it allows you to teleport. |
| [UTILITY] Aspect of the Spider | |
 |
Aspect of the Spider - Nearby enemies take increased damage and are Hindered. This effect stacks up to three times. |
|
|
6. Gear Setup
We've tried to cut the costs of gearing up here to a minimum, using some of the cheapest unique items and combining them with meager rares which can be obtained at a very low price. Use Uniques such as Ephemeral Edge, Esh's Visage, Ghostwrithe, Presence of Chayula, and Anathema. Over 50% of Spell Suppression Chance can be gathered from the Skill Tree, the rest should be gathered from gear. Evasion Rating and Energy Shield are important too. Remember to get some extra Accuracy on Gloves or a Helmet. If you struggle with Mana sustain aim for reduced Mana Cost of Skills. Attack Speed is useless. Lightning Exposure will be sourced from an Eldritch mod on Gloves.
Our recommended items will:
- Cap your resistances at 75%
- Provide you with enough DPS and Life to start mapping
|
Stat priorities on items:
|
 (Helmet) Rare Helmet - Aim for as much Energy Shield as you can afford. In addition to that try to get Elemental Resistances, Accuracy, Attributes, and Spell Suppression Chance. (Helmet) Rare Helmet - Aim for as much Energy Shield as you can afford. In addition to that try to get Elemental Resistances, Accuracy, Attributes, and Spell Suppression Chance. |
|
| Min. requirements: 250 Energy Shield +60% to Elemental Resistances Optional affixes: Attributes Accuracy Nearby Enemies have -9% to Lightning Resistance Spell Suppression Chance Evasion Rating |
|
| Helmet enchantments: Blade Trap enchantments |
|
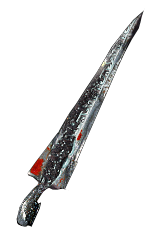 (Weapon) Ephemeral Edge - This weapon is much better than any Rare or even Unique one once you reach a high enough Maximum Energy Shield. The negative Attack Speed Bonus does not apply to Blade Trap. (Weapon) Ephemeral Edge - This weapon is much better than any Rare or even Unique one once you reach a high enough Maximum Energy Shield. The negative Attack Speed Bonus does not apply to Blade Trap. |
|
| 40% increased Global Accuracy Rating +10 to Intelligence 50% increased Global Critical Strike Chance (40-50)% increased maximum Energy Shield 25% reduced maximum Life Adds 1 to 75 Lightning Damage Attacks with this Weapon have Added Maximum Lightning Damage equal to 20% of your Maximum Energy Shield |
|
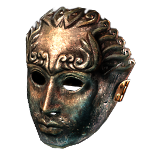
 (Off-hand) Esh's Visage - It's pretty much mandatory unless you have other ways to make your Chaos Damage not affect your Life Pool. You have around 200 Life so any Chaos Damage will kill you very quickly. Make sure that less than 50% of your Life is reserved. (Off-hand) Esh's Visage - It's pretty much mandatory unless you have other ways to make your Chaos Damage not affect your Life Pool. You have around 200 Life so any Chaos Damage will kill you very quickly. Make sure that less than 50% of your Life is reserved. |
|
| (5-10)% increased Spell Damage (240-260)% increased Energy Shield +(70-100) to maximum Life +(30-40)% to Lightning Resistance +(17-29)% to Chaos Resistance Chaos Damage taken does not bypass Energy Shield while not on Low Life Reflect Shocks applied to you to all Nearby Enemies |
|
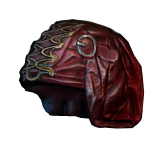
 (Body Armour) Ghostwrithe - It's the BiS armor - it adds tons of Chaos Resistance, ES, and converts your useless Life to Energy Shield. (Body Armour) Ghostwrithe - It's the BiS armor - it adds tons of Chaos Resistance, ES, and converts your useless Life to Energy Shield. |
|
| +(100-200) to maximum Energy Shield +(50-100) to maximum Life +50% to Chaos Resistance 50% of Maximum Life Converted to Energy Shield |
|
 (Boots) Rare Boots - Boots can get you Movement Speed, Energy Shield, Elemental Resistances, Evasion, Spell Suppression Chance, and exotic mobility buffs. (Boots) Rare Boots - Boots can get you Movement Speed, Energy Shield, Elemental Resistances, Evasion, Spell Suppression Chance, and exotic mobility buffs. |
|
| Min. requirements: 25% increased Movement Speed 150 Energy Shield +50% to Elemental Resistances Optional affixes: Spell Suppression Chance chance to gain Onslaught for 4 seconds on Kill You have Tailwind if you have dealt a Critical Strike Recently chance to gain Elusive on Critical Strike |
|
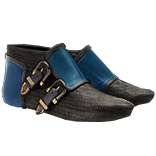 (Boots) Sin Trek - A lot of Movement Speed, Attributes, Evasion Rating, and Energy Shield. These boots have it all. It's usually the best-in-slot choice unless you lack Attributes, Suppression, or Resistances. (Boots) Sin Trek - A lot of Movement Speed, Attributes, Evasion Rating, and Energy Shield. These boots have it all. It's usually the best-in-slot choice unless you lack Attributes, Suppression, or Resistances. |
|
| +(20-30) to Dexterity +(20-30) to Intelligence (80-100)% increased Evasion Rating +(100-150) to maximum Energy Shield 30% increased Movement Speed Enemies Cannot Leech Life From you |
|
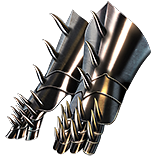 (Gloves) Rare Gloves - Gloves can be a good source for more Accuracy, Energy Shield, Spell Suppression Chance, Attributes, and added Lightning Damage to Attacks. Craft the Eldritch mod that applies Lightning Exposure on Hit. (Gloves) Rare Gloves - Gloves can be a good source for more Accuracy, Energy Shield, Spell Suppression Chance, Attributes, and added Lightning Damage to Attacks. Craft the Eldritch mod that applies Lightning Exposure on Hit. |
|
| Min. requirements: Accuracy +70% to Elemental Resistances Chance to Suppress Spell Damage Optional affixes: Attributes Adds Lightning Damage to Attacks Energy Shield |
|
 (Belt) Rare Belt - Rare Belt is to be used only if you struggle with Strength as it's one of the most common mods here. Energy Shield and Resistances are here too. (Belt) Rare Belt - Rare Belt is to be used only if you struggle with Strength as it's one of the most common mods here. Energy Shield and Resistances are here too. |
|
| Min. requirements: Energy Shield +80% to Elemental Resistances Strength Optional affixes: Flask modifiers Chaos Resistance |
|
 (Belt) Bated Breath - One of the best Belts for an additional Energy Shield and its Recharge Rate. (Belt) Bated Breath - One of the best Belts for an additional Energy Shield and its Recharge Rate. |
|
| +(9-20) to maximum Energy Shield +(15-25) to Intelligence 10% increased Damage +(20-30) to maximum Energy Shield 20% increased maximum Energy Shield 50% increased Energy Shield Recharge Rate |
|
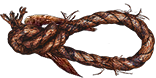 (Belt) Ascent From Flesh - This Belt grants a lot of Energy Shield, Evasion Rating, and Phasing bonuses. It also triggers Phasing quite often. (Belt) Ascent From Flesh - This Belt grants a lot of Energy Shield, Evasion Rating, and Phasing bonuses. It also triggers Phasing quite often. |
|
| +(9-20) to maximum Energy Shield +300 to Evasion Rating +(75-80) to maximum Energy Shield +(10-15)% to all Elemental Resistances You have Phasing if Energy Shield Recharge has started Recently 30% increased Evasion Rating while Phasing 10% increased Movement Speed while Phasing |
|
 (Amulet) Presence of Chayula - It converts more of your Life to ES, much like Ghostwrithe. It also grants tons of Chaos Resistance and Stun immunity. (Amulet) Presence of Chayula - It converts more of your Life to ES, much like Ghostwrithe. It also grants tons of Chaos Resistance and Stun immunity. |
|
| (10-16) to all Attributes 30% increased Rarity of Items found +60% to Chaos Resistance Cannot be Stunned 20% of Maximum Life Converted to Energy Shield |
|
| Recommended Anointments: Arcane Focus Divine Judgement Heart of Thunder |
|
 (Ring) Rare Rings - Rings are very similar to Amulets in terms of modifiers offered, also look for a Curse on Hit and Accuracy if you can afford it. (Ring) Rare Rings - Rings are very similar to Amulets in terms of modifiers offered, also look for a Curse on Hit and Accuracy if you can afford it. |
|
| Min. requirements: +80% to Elemental Resistances Attributes Optional affixes: Non-Channelling Skills have -# to Total Mana Cost (crafted) Curse Enemies with Conductivity / Elemental Weakness on Hit Accuracy Critical Strike Modifiers Maximum Energy Shield |
|
 (Ring) Anathema - This one allows you to apply 3 Curses instead of one by default - it can be extended to 5 by spending just 3 Skill Points on Instability and Infused. (Ring) Anathema - This one allows you to apply 3 Curses instead of one by default - it can be extended to 5 by spending just 3 Skill Points on Instability and Infused. |
|
| +(15-25) to maximum Energy Shield +(30-40) to Intelligence (10-15)% increased Cast Speed (10-20)% chance to gain a Power Charge when you Cast a Curse Spell Your Curse Limit is equal to your maximum Power Charges |
|
 (Jewel) Rare Jewels - Great for the miscellaneous missing stats and minor upgrades. (Jewel) Rare Jewels - Great for the miscellaneous missing stats and minor upgrades. |
|
| Recommended affixes: increased Energy Shield Attributes Sword / Attack / Lightning Damage Elemental Resistances Critical Strike modifiers |
|
  (Jewel) Forbidden Flame & Forbidden Flesh - You're looking for the Perfect Crime on your Forbidden Jewels. Chain Reaction is fine too as a second choice. Perfect Crime Regenerates your ES and without it, you rely solely on ES on Kill from Polymath and default Recharge and it's often not enough. (Jewel) Forbidden Flame & Forbidden Flesh - You're looking for the Perfect Crime on your Forbidden Jewels. Chain Reaction is fine too as a second choice. Perfect Crime Regenerates your ES and without it, you rely solely on ES on Kill from Polymath and default Recharge and it's often not enough. |
|
| Allocates <<Random Ascendancy Notable>> if you have the matching modifiers on Forbidden Flesh Allocates <<Random Ascendancy Notable>> if you have the matching modifiers on Forbidden Flame |
|
 (Jewel) Watcher's Eye - You're using Wrath, Grace, Discipline, Vitality, Clarity, and Precision. Precision can get you increased Damage. Grace and Discipline have predominantly defensive mods. Wrath is great for Penetration. (Jewel) Watcher's Eye - You're using Wrath, Grace, Discipline, Vitality, Clarity, and Precision. Precision can get you increased Damage. Grace and Discipline have predominantly defensive mods. Wrath is great for Penetration. |
|
| (4-6)% increased maximum Energy Shield (4-6)% increased maximum Life (4-6)% increased maximum Mana <Two or Three random aura modifiers> |
|
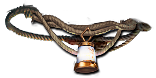
 (Flask) Bottled Faith - It's a big boost to your damage and Critical Strike Chance. Creates Consecrated Ground on use. (Flask) Bottled Faith - It's a big boost to your damage and Critical Strike Chance. Creates Consecrated Ground on use. |
|
| 40% increased Damage Creates Consecrated Ground on Use (30-15)% reduced Duration Consecrated Ground created by this Flask has Tripled Radius Consecrated Ground created during Effect applies (7-10)% increased Damage taken to Enemies (100-150)% increased Critical Strike Chance against Enemies on Consecrated Ground during Flask effect |
|
|
Other suggested Flasks:
|
|
    |
|
|
If you have any other build requests please leave them in the comments below. We are always open to suggestions and constructive feedback.
Pictures used in this article are the intellectual property of Grinding Gear Games.
