Shield Crush Trickster Build
Extremely tanky Shield Crush Trickster that deals converted Cold Damage with his shieldShield Crush
Trickster Build
Updated for Patch 3.24
The Best Crafty Guides by Odealo
| Guide notes |
| April 5, 2024 -Updated for Patch 3.24 |
| Build overview | |||
| Tags: [MELEE] [ELEMENTAL] [HYBRID] [STARTER] | |||
|
Budget: Defenses: |
|
Boss DPS: AoE: |
|
Trickster is one of the most durable Ascendancies in the game, its Keystones are remarkably good at mitigating damage or increasing survivability indirectly. This build capitalizes on Escape Artist and Soul Drinker for a massive bonus to Evasion and Energy Shield, Energy Shield Leech that does not stop after filling, and Attack/Cast Speed. With the abundance of Energy Shield and Evasion, it's reasonable to pick up Ghost Dance - after getting Hit it will instantly recover Energy Shield. That's not all, here we're also investing heavily in Armour which comes mostly from a Shield, Flasks, and Determination Aura. The Shield in question is Emperor's Vigilance. It requires some Maximum Life too, but in turn, offers superior stats comparable to a very good Rare one. Glancing Blows double your Block Chance, which is good since the damage taken from blocked Hits will get instantly recovered via Ghost Dance Keystone anyway. To top it all off, there's also Fortify.
The build is capable of easily capping Attack Block Chance and reaching very high Spell Block Chance, but the main defensive layer against Spell Hits is Spell Suppression, which here should equal 100%. With almost 40k of Armour and Evasion, it's reasonable to pick the Persevernece Belt for around 200% increased Attack Damage. The rest of the damage is granted by Shield Crush - a unique Attack Skill that sourced its damage from Shield's Armour rather than Weapon's Attack. The aforementioned Emperor's Vigilance is a Shield with a lot of Armour, even when compared to rare counterparts, and it's also relatively cheap. Shield Crush will deal here Cold Damage converted by Hrimsorrow Gloves. Cold Damage is easier to scale up and won't require Impaling. It's a build that uses some cheap Unique Items, later can accommodate even more of them, that's why it's good as a starter - these items should be already inexpensive on day two of a new league.
You can also check our other Path of Exile builds: Odealo's Crafty Guides - Full List
1. Gameplay
The build uses Shield Crush to deliver damage, it's a simple Attack, just be sure that you stand close to the target to benefit from overlapping waves. To boost your damage use both Ancestral Totems, apply a Curse, and Expose the enemy to Elemental Damage via Frost Bomb or Hydrosphere. For a Curse use Assassin's Mark with Mark on Hit, or Frostbite - Mark is good later in the game after accumulating a high Critical Strike Chance via global Attack modifiers. Flame Dash and Molten Shell are basic Guard and Mobility Skills used in a majority of builds, here too. For Auras use Grace, Determination, and Defiance Banner. These Auras grant a lot of Evasion and Armour. To upgrade your Damage use Precision and/or Hatred, but be careful, you will need some extra Mana Reservation Efficiency to do so.
|
|
|
|

2. Build's PROS & CONS
| PROS |
|
| CONS |
|
3. Leveling tips
The unique Shield we mentioned earlier requires Level 46, but even before that, it would be hard to get meaningful damage out of Shield Crush. As a Trickster, you can take advantage of other passives near your starting location - Traps, Mines, or Chaos Damage. We recommend using a Cobra Lash as it's an Attack that you can also upgrade by multiple Claw/Dagger Passives. It fires a fast Projectile that automatically aims for the next opponent after chaining, so levelling up with it should be a smooth experience. After getting Emperor's Vigilance, Hrimsorrow Gloves, and with Determination, Grace, and Defiance Banner up you can start using Shield Crush. It would make respecing quite a few nodes mandatory (around 25, and 20 are gained from quests), but that's the fastest way to level up.
Suggested leveling Gem setups:
| Cobra Lash setup | |
 |
Cobra Lash - A Chaining Projectile that deals Physical Damage, half of which is converted to Chaos, the other 40% can be obtained from Chaos Mastery. |
 |
Chance to Poison Support - Cobra Lash has a higher Chance to Poison on Hit. It's available at level 1, but later can be replaced with  Added Chaos Damage Support. Added Chaos Damage Support. |
 |
Volley Support - Makes you fire extra Projectile at where you're aiming. Upgrade it later with  Greater Volley Support. Greater Volley Support. |
 |
Vicious Projectiles Support - More Physical and Chaos Damage with Projectiles, but slightly lower Attack Speed. |
 |
Void Manipulation Support - More Chaos Damage, but it disables Elemental Damage, so be sure you deal only Chaos or Physical type. |
 |
Faster Projectiles Support - Faster Projectiles, as that of a Cobra Lash are quite slow. It also increases Damage. For simply more Damage, go for the Withering Touch Support instead. Withering Touch Support instead. |
| Utility Gems | |
 |
Grace - More Evasion, it's useful around acts 6 to 10. |
 |
Determination - Use it with Shield Crush after equipping a Shield with a lot of Armour. |
 |
Defiance Banner - Increases both - Armour and Evasion. |
 |
Clarity - Regenerates Mana, which might be useful if you're using Tabula Rasa. |
 |
Dash - Allows you to Dash, use it to move faster, and avoid attacks, traps, and such. |
 |
Despair - Lowers Chaos Resistance of your opponents. Alternatively, use  Assassin's Mark with Assassin's Mark with  Mark on Hit Support. Mark on Hit Support. |
 |
Steelskin - The most basic Guard Spell that stops Bleeding and mitigates damage. |
Bandits:
We recommend killing all the Bandits for two additional Passive Points
Leveling Skill Trees:
33 Points Skill Tree
Start with Chaos Damage, Physical Damage, and Maximum Life.
55 Points Skill Tree
With Polymath allocated, you want to grab all the different Masteries that would be of use. Add to that more Maximum Life and Chaos Damage.
Recommended leveling items:
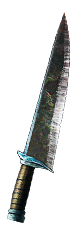 Mightflay - Level 30 Dagger with a lot of Physical Damage, some Strength, and Life on Hit. Mightflay - Level 30 Dagger with a lot of Physical Damage, some Strength, and Life on Hit. |
|
| 30% increased Global Critical Strike Chance +25 to Strength (80-100)% increased Physical Damage Adds 12 to 24 Physical Damage +10 Life gained for each Enemy hit by Attacks |
|
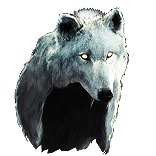
 Goldrim - The best levelling Helmet to keep your Resistances high. You can use it at level 1. Goldrim - The best levelling Helmet to keep your Resistances high. You can use it at level 1. |
|
| +(30-50) to Evasion Rating 10% increased Rarity of Items found +(30-40)% to all Elemental Resistances Reflects 4 Physical Damage to Melee Attackers Level Requirement reduced by 100 (Hidden) |
|
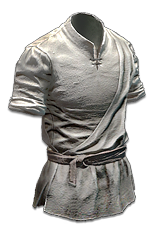 Tabula Rasa - Use Tabula Rasa Body Armour to gain six white sockets which are already linked. Tabula Rasa - Use Tabula Rasa Body Armour to gain six white sockets which are already linked. |
|
| Item has no level requirement and Energy Shield (Hidden) Item has 6 White Sockets and is fully linked (Hidden) |
|
|
|
|
| +(20-30) to Dexterity +(20-30) to Strength +100 to Accuracy Rating 30% increased Projectile Speed 10% increased Movement Speed 30% increased Projectile Damage |
|
 Blackheart - Adds tons of Chaos Damage to Attacks, and can be worn as soon as level 1. Blackheart - Adds tons of Chaos Damage to Attacks, and can be worn as soon as level 1. |
|
| Adds 1 to 4 Physical Damage to Attacks Adds (10-15) to (20-25) Chaos Damage to Attacks Regenerate (10-15) Life per second 10% chance to Cause Monsters to Flee |
|
 Karui Ward - Very powerful Amulet, all of the modifiers are very useful for a Cobra Lash.
4. Final Skill Tree, Ascendancy Points, and Pantheon
Final Skill Tree:
122 Points Final Skill Tree (does not include Jewels)
122 Points Path of Building (PoB) link
Ascendancy points:
Preferably in that order:
- Polymath
- Escape Artist
- Soul Drinker
- Swift Killer
Pantheon:
Major God: Soul of Lunaris 1% additional Physical Damage Reduction for each nearby Enemy, up to 8%; 1% increased Movement Speed for each nearby Enemy, up to 8%
Minor God: Soul of Gruthkul 1% additional Physical Damage Reduction for each Hit you've taken Recently up to a maximum of 5%
5. Final Gems links
| [DPS] Shield Crush | |
 |
Shield Crush - Shield Crush uses your Shield to deal Melee Physical Damage, later converted to Cold. Stay close to your opponent so it can receive more damage from overlapping waves. Use Anomalous or Divergent versions. |
 |
Cold Penetration Support - Damage Penetrates a big chunk of Cold Resistance. |
 |
Pulverise Support - More Area Damage, and larger Area of Effect - you can switch it for  Hypothermia Support for slightly more Damage and less AoE. Hypothermia Support for slightly more Damage and less AoE. |
 |
Multistrike Support - The Attack is being repeated a couple more times with a much higher Attack Rate, but less damage, overall still very good. |
 |
Elemental Damage with Attacks Support - Increases Elemental Damage of the Attack, which is all converted to Cold. |
 |
Fortify Support - Fortify Fortifies you on Hit increasing your defences and also granting more Damage. With Perseverance it also guarantees Onslaught. If you're willing to trade it for more damage, go for  Melee Physical Damage Support instead. Melee Physical Damage Support instead. |
| [UTILITY] Auras setup can be socketed in Alpha's Howl |
|
|
Determination - Adds and increases Armour that mitigates incoming Physical Damage from Hits - very important not only for survivability but also to upgrade DPS via Perseverance. |
|
Grace - Adds and increases Evasion Rating, it makes you more likely to avoid Hits completely and restores ES via Ghost Dance. |
|
Defiance Banner - Increases Evasion and Armour, while also reducing Critical Strike Chance for nearby foes. |
 |
Enlighten Support - Linked Skills have higher Mana Reservation Efficiency. |
| [UTILITY] Curse setup | |
|
Assassin's Mark - Increases Critical Strike Chance and Multiplier against the marked opponent. If your Critical Stike Chance is too low for it, switch for  Frostbite Curse and canst it manually. Frostbite Curse and canst it manually. |
|
Mark on Hit Support - Applies Mark on Hit against Rare and Unique enemies. |
 |
Molten Shell - Use it to mitigate incoming Hit Damage for some time, it's able to absorb more Damage the more Armour you have. |
 |
Lifetap Support - Skills cost Life instead of Mana. You also can skip it and link your Molten Shell with  CwDT instead. CwDT instead. |
| [UTILITY] Ancestral Totems | |
 |
Ancestral Warchief - This Totem grants you more Melee Damage after you summon it. |
 |
Ancestral Protector - It's similar to Ancestral Warchief, but provides you with Attack Speed instead, use the Anomalous version if you can. |
 |
Multiple Totems Support - Allows you to summon both Ancestral Totems at once. |
| [UTILITY] Auras setup can be socketed in Prismatic Eclipse |
|
 |
Precision - Increases Accuracy and Critical Strike Chance, it doesn't have to be levelled all the way up to save some Mana. |
 |
Hatred - More Cold Damage, and Extra Physical Damage as Cold Damage, the best Aura for Cold Conversion builds. |
|
Enlighten Support |
| [UTILITY] Flame Dash and Frost Bomb setup | |
 |
Flame Dash - A mobility Skill you can use to move faster and avoid attacks. |
 |
Frost Bomb - Applies Cold Exposure lowering Cold Resistance, and reduces Life Regeneration Rate which might be good against bosses that heal. |
 |
Blood Rage - More Attack Speed, Life Leech, and Freny Charges on Kill. It will slowly drain your Life, which is not an issue. |
|
Lifetap Support |
|
|
5. Gear Setup
The build can make use of multiple Unique Items, most of them are cheap, and none is overly expensive. It's a good starter build with a lot of room to upgrade in the later stages. The most notable stats to seek will be Maximum Life and Elemental Resistances. Later you will have to include Armour, Evasion, Spell Suppression, and Chaos Resistance. For more Damage, seek mostly global modifiers to Attack Speed, Critical Strike Chance, Critical Damage, and Accuracy Rating. Global stats are those that are not on a Weapon. Lowering the Cost of Skills, Mana Reservation Efficiency and Attributes like Strength and Intelligence will be quite useful to have too.
Our recommended items will:
- Cap your resistances
- Give you enough DPS/Life to start mapping
|
Stat priorities on items:
|
 (Helmet) Alpha's Howl - For a start, it's a very good Helmet mostly due to the Aura Level and Mana Reservation Efficiency. Definitely worth investing in before switching to a much more expensive Rare Helmet. (Helmet) Alpha's Howl - For a start, it's a very good Helmet mostly due to the Aura Level and Mana Reservation Efficiency. Definitely worth investing in before switching to a much more expensive Rare Helmet. |
|
| +2 to Level of Socketed Aura Gems (80-100)% increased Evasion Rating +(20-30)% to Cold Resistance 25% chance to Avoid being Chilled Cannot be Frozen 16% increased Mana Reservation Efficiency of Skills |
|
 (Helmet) Rare Helmet - There are multiple modifiers to look for on a Helmet, but the most notable are the ones for Mana Reservation Efficiency you can get via Redeemer's Suffix and blue Eldritch Implicit. Later you can get more luxury Redeemer's modifiers or the basic ones. (Helmet) Rare Helmet - There are multiple modifiers to look for on a Helmet, but the most notable are the ones for Mana Reservation Efficiency you can get via Redeemer's Suffix and blue Eldritch Implicit. Later you can get more luxury Redeemer's modifiers or the basic ones. |
|
| Min. requirements: 70 Maximum Life 70% Total Elemental Resistances around 20% increased Mana Reservation Efficiency of Skills Optional affixes: Armour and Evasion Attributes Spell Suppression Accuracy Rating chance to gain a Power Charge on Kill Nearby Enemies have -#% to Cold Resistance |
|
| Helmet enchantments: 40% Increased Shield Crush Damage Ancestral Protector Totem grants 18% increased Attack Speed while Active |
|
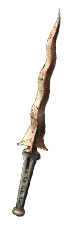
 (Weapon) Obliteration - The Weapon does not attack, but it can still provide global stats. It is the cheapest option, grants a lot of Chaos Damage, and makes enemies Explode on Death. Very good to start with, but doesn't synergize with Cold Damage or Ancestral Totems at all. (Weapon) Obliteration - The Weapon does not attack, but it can still provide global stats. It is the cheapest option, grants a lot of Chaos Damage, and makes enemies Explode on Death. Very good to start with, but doesn't synergize with Cold Damage or Ancestral Totems at all. |
|
| (31-35)% increased Spell Damage Gain (30-40)% of Physical Damage as Extra Chaos Damage Enemies you Kill have a 20% chance to Explode, dealing a quarter of their maximum Life as Chaos Damage |
|
 (Weapon) Grace of the Goddess - Similar to Obliteration, adds a lot of damage sourced from Physical Damage. Use it only if the damage rolls are high. (Weapon) Grace of the Goddess - Similar to Obliteration, adds a lot of damage sourced from Physical Damage. Use it only if the damage rolls are high. |
|
| (36-40)% increased Spell Damage (300-350)% increased Physical Damage Gain (10-30)% of Physical Damage as Extra Fire Damage Gain (10-30)% of Physical Damage as Extra Cold Damage Gain (10-30)% of Physical Damage as Extra Lightning Damage +1 to maximum number of Sacred Wisps +1 to number of Sacred Wisps Summoned |
|
 (Weapon) Prismatic Eclipse - Prismatic Eclipse. The best case would be to have three green sockets, but the Gems setup does not really allow for it - try to get at least two Green ones. It's not very good. (Weapon) Prismatic Eclipse - Prismatic Eclipse. The best case would be to have three green sockets, but the Gems setup does not really allow for it - try to get at least two Green ones. It's not very good. |
|
| +8% Chance to Block Attack Damage while Dual Wielding Adds (60-70) to (71-80) Physical Damage 25% increased Global Physical Damage with Weapons per Red Socket 12% increased Global Attack Speed per Green Socket 0.4% of Physical Attack Damage Leeched as Mana per Blue Socket +2 to Melee Strike Range per White Socket |
|
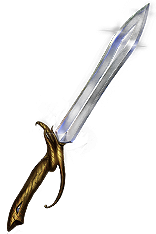
 (Weapon) Wand or Dagger - Kris Dagger for an increased Global Critical Strike Chance or an experimented Wand (Assembler, Congregator, Accumulator) for Charges every six seconds are good bases for a weapon. Redeemer's Physical Damage as Extra Cold Damage would be mandatory to outclass other Unique Weapons. (Weapon) Wand or Dagger - Kris Dagger for an increased Global Critical Strike Chance or an experimented Wand (Assembler, Congregator, Accumulator) for Charges every six seconds are good bases for a weapon. Redeemer's Physical Damage as Extra Cold Damage would be mandatory to outclass other Unique Weapons. |
|
| Min. requirements: 50% increased Global Critical Strike Chance (Kris Dagger) Gain #% of Physical Damage as Extra Cold Damage Accuracy Rating Optional affixes: Global Critical Strike Multiplier increased Critical Strike Chance if you have Killed Recently chance to gain a Power Charge on Kill Gain an Endurance, Frenzy or Power Charge every 6 seconds (Experimented Wand) |
|
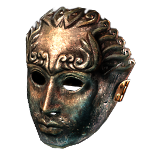
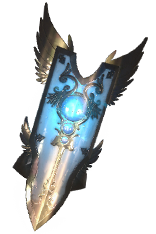 (Shield) Emperor's Vigilance - The best Shield. It has a lot of ES and Armour, a high Chance to Block, and Glancing Blows. It requires you to have a somewhat decent Maximum Life as damage may bypass Energy Shield. (Shield) Emperor's Vigilance - The best Shield. It has a lot of ES and Armour, a high Chance to Block, and Glancing Blows. It requires you to have a somewhat decent Maximum Life as damage may bypass Energy Shield. |
|
| (16-22)% Chance to Block Spell Damage 1000% increased Armour and Energy Shield Damage taken from Blocked Hits cannot bypass Energy Shield Damage taken from Unblocked hits always bypasses Energy Shield Glancing Blows |
|
 (Body Armour) Rare Body Armour - Body Armour, besides Life and Resistances, should get you Spell Suppression, Armour, Evasion, and maybe even Attributes. (Body Armour) Rare Body Armour - Body Armour, besides Life and Resistances, should get you Spell Suppression, Armour, Evasion, and maybe even Attributes. |
|
| Min. requirements: 70 Maximum Life 70% Total Elemental Resistances Optional affixes: Armour and Evasion Strength and Intelligence Chance to Suppress Spell Damage Attacks have +#% to Critical Strike Chance increased effect of Non-Curse Auras from your Skills You can apply an additional Curse Socketed Attacks have -15 to Total Mana Cost |
|
 (Body Armour) Farrul's Fur - It's not an outstanding Body Armour, a good Rare is still better, but this one has some virtues - high Evasion and Armour, Maximum Life, Frenzy and Power Charges, and Cat's buffs off charge which are very powerful. (Body Armour) Farrul's Fur - It's not an outstanding Body Armour, a good Rare is still better, but this one has some virtues - high Evasion and Armour, Maximum Life, Frenzy and Power Charges, and Cat's buffs off charge which are very powerful. |
|
| (100-150)% increased Armour and Evasion +(80-100) to maximum Life Aspect of the Cat has no Reservation +2 seconds to Cat's Stealth Duration Gain up to your maximum number of Frenzy and Power Charges when you gain Cat's Stealth You have Phasing while you have Cat's Stealth |
|
 (Boots) Rare Boots - Boots are basic, but that doesn't mean there are no luxury upgrades to look for later. Movement Speed, Resistances, and Life are good for a start. (Boots) Rare Boots - Boots are basic, but that doesn't mean there are no luxury upgrades to look for later. Movement Speed, Resistances, and Life are good for a start. |
|
| Min. requirements: 70 Maximum Life 70% Total Elemental Resistances 25% increased Movement Speed Optional affixes: chance to gain Onslaught for 4 seconds on Kill chance to gain Elusive on Critical Strike Freeze and Chill immunity chance to Suppress Spell Damage Attributes |
|
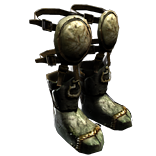
 (Boots) Darkray Vectors - Extremely DPS-oriented choice for a pair of boots. You could use it and have 10 Frenzy Charges in total for major benefits like Movement Speed and Evasion Rating. (Boots) Darkray Vectors - Extremely DPS-oriented choice for a pair of boots. You could use it and have 10 Frenzy Charges in total for major benefits like Movement Speed and Evasion Rating. |
|
| (40-70)% increased Armour and Evasion +(20-40)% to Lightning Resistance 5% increased Movement Speed per Frenzy Charge +1 to Maximum Frenzy Charges 40% reduced Frenzy Charge Duration 25% reduced Light Radius 10% increased Evasion Rating per Frenzy Charge |
|
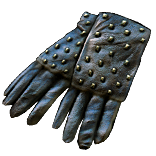 (Gloves) Hrimsorrow - The easiest way to convert all Damage to Cold - these gloves are cheap and common. Corrupt them for a +1 to Maximum Frenzy Charges. (Gloves) Hrimsorrow - The easiest way to convert all Damage to Cold - these gloves are cheap and common. Corrupt them for a +1 to Maximum Frenzy Charges. |
|
| +(20-30) to Strength +(40-50) to Evasion Rating +(20-30)% to Cold Resistance 100% of Physical Damage Converted to Cold Damage Reflects 100 Cold Damage to Melee Attackers |
|
 (Belt) Perseverance - Very good Belt for an Attack-based character that heavily invested in Armour and Evasion. Be sure that you are Fortified to have Onslaught. (Belt) Perseverance - Very good Belt for an Attack-based character that heavily invested in Armour and Evasion. Be sure that you are Fortified to have Onslaught. |
|
| +(260-320) to Armour and Evasion Rating (4-8)% increased maximum Life +(20-40)% to Cold Resistance 1% increased Attack Damage per 200 of the lowest of Armour and Evasion Rating Melee Hits which Stun Fortify You have Onslaught while Fortified |
|
 (Amulet) Rare Amulet - Rare Amulet is not a recommended choice, but if you can't fix some of the issues like Resistances, Accuracy, or Attributes, this Jewelry has you covered. (Amulet) Rare Amulet - Rare Amulet is not a recommended choice, but if you can't fix some of the issues like Resistances, Accuracy, or Attributes, this Jewelry has you covered. |
|
| Min. requirements: 60 maximum Life Optional affixes: Elemental Resistances Accuracy Rating Critical Strike modifiers Attributes Adds Physical/Cold Damage to Attacks Chaos Resistance increased Damage per Frenzy Charge |
|
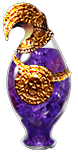
 (Amulet) The Pandemonius - Pandemonius is very good for Hit-based Cold Damage builds that can Chill, which is exactly what this build is. (Amulet) The Pandemonius - Pandemonius is very good for Hit-based Cold Damage builds that can Chill, which is exactly what this build is. |
|
| +(20-30) to Dexterity (20-30)% increased Cold Damage +(35-40)% to Cold Resistance Chill Enemy for 1 second when Hit, reducing their Action Speed by 30% Blind Chilled Enemies on Hit Damage Penetrates 20% Cold Resistance against Chilled Enemies |
|
 (Amulet) Yoke of Suffering - Yoke is great if you can Chill, Shock, Freeze, and Ignite. Even Better if you can Sap, Scorch, and Brittle. To do so add Elemental Damage to your Attacks via Jewels or The Taming Ring. There is no easy way to cause alternative Ailments here. (Amulet) Yoke of Suffering - Yoke is great if you can Chill, Shock, Freeze, and Ignite. Even Better if you can Sap, Scorch, and Brittle. To do so add Elemental Damage to your Attacks via Jewels or The Taming Ring. There is no easy way to cause alternative Ailments here. |
|
| +(10-16) to all Attributes +(10-20)% to Fire Resistance +(10-20)% to Cold Resistance +(20-40)% to Lightning Resistance 30% reduced Duration of Ailments on Enemies (5-10)% chance to Shock Enemies take (5-10)% increased Damage for each type of Ailment you have inflicted on them Your Elemental Damage can Shock |
|
 (Amulet) Replica Dragonfang's Flight - Easy fix to your Reservation Efficiency issue, but it's quite too overpriced for the value in this build. Shield Crush is an Attack that scales really well with Gem Level. (Amulet) Replica Dragonfang's Flight - Easy fix to your Reservation Efficiency issue, but it's quite too overpriced for the value in this build. Shield Crush is an Attack that scales really well with Gem Level. |
|
| +(10-16) to all Attributes +3 to Level of all <Random Skill> Gems +(5-10)% to all Elemental Resistances (5-10)% increased Reservation Efficiency of Skills Items and Gems have (10-5)% reduced Attribute Requirements |
|
| Recommended Anointments: Sovereignty |
|
 (Ring) Rare Ring - Seek Life, Resistances, increased or added Cold Damage with Attacks, Accuracy, and Attributes. Later you can craft a modifier for a reduced Mana Cost of Skills. (Ring) Rare Ring - Seek Life, Resistances, increased or added Cold Damage with Attacks, Accuracy, and Attributes. Later you can craft a modifier for a reduced Mana Cost of Skills. |
|
| Min. requirements: 70 maximum Life 60% Total Elemental Resistances Optional affixes: Adds Physical/Cold Damage to Attacks increased Elemental Damage with Attack Skills increased Attack Speed Accuracy Rating Attributes Non-Channelling Skills have -# to Total Mana Cost |
|
 (Ring) The Taming - Taming makes it easy to apply all types of basic Elemental Ailments on Hit, grants some Resistances, and Damage. Great with Yoke of Suffering, and also cheap. (Ring) The Taming - Taming makes it easy to apply all types of basic Elemental Ailments on Hit, grants some Resistances, and Damage. Great with Yoke of Suffering, and also cheap. |
|
| +(8-10)% to all Elemental Resistances 20% increased Damage with Hits and Ailments per Freeze, Shock or Ignite on Enemy +(20-30)% to all Elemental Resistances 30% increased Elemental Damage 10% chance to Freeze, Shock and Ignite 30% increased Elemental Damage with Attack Skills |
|
 (Ring) Mark of the Elder - Another heavily DPS-oriented piece of equipment. Adds a lot of Cold Damage, increases ES, Maximum Life, and is only good if your other Ring is influenced by the Shaper. (Ring) Mark of the Elder - Another heavily DPS-oriented piece of equipment. Adds a lot of Cold Damage, increases ES, Maximum Life, and is only good if your other Ring is influenced by the Shaper. |
|
| Adds (3-4) to (10-14) Physical Damage to Attacks 20% chance to Trigger Level 20 Tentacle Whip on Kill Adds (26-32) to (42-48) Cold Damage to Attacks (6-10)% increased maximum Energy Shield (6-10)% increased maximum Life (60-80)% increased Attack Damage if your other Ring is a Shaper Item Cannot be Stunned by Attacks if your other Ring is an Elder Item |
|
 (Jewels) Rare Jewels - Maximum Life and Mana Reservation Efficiency are the top priority. Later seek Resistances, Attributes, and Critical Strike modifiers. (Jewels) Rare Jewels - Maximum Life and Mana Reservation Efficiency are the top priority. Later seek Resistances, Attributes, and Critical Strike modifiers. |
|
| Recommended affixes: increased maximum Life Mana Reservation Efficiency Optional affixes: Elemental Resistances Critical Strike modifiers increased Attack Speed Attributes |
|
 (Jewels) Seething Fury - It fits here like a glove. With 385 ES on a Shield, it grants almost 6% base Critical Strike Chance and 154% increased Critical Strike Multiplier. (Jewels) Seething Fury - It fits here like a glove. With 385 ES on a Shield, it grants almost 6% base Critical Strike Chance and 154% increased Critical Strike Multiplier. |
|
| (10-15)% increased Attack Damage while holding a Shield +0.15% to Off Hand Critical Strike Chance per 10 Maximum Energy Shield on Shield +4% to Off Hand Critical Strike Multiplier per 10 Maximum Energy Shield on Shield Corrupted |
|
 (Jewels) Lethal Pride - You should have tons of passives allocated around the Fervour Notable. One Lethal Pride can get you around 100 Strength (which will be needed anyway) and some other bonuses, mostly to damage. (Jewels) Lethal Pride - You should have tons of passives allocated around the Fervour Notable. One Lethal Pride can get you around 100 Strength (which will be needed anyway) and some other bonuses, mostly to damage. |
|
| Commanded leadership over (10000-18000) warriors under Akoya Passives in radius are Conquered by the Karui Historic |
|
 (Jewels) Watcher's Eye - Hatred modifiers for more Critical Strike Chance or Cold Penetration are outstanding, look for one or both of these mods. (Jewels) Watcher's Eye - Hatred modifiers for more Critical Strike Chance or Cold Penetration are outstanding, look for one or both of these mods. |
|
| (4-6)% increased maximum Energy Shield (4-6)% increased maximum Life (4-6)% increased maximum Mana <Two or Three random aura modifiers> |
|
 (Flask) Taste of Hate - Extra Physical Damage as Cold Damage and multiple defensive bonuses are what make this flask excellent for Cold Conversion builds. (Flask) Taste of Hate - Extra Physical Damage as Cold Damage and multiple defensive bonuses are what make this flask excellent for Cold Conversion builds. |
|
| +50% to Cold Resistance 20% less Cold Damage taken (10-15)% of Physical Damage from Hits taken as Cold Damage during Flask effect Gain (10-15)% of Physical Damage as Extra Cold Damage during effect 30% chance to Avoid being Chilled during Flask effect 30% chance to Avoid being Frozen during Flask effect |
|
 (Flask) Atziri's Promise - Extra Chaos Resistance and Damage sourced from Physical and Cold Damage are excellent. (Flask) Atziri's Promise - Extra Chaos Resistance and Damage sourced from Physical and Cold Damage are excellent. |
|
| +35% to Chaos Resistance 2% of Chaos Damage Leeched as Life during Flask effect Gain (5-8)% of Physical Damage as Extra Chaos Damage during effect Gain (5-8)% of Elemental Damage as Extra Chaos Damage during effect |
|
Other suggested Flasks:
|
|
   |
|
|
If you have any other build requests please leave that in the comments below.
Pictures used in this article are the intellectual property of Grinding Gear Games.
