General's Cry Shield Crush Berserker Build
Physical General's Cry build for a Berserker that uses Shield Crush making it a great starter with a lot of ArmourGeneral's Cry
Shield Crush Berserker build
Updated for Patch 3.21
The Best Crafty Guides by Odealo
| Guide notes | |||
| February 03, 2022 -Build created September 19, 2022 -Updated for Patch 3.19 July 11, 2023 -Updated for Patch 3.21 |
|||
| Build overview | |||
| Tags: [MELEE] [PHYSICAL] [IMPALE] [LIFE] [STARTER] | |||
|
Budget: Defenses: |
|
Boss DPS: AoE: |
|
General's Cry is a Warcry Gem that's very different from any other of its kind, it summons Mirage Warriors from nearby corpses to perform an Attack of your choice. Link the Attack to the Warcry Skill Gem for it to work. You can summon up to 5 Mirage Warriors, which requires you to have 10 Corpses nearby and 25 Warcry Power - it can be guaranteed by constantly casting Desecrate. The skill of your choice is Shield Crush. Why Shield Crush and not Blade Flurry? it's cheaper to get more Attack Damage as it's based on the Armour on your Shield, which is easier to scale up than the Damage on your main-hand weapon. You can of course transition very easily to the Blade Flurry version as it's better but more expensive. You can check other General's Cry builds here: General's Cry Blade Flurry, and General's Cry Shield Charge.
You want of course to play as Berserker as you rely on Warcry and Attacks. Pick Call to Arms to use your Warcry instantly - it won't interrupt our Cyclone which is used to spawn Corpses via Descrate so that you still be at your prime even during boss fights. You want to get the usual Physical Attack Damage nodes, easily found on the bottom of the Skill Tree, and then some Warcry Cluster and Masteries. Look only for Global Physical Damage modifiers as the damage is sourced from your Shield. Use Resolute Technique to always Hit early on, and after being able to afford a specific Brutal Restraint you can stop using it. As is the case with Physical Attack Builds, make use of Impale mechanics for more damage. It's a very tanky build with a lot of Armour, obviously, and some other defensive measures. It's supposed to be played as a starter build so it's very cheap.
You can also find our other Path of Exile builds right over here Odealo's Crafty Guides - Full List
1. Gameplay
The gameplay is simple as most of the time you spin using Cyclone to spawn Corpses with Desecrate and mash the low-cooldown General's Cry Skill button. Enhance your Damage with Blood Rage, Pride, and Dread Banner. You can further increase your Damage for a short time with Berserk which spends your Rage, and Ancestral Totems. As your Armour is high, you should take Determination Aura to have even more of it and mitigate 90% of incoming Physical Damage. Use Leap Salm as your Movement Skill and Molten Shell to reduce damage taken. Vulnerability is the best Curse you can cast manually or via Ring Affix.
|
|
|
|

2. Build's PROS & CONS
| PROS |
|
| CONS |
|
3. Leveling tips
Start with any Attack, such as Cleave, Sunder, or Shield Crush if you already have a Shield with a lot of Armour on it. At level 24 you can link it with General's Cry and proceed forward. Remember that your main hand weapon stats do not affect your damage unless it's explicitly stated that it affects your global damage. A common useful mod you can find is for example "Attacks have a chance to cause Bleeding". At Level 23 you can use Dark Seer, but don't use it unless you have a 100% chance to Hit no matter your Accuracy, use Resolute Technique Keystone to achieve this status. After getting Brutal Restrain (Nasima variant) you can transform one of your Keystones into Second Sight for much more Critical Stre Chance. Keep changing your Shield to one with more Armour from time to time, higher tier Armour mods are restricted by Item Level.
Suggested leveling Gem setups:
| Cleave setup | |
 |
Ancestral Protector - a Strike Totem Attack which also grants you more Attack Speed |
 |
Ancestral Call Support - Strike Skills strike additional targets for better AoE |
 |
Ruthless Support - every third Attack deals much more damage |
 |
Maim Support - you deal more Damage and slow down enemies on Hit |
| Vaal Double Strike setup | |
 |
General's Cry - Warcry which creates Mirage Warriors performing the linked Attack |
 |
Melee Physical Damage Support - you deal more Physical Melee Damage but with less Attack Speed |
 |
Pulverise Support - more AoE, more Area Melee Damage, but less Attack Speed |
 |
Brutality Support - increases your Physical Damage, but disabled all Elemental Damage |
 |
Shield Crush - its damage scales with the Armour on your Shield, be sure that you have a lot of |
| various Gems | |
 |
Ancestral Warchief - use it to boost your Melee Damage during boss fights |
 |
Vulnerability - Curse that causes your enemies to take more Physical Damage with more Chance to Bleed |
 |
Pride - enemies near you take more Physical Damage |
 |
Precision - increases your Accuracy Rating and Crit. Chance, use only after you no longer use of Resolute Technique |
 |
Leap Slam - a movement Attack that makes you move faster, especially useful during the Lab trials |
Bandits:
We recommend killing all the Bandits for two additional Passive Points.
Leveling Skill Trees:
32 Points Skill Tree
Go for the Resolute Technique, it's good to level up with; after that go find more Life and Attack Damage
68 Points Skill Tree
Allocate Call to Arms and start using General's Cry; you should then allocate the three Warcry Clusters and get some more damage
Recommended leveling items:
 Blackheart - cheap and available leveling Ring for Physical Damage builds Blackheart - cheap and available leveling Ring for Physical Damage builds |
|
| Adds 1 to 4 Physical Damage to Attacks 5% increased Physical Damage Adds 1 to 3 Chaos Damage to Attacks +(20-30) to maximum Life (2-4) Life Regenerated per second 10% chance to Cause Monsters to Flee |
|
 Meginord's Girdle - a Belt granting increased Physical Damage and other good stats Meginord's Girdle - a Belt granting increased Physical Damage and other good stats |
|
| +(25-35) to Strength +25 to Strength Adds 10 to 20 Physical Damage to Attacks 10% increased maximum Life +(10-20)% to Cold Resistance 25% increased Flask Life Recovery rate |
|
|
|
|
| +(30-50) to Evasion Rating 10% increased Rarity of Items found +(30-40)% to all Elemental Resistances Reflects 4 Physical Damage to Melee Attackers Level Requirement reduced by 100 (Hidden) |
|
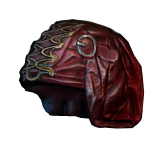 Goldrim - one of the best leveling Helmets, it offers tons of Elemental Resistances
4. Final Skill Tree, Ascendancy Points, and Pantheon
Final Skill Tree:
98 Points Final Skill Tree (doesn't include Unique or Cluster Jewels)
123 Points Path of Building (PoB) link
Ascendancy points:
Preferably in that order:
- War Bringer
- Aspect of Carnage
- Crave the Slaughter
- Rite of Ruin
Pantheon:
Major God - there are 2 choices depending on whether you are clearing Maps or want to challenge endgame Bosses
For clearing Maps:
Soul of Lunaris 1% additional Physical Damage Reduction for each nearby Enemy, up to 8%; 1% increased Movement Speed for each nearby Enemy, up to 8%
For single-target/Bosses:
Soul of Solaris 6% Physical Damage Reduction if there is only one nearby Enemy; 20% chance to take 50% less Area Damage from Hits
Minor God: Soul of Gruthkul 1% additional Physical Damage Reduction for each Hit you've taken Recently up to a maximum of 5%
5. Final Gems links
| [DPS] General's Cry setup | |
|
General's Cry - a Warcry that summons Mirage Warriors, they use a linked Attack which bypasses the animation sequence to deliver the Hit instantly |
|
Melee Physical Damage Support - you have increased Melee Physical Damage, but lower Attack Speed, which is not a downside |
|
Pulverise Support - at the cost of reduced Attack Speed (irrelevant with General's Cry) it grants you more AoE and Area Damage |
 |
Brutality Support - you're unable to deal Elemental Damage, but the Physical type of Damage is greatly increased |
|
Shield Crush - the Skill which your Mirage Warriors are using, its damage is based on the Armour on your Shield, not your weapon |
 |
Impale Support - You have increased Chance to Impale, which is more effective. Impale is an important part of the build. |
| [UTILITY] Cyclone and Desecrate setup | |
 |
Cyclone - Cyclone is a Channeling Attack that allows you to quickly Cast Desecrate while also allowing you to move |
 |
Cast while Channelling Support - link Cyclone with Desecrate to cast it every 0.35 seconds |
 |
Desecrate - Spawns 5 Corpses which are needed to create Mirage Warriors |
| [UTILITY] Totems setup | |
 |
Ancestral Warchief - summons a Totem which increases your Melee Damage |
|
Ancestral Protector - summons a Totem which increases your Attack Speed |
 |
Multiple Totems Support - you can summon both Totems at once to get the benefits of Attacks Speed and Melee Damage |
|
Maim Support - Totems will Maim on hit which reduces movement speed |
| [UTILITY] Blood Rage and Berserk setup | |
 |
Blood Rage - increases your Attack Speed, Life Leech, and generates Frenzy Charges on a kill while dealing Physical DoT to your character |
 |
Berserk - Spend Rage to temporarily gain a gradually decreasing in effectiveness buff which grants you similar benefits that Rage itself does |
 |
Enhance Support - increasing the Quality of Berserk and Blood Rage massively increases your Damage and Attack Speed |
| [UTILITY] Auras setup | |
|
Pride - increases the Physical Damage nearby enemies take, it's more effective after 4 seconds |
 |
Precision - Accuracy Rating and Critical Strike - which this Aura grants - are both very valuable stats |
 |
Determination - more and Increased Armour so you can mitigate more Physical Damage |
 |
Enlighten Support - linked Spells have higher Mana Reservation Efficiency |
| [MOBILITY] Leap Slam setup | |
|
Leap Slam - a Movement Attack that allows you to jump over objects and move faster |
 |
Faster Attacks Support - Leap Slam is faster further increasing your movement speed |
| [UTILITY] Dread Banner | |
 |
Dread Banner - It's the Imaple Banner that grants you an increased chance to Impale on Hit and increases the effect of Impale. Nearby enemies have less Accuracy Rating. |
| [UTILITY] Molten Shell | |
 |
Molten Shell - Guard Spell which scales with Armour that you should have a lot of |
|
|
5. Gear Setup
Below you will find the recommended items for the build. Unique Items listed here are not mandatory, but you should prioritize getting them as soon as you can. Look for a way to get 100% of Crit. Chance and Hit Chance, later focusing on Crit. Multiplier and Added or increased Physical Damage with Attacks. You don't need Attack Speed. The defensive stats to look for are Maximum Life, Armour, and Elemental Resistances.
|
Stat priorities on items:
|
 (Helmet) Rare Helmet - Rare Helmet is your preferred option as it should provide you with a lot of Defensive, and later offensive stats like Accuracy (Helmet) Rare Helmet - Rare Helmet is your preferred option as it should provide you with a lot of Defensive, and later offensive stats like Accuracy |
|
| Min. requirements: +70 maximum Life +80% to Total Elemental Resistances Optional affixes: Nearby enemies take #% Increased Physical Damage Critical Strike mods Accuracy Rating Intelligence |
|
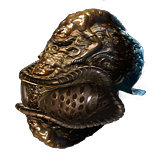 (Helmet) Abyssus - It's actually a great softcore option, it grants you a lot of Physical Damage, and with the abundance of Armour the downside is as much alleviated as it can be (Helmet) Abyssus - It's actually a great softcore option, it grants you a lot of Physical Damage, and with the abundance of Armour the downside is as much alleviated as it can be |
|
| +(20-25) to all Attributes Adds 40 to 60 Physical Damage to Attacks +(100-125)% to Melee Critical Strike Multiplier (100-120)% increased Armour (40-50)% increased Physical Damage taken |
|
| Helmet enchantment: General's Cry has +1 to maximum number of Mirage Warriors |
|
 (Body Armour) Rare Body Armour - Body Armour can potentially grant you a lot of Life, Elemental Resistances, and additional Critical Strike Chance (Body Armour) Rare Body Armour - Body Armour can potentially grant you a lot of Life, Elemental Resistances, and additional Critical Strike Chance |
|
| Min. requirements: +100 maximum Life Attacks have +1% to Critical Strike Chance Optional affixes: Maximum Life% Elemental Resistances You can apply an additional Curse Enemies you Kill have a chance to Explode, dealing a tenth of their Maximum Life |
|
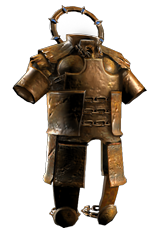
 (Body Armour) Belly of the Beast - a cheap Unique Armour that meets the requirements to be a viable alternative to a Rare Body Armour (Body Armour) Belly of the Beast - a cheap Unique Armour that meets the requirements to be a viable alternative to a Rare Body Armour |
|
| (150-200)% increased Armour (30-40)% increased maximum Life +(10-15)% to all Elemental Resistances 50% increased Flask Life Recovery rate Extra gore |
|
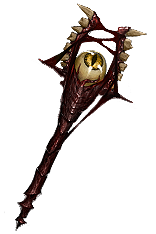 (Weapon) The Dark Seer - It's the best weapon, it makes you unaffected by a blindness which is immensely useful when combined with Second Sight. The most important stat, however, is the increased Global Damage. (Weapon) The Dark Seer - It's the best weapon, it makes you unaffected by a blindness which is immensely useful when combined with Second Sight. The most important stat, however, is the increased Global Damage. |
|
| 22% increased Elemental Damage (40-60)% increased Global Damage 10% Global chance to Blind Enemies on hit Unaffected by Blind Enemies Blinded by you while you are Blinded have Malediction +1 Maximum Life per Level +1 Maximum Mana or ES per Level |
|
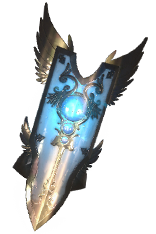
 (Shield) Rare Shield - sacrifice any useful stat if it means getting more Armour here, your damage is dependent on it (Shield) Rare Shield - sacrifice any useful stat if it means getting more Armour here, your damage is dependent on it |
|
| Min. requirements: 1800 Armour in total Quality (crafted) Optional affixes: more Armour |
|
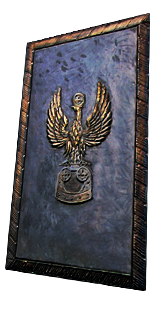
 (Shield) Emperor's Vigilance - It's a unique Shield with up to around 1800 Armour, which is a lot. It grants Glancing Blows which might be desirable if your Chance to Block is low. Definitely worth consideration. (Shield) Emperor's Vigilance - It's a unique Shield with up to around 1800 Armour, which is a lot. It grants Glancing Blows which might be desirable if your Chance to Block is low. Definitely worth consideration. |
|
| Chance to Block: 26% Armour: (1606-1837) Energy Shield: (330-385) Movement Speed: -3% (16-22)% Chance to Block Spell Damage 1000% increased Armour and Energy Shield Damage taken from Blocked Hits cannot bypass Energy Shield Damage taken from Unblocked hits always bypasses Energy Shield Glancing Blows |
|
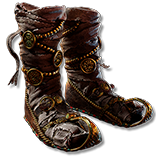 (Boots) Corpsewalker - these create corpses as you walk, increasing your Damage and Regenerating your Life, definitely the best pick for boots (Boots) Corpsewalker - these create corpses as you walk, increasing your Damage and Regenerating your Life, definitely the best pick for boots |
|
| Triggers Level 20 Corpse Walk when Equipped (80-120)% increased Evasion and Energy Shield 25% increased Movement Speed (20-40)% increased Damage if you have Consumed a corpse Recently For each nearby corpse, Regenerate 0.25% Life per second, up to 3% |
|
 (Belt) Rare Belt - A regular Belt with Life and Resistances is good, don't invest too much in it as the best Belt is a unique Ryslatha's Coil. (Belt) Rare Belt - A regular Belt with Life and Resistances is good, don't invest too much in it as the best Belt is a unique Ryslatha's Coil. |
|
| Min. requirements: +100 maximum Life +75% to Total Elemental Resistances Optional affixes: increased Damage Armour increased Maximum Life |
|
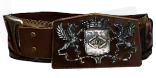
 (Belt) Ryslatha's Coil - Grants you tons of Damage and Maximum Life, but no Resistances. It's still your best choice. (Belt) Ryslatha's Coil - Grants you tons of Damage and Maximum Life, but no Resistances. It's still your best choice. |
|
| (20-30)% increased Stun Duration on Enemies +(20-40) to Strength (30-40)% more Maximum Physical Attack Damage (40-30)% less Minimum Physical Attack Damage Adds 1 to (15-20) Physical Damage to Attacks +(80-100) to maximum Life Gain 50 Life when you Stun an Enemy |
|
 (Amulet) Rare Amulet - there are a lot of useful mods to get, prioritize Life, Resistances, Accuracy Rating, Crit. Chance, and get some missing Attributes such as Intelligence (Amulet) Rare Amulet - there are a lot of useful mods to get, prioritize Life, Resistances, Accuracy Rating, Crit. Chance, and get some missing Attributes such as Intelligence |
|
| Min. requirements: +60 Maximum Life +70% to Elemental Resistances Optional affixes: +1 to Level of All Strength Skill Gems +1 to Level of All Physical Skill Gems Critical Strike Chance or Multiplier Attributes increased Area of Effect Physical Attack Damage Leeched as Mana |
|
| Recommended Anointments: Tenacity Depth Perception Will of Blades Weathered Hunter Dazzling Strikes |
|
 (Ring) Rare Rings - Curse on Hit is the most efficient way to cast it, go for Vulnerability. Increase your defensive and offensive stats as was the case with the Amulet. (Ring) Rare Rings - Curse on Hit is the most efficient way to cast it, go for Vulnerability. Increase your defensive and offensive stats as was the case with the Amulet. |
|
| Min. requirements: +65 maximum Life +85% to Total Elemental Resistances Curse enemies with level # Vulnerability on Hit Optional affixes: increased Melee Damage Accuracy Rating increased Attack Speed Added Physical Damage to Attacks Attributes |
|
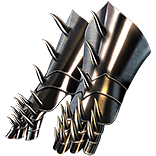 (Gloves) Rare Gloves - Gloves are one of the few gear pieces where you can easily get Accuracy, additionally, look for Maximum Life, added Damage, increased Attack Speed, and Crit. Chance (Gloves) Rare Gloves - Gloves are one of the few gear pieces where you can easily get Accuracy, additionally, look for Maximum Life, added Damage, increased Attack Speed, and Crit. Chance |
|
| Min. requirements: +80 maximum Life +400 Accuracy Rating Optional affixes: Added Physical Damage to Attacks Elemental/Chaos Resistance increased Melee Damage increased Attack Speed increased Global Critical Strike Chance chance to Impale Enemies on Hit with Attacks |
|
 (Jewel) Watcher's Eye - besides the increases to your Life, Mana, and ES it can provide you with unique enhancements to one of your Auras - look for the ones for Precision or Pride (Jewel) Watcher's Eye - besides the increases to your Life, Mana, and ES it can provide you with unique enhancements to one of your Auras - look for the ones for Precision or Pride |
|
| (4-6)% increased maximum Energy Shield (4-6)% increased maximum Life (4-6)% increased maximum Mana <Two or Three random aura modifiers> Recommended Aura modifier: Impales you inflict last 2 additional Hits while using Pride |
|
 (Jewel) Kitava's Teachings - it restores 5% of your Life and Mana if there is a corpse to consume nearby, which there always is (Jewel) Kitava's Teachings - it restores 5% of your Life and Mana if there is a corpse to consume nearby, which there always is |
|
| Adds Disciple of Kitava | |
 Jewel) Brutal Restraint - You can put it anywhere as long as it transforms one of the Keystones you're not using to a Second Sight - it makes you blind and grants you 25% more Critical Strike Chance. It can be only achieved in the Nasima version of the Jewel. Jewel) Brutal Restraint - You can put it anywhere as long as it transforms one of the Keystones you're not using to a Second Sight - it makes you blind and grants you 25% more Critical Strike Chance. It can be only achieved in the Nasima version of the Jewel. |
|
| Denoted service of (500-8000) dekhara in the akhara of Nasima Passives in radius are Conquered by the Maraketh Historic |
|
 (Jewel) Rare Jewels - these should provide extra Life and various damage bonuses (Jewel) Rare Jewels - these should provide extra Life and various damage bonuses |
|
| Recommended affixes: increased maximum Life increased Physical/Area Damage with a one-handed melee weapon Critical Strike Multiplier or Chance Optional affixes: Attributes |
|
 (Jewel) Large Cluster Jewel - Gladiator's Fortitude is a good Mana Leech source, other passives can provide you bonuses correlating to a shield-wielding playstyle (Jewel) Large Cluster Jewel - Gladiator's Fortitude is a good Mana Leech source, other passives can provide you bonuses correlating to a shield-wielding playstyle |
|
| Recommended affixes: 1 Added Passive Skill is Fuel the Fight 1 Added Passive Skill is Gladiator's Fortitude 1 Added Passive Skill is Smite the Weak |
|
 (Jewel) Medium Cluster Jewel - you should use two Medium Jewels with bonuses to Exerted Attacks, these are immensely beneficial for the build (Jewel) Medium Cluster Jewel - you should use two Medium Jewels with bonuses to Exerted Attacks, these are immensely beneficial for the build |
|
| Recommended affixes: 1 Added Passive Skill is Haunting Shout 1 Added Passive Skill is Lead By Example 1 Added Passive Skill is Mob Mentality |
|
 (Flask) Lion's Roar - the best flask for the Melee Physical Damage builds which also grants you more Armour (Flask) Lion's Roar - the best flask for the Melee Physical Damage builds which also grants you more Armour |
|
| +1500 to Armour Adds Knockback to Melee Attacks during Flask effect Knocks Back Enemies in an Area when you use a Flask 75% chance to cause Enemies to Flee on use (7-10)% more Melee Physical Damage during effect |
|
 (Flask) Bottled Faith - an expensive Flask that can be replaced by any magic Sulphur one until you can afford it (Flask) Bottled Faith - an expensive Flask that can be replaced by any magic Sulphur one until you can afford it |
|
| 40% increased Damage Creates Consecrated Ground on Use (30-15)% reduced Duration Consecrated Ground created by this Flask has Tripled Radius Consecrated Ground created during Effect applies (7-10)% increased Damage taken to Enemies (100-150)% increased Critical Strike Chance against Enemies on Consecrated Ground during Flask effect |
|
|
Other suggested Flasks:
|
|
   |
|
|
If you have any other build requests, please leave that in the comments below.
Pictures used in this article are the intellectual property of Grinding Gear Games.
