General's Cry BF Berserker Marauder Build
The best way to describe this build is "meme but strong" and that pronounces "insanely strong"General's Cry
Blade Flurry Berserker build
Updated for Patch 3.17
The Best Crafty Guides by Odealo
| Guide notes |
| November 13, 2020 -Build created March 31, 2022 -Updated for Patch 3.17 April 7, 2022 -Updated gameplay video |
| Build overview | |||
| Tags: [MELEE] [PHYSICAL] [IMPALE] [LIFE] | |||
|
Budget: Defenses: |
|
Boss DPS: AoE: |
|
General's Cry is a Warcry Gem with very unique properties. It's a Warcry that makes it feel more like would be playing a Minion build as it creates multiple Mirage Warriors from nearby corpses that will cast a Melee Attack linked to it. While you would normally treat Warcry as an extra secondary skill that slightly buffs you, in this build it's your primary damage-dealer, with tons of AoE damage and simply massive single-target damage.
The best description of this type of build could be "meme but strong" which just happens to be how someone described this type of build on Path of Exile's Reddit. And that just happens to be exactly the case here. By reducing your Warcries cooldown and automatically creating corpses around you with Desecrate, you will deal simply absurd damage without any exceptionally expensive equipment.
You can also find our other Path of Exile builds right over here Odealo's Crafty Guides - Full List
1. Gameplay
This is a very unique type of build that feels like a Melee build but is quite far away from it. You are going to mainly spin around with Cyclone, but its main goal is to buff you with Fortify, Infusion, and to create corpses by triggering Desecrate thanks to the linked Cast while Channelling Gem. While spinning, you are going to spam General's Cry (which happens to be an instant-cast Spell that doesn't stop your Cyclone) with a greatly reduced cooldown. Mirage Warriors from nearby corpses will be summoned to deal insane damage with Blade Flurry. In terms of raw damage, Blade Flurry is the best ability for this build, as it not only hits once like most of the attacks but instead will be channeled up until 6 stacks and released for high damage burst. You can also try this out with any other Melee Attack, and in most cases, this build is pure fun. You can try Charged Dash or Flicker Strike which also works just fine and doesn't require you to switch anything in the recommended Passives/equipment. By using Redblade Banner (which is kind of a must-have item here) and War Bringer Passive, you will basically generate 50 Rage with each Warcry, and deal 50% More Damage with General's Cry supported Attacks. Rage generated with War Bringer will also allow you to keep up the Berserk buff for a significant duration, for massive DPS bonuses.
|
|
|
|

2. Build's PROS & CONS
| PROS |
|
| CONS |
|
3. Leveling tips
We recommend leveling up with a standard Melee character that uses one-handed Swords and Cleave to deal decent AoE Damage (you can also use Blade Flurry, Cyclone, Sunder with Axe, or any other Melee Attack you feel comfortable leveling with). Whether you use Shield (better defenses) or dual-wield (more DPS) is entirely up to you, just make sure to skip Shield-related nodes if you decide to go the second way. It's also a good idea to make a secondary Vaal Double Strike setup for extra burst against Bosses. Other than that, just make sure to upgrade your Physical DPS on weapons, and get Life and Resistances on your equipment. Below you will find the base Gem setups for the leveling phase and several extremely useful Uniques you can use for it. Assuming you are not starting up on a new League, all of the Items should be very easy to acquire. It's also recommended to get Redblade Banner at level 35, as soon as it becomes available for your character.
Suggested leveling Gem setups:
| Cleave setup | |
 |
Cleave - one of the first AoE Melee Attacks that can be used with Swords. It offers a decent radius and has high added Physical Damage which should help you breeze through the campaign |
 |
Melee Physical Damage Support - great buff to your DPS and one of the core Support Gems for this type of build |
 |
Ruthless Support - this will make your every 3rd hit much stronger, which helps a lot with killing bosses |
 |
Brutality Support - increases the Physical DPS of Supported Skills but makes linked Skills unable to deal other types of damage |
| Vaal Double Strike setup | |
 |
Vaal Double Strike - summons spectral copies of your weapons for a short duration which will deal massive damage. Just use the Vaal part of this skill for a massive burst against Bosses |
|
Melee Physical Damage Support - great buff to your DPS and one of the core Support Gems for this type of build |
 |
Multistrike Support - makes supported Attacks repeat additional times with greatly increased damage and Attack Speed |
 |
Maim Support - increases the Physical DPS of Supported Skills and the Physical Damage taken by enemies Maimed by it |
| Utility Gems | |
 |
Ancestral Warchief - this Totem increases your melee damage and deals a lot of damage by itself, which might come in handy versus strong Rare enemies or Bosses |
 |
Vulnerability - one of the best Curses for this build. On lower levels, it has to be cast manually (assuming you need extra damage against Bosses) |
 |
Pride - the best Aura for this purely Physical DPS build |
 |
Precision - one of the core Auras for this build. It's very important on lower levels as your Attacks can miss quite often without additional sources of Accuracy Rating. Do not upgrade it above level 6/7 |
 |
Dash - recommended mobility Skill for this build |
Bandits:
We recommend killing all the Bandits for two additional Passive Points. You can also choose to help Alira for extra Crit. Multiplier, though this build is not purely Crit-based without very expensive gear
Leveling Skill Trees:
32 Points Skill Tree
Priorities: 1) Born to Fight 2) Defiance 3) Constitution 4) Art of the Gladiator 5) Command of Steel
64 Points Skill Tree
Priorities: 1) Blade Master 2) Blade of Cunning 3) Bloodless 4) Call to Arms 5) Barbarism 6) Disembowelin 7) Dismembering
Recommended leveling items:
 Blackheart - great Physical DPS leveling Ring. You can use two of these for a massive damage bonus on lower levels Blackheart - great Physical DPS leveling Ring. You can use two of these for a massive damage bonus on lower levels |
|
| Adds 1 to 4 Physical Damage to Attacks 5% increased Physical Damage Adds 1 to 3 Chaos Damage to Attacks +(20-30) to maximum Life (2-4) Life Regenerated per second 10% chance to Cause Monsters to Flee |
 Meginord's Girdle - a fantastic low-level Belt that offers a high DPS bonus and extra Life Meginord's Girdle - a fantastic low-level Belt that offers a high DPS bonus and extra Life |
|
| +(25-35) to Strength +25 to Strength Adds 5 to 15 Physical Damage to Attacks 10% increased maximum Life +(10-20)% to Cold Resistance 25% increased Flask Life Recovery rate |
|
|
|
| +(30-50) to Evasion Rating 10% increased Rarity of Items found +(30-40)% to all Elemental Resistances Reflects 4 Physical Damage to Melee Attackers Level Requirement reduced by 100 (Hidden) |
 Goldrim - one of the best leveling Helmets in PoE which offers tons of additional Resistances
|
|
|
| +15 to Dexterity +15 to Intelligence (100-150)% increased Evasion Rating 15% increased Movement Speed (5-10)% of Damage taken gained as Mana over 4 seconds when Hit 10% increased Movement Speed for you and nearby Allies |
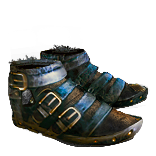 Victario's Flight - my personal favorite leveling Boots. On top of giving you a high bonus Movement Speed, they offer an extra Mana Recovery mechanic and Attributes which are very useful on lower levels
|
|
|
| +(20-30) to maximum Life (80-100)% increased Armour +(50-60) to maximum Life 20% increased Taunt Duration +5% Chance to Block 50% increased Warcry Cooldown Recovery Rate Warcries have infinite Power |
4. Final Skill Tree, Ascendancy Points, and Pantheon
Final Skill Tree:
94 Points Final Skill Tree (doesn't include Unique or Cluster Jewels)
121 Points Path of Building(PoB) link
Ascendancy points:
Preferably in that order:
- War Bringer
- Aspect of Carnage (you may also skip this entirely and go for Pain Reaver if you don't like the extra damage taken)
- Flawless Savagery
- Blitz
Pantheon:
Major God - there are 2 choices depending on whether you are clearing Maps or want to challenge endgame Bosses
For clearing Maps:
Soul of Lunaris 1% additional Physical Damage Reduction for each nearby Enemy, up to 8%; 1% increased Movement Speed for each nearby Enemy, up to 8%
For single-target/Bosses:
Soul of Solaris 6% Physical Damage Reduction if there is only one nearby Enemy; 20% chance to take 50% less Area Damage from Hits
Minor God: Soul of Gruthkul 1% additional Physical Damage Reduction for each Hit you've taken Recently up to a maximum of 5%
5. Final Gems links
| [DPS] General's Cry setup | |
 |
General's Cry - primary DPS skill in this build even though it inherently doesn't do any damage. It's a Warcry that will create multiple Mirage Warriors to use a linked Melee Attack once - Blade Flurry in our case |
|
Melee Physical Damage Support - one of the core Support Gems in this build. It has an Awakened variant, which grants an even higher DPS bonus but costs quite a bit |
 |
Pulverise Support - grants a high bonus Area Damage but reduces Attack Speed. It's negligible as even with a very low Attack Speed, your Mirage Warriors will only attack once anyway. It's a good idea to get a Divergent Pulverise for an extra "10% more" damage dealt |
 |
Brutality Support - increases Physical Damage but makes Supported Attacks unable to deal Elemental or Chaos Damage. It's a must-have Gem for this setup, which also has an Awakened variant that offers an even higher DPS bonus |
 |
Blade Flurry - the recommended Attack which will be used by your Mirage Warriors. Out of all Attacks, Blade Flurry will offer the highest possible DPS for General's Cry, as the Mirage Warriors will channel it for its duration instead of attacking just once |
 |
Impale Support - increases the Chance to Impale on Hit with Supported Attacks. Since you can't pick up all the Impale Passives from Skill Tree, that's the best way to get Impale Chance to 100% |
| [UTILITY] Cyclone/Desecrate | |
 |
Cyclone - in this build Cyclone is used to apply Fortify/Infusion buffs and create Corpses so that your General's Cry can work without any issues |
 |
Cast while Channelling Support - while you channel Cyclone, linked Spells will be cast automatically |
 |
Desecrate - a must-have Spell which will create piles of corpses for your General's Cry usage |
 |
Infused Channelling Support - increases your overall DPS and grants a defensive buff if you channel Cyclone for a certain duration (meaning you will have it at all times) |
| Gems granted by the Elder Boots: | |
 |
Fortify Support - increases the damage of your Cyclone and grants you the Fortify buff which reduces the damage taken by your character |
| [UTILITY] Totems setup | |
 |
Ancestral Warchief - summons a Totem which increases your Melee Damage |
 |
Ancestral Protector - summons a Totem which increases your Attack Speed |
 |
Multiple Totems Support - This Support Gem allows you to have both Totems being summoned simultaneously |
 |
Maim Support - Totems will Maim on hit reducing movement speed |
| [UTILITY] Dash/Berserk setup | |
 |
Dash - the recommended Mobility Skill used in this build, you can also use Leap Slam as an alternative |
 |
Berserk - grants some fantastic bonuses at the cost of your Rage. Since you basically generate 50 Rage with every second Warcry, this will be easy to keep this buff for an extended duration, making it a perfect tool to fight Bosses and tougher enemies |
 |
Second Wind Support - increases the number of Dash charges and reduces the cooldown of both Dash and Berserk |
[UTILITY] Blood Rage
 |
Blood Rage - Blood Rage grants more Attack Speed, Frenzy Charges, and Life Leech. Level 1 Blood Rage should be provided by your Paradoxica. |
| [UTILITY] Auras 1 | |
|
Pride - the best Aura for this build which greatly increases Physical Damage taken by enemies in its radius |
 |
Herald of Purity - it grants Physical Damage and is the most beneficial out of all Heralds. Swap it for  Determination if you're lacking in survivability. Determination if you're lacking in survivability. |
 |
Enlighten Support - use at least a level 3 Enlighten so that you have enough Mana Pool to use your Skills without interruptions |
| [UTILITY] Auras 2 | |
 |
Blood and Sand - it increases your Area Damage significantly while you are in the Blood Stance |
 |
Precision - increases your Crit. Chance and Accuracy Rating. Use a level 4-10 Precision depending on your available Mana Pool |
 |
Dread Banner - increases your Chance to Impale and Impale effectiveness |
|
Enlighten Support - again, use a level 3+ Enlighten here |
|
|
5. Gear Setup
Below you will find the recommended items for our General's Cry Blade Flurry Berserker Build. This build can be played with any random rare equipment, however, using Redblade Banner is heavily recommended. Also, Paradoxica with high increased Physical Damage/Impale/Bloodrage appears to be the best possible weapon for this setup and it shouldn't cost a fortune either.
|
Stat priorities on items:
|
 (Helmet) Rare Helmet - a regular Helmet with high Life and Elemental Resistances is our top recommendation. It allows you to use multiple Uniques (Weapon Slots and Belt) and still have decent survivability (Helmet) Rare Helmet - a regular Helmet with high Life and Elemental Resistances is our top recommendation. It allows you to use multiple Uniques (Weapon Slots and Belt) and still have decent survivability |
|
| Min. requirements: 80 maximum Life 100% Total Elemental Resistances Optional affixes: Nearby enemies take #% Increased Physical Damage Critical Strike Multiplier |
|
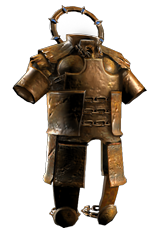
 (Helmet) Abyssus - grants the highest possible DPS but turns you into a Glass Cannon. Use if you are feeling comfortable enough to take some extra damage (Helmet) Abyssus - grants the highest possible DPS but turns you into a Glass Cannon. Use if you are feeling comfortable enough to take some extra damage |
|
| +(20-25) to all Attributes Adds 40 to 60 Physical Damage to Attacks +(100-125)% to Melee Critical Strike Multiplier (100-120)% increased Armour (40-50)% increased Physical Damage taken |
|
| Helmet enchantment: General's Cry has +1 to maximum number of Mirage Warriors |
|
 (Body Armour) Rare Body Armour - a Crafted Armour with very high Life is the best you can get. You can also get extra Crit. from this Piece (Body Armour) Rare Body Armour - a Crafted Armour with very high Life is the best you can get. You can also get extra Crit. from this Piece |
|
| Min. requirements: 110 maximum Life Attacks have +(1.1–1.5)% to Critical Strike Chance Optional affixes: Maximum Life% Elemental Resistances |
|
 (Weapon) Paradoxica - the best possible Weapon for this build. Just make sure it has increased Physical Damage and a triggers level 1 Blood Rage (Weapon) Paradoxica - the best possible Weapon for this build. Just make sure it has increased Physical Damage and a triggers level 1 Blood Rage |
|
| +25% to Global Critical Strike Multiplier Attacks with this Weapon deal Double Damage <Two Veiled Mods> |
|
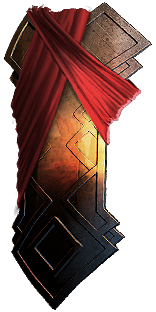 (Shield) Redblade Banner - pretty much a must-have and the best in slot Shield for this build. It causes your Warcries to generate maximum Rage with each cast and greatly reduces their cooldown (Shield) Redblade Banner - pretty much a must-have and the best in slot Shield for this build. It causes your Warcries to generate maximum Rage with each cast and greatly reduces their cooldown |
|
| +(20-30) to maximum Life (80-100)% increased Armour +(50-60) to maximum Life 20% increased Taunt Duration +5% Chance to Block 50% increased Warcry Cooldown Recovery Rate Warcries have infinite Power |
|
 (Boots) Rare Boots - recommended choice, get pair with the highest maximum Life bonus, and Movement Speed you can afford. Preferably pick a pair with Evasion as it will be easier to get the right sockets for it (pure Armor base may cost you a couple of Exalted Orbs to get 2 Blue/2 Green on it) (Boots) Rare Boots - recommended choice, get pair with the highest maximum Life bonus, and Movement Speed you can afford. Preferably pick a pair with Evasion as it will be easier to get the right sockets for it (pure Armor base may cost you a couple of Exalted Orbs to get 2 Blue/2 Green on it) |
|
| Min. requirements: 70 maximum Life 25% increased Movement Speed Optional affixes: Elemental Resistances chance to gain Elusive on Critical Strike chance to gain Onslaught for 4 seconds on Kill You have Tailwind if you have dealt a Critical Strike Recently Socketed Gems are Supported by level # Fortify |
|
| Boot enchantment: 16% increased Attack and Cast Speed if you've Killed Recently |
|
 (Belt) Rare Belt - again, we try to grab one with the highest maximum Life and Elemental Resistances (Belt) Rare Belt - again, we try to grab one with the highest maximum Life and Elemental Resistances |
|
| Min. requirements: 100 maximum Life 75% Total Elemental Resistances Optional affixes: increased Physical Damage/Damage Maximum Life% Armour Rating |
|
 (Belt) Ryslatha's Coil - one of the best Belts in terms of DPS. It also happens to add a very high Life bonus, but sadly 0 Resistances (Belt) Ryslatha's Coil - one of the best Belts in terms of DPS. It also happens to add a very high Life bonus, but sadly 0 Resistances |
|
| (20-30)% increased Stun Duration on Enemies +(20-40) to Strength (30-40)% more Maximum Physical Attack Damage (40-30)% less Minimum Physical Attack Damage Adds 1 to (15-20) Physical Damage to Attacks +(80-100) to maximum Life Gain 50 Life when you Stun an Enemy |
|
 (Amulet) Rare Amulet - the best Option for this build. You will need a lot of Attributes for Paradoxica and other Dexterity Gems. A Rare Amulet can provide both that and extra Life and DPS bonuses (Amulet) Rare Amulet - the best Option for this build. You will need a lot of Attributes for Paradoxica and other Dexterity Gems. A Rare Amulet can provide both that and extra Life and DPS bonuses |
|
| Min. requirements: 60 Dexterity 30 Intelligence 50 Maximum Life Adds 12 Physical Damage to Attacks Optional affixes: Channelled Skills have -# to Total Mana Cost Critical Strike Multiplier |
|
| Recommended Anointments: Lucidity Charisma |
|
 (Ring) Rare Rings - you should aim for Mana Cost reduction of your Cyclone on both of the Rings to spam it comfortably. You should also get a Ring with a Vulnerability Curse. (Ring) Rare Rings - you should aim for Mana Cost reduction of your Cyclone on both of the Rings to spam it comfortably. You should also get a Ring with a Vulnerability Curse. |
|
| Min. requirements: 65 maximum Life 85% Total Elemental Resistances Curse enemies with level # Vulnerability on Hit Optional affixes: Channelling Skills have -# to Total Mana Cost Non-Channelling Skills have -# to Total Mana Cost Added Physical Damage to Attacks Attributes Chaos Resistance |
|
 (Gloves) Rare Gloves - Aim for the highest defensive stats possible and extra Accuracy if needed. You could also corrupt them for an Implicit - a Vulnerability Curse on Hit. (Gloves) Rare Gloves - Aim for the highest defensive stats possible and extra Accuracy if needed. You could also corrupt them for an Implicit - a Vulnerability Curse on Hit. |
|
| Min. requirements: 80 maximum Life 400 Accuracy Rating Optional affixes: Added Physical Damage to Attacks Elemental/Chaos Resistance increased Melee Damage |
|
 (Jewel) Watcher's Eye - Watcher's Eye with extra Impale stacks while using Pride is the best DPS Jewel you can get for this build (Jewel) Watcher's Eye - Watcher's Eye with extra Impale stacks while using Pride is the best DPS Jewel you can get for this build |
|
| (4-6)% increased maximum Energy Shield (4-6)% increased maximum Life (4-6)% increased maximum Mana <Two or Three random aura modifiers> Recommended Aura modifier: Impales you inflict last 2 additional Hits while using Pride |
|
 (Jewel) Kitava's Teachings - a must-have Jewel for this build since you will have Corpses around you all the time which will be consumed to instantly recover 5% of your Maximum Life and Mana every second (Jewel) Kitava's Teachings - a must-have Jewel for this build since you will have Corpses around you all the time which will be consumed to instantly recover 5% of your Maximum Life and Mana every second |
|
| Adds Disciple of Kitava | |
 (Jewel) Rare Jewels - these should provide extra Life and damage bonuses (Jewel) Rare Jewels - these should provide extra Life and damage bonuses |
|
| Recommended affixes: increased maximum Life increased Physical/Area/Damage with Swords Critical Strike Multiplier Optional affixes: Attributes |
|
 (Jewels) Rare Abyss Jewel - if you are using a Stygian Vise you should get one Abyss Jewel with high Added Physical Damage to Attacks (Jewels) Rare Abyss Jewel - if you are using a Stygian Vise you should get one Abyss Jewel with high Added Physical Damage to Attacks |
|
| Recommended affixes: maximum Life added Physical Damage to Attacks/Sword Attacks Optional affixes: Critical Strike Multiplier |
|
 (Jewel) Large Cluster Jewel - it's recommended to get one Large Cluster Jewel with Attack Damage bonuses while you are using a Shield. It's good to have the extra Mana Leech and Life from Gladiator's Fortitude. The third one can be pretty much anything with Attack damage bonus (Jewel) Large Cluster Jewel - it's recommended to get one Large Cluster Jewel with Attack Damage bonuses while you are using a Shield. It's good to have the extra Mana Leech and Life from Gladiator's Fortitude. The third one can be pretty much anything with Attack damage bonus |
|
| Recommended affixes: 1 Added Passive Skill is Fuel the Fight 1 Added Passive Skill is Gladiator's Fortitude 1 Added Passive Skill is Smite the Weak |
|
 (Jewel) Medium Cluster Jewel - you should use two Medium Jewels with bonuses to Exerted Attacks. There are three extremely valuable Passives here, so you should try getting all of them on those 2 Jewels (Jewel) Medium Cluster Jewel - you should use two Medium Jewels with bonuses to Exerted Attacks. There are three extremely valuable Passives here, so you should try getting all of them on those 2 Jewels |
|
| Recommended affixes: 1 Added Passive Skill is Haunting Shout 1 Added Passive Skill is Lead By Example 1 Added Passive Skill is Mob Mentality |
|
 (Flask) Lion's Roar - great defensive and offensive utility Flask that is moderately cheap and offers simply fantastic DPS bonus (Flask) Lion's Roar - great defensive and offensive utility Flask that is moderately cheap and offers simply fantastic DPS bonus |
|
| Adds Knockback to Melee Attacks during Flask effect 75% chance to cause Enemies to Flee on use (20-25)% more Melee Physical Damage during effect Knocks Back Enemies in an Area when you use a Flask |
|
 (Flask) Bottled Faith - the best Flask in Path of Exile which offers tons of extra Damage for pretty much all Crit builds (Flask) Bottled Faith - the best Flask in Path of Exile which offers tons of extra Damage for pretty much all Crit builds |
|
| 40% increased Damage Creates Consecrated Ground on Use (30-50)% increased Duration Consecrated Ground created by this Flask has Tripled Radius +(1-2)% to Critical Strike Chance against Enemies on Consecrated Ground during Effect Consecrated Ground created during Effect applies (7-10)% increased Damage taken to Enemies |
|
|
Other suggested Flasks:
|
|
   |
|
|
If you have any other build requests, please leave that in the comments below.
Pictures used in this article are the intellectual property of Grinding Gear Games.
