Templar Leveling Guide using Toems in PoE
Find out how to efficiently level up a Templar character using Totems in PoETotem Templar/Hierophant
Leveling Guide
Updated for Patch 3.19
The Best Crafty Guides by Odealo
| Guide notes |
| November 6, 2022 -Guide created |
Totems are very old and deeply rooted game mechanics, so to nobody's surprise, there are many diverse Totem builds available. One of the established ways to divide Totem builds into different subcategories is by their ability type - is it Spell or Attack Totem? Attack Totems are often utilized by Chieftains or Rangers who use Ballista or Ancestral Totems, but this leveling guide's topic is Spell Totems. It is a role that is perfectly suited for a Templar, more specifically - Hierophant. His starting location on a Passive Skill Tree as well as Ascendancy Keystones put him in an advantageous position right from the start.
This Guide's goal is to prepare you for the endgame content no matter if you're starting with or without previously acquired items. Most Spell Totem builds are very similar as almost all of them deal (or should deal) Elemental Damage, so the only difference is this damage type - Cold, Fire, or Lightning. As a Templar, you will invest the vast majority of your skill points into general Elemental and Totem Damage, not a specific Damage type or interdependent Ailment, at least not in an overly substantial manner. It not only saves you a lot of trouble but also makes reverting any changes superfluous - the leveling process itself is very streamlined with no sudden changes. The remaining points are to be spent on Maximum Life, and much later on, on Cluster Jewels. The only points of divergence occur later in the game after you'll be able to re-allocate some of the passive nodes using only the refund points acquired from questlines. Holy Flame Totem is the first available Totem, it deals mixed Damage, half of which is Fire. You will use it in the early stages of the game. Spell Totem Support Gem can be used later on to transform any Spell existing in the game to be cast from a Totem. This Gem is the unique selling point of the whole archetype, as Totems have some distinctive amenities differentiating them from characters casting their Spells by hand, aka self-casters.
You can also check our other Path of Exile builds right over here Odealo's Crafty Guides - Full List
1. Important Skills
Most certainly you will start with a Holy Flame Totem, it's available at level 1. Your other options are Searing Bond Totem (level 12) or Shockwave Totem (level 28). Searing Bond requires intricate positioning and it is not recompensated enough by its damage, which is too low. It's unquestionably a bad choice. Shockwave Totem however would be great if not for its short range and the fact that it deals only Physical Damage, requiring you to convert all of it into an Elemental type. As a Templar, you're much more adapted for it. This damage conversion can be done, for example, by equipping Hrimsorrow Gloves, which is by far the easiest and most efficient method. You can also use any Spell and link it with Spell Totem Support, but that would cost you one gem socket. It's inadequate early on but becomes the most optimal solution later in the game.
Holy Flame Totem is the Skill Gem you can acquire at the start. It deals half Physical, half Fire Damage via Channelling Projectiles, and creates Consecrated Ground (Consecrated Ground Regenerates Life and reduces the effect of Curses by half (The consecrated ground from this specific Skill however makes you immune to Curses)). It has a medium range and moderately wide angle - looks similar to a flamethrower. It'd be great to convert the remaining 50% of Physical Damage to Fire, but 40% from a Fire Mastery is good enough. We recommend allocating Explosive Impact Notable to obtain it. The second option is to simply go for the Avatar of Fire Keystone. It's a very basic Skill but its base damage is relatively low compared to other late-game Totems. We would suggest using it until level 28 and switching to Shockwave Totem or Lightning Spell with Spell Totem Support for optimal performance, but if you've decided to stick to this Skill it won't render you sleazy, it can still be a decent skill up to yellow maps or higher.
As you're dealing predominantly Fire Damage, use Flammability Curse to lower the Fire Resistance of your enemies. Anger adds base Fire Damage to your Spells. Flame Wall is another addition to this setup. Remember that with Ancestral Bond Keystone Allocated, it won't deal any damage by itself, but it will upgrade Projectiles fired by your Totems that are passing through it by adding extra Fire Damage. If you have some unreserved Mana to spend, use Herald of Ash for more damage and better clear speed. Later in the game, you will also need to apply Fire Exposure. To do so, create a simple setup with Wave of Conviction linked to a Spell Totem Support and Combustion Support. Use it during boss fights.
Shockwave Totem has a much higher base damage and effectiveness of added damage than the Holy Flame Totem, but Converting 100% of Physical Damage into an Elemental type might be tricky. It also has a bit shorter range, but at level 40 it can be upgraded by Astral Projector Ring for a much, much better performance (this Ring is usually a bit expensive). You can convert the damage by using Physical to Lightning Support Gem combined with Lightning Mastery for 90% conversion. Hrimsorrow Gloves are the recommended option, it's an easy way to convert all of the damage to Cold. Gloves like this are very cheap and common.
- Lightning Shockwave Totem
Physical to Lightning Support Gem offers 50% Damage conversion, that's 90% after taking Lightning Mastery into account. The Anomalous version of this Gem can get you 100%, but it's expensive and requires a high character level, you can safely delay doing so until much later. The upside of this version is the price and accessibility, as you won't need any unique items. You should use this setup with Conductivity Curse and Wrath Aura.
- Cold Shockwave Totem
Hrimsorrow Gloves, available to equip at level 9, convert all your Physical Damage to Cold. Use them with Frostbite Curse and Hatred Aura. To apply Cold Exposure, which reduces Cold Resistance, use Frost Bomb. It won't deal any damage, but it can be used for its multiple debuffs applied on opponents. All of these skills will be available before you can even use Shockwave Totem, which you can pick as a quest reward after defeating General Gravicius in act 3.
Spell Totem Support Gem is by far the most efficient way to level up this build after a certain point. Shockwave Totem would be good if not for its short range, which can only be enhanced by Astral Projector Ring. If you're starting as a new character with no items whatsoever, switch to the Arc, Spark, or Storm Burst (Storm Burst requires further damage conversion) Spell linked with Spell Totem Support as soon as you obtain a 5-link Body Armour. Before that, use the Holy Flame Totem setup described above. These Lightning Spells are very efficient at killing multiple enemies, and even if their damage is a bit lower than this of a Shockwave Totem, it's completely justified to choose them instead. If you happen to have Tabula Rasa, you should start using the Spell Totem Support setup as soon as you're able to link it with enough good Support Gems, which happens around act two. If you have Soul Mantle Body Armour it's even better, as even a four-link is great. You might be able to acquire one after a day or two after the league start. It would also require you to reduce the Curse Effect by equipping a Unique Ring combined with Consecrated Ground to reduce the Curse Effect on you by 100%.
Use Wrath Aura, which is associated with Lightning Damage, and combine it later with some defensive Auras such as Purity of Elements or Determination. For a Curse use Conductivity.
To sum it all up in one flowchart: Use Holy Flame Totem at first. If you have the Astral Projector Ring switch to Lightning Shockwave Totem, and if you have Hrimsorrow Gloves too, it's better to specialize in the Cold Damage version of the Shockwave Totem. You can also switch to Shockwave Totem if you don't mind its short range, but it would make your leveling experience slow and clunky, so it's better to have the Astral Projector Ring in this scenario. If you can accommodate a five-link setup, use Spell Totem Support Gem linked with a Lighting Spell such as Arc as soon as you reach Act 2. Remember that Holy Flame Totem can carry you up to red maps if you're geared properly and use appropriate Skills.
All of these above-mentioned setups, no matter the skill you're using, consist of the same defensives. That is mostly Maximum Life and Elemental Resistances at first. In the later stages of the game, you will be also forced to invest in some other protective layers such as Armour or Block Chance. As a Hierophant, we can recommend picking up Mind over Matter Keystone too, especially if you have decent Mana Regeneration. It would redirect a big portion of damage to be taken from Mana before Life, and as you don't need to constantly cast Spells, only place Totems, it won't trammel your performance. After the fourth ascension, you can then allocate Divine Guidance and invest more into Maximum Mana to increase the MoM effect, save a skill point, and get more Mana and Damage. The Auras that are appropriate for these circumstances are Clarity and Vitality, as they reserve a relatively low amount of Mana while providing you with essential resource regeneration. Arcane Cloak is the preferable Guard Spell for when you have a big portion of your Mana unreserved. If that's not the case, use Molten Shell alongside Determination, or Steelskin if you don't use this Aura. For better mobility, it is safe to say that Flame Dash is the best option as it's not only very efficient but won't require Attributes other than Intelligence, which is the one you will have a lot of.
|
|

3. Skill Setups
Most of your Skill and Support Gems are red or blue, so for the proper sockets seek gear pieces with Armour and Energy Shield on them. That is if you're not using the Cold Shockwave Totem, which requires two to three green sockets, associated with Evasion Rating. Remember the previously-mentioned requirements you need to meet for each setup - for a Shockwave Totem, you will need some unique items beforehand. For the Lightning Spell Totem that uses Arc or other Spell, you will need at least five-link Armour to accommodate enough Support Gems to outclass the Holy Flame Totem.
New Skill Gems are unlocked by doing specific Quests during the Campaign, either as direct Quest Reward or indirectly by unlocking the possibility to buy it from Vendor, most of them are on the way to the next Act anyway, but Library one in Act 3 requires extra effort. You will gain access to every Gem regardless of your Class in Act 6 by doing Lilly Roth's Quest. Doing so will also unlock her shop in your Hideout for every new Character you make in the same league.
Suggested leveling Gem setups:
| Holy Flame Totem setup | |
 |
Holy Flame Totem - Deals Fire Projectile Damage via Channelling Spell. It's Physical Damage, half of which is already converted to Fire, the rest should be as well via Fire Mastery or Avatar of Fire. It's a very beginner-friendly Skill that requires no specific items. |
| Act 1 Support Gems | |
 |
Added Fire Damage Support - It adds Fire Damage sourced from Physical Damage, it is one of the best Support Gems available. |
| Combustion Support - Use it for more Fire Damage, increased Chance to Ignite, and to reduce the Fire Resistance of Ignited enemies. | |
| Act 2 Support Gems | |
 |
Elemental Focus Support - Elemental Focus grants a lot of extra Elemental Damage but makes you unable to cause Elemental Ailments such as Ignite. That's why combining it with |
 |
Controlled Destruction Support - Use it for a lot more Spell Damage. It nearly disables your Critical Strike Chance, which is not a problem as your Critical Strike Chance is very low early on anyway. |
| Act 3 Support Gems | |
 |
Fire Penetration Support - It simply Penetrates Fire Resistance massively increasing your damage. |
 |
Inspiration Support - Inspiration Charges are gained by using the Skill which is linked to this Support Gem, these grant more Elemental Damage and increased Critical Strike Chance per Inspiration Charge. The Mana Cost of Holy Flame Totem is getting reduced too. |
| Act 4 Support Gems | |
 |
Multiple Totems Support - You can place more Totems, twice as fast, but each deals less damage. It's overall a good tradeoff. |
| Lightning Shockwave Totem setup | |
 |
Shockwave Totem - It's a short-range Totem Spell that deals Physical Damage, you can convert nearly all of it to Lightning with a proper Lightning Mastery. It deals very high damage but it's unpleasant to use due to its range. We can't really recommend it if you don't have Astral Projector Ring. It's available in the second half of act 3. |
| Act 3 Support Gems | |
 |
Physical to Lightning Support - Converts half of the Physical Damage to Lighting, if you have the Anomalous version at 20% Quality, it's 60%, which is enough for a complete conversion. It also grants more Lightning Damage sourced from Physical one. Very important Gem in this setup. |
 |
Lightning Penetration Support - Lightning Damage penetrates a big portion of Resistance resulting in more damage. |
 |
Added Lightning Damage Support - Adds Lighting Damage to Shockwave Totem's Hits. |
|
Inspiration Support - Use it only if you struggle with Mana Regeneration. |
|
Elemental Focus Support - If your focus is on pure damage output, use this Support Gem. |
| Act 4 Support Gems | |
|
Multiple Totems Support - You can place more Totems, twice as fast, but each deals less damage. It's overall a good tradeoff. |
 |
Increased Area of Effect Support - One of the very few ways to improve your Area of Effect is to use this Gem. If you have Astral Projector Ring your AoE should be already very good.  Concentrated Effect Support reduces your AoE, but rewards you with much more Damage, so you might consider it a viable option too. Concentrated Effect Support reduces your AoE, but rewards you with much more Damage, so you might consider it a viable option too. |
| Cold Shockwave Totem setup | |
|
Shockwave Totem - It's a short-range Totem Spell that deals Physical Damage, you can convert all of it to Cold with the Hrimsorrow Gloves. It deals very high damage but it's unpleasant to use due to its range. We can't really recommend it if you don't have Astral Projector Ring. It's available in the second half of act 3. |
| Act 3 Support Gems | |
 |
Hypothermia Support - Use it to deal more damage to Chilled enemies and for an increased chance to Freeze. Do not combine it with Elemental Focus Support, you can replace it with it, but the ability to Chill and Freeze enemies is usually better than pure damage. |
 |
Cold Penetration Support - Damage penetrates more Cold Resistance for more damage. |
 |
Added Cold Damage Support - Simply Adds Cold Damage to each Hit of Shockwave Totem. |
|
Inspiration Support - Use it only if you struggle with Mana Regeneration. |
| Act 4 Support Gems | |
|
Multiple Totems Support - You can place more Totems, twice as fast, but each deals less damage. It's overall a good tradeoff. |
|
Increased Area of Effect Support - One of the very few ways to improve your Area of Effect is to use this Gem. If you have Astral Projector Ring your AoE should be already very good. Concentrated Effect Support reduces your AoE, but rewards you with much more Damage, so you might consider it a viable option too. |
| Arc Totem setup | |
 |
Arc - Arc is the simplest Spell you can hook up to a Spell Totem for meaningful DPS. It has low single-target damage, but it's only becoming noticeable much later in the game. Be sure that you have at least five linked sockets for your Support Gems. You can switch Arc for  Spark or Spark or  Storm Burst (Storm Burst requires further damage conversion from Physical to Lightning Support or from a Lightning Mastery) if you're willing to additionally invest in some Skil Effect Duration on a Passive Skill Tree. Storm Burst (Storm Burst requires further damage conversion from Physical to Lightning Support or from a Lightning Mastery) if you're willing to additionally invest in some Skil Effect Duration on a Passive Skill Tree. |
| Act 2 Support Gems | |
 |
Spell Totem Support - The build-enabling Support Gem. It transforms the Spell to be cast via Totem and reduces its damage. |
|
Elemental Focus Support |
|
Controlled Destruction Support |
|
Added Lightning Damage Support |
| Act 3 Support Gems | |
|
Inspiration Support - Use it only if you struggle with Mana Regeneration. |
|
Lightning Penetration Support |
| Act 4 Support Gems | |
|
Multiple Totems Support |
| Exposure/Curse setup | |
 |
Hydrosphere - Exposure reduces Elemental Resistance by 10% by default. Hydrosphere applies Cold and Lightning Exposure. It doesn't do any damage and it's unable to cause Elemental Ailments due to the Ancestral Bond Keystone. Use it for your Lightning Damage setup, but if you're dealing Cold Damage only, replace it with  Frost Bomb instead, this Spell also reduces the Life Regeneration of your enemies. Frost Bomb instead, this Spell also reduces the Life Regeneration of your enemies. |
| Act 4 Support Gems | |
 |
Hextouch Support - Link the Spell above with Hextouch to cast Curses automatically. |
 |
Conductivity Support - Conductivity reduces Lightning Resistance, so use it only if your Totems deal predominantly Lightning Damage. For Cold Damage use  Frostbite. There is no easy way to apply Fire Exposure and a Curse at the same time, so if you're specialized in Fire Damage, cast the Frostbite. There is no easy way to apply Fire Exposure and a Curse at the same time, so if you're specialized in Fire Damage, cast the  Flammability Curse manually. Flammability Curse manually. |
 |
Lifetap Support - It's optional to use Lifetap, it makes linked Skills cost Life instead of Mana, so use it if you struggle with Mana Regeneration. |
| Aura setup | |
 |
Determination - Adds and increases your Armour to mitigate Physical Hit Damage, one of the most common damage types. |
 |
Purity of Elements - Another defensive Aura, use it for more Elemental Resistances and complete immunity to Chill, Freeze, Ignite, Shock, Sap, Scorch, and Brittle Ailments. |
 |
Wrath - Makes you deal more Lightning Spell Damage. |
 |
Hatred - Grants you more Cold Damage, and Physical Damage as Extra Cold Damage. |
 |
Anger - Adds Extra flat Fire Damage to your Spells. |
 |
Clarity - Regenerates your Mana, heavily recommended Aura, it doesn't reserve a lot of Mana and is very useful. |
 |
Vitality - It is very similar to Clarity, but instead of Mana, it Regenerates Life. |
| Utility Skills setup | |
 |
Flame Dash - Use Flame Dash to teleport over a short distance. It stores up to three charges. |
 |
Arcane Cloak - Arcane Cloak is the best Guard Spell if you have a lot of unreserved Mana, around half of your total Mana Pool should be enough. It mitigates a potion of incoming Hit Damage. It's able to absorb more damage the more Mana you spent on it. You can alternatively use  Molten Shell, it's very similar and scales up with your Armour. Molten Shell, it's very similar and scales up with your Armour.  Steelskin is also a valid choice - it stops bleeding on use. Steelskin is also a valid choice - it stops bleeding on use. |
 |
Arcane Surge Support - Arcane Surge is a buff granting you more Spell Damage and Mana Regeneration. It is granted only after spending a certain amount of Mana on linked Skills. Be sure that it activates after a single use of Flame Dash or the Guard Spell, don't level it all the way up, as it will increase this threshold. That's why Arcane Cloak would be great here - its Mana cost is dependent on your current Mana. |
 |
Increased Duration Support - Increases the Skill Effect Duration so that the Guard Spell lasts longer, and also increases the Mana Cost to make the most of Arcane Surge. |
|
|
4. Gear
Leveling is easy, especially as a character that doesn't require unique or specific rare times that are hard to obtain. Most of your damage comes from the passive skill tree and proper support gems, the only important damage source to keep an eye on is your weapon - remember to switch it every few acts as the higher tiers of modifiers are limited by item level. The most important will be increased Spell or Elemental Damage, these weapons can be crafted or bought from other players at a very reasonable price. It is almost always more efficient to just buy the items with the very few required stats from players that don't need them anymore for a few chaos orbs than to craft them. Especially early in the league, the market is flooded with such items. Be sure to check the price of unique items before deciding to take a certain route. Also, bury in mind that certain socket colors are more likely to be chanced on specific bases, don't look just at the stats.
Maximum Life on your Gear is a nice thing to have, but it is not important, most of it will come from your Levels themself. Armor or Evasion Rating should be covered by your Auras. That leaves only one form of Defense you will need to get on your Rare Items: Elemental Resistances. You should aim to have at least 60% Resistance of each Element, excluding Chaos. To help with that, you should use Essences found during the Campaign, and the Crafting Bench in your hideout. Use the low-tier Crafts, as they are cheap and effective, while high tiers will also raise the Required Level to wear an Item.
Proper Flask Setup makes Leveling much quicker and easier. Try to get 2 or 3 Quicksilver Flasks so you can have at least one active at all times. Granite Flask is especially useful once you step into Act 5, as there is a very noticeable spike in Physical Damage dealt by the enemies. You will probably need one Mana Flask if you want to allocate Mind over Matter early. 20% Quality on each Flask is an easy way to prolong their Duration.
 Tabula Rasa - The iconic body Armour with unmatched potential for leveling, it grants six linked white sockets. Can be used since level 1. Tabula Rasa - The iconic body Armour with unmatched potential for leveling, it grants six linked white sockets. Can be used since level 1. |
|
| Item has no level requirement and Energy Shield (Hidden) Item has 6 White Sockets and is fully linked (Hidden) |
|
 Goldrim - This helmet is packed with Elemental Resistances and it can be worn at level 1. Goldrim - This helmet is packed with Elemental Resistances and it can be worn at level 1. |
|
| +(30-50) to Evasion Rating 10% increased Rarity of Items found +(30-40)% to all Elemental Resistances Reflects 4 Physical Damage to Melee Attackers Level Requirement reduced by 100 (Hidden) |
|
 Le Heup of All - Great all-around Ring. Provides Damage, Attributes, and Elemental Resistances, all are useful when leveling. Le Heup of All - Great all-around Ring. Provides Damage, Attributes, and Elemental Resistances, all are useful when leveling. |
|
| Adds 1 to 4 Physical Damage to Attacks +(10-30) to all Attributes (10-30)% increased Damage (10-30)% increased Rarity of Items found +(10-30)% to all Elemental Resistances |
|
 Praxis - We recommend this Ring if you have trouble with Mana sustain, and for more Maximum Mana. Praxis - We recommend this Ring if you have trouble with Mana sustain, and for more Maximum Mana. |
|
| +(20-30) to maximum Mana +(30-60) to maximum Mana Regenerate (3-6) Mana per second -(8-4) to Total Mana Cost of Skills 8% of Damage taken Recouped as Mana |
|
 Kikazaru - You can use it for Life and Mana Regeneration, Lightning Resistance, Attributes, and reduced Effect of Curses. Kikazaru - You can use it for Life and Mana Regeneration, Lightning Resistance, Attributes, and reduced Effect of Curses. |
|
| +(20-30)% to Lightning Resistance +(10-15) to all Attributes (20-40)% increased Mana Regeneration Rate 60% reduced Effect of Curses on you Regenerate 3 Life per second per Level |
|
 Dream Fragments - This Ring can be used for its abundant bonuses to Cold Resistance, Cold Ailments Immunity, Maximum Mana, and Mana Regeneration. Dream Fragments - This Ring can be used for its abundant bonuses to Cold Resistance, Cold Ailments Immunity, Maximum Mana, and Mana Regeneration. |
|
| +(20-30)% to Cold Resistance 20% increased maximum Mana 50% increased Mana Regeneration Rate +(30-40)% to Cold Resistance Cannot be Chilled Cannot be Frozen |
|
 Astral Projector - Combined with a Nova Spell like the one caused by Shockwave Totem, it significantly improves your clear speed as Totems aim for the targets all on their own. Astral Projector - Combined with a Nova Spell like the one caused by Shockwave Totem, it significantly improves your clear speed as Totems aim for the targets all on their own. |
|
| +(20-30)% to Lightning Resistance +(30-50) to Intelligence (20-25)% increased Spell Damage 30% chance to Avoid Elemental Ailments Nova Spells have 20% less Area of Effect Nova Spells deal 30% less Damage to Players Nova Spells Cast at the targeted location instead of around you |
|
 Atziri's Foible - Spells are usually expensive, use this Amulet if you have troubles with Mana Regeneration. It's also great with Divine Guidance or Mind over Matter Keystones. Atziri's Foible - Spells are usually expensive, use this Amulet if you have troubles with Mana Regeneration. It's also great with Divine Guidance or Mind over Matter Keystones. |
|
| (20-30)% increased Mana Regeneration Rate +100 to maximum Mana (16-24)% increased maximum Mana (80-100)% increased Mana Regeneration Rate Items and Gems have 25% reduced Attribute Requirements |
|
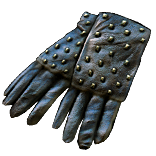 Hrimsorrow - Use these Gloves if you want to easily convert all your Physical Damage (from Shockwave Totem) to Cold Damage. Hrimsorrow - Use these Gloves if you want to easily convert all your Physical Damage (from Shockwave Totem) to Cold Damage. |
|
| +(20-30) to Strength +(40-50) to Evasion Rating +(20-30)% to Cold Resistance 100% of Physical Damage Converted to Cold Damage Reflects 100 Cold Damage to Melee Attackers |
|
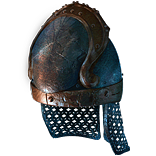 Mindspiral - It has been significantly improved in patch 3.19, now it is a good leveling Helmet for characters with a lot of Mana and Mana Regeneration. Mindspiral - It has been significantly improved in patch 3.19, now it is a good leveling Helmet for characters with a lot of Mana and Mana Regeneration. |
|
| +(100-120) to maximum Mana Gain (10-15)% of Maximum Mana as Extra Maximum Energy Shield Enemies Cannot Leech Mana From you (10-20)% of Damage taken Recouped as Mana Cannot Leech Mana |
|
 Soul Mantle - It is more of an end-game Item for most builds, but if you have one at level 49 it is recommended to equip it, but be sure that you can reduce the Curse Effect by 100%. It can be done by Thief's Torment or Kikazaru Ring and creating Consecrated Ground. Soul Mantle - It is more of an end-game Item for most builds, but if you have one at level 49 it is recommended to equip it, but be sure that you can reduce the Curse Effect by 100%. It can be done by Thief's Torment or Kikazaru Ring and creating Consecrated Ground. |
|
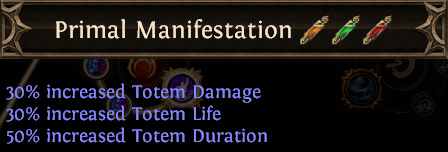
| Socketed Gems are Supported by Level 20 Spell Totem (20-25)% increased Spell Damage (100-120)% increased Energy Shield (20-30)% increased Totem Life Inflicts a random Hex on you when your Totems die, with 80% more Effect |
|
 Trolltimber Spire - Early-game Shield you can use to improve your Totems' and your own survivability. Trolltimber Spire - Early-game Shield you can use to improve your Totems' and your own survivability. |
|
| +(20-30) to maximum Life (130-150)% increased Armour +(40-60) to maximum Life You and your Totems Regenerate 0.5% of Life per second for each Summoned Totem 15% increased Area of Effect for Skills used by Totems 0.5% of Damage dealt by your Totems is Leeched to you as Life |
|
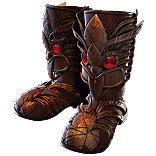 Torchoak Step - These boots make your Totems more durable, and placing them takes much less time. Torchoak Step - These boots make your Totems more durable, and placing them takes much less time. |
|
| (80-120)% increased Armour (20-30)% increased Totem Life 25% increased Movement Speed (30-50)% increased Totem Placement speed Totems Reflect 100% of their maximum Life as Fire Damage to nearby Enemies when Hit |
|
 String of Servitude - This belt is available at level 1, it can grant a significant amount of Elemental Resistances with the proper Implicit. String of Servitude - This belt is available at level 1, it can grant a significant amount of Elemental Resistances with the proper Implicit. |
|
| <(1-2) Random corrupted implicit modifiers> Implicit Modifier magnitudes are tripled Level Requirement reduced by 100 (Hidden) Desired Implicit: (42-48)% to All Elemental Resistances |
|
 Rare Wand or Sceptre - Use a rare weapon with increased or added Damage of the respective Element, or general Spell Damage. These can be crafted via the Essence of Woe, Torment, or Suffering. It is also recommended to use Vendor Recipes for specific pre-determined outcomes. Rare Wand or Sceptre - Use a rare weapon with increased or added Damage of the respective Element, or general Spell Damage. These can be crafted via the Essence of Woe, Torment, or Suffering. It is also recommended to use Vendor Recipes for specific pre-determined outcomes. |
|
| Optional Affixes: increased or added Elemental Damage increased Spell Damage +1 to Level of all Cold / Fire / Lightning / Physical Skill Gems |
|
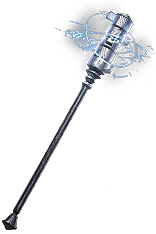 Axiom Perpetuum - Available at level 10, this Sceptre adds Elemental Damage of all kinds, Critical Strike Chance, and Cast Speed. Axiom Perpetuum - Available at level 10, this Sceptre adds Elemental Damage of all kinds, Critical Strike Chance, and Cast Speed. |
|
| 12% increased Elemental Damage Adds (2-3) to (5-6) Fire Damage to Spells Adds (2-3) to (5-6) Cold Damage to Spells Adds 1 to (10-12) Lightning Damage to Spells (4-6)% increased Cast Speed (100-140)% increased Critical Strike Chance for Spells |
|
 Ashcaller - Although you won't be able to summon Raging Spirits, this Wand, which is available at level 18, is still one of the best weapons for Fire-oriented builds. Ashcaller - Although you won't be able to summon Raging Spirits, this Wand, which is available at level 18, is still one of the best weapons for Fire-oriented builds. |
|
| (18-22)% increased Spell Damage 25% chance to Trigger Level 10 Summon Raging Spirit on Kill Adds (20-24) to (38-46) Fire Damage Adds (20-24) to (38-46) Fire Damage to Spells 10% chance to Cover Enemies in Ash on Hit |
|
 Seven-League Step - No other boots can grant as much movement speed as these, which makes them great for leveling. Seven-League Step - No other boots can grant as much movement speed as these, which makes them great for leveling. |
|
| 50% increased Movement Speed Level Requirement reduced by 100 (Hidden) |
|
 Wanderlust - Commonly used pair of boots, you can equip them as soon as level 1. Wanderlust - Commonly used pair of boots, you can equip them as soon as level 1. |
|
| +5 to Dexterity +(10-20) to maximum Energy Shield (20-40)% increased Mana Regeneration Rate 20% increased Movement Speed Cannot be Frozen |
|
|
Stat priorities on Rare Items:
|
|
Suggested Flasks:
|
|
     |
|
|
5. Passive Skills
To successfully create the Passive Tree for a Build, you have to consider most of the Passive Clusters for a given build, choose a few of them, and make an optimal path to allocate most of them in the least amount of Passive Skill Points spent. Here, we included a general Skill Tree for a Spell Totem Character. Nodes labeled as S-tier are great for all builds - the large block encompassing 10 important notables and Ancestral Bond Keystone is your starting route. the A-tier nodes are the best option for the mid-game damage boost - but be careful, don't pick all of them. Check if the type of damage they're granting matches the one you're dealing. B-tier nodes should be picked last. They grant Cast Speed, Critical Strike Chance, or Mana.

| S TIER | |
|---|---|
| The best and most efficient Passives in the Passive Tree. You will want to take them on almost every build. | |
 |
The first Notable you will allocate. Although Totems are not Minions, it's a good passive due to all the other bonuses. And it's on your way. |
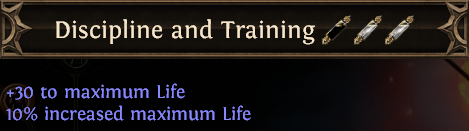 |
It can be considered the single best Notable on the entire skill tree to get more Maximum Life, take it. |
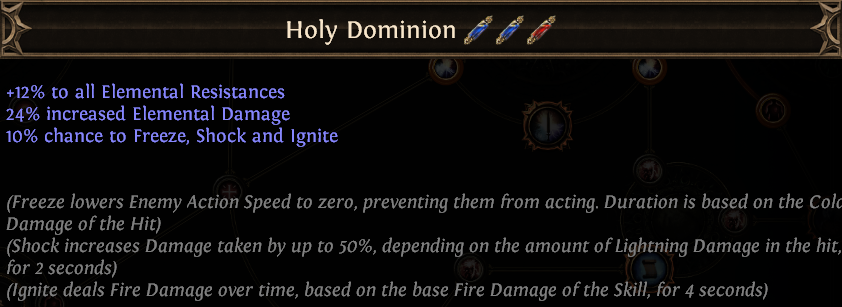 |
Elemental Resistances and Elemental Damage in one passive is a great deal. The extra chance to cause Ailments is not very good, but still better than nothing. |
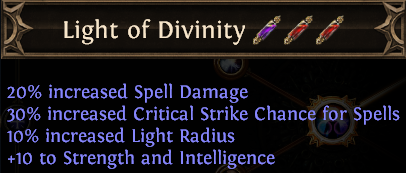 |
Increased Spell Damage will be useful early on, Critical Strike Chance for Spells - later. Light Radius is pretty much useless. |
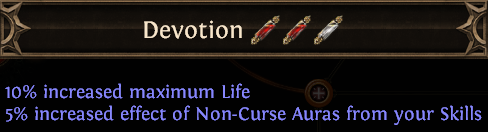 |
Another great passive for Maximum Life, it will grow even better after you start using Auras. |
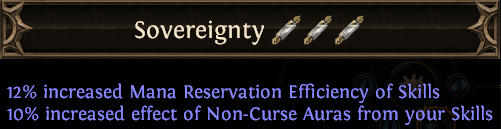 |
One of the very few passives for increased Mana Reservation Efficiency that every build needs, it allows you to fit more Auras which is very important in the later stages of the game. |
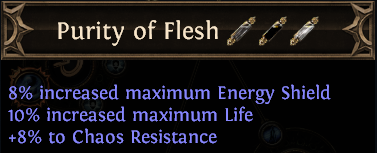 |
A big bonus to Maximum Life, Energy Shield, and Chaos Resistance is great, especially when reaching for this passive costs only two points. |
 |
A Totem node next to Ancestral Bond Keystone, it increases the overall performance of Totems. |
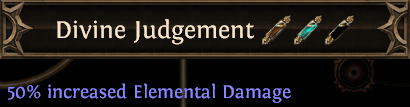 |
Massive boost to Elemental Damage of all types. |
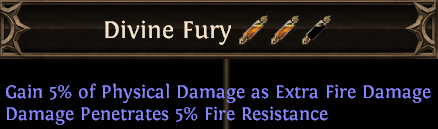 |
If you're using Holy Flame Totem, pick this node for more Fire Damage |
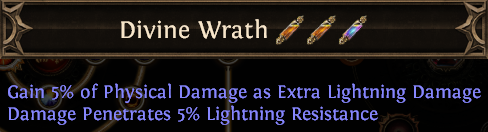 |
If you're using a Shockwave Totem which converts Physical Damage to Lightning, allocate this passive. |
 |
The three nodes leading up to his notable increase your Totems' damage and Placement speed. |
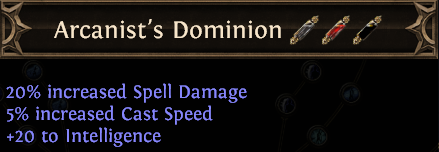 |
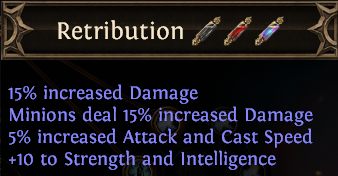
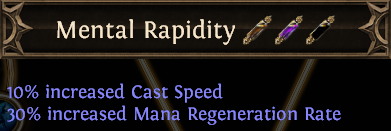
It's a notable passive that's located in a very favorable location, and it grants good stats like Spell Damage and Cast Speed. |
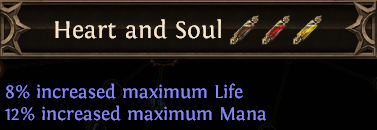 |
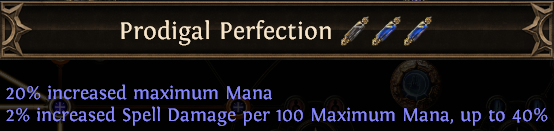
Maximum Life is always great to have, Maximum Mana will be more useful later. |
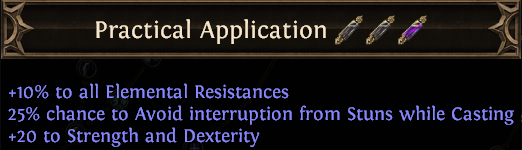 |
It's a passive very close to Arcanist's Dominion and Heart and Soul, it grants Resistances and Dexterity which might be of use. |
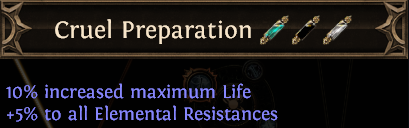 |
Cruel Preparation is a node for more Maximum Life that you can pick up when going up for specific Elemental Damage. |
 |
As advertised, this passive quickens your Life and Mana Recovery, on top of a bonus for more Maximum Life. |
| A TIER | |
| Those are also very good Passives, just not as universal as previous ones | |
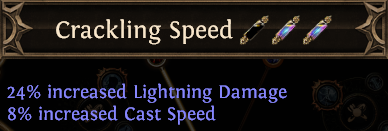 |
Cast Speed is hard to come by, so if you're dealing Lightning Damage, definitely go for Crackling Speed. |
 |
Explosive Impact is great for Fire Damage Totems, like Holy Flame Totem. |
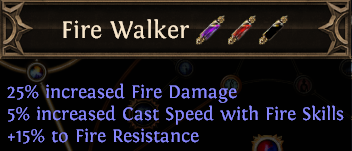 |
Fire Walker is an easy-to-reach Fire-oriented notable. |
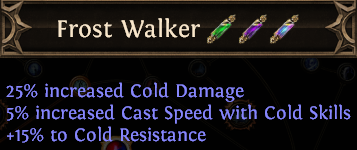 |
Another walker-type passive, they're all next to each other. This one is for Cold Damage Totems. |
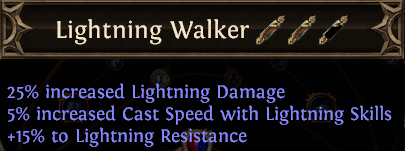 |
Lightning Damage notable for Lightning Damage dealers. |
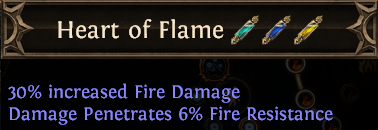 |
Heart of Flame is one of the three big Elemental-Damage-specific nodes located on big clusters at the very top of the passive skill tree. |
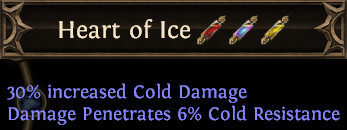 |
Heart of Ice is to be allocated if your character deals Cold Damage. |
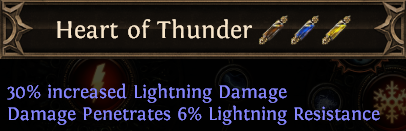 |
Exactly the same situation as with the aforementioned nodes - pick it only if it correlates with the damage you're dealing. |
| B TIER | |
| Passives that belong to this Tier fulfill their specific purpose | |
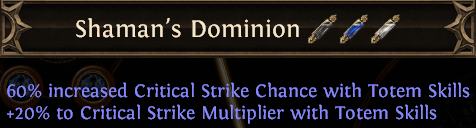 |
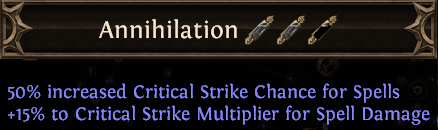
A heavily Critical-Damage-oriented notable for Totems, it should be very close to your route. |
 |
Cast Speed becomes very important later on, you should salvage as much of it as you can. |
 |
It's very similar to Shaman's Dominion but less specific and thus less potent - it works not only for totems. |
 |
At the end of the acts you will lean into Maximum Mana and Mana Regeneration, that is after allocating Mind over Matter and Divine Guidance. |
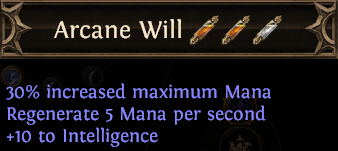 |
Very good node for Maximum Mana and Mana Regeneration Rate. |
 |
Yet another Mana-related node, it's right next to the Cruel Preparation. |
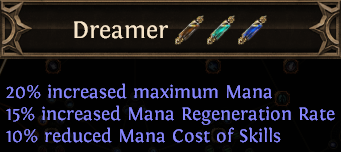 |
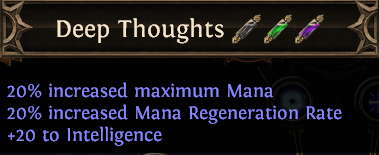
If you're going for a Dreamer node you will have to get closer to the center of the passive skill tree, there are some more mana-related nodes there, like Forethought that's next to this one. Dreamer lowers Mana Cost and grants more Mana. |
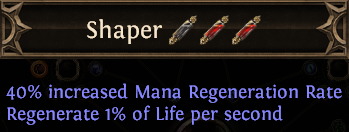 |
Shaper passive sits between Dreamer and Dynamo. It provides you with quick recovery of Life and Mana. |
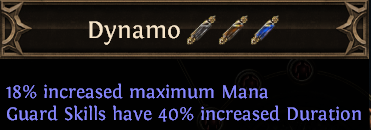 |
Dynamo is great when combined with Arcane Cloak Guard Spell, you can allocate its whole cluster. Since you're already there, you can pick the nearby Iron Will Keystone for more Damage, and Constitution for more Maximum Life. |
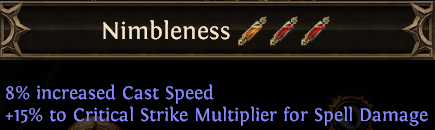 |
Nimbleness is pretty far away from your other nodes, but it's a good one if you have other passives nearby you want to allocate, such as the Pain Attunement Keystone or Melding. |
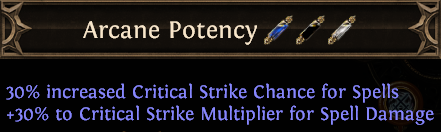 |
The same case as with Annihilation and Shaman's Dominion - pick it if you're interested in Critical Strikes damage, which you should only do in the later stages of the game. |
| Masteries Priority |
|
|
|
If you have any other build requests please leave that in the comments below. We are always open to suggestions and constructive feedback.
Pictures used in this article are the intellectual property of Grinding Gear Games.
