Unique Body Armours in PoE
Complete List of all Unique Body Armours in Path of ExileUnique Body Armours in PoE
Wiki page
Updated for Patch 3.21
In Path of Exile, Body Armour is a type of equipment that provide significant protection to your character. They are a crucial aspect of your overall gear setup as they offer both defensive and sometimes offensive bonuses. Body Armours are equipped in the "body armor" slot in your character's equipment inventory. While it is not uncommon for Unique Body Armours to provide near to no defensive capabilities, they are generally more oriented on providing such statistics for your character. Body Armours have the highest base defensive statistics like Armour, Evasion, and Energy Shield, and they also can roll higher values on Life and Damage Reduction mods.
Below you will find the list of all Unique Body Armours in Path of Exile, including the drop-restricted ones' that can be still found in the game world. The limit the length of this article, we have skipped the Legacy versions, as only a few are worth mentioning, and possibly those could be an interesting topic for a separate article due to their sometimes insane value. All the Items below are categorized by their Attribute requirements and offered defensive stats, where Strength is associated with Armour, Dexterity with Evasion, and intelligence with Energy Shield.
| Strength Body Armours | |
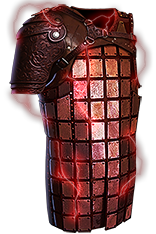
| +(30-60) to maximum Life -(15-10) Physical Damage taken from Attack Hits 1000% of Melee Physical Damage taken reflected to Attacker |
|
 Solaris Lorica - can be used by low-level characters that Reserve a big part of their maximum Life with Auras to protect them against Chaos Damage. Since it doesn't provide Energy Shield, it shouldn't be used for too long. Solaris Lorica - can be used by low-level characters that Reserve a big part of their maximum Life with Auras to protect them against Chaos Damage. Since it doesn't provide Energy Shield, it shouldn't be used for too long. |
|
| +(10-20) to Strength (60-80)% increased Armour 25% reduced Chaos Damage taken over time 25% increased Light Radius Chaos Damage taken does not bypass Energy Shield -(40-30) Chaos Damage taken |
|
 Greed's Embrace - a mandatory Unique for every Magic Find Build. Increases in Quantity and Rarity are very valuable stats for such characters. As with most MF Items, it not only doesn't provide any other useful stats, but it also actually makes you weaker. Greed's Embrace - a mandatory Unique for every Magic Find Build. Increases in Quantity and Rarity are very valuable stats for such characters. As with most MF Items, it not only doesn't provide any other useful stats, but it also actually makes you weaker. |
|
| (10-15)% increased Quantity of Items found (30-50)% increased Rarity of Items found -10% to Fire Resistance +(20-30)% to Cold Resistance -20% to Lightning Resistance 20% reduced Movement Speed 30% reduced Strength Requirement |
|
 Lioneye's Vision - is a decent budget choice for Projectile-based Characters that desperately need a source of Pierce in their Build. Level 15 of this Gem grants 14% more Damage and causes them to Pierce 3 additional Targets. Lioneye's Vision - is a decent budget choice for Projectile-based Characters that desperately need a source of Pierce in their Build. Level 15 of this Gem grants 14% more Damage and causes them to Pierce 3 additional Targets. |
|
| Socketed Gems are Supported by Level 15 Pierce (200-250)% increased Armour +(60-100) to maximum Life 0.4% of Physical Attack Damage Leeched as Mana +160 Dexterity Requirement Enemy Projectiles Pierce you |
|
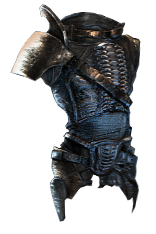
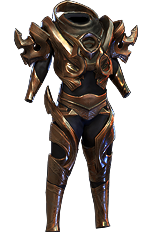
 The Iron Fortress -a core Body Armour for many Strength-stacking Builds out there, such as Wander Berserk or Shrapnel Ballista Hierophant. It grants you tons of Strength and Block Chance. It also makes Strength' Melee bonus more efficient. The Iron Fortress -a core Body Armour for many Strength-stacking Builds out there, such as Wander Berserk or Shrapnel Ballista Hierophant. It grants you tons of Strength and Block Chance. It also makes Strength' Melee bonus more efficient. |
|
| +1% Chance to Block Attack Damage per 50 Strength Chance to Block Spell Damage is Unlucky +(60-120) to Strength (80-100)% increased Armour 10% reduced Movement Speed Strength's Damage Bonus instead grants 3% increased Melee Physical Damage per 10 Strength |
|
 Blunderbore - this Armour requires absolutely massive amounts of Strength to wear. It makes all Shrine Buffs more effective on you, which makes a great synergy with The Gull Helmet and picking up Shrine Notables in your Atlas Tree. It also permanently grants you the effect of 2 Shrines, which grants you 20% increased Damage, Life, and AoE. Those are also increased by Shrine Buff Effects. Blunderbore - this Armour requires absolutely massive amounts of Strength to wear. It makes all Shrine Buffs more effective on you, which makes a great synergy with The Gull Helmet and picking up Shrine Notables in your Atlas Tree. It also permanently grants you the effect of 2 Shrines, which grants you 20% increased Damage, Life, and AoE. Those are also increased by Shrine Buff Effects. |
|
| +(8-12)% to all Elemental Resistances +(500-700) Strength Requirement (80-120)% increased Armour (50-75)% increased Effect of Shrine Buffs on you You have Lesser Brutal Shrine Buff You have Lesser Massive Shrine Buff |
|
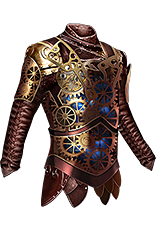
 Death's Oath - another Build-enabling Unique Armour. It grants you access to the Death Aura, which deals Chaos Damage to all nearby Enemies and can be improved by socketing Support Gems inside of the chest. You can check out our Death Aura Build Guide here. Death's Oath - another Build-enabling Unique Armour. It grants you access to the Death Aura, which deals Chaos Damage to all nearby Enemies and can be improved by socketing Support Gems inside of the chest. You can check out our Death Aura Build Guide here. |
|
| +(8-12)% to all Elemental Resistances Trigger Level 20 Death Aura when Equipped +(40-50) to all Attributes (10-15)% increased Attack Speed (180-220)% increased Armour +(60-70) to maximum Life 1% of Attack Damage Leeched as Life You take 450 Chaos Damage per second for 3 seconds on Kill Gore Footprints |
|
 Craiceann's Carapace - it is a very unpopular Chest, but it has a lot of defensive potential. Firstly, it disables Bleeding on you, which is pretty nice already. The Aspect of Crab grants you a 2% flat Physical Damage Reduction per Crab Barrier active. The best use for this Armour would be Character with lots of Evade Chance to not lose Crab Barriers too often. Craiceann's Carapace - it is a very unpopular Chest, but it has a lot of defensive potential. Firstly, it disables Bleeding on you, which is pretty nice already. The Aspect of Crab grants you a 2% flat Physical Damage Reduction per Crab Barrier active. The best use for this Armour would be Character with lots of Evade Chance to not lose Crab Barriers too often. |
|
| Grants Level 20 Aspect of the Crab Skill (200-250)% increased Armour +(100-120) to maximum Life +(25-30)% to Fire and Cold Resistances Bleeding cannot be inflicted on you +5 to Maximum number of Crab Barriers |
|
 The Brass Dome - is one of the best Armours in the Game. It grants you tons of Armour to reduce incoming Physical Damage. It also boosts your maximum Resistance to negate Elemental Damage. Disabling Critical Strikes is a great way to prevent random deaths. Unfortunately, it cuts out a decent amount of Maximum Life sourced from Strength, which is also a Life Modifier for the sake of popular Life Mastery. The Brass Dome - is one of the best Armours in the Game. It grants you tons of Armour to reduce incoming Physical Damage. It also boosts your maximum Resistance to negate Elemental Damage. Disabling Critical Strikes is a great way to prevent random deaths. Unfortunately, it cuts out a decent amount of Maximum Life sourced from Strength, which is also a Life Modifier for the sake of popular Life Mastery. |
|
| (350-400)% increased Armour +(1-5)% to all maximum Elemental Resistances Strength provides no bonus to Maximum Life Take no Extra Damage from Critical Strikes |
|
 Kaom's Heart - on the other hand, this Armour is all about a large bonus to maximum Life. It also has a hefty downside of not having any Sockets at all, which severely limits your Build. Usually, a well-crafted Endgame Rare Armour provides much more value to the Build, but it shines in the Early Game, especially on Fire-focused characters such as this Explosive Arrow Elementalist Starter Build. Kaom's Heart - on the other hand, this Armour is all about a large bonus to maximum Life. It also has a hefty downside of not having any Sockets at all, which severely limits your Build. Usually, a well-crafted Endgame Rare Armour provides much more value to the Build, but it shines in the Early Game, especially on Fire-focused characters such as this Explosive Arrow Elementalist Starter Build. |
|
| Has no Sockets (20-40)% increased Fire Damage +500 to maximum Life |
|
 Perfidy - this Armour grants bonuses to Banners and allows you to use 2 of them at once. The obvious candidate for it is the Champion which grants bonuses to Auras and makes Banners free. It is however not enough to make it any useful and should be avoided. Perfidy - this Armour grants bonuses to Banners and allows you to use 2 of them at once. The obvious candidate for it is the Champion which grants bonuses to Auras and makes Banners free. It is however not enough to make it any useful and should be avoided. |
|
| (25-40)% increased Melee Damage +(60-90) to maximum Life You can have two different Banners at the same time Banners you are carrying gain 1 Stage on Melee Hit, up to 5 per second <Two random Banner buff mods> War Banner has (100-200)% increased Adrenaline Duration Dread Banner grants an additional +(2–4) to maximum Fortification when placing the Banner Defiance Banner has (100-200)% increased Taunt Duration |
|
| Replica Kaom's Heart - it's a niche Replica for a niche Unique. It grants tons of Mana and some Lightning Damage, but the lack of Sockets is making it hard to justify. |
|
| Has no Sockets (30-40)% increased Lightning Damage +500 to maximum Mana |
| Dexterity Body Armours | ||
 Ashrend - It is a very powerful Armour choice for levelling Physical Projectile Build. Flat Damage Reduction is very powerful during the campaign, but it's not enough for Mapping. Ashrend - It is a very powerful Armour choice for levelling Physical Projectile Build. Flat Damage Reduction is very powerful during the campaign, but it's not enough for Mapping. |
||
| (80-100)% increased Evasion Rating +(40-50)% to Fire Resistance Cannot be Ignited (75-150)% increased Physical Damage with Ranged Weapons -(60-30) Physical Damage taken from Attack Hits |
||
 Foxshade - it grants you decent Movement Speed, so it can be used fro levelling or Heist. You would need good Life Recovery to constantly keep the Full Life status on. Foxshade - it grants you decent Movement Speed, so it can be used fro levelling or Heist. You would need good Life Recovery to constantly keep the Full Life status on. |
||
| +(20-30) to Dexterity +1000 to Evasion Rating while on Full Life (50-70)% increased Evasion Rating 30% increased Movement Speed when on Full Life Damage of Enemies Hitting you is Unlucky while you are on Full Life |
||
 Briskwrap - a great budget option for the not-so-budget-friendly type of Build: Dexterity stacking. It grants you lots of Dexterity and additional benefit for stacking it. It is eventually outshined by expensive Rare Items. The general theme suits Builds like our Ice Shot Raider or Hollow Palm Raider. Briskwrap - a great budget option for the not-so-budget-friendly type of Build: Dexterity stacking. It grants you lots of Dexterity and additional benefit for stacking it. It is eventually outshined by expensive Rare Items. The general theme suits Builds like our Ice Shot Raider or Hollow Palm Raider. |
||
| +(120-180) to Evasion Rating +(30-40)% to Cold Resistance (60-100)% increased Mana Recovery from Flasks 15% increased Dexterity 1% increased Damage per 15 Dexterity |
||
 Bronn's Lithe - being able to use only Movement Skill to deal Damage is one of the best examples of how creative can you get in Path of Exile, and this Armour is extremely helpful at it. The most popular choice for it is the Flame Dash Elementalist, but it is also great for various Flicker Strike Characters too! Bronn's Lithe - being able to use only Movement Skill to deal Damage is one of the best examples of how creative can you get in Path of Exile, and this Armour is extremely helpful at it. The most popular choice for it is the Flame Dash Elementalist, but it is also great for various Flicker Strike Characters too! |
||
| +5 to Level of Socketed Movement Gems 10% increased Attack Speed (60-100)% increased Damage with Movement Skills (200-250)% increased Evasion Rating 10% increased Movement Speed |
||
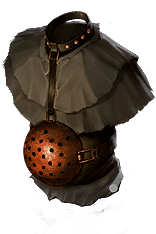 The Rat Cage - if the Damage taken conversion was opposite direction, it would be one of the best Armours out there. Unfortunately, as it stands out now, it's pretty much worthless. The Rat Cage - if the Damage taken conversion was opposite direction, it would be one of the best Armours out there. Unfortunately, as it stands out now, it's pretty much worthless. |
||
| (100-120)% increased Evasion Rating +(200-300) to maximum Life 15% increased Movement Speed 100% of Fire Damage from Hits taken as Physical Damage |
||
 Queen of the Forest - an End-game Armour of choice if you want tons of Movement Speed. To achieve the best outcome, you would need a 45k Evasion Rating, which is not that hard to obtain with Grace Aura and Jade Flask. Queen of the Forest - an End-game Armour of choice if you want tons of Movement Speed. To achieve the best outcome, you would need a 45k Evasion Rating, which is not that hard to obtain with Grace Aura and Jade Flask. |
||
| (200-240)% increased Evasion Rating +(60-70) to maximum Life +(6-10)% to Fire Resistance +(26-40)% to Cold Resistance +(11-25)% to Lightning Resistance 25% reduced Movement Speed 1% increased Movement Speed per 600 Evasion Rating, up to 75% -(50-40) Physical Damage taken from Hits by Animals |
||
 Kintsugi - is another great option for Characters that stack a lot of Evasion Rating, but this time it's valuable Damage Reduction that you get. The first Hit you actually take in 4 seconds will be greatly reduced, and you will gain tons of Evasion Rating to help you avoid the next incoming Attacks. Kintsugi - is another great option for Characters that stack a lot of Evasion Rating, but this time it's valuable Damage Reduction that you get. The first Hit you actually take in 4 seconds will be greatly reduced, and you will gain tons of Evasion Rating to help you avoid the next incoming Attacks. |
||
| (120-160)% increased Evasion Rating +(30-50)% to Fire Resistance 35% less Damage taken if you have not been Hit Recently 100% increased Evasion Rating if you have been Hit Recently |
||
 Yriel's Fostering - an Interesting Armour that grants you one of the 3 Minions depending on the variant you got. It also grants you some useful bonuses to your Attacks while your Minion is alive. Unfortunately, it's simply too weak to justify using it on a proper Build. Yriel's Fostering - an Interesting Armour that grants you one of the 3 Minions depending on the variant you got. It also grants you some useful bonuses to your Attacks while your Minion is alive. Unfortunately, it's simply too weak to justify using it on a proper Build. |
||
| Grants Level 20 Summon Bestial Minion Skill +(300-400) to Accuracy Rating (130-150)% increased Evasion Rating +(90-100) to maximum Life Projectile Attack Skills have (40-60)% increased Critical Strike Chance Projectiles from Attacks have 20% chance to Poison/Bleed/Maim on Hit while you have a Bestial Minion Adds (13-19) to (23-29) Chaos/Physical Damage to Attacks while you have a Bestial Minion |
||
 Hyrri's Ire - it is one of the best Armours for every Bow Character. It grants loads of Cold Damage and Spell Suppression chance. Even the lack of a maximum Life bonus can be seen as an upside, as you can allocate Life Mastery to get a 15% increased Life. It can be used with all kinds of Bow Skills, such as Tornado Shot or Ice Shot. Hyrri's Ire - it is one of the best Armours for every Bow Character. It grants loads of Cold Damage and Spell Suppression chance. Even the lack of a maximum Life bonus can be seen as an upside, as you can allocate Life Mastery to get a 15% increased Life. It can be used with all kinds of Bow Skills, such as Tornado Shot or Ice Shot. |
||
| +(40-50) to Dexterity (140-220)% increased Evasion Rating 25% increased Chill Duration on Enemies (105-145) to (160-200) Added Cold Damage with Bow Attacks +30% chance to Suppress Spell Damage |
||
 The Perfect Form - it grants you surplus amounts of Spell Suppression chance, but unfortunately it also comes with the Acrobatics Keystone, which turns it into Dodge Chance at half value, which makes it not desirable. The Perfect Form - it grants you surplus amounts of Spell Suppression chance, but unfortunately it also comes with the Acrobatics Keystone, which turns it into Dodge Chance at half value, which makes it not desirable. |
||
| +50% chance to Suppress Spell Damage (150-200)% increased Evasion Rating -30% to Cold Resistance Evasion Rating is increased by Overcapped Cold Resistance Acrobatics |
||
| Replica Perfect Form - it is a decent option for Hollow Palm Builds that allows them to save a few Passive Points and Jewel Slot on the One with Nothing Jewel. It grants plenty of maximum Life and Dexterity, and free Flesh and Stone Aura is also useful. |
||
| (10-15)% increased Dexterity (150-200)% increased Evasion Rating +(70-100) to maximum Life -30% to Cold Resistance Flesh and Stone has no Reservation Evasion Rating is increased by Overcapped Cold Resistance Hollow Palm Technique |
||
 The Snowblind Grace - it improves your Dexterity which is useful for Characters that stack only this one Attribute such as this Dexterity-stacking Ice Shot Raider. What makes this Armour Unique it grants you free and improved Arctic Armour to help reduce Physical Damage taken. The Snowblind Grace - it improves your Dexterity which is useful for Characters that stack only this one Attribute such as this Dexterity-stacking Ice Shot Raider. What makes this Armour Unique it grants you free and improved Arctic Armour to help reduce Physical Damage taken. |
||
| (10-15)% increased Dexterity (150-200)% increased Evasion Rating +(40-60) to maximum Life 50% increased Arctic Armour Buff Effect Arctic Armour has no Reservation |
||
 Cospri's Will - it is a niche Armour that can help many problems you may face at the early stages of your Poison Build. With this Armour, you don't have to invest anything into Poison Chance, and it is very important to have a 100% Chance to do so. Cospri's Will - it is a niche Armour that can help many problems you may face at the early stages of your Poison Build. With this Armour, you don't have to invest anything into Poison Chance, and it is very important to have a 100% Chance to do so. |
||
| (150-200)% increased Evasion Rating +(31-53)% to Chaos Resistance You can apply an additional Curse Your Hexes can affect Hexproof Enemies Always Poison on Hit against Cursed Enemies |
| Intelligence Body Armours | |||
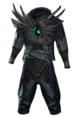
 Ghostwrithe - it can be a great help if you want to start using Energy Shield at early levels. It doesn't have much use in the end-game, except for some niche builds with Energy Blades such as our "Jedi Master" Inquisitor. Ghostwrithe - it can be a great help if you want to start using Energy Shield at early levels. It doesn't have much use in the end-game, except for some niche builds with Energy Blades such as our "Jedi Master" Inquisitor. |
|||
| +(100-200) to maximum Energy Shield +(50-100) to maximum Life +50% to Chaos Resistance 50% of Maximum Life Converted to Energy Shield |
|||
 Cloak of Flame - pretty powerful Armour to mitigate incoming Physical Damage. It is a bit weaker than the Lightning Coil, but this one grants you Resistance instead of taking them away. Cloak of Flame - pretty powerful Armour to mitigate incoming Physical Damage. It is a bit weaker than the Lightning Coil, but this one grants you Resistance instead of taking them away. |
|||
| +(50-75)% to Fire Resistance (40-75)% increased Ignite Duration on Enemies Reflects 100 Fire Damage to Melee Attackers 40% of Physical Damage taken as Fire Damage |
|||
 Zahndethus' Cassock - you can use it during Leveling if you are using Elemental Attacks or need Chaos Resistance, but other than that it's really weak. Zahndethus' Cassock - you can use it during Leveling if you are using Elemental Attacks or need Chaos Resistance, but other than that it's really weak. |
|||
| Adds 1 to 40 Lightning Damage to Attacks (125-150)% increased Energy Shield +(40-50)% to Chaos Resistance 25% increased Light Radius 100% chance to create Consecrated Ground when you Block Consecrated Ground regenerates 6% Life per second (Hidden) |
|||
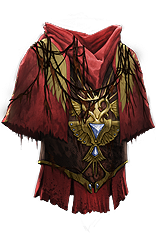
 Soul Mantle - very powerful and usual go-to Armour for most Spell Totem Builds. It grants you an additional Support Gem for your main setup, which usually means around 30% More Damage. You can check it out in action in our Freezing Pulse Totem Hierophant Build Guide. Soul Mantle - very powerful and usual go-to Armour for most Spell Totem Builds. It grants you an additional Support Gem for your main setup, which usually means around 30% More Damage. You can check it out in action in our Freezing Pulse Totem Hierophant Build Guide. |
|||
| Socketed Gems are Supported by Level 20 Spell Totem (20-25)% increased Spell Damage (100-120)% increased Energy Shield (20-30)% increased Totem Life Inflicts a random Hex on you when your Totems die |
|||
 The Covenant - an extremely powerful Body Armour for many Poison Builds. The level 29 Added Chaos Damage Gem often can be counted as 1,5 or even 2 Support Gems. An example of such power would be a very popular and successful Poison Summon Raging Spirits Build. The Covenant - an extremely powerful Body Armour for many Poison Builds. The level 29 Added Chaos Damage Gem often can be counted as 1,5 or even 2 Support Gems. An example of such power would be a very popular and successful Poison Summon Raging Spirits Build. |
|||
| Socketed Gems are Supported by Level 29 Added Chaos Damage +(20-30) to Intelligence (210-250)% increased Energy Shield 10% increased maximum Life Skills gain a Base Life Cost equal to 100% of Base Mana Cost |
|||
 The Coming Calamity - a very interesting Item that allows you to max our 2 Herald Skills, but nowadays it has little to no use. If you want to check out the modern Herald of Thunder Builds, take a look here. The Coming Calamity - a very interesting Item that allows you to max our 2 Herald Skills, but nowadays it has little to no use. If you want to check out the modern Herald of Thunder Builds, take a look here. |
|||
| +2 to Level of Socketed Herald Gems (80-100)% increased Energy Shield 35% chance to avoid being Stunned for each Herald Buff affecting you Mana Reservation of Herald Skills is always 45% |
|||
 Cloak of Tawm'r Isley - It used to be almost mandatory Unique for any self-respecting Animate Weapon Build out there, but ever since the change to that Skill the Armour is no longer needed. You can see how it's done nowadays here. Cloak of Tawm'r Isley - It used to be almost mandatory Unique for any self-respecting Animate Weapon Build out there, but ever since the change to that Skill the Armour is no longer needed. You can see how it's done nowadays here. |
|||
| Socketed Minion Gems are Supported by Level 16 Life Leech (150-200)% increased Energy Shield Minions cannot be Blinded Minions have 15% chance to Blind Enemies on hit Found Magic Items drop Identified |
|||
 Garb of the Ephemeral - It is an interesting Body Armour. It requires tons of Strength and Intelligence to wear. Roughly every 10 seconds you will gain 50% More Elemental Damage through the Divinity Buff. Garb of the Ephemeral - It is an interesting Body Armour. It requires tons of Strength and Intelligence to wear. Roughly every 10 seconds you will gain 50% More Elemental Damage through the Divinity Buff. |
|||
| (180-230)% increased Energy Shield +600 Strength and Intelligence Requirement Gain a Divine Charge on Hit +10 to maximum Divine Charges You gain Divinity for 10 seconds on reaching maximum Divine Charges Lose all Divine Charges when you gain Divinity Nearby Allies' Action Speed cannot be modified to below base value Nearby Enemies cannot deal Critical Strikes |
|||
 Fleshcrafter - very powerful Armour for Minions that use all 3 types of Elemental Damage, such as our Summon Skeleton Mages Necromancer Build. Ignoring Elemental Resistances is a great way to shred Monster's defence. Fleshcrafter - very powerful Armour for Minions that use all 3 types of Elemental Damage, such as our Summon Skeleton Mages Necromancer Build. Ignoring Elemental Resistances is a great way to shred Monster's defence. |
|||
| (100-150)% increased Energy Shield Minions Convert 2% of their Maximum Life to Maximum Energy Shield per 1% Chaos Resistance they have Chaos Damage taken does not bypass Minions' Energy Shield Minions have (50-100)% faster start of Energy Shield Recharge While Minions have Energy Shield, their Hits Ignore Monster Elemental Resistances |
|||
 Vis Mortis - was once a popular choice for Spectre Builds, but since the rework, it is really bad. If you play on Standard League, you can still buy the version that will increase the number of Summoned Spectres by 1. Vis Mortis - was once a popular choice for Spectre Builds, but since the rework, it is really bad. If you play on Standard League, you can still buy the version that will increase the number of Summoned Spectres by 1. |
|||
| (200-220)% increased Energy Shield +(20-30) to maximum Mana Minions have 20% reduced maximum Life Minions deal 15% increased Damage Minions gain (15-20)% of Elemental Damage as Extra Chaos Damage |
|||
 Shavronne's Wrappings - a very famous Chest Armour that enables the entire archetype of Low Life Builds. With this Armour, you can freely Reserve all your Life with Auras and not worry about random Chaos Damage killing you in one hit. Doing so will grant you access to more Auras to improve your Damage and Defense, as well enable the Pain Attunement Keystone for another 30% Damage Multiplier. Shavronne's Wrappings - a very famous Chest Armour that enables the entire archetype of Low Life Builds. With this Armour, you can freely Reserve all your Life with Auras and not worry about random Chaos Damage killing you in one hit. Doing so will grant you access to more Auras to improve your Damage and Defense, as well enable the Pain Attunement Keystone for another 30% Damage Multiplier. |
|||
| (3-10)% increased Spell Damage (100-150)% increased Energy Shield 10% faster start of Energy Shield Recharge +(30-40)% to Lightning Resistance Reflects 1 to 250 Lightning Damage to Melee Attackers Chaos Damage taken does not bypass Energy Shield |
|||
 Doedre's Skin - it's a popular choice for Curse Bot Builds that specializes in applying as many Curses to Enemies as possible. They are used only in Party-play, as they have no room for their own Damage. Doedre's Skin - it's a popular choice for Curse Bot Builds that specializes in applying as many Curses to Enemies as possible. They are used only in Party-play, as they have no room for their own Damage. |
|||
| Socketed Gems are Supported by Level 20 Blasphemy Grants Level 20 Summon Doedre's Effigy Skill Socketed Hex Curse Skills are Triggered by Doedre's Effigy when Summoned Hexes from Socketed Skills can apply 5 additional Curses 20% less Effect of Curses from Socketed Hex Skills +(30-40) to Intelligence (130-150)% increased Energy Shield |
|||
 Infernal Mantle - it is a niche Body Armour for Fire Spells. The best-case scenario would be a Crit Build that converts all Fire Damage to Chaos and uses Blood Magic to mitigate the downside. If you don't have a way to avoid the Low Mana status, it should be never used. Infernal Mantle - it is a niche Body Armour for Fire Spells. The best-case scenario would be a Crit Build that converts all Fire Damage to Chaos and uses Blood Magic to mitigate the downside. If you don't have a way to avoid the Low Mana status, it should be never used. |
|||
| +3 to Level of Socketed Fire Gems 100% increased Global Critical Strike Chance (120-160)% increased Energy Shield 15% of Fire Damage Converted to Chaos Damage 100% increased Spell Damage taken when on Low Mana |
|||
 Fenumus' Shroud - this Armour makes the Aspect of the Spider much better and more reliable. If you are using that Aspect and don't need any particular modifier on your Body Armour otherwise, this is a pretty solid option. Fenumus' Shroud - this Armour makes the Aspect of the Spider much better and more reliable. If you are using that Aspect and don't need any particular modifier on your Body Armour otherwise, this is a pretty solid option. |
|||
| +(30-40) to Intelligence (120-140)% increased Energy Shield Regenerate (80-100) Energy Shield per second Enemies affected by your Spider's Webs deal 10% reduced Damage Enemies affected by your Spider's Webs have -10% to All Resistances (50-70)% increased Aspect of the Spider Area of Effect |
|||
 The Beast Fur Shawl - the minuscule amounts of Spell Damage, Area of Effect, or Energy Shield Recovery rate are not worthy of increasing the Damage you take. The Beast Fur Shawl - the minuscule amounts of Spell Damage, Area of Effect, or Energy Shield Recovery rate are not worthy of increasing the Damage you take. |
|||
| 40% increased Spell Damage (120-160)% increased Energy Shield 10% increased Area of Effect 10% increased Damage taken (50-100)% increased Energy Shield Recovery rate |
|||
 The Queen's Hunger - you still need Corpses to trigger the Offerings, so it is not a very useful Armour. The Queen's Hunger - you still need Corpses to trigger the Offerings, so it is not a very useful Armour. |
|||
| Trigger Level 20 Bone Offering, Flesh Offering or Spirit Offering every 5 seconds Offering Skills Triggered this way also affect you (5-10)% increased Cast Speed (100-130)% increased Energy Shield (6-10)% increased maximum Life Veiled Prefix Veiled Suffix |
| Armour/Evasion Body Armours | |||
 Gruthkul's Pelt - way too many Skills in the game are considering Spell to use this Armour without hurting your Build. You would have to cut out Auras, Curses and Hexes, Guard Skills, etc. It can be however put on Animate Guardian to give him 10% Life Regeneration and plenty of maximum Life. Gruthkul's Pelt - way too many Skills in the game are considering Spell to use this Armour without hurting your Build. You would have to cut out Auras, Curses and Hexes, Guard Skills, etc. It can be however put on Animate Guardian to give him 10% Life Regeneration and plenty of maximum Life. |
|||
| 100% increased Global Physical Damage +(240-300) to maximum Life (300-400)% increased Armour and Evasion Regenerate 10% of Life per second 15% increased Character Size Spell Skills deal no Damage Your Spells are disabled |
|||
 Belly of the Beast - a popular and a bit nostalgic Armour for low-budget Builds. The Rare Armours eventually get much stronger, but if you lack funds and need some Defenses, it is a good choice. Belly of the Beast - a popular and a bit nostalgic Armour for low-budget Builds. The Rare Armours eventually get much stronger, but if you lack funds and need some Defenses, it is a good choice. |
|||
| (150-200)% increased Armour (30-40)% increased maximum Life +(10-15)% to all Elemental Resistances 50% increased Flask Life Recovery rate Extra gore |
|||
 Lightning Coil - one of the best Armours to mitigate Physical Damage, even on characters with tons of Armour. It is mostly used on Pathfinder Builds, as those can easily reach tons of Elemental Mitigation through Flasks. Lightning Coil - one of the best Armours to mitigate Physical Damage, even on characters with tons of Armour. It is mostly used on Pathfinder Builds, as those can easily reach tons of Elemental Mitigation through Flasks. |
|||
| Adds 1 to (20-30) Lightning Damage to Attacks (90-120)% increased Armour and Evasion +(60-80) to maximum Life -60% to Lightning Resistance 50% of Physical Damage from Hits taken as Lightning Damage |
|||
 Daresso's Defiance - it is a questionable Body Amour that you can use to generate Endurance Charges and improved Onslaught for your speed-farming character. It might be good if you find at least one with Corrupted Implicits. Daresso's Defiance - it is a questionable Body Amour that you can use to generate Endurance Charges and improved Onslaught for your speed-farming character. It might be good if you find at least one with Corrupted Implicits. |
|||
| (180-220)% increased Armour and Evasion +(60-90) to maximum Life 2% of Physical Attack Damage Leeched as Life You lose all Endurance Charges when Hit You gain an Endurance Charge on Kill You gain Onslaught for 5 seconds per Endurance Charge when Hit 100% increased Effect of Onslaught on you |
|||
 Cherrubim's Maleficence - it's a nice source of Chaos Damage for the Early-game progression on any Chaos Build, such as Caustic Arrow Trickster. In most cases, you will find a better alternative if you gather enough funds for them. Cherrubim's Maleficence - it's a nice source of Chaos Damage for the Early-game progression on any Chaos Build, such as Caustic Arrow Trickster. In most cases, you will find a better alternative if you gather enough funds for them. |
|||
| (50-80)% increased Chaos Damage (160-200)% increased Armour and Evasion +(70-100) to maximum Life 100% increased total Recovery per second from Life Leech |
|||
 Farrul's Fur - very important Armour for Builds that constantly consume Frenzy or Power Charges, such as this Flicker Strike Slayer. You can reduce the Duration of the Aspect with the Support Gem since it has no Reservation anyway. Farrul's Fur - very important Armour for Builds that constantly consume Frenzy or Power Charges, such as this Flicker Strike Slayer. You can reduce the Duration of the Aspect with the Support Gem since it has no Reservation anyway. |
|||
| (100-150)% increased Armour and Evasion +(80-100) to maximum Life Aspect of the Cat has no Reservation +2 seconds to Cat's Stealth Duration Gain up to your maximum number of Frenzy and Power Charges when you gain Cat's Stealth You have Phasing while you have Cat's Stealth |
|||
| Replica Farrul's Fur - it is an even better (but also more expensive) version, again used mostly by the Flicker Strike Slayer. The main advantage of Endurance Charges is the Arn's Anguish Belt which turns them into Brutal Charges that grant Triple Damage chances. |
|||
| (100-150)% increased Armour and Evasion +(80-100) to maximum Life +2 seconds to Cat's Agility Duration Aspect of the Cat has no Reservation Gain up to your maximum number of Frenzy and Endurance Charges when you gain Cat's Agility You have Onslaught while you have Cat's Agility |
| Armour/Energy Shield Body Armours | |||
 Voll's Protector - there is only one kind of Build that would need such a high amount of Power Charge generation: Cast on Crit Discharge. The Inner Conviction is a nice bonus that grants you extra Damage per Power Charge, but it is not enough for regular Build to use this Armour. Voll's Protector - there is only one kind of Build that would need such a high amount of Power Charge generation: Cast on Crit Discharge. The Inner Conviction is a nice bonus that grants you extra Damage per Power Charge, but it is not enough for regular Build to use this Armour. |
|||
| (100-150)% increased Armour and Energy Shield 50% reduced maximum Mana Gain a Power Charge for each Enemy you hit with a Critical Strike Inner Conviction |
|||
|
|
|||
| +(30-40) to Strength +(30-40) to Intelligence (140-160)% increased Armour and Energy Shield +(50-75)% to Cold Resistance Cannot be Chilled 20% chance to Freeze Enemies for 1 second when they Hit you |
|||
 Ambu's Charge - similar to the previous one, it can be used for the Elemental Resistances and maximum Life when you have nothing better, but you shouldn't aim for it. Ambu's Charge - similar to the previous one, it can be used for the Elemental Resistances and maximum Life when you have nothing better, but you shouldn't aim for it. |
|||
| (180-220)% increased Armour and Energy Shield +(60-80) to maximum Life +15% to all Elemental Resistances Gain up to maximum Endurance Charges when you take a Critical Strike Your nearby party members maximum Endurance Charges is equal to yours |
|||
| Replica Ambu's Charge - slightly better than the original, as it generates Endurance Charges, but it still shouldn't be used. |
|||
| (180-220)% increased Armour and Energy Shield +(60-80) to maximum Life +15% to all Elemental Resistances Share Endurance Charges with nearby party members Gain an Endurance Charge when you are Hit Lose 2% of Life per second if you have been Hit Recently |
|||
 Lightbane Raiment - it has currently no use in any build that we know of. Lightbane Raiment - it has currently no use in any build that we know of. |
|||
| (120-140)% increased Armour and Energy Shield 30% of Physical Damage Converted to Chaos Damage Reflects 30 Chaos Damage to Melee Attackers 25% reduced Light Radius 100% chance to create Desecrated Ground when you Block Desecrated Ground deals 250 Chaos Damage per second (Hidden) Desecrated Ground has a radius of 16 (Hidden) |
|||
 The Fourth Vow - an absurdly strong form of Damage Mitigation, but you will have to spend lots of Resources to make it good. You will need lots of Armour, and the Divine Flesh Keystone which converts half of the incoming Damage into Chaos Damage. You can see its usage at our Forbidden Rite Pathfinder, but you can also apply it to any Juggernaut Build. The Fourth Vow - an absurdly strong form of Damage Mitigation, but you will have to spend lots of Resources to make it good. You will need lots of Armour, and the Divine Flesh Keystone which converts half of the incoming Damage into Chaos Damage. You can see its usage at our Forbidden Rite Pathfinder, but you can also apply it to any Juggernaut Build. |
|||
| Physical Damage taken bypasses Energy Shield (150-250)% increased Armour and Energy Shield +(17-29)% to Chaos Resistance Regenerate 3% of Life per second Armour also applies to Chaos Damage taken from Hits |
|||
 Kingsguard - if your Build effortlessly generates Endurance Charge, you can use this Armour paired with the Immortal Call or Discharge to improve your sustain greatly. Otherwise, it's pretty bad. Kingsguard - if your Build effortlessly generates Endurance Charge, you can use this Armour paired with the Immortal Call or Discharge to improve your sustain greatly. Otherwise, it's pretty bad. |
|||
| (150-170)% increased Armour and Energy Shield +(60-90) to maximum Life +(50-70) to maximum Mana 30% increased Endurance Charge Duration Gain 100 Life when you lose an Endurance Charge |
|||
 Geofri's Sanctuary - it is a niche Unique for Builds that use tons of Strength. This Armour alone can provide tons of Energy Shield for additional defence, but you would usually prefer one that improves your Damage instead. Geofri's Sanctuary - it is a niche Unique for Builds that use tons of Strength. This Armour alone can provide tons of Energy Shield for additional defence, but you would usually prefer one that improves your Damage instead. |
|||
| (50-75)% increased Armour and Energy Shield +(30-40) to maximum Energy Shield +(60-70) to maximum Life +(14-18)% to all Elemental Resistances +2 maximum Energy Shield per 5 Strength Zealot's Oath |
|||
 Loreweave - it is very generic and pretty strong Body Armour. It grants you a bit of everything, but masters nothing in particular. The strong aspect is that your Maximum Resistances cannot be lowered any further, which makes it a powerful combination with Eternal Damnation Amulet. It has a very unusual way of acquiring it, as you need to sell 60 Unique Rings to Vendor to obtain it. Loreweave - it is very generic and pretty strong Body Armour. It grants you a bit of everything, but masters nothing in particular. The strong aspect is that your Maximum Resistances cannot be lowered any further, which makes it a powerful combination with Eternal Damnation Amulet. It has a very unusual way of acquiring it, as you need to sell 60 Unique Rings to Vendor to obtain it. |
|||
| Has 6 Sockets +(8-24) to all Attributes Adds (4-10) to (14-36) Physical Damage to Attacks (20-60)% increased Global Critical Strike Chance +(15-50) to maximum Energy Shield +(20-60) to maximum Life +(20-50) to maximum Mana (6-30)% increased Rarity of Items found (15-50)% increased Elemental Damage Your Maximum Resistances are (76-78)% |
|||
| Replica Loreweave - lowering your Maximum Resistance is bad and you should never use this Armour. |
|||
| Has 6 Sockets +(8-24) to all Attributes Adds (4-10) to (14-36) Physical Damage to Attacks (120-160)% increased Global Critical Strike Chance +(150-200) to maximum Energy Shield +(120-160) to maximum Life +(120-160) to maximum Mana (6-30)% increased Rarity of Items found (15-50)% increased Elemental Damage Your Maximum Resistances are (70-72)% |
|||
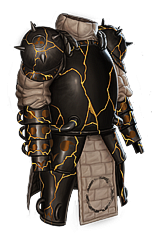
 Doryani's Prototype - very powerful and Build-defining Unique. You can lower your Lightning Resistance down to -200% and apply them to nearby Enemies. The biggest challenge here is to stay alive. You can find out how to achieve that on our Doryani's Touch Berserker Build Guide. It can also be used to boost your Minions, such as Absolution or Lightning Golems. Doryani's Prototype - very powerful and Build-defining Unique. You can lower your Lightning Resistance down to -200% and apply them to nearby Enemies. The biggest challenge here is to stay alive. You can find out how to achieve that on our Doryani's Touch Berserker Build Guide. It can also be used to boost your Minions, such as Absolution or Lightning Golems. |
|||
| (150-200)% increased Armour and Energy Shield +(60-90) to maximum Life Deal no Non-Lightning Damage Armour also applies to Lightning Damage taken from Hits Lightning Resistance does not affect Lightning Damage taken Nearby Enemies have Lightning Resistance equal to yours |
|||
 Sporeguard - it's a rather quirky Body Armour. It grants you a bit of Explosion to improve your Clear Speed, but it is limited to the Fungal Ground area, which you create by Killing an Enemy or being stationary. The Fungal Ground grants you a bit of Chaos Damage and lowers Enemy' Damage. As it is with most Blight Uniques, this item can be anointed by Cassia. Sporeguard - it's a rather quirky Body Armour. It grants you a bit of Explosion to improve your Clear Speed, but it is limited to the Fungal Ground area, which you create by Killing an Enemy or being stationary. The Fungal Ground grants you a bit of Chaos Damage and lowers Enemy' Damage. As it is with most Blight Uniques, this item can be anointed by Cassia. |
|||
| Trigger Level 10 Contaminate when you Kill an Enemy (200-250)% increased Armour and Energy Shield (7-10)% increased maximum Life +(17-23)% to Chaos Resistance Enemies on Fungal Ground you Kill Explode, dealing 5% of their Life as Chaos Damage You have Fungal Ground around you while stationary |
|||
 The Ivory Tower - it is a Body Armour worthy of building around it. It heavily encourages getting high amounts of Life, Energy Shield, and Mana at once. It is not reliable enough to safely Reserve all your Life with Auras, as occasional Chaos Damage spikes will be lethal. The Ivory Tower - it is a Body Armour worthy of building around it. It heavily encourages getting high amounts of Life, Energy Shield, and Mana at once. It is not reliable enough to safely Reserve all your Life with Auras, as occasional Chaos Damage spikes will be lethal. |
|||
| +(40-70) to Intelligence +30 to maximum Energy Shield per 100 Reserved Life +(80-100) to maximum Mana Regenerate 2% of Energy Shield per second Chaos Damage is taken from Mana before Life |
|||
 Chains of Command - it is an Armour designed only for one specific Build: Animate Guardian. It is vastly different from regular Animated Weapons as it disables all other Minions and obviously enforces focusing on the Animate Guardian. Chains of Command - it is an Armour designed only for one specific Build: Animate Guardian. It is vastly different from regular Animated Weapons as it disables all other Minions and obviously enforces focusing on the Animate Guardian. |
|||
| Trigger Level 20 Animate Guardian's Weapon when Animated Guardian Kills an Enemy 10% chance to Trigger Level 18 Animate Guardian's Weapon when Animated Weapon Kills an Enemy (150-190)% increased Armour and Energy Shield +(60-90) to maximum Life Animated Guardian deals 5% increased Damage per Animated Weapon Animated Minions' Melee Attacks deal Splash Damage to surrounding targets Animated Minions' Melee Attacks deal 50% less Damage to surrounding targets You cannot have non-Animated Minions |
|||
| (220-240)% increased Armour and Energy Shield +(80-90) to maximum Life (0.8-1)% of Attack Damage Leeched as Life Gain (10-20)% of Elemental Damage as Extra Chaos Damage 25% of Elemental Damage from Hits taken as Chaos Damage (20-30)% increased Light Radius Light Radius is based on Energy Shield instead of Life |
 Icetomb - you can use it for a while during levelling if it happens to drop, but it's rather underwhelming outside of the first day of the League.
| Energy Shield/Evasion Body Armours | |||
 Thousand Ribbons - great low-level Unique that provides many useful bonuses to your character. The bonuses quickly lose their value as you progress further into the campaign. Thousand Ribbons - great low-level Unique that provides many useful bonuses to your character. The bonuses quickly lose their value as you progress further into the campaign. |
|||
| Socketed Gems are Supported by Level 5 Elemental Proliferation Adds (2-4) to (5-9) Fire Damage to Spells and Attacks Adds (2-4) to (5-9) Cold Damage to Spells and Attacks Adds 1 to (4-12) Lightning Damage to Spells and Attacks +(30-60) to Evasion Rating +(30-60) to maximum Energy Shield +(25-50) to maximum Life +(25-50) to maximum Mana +(15-30)% to Fire Resistance +(15-30)% to Cold Resistance +(15-30)% to Lightning Resistance |
|||
|
|
|||
| Grants Level 15 Blood Offering Skill (100-120)% increased Evasion and Energy Shield (15-25)% increased maximum Life Minions have (20-30)% increased maximum Life Regenerate 1% of Life per second Minions have +(12-15)% chance to Suppress Spell Damage |
|||
 Cloak of Defiance - the regular version is a nice way to gain access to Mind Over Matter for Builds that can't allocate it on Passive Tree, such as Manaforged Deadeye. The Legacy version available only on Standard League grants another 10% Of Damage Taken from Mana, so it is a great pick for every MoM Build out there. Cloak of Defiance - the regular version is a nice way to gain access to Mind Over Matter for Builds that can't allocate it on Passive Tree, such as Manaforged Deadeye. The Legacy version available only on Standard League grants another 10% Of Damage Taken from Mana, so it is a great pick for every MoM Build out there. |
|||
| (300-400)% increased Evasion and Energy Shield +(100-150) to maximum Mana Regenerate 1% of Mana per second Mind Over Matter |
|||
 Victario's Influence - a very good Armour for Aurabot Builds, which sacrifices all their offensive power to boost allies with Auras. Occasionally it's also worn by Summoners. Victario's Influence - a very good Armour for Aurabot Builds, which sacrifices all their offensive power to boost allies with Auras. Occasionally it's also worn by Summoners. |
|||
| +1 to Level of Socketed Aura Gems Socketed Gems are Supported by Level 30 Generosity Socketed Gems have 45% increased Reservation Efficiency (120-150)% increased Evasion and Energy Shield (20-40)% increased Area of Effect of Aura Skills (10-15)% increased effect of Non-Curse Auras from your Skills |
|||
 Dendrobate - a very good Armour for any Poison Build. Fulfilling the Requirements is usually rather easy, and the level 10 Chance to Poison Gem can be used to fix your Poison Chance. Dendrobate - a very good Armour for any Poison Build. Fulfilling the Requirements is usually rather easy, and the level 10 Chance to Poison Gem can be used to fix your Poison Chance. |
|||
| Socketed Gems are Supported by Level 10 Chance to Poison (130-150)% increased Evasion and Energy Shield +40 to maximum Energy Shield +(15-25)% to all Elemental Resistances (75-100)% increased Damage with Poison if you have at least 300 Dexterity (15-25)% increased Poison Duration if you have at least 150 Intelligence |
|||
 Expedition's End - on it's own its rather weak Armour, there are better ways of getting Chill on Enemies anyway. The true potential of this Item lies within the Heatshiver Helmet, as that Helmet can nearly double your Damage as long as you can reliably Freeze your Enemies. Expedition's End - on it's own its rather weak Armour, there are better ways of getting Chill on Enemies anyway. The true potential of this Item lies within the Heatshiver Helmet, as that Helmet can nearly double your Damage as long as you can reliably Freeze your Enemies. |
|||
| (100-150)% increased Evasion and Energy Shield (5-10)% increased maximum Life All Damage can Freeze Freeze Chilled Enemies as though dealing (50-100)% more Damage Nearby Enemies are Chilled |
|||
 Carcass Jack - it is a great pick in the early stages of your Build to boost your AoE. However, its usefulness falls off in the late game, as there are better ways to scale AoE. Carcass Jack - it is a great pick in the early stages of your Build to boost your AoE. However, its usefulness falls off in the late game, as there are better ways to scale AoE. |
|||
| (120-150)% increased Evasion and Energy Shield +(50-70) to maximum Life +(9-12)% to all Elemental Resistances (40-50)% increased Area of Effect (40-50)% increased Area Damage Extra gore |
|||
 The Admiral - it's very strong and underused Body Armour. With this Armour you can benefit from only one type of Exposure and Curse on a Build that uses all 3 Elemental types, for example, on a Voidforge Bladestorm Slayer. The Admiral - it's very strong and underused Body Armour. With this Armour you can benefit from only one type of Exposure and Curse on a Build that uses all 3 Elemental types, for example, on a Voidforge Bladestorm Slayer. |
|||
| +(30-40) to Intelligence (100-140)% increased Evasion and Energy Shield +(10-20)% to all Elemental Resistances (5-10)% chance to Freeze, Shock and Ignite Elemental Damage you Deal with Hits is Resisted by lowest Elemental Resistance instead |
|||
 The Eternity Shroud - it is powerful, a bit complicated, and definitely expensive setup to make the most out of this Armour. You would have to Chance particular Uniques on Shaper-influenced Bases, which can be very daunting. The idea here is no convert Lightning Damage to Cold, and then Cold to Fire, in order to get the 5% extra Chaos Damage from every step of Conversion. In the final version, you would gain 150% Extra Chaos Damage and Ignore Chaos Resistance. The Eternity Shroud - it is powerful, a bit complicated, and definitely expensive setup to make the most out of this Armour. You would have to Chance particular Uniques on Shaper-influenced Bases, which can be very daunting. The idea here is no convert Lightning Damage to Cold, and then Cold to Fire, in order to get the 5% extra Chaos Damage from every step of Conversion. In the final version, you would gain 150% Extra Chaos Damage and Ignore Chaos Resistance. |
|||
| Trigger Level 20 Glimpse of Eternity when Hit (100-150)% increased Evasion and Energy Shield +(70-100) to maximum Life +(17-23)% to Chaos Resistance Gain (3-5)% of Elemental Damage as Extra Chaos Damage per Shaper Item Equipped Hits ignore Enemy Monster Chaos Resistance if all Equipped Items are Shaper Items |
|||
| Replica Eternity Shroud - it is a significantly weaker version than the original and would require a similar amount of effort. It is usually not worth the investment. |
|||
| Trigger Level 20 Shade Form when Hit (100-150)% increased Evasion and Energy Shield +(70-100) to maximum Life +(17-23)% to Chaos Resistance Gain (3-5)% of Physical Damage as Extra Chaos Damage per Elder Item Equipped Hits ignore Enemy Monster Chaos Resistance if all Equipped Items are Elder Items |
|||
 Saqawal's Nest - for most Builds, it is a convenient way to get Attributes and Mana Reservation. The best use for it is all 3 Attribute stacking Builds like Manaforged Attribute Stacking Inquisitor. Saqawal's Nest - for most Builds, it is a convenient way to get Attributes and Mana Reservation. The best use for it is all 3 Attribute stacking Builds like Manaforged Attribute Stacking Inquisitor. |
|||
| +(25-75) to all Attributes +(30-40)% to Lightning Resistance (12-20)% increased Mana Reservation Efficiency of Skills 100% increased Aspect of the Avian Buff Effect Aspect of the Avian also grants Avian's Might and Avian's Flight to nearby Allies +(120-150) to Evasion Rating and Energy Shield |
|||
 Doppelgänger Guise - it grants unfathomable amounts of Physical and Chaos Damage mitigation, as well as very solid Life Regeneration. It is not worth using it for offensive modifiers while Insane. The Unhinge Skill has no additional effects, its only purpose is to change your Sanity. Doppelgänger Guise - it grants unfathomable amounts of Physical and Chaos Damage mitigation, as well as very solid Life Regeneration. It is not worth using it for offensive modifiers while Insane. The Unhinge Skill has no additional effects, its only purpose is to change your Sanity. |
|||
| Grants Level 20 Unhinge Skill (40-60)% more Critical Strike Chance while Insane Enemies Killed by your Hits are destroyed while Insane (40-30)% less Physical and Chaos Damage Taken while Sane Regenerate 10% Life over one second when Hit while Sane |
|||
 Inpulsa's Broken Heart - is a great way to immensely boost your Map Clear. All Shocked Enemies will Explode on death, and you can boost it with the Storm's Gift Gloves or Shock Proliferation. It is a very popular choice for various Autobombers. Inpulsa's Broken Heart - is a great way to immensely boost your Map Clear. All Shocked Enemies will Explode on death, and you can boost it with the Storm's Gift Gloves or Shock Proliferation. It is a very popular choice for various Autobombers. |
|||
| +(60-80) to maximum Life (20-50)% increased Damage if you have Shocked an Enemy Recently (15-25)% increased Effect of Shock Shocked Enemies you Kill Explode, dealing 5% of their Life as Lightning Damage which cannot Shock Unaffected by Shock |
|||
 Tinkerskin - greatly improves the Quality of Life of any Trap Build. It grants you strong sustain, Frenzy Charges, and almost permanent Phasing. We have used it in our Explosive Trap Saboteur Build with great success! Tinkerskin - greatly improves the Quality of Life of any Trap Build. It grants you strong sustain, Frenzy Charges, and almost permanent Phasing. We have used it in our Explosive Trap Saboteur Build with great success! |
|||
| (140-170)% increased Evasion and Energy Shield +(60-90) to maximum Life (10-15)% increased Cooldown Recovery Rate for throwing Traps 15% chance to gain a Frenzy Charge when your Trap is triggered by an Enemy 30% chance to gain Phasing for 4 seconds when your Trap is triggered by an Enemy Recover 100 Life when your Trap is triggered by an Enemy Recover 50 Energy Shield when your Trap is triggered by an Enemy |
|||
 The Restless Ward - it is sometimes used by Righteous Fire characters with many Endurance Charges for great amounts of Life Regeneration, but it is an overall weak Item. The Restless Ward - it is sometimes used by Righteous Fire characters with many Endurance Charges for great amounts of Life Regeneration, but it is an overall weak Item. |
|||
| +(20-25) to maximum Mana (220-250)% increased Evasion and Energy Shield +(60-80) to maximum Life 4% increased Movement Speed per Frenzy Charge Regenerate 75 Life per second per Endurance Charge (100-200)% increased Endurance, Frenzy and Power Charge Duration |
|||
| Replica Restless Ward - it is even worse than the original. You might get more Life Regeneration here, but you lose out on benefits from Endurance Charges. |
|||
| +(20-25) to maximum Mana (220-250)% increased Evasion and Energy Shield +(60-80) to maximum Life 6% increased Movement Speed per Frenzy Charge -2 to Maximum Endurance Charges -2 to Maximum Frenzy Charges Regenerate (100-140) Life per second per Endurance Charge |
|||
 Shroud of the Lightless - very strong Unique that enables an entire way of scaling Damage through Abyss Sockets. On its own, it is rather weak, but some Builds are capable of reaching over 15 Abyss Jewels for great effect! You can fit it in most Elemental or Physical Conversion Builds. Shroud of the Lightless - very strong Unique that enables an entire way of scaling Damage through Abyss Sockets. On its own, it is rather weak, but some Builds are capable of reaching over 15 Abyss Jewels for great effect! You can fit it in most Elemental or Physical Conversion Builds. |
|||
| Has 3 Abyssal Sockets Penetrate 4% Elemental Resistances per Abyss Jewel affecting you 20% chance to Trigger Level 20 Shade Form when you Use a Socketed Skill (160-180)% increased Evasion and Energy Shield 1% increased Maximum Life per Abyss Jewel affecting you 1% increased Maximum Mana per Abyss Jewel affecting you |
|||
| Replica Shroud of the Lightless - vastly different from the original, it can be used to stack even more Abyssal Sockets. It can be strong in some niche cases but requires a very specific setup. |
|||
| Has 6 Abyssal Sockets | |||
 Stasis Prison - extremely powerful Armour, it provides tons of Life Recovery in the form of Recoup. The most popular way of using it is with Forbidden Rite to mitigate self-inflicted Damage. Stasis Prison - extremely powerful Armour, it provides tons of Life Recovery in the form of Recoup. The most popular way of using it is with Forbidden Rite to mitigate self-inflicted Damage. |
|||
| (140-160)% increased Evasion and Energy Shield +(80-100) to maximum Life Temporal Rift has no Reservation (80-100)% of Damage taken Recouped as Life Debuffs on you expire (80-100)% faster |
 Bloodbond - it is the only way to gain Blood Offering, which sacrifices 20% of your maximum Life to grant tons of Life Regeneration for Minions. Overall, it is a bad Item and shouldn't be used.
| Armour/Evasion/Energy Shield Body Armours | |||
 Shadowstitch - you can randomly obtain it by using Locus of Corruption in Alva's Temple on a Normal Quality Sacrificial Garb. It is a very generic and good Item for Builds that don't require particular modifiers on their Body Armour. If you Corrupt your other Items, it will grant you decent amount of Life, but take away your Resistances. Shadowstitch - you can randomly obtain it by using Locus of Corruption in Alva's Temple on a Normal Quality Sacrificial Garb. It is a very generic and good Item for Builds that don't require particular modifiers on their Body Armour. If you Corrupt your other Items, it will grant you decent amount of Life, but take away your Resistances. |
|||
| <2 Random corrupted implicit modifiers> Has an additional Implicit Mod +(20-30) to all Attributes (250-350)% increased Armour, Evasion and Energy Shield Recover (3-5)% of Life on Kill Recover (3-5)% of Energy Shield on Kill -(6-4)% to all Resistances for each Corrupted Item Equipped 8% increased Maximum Energy Shield for each Corrupted Item Equipped 6% increased Maximum Life for each Corrupted Item Equipped Item has 6 Sockets and is fully linked (Hidden) |
|||
|
|
|||
| +1 to Level of all Vaal Skill Gems (270-340)% increased Armour, Evasion and Energy Shield +(20-24)% to all Elemental Resistances Gain 100 Life per Enemy Killed Gain 100 Mana per Enemy Killed |
 Atziri's Splendour - there are many variants of this Item that differentiate in Defense Values. The most popular one is the Energy Shield and Evasion based on a Trickster Class that gets extra Energy Shield based on the Evasion. But even then, it is a rather weak Item.
 | No Defence Body Armours | |||
 Tabula Rasa - iconic levelling Armour, it allows you to use a 6-link setup without wasting any Fusings. It doesn't provide any other modifiers, so should be replaced rather quickly. Tabula Rasa - iconic levelling Armour, it allows you to use a 6-link setup without wasting any Fusings. It doesn't provide any other modifiers, so should be replaced rather quickly. |
|||
| Item has no level requirement and Energy Shield (Hidden) Item has 6 White Sockets and is fully linked (Hidden) |
|||
 Skin of the Loyal - very strong Armour for many Spell Casters. It doesn't provide any Defenses on its own, but greatly boosts the Defenses you have on your other Items and from your Auras and Flasks. Skin of the Loyal - very strong Armour for many Spell Casters. It doesn't provide any Defenses on its own, but greatly boosts the Defenses you have on your other Items and from your Auras and Flasks. |
|||
| Item has no level requirement and Energy Shield (Hidden) Sockets cannot be modified +1 to Level of Socketed Gems 100% increased Global Defences Item has 6 Sockets and is fully linked (Hidden) |
|||
|
|
|||
| Item has no level requirement and Energy Shield (Hidden) Sockets cannot be modified +2 to Level of Socketed Gems 100% increased Global Defences You can only Socket Corrupted Gems in this item Item has 6 Sockets and is fully linked (Hidden) <Random Keystone> |
 Skin of the Lords - you can upgrade the previous Armour with Blessing of Chauyla. You gain an additional level for Socketed Gem and a Random Keystone which may benefit or hurt your Build. It is a very important Armour for every
| Drop-disabled Body Armours | |||
 Demigod's Dominance - you can obtain it only as a reward from official Events, or by buying it from other players who happen to win such Events. It is used purely as a show-off Armour and held very high collector value. Demigod's Dominance - you can obtain it only as a reward from official Events, or by buying it from other players who happen to win such Events. It is used purely as a show-off Armour and held very high collector value. |
|||
| +(15-25)% to all Elemental Resistances +1 to Level of Socketed Gems +(30-50) to all Attributes |
|||
 Fox's Fortune - obtainable only on Standard League, it is a left-over from Prophecy League. There is no reason to pursue this Armour. Fox's Fortune - obtainable only on Standard League, it is a left-over from Prophecy League. There is no reason to pursue this Armour. |
|||
| (+(20-30) to Dexterity Adds 5 to 12 Physical Damage to Attacks +1500 to Evasion Rating while on Full Life +(400-500) to Evasion Rating (120-150)% increased Evasion Rating 10% increased Movement Speed Damage of Enemies Hitting you is Unlucky while you are on Full Life |
|||
|
|
|||
| +(30-40) to Strength +(30-40) to Intelligence (140-160)% increased Armour and Energy Shield +(50-75)% to Cold Resistance Cannot be Chilled 20% of Physical Damage from Hits taken as Cold Damage 30% of Fire Damage from Hits taken as Cold Damage (15-20)% increased Effect of Cold Ailments |
|||
 Rotting Legion - it is a weak Item that got removed from Drop as nobody was using it. Rotting Legion - it is a weak Item that got removed from Drop as nobody was using it. |
|||
| Socketed Gems are Supported by Level 1 Meat Shield (100-140)% increased Armour and Energy Shield +(50-80) to maximum Life (5-8)% increased Damage per Raised Zombie 1% less Elemental Damage taken per Raised Zombie |
|||
 Viper's Scales - it could be used with the Golden Rule Jewel if you really needed it, but otherwise, it is bad. Viper's Scales - it could be used with the Golden Rule Jewel if you really needed it, but otherwise, it is bad. |
|||
| (80-100)% increased Armour and Evasion +(30-40) to maximum Life +(15-25)% to Cold Resistance 5% increased Movement Speed 20% chance to Poison on Hit with Attacks Cannot be Poisoned |
|||
| Adds 2 to 4 Physical Damage to Attacks +2000 to Armour +(30-60) to maximum Life -(15-10) Physical Damage taken from Attack Hits 1000% of Melee Physical Damage taken reflected to Attacker |
|||
| Wildwrap - it is a bit better version of Briskwrap, as it also has some Attack Speed, however, it can only be traded on Standard League, which makes it pretty irrelevant. |
|||
| 10% increased Attack Speed +(600-700) to Evasion Rating +(30-40)% to Cold Resistance 5% increased Movement Speed (60-100)% increased Mana Recovery from Flasks 15% increased Dexterity 1% increased Damage per 15 Dexterity |
If you have any other Article requests please leave that in the comments below. We are always open to suggestions and constructive feedback.
Pictures used in this article are the intellectual property of Grinding Gear Games.
