Omni Tornado Shot Deadeye Build
True Meta build that uses Crystallised Omniscience to penetrate Elemental Resistances with Tornado ShotOmni Tornado Shot
Deadeye build
Updated for Patch 3.24
The Best Crafty Guides by Odealo
| Guide notes | |||
| June 13, 2024 -Updated for Patch 3.24 |
|||
| Build overview | |||
| Tags: [RANGED] [ELEMENTAL] [LIFE] | |||
|
Budget: Defenses: |
|
Boss DPS: AoE: |
|
Tornado Shot is one of the most popular Bow Skills, it does not need an introduction. Omniscience refers to the stats granted by the Crystallised Omniscience Amulet, it's transformed Strength, Dexterity, and Intelligence combined. It makes you penetrate all Elemental Resistances of your opponents, all give your character Elemental Resistances. You will no longer get Accuracy or Evasion from the usually-abundant Dexterity, you will need to get some more of it from your gear, but that's no issue. This type of build underlines the importance of Attribute-stacking, the more of it you have, the more damage and Resistances you will get. It's even possible to have no Resistances in all of your gear pieces, which is actually the preferable option, as both - Resistances and Attributes are Suffixes and vie for this turf, not to mention there's also Spell Suppression to get there.
There are two ways to approach this build - to go for mixed damage with Trinity, or to completely convert all your damage to cold. For a Trinity version, the physical damage does not have to be converted by equipping the anomalous version of a tornado shot, the regular one is good. With trinity, the majority of your damage will be elemental from the start. it is accomplished by seeking modifiers for added fire, cold, and lightning damage. the bow will play a huge role here, but The purely cold Damage version needs an expensive bow too, one that deals physical damage. In the cold version, you will need to convert all that Damage to Cold - it can be usually done with the already-mentioned Cold Mastery, Rare Gloves, or even Watcher's Eye. This guide will cover both versions, It's hard to say which one is better or cheaper, it depends on the price trends and item availability.
The survivability is not a priority here, as it is not for any Deadeye build, but you can still benefit from around 20k of Evasion on top of 3 or 4k of Maximum Life. Grace is an obligatory Aura, but there may not be enough space for Determination. The easiest solution to the fragility issue may be gaining the Wind Ward Keystone from a pair of Forbidden Jewels. As for the Ascendancy itself, pick the most standard Ricochet, Endless Munitions, Gathering Winds, and Focal Point. It will make the build extremely fast and deadly, perfectly suited for fast mapping and killing the regular bosses. It is however not suited to deal with Uber Bosses. The build is very expensive.
You can also check our other Path of Exile builds right over here Odealo's Crafty Guides - Full List
1. Gameplay
Use the Tornado Shot to deal with all kinds of opponents. The secondary setup that consists of Ballista Totem Tornado Shot can be deployed during boss fights. Sniper's Mark should be triggered automatically with Mark on Hit Support. Use Blood Rage as well to generate Frenzy Charges, gain Life Leech, and Attack Faster. To gain Power Charges and Onslaught use Manaforged Arrows setup. For Auras, use Grace, Hatred, Precision, and Herald of Purity. If you went for the Trinity version, you don't have to use Hatred - you can use Determination or a Defiance Banner instead.
|
|
|
|

2. Build's PROS & CONS
| PROS |
|
| CONS |
|
3. Leveling tips
Start with Ice or Lightning Shot - you can easily get extra Cold Damage from your Passive Skill Tree and convert the remaining 40% of Damage with one Cold Mastery. You can level up this way until yellow or red maps, so at this point, you should be able to equip all the necessary items. You can switch to Tornado Shot at a low level, given you can easily convert the Damage to Cold. Hrimsorrow Gloves may be good for this purpose. Most Unique Bows will be very good. Keep your Elemental Resistances High and remember to pick Maximum Life from the Skill Tree. Seek mostly added Physical or Cold Damage on the items.
Suggested leveling Gem setups:
| Ice Shot setup | |
 |
Ice Shot - It's available since level 1, it has nice are Damage and can be used indefinitely. |
 |
Mirage Archer Support - Creates a copy of your character which uses the same Attack but it's less efficient. |
 |
Added Cold Damage Support - Adds flat Cold Damage to your Attacks for more Damage |
 |
Greater Multiple Projectiles Support - Allows you to Fire extra Projectiles for better area coverage. |
 |
Hypothermia Support - You deal more Damage against Chilled enemies, and Chilling them with Hits is more probable. |
 |
Elemental Damage with Attacks Support - More and increased Elemental Damage with Attacks. |
| Utility Gems | |
 |
Frost Bomb - Applies Cold Exposure and reduces Life Regeneration. Useful during boss fights. |
 |
Herald of Ice - Adds more Cold Damage for your Attacks, and shatters Frozen enemies for extra area damage. |
 |
Hatred - Use it for More Cold Damage, especially good in conversion builds such as this one. |
 |
Precision - increases your Accuracy Rating and Critical Strike Chance. |
 |
Flame Dash - A basic movement Spell that allows you to move faster. |
 |
Sniper's Mark - Marked enemies receive more Projectile Damage. Link it with  Mark on Hit Support. Mark on Hit Support. |
Bandits:
You should kill all the Bandits and take two more Passive Skill Points
Leveling Skill Trees:
30 Points Skill Tree
Pick up some Bow, Projectile, and Elemental Damage, then some Maximum Life with Evasion
65 Points Skill Tree
Go for Charisma for more Reseravion Efficiency, Utmost Swiftness for Dexterity, and some more Maximum Life
Recommended leveling items:
 Le Heup of All - Increases Damage, adds Attributes, and Elemental Resistances. Le Heup of All - Increases Damage, adds Attributes, and Elemental Resistances. |
|
| (10-30)% increased Damage +(10-30) to all Attributes (10-30)% increased Rarity of Items found +(10-30)% to all Elemental Resistances |
|
 Tasalio's Sign - Adds tons of Cold Damage, a lot of Evasion, Cold Resistance, a 10% Chance to Freeze, and Chill avoidance. Tasalio's Sign - Adds tons of Cold Damage, a lot of Evasion, Cold Resistance, a 10% Chance to Freeze, and Chill avoidance. |
|
| +(20-30)% to Cold Resistance Adds (7-10) to (15-20) Cold Damage to Spells and Attacks +(200-300) to Evasion Rating 50% chance to Avoid being Chilled 10% chance to Freeze Adds 40 to 60 Cold Damage against Chilled Enemies |
 Goldrim - Gives you tons of Elemental Resistances. Goldrim - Gives you tons of Elemental Resistances. |
|
| +(30-50) to Evasion Rating 10% increased Rarity of Items found +(30-40)% to all Elemental Resistances Reflects 4 Physical Damage to Melee Attackers Level Requirement reduced by 100 (Hidden) |
 Tabula Rasa - A Body Armour with six, linked, white sockets. Tabula Rasa - A Body Armour with six, linked, white sockets. |
|
| Item has no level requirement and Energy Shield (Hidden) Item has 6 White Sockets and is fully linked (Hidden) |
 Prismweave - Consider using this Belt as it adds all the types of Elemental damage to your Attacks. Prismweave - Consider using this Belt as it adds all the types of Elemental damage to your Attacks. |
|
| (12-24)% increased Global Physical Damage Adds (7-8) to (15-16) Fire Damage to Attacks Adds (5-6) to (12-14) Cold Damage to Attacks Adds 1 to (30-34) Lightning Damage to Attacks +(6-8)% to all Elemental Resistances 30% increased Elemental Damage with Attack Skills during any Flask Effect 10% increased Elemental Damage with Attack Skills |
|
 Hrimsorrow - Consider using it to convert all your Cold Damage to Cold. Hrimsorrow - Consider using it to convert all your Cold Damage to Cold. |
|
| +(20-30) to Strength +(40-50) to Evasion Rating +(20-30)% to Cold Resistance 100% of Physical Damage Converted to Cold Damage Reflects 100 Cold Damage to Melee Attackers |
|
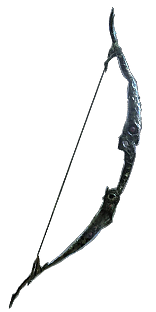
 Doomfletch - It has great stats on its own and additionally grants you the Elemental Damage of a random Element. Doomfletch - It has great stats on its own and additionally grants you the Elemental Damage of a random Element. |
|
| (20-24)% increased Elemental Damage with Attack Skills Adds (12-16) to (20-24) Physical Damage (10-14)% increased Attack Speed 60% increased Mana Regeneration Rate Gain 100% of Weapon Physical Damage as Extra Damage of a random Element |
|
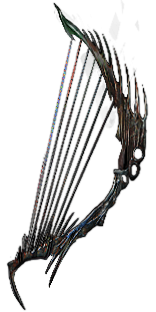 Death's Harp - An amazing Bow that has relatively high Damage, Attack Speed, and fires 2 additional arrows. Death's Harp - An amazing Bow that has relatively high Damage, Attack Speed, and fires 2 additional arrows. |
|
| (30-50)% increased Critical Strike Chance (90-105)% increased Physical Damage 10% increased Attack Speed +50% to Global Critical Strike Multiplier Bow Attacks fire 2 additional Arrows |
4. Final Skill Tree, Ascendancy Points, and Pantheon
Final Skill Tree:
87 Points Final Skill Tree (doesn't include Unique or Cluster Jewels)
123 Points Path of Building (PoB) link
Ascendancy points:
Preferably in that order:
- Ricochet
- Endless Munitions
- Gathering Winds
- Focal Point
Pantheon:
Major God: Soul of the Brine King: You cannot be Stunned if you've been Stunned or Blocked a Stunning Hit in the past 2 seconds
Minor God: Soul of Garukhan: 60% reduced Effect of Shock on you
5. Final Gems links
| [DPS] Tornado Shot setup | |
 |
Tornado Shot - The main Attack you will use. It fires multiple Arrows that then "split" into three Arrows each. These secondary arrows can hit the same target if originated from a different primary Arrow. Use the Anomalous version if you plan to include Trinity Support AND have a bow with tons of Physical damage, and if not - the Divergent. |
|
Elemental Damage with Attacks Support - Increased and more Elemental Damage with Attacks. |
 |
Inspiration Support - Reduced Mana Cost, Increased Elemental Damage, and Critical Strike Chance. |
 |
Increased Critical Damage Support - Your Critical Strike Chance should reach 100%, or be very close to it. Use this Gem for more Critical Damage. |
|
Greater Multiple Projectiles Support - Use it to fire more Projectiles. Tornado Shot scales great with the number of Arrows even against single targets. |
 |
Vicious Projectiles Support - Use it for more Physical Damage, later converted to Cold. Replace it with  Trinity Support if you plan to use it. Trinity Support if you plan to use it. |
| [DPS] Ballistic Tornado Shot setup | |
|
Tornado Shot - Another Tornado Shot, here it is used by Ballista Totems. |
 |
Ballista Totem Support - The linked Bow Attack is used By Ballistas you can place, three by default. |
 |
Focused Ballista Totem Support - Ballista Totems will fire as your character does, so much faster than their default Attack Rate allows them to. |
|
Elemental Damage with Attacks Support |
|
Greater Multiple Projectiles Support |
|
Inspiration Support |
| [UTILITY] Various Gems | |
|
Sniper's Mark - By far the best Curse/Mark, it makes the target receive increased Projectile Damage, and splits the Projectiles Hitting it. |
 |
Blood Rage - Use it for an increased Attack Spee, Life Leech, and Frenzy Charges on Kill. It drains your Life. |
|
Mark on Hit Support - Sniper's Mark will be applied automatically on Hit against though enemies. |
|
Precision - Adds Accuracy Rating and Increases Critical Strike Chance. If you have spare Mana, try to level it all the way up. |
| [UTILITY] Auras setup | |
 |
Grace - Use Grace for more and increased Evasion Rating. |
|
Hatred - Hatred grants more Cold Damage and adds extra Physical Damage as Cold. It's great if you have a Bow with a lot of Physical Damage, but if you plan to use Trinity Support in your Tornado Shot setup, you already need a Bow with a lot of added Elemental Damage, so it may not be suitable.  Determination is another good option to use instead, it grants you more Armour. Herald of Ice can be used for more DPS. Determination is another good option to use instead, it grants you more Armour. Herald of Ice can be used for more DPS. |
 |
Herald of Purity - Grants more Physical Damage, later converted to Cold. It's not very good in the Trinity version as your base Physical Damage is not high, to begin with. If that's the case, use  Anger instead. Anger instead. |
 |
Enlighten Support - Increases Mana Reservation Efficiency for all linked Skills. |
| [UTILITY] Manaforged Arrows setup | |
 |
Manaforged Arrows Support - Linked Bow Attacks are triggered as you spend enough Mana on other Bow Attacks. |
 |
Frenzy of Onslaught - Consumes Frenzy Charges and grants you Onslaught. |
 |
Ensnaring Arrow - Ensaners enemy so that it takes increased damage and moves slower. |
 |
Power Charge on Critical Support - Linked Skills have a chance of generating a Power Charge on Critical Strike. |
|
|
5. Gear Setup
Crystallised Omniscience completely changes many aspects of how you gear up. You should be able to get around 2000 Omniscience with a min-maxed gear, maybe even 2,5k in extreme cases. The Unique gear pieces, besides the amulet, are all optional, but the most popular option seems to be a well-rolled Black Sun Crest. The build is often used with Headhunter Belt as it fits really well into this insanely-fast-mapper archetype. Rare Items are in most cases the best options. Remember that you don't want items that scale up with Attributes, as you don't have any Attributes. Most Items should have a Prefix with Maximum Life and Suffixes with Attributes and Spell Suppression. Chaos Resistance may be an issue as it's also gained from Suffixes, so to avoid it use a Flask or proper Patheon options. The best source of Accuracy is Precision, but it can also be found in Rings, Helmet, Gloves, Amulet, and Bow. Damage penetration is not very useful here, you don't need to apply Exposure. You already Penetrate a lot of Elemental Resistances. Focus more on Added Damage, Critical Strike mods, and Attack Speed instead.
Our recommended items will:
- Cap your resistances
- Give you enough DPS/Life to start mapping successfully
|
Stat priorities on items:
|
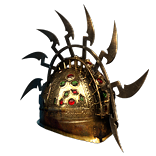 (Helmet) Black Sun Crest - Black Sun Crest with all the modifiers for Attributes at over 11 or 12% would be very good. You can socket your Aruas here for an extra Gem Level, which includes Enlighten Support. (Helmet) Black Sun Crest - Black Sun Crest with all the modifiers for Attributes at over 11 or 12% would be very good. You can socket your Aruas here for an extra Gem Level, which includes Enlighten Support. |
|
| +1 to Level of Socketed Gems (100-150)% increased Armour 40% reduced Light Radius (5-15)% increased Dexterity (5-15)% increased Strength (5-15)% increased Intelligence |
|
 (Helmet) Rare Helmet - Black Sun Creast is almost always better, but a Rare Helmet may be somewhat good too. You can look for the Hunter's Suffix for increased Intelligence, reduced Mana Cost of Attack or increased movement speed as Eldritch red Implicit, and increased Effect of Non-Damaging Ailments as Eldritch blue Implicit. (Helmet) Rare Helmet - Black Sun Creast is almost always better, but a Rare Helmet may be somewhat good too. You can look for the Hunter's Suffix for increased Intelligence, reduced Mana Cost of Attack or increased movement speed as Eldritch red Implicit, and increased Effect of Non-Damaging Ailments as Eldritch blue Implicit. |
|
| Min. requirements: +80 to maximum Life Attributes Optional affixes: Elemental Resistances increased Intelligence (up to 12%) Accuracy Rating Nearby Enemies have -9% to Elemental Resistance |
|
| Helmet enchantments: Tornado Shot enchantment |
|
 (Weapon) Rare Bow - If you plan to convert all your Damage to Cold, pick a Bow with the most Physical DPS you can afford. If you want to use Trinity to generate Resonance, you will need a Bow with added Fire, Cold or Lightning Damage to Attacks. Both are very expensive. You can also play the trinity version with a physical bow, and that would require the anomalous tornado shot. (Weapon) Rare Bow - If you plan to convert all your Damage to Cold, pick a Bow with the most Physical DPS you can afford. If you want to use Trinity to generate Resonance, you will need a Bow with added Fire, Cold or Lightning Damage to Attacks. Both are very expensive. You can also play the trinity version with a physical bow, and that would require the anomalous tornado shot. |
|
| Min. requirements (Trinity): Adds # Fire, Cold, and Lightning Damage 10% increased Attack Speed Bow Attacks fire 2 additional Arrows Min. requirements (Cold): as much Physical DPS as you can 10% increased Attack Speed Bow Attacks fire 2 additional Arrows Optional affixes: Critical Strike Chance Critical Strike Multiplier increased Accuracy Rating Chance to gain Phasing on Kill |
|
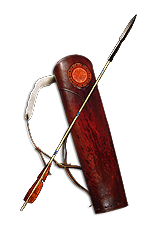 (Weapon) Rare Quiver - There are a lot of good affixes and bases for a Quiver, the most important are Maximum Life and "Bow Attacks fire an additional Arrow". As was the case with a Bow, you can get the Added Physical or Elemental Damage here too. (Weapon) Rare Quiver - There are a lot of good affixes and bases for a Quiver, the most important are Maximum Life and "Bow Attacks fire an additional Arrow". As was the case with a Bow, you can get the Added Physical or Elemental Damage here too. |
|
| Min. requirements: 60 maximum Life Bow Attacks fire an additional Arrow Optional affixes: Critical Strike Chance Dexterity Adds Physical or Elemental Damage to Attacks Accuracy Rating increased Damage with Bow Skills Gain #% of Physical Damage as Extra Cold Damage |
|
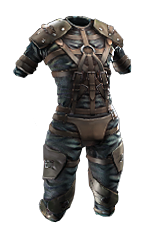 (Body Armour) Rare Body Armour - Get more Life, Critical Strike Chance, and Attributes via Attributes or the regular Suffixes. For the Eldritch Implicits, you can get an increased Effect of Auras. (Body Armour) Rare Body Armour - Get more Life, Critical Strike Chance, and Attributes via Attributes or the regular Suffixes. For the Eldritch Implicits, you can get an increased Effect of Auras. |
|
| Min. requirements: 100 maximum Life Attributes Attacks have +1% to Critical Strike Chance Optional affixes: increased Armour and Evasion Chance to Suppress Spell Damage Evasion Rating Elemental Resistances |
|
 (Body Armour) Hyrri's Ire - It's an Armour that adds Tons of Cold Damage which may make it difficult to generate Resonances, but if that's not a problem, it's a quite good Armour. Might be even cheaper than a comparable Rare one. (Body Armour) Hyrri's Ire - It's an Armour that adds Tons of Cold Damage which may make it difficult to generate Resonances, but if that's not a problem, it's a quite good Armour. Might be even cheaper than a comparable Rare one. |
|
| +(40-50) to Dexterity (140-220)% increased Evasion Rating 25% increased Chill Duration on Enemies (105-145) to (160-200) Added Cold Damage with Bow Attacks +30% chance to Suppress Spell Damage |
|
 (Boots) Rare Boots - Boots can get you increased Movement Speed, Life, Attributes, Suppression, and for the more sophisticated pair of Boots get the rare mods for Elusive and Onslaught buffs. (Boots) Rare Boots - Boots can get you increased Movement Speed, Life, Attributes, Suppression, and for the more sophisticated pair of Boots get the rare mods for Elusive and Onslaught buffs. |
|
| Min. requirements: 30% increased Movement Speed 70 maximum Life 50 Attributes Optional affixes: Elemental Resistances Spell Suppression Chance chance to gain Elusive on Critical Strike chance to gain Onslaught for 4 seconds on Kill Chance to Avoid Elemental Ailments |
|
 (Gloves) Rare Gloves - If you plan to convert all of your Damage to Cold, Gloves will be expensive. These need to cover the remaining 60% of Physical Damage, as the Cold mastery converts only 40%. Use a Crafted mod combined with Eldritch blue Implicit. If you play the Trinity version with Anomalous Tornado Shot, you won't need any conversion from Gloves. Get Attributes, Maximum Life, Attack Speed, Accuracy, and Spell Suppression. (Gloves) Rare Gloves - If you plan to convert all of your Damage to Cold, Gloves will be expensive. These need to cover the remaining 60% of Physical Damage, as the Cold mastery converts only 40%. Use a Crafted mod combined with Eldritch blue Implicit. If you play the Trinity version with Anomalous Tornado Shot, you won't need any conversion from Gloves. Get Attributes, Maximum Life, Attack Speed, Accuracy, and Spell Suppression. |
|
| Min. requirements: 50 maximum Life Attributes Optional affixes: Accuracy Rating Damage Conversion to Cold Added Fire, Lightning, or Cold Damage to Attacks Chance to Suppress Spell Damage Life or Mana Leech increased Attack Speed |
|
 (Belt) Rare Belt - It can grant you some great stats such as increased Elemental Damage with Attacks, Strength, or a lot of Maximum Life (Belt) Rare Belt - It can grant you some great stats such as increased Elemental Damage with Attacks, Strength, or a lot of Maximum Life |
|
| Min. requirements: 60 maximum Life 40% increased Elemental Damage with Attack Skills 40 Strength Optional affixes: Chaos Resistance Elemental Resistances increased maximum Life |
|
 (Amulet) Crystallised Omniscience - The core element of the build. It transforms your Attributes into Omniscience. (Amulet) Crystallised Omniscience - The core element of the build. It transforms your Attributes into Omniscience. |
|
| +(10-16) to all Attributes Modifiers to Attributes instead apply to Omniscience +1% to all Elemental Resistances per 15 Omniscience Penetrate 1% Elemental Resistances per 15 Omniscience Attribute Requirements can be satisfied by (15-25)% of Omniscience |
|
| Recommended Anointments: Sovereignty Utmost Intellect Utmost Might Divine Judgement |
|
 (Ring) Rare Ring - Rings offer a huge variety of mods, the most beneficial are Attributes, Life, and added Elemental Damage to Attacks. Mostly Attributes. (Ring) Rare Ring - Rings offer a huge variety of mods, the most beneficial are Attributes, Life, and added Elemental Damage to Attacks. Mostly Attributes. |
|
| Min. requirements: 50 to Maximum Life 100 Attributes Optional affixes: increased Elemental Damage with Attack Skills Added Fire, Lightning, or Cold Damage to Attacks Elemental Resistances Accuracy Rating Chaos Resistance Non-Channelling Skills have -7 to Total Mana Cost (crafted) |
|
 (Jewel) Rare Jewels - You can use these to patch the build with the missing stats and to further increase your damage and survivability. (Jewel) Rare Jewels - You can use these to patch the build with the missing stats and to further increase your damage and survivability. |
|
| Recommended affixes: increased maximum Life Elemental Resistances increased Fire/Cold/Lightning Damage with Attacks/Bows Attributes increased Evasion Rating |
|
 (Jewel) Large Cluster Jewel - Feed the Fury, Fuel the Fight, and Martial Prowess is an excellent combination of Notables found on Attack-type Large Cluster Jewels, but Elemental Damage ones can have some good ones too. (Jewel) Large Cluster Jewel - Feed the Fury, Fuel the Fight, and Martial Prowess is an excellent combination of Notables found on Attack-type Large Cluster Jewels, but Elemental Damage ones can have some good ones too. |
|
| Recommended affixes: 1 Added Passive Skill is Prismatic Heart 1 Added Passive Skill is Widespread Destruction 1 Added Passive Skill is Feed the Fury 1 Added Passive Skill is Fuel the Fight 1 Added Passive Skill is Martial Prowess |
|
 (Jewel) Medium Cluster Jewel - You can either go for Critical Strike passives or Attack Speed with Projectile Damage. (Jewel) Medium Cluster Jewel - You can either go for Critical Strike passives or Attack Speed with Projectile Damage. |
|
| Recommended affixes: 1 Added Passive Skill is Basics of Pain 1 Added Passive Skill is Pressure Points 1 Added Passive Skill is Repeater 1 Added Passive Skill is Streamlined |
|
 (Jewel) Lethal Pride - Lethal Pride is better than Brutal Restrain as the notable modifiers it grants are often more useful. Both of these Historic Jewels can be used for more Attributes, but you can have only one equipped. Socket it near Fervour. (Jewel) Lethal Pride - Lethal Pride is better than Brutal Restrain as the notable modifiers it grants are often more useful. Both of these Historic Jewels can be used for more Attributes, but you can have only one equipped. Socket it near Fervour. |
|
| Denoted service of (500-8000) dekhara in the akhara of (Asenath-Balbala-Nasima) Passives in radius are Conquered by the Maraketh Historic |
|
 (Jewel) The Interrogation - You can no longer Ignite, Chill, Freeze, and Shock, but instead, your Critical Strikes will cause Scorch, Brittle, and Sapped Ailmets, These are better, especially after some investment into non-damaging Ailments. (Jewel) The Interrogation - You can no longer Ignite, Chill, Freeze, and Shock, but instead, your Critical Strikes will cause Scorch, Brittle, and Sapped Ailmets, These are better, especially after some investment into non-damaging Ailments. |
|
| Adds Secrets of Suffering | |
 (Jewel) Lioneye's Fall - It can be put in a socket between Infused and Frenetic to take advantage of the Claw and Dagger nodes and Masteries nearby, but it's optional. (Jewel) Lioneye's Fall - It can be put in a socket between Infused and Frenetic to take advantage of the Claw and Dagger nodes and Masteries nearby, but it's optional. |
|
| Melee and Melee Weapon Type modifiers in Radius are Transformed to Bow Modifiers | |
 (Jewel) Thread of Hope - A Thread of Hope with the Massive Ring can be socketed near Supreme Ego, it would grant you access to around 13 great nodes, some of which overlap with the historic Jewell's radius. (Jewel) Thread of Hope - A Thread of Hope with the Massive Ring can be socketed near Supreme Ego, it would grant you access to around 13 great nodes, some of which overlap with the historic Jewell's radius. |
|
| Only affects Passives in Massive Ring Passives in Radius can be Allocated without being connected to your tree -(20-10)% to all Elemental Resistances |
|
 (Jewel) Watcher's Eye - Look for the Precision modifiers for more DPS, and if you have Hatred or Anger you can get some of the best ones like Critical Strike Chance, Multiplier, or Added Damage. One of Hatred's mods can also convert up to 40% of your Physical Damage to Cold if needed. (Jewel) Watcher's Eye - Look for the Precision modifiers for more DPS, and if you have Hatred or Anger you can get some of the best ones like Critical Strike Chance, Multiplier, or Added Damage. One of Hatred's mods can also convert up to 40% of your Physical Damage to Cold if needed. |
|
| (4-6)% increased maximum Energy Shield (4-6)% increased maximum Life (4-6)% increased maximum Mana <Two or Three random aura modifiers> |
|
 (Flask) Dying Sun - Your Skills fire two more Projectiles while you take less Fire Damage. (Flask) Dying Sun - Your Skills fire two more Projectiles while you take less Fire Damage. |
|
| +50% to Fire Resistance 20% less Fire Damage taken (125-150)% increased Charges per use (60-40)% less Duration (10-20)% increased Area of Effect during Flask Effect Skills fire 2 additional Projectiles during Flask Effect |
|
|
Other suggested Flasks:
|
|
    |
|
|
If you have any other build requests please leave that in the comments below. We are always open to suggestions and constructive feedback.
Pictures used in this article are the intellectual property of Grinding Gear Games.
