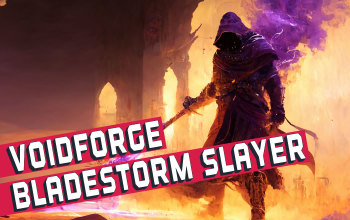
Voidforge Bladestorm Slayer Build
A very powerful Melee Build which uses the Voidforge Sword and Bladestorms to slice up your enemies!Voidforge Bladestorm
Slayer Build
Created for Patch 3.20
The Best Crafty Guides by Odealo
| Guide notes |
| February 26, 2023 -Build created |
| Build Overview | |||
| Tags: [MELEE] [ELEMENTAL] [LIFE] [CRIT] | |||
|
Budget: Defenses: |
|
Boss DPS: AoE: |
|
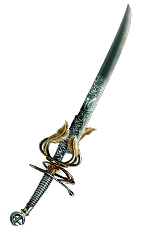
Voidforge is a very powerful Sword obtainable by defeating the Uber Elder in the Shaper's Realm. Its most distinguished modifier causes 700% of your Physical Damage to be added as Extra Cold, Fire, or Lightning Damage. In return, you cannot deal non-Elemental Damage at all. It also allows you to inflict Shocks with your Fire and Cold Damage. It has pretty low base Damage, so it works best when you add other sources of Physical Damage to your Attacks. It is a very versatile Sword that can be used with many various Skills. In this Build, we decided to use the Bladestorm. It's a strong wide-area Attack that creates up to 3 (or 4 with relevant Enchant) Bladestorms on the ground for a short duration, and they change their behavior depending on the Stance you are in. In the Sand Stance, the Storms will slowly travel toward nearby enemies while also granting you Movement Speed. On the other hand, being in the Blood Stance grants you a lot of Attack Speed and makes Storms stationary, so they can hit the same target more reliably. To change your Stances you have to use the Blood and Sand Aura, which also grants you a bonus Area of Effect or Area Damage depending on the Stance.
We are also using the new Eternal Damnation Amulet, which grants an enormous amount of Elemental Damage reduction based on your Chaos Resistance, but lowers your Maximum Resistances. To counter that last property, we are using the Lorewave Armour, which sets your Resistances to a fixed value, so it can't be lowered in any way. It also adds plenty of useful Stats such as Life, Added Physical Damage for your Attacks, or increased Elemental Damage and Critical Strike Chance. Thanks to that combination, you won't need to worry about Elemental Damage ever again. You should however be wary of Physical Damage, as we are also using the Abyssus Helmet. It has absolutely great synergy with the Voidforge, but it's a double-edged sword as it also increases the Physical Damage we take. Thanks to the other defensive layers, such as high Armour Rating, Fortify, or Damage reduction while Leeching (and your Leech never stops!), you are very tanky even when wearing that devious Helmet!
There is no replacement for the Voidforge - you need to have that Sword before you start this Build. Everything else is quite cheap to get and has a lot of room for improvement as you farm more Currency.
You can also check our other Path of Exile builds right over here Odealo's Crafty Guides - Full List
1. Gameplay
Your initial Hit with Bladestorm is enough to kill most monsters in your proximity, while Sandstorms finish off occasional strugglers. Thanks to the very high Movement Speed and Attack Speed on your Leap Slam you will quickly travel from pack to pack. For bosses and other tough opponents, you should change your Stance and use your Ancestral Warchief and Berserk to take them down in the blink of an eye.
|
|
|
|

2. Build's PROS & CONS
| PROS |
|
| CONS |
|
3. Leveling tips
Leveling is very smooth, as you can pick up a lot of useful Notables fairly quickly. You can use any Weapon you want, but Rare 2-Hander Swords works the best. You can get a decent Weapon for your Level Range by doing a specific Vendor Recipe. For more leveling tips, you can check out our Leveling Guide for Duelist!
Suggested leveling Gem setups:
| Bladestorm setup | |
 |
Splitting Steel - it's a very powerful Skill early on, and slowly falls off as you progress through the campaign. |
 |
Maim Support - Maiming your enemies will make them take more Damage from your Attacks. |
 |
Chance to Bleed Support - grants a lot of Physical Damage for your Attacks. Bleed is also useful, but it's only a minor improvement. |
 |
Vicious Projectiles Support - greatly improves your Damage but slightly lowers your Attack Speed. |
 |
Cruelty Support - a generic boost for all types of Damage you deal. |
 |
Faster Attacks Support - improves your Attack Speed so you can kill your opponents quicker! |
| Aura setup | |
 |
Determination - this Aura covers all your potential problems with Physical Damage dealt by enemies during the Campaign. Pair it with the Granite Flask for maximum results. |
 |
Clarity - you will need a bit of Mana Regeneration to sustain your Attacks. Mana Leech is quite ineffective at lower levels. |
| Utility setup | |
 |
Leap Slam - performs a jump that will always inflict Stun on new enemies. It can be used without Cooldown, but consecutive usage will be slightly slower. |
 |
Vulnerability - increases the Physical Damage taken by Cursed enemies. |
 |
Steelskin - protects you from incoming Damage and disables Bleeding Effects. |
Bandits:
Kill all Bandits to get additional 2 Passive Tree Skill Points
Leveling Skill Trees:
39 Points Passive Tree
We recommend this order:
1) Destroyer 2) Wrecking Ball 3) Golem's Blood 4) Blade Master 5) Juggernaut 6) Bloodless
Additional Passives just for leveling with Splitting Steel:
1) Fury Bolts
74 Points Passive Tree
Allocate:
1) Steadfast (and its Mastery) 2) Gladiator's Preservance 3) Heart of Oak 4) Herbalism 5) Blade of Cunning 6) Champion of the Cause 7) Dismembering
Recommended leveling items:
 Le Heup of All - it's a quite useful Ring that covers your Attribute and Resistance needs for the campaign. Le Heup of All - it's a quite useful Ring that covers your Attribute and Resistance needs for the campaign. |
|
| Adds 1 to 4 Physical Damage to Attacks +(10-30) to all Attributes (10-30)% increased Damage (10-30)% increased Rarity of Items found +(10-30)% to all Elemental Resistances |
|
 Goldrim - equipping this Helmet at level 1 greatly improves your defenses against Elemental Damage. Goldrim - equipping this Helmet at level 1 greatly improves your defenses against Elemental Damage. |
|
| +(30-50) to Evasion Rating 10% increased Rarity of Items found +(30-40)% to all Elemental Resistances Reflects 4 Physical Damage to Melee Attackers Level Requirement reduced by 100 (Hidden) |
 Tabula Rasa - you can use your 6-link setup very early thanks to this Armour. It provides nothing else. Tabula Rasa - you can use your 6-link setup very early thanks to this Armour. It provides nothing else. |
|
| Item has no level requirement and Energy Shield (Hidden) Item has 6 White Sockets and is fully linked (Hidden) |
|
 Oni-Goroshi - one of the best Weapons as it will serve you for your whole journey. It gains power as your Character levels up. You will need to cap your Fire Resistance at all times. Oni-Goroshi - one of the best Weapons as it will serve you for your whole journey. It gains power as your Character levels up. You will need to cap your Fire Resistance at all times. |
|
| Uses both hand slots (70-90)% increased Critical Strike Chance Adds 2 to 3 Physical Damage to Attacks per Level Gain Her Embrace for 3 seconds when you Ignite an Enemy While in Her Embrace, take 0.5% of your total Maximum Life and Energy Shield as Fire Damage per second per Level |
|
 Limbsplit - another very strong Weapon available at level 13. You can Socket Support Gems in it to improve the Gore Shockwave and trigger it with Leap Slam for very smooth early-game progression. Limbsplit - another very strong Weapon available at level 13. You can Socket Support Gems in it to improve the Gore Shockwave and trigger it with Leap Slam for very smooth early-game progression. |
|
| +1 to Level of Socketed Strength Gems Trigger Level 1 Gore Shockwave on Melee Hit if you have at least 150 Strength +(15-30) to Strength (80-100)% increased Physical Damage Adds 5 to 10 Physical Damage Culling Strike |
|
 Thief's Torment - it grants amazing Mana and Life sustain, but you won't be able to use second Ring. Thief's Torment - it grants amazing Mana and Life sustain, but you won't be able to use second Ring. |
|
| +(8-10)% to all Elemental Resistances (10-16)% increased Quantity of Items found Can't use other Rings +(25-40)% to all Elemental Resistances Gain (40-60) Life per Enemy Hit with Attacks Gain 30 Mana per Enemy Hit with Attacks 50% reduced Effect of Curses on you |
|
 Perandus Blazon - grants very useful Attributes as well as makes your Flasks last longer. Perandus Blazon - grants very useful Attributes as well as makes your Flasks last longer. |
|
| (15-25)% increased Stun and Block Recovery +(20-30) to all Attributes (6-8)% increased Quantity of Items found +20% to Fire Resistance 20% increased Flask Effect Duration -2 Physical Damage taken from Attack Hits |
|
 Karui Ward - improves the Damage of your Splitting Steel and grants your Extra Movement Speed. Karui Ward - improves the Damage of your Splitting Steel and grants your Extra Movement Speed. |
|
| +(20-30) to Dexterity +(20-30) to Strength +100 to Accuracy Rating 30% increased Projectile Speed 10% increased Movement Speed 30% increased Projectile Damage |
|
 Wanderlust - those give you plenty of Movement Speed and make you immune to Freeze Effect. Wanderlust - those give you plenty of Movement Speed and make you immune to Freeze Effect. |
|
| +5 to Dexterity +(10-20) to maximum Energy Shield (20-40)% increased Mana Regeneration Rate 20% increased Movement Speed Cannot be Frozen |
|
 Seven-League Step - those can be quite expensive for leveling Boots, but the investment is definitely worth it as it saves you a lot of time. Seven-League Step - those can be quite expensive for leveling Boots, but the investment is definitely worth it as it saves you a lot of time. |
|
| 50% increased Movement Speed Level Requirement reduced by 100 (Hidden) |
|
4. Final Skill Tree, Ascendancy Points, and Pantheon
Final Skill Tree:
111 Points Final Passive Tree
119 Points Path of Building (PoB) link
Ascendancy points:
Preferably in this order:
- Brutal Fervour
- Bane of Legends
- Headsman
- Impact
Pantheon:
Major God: Brine King: You cannot be Stunned if you've been Stunned in the past 2 seconds, Cannot be Frozen, 50% reduced Effect of Chill on you
Minor God: Soul of Ralakesh: 25% reduced Physical Damage over Time taken while moving; Moving while Bleeding doesn't cause you to take extra Damage
5. Final Gems links
| [DPS] Ancestral Protector setup | |
 |
Bladestorm - performs a wide-area Attack and creates damaging Bladestorms for a short duration. The behavior of the Storms depends on your Stance. |
 |
Multistrike Support - adds repeats to your Attacks and makes them much faster. Each repeat is stronger than the previous. |
 |
Pulverise Support - slows your Attack Speed but vastly improves your Area of Effect and Damage. Use the Anomalous Quality to get even more Area. |
 |
Trinity Support - gain bonus Damage and elemental Penetration for cycling through different Elemental types. Works very well with the random nature of Voidforge. |
 |
Elemental damage with Attacks Support - simply improves your Elemental Damage. You can use the Divergent Quality to get Mana Leech or Awakened version to be immune to Reflected Damage. |
 |
Rage Support - improves your Rage generation, but also grants a lot of Physical Damage for your Attacks. |
| [UTILITY] Auras | |
|
Determination - a very important defensive Aura that improves your Physical Hit Damage mitigation by adding a lot of Armour Rating. |
 |
Blood and Sand - allow you to change your Stances, as well as grants a lot of Damage or Area for your Attacks depending on the Stance you are in. |
 |
Herald of Purity - improves your Physical Damage. It also summons Sentinels of Purity, which can be quite helpful to taunt nearby enemies. |
 |
Precision - this Aura grants a lot of Accuracy Rating as well as some Critical Strike Chance. Try to keep it at the lowest Gem Level possible while also keeping the 100% chance to Hit. |
 |
Summon Skitterbots - this Aura allows you to inflict Chill and Shock even with the Interrogation Jewel. You will need some Rare Jewels with Mana Reservation Efficiency and Enlighten Support to use that Aura. |
 |
Enlighten Support - lowers the Reservation of all linked Auras. |
| [UTILITY] Curse setup | |
 |
Assassin's Mark - improves your Critical Strike Chance and Damage against marked enemies. It also allows you to generate Power Charges. |
 |
Mark on Hit Support - Hitting an enemy with any Attack will automatically apply a linked Mark at reduced effectiveness. |
 |
Lifetap Support - turns your Mana Costs into Life Costs. |
 |
Elemental Weakness - lowers all Elemental Resistances of Cursed enemies. Ideally, it should be applied via your Gear as you have plenty of Skills to use anyway. |
| [UTILITY] Leap Slam setup | |
|
Leap Slam - jumps to the targeted location, always stunning foes with Full Life. It scales very well with your Attack Speed. |
|
Faster Attacks Support - it greatly improves the speed of your jumps but also increases their Mana Cost. |
|
Lifetap Support - Leap Slam can drain your Mana very fast, so it's recommended to convert its costs to Life. |
| [UTILITY] Other Utility setups | |
 |
Ancestral Warchief - summons a Totem that Attacks nearby enemies and greatly improves your Damage while you are nearby. Vaal version boost that Damage even more. |
 |
Berserk - spends your Rage at an accelerating rate to massively boost your Damage, Attack Speed, and durability. |
 |
Enduring Cry - grants a very high burst of Life Regeneration that can be converted to Rage to fuel your Berserk thanks to the Kaom's Spirit Gloves. |
 |
Blood Rage - grants a lot of Attack Speed but degenerates your Life. |
|
Lifetap Support - you will need Lifetap to freely use some of those Skills. Tinker with previous Setups to fit in some of those Gems there as well. |
| [UTILITY] Molten Shell |
|
|
6. Gear Setup
Except for your Weapon, there are a lot of variants you could choose to build this character, and they all come with their own benefits and drawbacks or opportunity costs. Obviously, you need the Voidforge Sword, but you can decide how you want to scale its Damage potential. The biggest dilemma there is your Helmet. If you decide to wear Abyssus, you will gain a tremendous amount of Physical Damage and Critical Strike Multiplier, but you will take much more Physical Damage from your enemies. It also provides no Life or Resistance modifiers. Another important Gear piece to examine are your Gloves. Kaom's Spirit generates a lot of Rage, which allows you to even consider using the Berserk Skill, but takes away your whole Life Regeneration, makes your playstyle a lot more bursty, and you are missing out on Rare modifiers usually available in that slot. The final choice is your Body Armour and Amulet. While Loreweave is a solid choice on its own, a Rare Body could provide better benefits or free up requirements elsewhere. However, paired with Eternal Damnation, it's irreplaceable, as it grants immense defensive value against Elemental Damage. It will however require you to get much more Resistances on your Gear than usual, as you will also have to cap the Chaos Resistances. All those variations are perfectly viable, and you should choose the one matching your gameplay style the most!
|
Stat priorities on items:
|
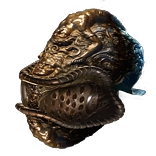 (Helmet) Abyssus - the Damage it provides is unmatched by any other Helmet, but it also makes you more susceptible to Physical Damage. It also makes getting enough Resistances or Spell Suppression harder. (Helmet) Abyssus - the Damage it provides is unmatched by any other Helmet, but it also makes you more susceptible to Physical Damage. It also makes getting enough Resistances or Spell Suppression harder. |
|
| +(20-25) to all Attributes Adds 40 to 60 Physical Damage to Attacks +(100-125)% to Melee Critical Strike Multiplier (100-120)% increased Armour (40-50)% increased Physical Damage taken |
|
| Helmet enchantments: +1 to maximum number of Bladestorms One of your Auras has x% increased Mana Reservation Efficiency |
|
 (Helmet) Rare Helmet - you can obtain a lot of maximum Life and Resistances if you decide to use a Rare Helmet. You can also get plenty of Mana Reservation Efficiency, Spell Suppression Chance, or Accuracy Rating here too. (Helmet) Rare Helmet - you can obtain a lot of maximum Life and Resistances if you decide to use a Rare Helmet. You can also get plenty of Mana Reservation Efficiency, Spell Suppression Chance, or Accuracy Rating here too. |
|
| Min. requirements: +70 to maximum Life +60% to Elemental and Chaos Resistances Optional affixes: Mana Reservation Efficiency Spell Suppression Chance Accuracy Rating Nearby Enemies take 9% increased Elemental Damage |
|
 (Weapon) Voidforge - it's a core Item for this Build. It provides a lot of Elemental Damage and works extremely well with other sources of flat Physical Damage. Having some Physical to Elemental Conversions is nice to have, but it usually comes with great opportunity cost so it's not always worth it. (Weapon) Voidforge - it's a core Item for this Build. It provides a lot of Elemental Damage and works extremely well with other sources of flat Physical Damage. Having some Physical to Elemental Conversions is nice to have, but it usually comes with great opportunity cost so it's not always worth it. |
|
| 30% increased Elemental Damage with Attack Skills (5-8)% increased Attack Speed +(90-100) to maximum Life Your Elemental Damage can Shock Gain 700% of Weapon Physical Damage as Extra Damage of a random Element 20% increased Area of Effect for Attacks Deal no Non-Elemental Damage |
|
 (Body Armour) Rare Armour - there are a lot of valuable modifiers to obtain on your Rare Armour, such as maximum Life, additional Physical Damage Reduction, higher Critical Strike Chance, or additional Curse. The only limitation is your budget. (Body Armour) Rare Armour - there are a lot of valuable modifiers to obtain on your Rare Armour, such as maximum Life, additional Physical Damage Reduction, higher Critical Strike Chance, or additional Curse. The only limitation is your budget. |
|
| Min. requirements: +70 to maximum Life +60% to Elemental and Chaos Resistances 15% Spell Suppression Chance Optional affixes: Attacks have +(1.1–1.5)% to Critical Strike Chance 8% additional Physical Damage Reduction (26–30)% increased effect of Non-Curse Auras from your Skills You can apply an additional Curse % of Physical Damage from Hits taken as Fire/cold/Lightning Damage |
|
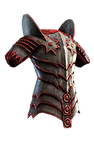
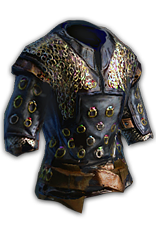 (Body Armour) The Loreweave - it's a very good Armour for this Build as it grants everything you need: flat Physical Damage, Critical Strikes, Life, and Elemental Damage. Its unique property is that your Resistances can never be lowered under a set value, which works very well when paired with Eternal Damnation Amulet. (Body Armour) The Loreweave - it's a very good Armour for this Build as it grants everything you need: flat Physical Damage, Critical Strikes, Life, and Elemental Damage. Its unique property is that your Resistances can never be lowered under a set value, which works very well when paired with Eternal Damnation Amulet. |
|
| Has 6 Sockets +(8-24) to all Attributes Adds (4-10) to (14-36) Physical Damage to Attacks (20-60)% increased Global Critical Strike Chance +(15-50) to maximum Energy Shield +(20-60) to maximum Life +(20-50) to maximum Mana (6-30)% increased Rarity of Items found (15-50)% increased Elemental Damage Your Maximum Resistances are (76-78)% |
|
 (Boots) Rare Boots - your Boots can provide you with lots of Resistances and Life Regeneration, as well as some Movement Speed, Spell Suppression Chance, or Life Regeneration. (Boots) Rare Boots - your Boots can provide you with lots of Resistances and Life Regeneration, as well as some Movement Speed, Spell Suppression Chance, or Life Regeneration. |
|
| Min. requirements: +70 to maximum Life +60% to Elemental and Chaos Resistances 20% increased Movement Speed 5% increased Action Speed (Searing Exarch Implicit) Optional affixes: Attributes Spell Suppression Chance Life Regeneration |
|
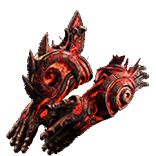 (Gloves) Kaom's Spirit - those can get you a bit of maximum Life and Resistances, but most importantly, covert your Life Regeneration into massive amounts of Rage, which can be used for Berserk Skill. Your Life Leech still works, so there are no problems with survivability. You can also get Elemental Weakness on Hit Corruption fairly easily. (Gloves) Kaom's Spirit - those can get you a bit of maximum Life and Resistances, but most importantly, covert your Life Regeneration into massive amounts of Rage, which can be used for Berserk Skill. Your Life Leech still works, so there are no problems with survivability. You can also get Elemental Weakness on Hit Corruption fairly easily. |
|
| +(50-70) to maximum Life +(20-30)% to Fire Resistance (0.3-0.5)% of Physical Attack Damage Leeched as Life Life Recovery from Regeneration is not applied Regenerate 1 Rage per second for every 100 Life Recovery per second from Regeneration |
|
 (Gloves) Rare Gloves - if you prefer more stable, but overall lower Damage, you can use a pair of Rare Gloves. Here you should look for modifiers such as maximum Life, Resistances, Spell Suppression, Attack Speed, or even chance to Intimidate your enemies. (Gloves) Rare Gloves - if you prefer more stable, but overall lower Damage, you can use a pair of Rare Gloves. Here you should look for modifiers such as maximum Life, Resistances, Spell Suppression, Attack Speed, or even chance to Intimidate your enemies. |
|
| Min. requirements: +70 to maximum Life +50% to Elemental and Chaos Resistances Optional affixes: Attack Speed Spell Suppression Chance chance to Intimidate Enemies for 4 seconds on Hit Attributes |
|
 (Belt) Rare Belt - you should pick Stygian Vise for your Belt Base, as it's always better than other Belt's Implicits. Try to get as much Life and Resistances here, while also getting some Life Regeneration or Elemental Damage if possible. (Belt) Rare Belt - you should pick Stygian Vise for your Belt Base, as it's always better than other Belt's Implicits. Try to get as much Life and Resistances here, while also getting some Life Regeneration or Elemental Damage if possible. |
|
| Min. requirements: +100 to Maximum Life +80% to Elemental and Chaos Resistances Optional affixes: % Increased Maximum Life Attributes Life Regeneration Elemental Damage |
|
 (Jewel) Rare Abyss Jewel - it's best to get maximum Life and Resistances here. If can, try to get some added flat Physical or Critical Strike Multiplier alongside. (Jewel) Rare Abyss Jewel - it's best to get maximum Life and Resistances here. If can, try to get some added flat Physical or Critical Strike Multiplier alongside. |
|
| Min. requirements: +30 to maximum Life Optional affixes: Attributes Resistances (7–8) to (9–10) Added Physical Damage with Sword Attacks +(9–12)% to Global Critical Strike Multiplier |
|
 (Amulet) Rare Amulet - you can get plenty of offensive modifiers on your Amulet. It is best to craft them with the Essence of Contempt to get a very high added flat Physical bonus, while also looking for high maximum Life, Critical Strike Multiplier, Resistances, or Accuracy Rating. (Amulet) Rare Amulet - you can get plenty of offensive modifiers on your Amulet. It is best to craft them with the Essence of Contempt to get a very high added flat Physical bonus, while also looking for high maximum Life, Critical Strike Multiplier, Resistances, or Accuracy Rating. |
|
| Min. requirements: +50% to Elemental and Chaos Resistances +60 to Maximum Life Adds 15 to 20 Physical Damage to Attacks Optional affixes: Attributes Critical Strike Multiplier Chaos Resistances Accuracy Rating |
|
| Recommended Anointments: Whispers of Doom Titanic Impacts |
|
 (Amulet) Eternal Damnation - this Amulet can provide a massive amount of Elemental Damage Reduction, and thanks to the Loreweave Armour you can ignore the Resistance penalty. You will have to get a lot of Chaos Resistances on your gear to make it worth it. (Amulet) Eternal Damnation - this Amulet can provide a massive amount of Elemental Damage Reduction, and thanks to the Loreweave Armour you can ignore the Resistance penalty. You will have to get a lot of Chaos Resistances on your gear to make it worth it. |
|
| +(40-70) to maximum Mana +(-13-13)% to Chaos Resistance -5% to all maximum Resistances Gain additional Elemental Damage Reduction equal to half your Chaos Resistance |
|
 (Ring) Rare Ring - you can get a lot of Resistances and Damage on your Rare Rings. They should also include a maximum Life bonus. Crafting a reduction of Mana Cost for your Skills is also a great idea. (Ring) Rare Ring - you can get a lot of Resistances and Damage on your Rare Rings. They should also include a maximum Life bonus. Crafting a reduction of Mana Cost for your Skills is also a great idea. |
|
| Min. requirements: +80% to Elemental and Chaos Resistances +60 to Maximum Life Optional affixes: Adds Physical Damage to Attacks Elemental Damage with Attacks Non-Channelling Skills have -(7-6) to Total Mana Cost Curse Enemies with Elemental Weakness on Hit |
|
 (Jewel) Rare Jewels - your Rare Jewels are quite important as they can give you a little bit of Mana Reservation Efficiency, just enough to fit in another Aura. They should also have some Life, Resistances, or Critical Strike Multiplier bonuses. (Jewel) Rare Jewels - your Rare Jewels are quite important as they can give you a little bit of Mana Reservation Efficiency, just enough to fit in another Aura. They should also have some Life, Resistances, or Critical Strike Multiplier bonuses. |
|
| Recommended affixes: increased maximum Life Mana Reservation Efficiency Attack Speed Resistances Critical Strike Multiplier |
|
 (Jewel) Large Cluster Jewel - Feed the Fury is a very good Damage bonus, as you will always have Leech active thanks to Slayer Ascendency. The other 2 Notables provide slightly less Damage but improve your Accuracy, which frees up important Suffixes elsewhere. (Jewel) Large Cluster Jewel - Feed the Fury is a very good Damage bonus, as you will always have Leech active thanks to Slayer Ascendency. The other 2 Notables provide slightly less Damage but improve your Accuracy, which frees up important Suffixes elsewhere. |
|
| Recommended affixes: 1 Added Passive Skill is Feed the Fury 1 Added Passive Skill is Graceful Execution 1 Added Passive Skill is Martial Prowess |
|
 (Jewel) Watcher's Eye - a Watcher's Eye with proper modifiers is always a good addition to any Build that uses Auras. Precision modifiers are particularly good here, as they can substantially improve your flasks' sustain or simply boost your Damage. (Jewel) Watcher's Eye - a Watcher's Eye with proper modifiers is always a good addition to any Build that uses Auras. Precision modifiers are particularly good here, as they can substantially improve your flasks' sustain or simply boost your Damage. |
|
| (4-6)% increased maximum Energy Shield (4-6)% increased maximum Life (4-6)% increased maximum Mana <Two or Three random aura modifiers> Recommended Aura mods: Gain a Flask Charge when you deal a Critical Strike while affected by Precision (40-60)% increased Attack Damage while affected by Precision |
|
 (Jewel) The Interrogation - thanks to this Jewel you won't be able to inflict usual Elemental Ailments, but instead you will inflict much more valuable Scorch, Brittle, and Sapped effects. The Brittle is especially important as it greatly improves your Critical Strike Chance. (Jewel) The Interrogation - thanks to this Jewel you won't be able to inflict usual Elemental Ailments, but instead you will inflict much more valuable Scorch, Brittle, and Sapped effects. The Brittle is especially important as it greatly improves your Critical Strike Chance. |
|
| Adds Secrets of Suffering | |
  (Jewel) Forbidden Flame&Flesh - this combination provides many interesting choices. The Overwhelm has great value if you lack Critical Strike Chance or don't want to depend on Flasks and Brittle, while First to Strike, last to Fall can grant you the Adrenaline Buff and occasional Life Recovery. (Jewel) Forbidden Flame&Flesh - this combination provides many interesting choices. The Overwhelm has great value if you lack Critical Strike Chance or don't want to depend on Flasks and Brittle, while First to Strike, last to Fall can grant you the Adrenaline Buff and occasional Life Recovery. |
|
| Allocates <Random Ascendancy Notable> if you have the matching modifiers on Forbidden Flesh/Flame | |
 (Jewel) Bottled Faith - this Flask grants a lot of Damage and Critical Strike Chance, but also a bit of Life Regeneration which can be converted to Rage thanks to the Kaom's Spirit Gloves. (Jewel) Bottled Faith - this Flask grants a lot of Damage and Critical Strike Chance, but also a bit of Life Regeneration which can be converted to Rage thanks to the Kaom's Spirit Gloves. |
|
| (30-15)% reduced Duration Consecrated Ground created by this Flask has Tripled Radius Consecrated Ground created during Effect applies (7-10)% increased Damage taken to Enemies (100-150)% increased Critical Strike Chance against Enemies on Consecrated Ground during Effect |
|
|
Suggested Flasks:
|
|
    |
|
|
If you have any other build requests please leave that in the comments below. We are always open to suggestions and constructive feedback.
Pictures used in this article are the intellectual property of Grinding Gear Games.
