Atziri's Rule Saboteur Build
If you ever wondered how it feels to be the final Boss, now is your chance to try it out!Atziri's Rule
Saboteur Build
Updated for Patch 3.21
The Best Crafty Guides by Odealo
| Guide notes |
| May 12, 2023 -Build created |
| Build Overview | |||
| Tags: [CASTER] [ELEMENTAL] [CRIT] [HYBRID] | |||
|
Budget: Defenses: |
|
Boss DPS: AoE: |
|
The Atziri's Rule is a Unique Staff that allows you to use the most iconic Atziri's abilities as your own. When equipped, it will grant you the Queen's Demand Skill which triggers either 2 Flameblasts or 12 Storm Call's Marks every time you use it. Thanks to the Saboteur's new Triggerbots it will Cast double the amount of Spells, but with slightly reduced Damage. This Ascendency also provides a 30% Cooldown Recovery Rate which is very important to improve the Damage of any Triggered Skill. To utilize this Staff to its full potential you will need plenty of Cast Speed on your Gear so you can immediately Trigger your Skills as soon as they go off Cooldown. But you can't be too fast either, as using the Demand when those Skills are still on Cooldown will only waste your time. As a baseline, Atziri's Spells will have a 1.15-second Cooldown with just your Ascendency, so your Casts should take a little bit more than 0.6 seconds to Trigger them continuously. Having too much Cast Speed is not necessarily a bad thing, as you will rarely have the opportunity to cast 3 or more times in a row without having to reposition.
In this Build we are also using the newly reworked Abyss Unique Items. The Shroud of the Lightless provides an insane amount of Elemental Penetration and bonus Life if you can stack a lot of Abyss Jewels. The Flames of Judgement have 850% added Damage Effectiveness, so stacking Jewels with Added Spell Damage is a very efficient way to scale your Damage. Since you can easily Penetrate over 50% of Elemental Resistances, and you deal mixed Damage Types, there is no point in reducing Enemy Resistances any further. Instead, we can use the new Elemental Mastery that grants a 25% chance to treat them as inverted which applies before the Penetration happens.
Defensively speaking, it is a decently tanky Character. You will have lots of maximum Life, plenty of Evasion and Armour Rating, some Energy Shield, and apply powerful Blind which also reduces the Damage of affected Enemies. The Petrified Blood splits incoming Damage and allows you to endlessly Leech in a similar fashion to the Slayer Ascendency.
The Build requires a few cheap Uniques to be playable. It has a lot of room for further improvements, but they are not required for basic Mapping.
You can also check our other Path of Exile builds right over here Odealo's Crafty Guides - Full List
1. Gameplay
A single Cast of either Atziri' Skills will be enough to nuke an entire screen of Enemies. One Flameblast is always cast at your location, while the other one is cast at your cursor's location. The Storm Calls follow the same principle, but they are more randomized. You will have lots of Auras, so the only other thing for you to use is a Flame Dash to move around and Assassin's Mark to improve your Damage against powerful enemies.
|
|
|
|

2. Build's PROS & CONS
| PROS |
|
| CONS |
|
3. Leveling tips
You need 68 levels to use the Atziri's Rule Staff, so you will need to level up using a different Spell. Fortunately, the Passive Tree is rather generic, so you can use any Spell you want. As a Saboteur you can experiment with various Cast on Crit or While Channeling setups, but ultimately even simple Self-cast is sufficient for the Campaign.
Suggested leveling Gem setups:
| Freezing Pulse setup | |
 |
Freezing Pulse - a simple Cold Spell that shoots an icy Projectile which pierces through Enemies. It deals the most Damage at the start of travel. |
 |
Added Lightning Damage Support - initially you don't have too much of a choice for your Support Gems, so you can use this one to gain a bit of Lightning Damage |
 |
Added Cold Damage Support - grants plenty of Cold Damage for your Spell. |
 |
Lesser Multiple Projectiles Support - additional Projectiles will help you with Clearing whole packs. |
 |
Arcane Surge Support - grants Cast Speed, Mana Regeneration, and some bonus Spell Damage. |
 |
Increased Critical Strikes Support - this is a very helpful Gem to have a somewhat reliable Critical Strike Chance during the campaign. |
| Aura setup | |
 |
Petrified Blood - this Aura grants you the Low Life status and doesn't reserve as much Mana as other Damage Auras. |
 |
Herald of Ice - grants you additional Cold Damage and causes explosions when you kill a Frozen Enemy. |
 |
Clarity - additional Mana Regeneration is very valuable. You might still need a Mana Flask to use your Spells continuously. |
| Utility setup | |
 |
Flame Dash - an instant Teleport that can cross most terrain gaps which is very valuable during the Campaign. |
 |
Elemental Weakness - lowers all Elemental Resistance Types of affected Enemies. |
 |
Steelskin - forms a protective barrier that absorbs part of the incoming Damage and stops Bleeding Effects. |
Bandits:
Kill all Bandits to get additional 2 Passive Tree Skill Points
Leveling Skill Trees:
37 Points Passive Tree
We recommend this order:
1) Blood Siphon 2) Assassination 3) Nibleness 4) Doomcast 5) Written in Blood 6) Disciple of the Forbidden 7) Cruel Preparation 8) Instability
62 Points Passive Tree
Allocate:
1) Paint Attunement 2) Arcane Potency 3) Purity of Flesh 4) Divine Judgement 5) Devotion 6) Counterweight
Recommended leveling items:
 Axiom Perpetuum - Dual-wielding those Sceptres makes Critical Strikes much more accessible early on. Axiom Perpetuum - Dual-wielding those Sceptres makes Critical Strikes much more accessible early on. |
|
| Adds (2-3) to (5-6) Fire Damage to Spells Adds (2-3) to (5-6) Cold Damage to Spells Adds 1 to (10-12) Lightning Damage to Spells (4-6)% increased Cast Speed (100-140)% increased Critical Strike Chance for Spells |
|
 Replica Tasalio's Sign - it can give you an absurd amount of Damage at level 20 and will be sufficient enough even in the last Act of the Campaign. Replica Tasalio's Sign - it can give you an absurd amount of Damage at level 20 and will be sufficient enough even in the last Act of the Campaign. |
|
| +(20-30)% to Cold Resistance Adds (15-20) to (25-35) Cold Damage to Spells and Attacks +(200-300) to Evasion Rating Your Cold Damage cannot Freeze Immune to Chill Adds 60 to 80 Cold Damage against Chilled Enemies |
|
 Tabula Rasa - the usual leveling Armour that grants a Six-link setup very early. You can look for Corrupted Implicits that would boost your main Skill. Tabula Rasa - the usual leveling Armour that grants a Six-link setup very early. You can look for Corrupted Implicits that would boost your main Skill. |
|
| Item has no level requirement and Energy Shield (Hidden) Item has 6 White Sockets and is fully linked (Hidden) |
|
 Goldrim - makes capping Elemental Resistances very easy. You don't need any other Modifiers here anyway. Goldrim - makes capping Elemental Resistances very easy. You don't need any other Modifiers here anyway. |
|
| +(30-50) to Evasion Rating 10% increased Rarity of Items found +(30-40)% to all Elemental Resistances Reflects 4 Physical Damage to Melee Attackers Level Requirement reduced by 100 (Hidden) |
|
 Replica Prismweave - you can use this Belt at level 25, and it will be good enough until the end of the leveling process. It grants a lot of flat Damage to your Spells. Replica Prismweave - you can use this Belt at level 25, and it will be good enough until the end of the leveling process. It grants a lot of flat Damage to your Spells. |
|
| Adds (14-16) to (30-32) Fire Damage to Spells Adds (10-12) to (24-28) Cold Damage to Spells Adds 1 to (60-68) Lightning Damage to Spells +(6-15)% to all Elemental Resistances 30% increased Elemental Damage during any Flask Effect |
|
 Karui Ward - it grants Movement Speed and other useful modifiers. If you decided to use an AoE Spell instead, consider using the Replica Karui Ward. Karui Ward - it grants Movement Speed and other useful modifiers. If you decided to use an AoE Spell instead, consider using the Replica Karui Ward. |
|
| +(20-30) to Dexterity +(20-30) to Strength +100 to Accuracy Rating 30% increased Projectile Speed 10% increased Movement Speed 30% increased Projectile Damage |
|
 Doedre's Tenure - those considerably slow your Cast Speed, but significantly improves your Damage in return. Doedre's Tenure - those considerably slow your Cast Speed, but significantly improves your Damage in return. |
|
| +(20-50) to Intelligence 100% increased Spell Damage (25-15)% reduced Cast Speed |
|
 Wanderlust - grants you total Freeze Avoidance, which is very helpful, as there are no reliable ways to get that modifier until later into the End-game. Wanderlust - grants you total Freeze Avoidance, which is very helpful, as there are no reliable ways to get that modifier until later into the End-game. |
|
| +5 to Dexterity +(10-20) to maximum Energy Shield (20-40)% increased Mana Regeneration Rate 20% increased Movement Speed Cannot be Frozen |
|
 Seven-League Step - if you don't care about occasional Freezes you can use this pair of Boots to simply Move really fast. Seven-League Step - if you don't care about occasional Freezes you can use this pair of Boots to simply Move really fast. |
|
| 50% increased Movement Speed Level Requirement reduced by 100 (Hidden) |
|
4. Final Skill Tree, Ascendancy Points, and Pantheon
Final Skill Tree:
104 Points Final Passive Tree (doesn't include Cluster or Unique Jewels)
119 Points Path of Building (PoB) link
Ascendancy points:
Preferably in this order:
- Like Clockwork
- Born in Shadows
- Perfect Crime
- Explosive Expert
Pantheon:
Major God: Soul of Arakaali: 10% reduced Damage taken from Damage Over Time, +40% Chaos Resistance against Damage Over Time
Minor God: Soul of Shakari: 50% less Duration of Poisons on You, You cannot be Poisoned while there are at least 3 Poisons on you
5. Final Gems links
| [DPS] Lightning Arrow setup | |
 |
Queen's Demand - a Skill granted by the Unique Staff, using it Triggers the Flames of Judgement or Storm of Judgement, alternating with each Cast. Flames have much higher Damage output, but Storm has better AoE Coverage. |
 |
Inspiration Support - lowers the Mana Cost, increases the Critical Strike Chance, and grants More Damage to your Spells. |
|
Arcane Surge Support - grants plenty of Cast Speed which is needed to balance the Cast and Cooldown ratio, and grants a Buff that improves your Damage and Mana regeneration. |
 |
Hypothermia Support - increases your Damage against Chilled Enemies and makes your Chills last longer. |
 |
Less Duration Support - lowers the delay of Triggered Skills and grants a bit More Damage for them. |
 |
Increased Critical Damage Support - Critical Strikes are the main way of scaling your Damage, so getting more Critical Strike Multiplier is always useful. |
|
Increased Critical Strikes Support - significantly improves your Critical Strike Chance. Should be replaced with Concentrated Effect Support or Increased Area of Effect Support at late stages once you can cap your Crit Chance with your Gear and Passives. |
| [UTILITY] Auras | |
 |
Determination - this Aura will be probably your only source of Armour Rating, but it is still worth using it to get basic Physical Damage Reduction. |
 |
Grace - you will have plenty of Evasion Rating on your Gear, so this Aura will grant you a decent boost. It has great synergy with your Ghost Dance Keystone. |
 |
Zealotry - an offensive Aura that improves your Spell Damage and grants you a chance to create Consecrated Ground when you land a Critical Strike. |
 |
Enlighten Support - lowers the Reservation Costs of your Auras. You will need it to fit in all your Auras. |
|
Petrified Blood - splits incoming Damage into Damage over Time Effect and doesn't allow you to go over 50% maximum Life without using a Life Flask, so your Leech won't stop too early. With a good Rare Helmet, you won't need a second Enlighten Support for this Gem alone. |
| [UTILITY] Arrogance Auras | |
|
Vitality - this Aura grants a lot of Life Regeneration to improve your sustain. It Reserves a flat amount of Mana instead of the usual percentage. |
|
Clarity - works very similarly to the previous Aura, but this time it grants you Mana Regeneration. |
 |
Arctic Armour - leaves a Chilled Ground when you move, and grants a lot of Physical Damage mitigation when you are stationary. Use the Anomalous Quality to sometimes Freeze your Attackers. |
 |
Arrogance Support - causes linked Auras to Reserve your Life instead of Mana. Try to avoid Reserving over 50% of your Life as you would lose the non-stopping Leech that way. |
| [UTILITY] Curse | |
 |
Assassin's Mark - significantly improves your Critical Strikes against Marked Enemy and grants you a chance to generate Power Charges when you Hit them. |
| [UTILITY] Other Utility Skills | |
|
Flame Dash - a short-raged teleport Spell used mostly to move around and dodge incoming Attacks. It can store up to 3 Charges and the first Cast is Instant. |
|
Steelskin - a Guard Skill that grants you a decent barrier against incoming Damage. It also stops all Bleeding Effects during its Duration. |
 |
Chaos Golem - a useful Golem that further improves your Physical Damage Mitigation by a flat amount. |
|
|
6. Gear Setup
In the current Crucible League you are able to gain much more Cooldown Recovery Rate than usual if you are persistent enough. The Cooldown Recovery Rate per Power Charge yields the best results, but the unconditional Cooldown Recovery Rate comes with a Reduced Duration modifier, which is a nice Quality of Life upgrade for your Spells. To improve your Single-target Damage you will need a lot of Cast Speed bonuses on your Gear so you can Trigger your Spells as soon as they are available, just be sure you are not Casting "empty" Spells when both Charges are still on Cooldown. You can also focus on the Elemental Damage and Critical Strike Multiplier to improve your one-shot potential. In this Build we are using up to 12 Abyss Jewels, which can grant you a lot of Damage but also cover lacking Attributes and Resistances if needed. They should always provide you with a flat Cold Damage bonus so you can Chill your Enemies to fully benefit from your Ascendency Notable. You should have at least one piece of Jewelry with a solid Mana Regeneration modifier to comfortably spam your Skill. A good Rare Helmet is also needed in that regard, as those can grant a lot of Mana Reservation Efficiency so you have more Unreserved Mana left. You should use the Base Items that grant Energy Shield. It is not as good as maximum Life, but it's still quite useful.
|
Stat priorities on items:
|
 (Helmet) Rare Helmet - ideally you should use a Helmet with Mana Reservation Efficiency Enchant for one of your Auras, and Mana Reservation Efficiency crafted with Essences and Eldritch Implicits. Other than that, just look for Life, Elemental Resistances, or Attributes. (Helmet) Rare Helmet - ideally you should use a Helmet with Mana Reservation Efficiency Enchant for one of your Auras, and Mana Reservation Efficiency crafted with Essences and Eldritch Implicits. Other than that, just look for Life, Elemental Resistances, or Attributes. |
|
| Min. requirements: 18% increased Mana Reservation Efficiency of Skills +60 to maximum Life Optional affixes: Elemental Resistances Attributes % of Physical Damage from Hits taken as Elemental Damage |
|
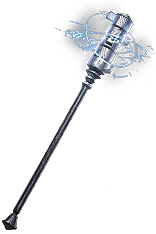
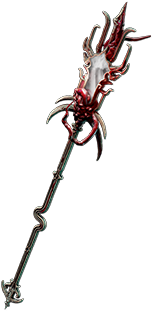
| (Weapon) Atziri's Rule - a core Unique Item for this Build. Socketed Support Gems will apply to the special Skills it grants, so you don't need to worry about linking it. You can get tons of Cooldown Recovery Rate with the proper Crucible Tree, which is very useful but not required. |
|
| Grants Level 20 Queen's Demand Skill Queen's Demand can Trigger Level 20 Flames of Judgement Queen's Demand can Trigger Level 20 Storm of Judgement Cannot be Stunned Damage cannot be Reflected |
|
| Recommended Crucible Tree Notables: -1 to Maximum Power Charges / 6% increased Cooldown Recovery Rate per Power Charge 10% reduced Skill Effect Duration / 25% increased Cooldown Recovery Rate |
|
 (Body Armour) Shroud of the Lightless - this Armour grants an insane amount of Elemental Penetration and maximum Life if you use a lot of Abyss Jewels. Usually, the Abyssal Sockets are somewhat problematic but we are using our Main Setup in the Weapon anyway. (Body Armour) Shroud of the Lightless - this Armour grants an insane amount of Elemental Penetration and maximum Life if you use a lot of Abyss Jewels. Usually, the Abyssal Sockets are somewhat problematic but we are using our Main Setup in the Weapon anyway. |
|
| Has (1-3) Abyssal Sockets Penetrate 4% Elemental Resistances per Abyss Jewel affecting you 20% chance to Trigger Level 20 Shade Form when you Use a Socketed Skill (160-180)% increased Evasion and Energy Shield 3% increased Maximum Life per Abyss Jewel affecting you 3% increased Maximum Mana per Abyss Jewel affecting you |
|
 (Boots) Bubonic Trail - another Abyss Unique granting you access to even more Abyssal Sockets. By using the Unique Jewel you will gain tons of Life and Mana Reservation Efficiency. You will also need an Magic Abyss Jewel to gain Movement Speed bonus. (Boots) Bubonic Trail - another Abyss Unique granting you access to even more Abyssal Sockets. By using the Unique Jewel you will gain tons of Life and Mana Reservation Efficiency. You will also need an Magic Abyss Jewel to gain Movement Speed bonus. |
|
| Has (1-2) Abyssal Sockets Triggers Level 20 Death Walk when Equipped (24-32)% increased Movement Speed while affected by a Magic Abyss Jewel (40-60)% reduced Duration of Elemental Ailments on You while affected by a Rare Abyss Jewel (16-24)% increased Reservation Efficiency while affected by a Unique Abyss Jewel |
|
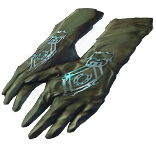
 (Gloves) Rare Gloves - on your Gloves you should get maximum Life and some Resistance and Attribute modifiers. You can also get potent Damage bonuses or Spell Suppression. Eldritch Implcitis are very useful here, as they can grant you Leech and Chance to Unnerve Enemies. (Gloves) Rare Gloves - on your Gloves you should get maximum Life and some Resistance and Attribute modifiers. You can also get potent Damage bonuses or Spell Suppression. Eldritch Implcitis are very useful here, as they can grant you Leech and Chance to Unnerve Enemies. |
|
| Min. requirements: +70 to maximum Life 60% total Elemental Resistance Optional affixes: (37-43)% increased Damage while Leeching Attributes 50 to 77 added Fire Damage against Burning Enemies chance to Unnerve Enemies for 4 seconds on Hit 12% chance to Suppress Spell Damage |
|
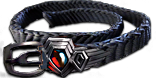
 (Belt) Darkness Enthroned - this Belt grants you 1 more abyssal Socket than a regular Rare Belt and significantly improves their effectiveness. It doesn't provide any other modifiers, which can make getting enough Resistances or Attributes harder. (Belt) Darkness Enthroned - this Belt grants you 1 more abyssal Socket than a regular Rare Belt and significantly improves their effectiveness. It doesn't provide any other modifiers, which can make getting enough Resistances or Attributes harder. |
|
| Has 2 Abyssal Sockets (50-100)% increased Effect of Socketed Abyss Jewels |
|
 (Belt) Rare Belt - obviously you should use the Stygian Vise to get an additional Abyss Socket. You can get a lot of maximum Life and Resistances here but don't forget about the very important Cooldown Recovery Rate modifier. (Belt) Rare Belt - obviously you should use the Stygian Vise to get an additional Abyss Socket. You can get a lot of maximum Life and Resistances here but don't forget about the very important Cooldown Recovery Rate modifier. |
|
| Min. requirements: +70 to Maximum Life 10% increased Cooldown Recovery Rate 50% total Elemental Resistances Optional affixes: % Increased Maximum Life Attributes Chaos Resistances Gain a Flask Charge when you deal a Critical Strike |
|
 (Jewel) Rare Abyss Jewel - you should aim to have maximum Life on every Jewel you use. Added Damage for Spells is very potent here, especially the Cold Damage which would grant you a chance to Chill Enemies with your Critical Strikes. Critical Multiplier is also important, but it is only slightly better than well-rolled Added Damage. You can also use modifiers that grant you a lot of Cast Speed if you Crited Recently. If you don't need Damage, you can use them to get various Ailment Avoidances or get lacking Resistances and Attributes. (Jewel) Rare Abyss Jewel - you should aim to have maximum Life on every Jewel you use. Added Damage for Spells is very potent here, especially the Cold Damage which would grant you a chance to Chill Enemies with your Critical Strikes. Critical Multiplier is also important, but it is only slightly better than well-rolled Added Damage. You can also use modifiers that grant you a lot of Cast Speed if you Crited Recently. If you don't need Damage, you can use them to get various Ailment Avoidances or get lacking Resistances and Attributes. |
|
| Min. requirements: +30 to maximum Life Optional affixes: Resistances (5–7)% increased Cast Speed if you've dealt a Critical Strike Recently Adds (19–23) to (24–32) Cold/Fire/Lightning Damage to Spells (19–25) to (26–34) Added Spell Cold Damage while wielding a Two Handed Weapon +(9–12)% to Global Critical Strike Multiplier (2–4)% increased Cast Speed Regenerate (3.3–4) Mana per second |
|
 (Amulet) Rare Amulet - on Amulet you can get lots of Cast Speed, but you should also have some maximum Life and Resistances there. Additional Attributes are quite helpful, but you can aim for Damage or Critical Strike Multiplier modifiers too. Continuously spamming with your Spells will drain your Mana really fast, so you want some Mana Recovery or Cost Reduction here as well. (Amulet) Rare Amulet - on Amulet you can get lots of Cast Speed, but you should also have some maximum Life and Resistances there. Additional Attributes are quite helpful, but you can aim for Damage or Critical Strike Multiplier modifiers too. Continuously spamming with your Spells will drain your Mana really fast, so you want some Mana Recovery or Cost Reduction here as well. |
|
| Min. requirements: +60 to Maximum Life 50% total Elemental Resistance 15% Cast Speed Optional affixes: increased Mana Regeneration Rate increased Damage while Leeching Critical Strike Multiplier Non-Channelling Skills have -7 to Total Mana Cost |
|
| Recommended Anointments: Disciple of the Slaughter Charisma |
|
 (Ring) Mark of the Shaper - it is a great way to gain tons of Damage for your Spells, but you will have to make sure your other Ring has the correct Influence type. With the proper Catalyst, you can get up to 96% Spell Damage from a single Item! (Ring) Mark of the Shaper - it is a great way to gain tons of Damage for your Spells, but you will have to make sure your other Ring has the correct Influence type. With the proper Catalyst, you can get up to 96% Spell Damage from a single Item! |
|
| (15-25)% increased Elemental Damage 20% chance to Trigger Level 20 Summon Volatile Anomaly on Kill Adds (13-18) to (50-56) Lightning Damage to Spells (6-10)% increased maximum Energy Shield (6-10)% increased maximum Life (60-80)% increased Spell Damage if your other Ring is an Elder Item Cannot be Stunned by Spells if your other Ring is a Shaper Item |
|
 (Ring) Rare Ring - your Rings are very similar to Amulet. You can use the Opal Ring for additional Damage, but Resistances or maximum Life are good too. Cast Speed and minimum Frenzy Charges are a great way to improve your Damage. (Ring) Rare Ring - your Rings are very similar to Amulet. You can use the Opal Ring for additional Damage, but Resistances or maximum Life are good too. Cast Speed and minimum Frenzy Charges are a great way to improve your Damage. |
|
| Min. requirements: +60 to Maximum Life 50% total Elemental Resistance 15% Cast Speed Optional affixes: Minimum Frenzy Charge Attributes Critical Strike Multiplier Non-Channelling Skills have -7 to Total Mana Cost |
|
 (Jewel) Kurgal's Gaze - you will need one Unique Jewel to get a Reservation Efficiency bonus from your Boots. It will significantly improve the Arcane Surge Buff you gain from your Support Gem since you will be using mostly Hypnotic Jewels. (Jewel) Kurgal's Gaze - you will need one Unique Jewel to get a Reservation Efficiency bonus from your Boots. It will significantly improve the Arcane Surge Buff you gain from your Support Gem since you will be using mostly Hypnotic Jewels. |
|
| +(10-20) to Intelligence 8% increased Effect of Arcane Surge on you per Hypnotic Eye Jewel affecting you, up to a maximum of 40% |
|
 (Jewel) Large Cluster Jewel - good Cluster Jewel can grant you a lot of Increased Damage for your Elemental Damage. The Sadist can give you up to 60% increased Damage from a single Notable, as you should inflict all Ailments all the time. (Jewel) Large Cluster Jewel - good Cluster Jewel can grant you a lot of Increased Damage for your Elemental Damage. The Sadist can give you up to 60% increased Damage from a single Notable, as you should inflict all Ailments all the time. |
|
| 1 Added Passive Skill is Sadist 1 Added Passive Skill is Prismatic Heart 1 Added Passive Skill is Widespread Destruction |
|
 (Jewel) Medium Cluster Jewel - two medium Clusters with bonuses to Critical Strike Chace will be required to get Crit Capped without the Support Gem. It will also grant you plenty of increased Damage. (Jewel) Medium Cluster Jewel - two medium Clusters with bonuses to Critical Strike Chace will be required to get Crit Capped without the Support Gem. It will also grant you plenty of increased Damage. |
|
| 1 Added Passive Skill is Pressure Points 1 Added Passive Skill is Basics of Pain |
|
 (Jewel) Impossible Escape - you can use this Jewel to allocate the Window of Opportunity and Profane Chemistry Notables. It will reduce the delay of your Spells and improve your Flask Sustain a bit. (Jewel) Impossible Escape - you can use this Jewel to allocate the Window of Opportunity and Profane Chemistry Notables. It will reduce the delay of your Spells and improve your Flask Sustain a bit. |
|
| Passive in Radius of Magebane can be Allocated without being connected to your tree | |
 (Flask) Bottled Faith - it is a great Flask for a Crit Build as it significantly improves your Critical Strike Chance and grants a lot of Damage on top of that. (Flask) Bottled Faith - it is a great Flask for a Crit Build as it significantly improves your Critical Strike Chance and grants a lot of Damage on top of that. |
|
| (30-15)% reduced Duration Consecrated Ground created by this Flask has Tripled Radius Consecrated Ground created during Effect applies (7-10)% increased Damage taken to Enemies (100-150)% increased Critical Strike Chance against Enemies on Consecrated Ground during Effect |
|
|
Suggested Flasks:
|
|
    |
|
|
If you have any other build requests please leave that in the comments below. We are always open to suggestions and constructive feedback.
Pictures used in this article are the intellectual property of Grinding Gear Games.
