Unique Belts in PoE
Complete List of all Unique Belts in Path of ExileUnique Belts in PoE
Wiki page
Updated for Patch 3.22
There are a lot of Unique Belts in Path of Exile. A lot of them are good, but Rare Belts are still the most common. What players usually expect from a Belt, is to provide them with the most basic Resistances, Maximum Life, and Strength or Flask modifiers. Unique Belts have to compete for this item slot with very strong contestants, as a regular Rare Belt can give you up to 100 Maximum Life with a single Prefix. Rare Belts are often associated with Flasks, they can provide the player with Increased Flask Effect, Increased Flask Life/Mana Recovery, increased Flask Charges gained, increased Flask effect Duration, and reduced Flask Charges used. They also can give you up to 48% of Cold, Lightning, or Fire Resistance from a single Suffix.
There are some build-enabling Belts that are universally praised such as Mageblood or Headhunter - one of the most expensive items in the game. A lot of Belts. however, can be replaced with a Rare counterpart. Unique Belts rarely offer an extremely hard-to-come-by feature that defines a build. That's why Rare Belts are still more prevalent. The list we have composed should inspire you, give you an idea of how a given Belt can be used, or explain the inner workings of the item so that you can better understand it and implement it into your own builds if you deem it good enough. It contains all the available Belts in the game.
| Belts | |
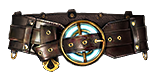
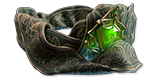
 Darkness Enthroned - It has two sockets where you can place two Abyss Jewels, their effectiveness will be increased or even doubled. For example - two Abyss Jewels granting 40 Maximum Life each, will result in 160 extra Maximum Life, more than any other Belt can offer. It is often used in Minion Builds because of the potency of Ghastly Abyss Jewels - it's one of the most efficient ways to increase your Minions' DPS, especially with a modifier for an increased Minions Damage if you've used a Minions Skill Recently. We have used it in our Absolution Summoner build. Darkness Enthroned - It has two sockets where you can place two Abyss Jewels, their effectiveness will be increased or even doubled. For example - two Abyss Jewels granting 40 Maximum Life each, will result in 160 extra Maximum Life, more than any other Belt can offer. It is often used in Minion Builds because of the potency of Ghastly Abyss Jewels - it's one of the most efficient ways to increase your Minions' DPS, especially with a modifier for an increased Minions Damage if you've used a Minions Skill Recently. We have used it in our Absolution Summoner build. |
|
|
Required Level: 1 Has 1 Abyssal Socket |
|
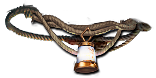
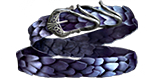
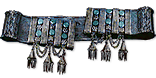
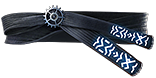
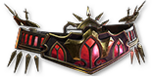
 String of Servitude - The list of possible modifiers is vast, and it defines how good this belt can be. The extra Elemental Resistances or increased Movement Speed During any Flask Effect are great for a leveling character, but it's the increased Quantity of Items found, increased effect of Auras like Hatred or Zealoty, and increased Attributes such as Strength or Intelligence are the most prized modifiers. Such Belts can be used in Aura-stacking or Attribute-stacking builds (where it has to compete with Cyclopean Coil and Syntesised Rare Belts). They're always Corrupted and you can loot them from the Temple of Atzoatl (Alva's missions). String of Servitude - The list of possible modifiers is vast, and it defines how good this belt can be. The extra Elemental Resistances or increased Movement Speed During any Flask Effect are great for a leveling character, but it's the increased Quantity of Items found, increased effect of Auras like Hatred or Zealoty, and increased Attributes such as Strength or Intelligence are the most prized modifiers. Such Belts can be used in Aura-stacking or Attribute-stacking builds (where it has to compete with Cyclopean Coil and Syntesised Rare Belts). They're always Corrupted and you can loot them from the Temple of Atzoatl (Alva's missions). |
|
|
Required Level: 1 <(1-2) Random corrupted implicit modifiers> |
|
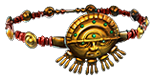
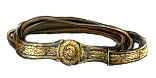
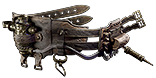
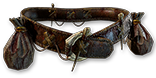
 Meginord's Girdle - It's an affordable Belt for all low-level Attack Characters. It adds Damage to Attacks, some Cold Resistance, Maximum Life, Flask Life Recovery rate, and a lot of Strength, making it the most useful for characters that need Strength early on but cannot gain it from the Skill Tree. Meginord's Girdle - It's an affordable Belt for all low-level Attack Characters. It adds Damage to Attacks, some Cold Resistance, Maximum Life, Flask Life Recovery rate, and a lot of Strength, making it the most useful for characters that need Strength early on but cannot gain it from the Skill Tree. |
|
|
Required Level: 8 +(25-35) to Strength |
|
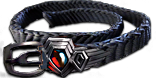
 Feastbind - It's not used in any build, and even during the leveling phase it is not very good. You may use it as a cheap substitute for a Rare Belt if you want to keep your Flasks up most of the time. Feastbind - It's not used in any build, and even during the leveling phase it is not very good. You may use it as a cheap substitute for a Rare Belt if you want to keep your Flasks up most of the time. |
|
|
Required Level: 11 (12-24)% increased Global Physical Damage |
|
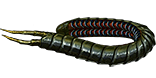
 Chain of Endurance - It's bad, and only slightly useful during the leveling phase, as it grants you some Maximum Life and Energy Shield. Chain of Endurance - It's bad, and only slightly useful during the leveling phase, as it grants you some Maximum Life and Energy Shield. |
|
|
Required Level: 14 +(9-20) to maximum Energy Shield |
|
 Perandus Blazon - It's another not-very-useful Belt. Its notable qualities are Attributes, increased Flask Effect Duration, and Item Quantity. Only if you have no other way to increase your Flask Effect Duration to have them up permanently it is remotely useful. A Rare Belt with various Flask modifiers is usually much better. Perandus Blazon - It's another not-very-useful Belt. Its notable qualities are Attributes, increased Flask Effect Duration, and Item Quantity. Only if you have no other way to increase your Flask Effect Duration to have them up permanently it is remotely useful. A Rare Belt with various Flask modifiers is usually much better. |
|
|
Required Level: 16 (15-25)% increased Stun and Block Recovery |
|
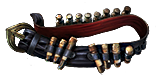
 The Magnate - This Belt is great in most Strength-stacking builds, we have used it in the Strength-stacking Wander Berserker. A Rare Belt with increased Strength is usually better for such builds, but The Magnate is extremely cheap. You may also use it during the leveling phase as it has quite a lot of Resistances, Strength, and increased Charges gained. The Magnate - This Belt is great in most Strength-stacking builds, we have used it in the Strength-stacking Wander Berserker. A Rare Belt with increased Strength is usually better for such builds, but The Magnate is extremely cheap. You may also use it during the leveling phase as it has quite a lot of Resistances, Strength, and increased Charges gained. |
|
|
Required Level: 16 (20-30)% increased Stun Duration on Enemies |
|
 Faminebind - It's very bad, the 50 Chaos DoT that you cannot Support with any Gems is borderline useless. Death Aura from Death's Oath deals 15 times as much damage with no Support Gems whatsoever, and it's still not a particularly good build in terms of damage. Faminebind - It's very bad, the 50 Chaos DoT that you cannot Support with any Gems is borderline useless. Death Aura from Death's Oath deals 15 times as much damage with no Support Gems whatsoever, and it's still not a particularly good build in terms of damage. |
|
|
Required Level: 18 (12-24)% increased Global Physical Damage |
|
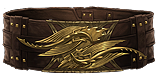
 Belt of the Deceiver - It's a quite good leveling Belt for Melee Physical Attack Damage characters. It increases your Physical Damage and causes nearby enemies to take increased Attack Damage. The other bonuses for Maximum Life, Resistances, and reduced Extra Damage from Critical Strikes are definitely useful in any case. Belt of the Deceiver - It's a quite good leveling Belt for Melee Physical Attack Damage characters. It increases your Physical Damage and causes nearby enemies to take increased Attack Damage. The other bonuses for Maximum Life, Resistances, and reduced Extra Damage from Critical Strikes are definitely useful in any case. |
|
|
Required Level: 20 +(25-35) to Strength |
|
 Bated Breath - It's a good Belt for a purely Energy Shield build, as it grants a lot of this resource combined with an increased Recharge Rate. A Rare Crystal Belt will be a better pick for a fully-developed character. Bated Breath - It's a good Belt for a purely Energy Shield build, as it grants a lot of this resource combined with an increased Recharge Rate. A Rare Crystal Belt will be a better pick for a fully-developed character. |
|
|
Required Level: 22 +(9-20) to maximum Energy Shield |
|
| Replica Bated Breath - Great for Fishing, otherwise useless. |
|
|
Required Level: 22 +(9-20) to maximum Energy Shield |
|
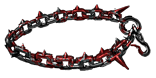
 Coward's Chains - You can use this Belt if you want to be treated as on Full Life, just be sure the Vulnerability Curse doesn't have an overly negative effect on you. Render yourself Hexproof or lower the Curses Effect on you. You may want to be on Full Life to use Damage on Full Life Support Gem, Foxshade, or Ondar's Clasp. It's not as good of a gimmick to justify using these items, and because of that, this Belt sees almost no use. You can also be on Full Life most of the time by Leeching Life, with Chaos Inoculation, or by implementing Energy Shield. Coward's Chains - You can use this Belt if you want to be treated as on Full Life, just be sure the Vulnerability Curse doesn't have an overly negative effect on you. Render yourself Hexproof or lower the Curses Effect on you. You may want to be on Full Life to use Damage on Full Life Support Gem, Foxshade, or Ondar's Clasp. It's not as good of a gimmick to justify using these items, and because of that, this Belt sees almost no use. You can also be on Full Life most of the time by Leeching Life, with Chaos Inoculation, or by implementing Energy Shield. |
|
|
Required Level: 22 +(9-20) to maximum Energy Shield |
|
 Prismweave - An excellent choice for a crude Elemental Attack Build. It's popular in builds that require a lot of added Elemental Damage, such as Lightning Arrow Deadeye or any build that uses Tinity Support Gem, as they often need a variety of Elemental Damage types in their arsenal. Later on, it is usually replaced with a Belt that grants Maximum Life, as there is none. Prismweave - An excellent choice for a crude Elemental Attack Build. It's popular in builds that require a lot of added Elemental Damage, such as Lightning Arrow Deadeye or any build that uses Tinity Support Gem, as they often need a variety of Elemental Damage types in their arsenal. Later on, it is usually replaced with a Belt that grants Maximum Life, as there is none. |
|
|
Required Level: 25 (12-24)% increased Global Physical Damage |
|
| Replica Prismweave - The Added Elemental damage, this time to Spells, may work on an Elementalist with Shaper of Flames, as these will count towards one big Ignite. It is not a popular Belt, as again, it gives no Maximum Life or ES. |
|
|
Required Level: 25 (12-24)% increased Global Physical Damage |
|
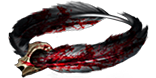
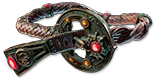
 Bisco's Leash - The Quantity of Items found is a prized stat in any MF build, but the String of Servitude provides three times as much of it. What makes Bisco's Leash good is the Rampage aspect that inherently increases your Movement Speed, and in this case, the Rarity of Items found, which adds up to around 67% at the maximum 1000 Rampage. Bisco's Leash - The Quantity of Items found is a prized stat in any MF build, but the String of Servitude provides three times as much of it. What makes Bisco's Leash good is the Rampage aspect that inherently increases your Movement Speed, and in this case, the Rarity of Items found, which adds up to around 67% at the maximum 1000 Rampage. |
|
|
Required Level: 30 +(25-35) to Strength |
|
 Umbilicus Immortalis - It's one of the worst Belts as it makes you unaffected by your own Flasks. These are often necessary for survival. There are also no overly overpowered Flasks that you may apply to your Zombies and Specters that would elevate your build. Mother's Embrace is better in most of such cases anyway. Umbilicus Immortalis - It's one of the worst Belts as it makes you unaffected by your own Flasks. These are often necessary for survival. There are also no overly overpowered Flasks that you may apply to your Zombies and Specters that would elevate your build. Mother's Embrace is better in most of such cases anyway. |
|
|
Required Level: 30 +(25-40) to maximum Life |
|
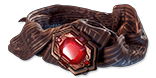
 Ryslatha's Coil - One of the best Belts for a Physical Attack Damage build. We have used it in many builds, examples of such being General's Cry Shield Crush Berserker and Shockwave Cyclone Slayer. It grants you tons of Maximum Life, Strength, Life Recovery on Stun, and a wider range of possible Attack Damage, much like Volatility Support. Ryslatha's Coil - One of the best Belts for a Physical Attack Damage build. We have used it in many builds, examples of such being General's Cry Shield Crush Berserker and Shockwave Cyclone Slayer. It grants you tons of Maximum Life, Strength, Life Recovery on Stun, and a wider range of possible Attack Damage, much like Volatility Support. |
|
|
Required Level: 32 +(20-30)% increased Stun Duration on Enemies |
|
 Sunblast - It may be good on a budget Trap build such as this Explosive Trap Saboteur. It does make you throw more Traps which are spread around the targeted location, but enemies no longer can activate them. You have to use Skitterbots and it's actually pretty smooth with Saboteur's Chain Reaction passive, but it's better for you to try it out for yourself. Sunblast - It may be good on a budget Trap build such as this Explosive Trap Saboteur. It does make you throw more Traps which are spread around the targeted location, but enemies no longer can activate them. You have to use Skitterbots and it's actually pretty smooth with Saboteur's Chain Reaction passive, but it's better for you to try it out for yourself. |
|
|
Required Level: 37 (15-25)% increased Stun and Block Recovery |
|
 Ceinture of Benevolence - It's used a lot in party play where you can Link yourself to a player and grant them Magic Flask bonuses to make them more durable or deal more damage. It's often picked up by Aurabots with a 100% Flask uptime. Ceinture of Benevolence - It's used a lot in party play where you can Link yourself to a player and grant them Magic Flask bonuses to make them more durable or deal more damage. It's often picked up by Aurabots with a 100% Flask uptime. |
|
|
Required Level: 40 (15-25)% increased Stun and Block Recovery |
|
 Headhunter - One of the most iconic chase items in the game. It grants you bonuses of slain Rare enemies for a duration, making it great on builds that can kill a lot of them very fast to stack multiple instances of these buffs. It's very popular on Tornado Shot Deadeyes since they're often the fastest builds with their Tailwind and long attack range. You can obviously select it for any build to upgrade it, it's just as good as most players think it is. Headhunter - One of the most iconic chase items in the game. It grants you bonuses of slain Rare enemies for a duration, making it great on builds that can kill a lot of them very fast to stack multiple instances of these buffs. It's very popular on Tornado Shot Deadeyes since they're often the fastest builds with their Tailwind and long attack range. You can obviously select it for any build to upgrade it, it's just as good as most players think it is. |
|
|
Required Level: 40 +(25-40) to maximum Life |
|
| Replica Headhunter - It is still good, just not as good as the original. Magic monsters have very few modifiers compared to Rare monsters so you will get fewer buffs. It can serve as a transitional item to be upgraded later on - it fills the same niche as Headhunter. |
|
|
Required Level: 40 +(25-40) to maximum Life |
|
 Mother's Embrace - With this Belt, you can enhance your Minions with Flasks while still being able to use them yourself. They can, for example, fire extra Projectiles with Dying Sun. You will quickly run out of charges if you summon a lot of Minions, so it is difficult to make use of this Belt in a conventional build, as most of the time you will be out of Flask Charges. An Absolution Summoner may be a good choice here as it rarely summons Minions, and can have only up to three of them. Mother's Embrace - With this Belt, you can enhance your Minions with Flasks while still being able to use them yourself. They can, for example, fire extra Projectiles with Dying Sun. You will quickly run out of charges if you summon a lot of Minions, so it is difficult to make use of this Belt in a conventional build, as most of the time you will be out of Flask Charges. An Absolution Summoner may be a good choice here as it rarely summons Minions, and can have only up to three of them. |
|
|
Required Level: 40 +(25-35) to Strength |
|
 Wurm's Molt - It does increase the total Recovery per second from Leech, but you won't Leech "faster". It increases the Life and Mana that can be recovered per second from a single instance. You're still limited to Recovering only 20% of your Maximum Life a second from Leech unless you also invest in Maximum total Life Recovery per second from Leech. It's still good if you need Mana and Life Leech, which a lot of low-level builds struggle with. Wurm's Molt - It does increase the total Recovery per second from Leech, but you won't Leech "faster". It increases the Life and Mana that can be recovered per second from a single instance. You're still limited to Recovering only 20% of your Maximum Life a second from Leech unless you also invest in Maximum total Life Recovery per second from Leech. It's still good if you need Mana and Life Leech, which a lot of low-level builds struggle with. |
|
|
Required Level: 41 +(25-40) to maximum Life |
|
 Pyroshock Clasp - It has a narrow range of uses, as the Conversion of Damage Taken works only on enemies you Ignite or Shock, so if you rely on this Conversion to survive, it won't always work. As a defensive layer, it is not only unreliable but also requires a very specific setup where you convert the remaining Physical Damage to be taken as some kind of Elemental Damage. If you manage to reach 100% Conversion of Physical Damage Taken, you won't need any Armour or Physical mitigation at all, which is one of the strongest defensive layers. It will also encourage you to invest in high Elemental/Chaos Resistances. It can be good in these very specific builds, or in a build with extremely high Maximum Fire and Lightning Resistances and almost no Armour. Pyroshock Clasp - It has a narrow range of uses, as the Conversion of Damage Taken works only on enemies you Ignite or Shock, so if you rely on this Conversion to survive, it won't always work. As a defensive layer, it is not only unreliable but also requires a very specific setup where you convert the remaining Physical Damage to be taken as some kind of Elemental Damage. If you manage to reach 100% Conversion of Physical Damage Taken, you won't need any Armour or Physical mitigation at all, which is one of the strongest defensive layers. It will also encourage you to invest in high Elemental/Chaos Resistances. It can be good in these very specific builds, or in a build with extremely high Maximum Fire and Lightning Resistances and almost no Armour. |
|
|
Required Level: 43 +(25-40) to maximum Life |
|
 Ascent From Flesh - This one has a lot of Energy Shield combined with Evasion Rating, making it good in a lot of builds that would pick the Ghost Dance Keystone, or in Trickster builds that do not rely on Maximum Life. It quite reliably grants Phasing, and even increases Movement Speed while being under its effect. A good Rare Crystal Belt will give you more ES, so it's only good if you want that Evasion and Movement Speed on top of the quite high ES. It's popular among Raiders with Quartz Infusion since they're always Phasing. Ascent From Flesh - This one has a lot of Energy Shield combined with Evasion Rating, making it good in a lot of builds that would pick the Ghost Dance Keystone, or in Trickster builds that do not rely on Maximum Life. It quite reliably grants Phasing, and even increases Movement Speed while being under its effect. A good Rare Crystal Belt will give you more ES, so it's only good if you want that Evasion and Movement Speed on top of the quite high ES. It's popular among Raiders with Quartz Infusion since they're always Phasing. |
|
|
Required Level: 44 +(9-20) to maximum Energy Shield |
|
 Mageblood - It can be considered the best Belt in the game, or even the single best item. It can turn four of your Magic Flasks into permanent buffs, you can then upgrade these Flasks with Enkindling Orb for a 70% increased Flask Effect with no downside whatsoever. It can fix your Resistances with Flask Suffixes, or you can use the Topaz, Ruby, and Sapphire Flasks to take much less Elemental Damage on top of your capped Resistances. It's good in any build. Mageblood - It can be considered the best Belt in the game, or even the single best item. It can turn four of your Magic Flasks into permanent buffs, you can then upgrade these Flasks with Enkindling Orb for a 70% increased Flask Effect with no downside whatsoever. It can fix your Resistances with Flask Suffixes, or you can use the Topaz, Ruby, and Sapphire Flasks to take much less Elemental Damage on top of your capped Resistances. It's good in any build. |
|
|
Required Level: 44 +(25-35) to Strength |
|
 Maligaro's Restraint - You can use it to Shock yourself. To mitigate the Effect of this Shock, invest in mods that would reduce the Effect of Shock on you by up to 0%. It may be good for its inherent bonuses for Damage and Movement Speed, but also when combined with Replica Winterheart which simply makes you unaffected by Shock, so you won't need to reduce its effect, and Regenerates 5% of Energy Shield per second. It may also be good with Leper's Alms to always cause Shock no matter the type of damage you're dealing, or The Fulcrum to be Lucky with damage. It's not a powerful combination of items and so the belt is rarely used - there are more much more potent Belts and setups. Maligaro's Restraint - You can use it to Shock yourself. To mitigate the Effect of this Shock, invest in mods that would reduce the Effect of Shock on you by up to 0%. It may be good for its inherent bonuses for Damage and Movement Speed, but also when combined with Replica Winterheart which simply makes you unaffected by Shock, so you won't need to reduce its effect, and Regenerates 5% of Energy Shield per second. It may also be good with Leper's Alms to always cause Shock no matter the type of damage you're dealing, or The Fulcrum to be Lucky with damage. It's not a powerful combination of items and so the belt is rarely used - there are more much more potent Belts and setups. |
|
|
Required Level: 44 +(9-20) to maximum Energy Shield |
|
 Siegebreaker - It's not a popular Belt, as Builds that use Minions to then detonate them and deal damage based on their Maximum Life with Death Wish or Minion Instability tend to Ignite their opponents and deal Fire Damage, not Chaos Damage. It's just more efficient as Death Wish and Minion Instability both deal base Fire Damage, which can Ignite. This Belt has no use as the Replica version is often much better. Siegebreaker - It's not a popular Belt, as Builds that use Minions to then detonate them and deal damage based on their Maximum Life with Death Wish or Minion Instability tend to Ignite their opponents and deal Fire Damage, not Chaos Damage. It's just more efficient as Death Wish and Minion Instability both deal base Fire Damage, which can Ignite. This Belt has no use as the Replica version is often much better. |
|
|
Required Level: 44 +(25-35) to Strength |
|
| Replica Siegebreaker - This Belt is used in Summon Raging Spirit Build with Minion Instability Keystone - it causes Minions to explode and Ignite enemies. This Burning Ground will deal significant damage, even without direct investment into Burning Damage, as you're probably using Exposure, Combustion, and other such types of Fire Resistance Reductions. It's a major damage boost there. |
|
|
Required Level: 45 +(25-35) to Strength |
|
 The Retch - It can be crafted by selling a Feastbind, Faminebind, and one Orb of Fusing. It makes your Flasks last longer while they gain fewer charges, but the most interesting line is "200% of Life Leech applies to Enemies as Chaos Damage". It makes your Hits apply Chaos DoT, and it stacks indefinitely (it's similar to Poison). It's hard to increase the damage of this effect, other than by generic effects that affect your enemies like Wither or Temporal Chains. The damage of this effect scales with your own Maximum Life and Maximum Recovery per Life Leech, and it can be a nice addition to some kind of Chaos DoT Slayer build with tons of Maximum Life, but this potential is yet to be explored. The Retch - It can be crafted by selling a Feastbind, Faminebind, and one Orb of Fusing. It makes your Flasks last longer while they gain fewer charges, but the most interesting line is "200% of Life Leech applies to Enemies as Chaos Damage". It makes your Hits apply Chaos DoT, and it stacks indefinitely (it's similar to Poison). It's hard to increase the damage of this effect, other than by generic effects that affect your enemies like Wither or Temporal Chains. The damage of this effect scales with your own Maximum Life and Maximum Recovery per Life Leech, and it can be a nice addition to some kind of Chaos DoT Slayer build with tons of Maximum Life, but this potential is yet to be explored. |
|
|
Required Level: 44 (12-24)% increased Global Physical Damage |
|
 Soulthirst - It's better the longer your Flask Duration is. Soul Eater increases your Attack Speed and Cast Speed by 5% per kill. It allows you to gain absurd amounts of Damage after investing in Flask Effect Duration, but it's pointless against bosses in separate arenas, and the damage is inconsistent. You can even use Enkindling Orbs to increase Flasks' duration by 100%. It resets after taking a sip from any of your Flasks, which you will eventually do. It's used in many builds that don't plan to kill bosses, and only do maps very fast. Soulthirst - It's better the longer your Flask Duration is. Soul Eater increases your Attack Speed and Cast Speed by 5% per kill. It allows you to gain absurd amounts of Damage after investing in Flask Effect Duration, but it's pointless against bosses in separate arenas, and the damage is inconsistent. You can even use Enkindling Orbs to increase Flasks' duration by 100%. It resets after taking a sip from any of your Flasks, which you will eventually do. It's used in many builds that don't plan to kill bosses, and only do maps very fast. |
|
|
Required Level: 45 (15-25)% increased Stun and Block Recovery |
|
 Gluttony - It completely removes your Armour and ES, which needless to say, is bad. It's hard to justify such a downside. It also damages you with Physical Damage (that now you cannot mitigate) each time you use a Movement Skill. The upsides are Life/Mana on kill, a lot of Maximum Life, and Culling Strike. It's not enough - almost every build in the game uses either ES or Armour, often both, and the benefits are not nearly enough to recoup this hindrance. However, the build that comes to our mind is something similar to a Wardloop autobomber (where you take nearly 18k damage a second) with CwDT setups, Ward, Curse on Hit, and Olroth's Resolve. By using this Belt you would have to use your Movement Skill very often to compete with that build, that's why no one uses it (imagine casting Lighting Warp around ~25 times/second). Gluttony - It completely removes your Armour and ES, which needless to say, is bad. It's hard to justify such a downside. It also damages you with Physical Damage (that now you cannot mitigate) each time you use a Movement Skill. The upsides are Life/Mana on kill, a lot of Maximum Life, and Culling Strike. It's not enough - almost every build in the game uses either ES or Armour, often both, and the benefits are not nearly enough to recoup this hindrance. However, the build that comes to our mind is something similar to a Wardloop autobomber (where you take nearly 18k damage a second) with CwDT setups, Ward, Curse on Hit, and Olroth's Resolve. By using this Belt you would have to use your Movement Skill very often to compete with that build, that's why no one uses it (imagine casting Lighting Warp around ~25 times/second). |
|
|
Required Level: 48 +(25-40) to maximum Life |
|
 Soul Tether - It gives you a fair amount of Maximum ES sourced from Maximum Life and Immoral Ambition. It's a good Keystone for a build with Life Leech - if you've Leeched all your Life Pool back, you start leeching ES. It also grants you overleech. It's good if you have a lot of both Life and Energy Shield, and are Leeching constantly Life. There are not a lot of builds that do that, and even fewer are willing to sacrifice their Belt slot for this extension to their Life Pool. It can be good with Tainted Pact, Strength of Blood, and Divine Flesh. Soul Tether - It gives you a fair amount of Maximum ES sourced from Maximum Life and Immoral Ambition. It's a good Keystone for a build with Life Leech - if you've Leeched all your Life Pool back, you start leeching ES. It also grants you overleech. It's good if you have a lot of both Life and Energy Shield, and are Leeching constantly Life. There are not a lot of builds that do that, and even fewer are willing to sacrifice their Belt slot for this extension to their Life Pool. It can be good with Tainted Pact, Strength of Blood, and Divine Flesh. |
|
|
Required Level: 48 (15-25)% increased Stun and Block Recovery |
|
| Replica Soul Tether - The Replica version gives you Strength instead of Intelligence, and Corrupted Soul instead of Immortal Ambition. Normally, your Chaos Damage bypasses Energy Shield while all the other types of damage are stopped by it. With this Belt, half of all types of damage bypasses your ES, but you gain Gain 15% of Maximum Life as Extra Maximum Energy Shield. It's good if you can recover both your Life and your ES at the same time with roughly equal efficiency, as the damage you receive is now spread out among both of these defensive layers. These intricacies make it good in a hybrid build with Pious Path, Supreme Decadence, or Sorrow of the Divine. It's a popular choice among Inquisitors and Pathfinders, it greatly improves their mixed ES/Life Pool. |
|
|
Required Level: 48 (15-25)% increased Stun and Block Recovery |
|
 The Druggery - It's not good. You can use it to heal your teammates, Minions, or even Totems with Life Flasks, but there is simply no good enough reason to do that. Your party members (who have to stay very close to you) should not rely on your Life Flasks to survive - it's unreliable. Your other allies are expendable. Don't use this belt. The Druggery - It's not good. You can use it to heal your teammates, Minions, or even Totems with Life Flasks, but there is simply no good enough reason to do that. Your party members (who have to stay very close to you) should not rely on your Life Flasks to survive - it's unreliable. Your other allies are expendable. Don't use this belt. |
|
|
Required Level: 48 (15-25)% increased Stun and Block Recovery |
|
 Bound Fate - It's the most unreliable and unpredictable of all Belts, but you can still try to make it useful. To be unaffected by Critical Strikes, reduce the extra damage you receive from Critical Strikes with items like Viridi's Veil, Inextricable Fate, The Brass Dome, notables like Sanctun of Thoughts, or a specific Poison Mastery. To not be affected by "Attacks against you always Hit", don't rely on Evasion or Dodge - Armour, ES, Suppression, Fortify, Resistances, and Block Chance will be more important. The "Damage of Hits against you is Lucky" typically affects you if you're against Lightning Damage, so to mitigate it get high Maximum Lighting Resistance, or use the already mentioned Viridi's Veil. To actually benefit from the modifiers, play a build with a high Critical Strike Multiplier while also not investing much into Crit Chance, and a build with a huge range of possible damage rolls (such as this Blade Trap Trickster with Volatility Support and Ephemeral Edge, or this Replica Alberon's Warpath Berserker). The "Attacks cannot Hit you" is always good, you don't need to play a specific build to benefit from it. To sum it up - we would recommend it for characters like Witch, Templars, or Marauders that use a Skill dealing base Lightning Damage, or a build with Replica Alberon's Warpath. Bound Fate - It's the most unreliable and unpredictable of all Belts, but you can still try to make it useful. To be unaffected by Critical Strikes, reduce the extra damage you receive from Critical Strikes with items like Viridi's Veil, Inextricable Fate, The Brass Dome, notables like Sanctun of Thoughts, or a specific Poison Mastery. To not be affected by "Attacks against you always Hit", don't rely on Evasion or Dodge - Armour, ES, Suppression, Fortify, Resistances, and Block Chance will be more important. The "Damage of Hits against you is Lucky" typically affects you if you're against Lightning Damage, so to mitigate it get high Maximum Lighting Resistance, or use the already mentioned Viridi's Veil. To actually benefit from the modifiers, play a build with a high Critical Strike Multiplier while also not investing much into Crit Chance, and a build with a huge range of possible damage rolls (such as this Blade Trap Trickster with Volatility Support and Ephemeral Edge, or this Replica Alberon's Warpath Berserker). The "Attacks cannot Hit you" is always good, you don't need to play a specific build to benefit from it. To sum it up - we would recommend it for characters like Witch, Templars, or Marauders that use a Skill dealing base Lightning Damage, or a build with Replica Alberon's Warpath. |
|
|
Required Level: 49 (15-25)% increased Stun and Block Recovery |
|
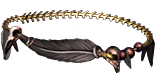
 Leash of Oblation - It allows you to have all three Offerings at the same time, but reduces their duration. It requires a lot of corpses and frequent casts, so these Offerings should be cast automatically with some kind of CwC-Cyclone-Desecrate setup. We've used it in our Flame Golem Necromancer. It's almost always used by Necromancers as they can benefit from Offerings themselves via Mistress of Sacrifice passive. Having all Offerings at the same time will grant you and your Minions Attack/Spell Block Chance, Critical Strike Chance/Multiplier, and Cast/Attack/Movement Speed. It's great in any Crit Minion build. Leash of Oblation - It allows you to have all three Offerings at the same time, but reduces their duration. It requires a lot of corpses and frequent casts, so these Offerings should be cast automatically with some kind of CwC-Cyclone-Desecrate setup. We've used it in our Flame Golem Necromancer. It's almost always used by Necromancers as they can benefit from Offerings themselves via Mistress of Sacrifice passive. Having all Offerings at the same time will grant you and your Minions Attack/Spell Block Chance, Critical Strike Chance/Multiplier, and Cast/Attack/Movement Speed. It's great in any Crit Minion build. |
|
|
Required Level: 49 +(25-40) to maximum Life |
|
 Immortal Flesh - This one grants a lot of Life and Life Regeneration, making it great in builds where you cannot Leech Life or Recover it in some other way, notably in Damage over Time builds, or builds where you deal damage by proxy - Minions, Ballistas, Totems. This Righteous Fire Juggernaut and Scorching Ray/Searing Bond Chieftain are examples of such builds. Juggernauts with Untiring can make especially good use of it as this Flat Regeneration gets increased by 40%. To put this into perspective - this Life Regeneration is almost two times as potent as level 20 Vitality Aura. It lowers your Resistances, which is usually a downside, but can be beneficial in a Doryani's Prototype build. Immortal Flesh - This one grants a lot of Life and Life Regeneration, making it great in builds where you cannot Leech Life or Recover it in some other way, notably in Damage over Time builds, or builds where you deal damage by proxy - Minions, Ballistas, Totems. This Righteous Fire Juggernaut and Scorching Ray/Searing Bond Chieftain are examples of such builds. Juggernauts with Untiring can make especially good use of it as this Flat Regeneration gets increased by 40%. To put this into perspective - this Life Regeneration is almost two times as potent as level 20 Vitality Aura. It lowers your Resistances, which is usually a downside, but can be beneficial in a Doryani's Prototype build. |
|
|
Required Level: 50 +(25-40) to maximum Life |
|
 Coward's Legacy - A Belt that causes you to be on Low Life even if you're not. It's useful if you want to benefit from Pain Attunement Keystone while also keeping all of your Life Pool. It does Curse you with Vulnerability and increases the Effect of Curses on you, so you have to be Hexproof or Immune to Curses to mitigate this downside. One way is to reach a 100% Reduced effect of Curses on you with various means like Flasks, Passives, and Consecrated Ground. You can also pick up Atziri's Reflection or Viridi's Veil and call it a day. It's the most useful in a Freezing Pulse Totem "Low Life" Hierophant build where you actually want to be affected by multiple Curses. Coward's Legacy - A Belt that causes you to be on Low Life even if you're not. It's useful if you want to benefit from Pain Attunement Keystone while also keeping all of your Life Pool. It does Curse you with Vulnerability and increases the Effect of Curses on you, so you have to be Hexproof or Immune to Curses to mitigate this downside. One way is to reach a 100% Reduced effect of Curses on you with various means like Flasks, Passives, and Consecrated Ground. You can also pick up Atziri's Reflection or Viridi's Veil and call it a day. It's the most useful in a Freezing Pulse Totem "Low Life" Hierophant build where you actually want to be affected by multiple Curses. |
|
|
Required Level: 52 +(9-20) to maximum Energy Shield |
|
 Dyadian Dawn - It's excellent for all Attack Ignite builds. There is currently one viable Ignite Attack build - Explosive Arrow Ballista Totem Elementalist. It causes your Ignites to deal damage faster, meaning their DPS is increased by a lot, and you can apply another Ignite sooner. It's one of the most valuable stats in an Ignite build. Its other stats are quite solid too. If there's any other Attack Ignite build you would want to try, definitely consider this Belt. Dyadian Dawn - It's excellent for all Attack Ignite builds. There is currently one viable Ignite Attack build - Explosive Arrow Ballista Totem Elementalist. It causes your Ignites to deal damage faster, meaning their DPS is increased by a lot, and you can apply another Ignite sooner. It's one of the most valuable stats in an Ignite build. Its other stats are quite solid too. If there's any other Attack Ignite build you would want to try, definitely consider this Belt. |
|
|
Required Level: 52 +(25-35) to Strength |
|
 Survivor's Guilt - It's not a popular Belt because it gives you the Imbalanced Guard Keystone, which is not a popular Keystone. It caps your Physical, Elemental, and Chaos Damage Reduction at 50% (you can still benefit from Fortify, Suppression, and Resistances - it only affects Reduction such as those found of Ruby, Topaz, Sapphire Flasks, or Eternal Damnation). Your Armour is effectively "doubled", but you can't use it to mitigate let's say 90% of the damage. It's only good if you plan to take big Physical Hits, ones that you cannot mitigate by half or more without Defending with 200% Armour anyway, and survive them. It will usually make you take increased damage against small Hits as in such cases it is much easier to mitigate over 50% of the Damage Taken. Most players just get more Armour until it eventually fixes this issue. The Belt itself reduces your Armour per Strength, which is not desirable unless you don't have much Strength and almost no Armour at all. You may combine with Flat Physical Damage Reduction to not die from these small Hits. Survivor's Guilt - It's not a popular Belt because it gives you the Imbalanced Guard Keystone, which is not a popular Keystone. It caps your Physical, Elemental, and Chaos Damage Reduction at 50% (you can still benefit from Fortify, Suppression, and Resistances - it only affects Reduction such as those found of Ruby, Topaz, Sapphire Flasks, or Eternal Damnation). Your Armour is effectively "doubled", but you can't use it to mitigate let's say 90% of the damage. It's only good if you plan to take big Physical Hits, ones that you cannot mitigate by half or more without Defending with 200% Armour anyway, and survive them. It will usually make you take increased damage against small Hits as in such cases it is much easier to mitigate over 50% of the Damage Taken. Most players just get more Armour until it eventually fixes this issue. The Belt itself reduces your Armour per Strength, which is not desirable unless you don't have much Strength and almost no Armour at all. You may combine with Flat Physical Damage Reduction to not die from these small Hits. |
|
|
Required Level: 38 +(25-35) to Strength |
|
 Hyperboreus - Hyperboreus is good on all Hit-based builds which can benefit from Focus. To make it useful you will most likely need other bonuses granted by Focusing, a lot of them can be found on Rare Items. The Chill applied by this Belt is the highest it can be, making it good for builds that can benefit from it, but often cannot afford to Chill due to lack of Cold Damage or Skitterbots. A Saboteur with Explosives Expert Passive and Profane Proxy might find it useful. It also massively increases the Cooldown Recovery Rate for Focus which is 8 seconds by default. Hyperboreus - Hyperboreus is good on all Hit-based builds which can benefit from Focus. To make it useful you will most likely need other bonuses granted by Focusing, a lot of them can be found on Rare Items. The Chill applied by this Belt is the highest it can be, making it good for builds that can benefit from it, but often cannot afford to Chill due to lack of Cold Damage or Skitterbots. A Saboteur with Explosives Expert Passive and Profane Proxy might find it useful. It also massively increases the Cooldown Recovery Rate for Focus which is 8 seconds by default. |
|
|
Required Level: 53 +(25-40) to maximum Life |
|
 Kaom's Binding - It's useful if you would like to mitigate Burning Damage, but it's not to be used if you take Burnign Damage constantly (as is the case in RF builds), or no Burning Damage at all. It encourages you to repeatedly take Burning Damage, and stop taking it every 0 to 4 seconds - this way you will take no Burning Damage at all. It's hard to arrange such a peculiar setup - you can either turn your RF on, equip the Eye of Innocence with a high Chance of Igniting yourself, or use Mokou's Embrace with some sort of self-hitting setup. Then, you can remove the Burnign with any Flask that has the proper modifier, and use it at least once every 4 seconds. In most cases, it would be just easier to be Unaffected by Ignite (if you don't mind non-Ignite Burning damage), or regenerate Life faster than the Burning is draining. The damage Conversion of nearby enemies is not something to take for granted as you have to stay close to your target. If you plan to take all Physical Damage as some other type of Damage, it is too unreliable, but it is still better the less Physical Mitigation you have. Kaom's Binding - It's useful if you would like to mitigate Burning Damage, but it's not to be used if you take Burnign Damage constantly (as is the case in RF builds), or no Burning Damage at all. It encourages you to repeatedly take Burning Damage, and stop taking it every 0 to 4 seconds - this way you will take no Burning Damage at all. It's hard to arrange such a peculiar setup - you can either turn your RF on, equip the Eye of Innocence with a high Chance of Igniting yourself, or use Mokou's Embrace with some sort of self-hitting setup. Then, you can remove the Burnign with any Flask that has the proper modifier, and use it at least once every 4 seconds. In most cases, it would be just easier to be Unaffected by Ignite (if you don't mind non-Ignite Burning damage), or regenerate Life faster than the Burning is draining. The damage Conversion of nearby enemies is not something to take for granted as you have to stay close to your target. If you plan to take all Physical Damage as some other type of Damage, it is too unreliable, but it is still better the less Physical Mitigation you have. |
|
|
Required Level: 56 +(25-35) to Strength |
|
 The Flow Untethered - It speeds up your Recovery of various resources, increases Attack and Cast Speed, Cooldown Recovery Rate, and reduces Debuffs duration on you. The Harbinger it summons increases Action Speed for your character, allies, and enemies by +10% for 8 seconds every 20 seconds. Most players use The Torrent's Reclamation as it's better in any case. The Flow Untethered - It speeds up your Recovery of various resources, increases Attack and Cast Speed, Cooldown Recovery Rate, and reduces Debuffs duration on you. The Harbinger it summons increases Action Speed for your character, allies, and enemies by +10% for 8 seconds every 20 seconds. Most players use The Torrent's Reclamation as it's better in any case. |
|
|
Required Level: 60 (15-25)% increased Stun and Block Recovery |
|
 The Torrent's Reclamation - It's the upgraded version of The Flow Untethered. The only difference is, that the Graeter Harbinger doesn't buff your enemies, only you and your allies. It's a direct upgrade. The stats it grants are universally good, but the Belt is the most valued in builds that want to increase the Cooldown Recovery Rate to trigger their setups with higher frequency, just note that this modifier can be found on Rare Shaper Belts too. The Torrent's Reclamation - It's the upgraded version of The Flow Untethered. The only difference is, that the Graeter Harbinger doesn't buff your enemies, only you and your allies. It's a direct upgrade. The stats it grants are universally good, but the Belt is the most valued in builds that want to increase the Cooldown Recovery Rate to trigger their setups with higher frequency, just note that this modifier can be found on Rare Shaper Belts too. |
|
|
Required Level: 60 (15-25)% increased Stun and Block Recovery |
|
 Chains of Emancipation - It is not a popular Belt. It causes enemy Hits to apply Temporach Chains Hex on Hit against you, and in turn, it grants you Maximum Rage when you lose this Temporal Chains Hex. The Hex lasts for 5 seconds. It's good if you're immune to Temporal Chains, and if you can't gain Rage any other way for some reason. Its efficiency relies on getting Hit, so it's not a popular Belt for bossing. There are plenty of ways to gain Rage quickly and more reliably, but it is still a good Belt - it grants a lot of Maximum Life, Chaos Resistance, and Curse Immunity if you have a lot of Rage already, which is often enough. Chains of Emancipation - It is not a popular Belt. It causes enemy Hits to apply Temporach Chains Hex on Hit against you, and in turn, it grants you Maximum Rage when you lose this Temporal Chains Hex. The Hex lasts for 5 seconds. It's good if you're immune to Temporal Chains, and if you can't gain Rage any other way for some reason. Its efficiency relies on getting Hit, so it's not a popular Belt for bossing. There are plenty of ways to gain Rage quickly and more reliably, but it is still a good Belt - it grants a lot of Maximum Life, Chaos Resistance, and Curse Immunity if you have a lot of Rage already, which is often enough. |
|
|
Required Level: 61 +(9-20) to maximum Energy Shield |
|
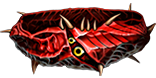
 Arn's Anguish - You can use it to transform your Endurance Charges, which normally grant Elemental Resistance and Physical Damage Mitigation, to Brutal Charges, which now grant a 3% chance to deal Triple damage and a 10% reduced Stun Threshold each. The most appealing scenario in which this Belt is good is in a Slayer build with Masterful Form passive and Replica Farrul's Fur. It is where you can gain a lot of Endurance Charges easily, without relying on them for survival. It's a popular pick in a lot of Flicker Strike Slayer builds. Arn's Anguish - You can use it to transform your Endurance Charges, which normally grant Elemental Resistance and Physical Damage Mitigation, to Brutal Charges, which now grant a 3% chance to deal Triple damage and a 10% reduced Stun Threshold each. The most appealing scenario in which this Belt is good is in a Slayer build with Masterful Form passive and Replica Farrul's Fur. It is where you can gain a lot of Endurance Charges easily, without relying on them for survival. It's a popular pick in a lot of Flicker Strike Slayer builds. |
|
|
Required Level: 68 (15-25)% increased Stun and Block Recovery |
|
 Bear's Girdle - Bear's Girdle is known for extending your Maximum Rage by 20, and Crushing enemies if you have at least 25 Rage. Crush lowers Physical Damage Reduction by 15%. It makes this Belt good in most Physical Damage builds that can consistently generate Rage, so in most Berserker builds with War Bringer. We have used it in Rage Vortex Berserker build, as it benefits from having a lot of Rage, and spends it rarely. Bear's Girdle - Bear's Girdle is known for extending your Maximum Rage by 20, and Crushing enemies if you have at least 25 Rage. Crush lowers Physical Damage Reduction by 15%. It makes this Belt good in most Physical Damage builds that can consistently generate Rage, so in most Berserker builds with War Bringer. We have used it in Rage Vortex Berserker build, as it benefits from having a lot of Rage, and spends it rarely. |
|
|
Required Level: 68 +(25-40) to maximum Life |
|
 Cyclopean Coil - Cyclopean Coil is good in most Attribute-stacking builds, as it increases your Attributes by up to 15%. It's very cheap at that. It provides you with tons of Maximum Life. If you value only one attribute, you may want to switch to a Syntesised Rare Belt that increases a specific Attribute by default. It is still great in builds in which you stack more than one Attribute, as is the case in this Energy Blade "Jedi Master" Inquisitor build. It is also a cheap substitute in most Attribute-stacking builds. Cyclopean Coil - Cyclopean Coil is good in most Attribute-stacking builds, as it increases your Attributes by up to 15%. It's very cheap at that. It provides you with tons of Maximum Life. If you value only one attribute, you may want to switch to a Syntesised Rare Belt that increases a specific Attribute by default. It is still great in builds in which you stack more than one Attribute, as is the case in this Energy Blade "Jedi Master" Inquisitor build. It is also a cheap substitute in most Attribute-stacking builds. |
|
|
Required Level: 68 +(25-40) to maximum Life |
|
 Doryani's Invitation, Cold - This version of Doryani's Invitation grants Chance to Freeze During Flask Effect, which often applies only to Cold Damage. It is not a popular choice for a Belt, but it does grant you a lot of Elemental Resistances and Life Leech from Coild Damage. Cold Damage Hit-based builds often have a high Crit Chance, and so they don't need this Belt for the extra chance to Chill and Freeze - it is guaranteed by Striking Critically. Doryani's Invitation, Cold - This version of Doryani's Invitation grants Chance to Freeze During Flask Effect, which often applies only to Cold Damage. It is not a popular choice for a Belt, but it does grant you a lot of Elemental Resistances and Life Leech from Coild Damage. Cold Damage Hit-based builds often have a high Crit Chance, and so they don't need this Belt for the extra chance to Chill and Freeze - it is guaranteed by Striking Critically. |
|
|
Required Level: 68 +(25-35) to Strength |
|
| Doryani's Invitation, Fire - This version of Doryani's Invitation grants up to a 30% Chance to Ignite during any Flask Effect. It is, again, not a popular choice for a Belt as most Spell Ignite builds use Shaper of Flames passive for the 100% chance to cause Ignite on Hit. Most Attack Ignite builds use Dyadian Dawn. It is good if you lack Ignite Chance in your build, and to Leech Life from Fire Damage. |
|
|
Required Level: 68 +(25-35) to Strength |
|
| Doryani's Invitation, Lightning - This version of Doryani's Invitation grants up to a 30% Chance to Shock during any Flask Effect. Lightning Damage builds often invest in Crit Chance, so this Belt is not really needed there. It is good if you don't have enough Shock Chance. It also allows you to Leech Life from Lightning Damage. It's a good Belt if you lack Life Leech or Shock Chance in your build. |
|
|
Required Level: 68 +(25-35) to Strength |
|
| Doryani's Invitation, Physical - The most valuable Doryani's Invitation. It is used to Leech Life from Physical Attacks, and provide your character with a lot of Elemental Resistances. The most appealing addition in this version of Doryani's Invitation are Resistances combined with Life Leech, which are often needed in Physical Damage builds. It can be great in this Corrupting Fever/Reap Champion build. |
|
|
Required Level: 69 +(25-35) to Strength |
|
 Graven's Secret - It's similar to Arn's Anguish. It transforms your Power Charges, which normally grant Crit Chance, into Absorbtion Charges, which now grant Life Recoup from Elemental Damage. It is good in builds where you can easily get a lot of Power Charges, but don't need the Crit Chance they provide. You can use it with Willclash or The Aylardex. It is also good in any build that makes you lose your Power Charges - you can gain them as easily as you would gain Power Charges, but you cannot lose them with effects present in items like Malachai's Loop. It's not a popular Belt. Crit Chance is good in a lot of builds. Graven's Secret - It's similar to Arn's Anguish. It transforms your Power Charges, which normally grant Crit Chance, into Absorbtion Charges, which now grant Life Recoup from Elemental Damage. It is good in builds where you can easily get a lot of Power Charges, but don't need the Crit Chance they provide. You can use it with Willclash or The Aylardex. It is also good in any build that makes you lose your Power Charges - you can gain them as easily as you would gain Power Charges, but you cannot lose them with effects present in items like Malachai's Loop. It's not a popular Belt. Crit Chance is good in a lot of builds. |
|
|
Required Level: 68 (15-25)% increased Stun and Block Recovery |
|
 Olesya's Delight - It's similar to Arn's Anguish and Graven's Secret. It changes your Frenzy Charges into Affliction Charges. Instead of granting Attack, Cast, and Movement Speed, these Charges give you 8% more Damage with Ailments and 8% more Effect of Non-Damaging Ailments per Charge. It can be good in a build where you cause damaging Ailments - like Bleed or Poison, and non-damaging Ailments - like Shock or Chill. Because of that, it may be good with Echoforge, but in most cases, Frenzy Charges are still much better as Poison scales up with Attack/Cast Speed as well. Olesya's Delight - It's similar to Arn's Anguish and Graven's Secret. It changes your Frenzy Charges into Affliction Charges. Instead of granting Attack, Cast, and Movement Speed, these Charges give you 8% more Damage with Ailments and 8% more Effect of Non-Damaging Ailments per Charge. It can be good in a build where you cause damaging Ailments - like Bleed or Poison, and non-damaging Ailments - like Shock or Chill. Because of that, it may be good with Echoforge, but in most cases, Frenzy Charges are still much better as Poison scales up with Attack/Cast Speed as well. |
|
|
Required Level: 68 (15-25)% increased Stun and Block Recovery |
|
 Perseverance - This Belt translates Amour and Evasion into a lot of damage, given you gave a lot of both. It is most commonly used in Champion builds - they can quite easily increase their Effect of Auras with Inspirational and Revelty passives. The most efficient way to gain more Evasion and Armour is from Grace and Determination Auras, so Champions are predisposed to having a lot of these defensive layers by default. Champions also gain a lot of Armour from Unstoppable Hero and Master of Metal passives. We have used it in our Trinity Molten Strike Champion build. Perseverance - This Belt translates Amour and Evasion into a lot of damage, given you gave a lot of both. It is most commonly used in Champion builds - they can quite easily increase their Effect of Auras with Inspirational and Revelty passives. The most efficient way to gain more Evasion and Armour is from Grace and Determination Auras, so Champions are predisposed to having a lot of these defensive layers by default. Champions also gain a lot of Armour from Unstoppable Hero and Master of Metal passives. We have used it in our Trinity Molten Strike Champion build. |
|
|
Required Level: 78 +(260-320) to Armour and Evasion Rating |
|
|
Required Level: 79 +(60-80) to maximum Energy Shield |
|
 The Burden of Truth - It is a Belt for a build with Maximum Life and Energy Shield. It makes your Life Flasks recover your Energy Shield too, so it can be used as a substitute for Elegant Hubris or The Sorrow of the Divine. Because of that, it is often used in Inquisitor builds that take advantage of ES and Life alike, or in Pathfinder builds with Master Surgeon passive to make Life Flasks more potent. It is quite similar to the Replica Soul Tether Belt, as it is also used in these Hybrid builds. The Burden of Truth - It is a Belt for a build with Maximum Life and Energy Shield. It makes your Life Flasks recover your Energy Shield too, so it can be used as a substitute for Elegant Hubris or The Sorrow of the Divine. Because of that, it is often used in Inquisitor builds that take advantage of ES and Life alike, or in Pathfinder builds with Master Surgeon passive to make Life Flasks more potent. It is quite similar to the Replica Soul Tether Belt, as it is also used in these Hybrid builds. |
|
|
Required Level: 79 +(60-80) to maximum Energy Shield |
If you have any other Article requests please leave that in the comments below. We are always open to suggestions and constructive feedback.
Pictures used in this article are the intellectual property of Grinding Gear Games.
