![[3.0]Flame Golem Witch Necromancer Build - Odealo's Crafty Guide](https://static.odealo.com/upload/images/article/flame-golem-necro_65807a4122bb6_l.jpg)
[3.0]Flame Golem Witch Necromancer Build - Odealo's Crafty Guide
A very powerful Minion build based on one of the oldest type of Golems in Path of ExileFlame Golem
Necromancer build
Updated for Patch 3.23
The Best Crafty Guides by Odealo
| Guide notes |
| March 18, 2022 -Updated for Patch 3.17 December 17, 2023 -Updated for Patch 3.23 |
| Build overview | |||
| Tags: [MINION] [ELEMENTAL] [LIFE] | |||
|
Budget: Defenses: |
|
Boss DPS: AoE: |
|
Necromancer is an ascendancy that specializes in dealing damage via Minions, usually, these are Skeletons or Zombies - not many players use Golems. Typically Golems are used by Elementalist to profit from the passive Buffs they grant, or a Carrion Golem that is used by Necromancers with a horde of Minions dealing Physical Damage. In this build, the main damage dealer is a Flame Golem. It uses three Spells - Magma Ball, Flame Wave, and Immolate. Most of these are Projectiles, Magama Ball behaves in a similar way to Rolling Magma Skill. The most efficient way to increase your Damage is to increase the maximum number of Golems you can summon to 4, with Forbidden Flesh and Flame with Liege of the Primordial of Elemenacer this limit can be extended to 5. You should also increase the Cooldown Recovery Rate for your Golems so that they can Cast their Spells more frequently.
It's a Life build with around 5k of Maximum Life, capped Block Chance with Glancing Blows, 15 to 30k Armour, Life Regeneration, and Aspect of the Avian which also increases your Minions' Damage. Golems should have high Crit. Chance - it can be done by investing in proper Support Gems and Passive Skill Points. Your Minions are extremely tanky with around 3k of Life Regenerated per second, they won't die. You will also use Animated Guardian and Spectres for various offensive utilities. The build uses Pledge of Hands, Saqawal's Nest, and Leash of Oblation. The Weapon and Body Armour can get expensive when 6-linked, be sure to check their price before you start.
Patch 3.23 introduced two variations of Flame Golem, and so we're switching to the Flame Golem of Hordes as it lets us Summon two additional Golems. The Gem Quality increases Golem's Cooldown Recovery Rate so that they can Cast their Spells more often. We didn't need the Damage buff anyway. The patch also nerfed The Anima Stone - it lets you summon only one extra Golem, not two. Overall, the changes are definitely a buff.
You can also check our other Path of Exile builds at Odealo's Crafty Guides - Full List
1. Gameplay
Playing a Summoner class is completely different from other builds. The gameplay is much less straightforward, while your character should have no direct contact with monsters, and is supposed to play a supportive role. Being able to freely kite Attacks and Spells while your Minions deal the damage is the core defensive layer. The main idea behind these types of builds is to have your Minions tank and kill monsters, with you assist them with your Auras, Curses, and Offerings. This is achieved by a mixture of good positioning, kiting skills, and general PoE experience. The build plays in a similar way to the Herald of Agony, but instead of one Minion, you have 4 or 5.
It's crucial to stay focused all the time while playing a Summoner character. It's rather easy to feel like you are not participating in the battle, lose focus and get killed by a Charge or an AoE attack.
|
|

2. Build's PROS & CONS
| PROS |
|
| CONS |
|
3. Leveling tips
Simply use our Witch Leveling Guide using Minions. The Flame Golem Summon build is very easy to level up. You will be using other types of Minions along the way, making it a rather smooth ride, with not many gear requirements. As Witch you will have very early access to powerful summon Gems right after you start: Summon Zombies and Summon Raging Spirit. Later on, you can either choose to stick with SRS as your primary DPS ability or swap to Summon Spectres Spell. In either setup, you should be able to grind your way up to your final Golem build. If you can afford one, it's also a good idea to put both your Minion Gems in a Tabula Rasa Body Armour.
Suggested leveling Gem setups:
| Raise Zombie setup | |
 |
Raise Zombie - your Minion-Tanks. Accessed as early as level 1, will most likely accompany you till the end game. They are slow and act as your meatshield. You should only support them with defensive Gems to make them more durable, allowing you to stay safe while casting offensive spells. |
 |
Minion Life Support - mandatory Support Gem for this setup. Will be available at level 18 |
 |
Elemental Army Support - grants Elemental Resistance to your Minions, as well as increased Elemental Damage. This one won't be available until Act 3 and level 31 though |
 |
Fortify Support - another decent defensive support option. Adds up a little extra damage too |
 |
Minion Speed Support - I can personally recommend this Gem. It will be available at level 18 (together with Minion Life Support), so you might want to use it before you get to swap it with the other recommended Support Gems |
| Summon Raging Spirit setup | |
 |
Summon Raging Spirit - your primary DPS ability starting from the very beginning. You can choose it as a reward from "Breaking some eggs" quest in Act 1. Raging Spirits are considered minions that use melee attacks. They act like homing missiles chasing enemies all around the screen. Also, keep in mind they only last for a limited time - their base duration is 5 seconds. Summon Ragin Spirit is a spell you should be spamming in combat while your Zombies tank the enemy attacks. This gem makes a great and cheap combination when used in a Reverberation wand |
 |
Minion Damage Support - well-round offensive Support Gem for minions |
 |
Melee Physical Damage Support - another great attacking Support Gem option. Adds extra Physical Damage to your Raging Spirits' attacks |
 |
Melee Splash Support - a good option for extra AoE damage. Boosts your clear speed by a fair bit |
|
Minion Speed Support - this should be used early, as it will be one of the first accessible Support Gems for SRS setup. Later one should be swapped for one of the above |
 |
Spell Echo Support - one of the best Support Gems for any SRS setup. However, if you are going to use a Reverberation wand you can skip this one |
| Raise Spectre setup | |
 |
Summon Spectre - this might potentially become your main DPS. You can raise Spectres starting from Act 3 - Solaris Temple - The Flame Sentinels. You should know that Spectres will have the same abilities that they had in life. Later on, you can replace Flame Sentinels with a melee version - the Kitava Heralds, from Act 5. You should use different Support Gems for each type, which are listed below. |
|
Minion Damage Support (both) - well-round offensive Support Gem for minions |
|
Melee Physical Damage Support (melee) - one of the best offensive Support Gems for melee fighters |
|
Spell Echo Support (caster) - one of the best Support Gem for casters. Doubling up the number of spells your Spectre casts |
 |
Greater Multiple Projectiles Support (caster) - most of the Flame Sentinel's spells are projectiles based; this will benefit their DPS greatly |
|
Spell Echo Support (caster) - one of the best Support Gems for any SRS setup. However, if you are going to use Reverberation Wand, you can skip this one |
|
Fortify Support (melee) - another decent option, for both extra toughness and DPS |
| Other viable options | |
 |
Empower Support - one of the best Support Gems for all types of Minion. However, it's not for players playing on a low budget. High-level Empower will cost a lot. However, it adds up the most Life and DPS by increasing all the supported active gems' levels |
|
|
Bandits:
You should kill all the Bandits for two extra Passive Skill Points. This is the best and the only valid option
Leveling Skill Trees:
31 Points Skill Tree
Priorities: 1) Lord of the Dead 2) Cruel Preparation 3) Death Attunement (if using Zombies) 4) Enduring Bond
65 Points Skill Tree
Priorities 1) Gravepact 2) Purity of Flesh 3) Sovereignty 4) Redemption and Righteous Army 5) Fearsome Force
Recommended leveling items:
 Sidhebreath - Very cheap and easy to get from other players early in the game. Should not cost more than 1 Alchemy Orb Sidhebreath - Very cheap and easy to get from other players early in the game. Should not cost more than 1 Alchemy Orb |
|
| (20-30)% increased Mana Regeneration Rate +25% to Cold Resistance Minions have (10-15)% increased maximum Life Minions have (10-15)% increased Movement Speed Minions deal (5-9) to (11-15) additional Cold Damage (15-10)% reduced Mana Cost of Minion Skills |
 Bones of Ullr - great leveling item for any summon build. Increases the maximum number of Zombies and Spectres by 1 Bones of Ullr - great leveling item for any summon build. Increases the maximum number of Zombies and Spectres by 1 |
|
| (40-60)% increased Energy Shield +20 to maximum Life +20 to maximum Mana (5-15)% increased Movement Speed +1 to Level of all Raise Zombie Gems +1 to Level of all Raise Spectre Gems |
 Reverberation Rod - Supports socketed Gems with Spell Echo. Allows powerful and cheap SRS combination. You should either aim to get one with three links or craft them yourself. The first option will be always cheaper with low-level items though Reverberation Rod - Supports socketed Gems with Spell Echo. Allows powerful and cheap SRS combination. You should either aim to get one with three links or craft them yourself. The first option will be always cheaper with low-level items though |
|
| (15-19)% increased Spell Damage +2 to Level of Socketed Gems Socketed Gems are Supported by Level 10 Spell Echo +(10-30) to Intelligence |
 Unending Hunger - if you plan to use Raise Spectres this is a great threshold jewel for this spell. It's also very cheap and shouldn't cost you more than 1 Alchemy Orb Unending Hunger - if you plan to use Raise Spectres this is a great threshold jewel for this spell. It's also very cheap and shouldn't cost you more than 1 Alchemy Orb |
|
| Minions have (6-8)% increased Area of Effect With at least 40 Intelligence in Radius, Raised Spectres have a 50% chance to gain Soul Eater for 20 seconds on Kill |
|
 Skullhead - a Helmet that makes your Minions much more durable while granting decent stats to your character Skullhead - a Helmet that makes your Minions much more durable while granting decent stats to your character |
|
| (60-80)% increased Armour and Evasion +(50-70) to maximum Life +(50-70) to maximum Mana +(10-20)% to all Elemental Resistances Minions have +10% Chance to Block Attack Damage Minions have +(300-350) to Armour Minions Regenerate 2% of Life per second |
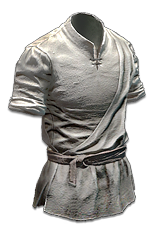 Tabula Rasa - it is always a good leveling option if you can afford one. However, spamming SRS with no extra mana/mana regeneration might be tricky with the extra support gems linked to it. Tabula Rasa - it is always a good leveling option if you can afford one. However, spamming SRS with no extra mana/mana regeneration might be tricky with the extra support gems linked to it. |
|
| Item has no level requirement and Energy Shield (Hidden) Item has 6 White Sockets and is fully linked (Hidden) |
4. Final Skill Tree, Ascendancy Points, and Pantheon
Final Skill Tree:
101 Points Final Skill Tree (doesn't include Cluster or Unique Jewels)
117 Points Path of Building(PoB) link
Ascendancy points:
Preferably in that order:
- Commander of Darkness
- Mindless Aggression
- Mistress of Sacrifice
- Plaguebringer
Pantheon:
Major God: Soul of the Brine King You cannot be Stunned if you've been Stunned or Blocked a Stunning Hit in the past 2 seconds
Minor God: Soul of Gruthkul 1% additional Physical Damage Reduction for each Hit you've taken Recently up to a maximum of 5%
5. Final Gems links
| [DPS] Flame Golem setup socketed in Pledge of Hands |
|
 |
Flame Golem of Hordes - Your core DPS skill. Flame Golems are ranged casters, with Fire projectile and AoE spells. Use the Flame Golem of Hordes version of the Gem for an increased Cooldown Recovery Rate and two additional Golems. |
|
Minion Damage Support - well-round offensive Support Gem for minions |
|
Spell Echo Support - works for the spells cast by your Flame Golem, while also significantly increasing their cast speed |
|
Greater Multiple Projectiles - increases the number of projectiles and the damage of the projectile-based spells cast by your Flame Golem |
 |
Fire Penetration Support - Fire Damage penetrates a big chunk of Fire Resistance of your opponents |
 |
Increased Critical Damage Support - Critical Strikes deal much more Damage |
| [UTILITY] Offering setup | |
 |
Cyclone - a Channeling Attack that allows you to move, which makes it the best Channeling Skill to use |
 |
Desecrate - crates corpses for you to consume and use for Offerings |
 |
Flesh Offering - grants increased Attack, Movement, and Cast Speed to your Minions and yourself |
 |
Bone Offering - increased Cast Speed, Life Regeneration on Block, Attack, and Spell Block Chance |
 |
Spirit Offering - increases Cast Speed, grants extra Chaos, and Elemental Resistances |
 |
Cast While Channeling - Offerings and Desecrate will be activated while you Channel Cyclone |
| [UTILITY] Minions setup | |
 |
Animate Guardian - You can equip this Minon with any Weapon, Gloves, Boots, Helmet, and Body Armour. We recommend using the Kingmaker weapon. |
|
Raise Spectre - Use Spectres which can give you various Buffs, deal Fire Damage, grant Charges, or Proximity Shield. We recommend Host Chieftain or Undying Evangelist. |
 |
Feeding Frenzy Support - Feeding Frenzy increases Damage, Cast, and Movement Speed of all your Minions |
|
Elemental Army Support - Minions will inflict Exposure on Hit, lowering Elemental Resistances of your targets |
| [UTILITY] Assassin's Mark setup | |
 |
Assassin's Mark - more Critical Strike Chance, increased Critical Strike Multiplier, slain enemies grant Power Charge, Life, and Mana |
 |
Mark on Hit Support - Mark is applied to the enemies you hit with Cyclone |
| [UTILITY] Skitterbots setup | |
 |
Summon Skitterbots - Skitterbots Chill and Shock enemies making them take increased damage and move slower |
 |
Unbound Ailments Support - the effect of Shock and Chill is increased and lasts longer |
| [UTILITY] Zealotry setup | |
 |
Zealotry - an Aura for more Spell Damage, increased Critical Strike Chance for Spells, and a chance to create Consecrated Ground during boss fights |
 |
Generosity Support - makes the supported Auras apply only to your Minions with increased effectiveness |
| [UTILITY] Auras setup | |
 |
Determination - use for more and increased Armour |
 |
Vitality - it makes you Regenerate a lot of Life per second |
| [MOBILITY] Flame Dash socketed in an Unset Ring |
|
 |
Flame Dash - your primary movement skill, it allows you to teleport |
5. Gear Setup
It's a straightforward Minion Build. Keep in mind that your Golems deal mostly Projectile Fire Spell Damage with a lot of Critical Strike Chance. Pledge of Hands is a Unique Staff that's the best weapon you can use - it grants you an extra Support Gem making the Golem setup 7-linked. You should also definitely use other recommended Unique items. It's important to enhance your Golems. You can increase their Cooldown Recovery Rate by increasing the Gem Quality, by equipping Ashes of the Stars. Focus on your own Life, Armour, Block Chance, Life, and Mana Regeneration. Cap your Resistances, leave an empty Suffix for the Aspect of the Avian Skill, and buy a lot of Primordial Harmony Unique Jewels.
Our recommended items will:
- Cap your resistances at 75%
- Provide you with enough DPS and Life to start mapping
|
Stat priorities on items:
|
 (Helmet) Rare Bone Helmet - Get the Maximum Life and increased Level of locally Socketed Minion Gems to upgrade your Spectres and Animated Guardian (Helmet) Rare Bone Helmet - Get the Maximum Life and increased Level of locally Socketed Minion Gems to upgrade your Spectres and Animated Guardian |
| Min. requirements: 70 maximum Life +1 to Level of Socketed Minion Gems Optional affixes: Elemental Resistances Armour Life Regeneration per second +3 to Level of Socketed Minion Gems |
| Helmet enchantments: Bone Offering grants an additional Chance to Block Attack Damage reduced Mana Reservation for Auras |
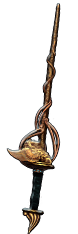
 (Weapon) Pledge of Hands - it's by far the best Staff for Flame Golems, as it allows them to Cast Spells at a much faster rate - socket your Golems setup here (Weapon) Pledge of Hands - it's by far the best Staff for Flame Golems, as it allows them to Cast Spells at a much faster rate - socket your Golems setup here |
| +20% Chance to Block Spell Damage while wielding a Staff Socketed Gems are Supported by Level 30 Greater Spell Echo (120-160)% increased Spell Damage 50% increased maximum Mana |
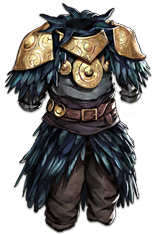 (Body Armour) Saqawal's Nest - It's a highly-recommended Body Armour as it grants you all the important stats, and enhances the Aspect of the Avian Buff Effect by 100% (Body Armour) Saqawal's Nest - It's a highly-recommended Body Armour as it grants you all the important stats, and enhances the Aspect of the Avian Buff Effect by 100% |
| +(25-75) to all Attributes +(30-40)% to Lightning Resistance (20-12)% increased Mana Reservation Efficiency of Skills 100% increased Aspect of the Avian Buff Effect Aspect of the Avian also grants Avian's Might and Avian's Flight to nearby Allies +(120-150) to Evasion Rating and Energy Shield |
 (Body Armour) Rare Armour - there aren't many useful mods to look for, just the usual Life and Resistances (Body Armour) Rare Armour - there aren't many useful mods to look for, just the usual Life and Resistances |
| Min. requirements: 90 maximum Life +50% to Elemental Resistances Optional affixes: increased maximum Life +1 to Level of Socketed Active Skill Gems |
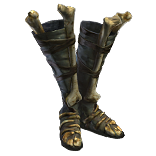
 (Boots) Rare Boots - look for Life, Movement Speed, and Elemental Resistances (Boots) Rare Boots - look for Life, Movement Speed, and Elemental Resistances |
| Min. requirements: +70 to Maximum Life 25% increased Movement Speed +60% to Elemental Resistances Optional affixes: Armour Chaos Resistance Chance to gain Onslaught on Kill |
 (Gloves) Rare Gloves - again, just Life and Resistances should be sufficient, but you can also craft the Minion Damage Prefix on your Crafting Bench (Gloves) Rare Gloves - again, just Life and Resistances should be sufficient, but you can also craft the Minion Damage Prefix on your Crafting Bench |
| Min. requirements: +50 to Maximum Life +60% to Elemental Resistances Minions deal 20% increased Damage (crafted) Optional affixes: Armour Dexterity Chaos Resistance |
 (Belt) Leash of Oblation - it allows you to have all three Offerings active at the same time which is great because all the buffs provided by them are useful not only for your Minions but also for your character (Belt) Leash of Oblation - it allows you to have all three Offerings active at the same time which is great because all the buffs provided by them are useful not only for your Minions but also for your character |
| +(25-40) to maximum Life +(15-20) to all Attributes +(50-70) to maximum Life You can have an Offering of each type Offering Skills have 50% reduced Duration |
 (Amulet) Ashes of the Stars - it enhances all of your Skill Gems, it's especially great with Flame Golem of Hordes, definitely the best-in-slot Amulet (Amulet) Ashes of the Stars - it enhances all of your Skill Gems, it's especially great with Flame Golem of Hordes, definitely the best-in-slot Amulet |
| +(10-16) to all Attributes (5-10)% increased Experience Gain of Gems +1 to Level of all Skill Gems +(20-30)% to Quality of all Skill Gems |
| Recommended Anointments: Golem Commander |
 (Rings) Rare Rings - seek Life, Resistances, and also some of the more exotic mods such as Aspect of the Avian Skill which you can craft as a Suffix, or increased Movement Speed for your Minions (Rings) Rare Rings - seek Life, Resistances, and also some of the more exotic mods such as Aspect of the Avian Skill which you can craft as a Suffix, or increased Movement Speed for your Minions |
| Min. requirements: +70 to Maximum Life +60% to Elemental Resistances Optional affixes: Chaos Resistance Grants Level 20 Aspect of the Avian Skill Minions deal 30% increased Damage Minions have increased Movement Speed |
 (Jewel) The Anima Stone - you should use it for one extra Golem (Jewel) The Anima Stone - you should use it for one extra Golem |
| +1 to maximum number of Summoned Golems if you have 3 Primordial Items Socketed or Equipped |
 (Jewel) Primordial Might - a powerful Jewel that boosts your Golem's DPS and also makes them more "aggressive," which improves their mobility and targeting, increasing your overall DPS. Equipping just one Primordial Might jewel is recommended, as we suggest using two Harmony Jewels to grant you the second golem from The Anima Stone (Jewel) Primordial Might - a powerful Jewel that boosts your Golem's DPS and also makes them more "aggressive," which improves their mobility and targeting, increasing your overall DPS. Equipping just one Primordial Might jewel is recommended, as we suggest using two Harmony Jewels to grant you the second golem from The Anima Stone |
| (25-30)% increased Damage if you Summoned a Golem in the past 8 seconds Golems Summoned in the past 8 seconds deal (35-45)% increased Damage Golems have (18-22)% increased Maximum Life Summoned Golems are Aggressive Primordial |
 (Jewel) Primordial Harmony - the recommended Primordial Jewels required to grant you the second additional golem from The Anima Stone. Can be stacked beyond the required 3, but will not grant an extra Golem (Jewel) Primordial Harmony - the recommended Primordial Jewels required to grant you the second additional golem from The Anima Stone. Can be stacked beyond the required 3, but will not grant an extra Golem |
| Golem Skills have (20-30)% increased Cooldown Recovery Rate Summoned Golems have (30-45)% increased Cooldown Recovery Rate (16-20)% increased Golem Damage for each Type of Golem you have Summoned Summoned Golems Regenerate 2% of their Life per second Primordial |
 (Jewels) Rare Jewels - the most important stats you are looking for are Minion Damage, Elemental Resistances, and Maximum Life. Prioritize Primordial Harmony over these Jewels. (Jewels) Rare Jewels - the most important stats you are looking for are Minion Damage, Elemental Resistances, and Maximum Life. Prioritize Primordial Harmony over these Jewels. |
| Recommended affixes: increased maximum Life increased Minion Damage Attributes Elemental Resistances |
 (Jewels) Large Cluster Jewels - it allows you to socket more Jewels, for Notables look for Vicious Bite and Renewal (Jewels) Large Cluster Jewels - it allows you to socket more Jewels, for Notables look for Vicious Bite and Renewal |
| Recommended affixes: 1 Added Passive Skill is Renewal 1 Added Passive Skill is Vicious Bite |
 (Flask) Rumi's Concoction - use it for more Armour and increased Block Chance (Flask) Rumi's Concoction - use it for more Armour and increased Block Chance |
| +1500 to Armour +(8-12)% Chance to Block Attack Damage during Flask effect +(4-6)% Chance to Block Spell Damage during Flask effect |
 (Flask) Bottled Faith - it's the best Flask for increasing the damage not only for your character but also for your Minions (Flask) Bottled Faith - it's the best Flask for increasing the damage not only for your character but also for your Minions |
| 40% increased Damage Creates Consecrated Ground on Use (30-15)% reduced Duration Consecrated Ground created by this Flask has Tripled Radius Consecrated Ground created during Effect applies (7-10)% increased Damage taken to Enemies (100-150)% increased Critical Strike Chance against Enemies on Consecrated Ground during Flask effect |
Other suggested Flasks:
|
   |
|
|
We hope that you have enjoyed this kind of guide, and we are looking forward to your feedback. We would love to hear your suggestions about which build should we work on next!
Pictures used in this article are the intellectual property of Grinding Gear Games.
