Melee Elemental Hit Champion
Very fast and powerful Champion Build which utilizes many Support Gems to scale Elemental Hit used with Melee WeaponMelee Elemental Hit
Champion Build
Created for Patch 3.21
The Best Crafty Guides by Odealo
| Guide notes |
| July 9, 2023 -Build created |
| Build Overview | |||
| Tags: [MELEE] [ELEMENTAL] [LIFE] [CRIT] | |||
|
Budget: Defenses: |
|
Boss DPS: AoE: |
|
Elemental Hit is a very versatile Attack that can be used with most Weapon types, although the Melee variant is the least popular one. The Skill itself doesn't rely on your Weapon Damage, instead, it uses its own values, which is very similar to Spells in that regard. Your Attack Speed and base Critical Strike Chance of course still applies to the Attack. With that information in mind, clearly, the best way to scale its Damage is through additional Support Gems and the Level of your Elemental Hit Gem. With certain Influences on your Weapon, you can quite easily get a pseudo 9-link Setup for your Main Skill, and push it up to 12-link if you have enough Currency to spend. To accomplish that you will also need The Squire Shield, which simply applies Gems socketed inside of it to your Weapon. You can use any 1-handed Weapon Type, but the Heist-specific Alternating Sceptre seems to be the best choice as it grants you easy access to Alternative Ailments. Otherwise, you would need to sacrifice Jewel Socket and additional Skill Point on The Interrogation Jewel. Alternative Ailments are extremely powerful on their own, but they are especially valuable for the Elemental Hit, as it gains additional Damage per each Ailment inflicted on the Enemy.
The other focus of this Build is Life Regeneration, which we turn into Rage with the use of Kaom's Spirit Gloves. High Regeneration grants us equally high Berserk uptime, which grants tons of Damage, Speed, and durability. High Attack Speed is a great way to scale flat Damage values provided by the Elemental Hit, but it also simply makes the build much more enjoyable to play. The lack of Life Regeneration itself is not a problem, since you will have tons of Life Leech and the Petrified Blood Aura essentially doubles its effectiveness.
The best and universal Ascendency for such Build is the Champion. Thanks to the Petrified Blood you can easily have 100% uptime on the Adrenaline buff, and you don't need to worry too much about Accuracy Rating. It also grants you tons of generic Damage and durability. Thanks to the Forbidden Jewels you can also borrow very potent Notables from other Duelist's Ascendencies, such as Bane of Legends or Arena Challenger.
You can also check our other Path of Exile builds right over here Odealo's Crafty Guides - Full List
1. Gameplay
You will be extremely mobile due to the very high Attack Speed on your Leap Slam. Elemental Hit is your main Skill to deal Damage. For bosses and other hard encounters, you should put down Ancestral Totems which grant immense bonuses to any Melee combatant. You should reuse the Berserk when you reach maximum Rage to maximize its uptime, but you should be able to generate it during its Cooldown anyway. Using your Life Flask will bring your Life over the 50% threshold, so you can trigger the Adrenaline Buff on demand very easily.
|
|
|
|

2. Build's PROS & CONS
| PROS |
|
| CONS |
|
3. Leveling tips
Elemental Hit consumes a lot of Mana and it's rather hard to rely on Critical Strikes during the leveling. It is suggested to complete the campaign with a more conventional setup and swap to Elemental Hit when you reach Maps. The most popular choice is to use the One With Nothing Jewel which can easily carry you through the Acts with minimal gear management. We recommend our Leveling Guide for Melee Duelist Builds to see more Leveling Tips.
Suggested leveling Gem setups:
| Smite setup | |
 |
Smite - creates a small AoE, dealing Lightning Damage. With proper positioning, it can overlap, hitting the enemy 2 times. |
 |
Ancestral Call Support - adds additional Strikes, allowing you to hit more Enemies at greater distances. |
 |
Added Fire Damage Support - adds a portion of your Physical Damage as Extra Fire Damage. |
 |
Elemental Damage with Attacks Support - greatly increases your Elemental Damage with Attacks. |
 |
Physical to Lightning Support - converts the remaining 50% of your Physical Damage to Lightning, so you can scale it better. |
 |
Inspiration Support - grants you Critical Stike Chance, Elemental Damage, and reduces Mana Costs. |
| Aura setup | |
 |
Determination - additional Armour is very valuable at early levels. |
 |
Herald of Purity - increases your Physical Damage and creates Minions when you deal Damage. |
| Utility setup | |
 |
Flame Dash - teleports you a short distance. |
 |
Elemental Weakness - a Curse Spell that lowers all Elemental Resistances. |
 |
Steelskin - grants you a Shield and disables Bleeding effects. |
Bandits:
Kill all Bandits to get additional 2 Passive Tree Skill Points
Leveling Skill Trees:
33 Points Passive Tree
If you decide to use the One with Nothing Jewel, your starting Tree should look a bit different in order to grab more Dexterity and Cluster Jewel Socket as soon as possible.
We recommend this order:
1) Art of the Gladiator 2) Large Jewel Socket (put One with Nothing Jewel there) 3) Utmost Swiftness 4) Precise Technique 5) Graceful Assault 6) Weathered Hunter (and Mastery) 7) Dervish
64 Points Passive Tree
Allocate:
1) Golem's Blood 2) Tribal Fury (and Mastery) 3) Steadfast (and Mastery) 4) Bloodless 5) Juggernaut
Recommended leveling items:
 One With Nothing - grants tons of Physical Damage and Attack Speed when you don't use any Gloves and Weapons. With this Jewel, you can use Dexterity to gain insane amounts of Damage relative to your level. One With Nothing - grants tons of Physical Damage and Attack Speed when you don't use any Gloves and Weapons. With this Jewel, you can use Dexterity to gain insane amounts of Damage relative to your level. |
|
| Adds Hollow Palm Technique | |
| Hollow Palm Technique: You count as Dual Wielding while you are Unencumbered 40% more Attack Speed with Melee Skills while you are Unencumbered Adds 14 to 20 Attack Physical Damage to Melee Skills per 10 Dexterity while you are Unencumbered |
|
 Le Heup of All - adds Dexterity, Damage, and Elemental Resistances. Le Heup of All - adds Dexterity, Damage, and Elemental Resistances. |
|
| Adds 1 to 4 Physical Damage to Attacks +(10-30) to all Attributes (10-30)% increased Damage (10-30)% increased Rarity of Items found +(10-30)% to all Elemental Resistances |
|
 Tabula Rasa - grants you easy access to a 6-link setup. White Colours allow you to easily swap and experiment with Support Gems. Tabula Rasa - grants you easy access to a 6-link setup. White Colours allow you to easily swap and experiment with Support Gems. |
|
| Item has no level requirement and Energy Shield (Hidden) Item has 6 White Sockets and is fully linked (Hidden) |
|
 Goldrim - this Helmet is notorious for granting tons of Elemental Resistances during leveling. Goldrim - this Helmet is notorious for granting tons of Elemental Resistances during leveling. |
|
| +(30-50) to Evasion Rating 10% increased Rarity of Items found +(30-40)% to all Elemental Resistances Reflects 4 Physical Damage to Melee Attackers Level Requirement reduced by 100 (Hidden) |
|
 Perandus Blazon - this Belt grants you all Attributes and prolongs the Duration of all your Flasks. Perandus Blazon - this Belt grants you all Attributes and prolongs the Duration of all your Flasks. |
|
| (15-25)% increased Stun and Block Recovery +(20-30) to all Attributes (6-8)% increased Quantity of Items found +20% to Fire Resistance 20% increased Flask Effect Duration -2 Physical Damage taken from Attack Hits |
|
 Astramentis - grants tons of Dexterity. Other Attributes are also useful to fulfill Gem requirements. Astramentis - grants tons of Dexterity. Other Attributes are also useful to fulfill Gem requirements. |
|
| +(10-16) to all Attributes +(80-100) to all Attributes -4 Physical Damage taken from Attack Hits |
|
 Seven-League Step - those boots will greatly speed up your leveling progress. Seven-League Step - those boots will greatly speed up your leveling progress. |
|
| 50% increased Movement Speed Level Requirement reduced by 100 (Hidden) |
|
4. Final Skill Tree, Ascendancy Points, and Pantheon
Final Skill Tree:
89 Points Final Passive Tree (doesn't include Cluster or Unique Jewels)
119 Points Path of Building (PoB) link
Ascendancy points:
Preferably in this order:
- Conqueror
- worthy Foe
- First to Strike, Last to Fall
- Inspirational
Pantheon:
Major God: Soul of the Brine King: You cannot be Stunned if you've been Stunned or Blocked a Stunning Hit in the past 2 seconds; 30% increased Stun and Block Recovery
Minor God: Soul of Ralakesh: 25% reduced Physical Damage over Time taken while moving; Moving while Bleeding doesn't cause you to take extra Damage
5. Final Gems links
| [DPS] Elemental Hit setup | |
 |
Elemental Hit - deals Damage of a randomly chosen Element, and has additional Damage per each Ailment on an Enemy. The Damage depends on the Gem Level instead of your Weapon. |
 |
Trinity Support - grants tons of Elemental Damage and Elemental Penetration. |
|
Inspiration Support - reduces Mana Costs and increases Elemental Damage. |
 |
Empower Support - raises the Levels of Elemental Hit, which greatly increases the Base Damage. |
 |
Ancestral Call Support - the Awakened version of this Gem grants 3 additional Strike targets, which massively increases the Map Clear. Swap for another Gem if you need single-target Damage. |
| Supports available through your Weapon: Your Weapon should provide 2-5 of those Supports. Use PoB to determine the best Setup for your specific Character. |
|
 |
Multistrike Support - repeats your Attack 2 additional times, each swing deals More Damage than the previous. As a Weapon modifier, it also increases its base Attack Speed. |
 |
Increased Critical Strikes Support - increases your Critical Strike Chance significantly. As a Weapon modifier, it also increases its base Critical Strike Chance. |
 |
Increased Critical Damage Support - grants tons of Critical Strike Multiplier. As a Weapon modifier, it also grants extra Crit. Multiplier. |
 |
Ruthless Support - every third Hit deals large amounts of Damage, which is great to inflict powerful Elemental Ailments. As a Weapon modifier, it also increases its Physical Damage, which is not useful. |
|
Elemental Damage with Attacks Support - increases Elemental Damage with Attacks. As a Weapon modifier, it also slightly increases Elemental Damage with your Attacks, but you lose the opportunity to use the Awakened version which would grant Elemental Reflect immunity. |
| [UTILITY] Aura setup | |
|
Determination - this Aura grants you tons of Armour Rating by providing a Flat amount and an Armour Multiplier. |
 |
Petrified Blood - half of the Damage you take will be dealt over time, and you can't regenerate over 50% maximum Life except for the Life Flask. It makes your Life Leech twice as effective, and you can easily trigger Adrenaline Buff. |
 |
Tempest Shield - grants you plenty of Spell Block Chance and makes you immune to Shocks. You can also use the Arctic Armour instead, which grants Physical Damage Reduction and Freeze Immunity. |
 |
Summon Skitterbots - you will need those to inflict Shock and Chill in conjunction with Alternative Ailments. |
 |
Defiance Banner - your Ascendency makes your Banner Skill free to use. This Banner increases your Armour and Evasion Rating. |
 |
Enlighten Support - lowers the Mana Reservation of linked Auras. |
| [UTILITY] Arrogance setup | |
 |
Vitality - grants lots of Life Regeneration which we use to generate Rage. It reserves a flat amount instead of the usual percentage. |
 |
Precision - grants Accuracy Rating and Critical Strike Chance. It also enables powerful Watcher's Eye modifiers. |
 |
Blood and Sand - grants extra Area of Effect or Damage, depending on the Stance. It also allows you to use the Arena Challenger Notable which you can get through Forbidden Jewels. |
 |
Arrogance Support - causes linked Auras to Reserve Life instead of Mana. Since you use Petrified Blood, you can freely Reserve the upper half of your Life. |
| [UTILITY] Ancestral Totems setup | |
 |
Ancestral Protector - summons a Totem that grants you tons of Attack Speed if you are fairly close to it. |
 |
Multiple Totems Support - increases the maximum Totem limit for linked Skills. |
 |
Ancestral Warchief - a Totem that grants you Attack Damage while active. The Vaal version grants you an even more powerful Buff for a short time. |
| [UTILITY] Mark setup | |
 |
Assassin's Mark - Enemies Marked by this Spell will take more Damage from your Critical Strikes, and you will generate Power Charges. |
 |
Mark on Hit Support - automatically applies a linked Mark when you Hit Enemies with an Attack. |
| [UTILITY] Other Utility setups | |
 |
Berserk - rapidly consumes your Rage, but grants insane amounts of Damage and Damage Reduction during its effect. |
 |
Leap Slam - a quick jump toward the targeted location. It always Stuns Enemies with Full Life, which makes it a great Skill to engage. |
 |
Blood Rage - deals a low amount of Damage over time to you, but grants you Attack Speed and Frenzy Charge generation. |
|
|
6. Gear Setup
The Weapon is by far the most important piece of this Build. By using Shaper and Elder Influence on one Item, you are able to get up to 5 Support Gems added to your baseline 3-link setup. Although the 5 Gems version is quite unrealistic, the 2 or 3 Gems versions are easily reachable. When you add The Squire with another 3 Support Gems, it creates a very powerful combination. The rest of the Gear is pretty usual - you should look for maximum Life, Resistances, Elemental Damage, and Critical Strike Multiplier. To use all your Auras you will need some Mana Reservation Efficiency, mostly on your Helmet. This Build uses only a few Unique Items, so there is much customization with Rare Items left for the player. Cluster Jewels are also quite important, especially the Medium ones - they provide tons of Critical Strike and Double Damage Chances. With so many Support Gems, you really want to have Mana Cost Reduction crafts on both of your Rings, as it can be very draining. The Accuracy is solved by your Ascendency, as you will never miss a Hit against taunted Enemies.
|
Stat priorities on items:
|
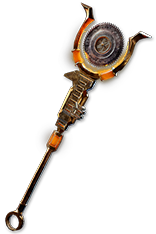 (Weapon) Rare 1-Handed Weapon - by mixing Shaper and Elder Influences you can get modifiers that add extra Support Gem to socketed Skills or simply cause them to deal More Damage. Obtaining at least 3 of them is a bit hard to craft, but you can find them cheaply on the market since the demand for them is very low. The best base would be the Alternating Sceptre, but it's not required. (Weapon) Rare 1-Handed Weapon - by mixing Shaper and Elder Influences you can get modifiers that add extra Support Gem to socketed Skills or simply cause them to deal More Damage. Obtaining at least 3 of them is a bit hard to craft, but you can find them cheaply on the market since the demand for them is very low. The best base would be the Alternating Sceptre, but it's not required. |
|
| Min. 3 of those modifiers: Socketed Skills deal 40% more Attack Damage Socketed Gems are supported by Level # Elemental Damage with Attacks Socketed Gems are Supported by Level # Increased Critical Strikes Socketed Gems are Supported by Level # Ruthless Socketed Gems are supported by Level # Multistrike Socketed Gems are supported by Level # Increased Critical Damage Optional affixes: Attack Speed Critical Strike Chance Elemental Penetration Levels to socketed Gems |
|
 (Weapon) The Squire - it's quite costly but will add 3 Extra Support Gems for your Setup. (Weapon) The Squire - it's quite costly but will add 3 Extra Support Gems for your Setup. |
|
| Has 3 Sockets All Sockets are White +(5-8)% to Quality of Socketed Support Gems Socketed Support Gems can also Support Skills from your Main Hand (100-150)% increased Armour and Evasion +(3-5)% Chance to Block |
|
|
|
|
| Min. requirements: +60 to maximum Life Mana Reservation Efficiency (Exarch Implicit + Essence) Optional affixes: Reduced Mana Cost of Attack Skills (Eater Influence) Elemental Resistances Attributes Optional Enchants: Berserk has 30% increased Buff Effect 30% specific Aura Reservation Efficiency Ancestral Protector Totem grants 18% increased Attack Speed while Active |
|
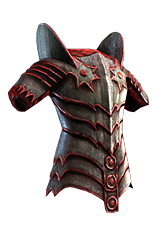 (Body Armour) Rare Armour - here you have lots of options with useful Influence modifiers. It should always provide plenty of maximum Life and Resistances, but other than that you can look for modifiers such as Additional Crit. Chance for Attacks, Frenzy Charge generation, or Onslaught when Hit. (Body Armour) Rare Armour - here you have lots of options with useful Influence modifiers. It should always provide plenty of maximum Life and Resistances, but other than that you can look for modifiers such as Additional Crit. Chance for Attacks, Frenzy Charge generation, or Onslaught when Hit. |
|
| Min. requirements: +80 to maximum Life +50% to Elemental Resistances Optional affixes: Life Regeneration % of Physical Damage from Hits taken as Elemental Damage Attacks have +#% to Critical Strike Chance #% increased maximum Life chance to gain a Power/Frenzy Charge on Critical Strike/Hit You gain Onslaught for 6 seconds when Hit |
|
 (Boots) Rare Boots - you will move around using mostly Leap Slam, but some Movement Speed is always useful, especially if it comes with a chance to gain Onslaught on Kill. Other than that, look for maximum Life, Resistances, and optionally Attributes or Elemental Avoidances. (Boots) Rare Boots - you will move around using mostly Leap Slam, but some Movement Speed is always useful, especially if it comes with a chance to gain Onslaught on Kill. Other than that, look for maximum Life, Resistances, and optionally Attributes or Elemental Avoidances. |
|
| Min. requirements: +70 to maximum Life 20% increased Movement Speed 5% increased Action Speed (Searing Exarch Implicit) Optional affixes: Chance to gain Onslaught on Kill Chaos Resistance Attributes % chance to Avoid Elemental Ailments |
|
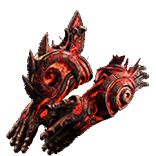 (Gloves) Kaom's Spirit - those Gloves convert your Life Regeneration into insane amounts of Rage, which allows you to use Berserk far more often than usual. (Gloves) Kaom's Spirit - those Gloves convert your Life Regeneration into insane amounts of Rage, which allows you to use Berserk far more often than usual. |
|
| +(50-70) to maximum Life +(20-30)% to Fire Resistance (0.3-0.5)% of Physical Attack Damage Leeched as Life Life Recovery from Regeneration is not applied Regenerate 1 Rage per second for every 100 Life Recovery per second from Regeneration |
|
 (Gloves) Rare Gloves - you can also use regular Rare Gloves and use Berserk only when it's needed for a short burst of Damage. In such case, you should aim for maximum Life, Attack Speed, Resistances, Attributes, and Additional Strike targets or Rage generation. (Gloves) Rare Gloves - you can also use regular Rare Gloves and use Berserk only when it's needed for a short burst of Damage. In such case, you should aim for maximum Life, Attack Speed, Resistances, Attributes, and Additional Strike targets or Rage generation. |
|
|
Min. requirements: |
|
 (Belt) Rare Belt - on your Belt you can get tons of maximum Life, Resistances, and lacking Attributes. It's also possible to increase Elemental Damage with Attacks or improve your Flask sustain. (Belt) Rare Belt - on your Belt you can get tons of maximum Life, Resistances, and lacking Attributes. It's also possible to increase Elemental Damage with Attacks or improve your Flask sustain. |
|
| Min. requirements: +70 to maximum Life +80% to Elemental Resistance Optional affixes: Attributes increased Elemental Damage with Attacks Life Regeneration Flask and Flask Charges modifiers |
|
 (Amulet) Marylene's Fallacy - you will get tons of Critical Strike Chance from Brittle, so you can use this Amulet to get a massive amount of Critical Strike Multiplier. You can also use Catalysts to get more Crit. Multiplier, but be aware it will also lower your Crit. Chances too. (Amulet) Marylene's Fallacy - you will get tons of Critical Strike Chance from Brittle, so you can use this Amulet to get a massive amount of Critical Strike Multiplier. You can also use Catalysts to get more Crit. Multiplier, but be aware it will also lower your Crit. Chances too. |
|
| +(20-30) to Intelligence +(80-120) to Accuracy Rating +(210-240)% to Global Critical Strike Multiplier +(80-100) to Evasion Rating (10-15)% increased Light Radius 40% less Critical Strike Chance Critical Strikes have Culling Strike |
|
| Recommended Anoint: Panopticon Forces of Nature |
|
 (Ring) Rare Ring - it's a great place to get lots of Attributes, Resistances, Maximum Life, and some Damage. They should also provide flat Mana Cost Reduction for your Skills. (Ring) Rare Ring - it's a great place to get lots of Attributes, Resistances, Maximum Life, and some Damage. They should also provide flat Mana Cost Reduction for your Skills. |
|
| Min. requirements: +60 to maximum Life +50% to Elemental Resistance Optional affixes: Attributes increased Elemental Damage with Attacks Critical Strike Multiplier Chaos Resistance Non-Channelling Skills have -(7-6) to Total Mana Cost |
|
 (Jewel) Rare Jewels - Elemental Hit has many tags, so you can easily get lots of Critical Strike Multiplier with your Jewels. Other than that, look for maximum Life, lacking Resistances and Attributes, or Attack Speed. (Jewel) Rare Jewels - Elemental Hit has many tags, so you can easily get lots of Critical Strike Multiplier with your Jewels. Other than that, look for maximum Life, lacking Resistances and Attributes, or Attack Speed. |
|
| Min. requirements: increased maximum Life Recommended affixes: Resistances % to Critical Strike Multiplier with One Handed Melee Weapons % to Critical Strike Multiplier with Fire/Cold/Lightning/Elemental Skills % to Global Critical Strike Multiplier % to Melee Critical Strike Multiplier Attack Speed |
|
 (Jewel) Rare Abyss Jewel - if you use Stygian Vise for your Belt, you can fit one extra Jewel in there. It should grant you maximum Life, Crit. Multiplier, and lacking Resistances, Attributes, or Elemental Avoidances. (Jewel) Rare Abyss Jewel - if you use Stygian Vise for your Belt, you can fit one extra Jewel in there. It should grant you maximum Life, Crit. Multiplier, and lacking Resistances, Attributes, or Elemental Avoidances. |
|
| Min. requirements: +30 to maximum Life Recommended affixes: % to Global Critical Strike Multiplier Resistances Attributes chance to Avoid Ailment |
|
 (Jewel) Large Cluster Jewel - use a Large Cluster matching your Weapon type. You should use all 3 Notables, Feed the Fury is overall the best one to get, but you should also include one Fuel the Fight to get Mana Leech. (Jewel) Large Cluster Jewel - use a Large Cluster matching your Weapon type. You should use all 3 Notables, Feed the Fury is overall the best one to get, but you should also include one Fuel the Fight to get Mana Leech. |
|
| Recommended affixes: 1 Added Passive Skill is Feed the Fury 1 Added Passive Skill is Fuel the Fight 1 Added Passive Skill is Martial Prowess 1 Added Passive Skill is Calamitous 1 Added Passive Skill is Weight Advantage |
|
 (Jewel) Medium Cluster Jewel - you can get lots of Critical Strike and Double Damage Chances through your Medium Jewels, which you can use 4 of. You can also use one or two Jewels focused on Ailment Effects to make sure you can always inflict maximum Effects of them on bosses. (Jewel) Medium Cluster Jewel - you can get lots of Critical Strike and Double Damage Chances through your Medium Jewels, which you can use 4 of. You can also use one or two Jewels focused on Ailment Effects to make sure you can always inflict maximum Effects of them on bosses. |
|
| Recommended affixes: 1 Added Passive Skill is Basics of Pain 1 Added Passive Skill is Pressure Points 1 Added Passive Skill is Astonishing Affliction 1 Added Passive Skill is Eye of the Storm |
|
  (Jewel) Forbidden Flame&Flesh - the Duelist has many good Notables to borrow, but the best ones are the Bane of Legends, Arena Challenger, or Impact. You can also use Brutal Fervour to improve your Defense and Recovery. (Jewel) Forbidden Flame&Flesh - the Duelist has many good Notables to borrow, but the best ones are the Bane of Legends, Arena Challenger, or Impact. You can also use Brutal Fervour to improve your Defense and Recovery. |
|
| Allocates <Ascendency Notable> if you have the matching modifiers on Forbidden Flesh/Flame Recommended Notables: Bane of Legends Arena Challenger Impact Brutal Fervour |
|
 (Jewel) Watcher's Eye - while you use a lot of Auras, there are only a few useful modifiers to be found on this Jewel, namely Precision and Vitality related. If you need more Defense, you can get modifiers related to the Determination Aura. (Jewel) Watcher's Eye - while you use a lot of Auras, there are only a few useful modifiers to be found on this Jewel, namely Precision and Vitality related. If you need more Defense, you can get modifiers related to the Determination Aura. |
|
| (4-6)% increased maximum Energy Shield (4-6)% increased maximum Life (4-6)% increased maximum Mana <Two or Three random aura modifiers> Recommended Aura mods: (40-60)% increased Attack Damage while affected by Precision (10-15)% increased Attack Speed while affected by Precision +(20-30)% to Critical Strike Multiplier while affected by Precision (10-15)% increased Life Recovery Rate while affected by Vitality |
|
 (Jewel) The Interrogation - if you can't get Alternating Sceptre or Crucible mod for Elemental Hit, you should use this Jewel instead. It enables Alternative Ailments while disabling regular ones. Scorch and Brittle are very important for your DPS. (Jewel) The Interrogation - if you can't get Alternating Sceptre or Crucible mod for Elemental Hit, you should use this Jewel instead. It enables Alternative Ailments while disabling regular ones. Scorch and Brittle are very important for your DPS. |
|
| Adds Secrets of Suffering | |
 (Flask) Bottled Faith - very strong offensive Flask that creates Consecrated Ground with greatly increased range. You will have an increased Critical Strike Chance and deal more Damage to Enemies standing inside of it. (Flask) Bottled Faith - very strong offensive Flask that creates Consecrated Ground with greatly increased range. You will have an increased Critical Strike Chance and deal more Damage to Enemies standing inside of it. |
|
| Creates Consecrated Ground on Use (30-15)% reduced Duration Consecrated Ground created by this Flask has Tripled Radius Consecrated Ground created during Effect applies (7-10)% increased Damage taken to Enemies (100-150)% increased Critical Strike Chance against Enemies on Consecrated Ground during Effect |
|
|
Suggested Flasks:
|
|
    |
 (Helmet) Rare Helmet - it is your biggest source of Mana Reservation Efficiency. You can try to start crafting on a Helmet that already has useful Enchant. Look for Maximum Life, Resistances, and lacking Attributes.
 |
|
If you have any other build requests please leave that in the comments below. We are always open to suggestions and constructive feedback.
Pictures used in this article are the intellectual property of Grinding Gear Games.
