Templar Leveling Guide for PoE using Lightning Spells
Complete Leveling Guide for Templar using Lightning Spells such as ArcTemplar Leveling Guide
Lightning Spell Damage version
Updated for Patch 3.20
The Best Crafty Guides by Odealo
| Guide notes |
| March 27, 2023 -Guide created |
Templar is one of the most popular characters that may be summarised as a paladin archetype. Its most recognizable trait, seen across all ascendancies, is its proficiency in making use of Elemental Spells (especially Fire and Lightning types) and quite good defensive features. Inquisitor is an excellent class for a well-rounded Elemental Damage dealer that utilizes Critical Strikes and is predisposed to protect itself with Life as well as Energy Shield. Hierophant is the best pick for Totem users or generalist Spell casters that derive their power from Mana. Guardian is a tank class for party play, Minion, or other specific builds.
This guide will cover all the basics for leveling with a Templar that uses Lightning Spells. Lightning Damage is the type of Elemental Damage defining the upper part of a Passive Skill Tree, so it's very accessible for a Templar - you can comfortably source enough damage from Skill Tree only, without much investment into gear or Support Gems. The Ailment caused by Lightning is Shock, it simply increases Damage. Cast Speed and Maximum Life passives are too conveniently spread all across the top. We wouldn't recommend pursuing the Attack specialization. Attacks, in general, are the domain of classes that start at the bottom of the Skill Tree. We also would not choose Fire Damage over Lightning. Fire Skills lack the synergy with its Ailment when played as an on-hit build and the damage is usually lower. Even if you plan to create a Righteous Fire build, it is more efficient to level up using this guide. Lightning Damage offers multiple great Spells like Arc, Orb of Storms, Galvanic Field, or Sigil of Power. The Elemental Overload combined with Lighting Mastery for non-critical Strike Hits to be lucky offer a major damage boost early on. As you start mapping, or after the first few acts, you can switch to Critical Strikes by allocating Righteous Providence/Conviction of Power which is again a big damage spike.
You can also check our other Path of Exile builds right over here Odealo's Crafty Guides - Full List
1. Important Skills
What we recommend to start with is Lightning Tendrils as it's a Spell available at level 1 as a reward for killing Hillock. It has a short range but it's good enough to carry you through the first act at the end of which you will be able to switch to Arc. In the meantime, at level 4, you can start using Orb of Storms. It's especially good with Lightning Tendrils as it will Hit enemies every half a second. Arc may not have the highest damage, but it is still enough to slay most of the bosses. At level 16 you can start using Galvanic Field for some extra damage, especially against bosses. As you reach level 34, use Sigil of Power - even at stage one and Gem Level 1, it adds as much damage as level 6 Added Lightning Damage Support. Spark and Ball Lightning are good but require some specific upgrades to make them more suitable for a proper build.
Arc is the Spell we would recommend using from level 12 onwards. It instantly delivers damage to multiple enemies with almost no need for aiming. The Skill would not benefit from any AoE enhancements, but it's not needed, the clear speed is one of the highest. Allocate the Lightning Mastery to make it chain one extra time, and link it with Chain Support if you can afford to do so, it would grant you more Damage against bosses.
For Mana-reserving Skills we recommend Clarity for Mana Regeneration, especially when wearing Tabula Rasa. It can be used as soon as level 10. Wrath grants you more Lightning Damage, you can use it at level 24. Herald of Thunder is another offensively-oriented passive Skill that adds Lightning Damage and is capable of Hitting enemies on its own, as long as you manage to consistently Shock and kill them. If you lack survivability, use Determination for more Armour. Zealotry can be implemented after you finish acts, it requires you to already have a decent Crit Chance, which is then increased alongside Critical Strike Multiplier.
Other Skills that can improve your performance are Orb of Storms, for as long as you cast Spells near it, it will Hit enemies alongside you. It's quite useful early on to boost your Damage or can be later linked to Overcharge Support to Shock more efficiently. Galvanic Field is not very useful after the first few acts as it won't be linked to many Support Gems, but it is decent when you have a high chance to Shock and Shock effectiveness. You can link it with three Support Gems and use it against bosses since level 16. Sigil of Power, available at level 34, is another Skill to be used when fighting sizeable foes. Cast it once and stand inside the circle to receive an additional bonus to Lightning Damage. For a Curse use Conductivity. To apply Exposure use Hydrosphere. As your movement key we recommend selecting Steelskin to slightly improve survivability.
|
|

3. Setups
You will need predominantly blue sockets on your gear. Be sure to avoid gear pieces with Armour or Evasion as these are often skewed to roll more Red and Green sockets. Tabula Rasa is the sound solution to any of these issues. New Skill Gems are unlocked by entering a new Act and completing a quest, some of them can be granted as a reward but there is no need to pay attention to that, these are extremely cheap. In Act 6 you will be tasked by Lilly Roth to complete a quest, by doing so you're granted access to all Skill and Support Gems available for any class. It will also unlock her shop in your Hideout for every new Character you make in the same league.
Suggested leveling Gem setups:
| Arc setup | |
 |
Arc - Arc chains off of enemies at a very high speed. It lets you kill a pack of monsters with one or two casts with no need for aiming. |
| Act 1 Support Gems | |
 |
Onslaught Support - Use it to gain an Onslaught buff for more Cast and Movement Speed, it quickly becomes obsolete as this buff is quite easy to get, from a Silver Flask for example. |
 |
Arcane Surge Support - After spending some Mana on linked Skill it grants a buff for more Spell Damage and Mana Regeneration. |
 |
Added Lightning Damage Support - Adds Lightning Damage to a Spell. You can keep it here for the rest of the leveling process, it's that good. |
 |
Increased Critical Strikes Support - Increases Chance to strike Critically. It becomes useful later on, especially after allocating Inevitable Judgement. |
 |
Added Cold Damage Support - Simply adds Cold Damage. |
| Act 2 Support Gems | |
 |
Faster Casting Support - By casting faster you can deal more damage it's as simple as that. |
 |
Power Charge On Critical Support - Quite a useful Support Gem that grants you a chance for a Power Charge with Critical Strike. Each Power Charge increases Crti Chance by 40%. It requires you to have a somewhat good Crit Chance already or you won't be able to generate them during boss fights. |
 |
Elemental Focus Support - The inability to Shock may hinder your performance, but with the second Orb of Storms setup presented below it should not be an issue. |
 |
Increased Critical Damage Support - You should already have quite a good Critical Strike Chance (around 25% in the third act) if you use other Support Gems/Charges that increase it. This Gem increases your Critical Damage by a lot. |
| Act 3 Support Gems | |
 |
Innervate Support - Grants you a Chance to Shock, adds Lighting Damage, and even more of it after killing the Shocked enemy. It's rarely used as you cannot Shock with Elemental Focus, and deploying Orb of Storms just for this bonus is not the most efficient way to quickly level up. |
 |
Lightning Penetration Support - Your Damage Penetrates Lightning Resistance, which is often one of the best ways to increase DPS, especially later in the game. |
 |
Inspiration Support - Increases Critical Strike Chance, Elemental Damage, and lowers Mana Cost of Skills. Use it if you can't sustain the Mana drain. |
| Act 4 Support Gems | |
 |
Spell Echo Support - Arc is being repeated an additional time, with much higher Cast Speed but lower damage. Overall it's a great deal and it will undoubtedly increase your DPS. |
 |
Chain Support - It would be a good fit, but at this point, there are usually better options. Nonetheless, you can use it to make your Arc chain an additional time, it increases its damage too. |
| An example of a final setup: Arc, Added Lightning Damage, Inspiration, Increased Critical Damage, Lightning Penetration, Spell Echo | |
| Orb of Storms setup | |
 |
Orb of Storms - Orbs that linger in one place Hitting enemies once you cast it, and later each time you cast any other Spell when standing near it. It doesn't deal much damage. |
| Act 1 Support Gems | |
|
Arcane Surge Support - Arcane Surge buff granted by this Support Gem applies to your character and all your other Spells, so it can be put here to save up space in your main setup. |
|
Increased Critical Strikes Support - With Power Charge On Critical you may want to be sure that this Spell has a high Crit Chance. |
| Act 2 Support Gems | |
 |
Overcharge Support - Orb will deal less Damage, but the effect of Shock it applies is much higher, which increases the damage you deal to the target. Orb of Storms is the only source of Shock here. |
|
Power Charge On Critical Support - If you don't use it in your main Arc setup, use it here to generate Power Charges. |
| An example of a final setup: Orb of Storms, Increased Critical Strikes, Overcharge, Power Charge On Critical | |
| Aura setup | |
 |
Determination - It is very popular, and you should definitely start using it around acts 6 to 10. It grants more Armour to mitigate incoming Physical Damage. |
 |
Herald of Thunder - Adds Lightning Damage and is capable of Hitting enemies on its own, as long as you manage to consistently Shock and kill them, so we wouldn't recommend it if you're using Elemental Focus Support in your main Arc setup. |
 |
Wrath - Simply grants more Lightning Damage to Spells. |
 |
Clarity - Regenerates your Mana. It may not be needed at all with the right gear. |
 |
Zealotry - In the later stages of the game it outclasses other Auras. It grants more Spell Damage (much like Wrath but less of it), increases Crit Chance, and Crit Multiplier for Spells. |
| Utility Skills | |
 |
Flame Dash - A simple Dash Spell to move faster and dodge attacks. Link it with a low-level Arcane Surge Support to have its bonus applied with a single use of this Spell. |
 |
Conductivity - Lowers Lightning Resistance of your foes. If you already have a 100% Crit Chance with Inevitable Judgement, abandon it, and replace with  Assassin's Mark, which is a much better Curse for more Crit Damage and Crit Chance. Assassin's Mark, which is a much better Curse for more Crit Damage and Crit Chance. |
 |
Steelskin - A Guard Spell that you can set up as your movement key to gain a temporary buff that mitigates incoming damage and stops Bleeding. |
 |
Hydrosphere - Cast it once to make enemies around it Drenched - it applies Cold and Lightning Exposure, which reduces their Resistance to these types of damage. You don't need to level it up. |
 |
Holy Flame Totem - There's no reason not to pick it, unless you're short on red sockets that is. You can place it to deal more damage, be immune to curses, regenerate some Life, and redirect aggro. All at level 4. |
 |
Sigil of Power - Cast it once and try to stand inside of it while casting Spells. It adds Lightning Damage. |
 |
Lightning Golem - The buff this Golem grants will increase your Cast Speed. W recommend linking it with  Cast when Damage Taken to have it re-summoned automatically from time to time. You can use other Golems as well. Cast when Damage Taken to have it re-summoned automatically from time to time. You can use other Golems as well. |
 |
Vaal Righteous Fire - With Pious Path and capped Fire Resistance you should be able to sustain regular RF, it grants you more Spell Damage. If you can't sustain the life drain, use only the Vaal variant that lasts just a few seconds. |
|
|
4. Gear
Spell/Lightning Damage and Cast Speed, which can be found on a weapon, is the easiest way to gain more damage from gear. You can craft a weapon with increased Spell Damage by selling a regular Sceptre or Wand, at least a magic Chain Belt, and a Blacksmith's Whetstone to any vendor. If you have Essences, you can use them to craft weapons too - use Essence of Torment or better yet - Wrath. Essences of Scorn and Loathing will increase your Critical Strike Chance. Speaking of which - at around level 40 to 50 your Crit Chance should be at around 50% or even more with Righteous Providence.
Maximum Life on your Gear is a nice thing to have, but it is not important, most of it will come from your Levels themself. Armor or Evasion Rating should be covered by your Auras. That leaves only one form of Defense you will need to get on your Rare Items: Elemental Resistances. You should aim to have at least 60% Resistance of each Element, excluding Chaos. To help with that, you should use Essences found during the Campaign, and the Crafting Bench in your hideout. Use the low-tier Crafts, as they are cheap and effective, while high tiers will also raise the Required Level to wear an Item.
Proper Flask Setup makes Leveling much quicker and easier. Try to get 2 Quicksilver Flasks so you can have at least one active. Silver Flask increases your damage and mobility. Granite Flask is especially useful once you step into Act 5, as there is a very noticeable spike in Physical Damage dealt by the enemies. Diamond Flask can be used to increase Critical Strike Chance. 20% Quality on each Flask is an easy way to prolong their Duration.
 Tabula Rasa - Has six sockets where you can accommodate any Gems. Tabula Rasa - Has six sockets where you can accommodate any Gems. |
|
| Item has no level requirement and Energy Shield (Hidden) Item has 6 White Sockets and is fully linked (Hidden) |
|
 Goldrim - Helmet that's used mostly for its abundance of Elemental Resistances. Goldrim - Helmet that's used mostly for its abundance of Elemental Resistances. |
|
| +(30-50) to Evasion Rating 10% increased Rarity of Items found +(30-40)% to all Elemental Resistances Reflects 4 Physical Damage to Melee Attackers Level Requirement reduced by 100 (Hidden) |
|
 Le Heup of All - A Ring with a lot of Elemental Resistances, some Attributes, and increased Damage. Le Heup of All - A Ring with a lot of Elemental Resistances, some Attributes, and increased Damage. |
|
| Adds 1 to 4 Physical Damage to Attacks +(10-30) to all Attributes (10-30)% increased Damage (10-30)% increased Rarity of Items found +(10-30)% to all Elemental Resistances |
|
 Praxis - Praxis grants a lot of Mana, Mana Regeneration, and lowers Mana Cost of Skills. Praxis - Praxis grants a lot of Mana, Mana Regeneration, and lowers Mana Cost of Skills. |
|
| +(20-30) to maximum Mana +(30-60) to maximum Mana Regenerate (3-6) Mana per second -(8-4) to Total Mana Cost of Skills 8% of Damage taken Recouped as Mana |
|
 Dream Fragments - It significantly improves Cold Resistance and Mana Regeneration Rate which goes hand in hand with Clarity. It prevents Freezing and Chilling which is useful in some places. Dream Fragments - It significantly improves Cold Resistance and Mana Regeneration Rate which goes hand in hand with Clarity. It prevents Freezing and Chilling which is useful in some places. |
|
| +(20-30)% to Cold Resistance 20% increased maximum Mana 50% increased Mana Regeneration Rate +(30-40)% to Cold Resistance Cannot be Chilled Cannot be Frozen |
|
 Mark of Submission - You may want to put your Conductivity Gem here to automatically Hex enemies on Hit. Mark of Submission - You may want to put your Conductivity Gem here to automatically Hex enemies on Hit. |
|
| Curse Enemies with Socketed Hex Curse Gem on Hit | |
 Astramentis - It's only to be used when you need more Attributes. Because of that, it's also very good with Righteous Providence. Astramentis - It's only to be used when you need more Attributes. Because of that, it's also very good with Righteous Providence. |
|
| +(10-16) to all Attributes +(80-100) to all Attributes -4 Physical Damage taken from Attack Hits |
|
 Atziri's Foible - Reduces Attribute Requirements and significantly boosts your Maximum Mana and Mana Regeneration Rate. Atziri's Foible - Reduces Attribute Requirements and significantly boosts your Maximum Mana and Mana Regeneration Rate. |
|
| (20-30)% increased Mana Regeneration Rate +100 to maximum Mana (16-24)% increased maximum Mana (80-100)% increased Mana Regeneration Rate Items and Gems have 25% reduced Attribute Requirements |
|
 Voice of the Storm - Voice of the Storm is a good Amulet if you have a lot of Lightning Resistance or Critical Strike Chance. Voice of the Storm - Voice of the Storm is a good Amulet if you have a lot of Lightning Resistance or Critical Strike Chance. |
|
| +(20-30) to Intelligence Trigger Level 12 Lightning Bolt when you deal a Critical Strike +(10-15) to all Attributes (10-20)% increased maximum Mana Critical Strike Chance is increased by Overcapped Lightning Resistance |
|
 String of Servitude - We recommend the variant of this Belt with a bonus to all Elemental Resistances, it can get you up to 144% Resistances. String of Servitude - We recommend the variant of this Belt with a bonus to all Elemental Resistances, it can get you up to 144% Resistances. |
|
| <(1-2) Random corrupted implicit modifiers> Implicit Modifier magnitudes are tripled Level Requirement reduced by 100 (Hidden) Desired Implicit: (42-48)% to All Elemental Resistances |
|
 Seven-League Step - If you value movement speed over anything, which is reasonable at early levels, use these Boots. Seven-League Step - If you value movement speed over anything, which is reasonable at early levels, use these Boots. |
|
| 50% increased Movement Speed Level Requirement reduced by 100 (Hidden) |
|
 Wanderlust - A pair of Boots with increased Movement Speed, Mana Regeneration Rate, and Freeze immunity. Wanderlust - A pair of Boots with increased Movement Speed, Mana Regeneration Rate, and Freeze immunity. |
|
| +5 to Dexterity +(10-20) to maximum Energy Shield (20-40)% increased Mana Regeneration Rate 20% increased Movement Speed Cannot be Frozen |
|
 Lifesprig - You can use this wand since level 1, and at this point, it's quite good for most of the Spell Damage builds. Lifesprig - You can use this wand since level 1, and at this point, it's quite good for most of the Spell Damage builds. |
|
| (8-12)% increased Spell Damage +1 to Level of Socketed Spell Gems (20-28)% increased Spell Damage (5-8)% increased Cast Speed +(15-20) to maximum Life +(15-20) to maximum Mana Regenerate (6-8) Life over 1 second when you Cast a Spell |
|
 Storm Prison - Storm Prison requires level 12. It increases Mana Regeneration Rate, Damage, adds Lighting Damage, increases the upper limit of Power Charges, and grants them on kill. Storm Prison - Storm Prison requires level 12. It increases Mana Regeneration Rate, Damage, adds Lighting Damage, increases the upper limit of Power Charges, and grants them on kill. |
|
| (11-15)% increased Spell Damage (40-60)% increased Physical Damage Adds 1 to (35-45) Lightning Damage (15-25)% increased Mana Regeneration Rate +1 to Maximum Power Charges (25-35)% chance to gain a Power Charge on Kill |
|
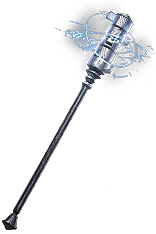 Axiom Perpetuum - At level 10 you can start using this weapon which adds Cold, Fire, and Lightning Damage, increases Cast Speed, Elemental Damage, and Critical Strike Chance. Axiom Perpetuum - At level 10 you can start using this weapon which adds Cold, Fire, and Lightning Damage, increases Cast Speed, Elemental Damage, and Critical Strike Chance. |
|
| 12% increased Elemental Damage Adds (2-3) to (5-6) Fire Damage to Spells Adds (2-3) to (5-6) Cold Damage to Spells Adds 1 to (10-12) Lightning Damage to Spells (4-6)% increased Cast Speed (100-140)% increased Critical Strike Chance for Spells |
|
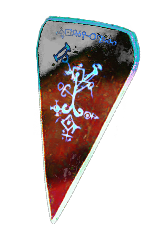 Saffell's Frame - Use it for increased Spell Damage, Spell Block Chance, Elemental Resistances, and Maximum Resistances - it would help you sustain Righteous Fire. Saffell's Frame - Use it for increased Spell Damage, Spell Block Chance, Elemental Resistances, and Maximum Resistances - it would help you sustain Righteous Fire. |
|
| +4% to all Elemental Resistances (20-30)% Chance to Block Spell Damage (20-30)% increased Spell Damage +(20-30)% to all Elemental Resistances +4% to all maximum Resistances Cannot Block Attacks |
|
|
Stat priorities on Rare Items:
|
|
Suggested Flasks:
|
|
     |
5. Passive Skills
To successfully create the Passive Tree for a Build, you have to consider most of the Passive Clusters for a given build, choose a few of them, and make an optimal path to allocate most of them in the least amount of Passive Skill Points spent. Here, we showcased the best Passives that a Lightning Damage Templar. S-tier Passives are great in most cases, and A-tier ones are more specific - you may want to skip them if you took a different route or imposed some restriction on yourself making them worthless. B is a tier with less useful passives that are to be picked later, or not at all. If you're using Power Charges, go for the nodes for extra Maximum Power Charges. Jewel Sockets are good in the late game. Cluster Jewels are usually very good, expensive, and require level 54.

| S TIER | |
|---|---|
| The best and most efficient Passives in the Passive Tree. You will want to take them on almost every build. | |
 |
It's one of the best Notables for more Maximum Life one can get. |
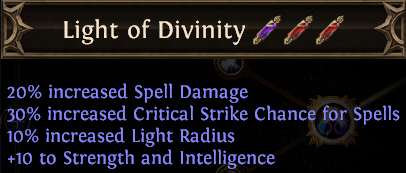 |
Spell Damage, Attributes, and Crit Chance are all useful. |
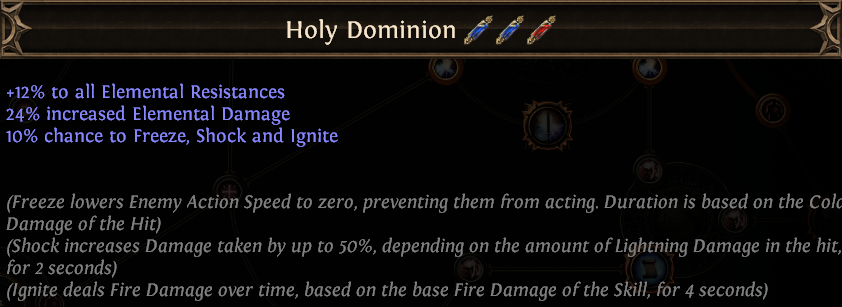 |
For Elemental Resistances, Elemental Damage, and a chance to Shock. |
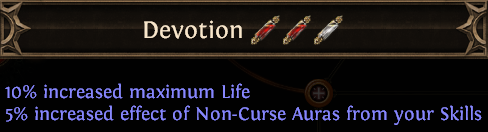 |
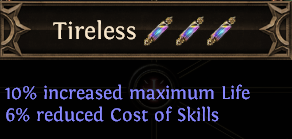
Second Notable for more Maximum Life, and increased effect of Auras. |
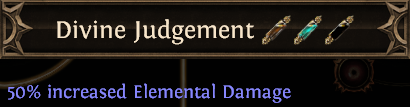 |
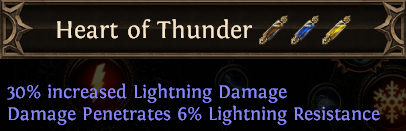
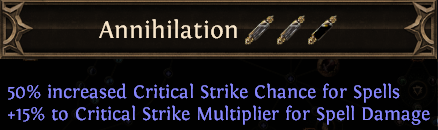
One of the best nodes for simply more Elemental Damage. |
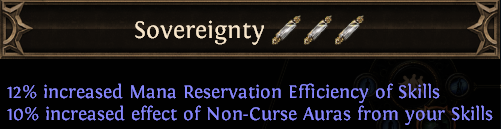 |
Every build needs some Reservation Efficiency. Here it is granted by Sovereignty. |
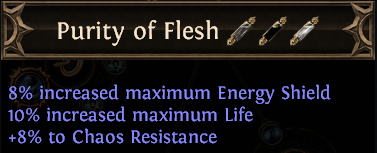 |
Third notable that increases Maximum Life, but also Energy Shield and Chaos Resistance, which is usually also quite good. |
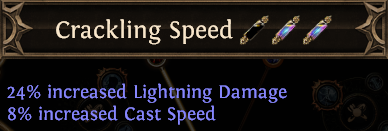 |
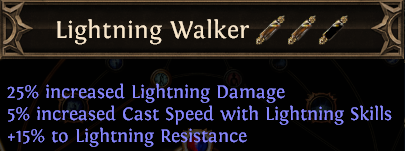
Lightning Damage and Cast Speed are very efficient damage sources. |
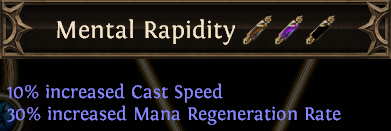 |
Another node for more Cast Speed, but also Mana Regeneration Rate. |
 |
To keep up with the increasing damage get more Maximum Life from the Skill Tree. |
 |
The big Lightning Cluster at the top offers some great passives, this notable being the better one of the two. |
| A TIER | |
| Those are also very good Passives, just not as universal as previous ones | |
 |
It's a bit out of the way, and you probably won't need it, but you can pick it up for more protection and to reduce Mana Cost of Skills. |
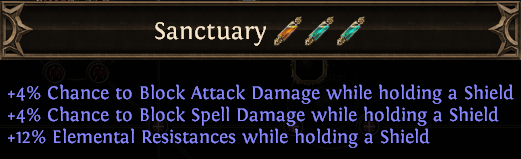 |
If you've gone for Tireless you should be also very close to Sanctuary. It offers some defenses while holding a Shield. |
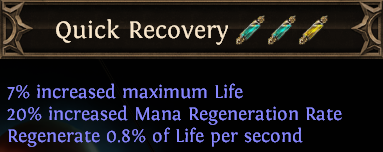 |
Increased Maximum Life, Life, and Mana Regeneration Rate. |
 |
Cast Speed, Lightning Damage, and Lightning Resistance. |
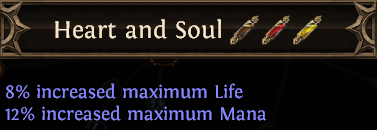 |
increased Maximum Life and Mana. More Maximum Mana actually helps with the Reservation Efficiency of Auras Like Clarity or Vitality, or it's overall great on a Hierophant. |
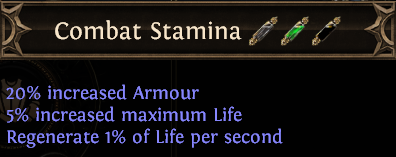 |
Combat Stamina is great if you're using Determination - you can then allocate its Mastery for increased Reservation Efficiency. It also increases Armour and Maximum Life. |
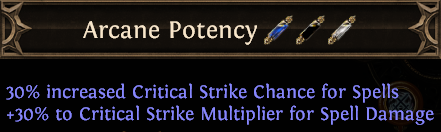 |
Use it for Crit Chance and Crit Damage. |
 |
It's very similar to Arcance Potency, and worth picking up as it will cost little to no Passive Skill Points. |
| B TIER | |
| Passives that belong to this Tier fulfill their specific purpose | |
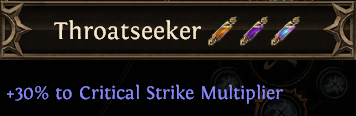 |
If you have a high Crit Chance, pick Throatseeker. |
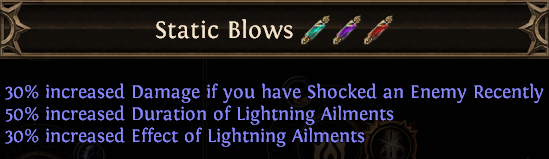 |
Static Blow is useful if you lack damage and can Shock. |
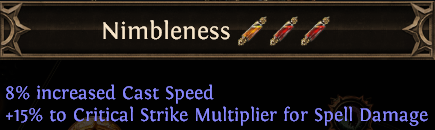 |
Nimbleness increases Cast Speed and Crit Multiplier, so as was the case with Throatseeker, you already need a decent Crit Chance. |
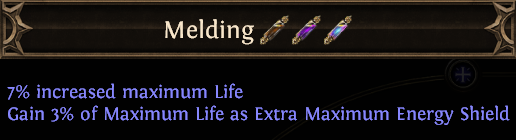 |
Melding increases Maximum Life and grants ES sourced from it. It's good if you have Pios Path to regenerate it. |
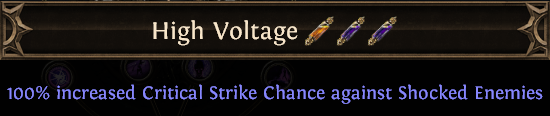 |
High Voltage is quite a distance from all your other passives, but it will greatly increase your Crit Chance, that is if you can Shock. |
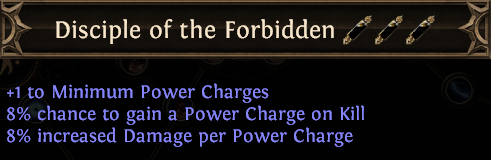 |
If you have 5 or more Power Charges most of the time, allocating Disciple of the Forbidden may elevate your DPS. |
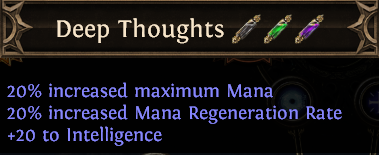 |
Use it if you desperately need more Mana, or for one of the Mana Masteries it unlocks. |
 |
Increases Effect of Shock and Lighnind Damage. Pick it up later in the game if you don't have any Cluster Jewels and need more Damage. |
| Masteries Priority |
|
|
|
If you have any other build requests please leave that in the comments below. We are always open to suggestions and constructive feedback.
Pictures used in this article are the intellectual property of Grinding Gear Games.
