Ranger Leveling Guide with Bows/DoT in PoE
One of the most popular leveling builds for Bow-wielding Rangers - mainly Raiders and PathfindersToxic Rain Raider
Leveling Guide
Updated for Patch 3.19
The Best Crafty Guides by Odealo
| Guide notes |
| November 18, 2022 -Guide created |
Ranger's Raider is the best example of a rapidly-moving-and-attacking character archetype - perfectly suited for farming, quickly progressing through a map, and one that's able to finish the leveling phase in no time. The Pathfinder sub-class also has some virtues, mostly Flask-related, and it's not as good as a Raider, but still decent. Wielding a Bow and using ranged attacks issue an immense advantage over melee characters as you won't have to approach enemies. One of the most popular ranged skills early in the league, Toxic Rain, fits here like a glove.
This Guide's goal is to prepare you for the endgame content while starting with no items - it's how it usually goes at the start of a new league. Toxic Rain is a unique skill, it fires a payload arrow into the air to land at a targeted location. The arrows then create spore pods lasting a few seconds, dealing Chaos Damage over Time to surrounding enemies - it is the main way in which the damage will be dealt. The most important stats to look for will be the ones increasing Chaos Damage over Time, Skill Effect Duration, and Attack Speed - this way the spore pods will last longer and there will be more of them. Another great thing about this build is that you don't need any Accuracy Rating - the spore pods are guaranteed to spawn, and the Attack Damage of your weapon is also not an issue as the damage comes not from the attack itself but the secondary effect that follows it. A good bow for almost any attack-based build is usually immensely expensive so that's definitely a big advantage. As for the defensive layers - you will be using Spell Suppression Chance and Evasion Rating to protect your rather unremarkable Life Pool. Remember that it is not a very tanky build and the distance you're keeping from your enemies is the primary defensive mechanics, a luxury that melee characters lack. Toxic Rain Raider is also one of the starter builds that can be kept and expanded on later in the league, it's very good even against the endgame threats. You can also use the Raider character for many other builds if you wish to switch to another, it's one of the most popular classes in the game. The items needed to keep up with content will progressively grow in value, but the makeshift economic gear should keep you alive even when fighting pinnacle bosses.
You can also check our other Path of Exile builds right over here Odealo's Crafty Guides - Full List
1. Important Skills
Toxic Rain is available at level 12, so before you reach it you will need to use something else. Fortunately, at this stage of the game, it won't really matter what Skill you're using as all of them are sufficiently good. We can recommend the Caustic Arrow - it's somewhat similar to Toxic Rain and can be used even later on in some specific cases. Both of these Deal Chaos Damage over Time. Having a Bow allows you for a secondary six-link Gem setup alongside the one on Body Armour, and as you probably won't have it linked all the way up until much later into the game, it's still important to keep in mind that the second setup can be used for Focused Ballista Totems firing the same Toxic Rain with some added utility potential. Deploying these Ballista Totems to deal damage alongside your character improves your damage during boss fights, and applies a stackable withered debuff, increasing your Chaos Damage further. For Auras you will use Grace and Malevolence, and for a Curse - Despair.
Toxic Rain fires a number of arrows into the air which then lands and creates a spore pod that explodes after some time. You don't really care about the initial impact or final explosion but the middle part, when the pod deals Chaos Damage over Time. Note that it is no Poison Damage - Poison is an Ailment that has to be caused by a Hit. You don't deal any Poison Damage, as you will rarely Hit anything and your Chance to Poison should be 0%, this is just Chaos DOT. The spore pods' damage can overlap on a single enemy which is rare, most skills prevent this "shotgun" effect, but here it is allowed. This is why the Area of Effect, the number of Fired Arrows per Attack, Attack Speed, and Skill Effect Duration are very helpful. If the boss is stationary, it lets you quickly overwhelm it with the number of spore pods.
Ballista Toxic Rain is a tool you can use later, after you start noticing your damage against single targets could be improved. The Ballista Totem Support Gem allows you to link any Projectile Attack to it and have it fired from a Totem. This way you can place a few of these and continue attacking while the Totems will do so as well, using the same Attack, which is Toxic Rain. We recommend equipping it only after you can afford an extra 5-link setup on a Bow or Body Armour, and linking it with Focused Ballista Support too, which is available to use only after level 31 - that's act 3. It will also be linked with Withering Touch Support Gem to apply Withered debuff - it applies a 6% increased Chaos Damage taken and stacks up to 15 times resulting in a 90% increased Chaos Damage taken from all sources.
These are basically the only Skills you will use regularly, but you still have three four-socket setups for other Skills. One setup will be used to host Auras - Grace for increased Evasion, Malevolence for increased Damage over Time and Skill Effect Duration, and possibly Defiance Banner if you can afford it. Another setup can be a home for movement skills such as Dash or Blink Arrow, Withering Step or Phase Run, and Blood Rage. You will also be able to fit the Guard Spell, cast automatically after taking some damage, and a Curse.
|
|

3. Skill Setups
When scavenging for items seek ones with predominantly green sockets as most of your Gems are green, these are the items that grant Evasion which is also needed. It'd be easier to equip such items as you wouldn't need any Attribute other than Dexterity, which is the only one you will have a lot of. Bows are always skewed to roll with mostly green sockets. Four-link items are available at item level 25, five-links at 35, and six-links at 50. The item level corresponds roughly to the character level.
New Skill Gems are unlocked by doing specific Quests during the Campaign, either as direct Quest Reward or indirectly by unlocking the possibility to buy it from Vendor, most of them are on the way to the next Act anyway, but Library one in Act 3 requires extra effort. You will gain access to every Gem regardless of your Class in Act 6 by doing Lilly Roth's Quest. Doing so will also unlock her shop in your Hideout for every new Character you make in the same league.
Suggested leveling Gem setups:
| Toxic Rain setup | |
 |
Toxic Rain - Toxic Rain is available at level 12, that's very early into the game - a quest reward for killing the act 1 boss, Merveil. Before that use the  Caustic Arrow. Caustic Arrow. |
| Act 1 Support Gems | |
 |
Mirage Archer Support - After using an Attack you summon a Mirage Archer that follows your character and uses the exact same skill, but with less Attack Speed and damage. It is not a minion, but more an extension of your own Attack. |
 |
Void Manipulation Support - This makes you deal more Chaos Damage, and unable to deal any Elemental one with the linked skill, which is not a problem. |
 |
Efficacy Support - Increases Skill Effect Duration and Damage over Time so that spore pods last longer and deal more damage. |
| Act 2 Support Gems | |
 |
Vicious Projectiles Support - It has the downside of lowering your Attack Speed, but the bonus to extra Chaos Damage over Time is too big to ignore. |
 |
Faster Attacks Support - Increases your Attack Speed, resulting in more Damage. |
| late-game Support Gems | |
 |
Empower Support - This is a very expensive Gem that has to be leveled up to work. It increases the Gem Level of Toxic Rain which increases its damage, but it's only good much later into the game. |
| Ballista Toxic Rain setup | |
|
Toxic Rain - In this setup, it is fired by Ballista Totems. It provides some extra damage against bosses. |
| Act 3 Support Gems | |
 |
Ballista Totem Support - Turns the Attacks into a Totem that fires the Attack on its own instead, you should be able to summon 5 of them in total, but each has less Attack Speed and deals less damage that the original Attack. |
 |
Focused Ballista Support - Your character has a lot of Attack Speed, and this Support Gem makes your Ballistas fire at the same rate as you do. It additionally increases Totem Placement speed and damage. |
 |
Withering Touch Support - Each Hit has a chance to inflict Withered debuff lasting two seconds, which results in more Chaos Damage taken. |
|
Efficacy Support |
| Act 4 Support Gems | |
 |
Multiple Totems Support - It lowers the damage of each Totem but you can place two more of them, which is still the best way to get more damage. |
| Guard Spell setup | |
 |
Steelskin - Steelskin prevents a portion of incoming Hit damage for some time. It can absorb a few hundred, up to around 2k of Damage, and stops bleeding. |
 |
Cast when Damage Taken - Steelskin should be cast automatically after receiving some damage. |
 |
Increased Duration Support - Increases the Duration of Steelskin. |
 |
Lifetap Support - Steelskin cost no Mana, but Life instead. It is good since the character may be low on Mana after continuously using Attacks. |
| Auras - three or four to choose from | |
 |
Determination - Adds and increases Armour - it is not the best Aura to use during leveling, or even at all, Armour shouldn't be your primary defensive layer. It's also really expensive - reserves half of the Mana pool. |
 |
Grace - Adds and increases Evasion Rating, we heavily recommend starting using it around acts 6 to 10, after allocating some Mana Reservation Efficiency. |
 |
Purity of Elements - Purity of Elements increases all your Elemental Resistances and makes you immune to all Elemental Ailments, which might be useful, but should be done with Items and Flasks instead. Rarely used Aura. |
 |
Malevolence - The best damage-oriented Aura, it increases your Damage over Time and Skill Effect Duration. Heavily recommended, if not mandatory. |
 |
Clarity - You might struggle with Mana Regeneration, use this Aura at a low gem level if you can afford to do so. |
 |
Defiance Banner - Increases Armour, Evasion, and reduces Critical Strike Chance for nearby enemies. |
| Mobility Skills setup | |
 |
Dash - A simple Dash to increase your mobility and dodge incoming attacks.  Blink Arrow might be used here instead, it's great with Attack Speed which you should have a lot of, but that's up to your personal preference. Blink Arrow might be used here instead, it's great with Attack Speed which you should have a lot of, but that's up to your personal preference. |
 |
Withering Step - Grants you an Elusive and Phasing Buffs on use. It increases Movement Speed, the Chance to avoid Hit Damage, and allows you to move through enemies. It also Inflicts a few stacks of Withered debuff.  Phase Run can be used here instead - it grants Phasing and increases Movement Speed, but it also lasts longer the more Frenzy Charges you've spent on this skill. Phase Run can be used here instead - it grants Phasing and increases Movement Speed, but it also lasts longer the more Frenzy Charges you've spent on this skill. |
 |
Blood Rage - It's optional. This skill drains your Life in exchange for Life Leech, Attack Speed, and Frenzy Charges on kill. use it if you don't mind the Life drain. |
| Despair | |
 |
Despair - Cursed enemies have reduced Chaos Resistance and take increased Damage from Damage Over Time effects. This Curse can also be applied on-hit via a rare Ring modifier. |
|
|
4. Gear
There are only a few unique items that are exceptionally good for this specific build, but none of them are mandatory. You should generally aim for high Attack Speed and Chaos Damage over Time on your weapon, while all the other gear pieces can be used for their defensive values - Maximum Life, Elemental Resistances, Evasion Rating, and Spell Suppression Chance. Spell Suppression and Evasion can be found on the Evasion or mixed Evasion bases (the ones with green sockets). During the very first acts seek only Maximum Life and Resistances as these are most needed. You might also find Intelligence and Strength useful as some of your Gems will require these Attributes. You won't find a lot of them on the skill tree alone. After reaching a high gem level of Toxic Rain, try to get a six-link bow with local modifiers that would increase the Gem Level of Toxic Rain and Chaos Damage over Time even further.
Maximum Life on your Gear is a nice thing to have, but it is not important, most of it will come from your Levels themself. Armor or Evasion Rating should be covered by your Auras. That leaves only one form of Defense you will need to get on your Rare Items: Elemental Resistances. It would be best if you aimed to have at least 60% Resistance of each Element, excluding Chaos. To help with that, you should use Essences found during the Campaign, and the Crafting Bench in your hideout. Use the low-tier Crafts, as they are cheap and effective, while high tiers will also raise the Required Level to wear an Item.
Proper Flask Setup makes Leveling much quicker and easier. Try to get 2 or 3 Quicksilver Flasks so you can have at least one active at all times. Jade Flask is especially useful once you step into Act 5, as there is a very noticeable spike in Physical Damage dealt by the enemies. You will probably need one Mana Flask if your Mana Regeneration Rate doesn't allow you to Attack continuously. 20% Quality on each Flask is an easy way to prolong their Duration.
 Tabula Rasa - The best leveling chest early on - provides six, white, and linked sockets at level 1. Tabula Rasa - The best leveling chest early on - provides six, white, and linked sockets at level 1. |
|
| Item has no level requirement and Energy Shield (Hidden) Item has 6 White Sockets and is fully linked (Hidden) |
|
 Goldrim - This Helmet is very popular due to the Elemental Resistances it provides, also available to wear at level 1. Goldrim - This Helmet is very popular due to the Elemental Resistances it provides, also available to wear at level 1. |
|
| +(30-50) to Evasion Rating 10% increased Rarity of Items found +(30-40)% to all Elemental Resistances Reflects 4 Physical Damage to Melee Attackers Level Requirement reduced by 100 (Hidden) |
|
 Le Heup of All - A ring with a lot of Attributes, Resistances, and some extra Damage. Le Heup of All - A ring with a lot of Attributes, Resistances, and some extra Damage. |
|
| Adds 1 to 4 Physical Damage to Attacks +(10-30) to all Attributes (10-30)% increased Damage (10-30)% increased Rarity of Items found +(10-30)% to all Elemental Resistances |
|
 Praxis - It is mostly used to lower the Mana Cost of Skills, it might be an issue later in the game. Praxis - It is mostly used to lower the Mana Cost of Skills, it might be an issue later in the game. |
|
| +(20-30) to maximum Mana +(30-60) to maximum Mana Regenerate (3-6) Mana per second -(8-4) to Total Mana Cost of Skills 8% of Damage taken Recouped as Mana |
|
 Death Rush - Chaos Resistance, Life Recovery on Kill, and Adrenaline for increased Damage, Attack, and Movement Speed are very good. Death Rush - Chaos Resistance, Life Recovery on Kill, and Adrenaline for increased Damage, Attack, and Movement Speed are very good. |
|
| +(17-23)% to Chaos Resistance Recover (3-5)% of Life on Kill Gain Adrenaline for (1-3) seconds on kill |
|
 Quill Rain - The 100% increased Attack Speed bonus is so influential that even the drawback of 30% less Damage shall not discourage you. Quill Rain - The 100% increased Attack Speed bonus is so influential that even the drawback of 30% less Damage shall not discourage you. |
|
| +(10-20) to Dexterity 100% increased Physical Damage 100% increased Attack Speed Gain 2 Mana per Enemy Hit with Attacks (50-100)% increased Projectile Speed +(25-50) to Accuracy Rating 30% less Damage |
|
 String of Servitude - It can potentially provide you with a lot of Elemental Resistances, and can be worn a level 1. Might be expensive in the first days of a new league as it drops only from The Temple of Atzoatl. String of Servitude - It can potentially provide you with a lot of Elemental Resistances, and can be worn a level 1. Might be expensive in the first days of a new league as it drops only from The Temple of Atzoatl. |
|
| <(1-2) Random corrupted implicit modifiers> Implicit Modifier magnitudes are tripled Level Requirement reduced by 100 (Hidden) Desired Implicit: (42-48)% to All Elemental Resistances |
|
 Devoto's Devotion - Great Helemnt due to the Attack Speed, Chaos Resistance, Dexterity, Evasion, and Movement Speed bonuses. Devoto's Devotion - Great Helemnt due to the Attack Speed, Chaos Resistance, Dexterity, Evasion, and Movement Speed bonuses. |
|
| +(50-65) to Dexterity 10% reduced Global Physical Damage 16% increased Attack Speed (150-200)% increased Armour and Evasion +(15-25)% to Chaos Resistance 20% increased Movement Speed Mercury Footprints |
|
 Carcass Jack - Very good Unique Armour that provides Life, Elemental Resistances, Area Damage, and Area of Effect. Carcass Jack - Very good Unique Armour that provides Life, Elemental Resistances, Area Damage, and Area of Effect. |
|
| (120-150)% increased Evasion and Energy Shield +(50-70) to maximum Life +(9-12)% to all Elemental Resistances (40-50)% increased Area of Effect (40-50)% increased Area Damage Extra gore |
|
 Seven-League Step - The fastest boots in the game, but besides that, there's nothing else on them. Seven-League Step - The fastest boots in the game, but besides that, there's nothing else on them. |
|
| 50% increased Movement Speed Level Requirement reduced by 100 (Hidden) |
|
 Wanderlust - Movement Speed, Mana Regeneration Rate, and Freeze immunity are all very good here. Wanderlust - Movement Speed, Mana Regeneration Rate, and Freeze immunity are all very good here. |
|
| +5 to Dexterity +(10-20) to maximum Energy Shield (20-40)% increased Mana Regeneration Rate 20% increased Movement Speed Cannot be Frozen |
|
|
Stat priorities on Rare Items:
|
|
Suggested Flasks:
|
|
     |
|
|
5. Passive Skills
To successfully create the Passive Tree for a Build, you have to consider most of the Passive Clusters for a given build, choose a few of them, and make an optimal path to allocate most of them in the least amount of Passive Skill Points spent. Here, we included a Skill Tree for a Toxic Rain Ranger - more specifically Raider character. Nodes labeled as S-tier are great and should always be picked - the large S-tier blob with multiple passives in it is your starting route packed with the best nodes you can find. A-tier passives shall be allocated later on, or perhaps not at all - that depends on your route. Passives described as B-tier should be picked after allocating all the S-tier ones. They're good but less potent, and forming a path up there costs a lot of points.

| S TIER | |
|---|---|
| The best and most efficient Passives in the Passive Tree. You will want to take them on almost every build. | |
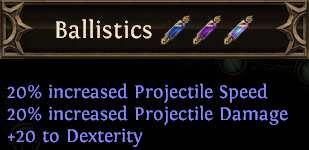 |
The first Notable you will pick. It increases Projectile Speed and Damage. Note that the Damage of Toxic Rain's DOT scales up with Projectile Damage which is an exception. |
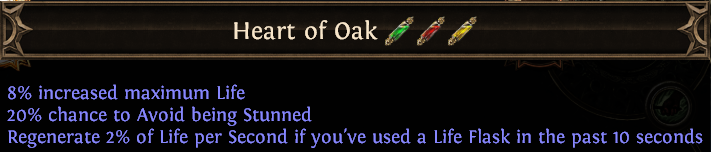 |
Going down you will encounter this node for Maximum Life, a Chance to Avoid Stun, and Life Regeneration. |
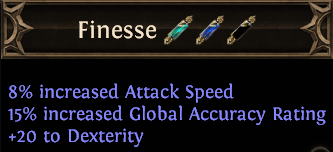 |
The next one is Finesse - for Attack Speed, Dexterity, and Accuracy. |
 |
One of the best nodes for Bow-wielding Attack-based DOT characters. All of the improvements here will suit this build perfectly, except for Accuracy. |
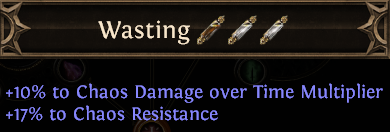 |
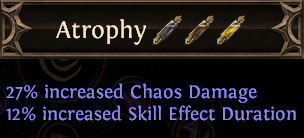
The first passive that improves your Chaos Damage over Time specifically, and additionally adds Chaos Resistance. |
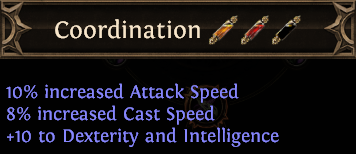 |
Going further up you will come across Coordination for more Attack Speed, Dexterity, and Intelligence. |
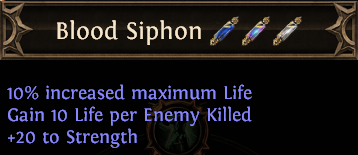 |
Blood Siphon grants you Maximum Life, Strength, and Life on Kill. All of it is desirable. |
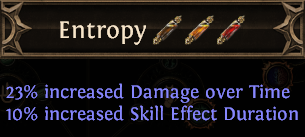 |
Entropy increases the spore pods' duration and their Damage over Time. |
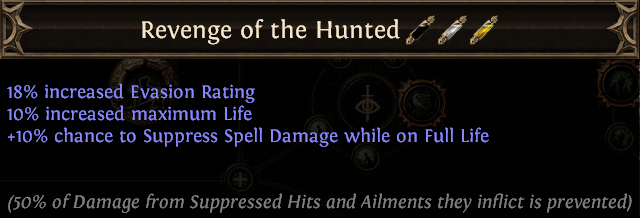 |
Maximum Life, Evasion Rating, and Spell Suppression Chance are your three primary defensive layers, all found here. |
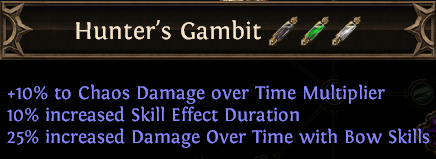 |
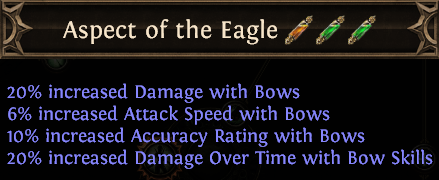
A Bow-oriented Passive that also has DOT and Skill effect Duration upgrades, much like Entropy, but better. |
 |
Charisma increases Mana Reservation Efficiency allowing you to fit more Auras, very useful around act 3. |
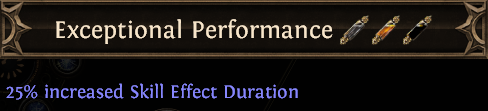 |
The one passive disconnected from the main block of the best passives is Exceptional Performance - it increases spore pods' duration. You can approach it by taking Reflexes or Avatar of the Hunt. |
| A TIER | |
| Those are also very good Passives, just not as universal as previous ones | |
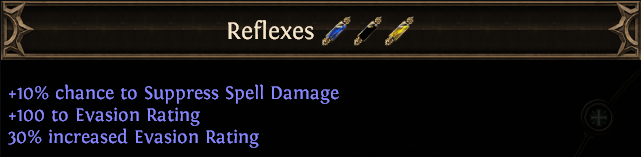 |
Reflexes is a passive brimming with Evasion Rating and Spell Suppression Chance, one of the best defensive passives you can find. |
| Avatar of the Hunt is an offensively-oriented Bow notable that also has some Evasion Rating and Movement Speed. | |
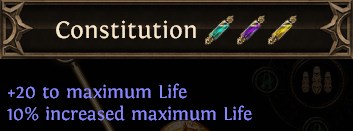 |
Constitution grants a lot of Maximum Life. When going for it you will also encounter Sentinel for Elemental Resistances for even better defenses. |
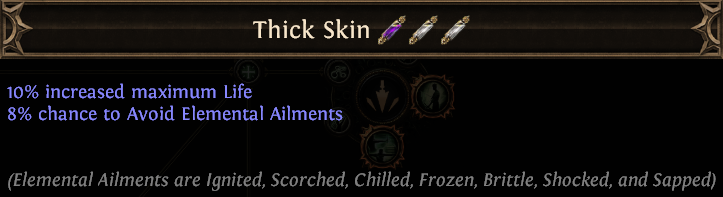 |
Thick skin is the bottom-most passive you can aspire for, but it is located near Farsight for more Damage. |
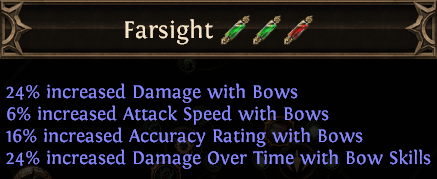 |
Farsight increases Damage, Attack Speed, Accuracy, and Damage over Time - it's almost exactly the same as Eagle Eye, but better. |
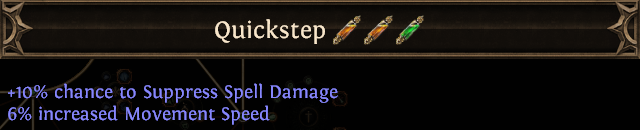 |
Allocate Quickstep for Spell Suppression Chance and Movement Speed. |
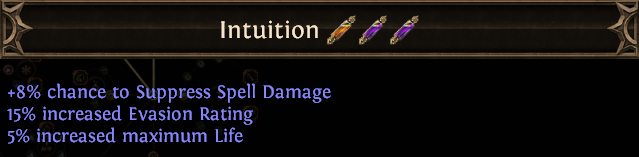 |
Next to Quickstep is Intuition, for Spell Suppression Chance, Evasion Rating, and Maximum Life. |
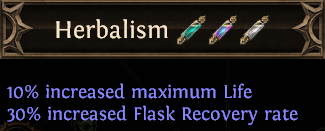 |
A bit further to the right you can find Herbalism for Maximum Life and Life Recovery Rate. |
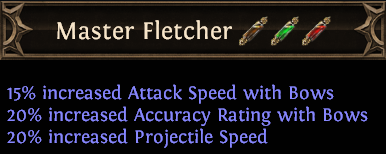 |
On the bottom branch of the large Bow cluster resides Master Fletcher, the small nodes leading to it are actually better than the big notable itself, but it is still worth allocating it for the major Attack Speed bonus. |
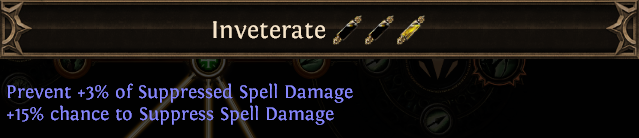 |
It's the Spell Suppression notable on a Spell Suppression cluster, allocate it to take less damage from Spells. |
 |
Use it for Maximum Life and Life Recovery on Kill - the 2% might seem like a small number but it makes a big difference when killing tons of enemies. |
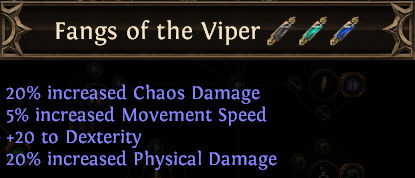 |
Fangs of the Viper can be used to increase Chaos Damage, Dexterity, and Movement Speed. |
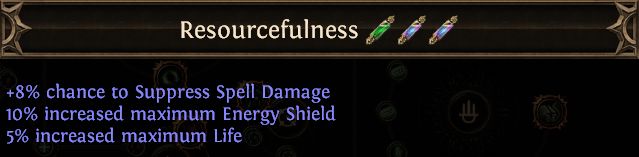 |
Chance to Suppress Spell Damage and Maximum Life are definitely great additions, and it's only one point away from Fangs of the Viper. Energy Shield is not that great here. |
| B TIER | |
| Passives that belong to this Tier fulfill their specific purpose | |
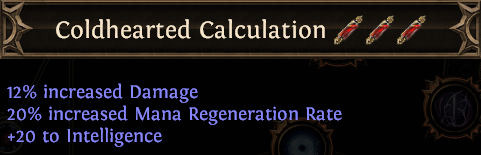 |
Right next to Resourcefulness you can find Coldhearted Calculation, it's not that great - you can pick it up for damage, Mana Regeneration Rate, and Intelligence. |
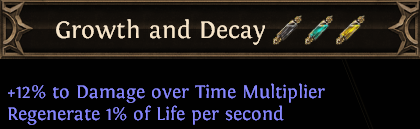 |
Traveling up you will come across Growth and Decay for more DOT and Life Regeneration. |
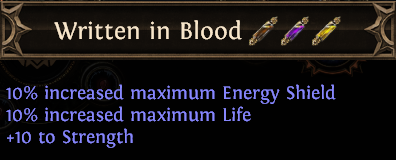 |
Now to allocate the nodes on the outer ring, we recommend going through the cluster with Written in Blood for more Maximum Life and ES. |
 |
Very powerful Notable, one of the main reasons for allocating passives so high up in the first place. |
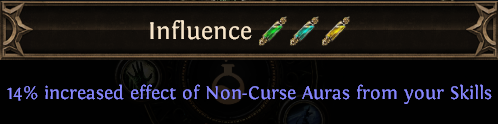 |
Influence increases the Effect of Auras which translates to more Damage and Evasion - going for it you will also pick up a small node for Reservation Efficiency. |
| Masteries Priority |
|
|
|
If you have any other build requests please leave that in the comments below. We are always open to suggestions and constructive feedback.
Pictures used in this article are the intellectual property of Grinding Gear Games.
