
BAMA Leveling Guide for all Classes in POE
The best leveling Setup for the fastest Campaign Progression for any Class in the game using Transfigured Blink and Mirror Arrows!All Classes
BAMA Leveling Guide
Updated for Patch 3.27
The Best Crafty Guides by Odealo
| Guide notes |
| November 10, 2025 -Guide updated for Patch 3.27 |
The leveling process with your desired Build is not always fast or easy. Sometimes you will need a very specific, high-level Unique Item, sometimes the Skill of choice simply lacks proper scaling during early levels to feel comfortable. In most cases, however, it is simply slower than using a dedicated Leveling Build, such as the one featured in this Guide. It works very good with all Classes, although Witches and Templars are the best here due to the position on the Passive Tree. On the other hand, Rangers and Duelists can significantly reduce the Cooldowns via Bow Mastery or boost the effect of Quicksilver Flasks, and the difference in Damage output is negligible. Keep in mind, it is not a League-starter strategy. The Guide assumes you will have access to the Lilly NPC in your Hideout for easy access to all regular Skill and Support Gems, some Currency for necessary Items and special Gems, and enough Gold or Regret Orbs to easily transition to your desired Build once you complete the Campaign. Do not worry about your spending - almost all Leveling Gear and Gems can be resold very quickly, sometimes even with a profit if you use your Labirynth Fonts to upgrade the Quality of your Gems for free.
You can also check our Endgame version of this Build for Necromancer if you aim for significantly higher levels (90+) before swapping to your desired Build.
1. Important Skills
You will use Blink Arrow, which teleports you to the location and leaves a Clone behind, and a Mirror Arrow that simply creates a Clone in the targeted location. They both have Transfigured versions, called Bombarding and Prismatic Clones, which deal significantly more Damage with their special Attacks. You can have up to 3 Bombarding Clones, only 3 Prismatic Clones, and you can easily swap them around by selling the Gem and one Orb of Alteration to the Vendor NPC. Those Minions use your own Bow and Quiver, which gives you more opportunities to scale their Damage compared to regular Minions. The Prismatic Clone uses a special version of Elemental Hit that excels at Single-Target Damage. It converts all Physical Damage to random Element, but discards any other Elemental Damage types. The Bombarding Clone fires a Rain of Arrows Skill at nearby Enemies, which is excellent for Clear, and has no special Conversion rates included. Optimizing those contradicting Damage profiles for the endgame can be a bit tricky, but it is not important for the Campaign. As long as you use a decent Bow suited for your level, you will have no problems with your DPS output.
Not only is their damage great, but the playstyle is also ideal for quick progress. You will summon your Minions and continue to move towards the next area, while your Clone automatically kills all Enemies around you, giving you valuable Experience and Flask Charges for your Quicksilver Flasks. Dealing Damage while on the move is one of the most important aspects of fast leveling. You should avoid downtime as much as possible. For maximum efficiency, you should start with the Blink Arrow and immediately fire the Mirror Arrow while awaiting the teleport caused by the falling Arrow. This way, you will summon both Minions while stopping to Attack only once. The Minions have a short Cooldown of 3 seconds, but also a short Duration of 5 seconds. To maintain them at all times, you will need Gem Quality and Fleetfoot Notable anointed on your Amulet, as well as some bonuses for Minion Duration, which are easy to obtain.
You can start using this Skill at level 10, which means you will need some other way to complete the first Act. Our recommendation is to use two Blackheart Rings, which add up to 20 flat Chaos Damage to your Attacks, and you can use two of them at level 1. For comparison, the Added Cold or Lightning Damage Support Gems available at level 8 add only 5 flat Damage. You can then use Bows with Split Arrow and Burning Arrow, Claws with Cobra Lash and Double Strike, or Wands with Kinetic Bolt. Thanks to this absurd amount of Damage, you will have no problems with the first stage of the Campaign. It is especially important for the Rangers and Duelists, as they have to travel across the whole Passive Tree to reach Minion Notables, which are necessary to improve their Clones later on. Remember that refunding the Passive Points with Gold is extremely cheap at lower levels. It is recommended to allocate various useful nearby Passives to get every advantage possible, and refund them once you are ready to switch to the Minion Setup.
Once you transition to the Blink and Mirror Arrow Setup, it will become smooth sailing all the way to the Maps. There are some fine details like the Damage types, or using your own Bow to scale your Clones, but at the essence, it is a Minion Build, meaning you don't have that much to do after summoning your small army. For extra mobility, use the Flame Dash or Frostblink - despite the name, those Skills do not share the Cooldown with Blink Arrow. The Steelskin is a very valuable Guard Skill that absorbs some Damage, but most importantly, it disables Bleeding on you. Your Minions will deal various Damage types at different stages, but the Sniper's Mark covers it all by increasing all Projectile Damage taken by Enemies. Later on, it can be supplemented by Elemental Weakness cast via Arcanist Brand. It will also trigger the Flesh Offering, greatly increasing the Attack Speed of your Minions.
For your Auras, you will want to start with Clarity. Do not level it up too fast if it's not necessary; it raises their Reservation Cost very quickly. For your major Aura, you will want to use Purity of Elements, which grants you tons of Resistances and makes you immune to Ailments. The offensive Aura is not very good here - Anger or Wrath would be an easy choice for the Bombarding Clones, but they apply to the Prismatic Clones only 1/3 of the time, depending on the chosen Element. Furthermore, you shouldn't really have problems with DPS, while a lack of defense might be quite noticeable, especially if you get Frozen.
|
|

2. Path of Building Planners
The Path of Building tool is necessary for a transparent overview of progression. There you will find Gear, Passive Tree, and Skill Setups divided for 4 main stages: levels 1-10, 10-25, 25-50, and finally 50+, which will be able to guide you from the first town straight to Endgame Maps in the easiest way possible. Use the Loadouts option to quickly swap between those settings.
Important: All Gem Levels in the Pobs are kept at level 1 to highlight their unlock levels. You should level them up naturally during your gameplay.
Path of Building links:
Witch BAMA Leveling Progression PoB
Templar BAMA Leveling Progression PoB
Shadow BAMA Leveling Progression PoB
Marauder BAMA Leveling Progression PoB
Scion BAMA Leveling Progression PoB
Ranger BAMA Leveling Progression PoB
Duelist BAMA Leveling Progression PoB
3. Skill Gems
As you progress through the Campaign, you will unlock new Active and Support Gems. Since it is not a League-starting scenario, you can pre-buy all necessary Gems from Lilly NPC in your Hideout. The only exception are the Transfigured Gems, which you will have to buy from other players.
Suggested leveling Gem setups:
Act 1: The first chapter of your journey varies depending on your chosen Class. Your goal is to reach level 10 and start using the Transfigured Blink and Mirror Arrows. Our recommendation is to use two Blackheart Rings, which will make any Attack of your choice crazy powerful. The Bows offer the best AoE Coverage at this level. A 6-link Setup is not necessary at this point - sustaining Mana can be problematic, and you will have enough DPS anyway.
| Act 1 Main Damage Setup | |
 |
Split Arrow - fires multiple Projectiles that deal a moderate amount of Damage. |
 |
Burning Arrow - your primary Single-target Damage. It has the best Damage Effectiveness at this level. |
 |
Mirage Archer Support |
 |
Faster Attacks Support |
| Act 1 Utility setup | |
 |
Sniper's Mark - increased the Damage caused by your Projectiles. |
 |
Steelskin - absorbs Damage and disables Bleeding on you. |
 |
Frostblink - a quick teleport with a short Cooldown. |
 |
Precision - an Aura that improves your Accuracy Rating. |
 |
Clarity - a very important Aura that provides Mana Regeneration. You will need to use Mana Flask anyway. |
At the end of Act 1, you can switch to the BAMA Setup. You can also continue to use the Split and Burning Arrow Setup until the power of Blackheart Rings diminishes. Combine both Gems into a double 5-link Setup.
| BAMA setup | |
 |
Blink Arrow of Bombarding Clones - teleports you to the targeted location and creates a Clone that fires Rain of Arrows at nearby Enemies. |
 |
Mirror Arrow of Prismatic Clones - fires an arrow that creates a Clone upon landing. The Minion uses Elemental Hit, which can deal only one type of randomly chosen Elemental Damage at a time. |
| Act 1 Support Gems | |
 |
Minion Damage Support |
|
Faster Attacks Support |
 |
Maim Support - replaced by Vicious Projectiles later on. |
| Act 2 Support Gems | |
 |
Minion Speed Support - replaced by Hypothermia later on. |
 |
Elemental Damage with Attacks Support |
| Act 3 Support Gems | |
 |
Hypothermia Support |
You will also progressively gain access to new, useful Utility and Aura Skills.
| Utility Skills | |
| Act 1 | |
 |
Flesh Offering - consumes nearby Corpses to improve the Attack Speed of your Minions. |
| Act 2 | |
 |
Desecrate - creates Corpses necessary to use Flesh Offering. |
| Act 3 | |
 |
Elemental Weakness - lowers Elemental Resistances of affected Enemies. You can use two Curses thanks to Doedre's Damning, but it is only useful against Bosses. |
 |
Purity of Elements - grants you Elemental Resistances and makes you immune to Elemental Ailments. |
| Act 4 | |
 |
Carrion Golem - grants Physical Damage to all your other Minions. You can also use the Stone Golem for Life Regeneration. |
 |
Arcanist Brand - automates several Utility Spells at once. Link it with Desecrate, Flesh Offering, and Sniper's Mark. |
|
|
4. Gear
Popular leveling Uniques will immensely speed up your Campaign. Most of them are quite cheap, but some very important pieces can get expensive, such as Tabula Rasa or Seven-league Steps. It is always worth it to buy them, and you can always sell them very quickly after you are done with the campaign. You will barely use any Rare Items. They might be better at some point, but you will outgrow them very fast, so it is not worth the time to look them up or Craft. The exception here is your Bow and Jewels at the later stages of the campaign, although it is not mandatory.
The only important defensive modifiers during the Campaign are Elemental Resistances and a bit of maximum Life, although most of it will be gained from leveling up your Character. You will also need Movement Speed, some Mana Regeneration, and enough Attributes to use and level up your Gems. It is an unusual Minion Build that uses your own Bow and Quiver to scale the Damage. Keep in mind that Added Damage on your Rings or Gloves does not apply to Minions. You can do it only via Abyssal Jewels available in the later stages of the Campaign.
 Tabula Rasa - this Armour provides a lot of Damage and flexibility thanks to a guaranteed Six-linked White Sockets that can accommodate any Gems. Tabula Rasa - this Armour provides a lot of Damage and flexibility thanks to a guaranteed Six-linked White Sockets that can accommodate any Gems. |
|
| Required level: 1 Item has no level requirement and Energy Shield (Hidden) Item has 6 White Sockets and is fully linked (Hidden) |
|
 Goldrim - grants a lot of Elemental Resistances, which is your main defense during the Campaign. Goldrim - grants a lot of Elemental Resistances, which is your main defense during the Campaign. |
|
| Required level: 1 +(30-50) to Evasion Rating 10% increased Rarity of Items found +(30-40)% to all Elemental Resistances Reflects 4 Physical Damage to Melee Attackers Level Requirement reduced by 100 (Hidden) |
|
 Thrillsteel - a very simple Helmet that grants only one thing: the Onslaught Buff, which provides 20% Movement Speed at all times. Thrillsteel - a very simple Helmet that grants only one thing: the Onslaught Buff, which provides 20% Movement Speed at all times. |
|
| Required level: 18 Onslaught |
|
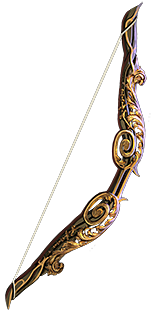
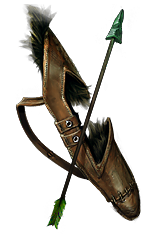
 Silverbranch - a great starting Bow. It deals decent Damage but also recovers Mana on Kill, which is very useful. Silverbranch - a great starting Bow. It deals decent Damage but also recovers Mana on Kill, which is very useful. |
|
| Required level: 1 +1 to Level of Socketed Bow Gems (80-100)% increased Physical Damage 10% increased Attack Speed Gain 10 Mana per Enemy Killed +30 to Accuracy Rating |
|
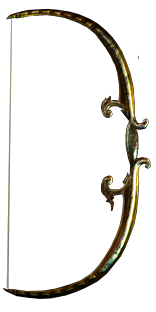
 Roth's Reach - another great Bow, it deals a lot of Damage, and the extra Chain further helps with Clear. Roth's Reach - another great Bow, it deals a lot of Damage, and the extra Chain further helps with Clear. |
|
| Required level: 18 +(15-25)% to Global Critical Strike Multiplier (60-80)% increased Physical Damage Skills Chain +2 times 30% increased Projectile Speed (60-80)% increased Elemental Damage with Attack Skills |
|
 Doomfletch - a very powerful Bow that can serve you for a very long time due to the Extra Damage modifier. However, its power diminishes as you get close to Maps and unlock end-game-oriented Bows. Doomfletch - a very powerful Bow that can serve you for a very long time due to the Extra Damage modifier. However, its power diminishes as you get close to Maps and unlock end-game-oriented Bows. |
|
| Required level: 28 (20-24)% increased Elemental Damage with Attack Skills Adds (12-16) to (20-24) Physical Damage (10-14)% increased Attack Speed 60% increased Mana Regeneration Rate Gain 100% of Weapon Physical Damage as Extra Damage of each Element |
|
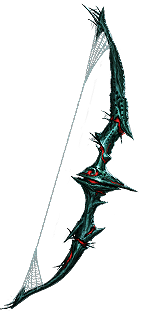
 Lioneye's Glare - the final Bow you will need, it can be used to comfortably farm low-tier maps if you need some extra levels before switching to the final Build. Lioneye's Glare - the final Bow you will need, it can be used to comfortably farm low-tier maps if you need some extra levels before switching to the final Build. |
|
| Required level: 66 (20-24)% increased Elemental Damage with Attack Skills (180-200)% increased Physical Damage Adds (7-14) to (24-34) Physical Damage (10-20)% increased Attack Speed +(80-100) to maximum Mana Hits can't be Evaded Far Shot |
|
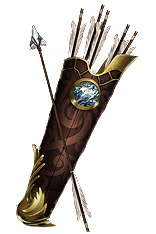
 Craghead - a starting Quiver, it adds a lot of Physical Damage to your Attacks. Craghead - a starting Quiver, it adds a lot of Physical Damage to your Attacks. |
|
| Required level: 4 Adds 1 to 4 Physical Damage to Attacks (20-25)% reduced Enemy Stun Threshold 25% reduced Projectile Speed (140-200)% increased Stun Duration on Enemies 6 to 10 Added Physical Damage with Bow Attacks |
|
 Hyrri's Bite - it provides Attack Speed and adds a bit of Cold Damage. The extra Attributes are also very useful. Hyrri's Bite - it provides Attack Speed and adds a bit of Cold Damage. The extra Attributes are also very useful. |
|
| Required level: 14 Gain (6-8) Life per Enemy Hit with Attacks +(15-25) to Strength +(35-45) to Dexterity +(15-25) to Intelligence Adds 10 to 20 Cold Damage to Attacks (7-10)% increased Attack Speed Gain (2-3) Life per Enemy Hit with Attacks 10% increased Area of Effect |
|
 Drillneck - this Quiver adds tons of Physical Damage, which is very valuable for the Doomfletch Bow. It also increases the Damage of Piercing Projectiles used by Prismatic Clones. Drillneck - this Quiver adds tons of Physical Damage, which is very valuable for the Doomfletch Bow. It also increases the Damage of Piercing Projectiles used by Prismatic Clones. |
|
| Required level: 36 Arrows Pierce an additional Target (8-12)% increased Attack Speed +350 to Evasion Rating +(40-50) to maximum Life (10-14) to (19-24) Added Physical Damage with Bow Attacks Arrows deal 50% increased Damage with Hits and Ailments to Targets they Pierce |
|
 Blackheart - those Rings will easily carry you through the beginning of the Campaign thanks to the immense amount of Damage they add to your Attacks. You can use Noxious Catalysts to boost it even more. Blackheart - those Rings will easily carry you through the beginning of the Campaign thanks to the immense amount of Damage they add to your Attacks. You can use Noxious Catalysts to boost it even more. |
|
| Required level: 1 Adds 1 to 4 Physical Damage to Attacks Adds (10-15) to (20-25) Chaos Damage to Attacks Regenerate (10-15) Life per second 10% chance to Cause Monsters to Flee |
|
 Praxis - if you have problems with Mana, using this Ring will massively help. It lowers the Mana Costs while also providing tons of flat Mana Regeneration. Praxis - if you have problems with Mana, using this Ring will massively help. It lowers the Mana Costs while also providing tons of flat Mana Regeneration. |
|
| Required level: 22 +(20-30) to maximum Mana +(30-60) to maximum Mana Regenerate (3-6) Mana per second -(8-4) to Total Mana Cost of Skills 8% of Damage taken Recouped as Mana |
|
 Doedre's Damning - allows you to use additional Curse for extra Damage, but also provides tons of Elemental Resistances. Doedre's Damning - allows you to use additional Curse for extra Damage, but also provides tons of Elemental Resistances. |
|
| Required level: 1 +(20-30) to maximum Mana +(5-20) to Intelligence +(5-20)% to all Elemental Resistances Gain (5-20) Mana per Enemy Killed You can apply an additional Curse |
|
 Kikazaru - this Ring grants both Life and Mana Regeneration, as well as provides plenty of Attributes and a bit of Lightning Resistance. Kikazaru - this Ring grants both Life and Mana Regeneration, as well as provides plenty of Attributes and a bit of Lightning Resistance. |
|
| Required level: 20 +(20-30)% to Lightning Resistance +(10-15) to all Attributes (20-40)% increased Mana Regeneration Rate 60% reduced Effect of Curses on you Regenerate 3 Life per second per Level |
|
 Ondar's Clasp - grants tons of Attack Speed and Lightning Damage during the early levels. You should replace them once you switch to Minions. Ondar's Clasp - grants tons of Attack Speed and Lightning Damage during the early levels. You should replace them once you switch to Minions. |
|
| Required level: 5 30% increased Attack Speed when on Full Life Adds (1-4) to (30-50) Lightning Damage to Attacks +(100-200) to Accuracy Rating 20% increased Movement Speed when on Low Life |
|
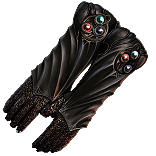 Triad Grip - to make your Bombarding Clones fully benefit from Elemental Damage bonuses and amplifications, you will need to convert their Physical Damage to Elemental. It is not necessary. Triad Grip - to make your Bombarding Clones fully benefit from Elemental Damage bonuses and amplifications, you will need to convert their Physical Damage to Elemental. It is not necessary. |
|
| Required level: 32 (80-120)% increased Armour and Energy Shield Minions convert 25% of Physical Damage to Fire Damage per Red Socket Minions convert 25% of Physical Damage to Cold Damage per Green Socket Minions convert 25% of Physical Damage to Lightning Damage per Blue Socket Minions convert 25% of Physical Damage to Chaos Damage per White Socket Minions have (5-10)% chance to Freeze, Shock and Ignite |
|
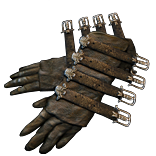
 Rare Gloves - our recommendation is to use any pair of Rare Gloves with Resistances on them. You should make use of the Crafting Bench in your Hideout to add even more Resistances as well. Rare Gloves - our recommendation is to use any pair of Rare Gloves with Resistances on them. You should make use of the Crafting Bench in your Hideout to add even more Resistances as well. |
|
| Recommended modifiers: Elemental Resistance Dexterity Maximum Life |
|
 Perandus Blazon - grants a lot of Attributes, and prolongs your Flask Duration, which means more Movement Speed from your Quicksilvers. Perandus Blazon - grants a lot of Attributes, and prolongs your Flask Duration, which means more Movement Speed from your Quicksilvers. |
|
| Required level: 16 +(20-30) to all Attributes (10-20)% increased Rarity of Items found +20% to Fire Resistance 20% increased Flask Effect Duration -2 Physical Damage taken from Attack Hits |
|
 Karui Ward - the most important modifier here is the Movement Speed, but the extra Attributes are useful too. You can also use cheap Anoints to speed you up. Karui Ward - the most important modifier here is the Movement Speed, but the extra Attributes are useful too. You can also use cheap Anoints to speed you up. |
|
|
Required level: 5 |
|
 Seven-League Step - the best leveling Boots you can use, they massively improve your Movement Speed. Seven-League Step - the best leveling Boots you can use, they massively improve your Movement Speed. |
|
| Required level: 1 50% increased Movement Speed Level Requirement reduced by 100 (Hidden) |
|
 Wanderlust - if you are working on a very limited budget, you can use those Boots instead. They provide less Movement Speed, but prevent Freeze. Wanderlust - if you are working on a very limited budget, you can use those Boots instead. They provide less Movement Speed, but prevent Freeze. |
|
| Required level: 1 +5 to Dexterity +(10-20) to maximum Energy Shield (20-40)% increased Mana Regeneration Rate 20% increased Movement Speed Cannot be Frozen |
|
 Large Cluster Jewel - In the later stages of the Campaign, you will simply run out of Minion Notables to invest into. At this point, you can start preparing to swap to your final Build or get any Minion Cluster Jewel to keep up the momentum. Even without any extra modifiers, it will be better than keeping your Points unspent. Large Cluster Jewel - In the later stages of the Campaign, you will simply run out of Minion Notables to invest into. At this point, you can start preparing to swap to your final Build or get any Minion Cluster Jewel to keep up the momentum. Even without any extra modifiers, it will be better than keeping your Points unspent. |
|
| Required level: Depends on modifiers Recommended modifiers: Added Small Passive Skills grant: Minions deal 10% increased Damage |
|
 Abyssal Jewel - you can also use Abyssal Jewels with added Physical Damage; it will greatly boost your Doomfletch Bow. It is a temporary boost to maximise your Speed. Do not spend more than a few Chaos Orbs on them. It is only useful if you plan to spend a bit more time in Maps before swapping to the final Build. Abyssal Jewel - you can also use Abyssal Jewels with added Physical Damage; it will greatly boost your Doomfletch Bow. It is a temporary boost to maximise your Speed. Do not spend more than a few Chaos Orbs on them. It is only useful if you plan to spend a bit more time in Maps before swapping to the final Build. |
|
| Required level: Depends on modifiers Recommended modifiers: Minions deal # - # additional Physical Damage |
|
 Impossible Escape - this method is a bit excessive, but it can be useful for Classes without easy access to Minion Notables. With this Jewel, you will be able to pick up a lot of Damage early on. Impossible Escape - this method is a bit excessive, but it can be useful for Classes without easy access to Minion Notables. With this Jewel, you will be able to pick up a lot of Damage early on. |
|
| Required level: 1 Passives in Radius of The Agnostic can be Allocated without being connected to your tree |
|
 Elegant Hubris - another great way to massively improve your Damage during the Campaign. There are lots of possibilities to gain 3 Slum Lord Notables, each increasing your Minion Damage by 80%. Many of them would be ineffective by the Endgame standards, but during the leveling, it is a massive boost. Elegant Hubris - another great way to massively improve your Damage during the Campaign. There are lots of possibilities to gain 3 Slum Lord Notables, each increasing your Minion Damage by 80%. Many of them would be ineffective by the Endgame standards, but during the leveling, it is a massive boost. |
|
| Required level: 1 Commissioned (2000-160000) coins to commemorate (Cadiro-Caspiro-Victario) Passives in radius are Conquered by the Eternal Empire Historic |
|
 Fortress Covenant - provides tons of Damage for Minions, it is especialy useful for Classes that start far away from Minion Notables. Its downside can be quite annoying to deal with. Fortress Covenant - provides tons of Damage for Minions, it is especialy useful for Classes that start far away from Minion Notables. Its downside can be quite annoying to deal with. |
|
| Required level: 1 Minions deal (35-45)% increased Damage Minions have +(10-12)% Chance to Block Attack Damage Minions have +(10-12)% Chance to Block Spell Damage Notable Passive Skills in Radius are Transformed to instead grant: Minions take 20% increased Damage |
|
  Combat Focus - if you want to specialise in one Damage type efficiently, you will need to Convert Physical Damage with Triad Grip Gloves, and disable other Damage types with those two Jewels. Usually, it is not required. Combat Focus - if you want to specialise in one Damage type efficiently, you will need to Convert Physical Damage with Triad Grip Gloves, and disable other Damage types with those two Jewels. Usually, it is not required. |
|
| Required level: 1 (10-15)% increased Elemental Damage With 40 total Intelligence in Radius, Prismatic Skills cannot choose Fire/Cold With 40 total Intelligence in Radius, Prismatic Skills deal 50% less Fire/Cold Damage |
|
|
Stat priorities on Rare Items:
|
|
Suggested Flasks:
|
|
   |
5. Passives
Understanding the Passive Tree choices can make your progression much smoother, especially if you are not familiar with Minion Builds. In the Endgame, a lot of your Damage comes from your Rings, Jewels, Cluster Jewels, and Weapons. However, most of them are restricted by high-level requirements. During the Campaign, almost all your scaling power comes only from the Passive Tree, while the Gear only provides base Damage. There are just a few sources of Minion Damage there, and you will want to pick them all. You will also need to boost their Attack Speed and Accuracy Rating. Naturally, Classes such as Duelist and Ranger have to travel across the Passive Tree for many more levels to reach them, but it is not a huge problem overall. Furthermore, in a proper Build, you would want to include Duration and more Defenses, but during the Campaign, it is not really that important; your goal is to reach Maps as fast as possible.
 |
| The core Notable Passives every Class should aim for during leveling. Click on the image to open the Passive Tree preview in a new window |
|
|
If you have any other build requests please leave that in the comments below. We are always open to suggestions and constructive feedback.
Pictures used in this article are the intellectual property of Grinding Gear Games.
