Poisonous Concoction of Bouncing Trickster
An extremely efficient Setup for Poisonous Concoction of Bouncing Trickster that uses Affliction Charges to achieve absurd Poison DPS.Poisonous Concoction of Bouncing
Trickster Build
Created for Patch 3.26
The Best Crafty Guides by Odealo
| Guide notes |
| July 08, 2024 -Created for Patch 3.24 July 13, 2025 -Updated for Patch 3.26 |
| Build Overview | |||
| Tags: [POISON] [CHAOS] [HYBRID] [ATTACK] | |||
|
Budget: Defenses: |
|
Boss DPS: AoE: |
|
The Poisonous Concoction of Bouncing is arguably a strictly upgraded version of this very popular Starter Skill. As the name suggests, instead of throwing multiple Flasks you will throw a single Projectile that bounces a few times before dissipating, dealing Damage each time. Thankfully, those recoils are not completely random, as they will try to follow your Enemies, leading to very powerful overlaps. By increasing the amount of Projectiles you will instead increase the amount of bounces, which is your main way of improving your Damage. Each throw will also consume 8 Life Flask Charges to greatly improve the Damage dealt with each explosion, which can be quite problematic. To overcome this feature you will have to invest some points into Flask Charge Generation, as well as get proper Life Sustain without the use of Flask.
The Poisonous Concoction deals Chaos Damage, and you can't use a Weapon, so the only natural choice to scale your Damage is the Poison Ailment. There are multiple ways to Build your Character around it, but for this setup, we recommend using the Affliction Charges provided by the Olesya's Delight Belt. Each Affliction Charge grants you 8% More Damage with Ailments, and their maximum number is equal to your Frenzy Charge limit. Usually, they would replace the Frenzy Charges, but by using the Ralakesh's Impatience Boots you will be able to benefit from both Charges at once. Additionally, you can incorporate the Replica Badge of the Brotherhood Amulet to apply all your Maximum Frenzy Charge investments to the Endurance Charges as well, so you will be scaling both your DPS and survivability at once. Charges last for a very long time thanks to Swift Killer - use Enduring Cry to generate Endurance Charges.
The Trickster Ascendency is the ideal choice for such a Setup, as the Swift Killer Notable raises your Frenzy Charge limit by 2, and makes all your Charges last significantly longer. It also offers the usual generic yet powerful Notables, such as the Polymath that improves your Damage for each unique Mastery you pick, or the Soul Drinker which grants you the endless Energy Shield Leech.
It also can be played as the Pathfinder Ascendency, although it won't fully utilize the potential of this Setup. However, it will be much stronger in a League-starting scenario. You can check out our Poisonous Concoction Pathfinder Build Guide for a more traditional setup.
You can also check our other Path of Exile builds right over here Odealo's Crafty Guides - Full List
1. Gameplay
The Build is very simple to play. Use the Poisonous Concoction of Bouncing to slay your Enemies. You don't have to aim too precisely, as the bounces will automatically target nearby Enemies. To boost your Damage, use the Arcanist Brand linked with all your Curses. Your Concoction will apply the Witer Debuff automatically. For Movement, use the very fast Shield Charge supplemented by instantaneous Frostblink.
|
|
|
|

2. Build's PROS & CONS
| PROS |
|
| CONS |
|
3. Leveling tips
The Poisonous Concoction is a strong leveling Skill, although it may feel weak without good Life Flask Sustain and a 100% chance to Poison. We recommend leveling with Bow Chaos DoT Skills for the best results, but if you prefer using your final Skill right from the start it is completely viable too. You can check out our Guide for Ranger with DoT Bows to see more tips!
Suggested leveling Gem setups:
| Toxic Rain setup | |
 |
Toxic Rain - fires a number of Projectiles that apply Chaos Damage over Time effect to Enemies standing in the pods. Multiple pods may overlap. |
 |
Mirage Archer Support - creates a clone that automatically fires extra arrows. |
 |
Efficacy Support - improves your Damage with DoT effects. |
 |
Void Manipulation Support - improves your Chaos Damage. |
 |
Vicious Projectiles Support - improves your Damage with Projectile Attacks. |
 |
Faster Attacks Support - improves your Attack Speed. You can also use the Concentrated Effect Support. |
| Frenzy setup | |
 |
Frenzy - a simple Projectile Attack that grants you a Frenzy Charge when you hit an Enemy. |
 |
Manaforged Arrows Support - triggers linked Bow Skill when you spend enough Mana with your other Bow Skills. |
| Aura setup | |
 |
Grace - grants you tons of Evasion ratings, greatly increasing your chance to Evade Attacks. |
 |
Clarity - improves your Mana Regeneration Rate. |
| Utility setup | |
 |
Flame Dash - a swift teleport that can be used to cross most terrain gaps during the campaign. |
 |
Despair - this Curse lowers the Chaos Resistances of affected Enemies. |
 |
Steelskin - use it to disable Bleeding on you, or absorb a portion of the incoming Damage. |
Bandits:
Kill all Bandits to get additional 2 Passive Tree Skill Points
Leveling Skill Trees:
38 Points Passive Tree
If you use Toxic Rain for your leveling, you should take relevant Bow Notables, it will cost some Orbs of Regret later but will save you a lot of time!
67 Points Passive Tree
Use the Frenzy with Manaforged Arrows Support to generate Frenzy Charges. We recommend waiting with Poisonous Concoction until you can use the Olesya's Delight Belt.
4. Final Skill Tree, Ascendancy Points, and Pantheon
Final Skill Tree:
122 Points Final Passive Tree
122 Points Path of Building (PoB) link
Ascendancy points:
Preferably in this order:
- Polymath
- Swift Killer
- Escape Artist
- Soul Drinker
Pantheon:
Major God: Soul of Arakaali: 10% reduced Damage taken from Damage Over Time; +40% Chaos Resistance against Damage Over Time
Minor God: Soul of Ralakesh: 25% reduced Physical Damage over Time taken while moving; Moving while Bleeding doesn't cause you to take extra Damage
5. Final Gems links
| [DPS] Poisonous Concoction of Bouncing setup | |
 |
Poisonous Concoction of Bouncing - throws a bouncing Projectile that deals additional Chaos Damage by consuming your Life Flask Charges. You can't use this Skill if you wield a Weapon. |
 |
Greater Multiple Projectiles Support - the additional Projectiles increase the number of extra Chains for this Skill. |
|
Vicious Projectiles Support - greatly improves your Damage, but slightly lowers your Attack Speed. You can also use the Greater Volley Support to create more Chains. |
 |
Unbound Ailments Support - improves the Damage and Duration of your Poisons. |
 |
Deadly Ailments Support - lowers your Damage with Hits, but increases your Poison Damage. |
|
Void Manipulation Support - disables Elemental Damage, but boosts your Chaos Damage. |
| [UTILITY] Aura setup | |
 |
Malevolence - an offensive Aura that improves your Damage over Time effects, such as your Poisons. |
|
Grace - a defensive Aura that grants you a flat Evasion Rating and improves it further. |
 |
Purity of Elements - with this Aura you will become immune to Elemental Ailments and get plenty of Elemental Resistances. |
 |
Precision - a very useful Aura that improves your Accuracy Rating. Try to keep it on a low level to reduce the amount of Mana Reserved. |
 |
Enlighten Support - lowers the Mana Reservation Cost of all linked Auras. |
| [UTILITY] Mark setup | |
 |
Poacher's Mark - allows you to generate Affliction Charges, improves your Life and Mana sustain, and provides a bit of Physical Damage against Marked Enemies. |
 |
Mark on Hit Support - automatically applies linked Mark to Enemies you Hit with Attacks. |
| [UTILITY] Movement setup | |
 |
Shield Charge - performs a swift charge toward the targeted location. It is not limited by Cooldown, but can't cross terrain gaps. |
|
Faster Attacks Support - increases your Speed with the Shield Charge. |
 |
Enduring Cry - Use to generate Endurance Charges. You may also gain Endurance Charges via Elixir of the Unbroken Circle or Enduring Composure from Cluster Jewels. |
| [UTILITY] Curse setup | |
 |
Temporal Chains - slows the Action Speed of your Enemies and makes your Poisons and other Effects last longer on them. |
|
Despair - this Curse greatly improves your Damage by lowering the Chaos Resistances of affected Enemies. |
 |
Enfeeble - a defensive Curse that lowers the Damage of your Enemies, and makes them more likely to miss Attacks against you. |
 |
Arcanist Brand - creates a magical Brand that attaches to nearby Enemies and casts linked Spells in order. |
| [UTILITY] Various Gems | |
 |
Frostblink - a secondary Movement Skill that instantly teleports you in a short distance. You can use it without interrupting other actions. |
 |
Plague Bearer - if you automatically apply Temporal Chains, you can use this Skill instead to deal Chaos DoT around your character. You can link it with the Increased Area of Effect Support or Empower Support, but it might be hard to find enough Sockets. |
 |
Blood Rage - 20% increased Attack Speed at the cost of your Life and Es. It's optional. |
|
|
6. Gear Setup
The gearing process is very easy, as you will use a lot of Unique Items. The very few Rare Items in your arsenal are also very straightforward, as you will need only basic modifiers for them. The Build functions even without the Ralakesh's Impatience Boots, although the Damage will be obviously much weaker. There are two very powerful Unique Gloves available for this Build, each serving a completely different role. All your Damage will be sourced from the Unique Items, so on your Rares, you should focus on getting maximum Life, Resistance, Attributes, and Spell Suppression. A bit of Accuracy is also important. You can raise your Frenzy Charge limit with Synthesised Implicits, but it can be insanely expensive. You will have tons of Dexterity, you should use Tattoos to replace all the Dexterity Nodes with Chaos Resistance, All Attributes, or All Elemental Resistances.
|
Stat priorities on items:
|
 (Helmet) Rare Helmet - you will need a lot of Mana Reservation Efficiency here, which you can acquire via Essence of Loathing and Eater of Worlds Implicit. Other than that, look for maximum Life, Energy Shield, Resistances, Attributes, or Accuracy Rating. (Helmet) Rare Helmet - you will need a lot of Mana Reservation Efficiency here, which you can acquire via Essence of Loathing and Eater of Worlds Implicit. Other than that, look for maximum Life, Energy Shield, Resistances, Attributes, or Accuracy Rating. |
|
| Min. requirements: +80 to maximum Life 15% increased Mana Reservation Efficiency of Skills Optional affixes: Energy Shield Resistances Attributes |
|
 (Weapon) Rare Shield - on your Shield look for tons of maximum Life, Spell Suppression Chance, and lacking Resistances or Attributes. You can also get a bonus to your Attack Speed or Accuracy Rating. It is possible the get an additional Frenzy Charge via Implicit, but it will be very expensive. (Weapon) Rare Shield - on your Shield look for tons of maximum Life, Spell Suppression Chance, and lacking Resistances or Attributes. You can also get a bonus to your Attack Speed or Accuracy Rating. It is possible the get an additional Frenzy Charge via Implicit, but it will be very expensive. |
|
| Min. requirements: +80 to maximum Life +50 to Elemental Resistance +20% chance to Suppress Spell Damage Optional affixes: Attack Speed Accuracy Rating +1 to maximum Frenzy Charge |
|
 (Body Armour) The Restless Ward - this Armour offers you tons of Energy Shield and Evasion Rating. It also greatly improves your Movement Speed and Life Regeneration. You should seek a Corrupted Implicits that would increase the Gem Levels of your main Skill. (Body Armour) The Restless Ward - this Armour offers you tons of Energy Shield and Evasion Rating. It also greatly improves your Movement Speed and Life Regeneration. You should seek a Corrupted Implicits that would increase the Gem Levels of your main Skill. |
|
| (220-250)% increased Evasion and Energy Shield +(60-80) to maximum Life 4% increased Movement Speed per Frenzy Charge Regenerate 75 Life per second per Endurance Charge (100-200)% increased Endurance, Frenzy and Power Charge Duration |
|
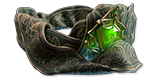 (Belt) Olesya's Delight - all your Frenzy Charge modifiers will be applied to Affliction Charges, which grants you 8% More Damage with Ailments per Charge. Try to get one with a useful Corrupted Implicit, as the original one is not good. (Belt) Olesya's Delight - all your Frenzy Charge modifiers will be applied to Affliction Charges, which grants you 8% More Damage with Ailments per Charge. Try to get one with a useful Corrupted Implicit, as the original one is not good. |
|
| +(600-700) to Evasion Rating +(40-60)% to Cold Resistance (8-12)% increased Movement Speed +1 to Maximum Frenzy Charges Modifiers to Minimum Frenzy Charges instead apply to Minimum Affliction Charges Maximum Affliction Charges is equal to Maximum Frenzy Charges Gain Affliction Charges instead of Frenzy Charges |
|
 (Boots) Ralakesh's Impatience - with those boots you will be able to benefit from all your Frenzy Charges, even after converting them to Affliction Charges. (Boots) Ralakesh's Impatience - with those boots you will be able to benefit from all your Frenzy Charges, even after converting them to Affliction Charges. |
|
| (15-25)% increased Movement Speed +(15-25)% to Cold Resistance +(15-25)% to Chaos Resistance Immune to Corrupted Blood Count as having maximum number of <Endurance, Frenzy, or Power> Charges |
|
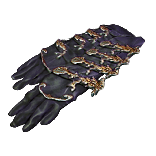 (Gloves) Asenath's Gentle Touch - the best Gloves to use if you're mainly focused on quickly clearing Maps. The additional explosions will annihilate whole packs of monsters, including Rare Enemies unfortunate enough to be caught in the explosions. (Gloves) Asenath's Gentle Touch - the best Gloves to use if you're mainly focused on quickly clearing Maps. The additional explosions will annihilate whole packs of monsters, including Rare Enemies unfortunate enough to be caught in the explosions. |
|
| +(20-30) to Intelligence +(60-80) to maximum Life +(60-80) to maximum Mana Curse Enemies with Temporal Chains on Hit Non-Aura Curses you inflict are not removed from Dying Enemies Enemies near corpses affected by your Curses are Blinded Enemies Killed near corpses affected by your Curses explode, dealing 3% of their Life as Physical Damage |
|
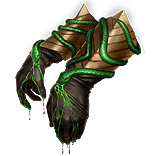 (Gloves) Snakebite - this pair of Gloves grants you an insane amount of Damage by improving your Attack Speed, Accuracy Rating, and DoT Multiplier. You should get a Corrupted Implicit that raises your Frenzy Charge limit. (Gloves) Snakebite - this pair of Gloves grants you an insane amount of Damage by improving your Attack Speed, Accuracy Rating, and DoT Multiplier. You should get a Corrupted Implicit that raises your Frenzy Charge limit. |
|
| (150-180)% increased Evasion Rating +(60-70) to maximum Life 2% increased Attack Speed per Frenzy Charge 6% increased Accuracy Rating per Frenzy Charge 10% reduced Frenzy Charge Duration per Frenzy Charge Attacks have 60% chance to Poison while at maximum Frenzy Charges +5% to Damage over Time Multiplier for Poison per Frenzy Charge |
|
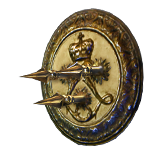
 (Amulet) Replica Badge of the Brotherhood - this Amulet effectively grants you at least 7 additional Endurance Charges, which is a massive defensive boost. They will also contribute towards your Damage and AoE via Disciple of Unyielding Notable. (Amulet) Replica Badge of the Brotherhood - this Amulet effectively grants you at least 7 additional Endurance Charges, which is a massive defensive boost. They will also contribute towards your Damage and AoE via Disciple of Unyielding Notable. |
|
| +(16-24) to Dexterity and Intelligence Your Maximum Endurance Charges is equal to your Maximum Frenzy Charges +1 to maximum Fortification per Endurance Charge (7-10)% increased Cooldown Recovery Rate of Travel Skills per Frenzy Charge (20-25)% chance to lose a Frenzy Charge when you use a Travel Skill (20-25)% chance to lose an Endurance Charge when you gain Fortification |
|
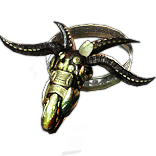
 (Ring) Anathema - raises your Curse limit based on the amount of your maximum Power Charges. With a minimal investment of 1 Skill Point on your Passive Tree, you will be able to use 4 Curses. (Ring) Anathema - raises your Curse limit based on the amount of your maximum Power Charges. With a minimal investment of 1 Skill Point on your Passive Tree, you will be able to use 4 Curses. |
|
| +(15-25) to maximum Energy Shield +(30-40) to Intelligence (10-15)% increased Cast Speed (10-20)% chance to gain a Power Charge when you Cast a Curse Spell Your Curse Limit is equal to your maximum Power Charges |
|
 (Ring) Rare Ring - look for maximum Life and lacking Resistances or Attributes. You can also get bonuses to your Chaos Damage, DoT Multiplier, Accuracy Rating, or Life Recoup here. (Ring) Rare Ring - look for maximum Life and lacking Resistances or Attributes. You can also get bonuses to your Chaos Damage, DoT Multiplier, Accuracy Rating, or Life Recoup here. |
|
| Min. requirements: +80% to Elemental Resistances +60 to Maximum Life Optional affixes: Attributes +1 to Maximum Frenzy Charges % increased Chaos Damage % Damage over Time Multiplier Accuracy Rating |
|
 (Jewel) Rare Jewels - here you can increase your maximum Life, cover lacking Resistances and Attributes, and bolster your Damage. The best offensive modifiers are DoT Multiplier, Poison Duration, and increased damage with Poisons. (Jewel) Rare Jewels - here you can increase your maximum Life, cover lacking Resistances and Attributes, and bolster your Damage. The best offensive modifiers are DoT Multiplier, Poison Duration, and increased damage with Poisons. |
|
| Recommended affixes: increased maximum Life Attribute Resistances % to Chaos Damage over Time Multiplier Damaging Ailments deal damage #% faster % increased Poison Duration % increased Damage with Poison |
|
 (Jewel) Watcher's Eye - it is a very potent Jewel, it can grant you many useful modifiers based on your Aura Setup. To boost your Damage look for modifiers related to the Malevolence Aura, but the Flask Sustain from the Precision can be more useful in prolonged fights. (Jewel) Watcher's Eye - it is a very potent Jewel, it can grant you many useful modifiers based on your Aura Setup. To boost your Damage look for modifiers related to the Malevolence Aura, but the Flask Sustain from the Precision can be more useful in prolonged fights. |
|
| (4-6)% increased maximum Energy Shield (4-6)% increased maximum Life (4-6)% increased maximum Mana <Two or Three random aura modifiers> Recommended Aura mods: +(18-22)% to Damage over Time Multiplier while affected by Malevolence +(12-15)% chance to Suppress Spell Damage while affected by Grace Gain a Flask Charge when you deal a Critical Strike while affected by Precision |
|
 (Jewel) Brutal Restraint - This jewel can add many amazing bonuses to nearby Notables, such as increased Damage with Poisons, a chance to gain Onslaught on Kill, improved Flask Charge sustain, or a chance to Blind Enemies on Hit. It also grants you tons of Dexterity, so you can use Tattoos to replace most of your Dex Nodes with more useful modifiers. (Jewel) Brutal Restraint - This jewel can add many amazing bonuses to nearby Notables, such as increased Damage with Poisons, a chance to gain Onslaught on Kill, improved Flask Charge sustain, or a chance to Blind Enemies on Hit. It also grants you tons of Dexterity, so you can use Tattoos to replace most of your Dex Nodes with more useful modifiers. |
|
| Denoted service of (500-8000) dekhara in the akhara of (Asenath-Balbala-Nasima) Passives in radius are Conquered by the Maraketh Historic |
|
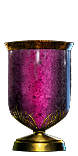 (Flask) The Overflowing Chalice - you can use this Flask to massively boost your Life Flask Charge generation against dangerous Enemies. Use the Enkindling Orb to raise its effectiveness. (Flask) The Overflowing Chalice - you can use this Flask to massively boost your Life Flask Charge generation against dangerous Enemies. Use the Enkindling Orb to raise its effectiveness. |
|
| 40% increased Damage (40-60)% increased Charge Recovery Gains no Charges during Effect of any Overflowing Chalice Flask (50-100)% increased Charges gained by Other Flasks during Effect |
|
|
Your Life Flasks contribute towards your DPS. Use two Flasks with increased amount Recovered to deal the most Damage. It is still the best source of Bleed Immunity, but sometimes you will run out of Charges to use them.
|
|
   |
|
|
If you have any other build requests please leave that in the comments below. We are always open to suggestions and constructive feedback.
Pictures used in this article are the intellectual property of Grinding Gear Games.
