Poison Detonate Dead Occultist Build
Detonate Dead Build for Occultist with full Chaos Conversion and ramping up Poison DamageDetonate Dead
Occultist Build
Updated for Patch 3.18
The Best Crafty Guides by Odealo
| Guide notes | |||
| July 04, 2022 -Build Created July 07, 2022 -Added gameplay video |
|||
| Build overview | |||
| Tags: [CASTER] [CHAOS] [ENERGY SHIELD] | |||
|
Budget: Defenses: |
|
Boss DPS: AoE: |
|
Detonate Dead is a very popular Skill for any Witch's Ascendancy. We've already covered the Necromancer and Elementalist versions of it. The advantages of the Occultist Ascendancy are obvious at first glance as it's the class specializing in Chaos Damage, which you will deal. It uses an Anomalous version of Detonate Dead Skill Gem which converts Fire Damage to Chaos Damage, but the Quality has to be high - it takes around 33% Gem Quality to convert all of your Damage. To create Corpses - your ammunition - you will use Corpsewalker boots which create corpses with every step, and Cyclone, linked to the Cast-when-Channeling Detonate Dead. It results in a very smooth Melee-like playstyle. The Detonate Dead's damage scales up not only with the general Elemental Damage but also with Corpse's Maximum Life. You won't need to Summon Specters with a lot of maximum life as was the case with other Detonate Dead builds, the Hit Poison scaling is not efficient enough to justify sacrificing Gem Sockets. During boss fights, you will spawn tons of these Corpses, which will inflict Poison upon an enemy, which stacks up indefinitely. It's an important distinction, as other Classes use Detonate Dead to cause Ignite, not Poison. This is not the case in this build.
It's an Energy Shield build with Chaos Inoculation, meaning a complete Chaos Damage Immunity for the character. You will be able to reach around 6k of ES. Other defensive aspects of the build are high Armour Rating and capped Block Chance with Glancing Blows. With Purity of Elements, you're also completely immune to every Elemental Ailment. By using Aegis Aurora and Melding of the Flesh it's also possible to reach very high Maximum Elemental Resistances. Every Witch's Ascendancy has some good keystones for this build, you can borrow one of them via Forbidden Jewels - Necromancer's Corpse Pact is especially good. As for Occultist's Keystones, you will benefit from Void Beacon and Withering Presence for a massive Chaos Damage boost. Profane Bloom is the clear speed tool to make enemies explode on death, dealing Chaos Damage. With Malediction, you're able to apply an extra Curse and reduce damage taken. The build is very simple to play as it requires you only to Channel Cyclone, all the other Skills work passively or are automated. It's one of the more expensive builds to fully blossom, the Unique and Rare Items are very expensive.
You can also check our other Path of Exile builds right over here Odealo's Crafty Guides - Full List
1. Gameplay
The build uses Cyclone to cast Detonate Dead at a fast and consistent rate, Corpses are generated via Unique Boots at an equally steady frequency, so it all feels very smooth. Molten Shell should be the Guard Spell, and for a movement Spell you can use Flame Dash, but that's optional. There are a lot of Mana-reserving Spells, be sure you have a source of extra Mana Reservation Efficiency. These are Determination, Discipline, Purity of Elements, Malevolence, Herald of Agony, Tempest Shield, Defiance Banner, Clarity, and Aspect of the Spider. Curses can be applied via Ring's Affix or Hextouch with Reckoning as your Block Chance is 75%. One of the Curses must be Despair, the other one/ones you can choose are Punishment, Temporal Chains, and Enfeeble.
|
This video was recorded on a level 95 Occultist with 85% All Resistances, 60k Armour, and Mageblood equipped - making it one of the tankiest and most expensive builds we ever made. It was simply perfect for Wave 30 Simulacrum, and was able to take down most of the content - Uber Bosses takes quite some time though |
|
|

2. Build's PROS & CONS
| PROS |
|
| CONS |
|
3. Leveling tips
Definitely start as a Life build with Chaos Damage Spell. For boss fights we recommend Blight - it's a DoT type Skill so it shares a lot of properties with your final form. For clearing use the combination of Contagion and Essence Drain. Ashes of the Stars require level 60, before that be sure you have Corpsewalker. It's the bare minimum for the build to work properly. At level 70 have ready Incandescent Heart with preferably six links. If you don't have the unique Amulet yet, the budget option is to equip Blackflame Ring and use regular Detonate Dead. Just be aware that this is no longer a Fire to Chaos conversion - it works only for Ignites and it's technically very different and you will not cause Ignites at all in the final form. Switch to Energy Shield and Chaos Inoculation after accumulating enough Energy Shield. It's a build that requires entering a pack of enemies first, so it might be late into the game before that switch happens. At first focuses on Maximum Life, Chaos Damage, and Damage over Time, to later implement Mana Reservation Efficiency, Armour, Block Chance, Energy Shield, and Chaos Resistance Penetration. Large Cluster Jewels can be socketed at level 54 and you should do so as these are very good even early on.
Suggested leveling Gem setups:
| Blight setup | |
 |
Blight - Channeling Chaos DoT Spell which quickly ramping up damage. Use the Vaal version if you have one. |
 |
Concentrated Effect Support - less Area of Effect but much more Spell Damage, it's a good deal |
 |
Efficacy Support - Efficacy increases Damage over Time and Skill Effect Duration |
 |
Void Manipulation Support - more Chaos Damage at a cost of the inability to deal Elemental Damage |
 |
Swift Affliction Support - less Skill Effect Duration, but more Damage over Time |
| Contagion setup | |
 |
Contagion - applies a debuff dealing Chaos Damage, if enemy dies while affected, the debuff spreads to other nearby opponents |
 |
Increased Area of Effect Effect Support - increases Area of Effect so it will affect more enemies and have a better spreading potential |
 |
Arcane Surge Support - grants Aracne Surge for more Spell Damage and increased mana Regeneration Rate |
| Essence Drain setup | |
 |
Essence Drain - Essence Drain deals Chaos Damage over Time and heals your character. It spreads alongside Contagion, use on enemies affected by Contagion. |
 |
Controlled Destruction Support - inability to deal Critical Strike, but more Spell Damage, modifiers to Spell Damage apply to this skill's DoT which is another unique property of Essence Drain |
|
Void Manipulation Support |
|
Swift Affliction Support |
| various gems | |
 |
Despair - the Curse that significantly lowers and causes them to take increased Damage over Time |
 |
Malevolence - An Aura for you to use to deal increased Damage over Time |
 |
Flame Dash - a simple mobility Skills |
Bandits:
Kill all three bandits for two additional Skill Points
Leveling Skill Trees:
28 Points Passive Tree
Take more Maximum Life, Chaos Damage, and Damage over Time
57 Points Passive Tree
Allocate more Maximum Life, Sovereignty Cluster, and the Large Jewel Sockets for Cluster Jewels
Recommended leveling items:
 Le Heup of All - grants more Damage, Attributes, and Elemental Resistances, all useful Le Heup of All - grants more Damage, Attributes, and Elemental Resistances, all useful |
|
| Adds 1 to 4 Physical Damage to Attacks +(10-30) to all Attributes (10-30)% increased Damage (10-30)% increased Rarity of Items found +(10-30)% to all Elemental Resistances |
|
 Goldrim - Helmet which grants you tons of Elemental Resistances Goldrim - Helmet which grants you tons of Elemental Resistances |
|
| +(30-50) to Evasion Rating 10% increased Rarity of Items found +(30-40)% to all Elemental Resistances Reflects 4 Physical Damage to Melee Attackers Level Requirement reduced by 100 (Hidden) |
 Tabula Rasa - allows you to six-link a setup from the start Tabula Rasa - allows you to six-link a setup from the start |
|
| Item has no level requirement and Energy Shield (Hidden) Item has 6 White Sockets and is fully linked (Hidden) |
|
4. Final Skill Tree, Ascendancy Points, and Pantheon
Final Skill Tree:
92 Points Final Passive Tree (doesn't include Cluster or Unique Jewels)
119 Points Path of Building (PoB) link
Ascendancy points:
Preferably in that order:
- Void Beacon
- Profane Bloom
- Withering presence
- Malediction
Pantheon:
Major God: Soul of Lunaris: 1% increased Movement Speed for each nearby Enemy, up to 8%; 1% additional Physical Damage Reduction for each nearby Enemy, up to 8%
Minor God: Soul of Gruthkul: 1% additional Physical Damage Reduction for each Hit you've taken Recently up to a maximum of 5%
5. Final Gems links
| [DPS] Detonate Dead setup | |
 |
Vaal Anomalous Detonate Dead - To use this Spell it's required to have a Corpse, the higher its Maximum Life, the more damage you can deal. The Corpse explodes dealing Fire Damage, later converted to Chaos, and causing Poison. |
 |
Cyclone - a rapidly-hitting Channeling Movement Attack - it is the best Skill to be used with Cast-while-Channeling types of setups. |
 |
Cast while Channelling Support - Cast the linked Spell around three times a second as long as you're channeling Cyclone |
 |
Cruelty Support - Grants more Damage with Hits and a Cruelty Buff, it makes you deal more Damage over Time with the Skills linked up to Cruelty |
 |
Elemental Focus Support - Makes you unable to deal Elemental Ailments such as Ignite, but in return grants more Elemental Damage |
 |
Unbound Ailments Support - Increased Ailments Duration, Damage, and Effect of non-damaging ones. Use it to enhance your Poison Damage. |
| [UTILITY] Reckoning/Shield Charge/Curse setup | |
 |
Reckoning - Reckoning is an Attack that you can't use, it's triggered automatically each time you Block a Hit. It requires a Melee Weapon. |
 |
Shield Charge - Shield Charge is a Travel Attack that is used here to move a bit faster and to apply linked Curse on demand. |
 |
Hextouch Support - After you hit an enemy with one of the linked Skills it will apply one Curse from this setup with reduced Duration |
 |
Temporal Chains - This Curse lowers the Action Speed of an enemy - meaning lower Cast Speed, Attack Speed, and general movement. It also makes all effects expire more slowly, including Poisons (it may result in more DPS). |
| [UTILITY] Auras setup | |
|
Malevolence - An Aura that increases Skill Effect Duration and the Damage over Time of your Skills |
 |
Determination - adds and increases Armour, one of the most basic defensive mechanics |
 |
Discipline - adds bonus Energy Shield and increases ES Recharge Rate |
 |
Enlighten Support - increases Mana Reservation Efficiency for all linked Mana-reserving Spells |
| [UTILITY] Mana-reserving setup | |
 |
Purity of Elements - Provides a lot of Elemental Resistances and a complete Immunity to all Elemental Ailments such as Chill, Shock, Freeze, Ignite, or even Scorch, Sap, and Brittle. |
 |
Defiance Banner - increases Armour and Evasion Rating of the character while reducing Critical Strike Chance for nearby enemies |
 |
Tempest Shield - use it for an additional Spell Block Chance while holding a Shield |
|
Enlighten Support |
| [UTILITY] Clarity | |
 |
Clarity - grants faster Mana Regeneration Rate, it doesn't have to be leveled beyond level 1 |
| [UTILITY] Herald of Agony | |
 |
Herald of Agony - use it for more Poison Damage and increased the Chance to Poison, a big part of the build |
| [UTILITY] Withering Step | |
 |
Withering Step - Enhances the character with Elusive and Phasing while also applying WIthered Debuff to nearby enemies |
| [MOBILITY] Flame Dash | |
|
Flame Dash - a simple movement Spell used to dash and move faster |
| [UTILITY] Plague Bearer | |
 |
Plague Bearer - This Spell can be used to deal with smaller enemies surrounding you, it creates a damaging circular area around the character dealing Chaos Damage over Time, but activation requires incubating Poison Damage, which is released later. |
| [UTILITY] Molten Shell | |
 |
Molten Shell - the Guard Spell to be used as the movement button, it prevents a portion of Hit Damage from reaching the character |
| [UTILITY] Despair | |
|
Despair - This Curse should be applied automatically, for example via Ring Affix. It makes the opponent more vulnerable to Chaos Damage and Damage over Time. |
|
|
6. Gear Setup
The mandatory Unique Item is Corpsewalker. You will also need to find a way to increase the Gem Quality of the Detonate Dead Skill socketed in your Unique Body Armour, which might be problematic without Ashes of the Stars, but possible with The Consuming Dark instead. As for offenses, you're relying mostly on Poison Damage and Chaos Damage over Time, there are a few Unique Items you can source this specific damage from, such as Incandescent Heart. For better defenses, you can use the combination of Aegis Aurora and Melding of the Flesh, this way you will be able to cap your Elemental Resistances at over 85%. When choosing your Rare Items focus mainly on Chaos, Poison, or Fire Damage, increases in the Gem Level of Detonate Dead, reducing Mana Cost of your Skills, Energy Shield, and mana Reservation Efficiency. You will also need a lot of Dexterity to run Plague Bearer and Herald of Agony, and Strenth for Determination. With Melding of the Flesh, it will be required to have a lot more Elemental Resistances than normally. It's very hard to assemble the build, the overall requirements for it to work at maximum efficiency are extremely high.
Our recommended items will:
- Cap your resistances at 75%
- Provide you with enough DPS and Life to start mapping
|
Stat priorities on items:
|
 (Helmet) Rare Helmet - It's a good place to get more Mana Reservation Efficiency as the Redeemer's Suffix and Eater's Implicit - up to 26% in total, but to actually use the Eldritch Orb, the Helmet cannot be influenced, it can be Fractured or Essence-Crafted. Other than that, look for Energy Shield, Resistances, and Attributes. (Helmet) Rare Helmet - It's a good place to get more Mana Reservation Efficiency as the Redeemer's Suffix and Eater's Implicit - up to 26% in total, but to actually use the Eldritch Orb, the Helmet cannot be influenced, it can be Fractured or Essence-Crafted. Other than that, look for Energy Shield, Resistances, and Attributes. |
|
| Min. requirements: +300 to Energy Shield +80% to Elemental Resistances increase Mana Reservation Efficiency of Skills Optional affixes: Dexterity/Strength Armour Nearby Enemies have -#% to Chaos Resistance |
|
| Helmet enchantments: Detonate Dead has a 45% chance to detonate an additional corpse |
|
 (Weapon) Rare Rune Dagger - You need a Melee Weapon with increased Chaos Damage over Time, Fire Damage, Chance to Poison, and an additional one or two Gem Levels for Detonate Dead. A melee weapon is required to attack using Cyclone. (Weapon) Rare Rune Dagger - You need a Melee Weapon with increased Chaos Damage over Time, Fire Damage, Chance to Poison, and an additional one or two Gem Levels for Detonate Dead. A melee weapon is required to attack using Cyclone. |
|
| Min. requirements: +1 to Level of all Spell/Fire Spell Skill Gems 50% Increased Fire Spell Damage Recommended affixes: +1 to Level of all Spell/Fire Spell Skill Gems Chaos Damage over Time Multiplier Chance to Poison/Increased Damage with Poison |
|
 (Weapon) The Consuming Dark - If you're not using Ashes of the Stars, use this Dagger to convert the remaining Fire Damage to Chaos. It also grants a Gem Level of Detonate Dead, increased Fire Damage, and Chance to Poison. (Weapon) The Consuming Dark - If you're not using Ashes of the Stars, use this Dagger to convert the remaining Fire Damage to Chaos. It also grants a Gem Level of Detonate Dead, increased Fire Damage, and Chance to Poison. |
|
| 40% increased Global Critical Strike Chance +1 to Level of all Fire Spell Skill Gems +(20-40) to Intelligence (40-60)% increased Fire Damage 30% of Fire Damage Converted to Chaos Damage Your Chaos Damage has 60% chance to Poison Enemies |
|
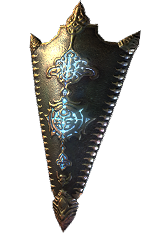 (Off-hand) Aegis Aurora - Grants you a lot of Maximum Cold Resistance, Energy Shield on Block, Armour, Energy Shield, and Elemental Resistances. Definitely use with Melding of the Flesh for the extended cap on Cold Resistance. (Off-hand) Aegis Aurora - Grants you a lot of Maximum Cold Resistance, Energy Shield on Block, Armour, Energy Shield, and Elemental Resistances. Definitely use with Melding of the Flesh for the extended cap on Cold Resistance. |
|
| (300-400)% increased Armour and Energy Shield +10% to all Elemental Resistances +5% to maximum Cold Resistance +6% Chance to Block Replenishes Energy Shield by 2% of Armour when you Block (10-20)% increased Elemental Damage with Attack Skills |
|
| (220-240)% increased Armour and Energy Shield +(80-90) to maximum Life (0.8-1)% of Attack Damage Leeched as Life Gain (10-20)% of Elemental Damage as Extra Chaos Damage 25% of Elemental Damage from Hits taken as Chaos Damage (20-30)% increased Light Radius Light Radius is based on Energy Shield instead of Life |
|
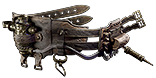
 (Boots) Corpsewalker - It constantly creates Corpses as you walk or use Cyclone. These have a chance to Spawn your Spectres at the same rate as Desecrate Skill. (Boots) Corpsewalker - It constantly creates Corpses as you walk or use Cyclone. These have a chance to Spawn your Spectres at the same rate as Desecrate Skill. |
|
| Triggers Level 20 Corpse Walk when Equipped (80-120)% increased Evasion and Energy Shield 25% increased Movement Speed (20-40)% increased Damage if you have Consumed a corpse Recently For each nearby corpse, Regenerate 0.25% Life per second, up to 3% |
|
 (Gloves) Rare Gloves - Gloves are the main source of Elemental Resistances, be sure to gain a lot of them here. In addition, seek Energy Shield. It's a good place to craft in the Aspect of the Spider Suffix. (Gloves) Rare Gloves - Gloves are the main source of Elemental Resistances, be sure to gain a lot of them here. In addition, seek Energy Shield. It's a good place to craft in the Aspect of the Spider Suffix. |
|
| Min. requirements: Energy Shield +70% to Elemental Resistances Optional affixes: increased Damage over Time Dexterity Armour |
|
 (Belt) Rare Belt - Crystal Belt with Energy Shield and maximum Resistances is good enough, in addition to that, look for Attributes - Strength and Dexterity. We Recommend getting the Mageblood as the final upgrade of the build. (Belt) Rare Belt - Crystal Belt with Energy Shield and maximum Resistances is good enough, in addition to that, look for Attributes - Strength and Dexterity. We Recommend getting the Mageblood as the final upgrade of the build. |
|
| Min. requirements: Energy Shield +100% to Elemental Resistances Strength Optional affixes: Armour Dexterity |
|
 (Belt) Mageblood - the most expensive Unique item in the game, which is particularly good for this build when using Melding of the Flesh. You can easily get all the missing Resistances from permanent flasks with increased effect, on top of the extra defensive bonuses like Armour Rating, Spell Suppression, and more (Belt) Mageblood - the most expensive Unique item in the game, which is particularly good for this build when using Melding of the Flesh. You can easily get all the missing Resistances from permanent flasks with increased effect, on top of the extra defensive bonuses like Armour Rating, Spell Suppression, and more |
|
| +(25-35) to Strength +(30-50) to Dexterity +(15-25)% to Fire Resistance +(15-25)% to Cold Resistance Magic Utility Flasks cannot be Used Leftmost (2-4) Magic Utility Flasks constantly apply their Flask Effects to you Magic Utility Flask Effects cannot be removed |
|
 (Amulet) Ashes of the Stars - It's an expensive Amulet, but it ensures that all of your Damage is converted to Chaos, which is important. All the additional mods such as Reservation Efficiency and Extra Gem Level are extremely valuable. (Amulet) Ashes of the Stars - It's an expensive Amulet, but it ensures that all of your Damage is converted to Chaos, which is important. All the additional mods such as Reservation Efficiency and Extra Gem Level are extremely valuable. |
|
| +(10-16) to all Attributes (5-10)% increased Experience Gain of Gems (10-20)% increased Reservation Efficiency of Skills +1 to Level of all Skill Gems +(20-30)% to Quality of all Skill Gems |
|
 (Amulet) Rare Amulet - A Rare Amulet can provide Resistances, Mana Reservation Efficiency for all Skills or the Specific ones you're using, up to two additional Levels for Detonate Dead Skill Gem, Attributes, Damage, and reduced Mana Cost of Skills. (Amulet) Rare Amulet - A Rare Amulet can provide Resistances, Mana Reservation Efficiency for all Skills or the Specific ones you're using, up to two additional Levels for Detonate Dead Skill Gem, Attributes, Damage, and reduced Mana Cost of Skills. |
|
| Min. requirements: +70% to Elemental Resistances Optional affixes: Attributes +1 to Level of all Fire Skill Gems increased Mana Reservation Efficiency of Skills Discipline/Malevolence/Determination has increased Mana Reservation Efficiency Chaos Damage over Time Multiplier maximum Energy Shield Non-Channelling Skills have -7 to Total Mana Cost (crafted) |
|
| Recommended Anointments: Charisma |
|
 (Ring) Rare Ring - Get one Ring with Despair Curse on Hit, in general, these should grant you a lot of Elemental Resistances and Attributes. You can also craft the reduced Mana Cost of Skills, and you probably will need one with Gem Socket for one of your Skills. (Ring) Rare Ring - Get one Ring with Despair Curse on Hit, in general, these should grant you a lot of Elemental Resistances and Attributes. You can also craft the reduced Mana Cost of Skills, and you probably will need one with Gem Socket for one of your Skills. |
|
| Min. requirements: +70% to Elemental Resistances Optional affixes: Strength Dexterity Curse Enemies with Despair on Hit increased Fire/Chaos Damage increased maximum Energy Shield Non-Channelling Skills have -7 to Total Mana Cost (crafted) |
|
 (Jewel) Replica Conqueror's Efficiency - increased Skill Effect Duration and Reduced Mana Cost of Skills are significant improvements to the build (Jewel) Replica Conqueror's Efficiency - increased Skill Effect Duration and Reduced Mana Cost of Skills are significant improvements to the build |
|
| 4% increased Skill Effect Duration +5 to Maximum Rage Non-Channelling Skills have -9 to Total Mana Cost |
|
 (Jewel) Thread of Hope - you can socket one near Overcharge and Endurance Notables and gain access to the Glancing Blows Keystone (Jewel) Thread of Hope - you can socket one near Overcharge and Endurance Notables and gain access to the Glancing Blows Keystone |
|
| Only affects Passives in Large Ring Passives in Radius can be Allocated without being connected to your tree -(20-10)% to all Elemental Resistances |
|
 (Jewel) Melding of the Flesh - If your Maximum Cold Resistance is particularly high and you're able to withstand the reduction to Elemental Resistances, definitely use this Jewel to increase your Maximum Fire and Lightning Resistances too. (Jewel) Melding of the Flesh - If your Maximum Cold Resistance is particularly high and you're able to withstand the reduction to Elemental Resistances, definitely use this Jewel to increase your Maximum Fire and Lightning Resistances too. |
|
| -(80-70)% to all Elemental Resistances Elemental Resistances are capped by your highest Maximum Elemental Resistance instead |
|
 (Jewel) Impossible Escape - The notables in the radius of the Imbalanced Guard Keystone are great if you're using Melding of the Flesh, you can gain additional 3% to all Maximum Elemental Resistances. (Jewel) Impossible Escape - The notables in the radius of the Imbalanced Guard Keystone are great if you're using Melding of the Flesh, you can gain additional 3% to all Maximum Elemental Resistances. |
|
| Passive in Radius of <<Keystone>> can be Allocated without being connected to your tree | |
  (Jewel) Forbidden Flame & Forbidden Flesh - Get the Corpse pact Keystone, it's by far the biggest improvement to the build. It increases the Maximum Life of the Corpses, Chills and Shocks enemies, and grants Attacks and Cast Speed. (Jewel) Forbidden Flame & Forbidden Flesh - Get the Corpse pact Keystone, it's by far the biggest improvement to the build. It increases the Maximum Life of the Corpses, Chills and Shocks enemies, and grants Attacks and Cast Speed. |
|
| Allocates <<Random Ascendancy Notable>> if you have the matching modifiers on Forbidden Flame Allocates <<Random Ascendancy Notable>> if you have the matching modifiers on Forbidden Flesh |
|
 (Jewel) Watcher's Eye - You're using Malevolence, Determination, Purity of Elements, Discipline, and Clarity. We recommend increased Damage over Time Multiplier from Malevolence and Clarity's reduced Mana Cost of Skills. (Jewel) Watcher's Eye - You're using Malevolence, Determination, Purity of Elements, Discipline, and Clarity. We recommend increased Damage over Time Multiplier from Malevolence and Clarity's reduced Mana Cost of Skills. |
|
| (4-6)% increased maximum Energy Shield (4-6)% increased maximum Life (4-6)% increased maximum Mana <Two or Three random aura modifiers> |
|
 (Jewel) Large Cluster Jewels - Most of the notables that are found on Chaos Damage Large Cluster Jewel are good. Try to get at least one Touch of Cruelty and two Wicked Palls. (Jewel) Large Cluster Jewels - Most of the notables that are found on Chaos Damage Large Cluster Jewel are good. Try to get at least one Touch of Cruelty and two Wicked Palls. |
|
| Recommended affixes: 1 Added Passive Skill is Touch of Cruelty 1 Added Passive Skill is Unholy Grace 1 Added Passive Skill is Wicked Pall 1 Added Passive Skill is Unwaveringly Evil |
|
 (Jewel) Medium Cluster Jewels - You can again go for the Wicked Pall or Vile Reinvigoration and Circling Oblivion, these are to be found on a Chaos Damage over Time base. (Jewel) Medium Cluster Jewels - You can again go for the Wicked Pall or Vile Reinvigoration and Circling Oblivion, these are to be found on a Chaos Damage over Time base. |
|
| Recommended affixes: 1 Added Passive Skill is Wicked Pall 1 Added Passive Skill is Circling Oblivion 1 Added Passive Skill is Vile Reinvigoration |
|
 (Jewel) Small Cluster Jewels - You actually don't need any of the Notables, the most important are small nodes with 6% increased Mana Reservation Efficiency of Skills, you can even increase this effect by 35%. (Jewel) Small Cluster Jewels - You actually don't need any of the Notables, the most important are small nodes with 6% increased Mana Reservation Efficiency of Skills, you can even increase this effect by 35%. |
|
| Recommended affixes: 1 Added Passive Skill is Uncompromising Added Small Passive Skills have 35% increased Effect |
|
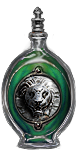
 (Flask) Atziri's Promise - It grants you extra Chaos Damage, Chaos Resistance, and Life Leech (Flask) Atziri's Promise - It grants you extra Chaos Damage, Chaos Resistance, and Life Leech |
|
| +35% to Chaos Resistance 2% of Chaos Damage Leeched as Life during Flask effect Gain (5-8)% of Physical Damage as Extra Chaos Damage during effect Gain (5-8)% of Elemental Damage as Extra Chaos Damage during effect |
|
|
Suggested Flasks:
|
|
    |
|
|
If you have any other build requests please leave that in the comments below. We are always open to suggestions and constructive feedback.
Pictures used in this article are the intellectual property of Grinding Gear Games.
