General's Cry Shield Charge Berserker Build
Non-meta General's Cry setup that utilizes Shield Charge for devastating off-hand AttacksGeneral's Cry
Shield Charge Berserker build
Updated for Patch 3.16
The Best Crafty Guides by Odealo
Estimated budget: medium to high

| Guide notes |
| November 23, 2021 -Build created November 25, 2021 -Added gameplay video |
General's Cry is one of the most unusual Warcry Skills in Path of Exile. Unlike all the other Warcries, it's not used to buff your character (or debuff enemies) but it's an ability with the main purpose of dealing massive damage with Attacks. General's Cry summons Mirage Warriors from nearby corpses to use a linked Attack Skill once before dissipating, and their attack will count as Exerted. By reducing the General's Cry cooldown, and increasing your Attack Damage/Exerted Attack Damage, you can make the MIrage Warriors to dish out some insane damage numbers, and use powerful Attacks with much slower than regular intervals - for example, Shield Charge. By using it with General's Cry, you can bypass the skills a very long animation and attack time, which makes it completely ineffective as damage-dealing ability when used on your own. At the same time, this skill takes its damage based on the Armour and Evasion Rating on your Shield, which allows you to use interesting combinations when it comes to your main-hand weapon. In this case, you will be using The Dark Seer. A weapon that can apply Malediction, a powerful debuff that both increases your damage output, and reduces the damage of affected enemies. In order to be able to Blind enemies while you are Blinded (the requirement induced by The Dark Seer) you will be using Second Sight Passive, which can be allocated by using a Brutal Restraint Timeless Jewel.
You can also find our other Path of Exile builds right over here Odealo's Crafty Guides - Full List
1. Gameplay
This is quite a difficult and complex Melee build that utilizes synergies from several Skills. Your main source of DPS will be Shield Charge cast by Mirage Warriors, so you are going to basically spam your General's Cry whenever off-cooldown. In order to "provide" enough corpses and power for it, you will be using the Corpsewalker Unique Boots, and get a Warcry Mastery to increase the minimum power of your Warcries. Normally, you would be using a Redblade Banner, but in this case, you need a shield with the highest Armour Rating possible. You are also going to use Shield Crush - it deals solid damage even on a single link, but what's more important, it will allow you to quickly Blind enemies to inflict Malediction. You can also boost your clear speed by using Call of Steel - in order to do it, you need to socket a level 1 Splitting Steel/Lancing Steel in your equipment, and the skill will be available for you. It will allow you to "consume" Impale debuffs from enemies to deal extra AoE damage around them in form of Reflected Damage. This will basically clear all the enemies on your screen that somehow did not die to your Shield Charge or Shield Crush. You should also use Berserk, Blood Rage, Ancestral Warchief, and Molten Shell for extra buffs to your character - as you can see, this build utilizes a bunch of active skills which for some may be a more interesting option.
|
This video was recorded on a level 94 Berserker on Standard League. We had less than 2300 Armour Rating on our Shield so there's still plenty of space for improvements here. Overall it offers quite a smooth and captivating playstyle with a number of active skills that had to be used - with more experience and investments this build can be a true powerhouse |
|
|

2. Build's PROS & CONS
| PROS |
|
| CONS |
|
3. Leveling tips
We recommend leveling up with a nearly standard Melee character that uses Shield Crush and solely amplifies his damage output by General's Cry after reaching level 24. You should aim to get both setups to at least 4 links, and you should have enough DPS to easily get through the campaign, as long as you increase the Armour Rating on your shield as your progress to the Acts. Redblade Banner is a great Shield to have, not only it boosts the effectiveness of all your Wacries and reduce their cooldown, but it also has a very high Armour Rating for a shield with a level 35 requirement. If you can afford it, it will work just fine for at least 30 levels. Below you can find the basic leveling Skill Gems setups, and several extremely useful Uniques that can be used to aid you on your journey.
Suggested leveling Gem setups:
| Shield Crush setup | |
 |
Shield Crush - a powerful AoE attack that has increased based damage for every 15 Points of Armour and Evasion on your Shield. On lower levels simply add extra Support Gems and it will be melting enemies, whereas, later on, use it on a single link only |
 |
Melee Physical Damage Support - great buff to your DPS and one of the core Support Gems for this type of build |
 |
Maim Support - increases your Physical Damage and Maims enemies, slowing them down |
 |
Brutality Support - increases the Physical DPS of Supported Skills but makes linked Skills unable to deal other types of damage |
| General's Cry setup | |
 |
General's Cry - you can start using General's Cry at level 24, and with all the Warcry nodes nearby, it will be a good way to boost your DPS output, though you may as well level up using Shield Crush only |
 |
Shield Charge - the primary damage-dealing ability in this build. During leveling it's not as powerful, but you may as well use it then to level up your Gem and get to know how the skill works |
|
Melee Physical Damage Support |
|
Brutality Support |
| Utility Gems | |
 |
Ancestral Warchief - this Totem increases your melee damage and deals a lot of damage by itself, which might come in handy versus strong Rare enemies or Bosses |
 |
Vulnerability - one of the best Curses for this build. On lower levels, it has to be cast manually (assuming you need extra damage against Bosses) |
 |
Pride - the best Aura for this purely Physical DPS build |
 |
Precision - one of the core Auras for this build. It's very important on lower levels as your Attacks can miss quite often without additional sources of Accuracy Rating. Do not upgrade it above level 6/7 |
 |
Leap Slam - the recommended mobility Skill for this build |
Bandits:
We recommend killing all the Bandits for two additional Passive Points which is the only viable option here
Leveling Skill Trees:
35 Points Skill Tree
Priorities: 1) Born to Fight 2) Bravery 3) Merciless Skewering 4) Bloodless 5) Aggressive Bastion
66 Points Skill Tree
Priorities: 1) Deep Breaths 2) Natural Authority 3) Measured Fury 4) Golem's Blood
Recommended leveling items:
 Blackheart - great Physical DPS leveling Ring. You can use two of these for a massive damage bonus on lower levels Blackheart - great Physical DPS leveling Ring. You can use two of these for a massive damage bonus on lower levels |
|
| Adds 1 to 4 Physical Damage to Attacks 5% increased Physical Damage Adds 1 to 3 Chaos Damage to Attacks +(20-30) to maximum Life (2-4) Life Regenerated per second 10% chance to Cause Monsters to Flee |
 Meginord's Girdle - a fantastic low-level Belt that offers a high DPS bonus and extra Life Meginord's Girdle - a fantastic low-level Belt that offers a high DPS bonus and extra Life |
|
| +(25-35) to Strength +25 to Strength Adds 5 to 15 Physical Damage to Attacks 10% increased maximum Life +(10-20)% to Cold Resistance 25% increased Flask Life Recovery rate |
|
|
|
| +(30-50) to Evasion Rating 10% increased Rarity of Items found +(30-40)% to all Elemental Resistances Reflects 4 Physical Damage to Melee Attackers Level Requirement reduced by 100 (Hidden) |
 Goldrim - one of the best leveling Helmets in PoE which offers tons of additional Resistances
|
|
|
| +15 to Dexterity +15 to Intelligence (100-150)% increased Evasion Rating 15% increased Movement Speed (5-10)% of Damage taken gained as Mana over 4 seconds when Hit 10% increased Movement Speed for you and nearby Allies |
 Victario's Flight - this pair offers high bonus Movement Speed but also a very reliable Mana Recovery mechanic
|
|
|
| +(20-30) to maximum Life (80-100)% increased Armour +(50-60) to maximum Life 20% increased Taunt Duration +5% Chance to Block 50% increased Warcry Cooldown Recovery Rate Warcries have infinite Power |
 Redblade Banner - if you get this Shield during the campaign, it will be a real piece of cake. This Shield greatly boosts your Warcries effectiveness, but also has decent base Armour Rating for its' level
4.Final Skill Tree, Ascendancy Points, and Pantheon
Final Skill Tree:
116 Points Final Skill Tree (doesn't Include Passives from Unique and Cluster Jewels)
116 Points Path of Building(PoB) link
Ascendancy points:
Preferably in that order:
- War Bringer
- Aspect of Carnage
- Crave the Slaughter
- Rite of Ruin
Pantheon:
Major God: Soul of the Brine King while you are Immunity to Stun with Rite of Ruin, I found Freeze to be too deadly to leave it to Flasks only, so it's important to get the additional Freeze immunity modifier available here
Minor God: Soul of Gruthkul 1% additional Physical Damage Reduction for each Hit you've taken Recently up to a maximum of 5%
5. Final Gems links
| [DPS] General's Cry setup | |
|
General's Cry - primary DPS skill in this build even though it inherently doesn't do any damage. Your General's Cry will spawn Mirage Warriors from corpses created by Corpsewalker that will attack nearby enemies with Shield Charge |
|
Shield Charge - Attack Skill which has higher damage the higher the Armour on your Shield is. It will also deal more damage the longer the distance, so it's best to use it while being a bit further away from Bosses |
|
Melee Physical Damage Support - one of the core Support Gems in this build. It has an Awakened variant, which grants an even higher DPS bonus but costs quite a bit |
 |
Pulverise Support - grants a high bonus Area Damage but reduces Attack Speed. The Attack Speed reduction is negligible, as your Mirage Warriors will only attack once anyway |
 |
Brutality Support - increases Physical Damage but makes Supported Attacks unable to deal Elemental or Chaos Damage. Again, the downside is irrelevant for this build |
 |
Impale Support - increases the Chance to Impale on Hit with Supported Attacks. With all the Passives you will easily reach 100% Chance to Impale, which greatly boosts your damage |
| [UTILITY] Auras 1 (Socketed in Shield with increased Mana Efficiency if possible) |
|
 |
Blood and Sand - Aura Skill that boosts your Melee Area Damage at the cost of reduced AoE while you are using the Blood Stance |
 |
Herald of Purity - Herald Spell that grants high Physical Damage multiplier |
 |
Pride - the best Aura for pure Physical builds that have increased effect the longer the enemy stays within its radius |
| [UTILITY] Ancestral Warchief | |
 |
Ancestral Warchief - summons a Totem which increases your Melee Damage. With the linked Gems it will also Maim enemies and instantly kill monsters below 10% Life |
 |
Culling Strike Support - makes your Totem instantly kill enemies below 10% Maximum Life |
|
Maim Support - Totems will Maim on hit reducing movement speed |
| [UTILITY] Leap Slam/Shield Crush | |
|
Leap Slam - the recommended Mobility skill used in this build. You can replace it with a preferred skill of choice which can include another Shield Charge, Dash, or Flame Dash too |
|
Shield Crush - deals some decent damage with a high Armour Shield, but in this build it's mainly used to consistently apply Blind to enemies |
 |
Faster Attacks Support - boosts the Attack Speed of linked skills |
[UTILITY] Dread Banner
 |
Dread Banner - Banner Skill that helps you get to 100% Chance to Impale. It also reduces the Accuracy of nearby enemies boosting your defenses |
| [UTILITY] Molten Shell/Punishment | |
 |
Molten Shell - the best Guard Skill used in this build which increases your Armour Rating and grants a protective shield that absorbs part of the incoming damage. Allocate it under your left mouse button so that it's nearly an automatic cast |
 |
Punishment - the second most important Curse in this build. You will need the Body Armour affix for it, but it's totally worth it. Not only it increase your DPS but also debilitates enemies to reduce their damage. Keep this Gem at level 14 for more frequent casts |
 |
Cast when Damage Taken Support - will automatically cast Punishment after you take a certain amount of damage. Keep this Gem at level 11 |
 |
Lifetap Support - makes Molten Shell and Punishment cost Life instead of Mana helping you with Mana management |
| [UTILITY] Utility Gems | |
 |
Blood Rage - boots your Attack Speed, Life Leech and allows you to generate Frenzy Charges |
 |
Berserk - use against Bosses for massive DPS burst. It significantly increases your Attack Damage, Attack, and Movement Speed if you have enough Rage to sustain it |
 |
Splitting Steel - used only to enable to Call of Steel ability that's used for additional AoE damage and taking down leftovers |
 |
Enhance Support - boots the Quality of Berserk and Blood Rage increasing the bonuses they give you |
|
|
5. Gear Setup
Below you will find the recommended items for our General's Cry Shield Charge Berserker Build. Unlike your typical Melee builds, this setup requires a number of specific Uniques, and while it can be played without those, this would require you to change the setup slightly and, different variations will not be part of this Guide. It's also a build that requires you to have a very high Armour Rating Shield, which can significantly increase the price of your Items, so you shouldn't pick it for a League Starter build or if you are a plain beginner.
|
Stat priorities on items:
|
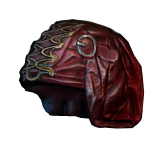
 (Helmet) Rare Helmet - a regular Helmet with high Life and Elemental Resistances is always a good choice. However, for an off-hand Attack the number of affixes that boost your damage is limited (Helmet) Rare Helmet - a regular Helmet with high Life and Elemental Resistances is always a good choice. However, for an off-hand Attack the number of affixes that boost your damage is limited |
|
| Min. requirements: 80 maximum Life 100% Total Elemental Resistances Optional affixes: Nearby enemies take #% Increased Physical Damage Attributes High Armour Rating |
|
 (Helmet) Crown of the Inward Eye - one of the best Helmts for this build which grants global damage bonus based on your Life, Mana and Energy Shield. It also increases all those three attributes (Helmet) Crown of the Inward Eye - one of the best Helmts for this build which grants global damage bonus based on your Life, Mana and Energy Shield. It also increases all those three attributes |
|
| 333% increased Armour and Energy Shield (9-21)% increased maximum Life, Mana and Global Energy Shield Transfiguration of Soul Transfiguration of Body Transfiguration of Mind |
|
| Helmet enchantment: General's Cry has +1 to maximum number of Mirage Warriors |
|
 (Body Armour) Rare Body Armour - a Crafted Armour with very high Life is the best you can get. You should also look for one with an extra Curse (Body Armour) Rare Body Armour - a Crafted Armour with very high Life is the best you can get. You should also look for one with an extra Curse |
|
| Min. requirements: 100 maximum Life You can apply an additional Curse Optional affixes: Maximum Life% Elemental Resistances Attributes |
|
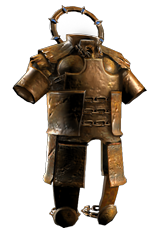
 (Body Armour) Belly of the Beast - inexpensive, but solid option. It grants simply massive Life bonus and has decent base Armour Rating (Body Armour) Belly of the Beast - inexpensive, but solid option. It grants simply massive Life bonus and has decent base Armour Rating |
|
| (150-200)% increased Armour (30-40)% increased maximum Life +(10-15)% to all Elemental Resistances 50% increased Flask Life Recovery rate Extra gore |
|
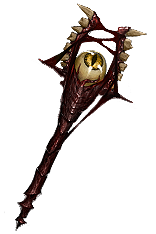 (Weapon) The Dark Seer - a build defining weapon. It boots global damage which also applies to off-hand Attacks, and applies Malediction that increases damage taken by enemies by 10% and also makes them deal 10% less damage to you. Make sure to get one with Max Life and Mana (Weapon) The Dark Seer - a build defining weapon. It boots global damage which also applies to off-hand Attacks, and applies Malediction that increases damage taken by enemies by 10% and also makes them deal 10% less damage to you. Make sure to get one with Max Life and Mana |
|
| 22% increased Elemental Damage (40-60)% increased Global Damage 10% Global chance to Blind Enemies on hit Blind does not affect your Chance to Hit Enemies Blinded by you while you are Blinded have Malediction +1 Maximum Life per Level +1 Maximum Mana per Level |
|
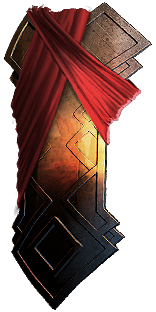
 (Shield) Rare Shield - a Shield with over 2,000 Armour Rating is basically mandatory for this build. Only Rares one can do that, and obviously you want the highest value you can afford on it (Shield) Rare Shield - a Shield with over 2,000 Armour Rating is basically mandatory for this build. Only Rares one can do that, and obviously you want the highest value you can afford on it |
|
| Min. requirements: 2000 Armour Rating Optional affixes: Maximum Life Elemental Resistances Increased Warcry Cooldown Recovery Rate Socketed Spells have #% Increased Mana Efficiency |
|
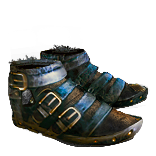
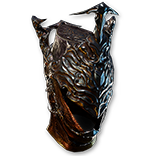
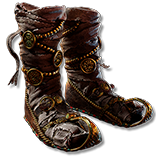 (Boots) Corpsewalker - a mandatory pair of Boots that will constantly create corpses around for you to increase the power of your General's Cry (Boots) Corpsewalker - a mandatory pair of Boots that will constantly create corpses around for you to increase the power of your General's Cry |
|
| Triggers Level 20 Corpse Walk when Equipped (80-120)% increased Evasion and Energy Shield 25% increased Movement Speed (20-40)% increased Damage if you have Consumed a corpse Recently For each nearby corpse, Regenerate 0.25% Life per second, up to 3% |
|
| Boot enchantment: 16% increased Attack and Cast Speed if you've Killed Recently |
|
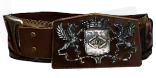
 (Belt) Rare Belt - try to grab one with the highest maximum Life and Elemental Resistances. Stygian Vise is recommended for its additional Abyssal Socket (Belt) Rare Belt - try to grab one with the highest maximum Life and Elemental Resistances. Stygian Vise is recommended for its additional Abyssal Socket |
|
| Min. requirements: 100 maximum Life 75% Total Elemental Resistances Optional affixes: increased Physical Damage/Damage Maximum Life% Armour Rating |
|
 (Belt) Ryslatha's Coil - one of the best Belts in terms of DPS. It also happens to add a very high Life bonus, but sadly no Elemental Resistances (Belt) Ryslatha's Coil - one of the best Belts in terms of DPS. It also happens to add a very high Life bonus, but sadly no Elemental Resistances |
|
| (20-30)% increased Stun Duration on Enemies +(20-40) to Strength (30-40)% more Maximum Physical Attack Damage (40-30)% less Minimum Physical Attack Damage Adds 1 to (15-20) Physical Damage to Attacks +(80-100) to maximum Life Gain 50 Life when you Stun an Enemy |
|
 (Amulet) Rare Amulet - the best Option for this build. You can try getting one with bonus levels to Strength/Physical Skill Gems or flat added Physical DPS to attacks - both will have similar effects. Other than that grab extra Life, Attributes, and Resistnaces (Amulet) Rare Amulet - the best Option for this build. You can try getting one with bonus levels to Strength/Physical Skill Gems or flat added Physical DPS to attacks - both will have similar effects. Other than that grab extra Life, Attributes, and Resistnaces |
|
| Min. requirements: 60 Maximum Life Adds # Physical Damage to Attacks +1 to Level of All Physical/Strength Skill Gems Optional affixes: Elemental Resistances Attributes Pride has #% Increased Mana Efficiency |
|
| Recommended Anointments: Retaliation Tenacity Master of Blades Panopticon Charisma |
|
 (Ring) Rare Rings - you should aim to get one Ring with the Vulnerability Curse on Hit. Then simply get extra Life, Resistances, Attributes, and possibly added Physical Damage to Attacks (Ring) Rare Rings - you should aim to get one Ring with the Vulnerability Curse on Hit. Then simply get extra Life, Resistances, Attributes, and possibly added Physical Damage to Attacks |
|
| Min. requirements: 65 maximum Life 85% Total Elemental Resistances Curse enemies with level # Vulnerability on Hit Optional affixes: Non-Channelled Skills have -# to Total Mana Cost Added Physical Damage to Attacks Chaos Resistance Attributes |
|
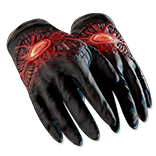 (Gloves) Rare Gauche Gloves - aim for the highest defensive stats possible and extra Accuracy if needed. Gauche Gloves are the best base as they offer a very high bonus to Off-hand Attacks with a negligible downside in this case (Gloves) Rare Gauche Gloves - aim for the highest defensive stats possible and extra Accuracy if needed. Gauche Gloves are the best base as they offer a very high bonus to Off-hand Attacks with a negligible downside in this case |
|
| Min. requirements: 80 maximum Life Added # Physical Damage to Attacks 60% Total Elemental Resistances Optional affixes: Chaos Resistance Attributes |
|
 (Jewel) Watcher's Eye - Watcher's Eye with extra Impale stacks while using Pride is the best DPS Jewel you can get for this build (Jewel) Watcher's Eye - Watcher's Eye with extra Impale stacks while using Pride is the best DPS Jewel you can get for this build |
|
| (4-6)% increased maximum Energy Shield (4-6)% increased maximum Life (4-6)% increased maximum Mana <Two or Three random aura modifiers> Recommended Aura modifier: Impales you inflict last 2 additional Hits while using Pride (8-12)% chance to deal Double Damage while using Pride |
|
 (Jewel) Lord of Steel - increases the effectiveness of your Call of Steel ability. Make sure to get the version with casting Speed and increased Damage (Jewel) Lord of Steel - increases the effectiveness of your Call of Steel ability. Make sure to get the version with casting Speed and increased Damage |
|
| Impale Damage dealt to Enemies Impaled by you Overwhelms 10% Physical Damage Reduction Call of Steel has (80-100)% increased Use Speed Call of Steel causes (40-50)% increased Reflected Damage |
|
 (Jewel) Brutal Restraint - mandatory Unique Jewel that converts Unwavering Stance to Inner Sight and allows you to consistently blind enemies while you are also blinded. You will need the Nasima version (Jewel) Brutal Restraint - mandatory Unique Jewel that converts Unwavering Stance to Inner Sight and allows you to consistently blind enemies while you are also blinded. You will need the Nasima version |
|
| Denoted service of (500-8000) dekhara in the akhara of (Asenath-Balbala-Nasima) Passives in radius are Conquered by the Maraketh Historic |
|
 (Jewel) Rare Jewels - these should provide extra Life and damage bonuses. You can also find missing Attributes or Resistances here (Jewel) Rare Jewels - these should provide extra Life and damage bonuses. You can also find missing Attributes or Resistances here |
|
| Recommended affixes: Maximum Life Increased Physical/Area/Melee Optional affixes: Attributes Elemental Resistances |
|
 (Jewels) Rare Abyss Jewel - if you are using a Stygian Vise you should get one Abyss Jewel with high Added Physical Damage to Attacks and possibly some other bonuses (Jewels) Rare Abyss Jewel - if you are using a Stygian Vise you should get one Abyss Jewel with high Added Physical Damage to Attacks and possibly some other bonuses |
|
| Recommended affixes: Maximum Life Added Physical Damage to Attacks #% Increased Damage if you have killed recently Optional affixes: Attributes or Elemental Resistances |
|
 (Jewel) Large Cluster Jewel - it's recommended to get two Physical DPS or Attack Damage while holding a Shield Cluster Jewels, with a lot of potential and powerful Passives you can find on those (Jewel) Large Cluster Jewel - it's recommended to get two Physical DPS or Attack Damage while holding a Shield Cluster Jewels, with a lot of potential and powerful Passives you can find on those |
|
| Recommended affixes: 1 Added Passive Skill is Force Multiplier 1 Added Passive Skill is Exploit Weakness 1 Added Passive Skill is Master the Fundamentals 1 Added Passive Skill is Martial Prowess 1 Added Passive Skill is Prodigious Defence 1 Added Passive Skill is Veteran Defender |
|
 (Jewel) Medium Cluster Jewel - depending on your level you can use between 3 and 4 Medium Jewels as well. There is a number of important Passives here related to Warcries that you should allocate (one of each is best) (Jewel) Medium Cluster Jewel - depending on your level you can use between 3 and 4 Medium Jewels as well. There is a number of important Passives here related to Warcries that you should allocate (one of each is best) |
|
| Recommended affixes: 1 Added Passive Skill is Haunting Shout 1 Added Passive Skill is Lead By Example 1 Added Passive Skill is Mob Mentality 1 Added Passive Skill is Warning Call 1 Added Passive Skill is Cry Wolf 1 Added Passive Skill is Rattling Bellow |
|
 (Flask) Lion's Roar - great defensive and offensive utility Flask that is moderately cheap and offers simply fantastic DPS bonus (Flask) Lion's Roar - great defensive and offensive utility Flask that is moderately cheap and offers simply fantastic DPS bonus |
|
| Adds Knockback to Melee Attacks during Flask effect 75% chance to cause Enemies to Flee on use (20-25)% more Melee Physical Damage during effect Knocks Back Enemies in an Area when you use a Flask |
|
 (Flask) Forbidden Taste - an amazing Life Recovery Flask that can save your Life countless times when you are taking too much self-damage from Rage and Blood Rage (Flask) Forbidden Taste - an amazing Life Recovery Flask that can save your Life countless times when you are taking too much self-damage from Rage and Blood Rage |
|
| +10% chance to Suppress Spell Damage Buff grants Phasing Recover (75–100)% of Life on use 25% of Maximum Life taken as Chaos Damage per second |
|
|
Other suggested Flasks:
|
|
   |
|
|
If you have any other build requests, or you have any suggestions about this particular setup, please let us know in the comments below. We appreciate all forms of feedback and even criticism :)
Pictures used in this article are the intellectual property of Grinding Gear Games.
