
Windripper Elemental Tornado Shot Deadeye build
One of the fastest Bow/Ranged builds in PoE making it a perfect setup for grinding high Tier MapsWindripper
Elemental Tornado Shot
Deadeye build
Updated for Patch 3.9
The Best Crafty Guides by Odealo
Estimated budget: medium

| Guide notes |
| January 30, 2020 -Updated for Patch 3.9 |
With major changes to Passive Skill Tree introduced in Patch 3.7, making an Elemental Bow build is much easier. Both Master Fletcher and King of the Hill now apply their bonuses to ALL types of Bows instead of just Physical ones. Furthermore, it's now much easier to cap Chance to Hit, and we are no longer limited to Lioneye's Glare or expensive gear with high Accuracy Rating bonuses. These changes heavily impact Bow playstyle so we have decided to make a very flexible Tornado Shot build. It's extremely fast, with Mirage Archer clearing everything for you; extremely powerful, with most of the Bosses down even when optimized for maximum Movement Speed; and budget-friendly, as you can easily farm high Tier Maps with just 5-linked Tempest Bow.
You can also check our other PoE builds right here: Odealo's Crafty Guides - Full List
1. Gameplay
This build is mainly oriented on clearing Maps in a blink of an eye. You let Mirage Archer do most of the job, so all you have to do is attack once in a while to have in summoned, and progress through Maps. In our recommended setup, most of the enemies including Rare ones on Tier 15 and Tier 16 Maps will be one-shotted, thanks to overlapping Herald of Ice explosions. And against Bosses, you have Barrage Attack which has the highest single-target DPS out of all Bow Skills. You should still have some respect for Tier 15+ Bosses as this is definitely not a Boss-killer build. You can get one-shotted if you don't roll your Evasion/Dodge, and the DPS is rather low without higher investments in gear. If you are still leveling or grinding currency, you can just stick to Tornado Shot even against Bosses, it will do just fine on mid-Tier Maps.
|
|
|
|

2. Build's PROS & CONS
| PROS |
|
| CONS |
|
3. Leveling tips
Leveling as a Ranger is of the easiest kind. It usually is more than enough to upgrade your gear with the self-found items, and the build itself provides a great balance between offense and defense. You can use at least a couple bow skills that will do just fine, with either higher single or AoE DPS. We recommend using Burning Arrow(or other Bow Attacks that you can get for completing the first quest - content is easy enough to pick any of them) early on and replace it with Tornado Shot at level 28.
Suggested leveling Gem setups:
| Caustic Arrow setup | |
 |
Caustic Arrow - I have personally found Caustic Arrow to perform the best on the first levels. Assuming you don't invest excessively during first levels, you DPS may be low if you decide to use a skill that scales with your weapon's damage |
 |
Mirage Archer Support - allows you to progress through campaign while Mirage Archer uses Caustic Cloud to take down enemies |
 |
Void Manipulation Support - increases Chaos Damage dealt with Supported skills |
| Tornado Shot setup | |
 |
Tornado Shot - the primary Attack Skill used in this build. You should equip it right after you reach level 28. Make sure to equip a Bow with high Elemental DPS(preferably The Stormcloud, and eventually The Tempest) when you switch to Tornado Shot, which wasn't that important when you were running with Caustic Arrow |
 |
Greater Multiple Projectiles Support - one of the best Support Gems for Tornado Shot, since all the secondary projectiles can hit the same target |
|
Mirage Archer Support |
 |
Elemental Damage with Attacks Support - increases Elemental Damage dealt with supported Attacks. It's also one of the recommended end-game Gems |
| Utility Gems | |
 |
Lightning Golem - the recommended Golem for this build which increases your Attack and Cast Speed |
 |
Projectile Weakness - the recommended Curse for this build |
 |
Herald of Ice - greatly increases your clear speed by causing AoE explosions when you kill Frozen enemies |
 |
Herald of Thunder - adds Lightning Damage to your Attacks |
Bandits:
We recommend helping Alira for increased Critical Strike Multiplier and Elemental Resistances
Leveling Skill Trees:
33 Points Skill Tree
Priorities: 1) Finesse 2) Herbalism 3) Master Fletcher/King of the Hill 4) Thick Skin 5) Freedom of Movement
60 Points Skill Tree
Priorities: 1) Acrobatics 2) Blood Drinker 3) Jewel Sockets 4) Coordination 5) Lethality
Recommended leveling items:
 Berek's Grip - amazing leveling Ring which gives you high Life Leech bonuses Berek's Grip - amazing leveling Ring which gives you high Life Leech bonuses |
|
| +(12-16)% to Cold and Lightning Resistances (25-30)% increased Cold Damage Adds 1 to (50-70) Lightning Damage to Spells and Attacks +(30-40) to maximum Life 1% of Damage Leeched as Life against Shocked Enemies 1% of Damage Leeched as Mana against Frozen Enemies |
|
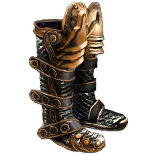 Wake of Destruction - if you are running with Storm Cloud or Tempest, this pair of boots will give you an amazing DPS bonus Wake of Destruction - if you are running with Storm Cloud or Tempest, this pair of boots will give you an amazing DPS bonus |
|
| Adds 1 to 120 Lightning Damage to Attacks (20-60)% increased Armour and Energy Shield +(10-20) Life gained on Kill 10% chance to Cause Monsters to Flee 15% increased Movement Speed |
|
 Karui Ward - amazing DPS and Movement Speed bonuses makes it one of the best leveling Amulets for Bow builds Karui Ward - amazing DPS and Movement Speed bonuses makes it one of the best leveling Amulets for Bow builds |
|
| +(20-30) to Dexterity +(20-30) to Strength +100 to Accuracy Rating 30% increased Projectile Speed 10% increased Movement Speed 30% increased Projectile Damage |
|
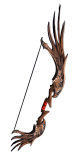
 Storm Cloud - the best leveling Bow for this build. On lower levels it makes your Mirage Archer cover the screen with Caustic Clouds, and later on, provides very high Elemental Damage for Tornado Shot Storm Cloud - the best leveling Bow for this build. On lower levels it makes your Mirage Archer cover the screen with Caustic Clouds, and later on, provides very high Elemental Damage for Tornado Shot |
|
| No Physical Damage Adds 1 to 85 Lightning Damage (36-50)% increased Attack Speed |
|
| The Tempest- fated version of Storm Cloud which grants very high Lightning Damage bonus. It works perfectly if you can get two or three Abyssal Jewels with flat added Lightning Damage to Attacks |
|
| No Physical Damage 100% increased Lightning Damage Adds 1 to 85 Lightning Damage (36-50)% increased Attack Speed |
|
4. Final Skill tree, Ascendancy Points, and Pantheon
Final Skill Tree:
115 Points Final Skill Tree
115 Points Path of Building(PoB) link
Ascendancy points:
Preferably in that order:
- Far Shot
- Endless Munitions
- Gathering Winds
- Ricochet
Pantheon:
Major God: Soul of Lunaris 1% additional Physical Damage Reduction for each nearby Enemy, up to 8%; 1% increased Movement Speed for each nearby Enemy, up to 8%
Minor God: Soul of Garukhan +5% chance to Evade Attacks if you've taken a Savage Hit recently
5. Final Gems links
| [DPS] Tornado Shot | |
|
Tornado Shot - your main DPS skill. It grants amazing clear speed when linked with Mirage Archer Support allowing you to just run around Maps when it does the job |
|
Greater Multiple Projectiles Support - core Support Gem for Tornado Shot |
|
Mirage Archer Support - created a Mirage Archer on your back which uses Tornado Shot to take down enemies while you are running |
 |
Elemental Damage with Attacks Support |
 |
Inspiration Support - grants a very high increase to Elemental Damage and Critical Strike Chance, at the same time reducing Tornado Shot's Mana Cost |
 |
Immolate Support - grants high bonus Damage against burning enemies |
| [DPS] Barrage setup | |
 |
Barrage - used mainly against Bosses for its' unparalleled single-target DPS |
 |
Elemental Focus Support - greatly increases Elemental Damage caused by Barrage but you need the Mirage Archer anyway to inflict Elemental Ailments |
|
Inspiration Support |
|
Elemental Damage with Attacks Support |
 |
Hypothermia Support |
|
Immolate Support |
| [UTILITY] Herald of Ice setup | |
|
Herald of Ice - grants extra Cold Damage to Spell and Attacks and causes AoE explosions which will apply your Curse |
 |
Curse on Hit Support - makes Herald of Ice explosions apply linked Curse |
 |
Assassin's Mark - the recommended Curse for this build. It increases your Critical Strike Chance and generates Power Charges |
| [UTILITY] Vaal Skills | |
 |
Vaal Haste - increases your Movement and Attack Speel while active |
 |
Vaal Grace - we use the regular Aura for extra Evasion (and Movement Speed if you have Queen of the Forest equipped). The Vaal part of the skill grants high Attack and Spell Dodge Chance |
 |
Increased Duration Support - increases the duration of both Vaal effects |
| [UTILITY] Golem setup | |
 |
Cast when Damage Taken Support - will automatically resummon your Golem after you take a certain amount of damage |
|
Summon Lightning Golem - grants increased Attack and Cast Speed |
| [MOBILITY] Blink Arrow | |
 |
Blink Arrow - your main mobility skill. It's great for avoiding big damage spikes and Bosses' abilities |
| [UTILITY] Blood Rage | |
 |
Blood Rage - increases your Attack Speed and generates Frenzy Charges for even more DPS |
|
|
5. Gear Setup
Below you will find the recommended gear for our Elemental Tornado Shot build. It's mainly oriented around maximizing clear speed and we didn't push the DPS too hard to keep the total budget at a reasonable level.
The recommended items from our list will:
- Help you cap your resistances
- Give you enough DPS and Life to start mapping successfully
- You will save at least a couple of hours since all the item requirements are listed
|
Stat priorities on items:
|
 (Helmet) Starkonja's Head - very solid Helmet which grants very high defensive utility (Helmet) Starkonja's Head - very solid Helmet which grants very high defensive utility |
|
| 50% reduced Damage when on Low Life +(50-70) to Dexterity 10% increased Attack Speed 25% increased Global Critical Strike Chance (100-130)% increased Evasion Rating +(80-100) to maximum Life 150% increased Global Evasion Rating when on Low Life |
|
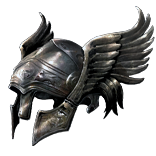 (Helmet) Devoto's Devotion - another great Helmet which greatly boosts your clear speed. The Physical Damage reduction doesn't affect as at all which makes it even better (Helmet) Devoto's Devotion - another great Helmet which greatly boosts your clear speed. The Physical Damage reduction doesn't affect as at all which makes it even better |
|
| 10% reduced Physical Damage +(50-65) to Dexterity 16% increased Attack Speed (150-200)% increased Armour and Evasion +(15-25)% to Chaos Resistance 20% increased Movement Speed Mercury Footprints |
|
| Helmet enchantment: Tornado Shot fires 2 additional secondary Projectiles |
|
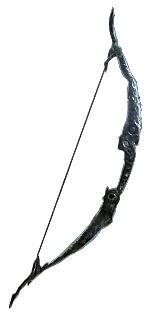
 (Weapon) The Tempest - which is one of the recommended leveling weapons for this build. Surprisingly, it offers almost the same DPS as good-rolled Windripper, but for a map-farming build, the latter performs much better. If you are playing on a budget, just stick to The Tempest (Weapon) The Tempest - which is one of the recommended leveling weapons for this build. Surprisingly, it offers almost the same DPS as good-rolled Windripper, but for a map-farming build, the latter performs much better. If you are playing on a budget, just stick to The Tempest |
|
| No Physical Damage 100% increased Lightning Damage Adds 1 to 85 Lightning Damage (36-50)% increased Attack Speed |
|
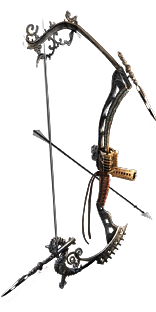
 (Weapon) Windripper - decent base Elemental DPS, high Attack Speed, and extra Crit. Chance makes this one of the best Elemental Bows in the game (except for Mirror-level stuff obviously) (Weapon) Windripper - decent base Elemental DPS, high Attack Speed, and extra Crit. Chance makes this one of the best Elemental Bows in the game (except for Mirror-level stuff obviously) |
|
| (20-24)% increased Elemental Damage with Attack Skills Adds (48-60) to (72-90) Cold Damage Adds 1 to (120-150) Lightning Damage (10-15)% increased Attack Speed (30-40)% increased Critical Strike Chance 15% increased Quantity of Items Dropped by Slain Frozen Enemies 30% increased Rarity of Items Dropped by Slain Shocked Enemies |
|
 (Weapon) Rare Bow - can be potentially the BiS Weapon for this build. Just aim for the highest possible Elemental DPS and possibly some additional stats like Crit. Multi or Chance to deal double damage (Weapon) Rare Bow - can be potentially the BiS Weapon for this build. Just aim for the highest possible Elemental DPS and possibly some additional stats like Crit. Multi or Chance to deal double damage |
|
| Min. requirements: 450 Elemental DPS Optional affixes: Critical Strike Multiplier Chance to deal Double Damage |
|
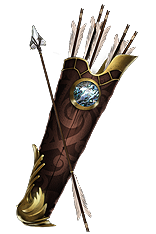 (Quiver) Hyrri's Demise - grants very high bonus damage and it shouldn't cost more than a few Chaos Orbs (Quiver) Hyrri's Demise - grants very high bonus damage and it shouldn't cost more than a few Chaos Orbs |
|
| +(3-4) Life gained for each Enemy hit by your Attacks +(15-30) to all Attributes (7-10)% increased Attack Speed +(2-3) Life gained for each Enemy hit by your Attacks 10% increased Area of Effect Adds 1 to 2 Cold Damage to Attacks per 10 Dexterity Adds 1 to 2 Fire Damage to Attacks per 10 Strength Adds 0 to 3 Lightning Damage to Attacks per 10 Intelligence |
|
 (Quiver) Ringwald's Quills - amazing Quiver which makes all your Tornado Shot's projectiles Fork, giving this build unparalleled area coverage and clear speed (Quiver) Ringwald's Quills - amazing Quiver which makes all your Tornado Shot's projectiles Fork, giving this build unparalleled area coverage and clear speed |
|
| (20-30)% increased Global Accuracy Rating -10% to Fire Resistance +(20-30)% to Lightning Resistance +7 Life gained for each Enemy hit by your Attacks 20% reduced Projectile Speed (30-50)% increased Projectile Damage Projectiles Fork |
|
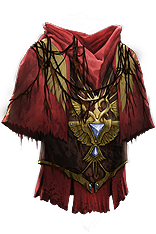 (Body Armour) Queen of the Forest - top recommendation for this build. It allows us to reach over 200% bonus Movement Speed (Body Armour) Queen of the Forest - top recommendation for this build. It allows us to reach over 200% bonus Movement Speed |
|
| (200-240)% increased Evasion Rating +(60-70) to maximum Life +(6-10)% to Fire Resistance +(26-40)% to Cold Resistance +(11-25)% to Lightning Resistance 25% reduced Movement Speed 1% increased Movement Speed per 600 Evasion Rating, up to 75% -(50-40) Physical Damage taken when Hit by Animals |
|
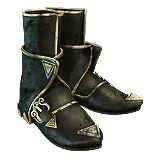 (Boots) Rare Boots - with high Evasion Rating, defensive stats, and Movement Speed bonus (Boots) Rare Boots - with high Evasion Rating, defensive stats, and Movement Speed bonus |
|
| Min. requirements: 65 maximum Life 30% increased Movement Speed 500 Evasion Rating Optional affixes: Elemental Resistances maximum Mana |
|
| Boot enchantment: 16% increased Attack and Cast Speed if you've Killed Recently Adds 45 to 68 Fire Damage if you've Killed Recently |
|
 (Belt) Stygian Vise - Abyssal Socket makes this Belt the best possible choice for this build (Belt) Stygian Vise - Abyssal Socket makes this Belt the best possible choice for this build |
|
| Min. requirements: 80 maximum Life 30% Fire Resistance 30% Lightning Resistance 30% Cold Resistance Optional affixes: increased Elemental Damage with Attack Skills |
|
 (Amulet) Rare Amulet (Amulet) Rare Amulet |
|
| Min. requirements: 60 maximum Life 24 Intelligence 28% Global Critical Strike Multiplier 30% increased Elemental Damage with Attack Skills Optional affixes: All Elemental Resistances added Elemental Damage to Attacks |
|
 (Ring) Rare Rings (Ring) Rare Rings |
|
| Min. requirements: 60 maximum Life 90% All Elemental Resistances Optional affixes: increased Elemental Damage with Attack Skills added Elemental Damage to Attacks |
|
 (Ring) The Taming - one of the best Rings for this build. It grants insane damage bonuses since we are going to inflict all three Elemental Ailments on your enemies (Ring) The Taming - one of the best Rings for this build. It grants insane damage bonuses since we are going to inflict all three Elemental Ailments on your enemies |
|
| +(8-10)% to all Elemental Resistances 20% increased Damage with Hits and Ailments per Freeze, Shock and Ignite on Enemy 30% increased Elemental Damage with Attack Skills +(20-30)% to all Elemental Resistances 30% increased Elemental Damage 10% chance to Freeze, Shock and Ignite |
|
 (Gloves) Rare Gloves - just aim for high defensive stats and good Evasion rolls (Gloves) Rare Gloves - just aim for high defensive stats and good Evasion rolls |
|
| Min. requirements: 60 maximum Life 400 Evasion Rating 25% Fire resistance 25% Lightning resistance 25% Cold resistance |
|
 (Gloves) Tombfist - amazing pair of gloves even after the most recent nerfs. It provides up to two Abyssal Sockets, and each of them can provide powerful bonuses (Gloves) Tombfist - amazing pair of gloves even after the most recent nerfs. It provides up to two Abyssal Sockets, and each of them can provide powerful bonuses |
|
| Has 2 Abyssal Sockets (4-6)% increased maximum Life With a Murderous Eye Jewel Socketed, Intimidate Enemies for 4 seconds on Hit with Attacks With a Searching Eye Jewel Socketed, Maim Enemies for 4 seconds on Hit with Attacks |
|
 (Jewels) Lioneye's Fall - this Jewel should be socketed below the Claw nodes, and it will grant a lot of Crit Chance and Multiplier, as well as, extra Leech. If you can't afford/obtain it, just pick the regular Life and small Mana Leech nodes from below Vaal Pact (Jewels) Lioneye's Fall - this Jewel should be socketed below the Claw nodes, and it will grant a lot of Crit Chance and Multiplier, as well as, extra Leech. If you can't afford/obtain it, just pick the regular Life and small Mana Leech nodes from below Vaal Pact |
|
| Melee and Melee Weapon Type modifiers in Radius are Transformed to Bow Modifiers | |
 (Jewels) Brutal Restraint (Maraketh) - a great choice for the Jewel Socket in the Jewel socketed located on the right side of the Skill Tree right next to Heartseeker Passive. We had Maraketh one with the count at around 6,000 on it, which provided the following bonuses (Jewels) Brutal Restraint (Maraketh) - a great choice for the Jewel Socket in the Jewel socketed located on the right side of the Skill Tree right next to Heartseeker Passive. We had Maraketh one with the count at around 6,000 on it, which provided the following bonuses |
|
| Denoted service of (500-8000) dekhara in the akhara of Nasima Passives in radius are Conquered by the Maraketh Historic Our bonuses (approx 6,000): 4% Increased Maximum Life +60 Dexterity 25% Increased Global Critical Strike Chance 20% Increased Evasion Rating 5% Increased Attack Speed |
|
 (Jewels) Rare Abyss Jewels - with high flat Elemental Damage added to Attacks/Bow Attacks and Life (Jewels) Rare Abyss Jewels - with high flat Elemental Damage added to Attacks/Bow Attacks and Life |
|
|
Recommended affixes: |
|
 (Jewels) Rare Jewels - this should provide extra Life and damage bonuses (Jewels) Rare Jewels - this should provide extra Life and damage bonuses |
|
| Recommended affixes: increased maximum Life increased Damage with Bows/Projectile Damage increased Global Critical Strike Multiplier Optional affixes: Attributes |
|
 (Flask) Atziri's Promise - one of the best Flasks in the game which grants very high bonus DPS and Life Leech while costing near to nothing (Flask) Atziri's Promise - one of the best Flasks in the game which grants very high bonus DPS and Life Leech while costing near to nothing |
|
| +35% to Chaos Resistance 2% of Chaos Damage Leeched as Life during Flask effect Gain (15-20)% of Physical Damage as Extra Chaos Damage during effect Gain (10-15)% of Elemental Damage as Extra Chaos Damage during effect |
|
 (Flask) Dying Sun - increases the number of your projectiles, greatly increasing DPS and clear speed (Flask) Dying Sun - increases the number of your projectiles, greatly increasing DPS and clear speed |
|
| +50% to Fire Resistance +6% to maximum Fire Resistance (-10-10)% increased Charges used (15-25)% increased Area of Effect during Flask Effect 2 additional Projectiles during Flask Effect |
|
Suggested Flasks:
|
|
   |
|
|
If you have any other build requests please leave that in the comments below.
Pictures used in this article are the intellectual property of Grinding Gear Games.
