Void Sphere of Rending Pathfinder
A great starting setup for Pathfinder that uses Void Sphere of Rending to completely remove Enemies from existence using PoisonsVoid Sphere of Rending
Pathfinder Build
Created for Patch 3.24
The Best Crafty Guides by Odealo
| Guide notes |
| July 5, 2024 -Created for Patch 3.24 |
| Build Overview | |||
| Tags: [CHAOS] [POISON] [LIFE] [CASTER] | |||
|
Budget: Defenses: |
|
Boss DPS: AoE: |
|
The Transfigured Void Sphere of Rending removes the Cooldown of this Skill, allowing you to use it as your main way of dealing Damage. It summons a massive black hole that sucks in nearby Enemies, slowing them and radiating Damage. You are still limited to only one Sphere at a time, but it deals twice as much Damage and pulses slightly faster compared to the original version. It converts 40% of its Physical Damage into Chaos Damage, which makes it very biased towards Poison as your main way of scaling Damage. It is possible to convert the remaining 60% and use Critical Strikes, but it can be quite expensive to achieve satisfying results.
To Poison Enemies you don't need to worry about Conversion, as both Physical and Chaos Damage counts toward this Ailment. The Void Sphere pulses at fixed intervals, so you also don't need to invest in Cast Speed, although it makes relocating your Sphere more comfortable. You can use sources of Extra Chaos Damage such as the Obliteration Wand or Ming's Heart for a massive boost to your DPS at a very low cost.
The Pathfinder is undoubtedly the most popular choice for most Poison Builds. It offers plenty of Damage, Proliferation, and exceptional Flask Sustain. It also makes your Life Flasks more reliable, and it is usually the best way to Recover Life for Builds that cannot Leech.
As a Ranger, you can easily cap your Suppression Chance and Evade the vast majority of incoming Attacks. To deal with Physical and Chaos Damage you should use the Doppelgänger Guise Armour, as well as maintain 3 Endurance Charges via automatic Enduring Cry. You can also heavily slow down your opponents via Temporal Chain Curse and Chill, making them very easy to outmaneuver with your exceptional Movement Speed.
You can also check our other Path of Exile builds right over here Odealo's Crafty Guides - Full List
1. Gameplay
Use Void Sphere of Rending to remove your Enemies from existence. Use Despair to lower their Chaos Resistances. You will automatically apply Withering Debuff on Hit, but you can make it faster with the Withering Step. The very fast Shield Charge will be your main Movement Skill, with the occasional use of Frostblink when needed.
|
|
|
|

2. Build's PROS & CONS
| PROS |
|
| CONS |
|
3. Leveling tips
You can start using the Void Sphere of Rending at level 34. At this point, you should have a high enough chance to reliably Poison your Enemies. To reach that level you should use the Bow DoT Skills such as Caustic Arrow or Toxic Rain. You can check out our Ranger Leveling Guide with Bows/DoT in PoE to see more tips!
Bandits:
Kill all Bandits to get an additional 2 Passive Tree Skill Points.
Leveling Skill Trees:
39 Points Passive Tree
At first, your Passive Tree is the only way to improve your Damage with DoT Skills. A bit of Life and Mana is also necessary.
72 Points Passive Tree
Pick up more Bow DoT modifiers and maximum Life. Additional Flask Charges and Onslaught on Kill will greatly boost your leveling speed. You can transition to the Poison variant when you are sure to reach a 100% Chance to Poison all at once.
4. Final Skill Tree, Ascendancy Points, and Pantheon
Final Skill Tree:
91 Points Final Passive Tree
121 Points Path of Building (PoB) link without Cluster Jewels
121 Points Path of Building (PoB) link final version
Ascendancy points:
Preferably in this order:
- Nature's Adrenaline
- Nature's Reprisal
- Master Toxicist
- Master Surgeon
Pantheon:
Major God: Soul of Arakaali: 10% reduced Damage taken from Damage Over Time; +40% Chaos Resistance against Damage Over Time
Minor God: Soul of Ryslatha: 60% increased Life Recovery from Flasks used when on Low Life; Enemies you've Hit Recently have 50% reduced Life Regeneration rate
5. Final Gems links
| [DPS] Void Sphere of Rending setup | |
 |
Void Sphere of Rending - creates a voided sphere that sucks in nearby Enemies, slowing them down, dealing Damage, and consuming their corpses. |
 |
Unbound Ailments Support - greatly prolongs the Duration of your Poisons. |
 |
Deadly Ailments Support - reduce your Damage with Hits but make your Poisons stronger. |
 |
Void Manipulation Support - improves your Chaos Damage. The Awakened Version also raises the Gem Level of supported Chaos Skill by 1. |
 |
Empower Support - improves the base Damage of the Void Sphere by increasing its Gem Levels. |
 |
Efficacy Support - improves your Damage over Time and makes your Void Sphere last longer. You can also use Increased Area of Effect Support for better Clear Speed. |
| [UTILITY] Aura setup | |
 |
Grace - this Aura greatly improves your Evasion Rating allowing you to Evade most of the incoming Attacks. |
 |
Herald of Purity - this Herald improves your Physical Damage, which affects the Void Sphere before Conversion to Chaos Damage. |
 |
Purity of Elements - grants you a lot of Elemental Resistances and makes you immune to Elemental Ailments. At a higher budget, you can replace it with Petrified Blood for better Damage mitigation. |
 |
Herald of Agony - improves your Chance to inflict Poison, and empower its Damage. |
 |
Enlighten Support - you will need this Support to use all Auras. One Herald can be left unsupported. |
| [UTILITY] Divine Blessing setup | |
 |
Malevolence - an offensive Aura that greatly improves your Damage over Time. |
 |
Divine Blessing Support - turns permanent Aura into temporary Buff, you can activate it with Energy Shield after allocating Eldritch Battery Keystone. |
 |
Inspiration Support - lowers the Mana Cost of Supported Skills, which is necessary if you have a low amount of Energy Shield. |
| [UTILITY] Curse setup | |
 |
Despair - this Curse massively reduces the Chaos Resistance of affected Enemies. Cast it manually for the best result. |
| [UTILITY] Movement setup | |
 |
Shield Charge - a very fast Movement Skill that can be used without Cooldown. |
 |
Faster Attacks Support - you can boost your Attack Speed and Movement Speed to make the Shield Charge faster. |
 |
Momentum Support - grants a bit of Attack Speed even without any Momentum stacks. |
| [UTILITY] Automation setup | |
 |
Enduring Cry - a Warcry that regenerates a lot of maximum Life and generates Endurance Charges. |
 |
Steelskin - a Guard Skill that absorbs large amounts of Damage. You can also use Immortal Call if you don't have enough Strength, as it offers flat Damage Reduction. |
 |
Automation - automatically uses your Guard Skill when it is ready. You can also use Cast When Damage Taken Support to trigger it after taking Damage. |
 |
Call to Arms - automatically triggers the Enduring Cry when it cools down. |
| [UTILITY] Utility setup | |
 |
Withering Step - it is a great way to inflict many Withering Debuffs all at once. It shares a Cooldown with other Movement Skills. |
 |
Frostblink - an instant Teleport Skill that can be used while Casting. Use it to dodge attacks and cross terrain gaps. |
|
|
6. Gear Setup
Most Unique Items are very cheap, and not necessary for the build functionality. Some of them can be Corrupted to gain additional bonuses for a quite cheap price. The most notable is the Obliteration Wand, which will be good enough for the majority of the content. The Rare Items are rather simple and focused on defense. You should use Energy Shield and Evasion bases to comfortably make use of Eldritch Battery Keystone and get Spell Suppression modifiers. The majority of your Damage comes from Cluster Jewels.
|
Stat priorities on items:
|
 (Helmet) Rare Helmet - your Helmet may be the biggest contribution towards the Energy Shield, which you need to cast the Malovelence Aura. Other than that, look for maximum Life, Spell Suppression, and Resistance. (Helmet) Rare Helmet - your Helmet may be the biggest contribution towards the Energy Shield, which you need to cast the Malovelence Aura. Other than that, look for maximum Life, Spell Suppression, and Resistance. |
|
| Min. requirements: +70 to maximum Life +100 Energy Shield +10% chance to Suppress Spell Damage 50% to Elemental Resistance Optional affixes: Mana Reservation Efficiency % of Physical Damage from Hits taken as Fire Damage Attributes increased Duration of Ailments you inflict while Focused |
|
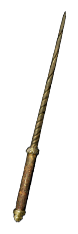
 (Weapon) Obliteration - grants a lot of Damage by adding the Extra Chaos Damage based on the initial Physical Damage of the Void Sphere. The additional Explosions massively help with your Clear Speed. (Weapon) Obliteration - grants a lot of Damage by adding the Extra Chaos Damage based on the initial Physical Damage of the Void Sphere. The additional Explosions massively help with your Clear Speed. |
|
| (33-37)% increased Spell Damage Gain (30-40)% of Physical Damage as Extra Chaos Damage Enemies you Kill have a 20% chance to Explode, dealing a quarter of their maximum Life as Chaos Damage |
|
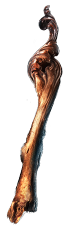
 (Weapon) Cold Iron Point - a very cheap way to gain tons of Damage. You can Corrupt it to get an additional Damage over Time bonus. (Weapon) Cold Iron Point - a very cheap way to gain tons of Damage. You can Corrupt it to get an additional Damage over Time bonus. |
|
| 30% increased Global Critical Strike Chance +3 to Level of all Physical Spell Skill Gems Deal no Elemental Damage |
|
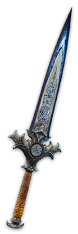
 (Weapon) Rare Weapon - it will be expensive, but a Rare Weapon can grant you the most Damage. You will need bonuses to Gem Levels, Damage over Time Multiplier, and increases to the Chaos Damage. (Weapon) Rare Weapon - it will be expensive, but a Rare Weapon can grant you the most Damage. You will need bonuses to Gem Levels, Damage over Time Multiplier, and increases to the Chaos Damage. |
|
| Min. requirements: +1 to Level of all Physical/Chaos Spell Skill Gems +25% to Damage over Time Multiplier +25% to Chaos Damage over Time Multiplier Optional affixes: +1 to Level of all Spell Skill Gems % increased Chaos Damage % increased Damage over Time |
|
 (Weapon) Rare Shield - here look for defensive modifiers such as maximum Life, Spell Suppression, and Elemental Resistances, but you can also get a bit of Damage via additional Gem Levels. (Weapon) Rare Shield - here look for defensive modifiers such as maximum Life, Spell Suppression, and Elemental Resistances, but you can also get a bit of Damage via additional Gem Levels. |
|
| Min. requirements: +1 to Level of all Physical/Chaos Spell Skill Gems +80 to maximum Life +10% chance to Suppress Spell Damage (Crafted via Crafting Bench) Optional affixes: Resistance Attribute Energy Shield |
|
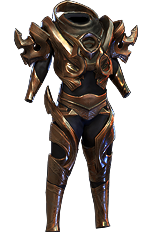 (Body Armour) Doppelgänger Guise - this Armour massively reduces the Damage you take from Physical and Chaos Hits and DoTs. It also offers decent life Recovery after taking a Hit. To get more Damage try to get a Corrupted Implicit that boosts Gem Levels of the Void Sphere. (Body Armour) Doppelgänger Guise - this Armour massively reduces the Damage you take from Physical and Chaos Hits and DoTs. It also offers decent life Recovery after taking a Hit. To get more Damage try to get a Corrupted Implicit that boosts Gem Levels of the Void Sphere. |
|
| Grants Level 20 Unhinge Skill (40-60)% more Critical Strike Chance while Insane Enemies Killed by your Hits are destroyed while Insane (40-30)% less Physical and Chaos Damage Taken while Sane Regenerate 10% Life over one second when Hit while Sane |
|
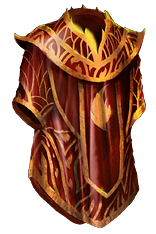 (Body Armour) Cloak of Flame - it is the cheaper alternative, but it doesn't protect you from Chaos Damage. You can also use the Lightning Coil for more Physical Damage reduction against Hits, but it will be harder to cover Elemental Resistances. (Body Armour) Cloak of Flame - it is the cheaper alternative, but it doesn't protect you from Chaos Damage. You can also use the Lightning Coil for more Physical Damage reduction against Hits, but it will be harder to cover Elemental Resistances. |
|
| +(50-75)% to Fire Resistance (40-75)% increased Ignite Duration on Enemies Reflects 100 Fire Damage to Melee Attackers 40% of Physical Damage taken as Fire Damage |
|
 (Belt) Rare Belt - here you should look for tons of maximum Life, Elemental Resistance, Flask Sustain, and Strength. You should use the Stygian Vise to get an additional Abyss Jewel. (Belt) Rare Belt - here you should look for tons of maximum Life, Elemental Resistance, Flask Sustain, and Strength. You should use the Stygian Vise to get an additional Abyss Jewel. |
|
| Min. requirements: +90 to maximum Life +50% Resistance Optional affixes: % increased maximum Life Strength Flask Charges |
|
 (Belt) The Tides of Time - this Belt will greatly improve your Flask Effect and their Sustain. It can be very powerful if you mainly fight Bosses, but for regular Map Clearing the regular Rare Belt will be better. (Belt) The Tides of Time - this Belt will greatly improve your Flask Effect and their Sustain. It can be very powerful if you mainly fight Bosses, but for regular Map Clearing the regular Rare Belt will be better. |
|
| 100% increased Life Recovery from Flasks 100% increased Mana Recovery from Flasks Flasks applied to you have 25% increased Effect Life Flasks gain (0-3) Charges every 3 seconds Mana Flasks gain (0-3) Charges every 3 seconds Utility Flasks gain (0-3) Charges every 3 seconds |
|
 (Jewel) Rare Abyss Jewel - on the extra Abyss Jewel you should get maximum Life, lacking Resistances or Attributes. You can also lower the Regeneration Rate of Hindered Enemies. (Jewel) Rare Abyss Jewel - on the extra Abyss Jewel you should get maximum Life, lacking Resistances or Attributes. You can also lower the Regeneration Rate of Hindered Enemies. |
|
| Min. requirements: +30 to maximum Life Optional affixes: Corrupted Blood cannot be inflicted on you Enemies Hindered by you have 20% reduced Life Regeneration rate Attributes Resistances |
|
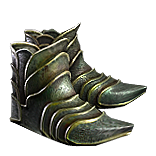 (Boots) Rare Boots - your Boots are an important source of your Movement Speed. Other than that you should try to get maximum Life and Resistance. (Boots) Rare Boots - your Boots are an important source of your Movement Speed. Other than that you should try to get maximum Life and Resistance. |
|
| Min. requirements: +70 to maximum Life +10% chance to Suppress Spell Damage 50% to Elemental Resistance 20% increased Movement Speed Optional affixes: Poisons you inflict deal Damage 7% faster Action Speed % chance to gain Onslaught on kill |
|
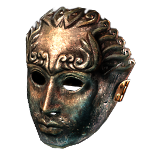
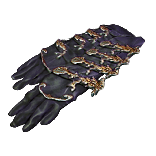 (Gloves) Asenath's Gentle Touch - the best Gloves for any Poison Build, they automatically apply Temporal Chains Curse and provide extra Explosions for better Clear Speed. (Gloves) Asenath's Gentle Touch - the best Gloves for any Poison Build, they automatically apply Temporal Chains Curse and provide extra Explosions for better Clear Speed. |
|
| +(20-30) to Intelligence +(60-80) to maximum Life +(60-80) to maximum Mana Curse Enemies with Temporal Chains on Hit Non-Aura Curses you inflict are not removed from Dying Enemies Enemies near corpses affected by your Curses are Blinded Enemies Killed near corpses affected by your Curses explode, dealing 3% of their Life as Physical Damage |
|
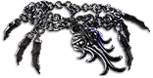
 (Amulet) Replica Dragonfang's Flight - this Amulet can grant 3 Gem Levels to any Skill in the Game, look for one that would boost your Void Sphere. It is an unpopular Skill, so getting high Reservation Efficiency shouldn't be too hard. (Amulet) Replica Dragonfang's Flight - this Amulet can grant 3 Gem Levels to any Skill in the Game, look for one that would boost your Void Sphere. It is an unpopular Skill, so getting high Reservation Efficiency shouldn't be too hard. |
|
| +(10-16) to all Attributes +3 to Level of all <Random Skill> Gems +(5-10)% to all Elemental Resistances (5-10)% increased Reservation Efficiency of Skills Items and Gems have (10-5)% reduced Attribute Requirements |
|
 (Ring) Circle of Guilt/Nostalgia - you use two very powerful Heralds, and this Ring can make them even stronger. The Circle of Ambition is the even stronger version that grants 3 Herald modifiers, but a synergetic combo might be very expensive. (Ring) Circle of Guilt/Nostalgia - you use two very powerful Heralds, and this Ring can make them even stronger. The Circle of Ambition is the even stronger version that grants 3 Herald modifiers, but a synergetic combo might be very expensive. |
|
| +(10-20) to all Attributes Adds (8-10) to (13-15) Physical Damage +(350-400) to Armour <Two Random Herald of Purity modifiers> Recommended Herald modifiers: Herald of Purity/Agony has (40-60)% increased Buff Effect (40-60)% increased Physical Damage while affected by Herald of Purity/Agony |
|
 (Ring) Ming's Heart - this Ring grants you absurd amounts of Damage but also lowers your maximum Life by a noticeable amount. Use Noxious Catalyst to make the bonus even stronger. (Ring) Ming's Heart - this Ring grants you absurd amounts of Damage but also lowers your maximum Life by a noticeable amount. Use Noxious Catalyst to make the bonus even stronger. |
|
| +(17-23)% to Chaos Resistance 25% reduced maximum Energy Shield 25% reduced maximum Life +(40-50)% to Chaos Resistance Gain (40-60)% of Physical Damage as Extra Chaos Damage |
|
 (Ring) Icefang Orbit - another great Ring to use, it grants a decent amount of Damage, provides a chance to Poison which can be helpful at early levels, and applies a 10% Chill effect to every Enemy you hit. Try to get a useful Corrupted Implicit. (Ring) Icefang Orbit - another great Ring to use, it grants a decent amount of Damage, provides a chance to Poison which can be helpful at early levels, and applies a 10% Chill effect to every Enemy you hit. Try to get a useful Corrupted Implicit. |
|
| Adds 1 to 4 Physical Damage to Attacks +(20-30) to Dexterity 25% chance to Poison on Hit (40-60)% increased Damage with Poison You are Chilled when you are Poisoned Non-Chilled Enemies you Poison are Chilled Poisoned Enemies you Kill with Hits Shatter |
|
 (Ring) Rare Ring - the Rare Ring is the best defensive option that can also provide plenty of Damage. Look for maximum Life, Dot Multiplier, increased Chaos Damage, minimum Frenzy Charge, Life Recoup, and lacking Resistances or Attributes. (Ring) Rare Ring - the Rare Ring is the best defensive option that can also provide plenty of Damage. Look for maximum Life, Dot Multiplier, increased Chaos Damage, minimum Frenzy Charge, Life Recoup, and lacking Resistances or Attributes. |
|
| Min. requirements: +50 to Maximum Life Optional affixes: Attributes Resistance increased Chaos Damage Damage over Time Multiplier +1 to Minimum Frenzy Charges |
|
 (Jewel) Rare Jewels - your Rare Jewels can be a quite potent source of maximum Life, DoT Multiplier, and increased Damage of Poison. You can also get a bit of Flask Sustain, cover Resistances and Attributes, or get immunity to Corrupted Blood. (Jewel) Rare Jewels - your Rare Jewels can be a quite potent source of maximum Life, DoT Multiplier, and increased Damage of Poison. You can also get a bit of Flask Sustain, cover Resistances and Attributes, or get immunity to Corrupted Blood. |
|
| Min. requirements: increased maximum Life Recommended affixes: DoT Multiplier Poison Damage Resistances Attributes Poison Duration |
|
 (Jewel) Large Cluster Jewel - Cluster Jewels are simply a more effective way to scale your Damage than Notables available on the Passive Tree. The Physical Damage version offers more raw Damage, but Chaos Cluster can grant you Explosions or prevent Stuns while Casting. (Jewel) Large Cluster Jewel - Cluster Jewels are simply a more effective way to scale your Damage than Notables available on the Passive Tree. The Physical Damage version offers more raw Damage, but Chaos Cluster can grant you Explosions or prevent Stuns while Casting. |
|
| Recommended affixes: 1 Added Passive Skill is Grim Oath 1 Added Passive Skill is Unwaveringly Evil 1 Added Passive Skill is Wicked Pall 1 Added Passive Skill is Unholy Grace 1 Added Passive Skill is Unspeakable Gifts 1 Added Passive Skill is Battle-Hardened 1 Added Passive Skill is Master the Fundamentals |
|
 (Jewel) Medium Cluster Jewel - the Medium Chaos Clusters offer even more Damage, as well as additional Flask Sustain or maximum Life. The Circling Oblivion is the mandatory Notable, as it grants both Damage and the Duration of your Poisons. (Jewel) Medium Cluster Jewel - the Medium Chaos Clusters offer even more Damage, as well as additional Flask Sustain or maximum Life. The Circling Oblivion is the mandatory Notable, as it grants both Damage and the Duration of your Poisons. |
|
| Recommended affixes: 1 Added Passive Skill is Circling Oblivion 1 Added Passive Skill is Flow of Life 1 Added Passive Skill is Brewed for Potency |
|
 (Jewel) Watcher's Eye - here you can get very powerful bonuses while you use your only offensive Aura, the Malovelece. You can also get bonuses for using Grace or Purity of Elements, such as additional Spell Suppression or Chaos Resistance. (Jewel) Watcher's Eye - here you can get very powerful bonuses while you use your only offensive Aura, the Malovelece. You can also get bonuses for using Grace or Purity of Elements, such as additional Spell Suppression or Chaos Resistance. |
|
| (4-6)% increased maximum Energy Shield (4-6)% increased maximum Life (4-6)% increased maximum Mana <Two or Three random aura modifiers> Recommended Aura mods: +(18-22)% to Damage over Time Multiplier while affected by Malevolence Damaging Ailments you inflict deal Damage (10-15)% faster while affected by Malevolence |
|
 (Jewel) Lethal Pride - this Jewel can grant you plenty of Strenght, and redirect portion of the Physical Damage to be taken as Fire. You can also use the Brutal Restraint to get more Damage, Blind Enemies on Hit, or gain Onslaught on Kill. (Jewel) Lethal Pride - this Jewel can grant you plenty of Strenght, and redirect portion of the Physical Damage to be taken as Fire. You can also use the Brutal Restraint to get more Damage, Blind Enemies on Hit, or gain Onslaught on Kill. |
|
| Commanded leadership over (10000-18000) warriors under (Akoya-Kaom-Rakiata) Passives in radius are Conquered by the Karui Historic |
|
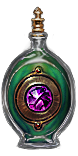
 (Flask) Progenesis - the best defensive Flask in the game, it effectively offers you 30% more Life as you will easily offset the Damage Taken over Time with your powerful Life Flask. As a Pathfinder you will have no problems sustaining it at all times. (Flask) Progenesis - the best defensive Flask in the game, it effectively offers you 30% more Life as you will easily offset the Damage Taken over Time with your powerful Life Flask. As a Pathfinder you will have no problems sustaining it at all times. |
|
| (20-10)% reduced Charges per use (-35-35)% increased Duration When Hit during effect, 25% of Life loss from Damage taken occurs over 4 seconds instead |
|
|
Suggested Flasks:
|
|
     |
|
|
If you have any other build requests please leave that in the comments below. We are always open to suggestions and constructive feedback.
Pictures used in this article are the intellectual property of Grinding Gear Games.
