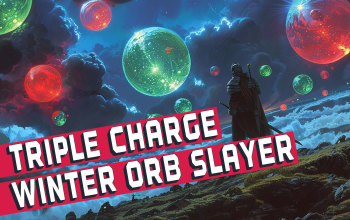
Triple Charge Stacking Winter Orb Slayer Build
A build for a Slayer that stacks all three types of Charges to deal greatly increased damage with Winter OrbTriple Charge Stacking Winter Orb
Slayer Build
Updated for Patch 3.24
The Best Crafty Guides by Odealo
| Guide notes | |||
| July 1, 2024 -Build created |
|||
| Build overview | |||
| Tags: [CASTER] [ELEMENTAL] [LIFE] | |||
|
Budget: Defenses: |
|
Boss DPS: AoE: |
|
With Slayer's Masterful Form passive your Maximum Endurance Charges are equal to your Maximum Frenzy Charges. With Badge of the Brotherhood Amulet, your Maximum Frenzy Charges are equal to your Maximum Power Charges. By stacking only Maximum Power Charges you're granted all the other Maximum Charges too. To do so, equip Void Battery, Malachai's Loop, a Rare or Corrupted Unique Helmet, and a pair of good Rings - you can reach up to 12 Maximum Charges this way. To have all of these Charges up at all times you shall wear Ralakesh's Impatience Boots. This results in a lot of Elemental Resistances and Physical Damage Reduction with Endurance Charges, Attack Speed, Cast Speed, and Damage with Frenzy Charges, and Critical Strike Chance with Power Charges. You can also equip Arn's Anguish Belt and generate Brutal Charges with Enduring Cry for up to a 36% chance of dealing triple damage. Almost any Skill will benefit from these stats, but we recommend an Elemental Spell to reap the benefits of the aforementioned items, Inner Conviction Keystone, and Willclash Helmet. Winter Orbs seems like a good candidate. Its Projectiles can shotgun a single enemy if you have enough Area of Effect, which can be conveniently scaled up with Power Charges and Vast Power notables from Medium Cluster Jewels. Winter Orb must be channelled to start dealing damage, but with the high Cast Speed from Frenzy Charges, it's not a big issue. This Spell's Projectile firing frequency also scales well with Cast Speed.
Slayers rarely use Spells as their passives and the skill tree starting location are tailored to suit an Attack playstyle more, but he does have Bane of Legends, Headsman, and Brutal Fervour which will work with Spells. These grant more movement speed and damage, execute enemies below 20% of their Maximum Life on hit, increase Maximum Recovery per Life Leech with Overleech, and reduce damage taken. You will rely on this Life Leech heavily - Elemental Damage Leeched as Life is obtained from the Doryani's Lesson notable on a Large Cluster Jewel. On top of Leech, the character's durability is derived from Endurance Charges, a lot of Life Regeneration from Replica Restless Ward, capped Spell Block Chance with Tempest Shield and Willclash, and Fortify. With Purity of Elements, you're immune to all Elemental Ailments. The build has a relatively low Maximum Life, up to around 4000, so it is still vulnerable to singular big blows.
You can also check our other Path of Exile builds right over here Odealo's Crafty Guides - Full List
1. Gameplay
Charge up the Winter Orb from time to time, it automatically seeks enemies to kill. Occasionally you can also turn on Zealotry linked with Divine Blessing, cast Frostbite Curse, or activate Righteous Fire to gain more damage. To move around use Shield Dash. Sniper's Mark, Enduring Cry, and Steelskin are triggered automatically. Your Mana-reserving Skills are Hatred, Tempest Shield, Purity of Elements, and Herald of Ice.
|
|
|
|
2. Build's PROS & CONS
| PROS |
|
| CONS |
|
3. Leveling tips
Use this guide: Duelist Leveling Guide with Melee/Impale. The build has a peculiar Passive Skill Tree that doesn't do much at the early stages of the game. You should swap to this final version of a build after you're able to equip all the required unique items, around level 80 to 90.
Bandits:
Killing all Bandits for two additional Passive Points is the best option
4. Final Skill Tree, Ascendancy Points, and Pantheon
Final Skill Tree:
96 Points Final Skill Tree - (doesn't include Unique or Cluster Jewels)
123 Points Path of Building (PoB) link
Ascendancy points:
Preferably in that order:
- Bane of Legends
- Brutal Fervour
- Headsman
- Masterful Form
Pantheon:
Major God: Soul of Lunaris: 1% increased Movement Speed for each nearby Enemy, up to 8%; 1% additional Physical Damage Reduction for each nearby Enemy, up to 8%
Minor God: Soul of Ryslatha: Life Flasks gain 3 Charges every 3 seconds if you haven't used a Life Flask Recently; 60% increased Life Recovery from Flasks used when on Low Life
5. Final Gems links
| [DPS] Winter Orb setup | |
 |
Winter Orb - Any spell will work. Winter Orb is good because you can quickly charge it up, it scales with AoE and Cast Speed, and you don't have to stop to deal damage. |
 |
Greater Multiple Projectiles Support - Winter Obr fires more projectiles resulting in more damage. |
 |
Power Charge on Critical Support - More Damage per Power Charge. |
 |
Ice Bite Support - Adds Cold Damage per Frenzy Charge, which you have a lot of. |
 |
Infused Channelling Support - More Damage with Winter Orb with Infusion. While Channelling, you will take less damage. |
 |
Cold Penetration Support - Penetrates Cold Resistance. use the Awakened version to apply Exposure on Hit. |
| [UTILITY] Aura setup | |
 |
Hatred - More Cold Damage with Spells. You could swap it for  Grace for better durability, but that won't provide you with much Evasion. Grace for better durability, but that won't provide you with much Evasion. |
 |
Tempest Shield - Use it for additional Spell Block Chance and to Shock enemies. |
 |
Purity of Elements - We have used Purity of Elements for Elemental Ailment immunity and Elemental Resistances. It makes gearing up much easier. |
 |
Enlighten Support - With level 4 Enlighten you won't need any additional Reservation Efficiency. Corrupt one of your Unique gear pieces to increase its level. |
| [UTILITY] Herald of Ice | |
 |
Herald of Ice - Clear speed is much better. It adds Cold Damage to Spells and Shatters frozen enemies on kill. |
| [UTILITY] Sniper's Mark setup | |
 |
Sniper's Mark - Marked enemy takes increased Projectile Damage. |
 |
Mark on Hit Support - Sniper's Mark is applied automatically on Hit against Rare and Unique enemies. You'll have to use Chield Charge. |
| [UTILITY] Steelskin setup | |
 |
Steelskin - Stops Bleeding and absorbs some incoming Hit Damage. |
 |
Cast when Damage Taken Support - It triggers Steelskin after taking enough damage. |
| [UTILITY] Enduring Cry setup | |
 |
Enduring Cry - Generates Brutal Charges and Regenerates Life. |
 |
Call to Arms - Triggers linked Warcry automatically. |
| [MOBILITY] Shield Charge setup | |
 |
Shield Charge - The mobility Skill you will use to move around faster. |
 |
Faster Attacks Support - Shield Charge movement speed scales up with its Attack Speed. |
 |
Fortify Support - Grants Fortify buff after hitting an enemy. |
| [UTILITY] Zealotry setup | |
 |
Zealotry - More Spell damage and increased Critical Strike Chance for Spells. It can create a Consecrated Ground on Hit against Rare or Unique enemies. |
 |
Divine Blessing Support - Zealotry is a temporary Aura. You will be able to afford it thanks to the Eldritch Battery. |
| [UTILITY] Frostbite | |
 |
Frostbite - With whispers of Doom you can apply one additional Curse. Frostbite lowers Cold Resistance. |
| [UTILITY] Vaal Rightous Fire | |
 |
Vaal Rightous Fire - You should be able to sustain regular RF, but if that's not the case, use Vaal RF for more Spell Damage. |
| [MOBILITY] Withering Step setup | |
 |
Withering Step - If you can spare two sockets for Withering Step we recommend doing so. It grants you the Elusive buff, the effect of which is magnified due to the Badge of the Brotherhood. |
 |
Automation - Triggers Withering Step automatically. |
|
|
6. Gear Setup
With Purity of Elements, Endurance Charges, and some additional Attributes and Resistances from Jewels, it's possible to equip the character exclusively with Unique items. Nevertheless, we recommend using Rare Gloves and Rings for that purpose. Most of the mandatory Uniques are cheap so scout for favourable Corrupted Implicit modifiers such as increased level of socketed Gems or extra Spell Crit Chance. Rings and Jewels are the most expensive parts of this build. The character has almost no Armour, but due to the abundance of Endurance Charges, it takes vastly reduced Physical Damage, and so investing in Armour is rather pointless. Your focus should be on extending the Maximum Power Charge limit, seeking stats that scale up with Charges, capping Crit Chance, getting more Critical Strike Multiplier, and increasing the Gem Level of Winter Orb. Life Leech can be found on a Large Cluster Jewel, while ES Leech is easily obtained by spending one Passive Skill Point on an ES Leech node. You will need some extra Strength and Intelligence, the Skill Tree does not grant you enough of these.
Our recommended items will:
- Cap your resistances at 75%
- Provide you with enough DPS and Life to start mapping
|
Stat priorities on items:
|
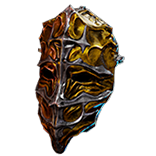 (Helmet) Willclash - Used for increased Elemental Damage and to cap Spell Block Chance after combining with Tempest Shield. It's very cheap - try to Corrupt it for one additional Maximum Power Charge. (Helmet) Willclash - Used for increased Elemental Damage and to cap Spell Block Chance after combining with Tempest Shield. It's very cheap - try to Corrupt it for one additional Maximum Power Charge. |
|
| (350-400)% increased Evasion and Energy Shield +5% Chance to Block Spell Damage per Power Charge (3-5)% increased Elemental Damage per Power charge Gain a Power Charge every Second if you haven't lost Power Charges Recently Lose all Power Charges when you Block |
|
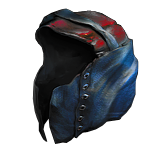 (Helmet) Heatshiver - Grants tons of additional Fire Damage sourced from Cold Damage. It has little to no defences. If you plan to use it, replace your Frostbite Curse with Elemental Weakness. (Helmet) Heatshiver - Grants tons of additional Fire Damage sourced from Cold Damage. It has little to no defences. If you plan to use it, replace your Frostbite Curse with Elemental Weakness. |
|
| (80-100)% increased Evasion Rating 60% increased Mana Regeneration Rate +(20-30)% to Fire Resistance +(20-30)% to Cold Resistance Gain 1% of Cold Damage as Extra Fire Damage per 1% Chill Effect on Enemy Gain 30% of Cold Damage as Extra Fire Damage against Frozen Enemies |
|
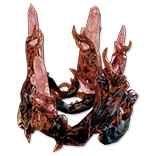 (Helmet) Rare Helmet - A Warlord Blizzard Crown with one additional Maximum Power Charge could be the best-in-slot Helmet, but it's also quite expensive. Here you can look for Maximum Life and other various offensive and defensive stats. (Helmet) Rare Helmet - A Warlord Blizzard Crown with one additional Maximum Power Charge could be the best-in-slot Helmet, but it's also quite expensive. Here you can look for Maximum Life and other various offensive and defensive stats. |
|
| Min. requirements: +70 Maximum Life Maximum Power Charge (Warlord's Prefix) Optional affixes: Nearby enemies take #% Increased Elemental Damage Nearby enemies have -#% to Cold Resistance Chaos Resistance Attributes Elemental Resistances |
|
 (Weapon) Void Battery - Grants one additional Maximum Power Charge, increased Damage per Power Charge, increased Cast Speed, and Crit Chance for Spells. (Weapon) Void Battery - Grants one additional Maximum Power Charge, increased Damage per Power Charge, increased Cast Speed, and Crit Chance for Spells. |
|
| (36-40)% increased Spell Damage 80% reduced Spell Damage (10-20)% increased Cast Speed (50-65)% increased Global Critical Strike Chance +(40-50) to maximum Mana +1 to Maximum Power Charges 25% increased Spell Damage per Power Charge |
|
 (Off-hand) Malachai's Loop - Used mainly for two additional Maximum Power Charges and increased Spell Damage per Power Charge. With Ralakesh's Impatience, the downside will not apply. (Off-hand) Malachai's Loop - Used mainly for two additional Maximum Power Charges and increased Spell Damage per Power Charge. With Ralakesh's Impatience, the downside will not apply. |
|
| (10-15)% increased Spell Damage (210-250)% increased Energy Shield +2 to Maximum Power Charges 20% chance to gain a Power Charge on Hit (12-16)% increased Spell Damage per Power Charge Lose all Power Charges on reaching Maximum Power Charges Shocks you when you reach Maximum Power Charges |
|
 (Body Armour) Replica Restless Ward - Increases Movement Speed and Regenerates a lot of Life. It has no downsides in this configuration. You should Corrupt it for a chance of increasing the Gem Level of Winter Orb. (Body Armour) Replica Restless Ward - Increases Movement Speed and Regenerates a lot of Life. It has no downsides in this configuration. You should Corrupt it for a chance of increasing the Gem Level of Winter Orb. |
|
| +(20-25) to maximum Mana (220-250)% increased Evasion and Energy Shield +(60-80) to maximum Life 6% increased Movement Speed per Frenzy Charge -2 to Maximum Endurance Charges -2 to Maximum Frenzy Charges Regenerate (100-140) Life per second per Endurance Charge |
|
 (Boots) Ralakesh's Impatience - Keeps your character Charged up. The build will not function properly without it. (Boots) Ralakesh's Impatience - Keeps your character Charged up. The build will not function properly without it. |
|
| +(15-25)% to Cold Resistance +(15-25)% to Chaos Resistance Count as having maximum number of Endurance Charges Count as having maximum number of Frenzy Charges Count as having maximum number of Power Charges |
|
 (Gloves) Surgebinders - These Gloves are not particularly good, but it's still a lot of damage due to the overabundance of the Charges you have. (Gloves) Surgebinders - These Gloves are not particularly good, but it's still a lot of damage due to the overabundance of the Charges you have. |
|
| (90-110)% increased Armour and Evasion (4-7)% increased Elemental Damage per Frenzy Charge (4-7)% increased Physical Damage per Endurance Charge (4-7)% increased Spell Damage per Power Charge 10% chance to Steal Power, Frenzy, and Endurance Charges on Hit |
|
| Min. requirements: +70 to maximum Life +80% to Elemental Resistances Optional affixes: Chaos Resistance Life Regeneration increased Damage while Leeching increased Damage with Hits against Chilled Enemies |
|
 (Belt) Arn's Anguish - Has good base stats but its main selling point are Brutal Charges which may triple your damage. That's a 3% chance of dealing Triple Damage per Brutal Charge. (Belt) Arn's Anguish - Has good base stats but its main selling point are Brutal Charges which may triple your damage. That's a 3% chance of dealing Triple Damage per Brutal Charge. |
|
| (15-25)% increased Stun and Block Recovery +(600-700) to Armour (12-15)% increased maximum Life +(40-60)% to Fire Resistance +1 to Maximum Endurance Charges Modifiers to Minimum Endurance Charges instead apply to Minimum Brutal Charges Maximum Brutal Charges is equal to Maximum Endurance Charges Gain Brutal Charges instead of Endurance Charges |
|
 (Amulet) Badge of the Brotherhood - Your Maximum Frenzy Charges are equal to your Maximum Power Charges. You will then carry on this Charge cap to Endurance Charges via Masterful Form passive. (Amulet) Badge of the Brotherhood - Your Maximum Frenzy Charges are equal to your Maximum Power Charges. You will then carry on this Charge cap to Endurance Charges via Masterful Form passive. |
|
| +(16-24) to Dexterity and Intelligence (7-10)% increased Cooldown Recovery Rate of Travel Skills per Frenzy Charge (7-10)% increased Effect of Elusive on you per Power Charge (20-25)% chance to lose a Frenzy Charge when you use a Travel Skill (20-25)% chance to lose a Power Charge when you gain Elusive Your Maximum Frenzy Charges is equal to your Maximum Power Charges |
|
| Recommended Anointments: Overcharge |
|
 (Ring) Rare Ring - Rings are the expensive part of the build. Try to get a Ring with one Maximum Power Charge for the implicit, Maximum Life, Attributes, and Resistances. (Ring) Rare Ring - Rings are the expensive part of the build. Try to get a Ring with one Maximum Power Charge for the implicit, Maximum Life, Attributes, and Resistances. |
|
| Min. requirements: +1 to Maximum Power Charges (Synthesised Implicit) +70 Maximum Life Non-Channelling Skills have -7 to Total Mana Cost (crafted Prefix) Optional affixes: Resistances Attributes increased Cast Speed increased Elemental Damage Added Cold Damage per Frenzy Charge (Redeemer's Prefix) |
|
 (Ring) Precursor's Emblem - Precursor's Emblem with one Maximum Power Charge would be perfect, but you have tons of all kinds of Charges so nearly any Precursor's Emblem will improve your build. You may find mods such as Chaos Resistance, Crit Chance, Cold Damage as extra Chaos Damage, Movement Speed, Life Regeneration, Flask Charge on Critical Strike, Physical Damage Reduction, additional Curse, or Crit Multiplier per Charge. (Ring) Precursor's Emblem - Precursor's Emblem with one Maximum Power Charge would be perfect, but you have tons of all kinds of Charges so nearly any Precursor's Emblem will improve your build. You may find mods such as Chaos Resistance, Crit Chance, Cold Damage as extra Chaos Damage, Movement Speed, Life Regeneration, Flask Charge on Critical Strike, Physical Damage Reduction, additional Curse, or Crit Multiplier per Charge. |
|
| +(8-10)% to all Elemental Resistances +20 to all Attributes 5% increased maximum Energy Shield 5% increased maximum Life <One Endurance Charge mod> <One Frenzy Charge mod> <One Power Charge mod> |
|
 (Jewel) Rare Jewels - Maximum Life and Critical Strike Multiplier for Cold or Elemental Spells is what should be prioritized on Jewels. Attributes and Resistances can also be useful. (Jewel) Rare Jewels - Maximum Life and Critical Strike Multiplier for Cold or Elemental Spells is what should be prioritized on Jewels. Attributes and Resistances can also be useful. |
|
| Recommended affixes: Maximum Life Attributes Critical Strike mods |
|
 (Jewel) Large Cluster Jewel - Blast-Freeze and Blanketed Snow notables can be found on Cold Damage Large Cluster Jewels. One Doryani's Lesson for Life Leech should be there too. We have used two such Jewels. (Jewel) Large Cluster Jewel - Blast-Freeze and Blanketed Snow notables can be found on Cold Damage Large Cluster Jewels. One Doryani's Lesson for Life Leech should be there too. We have used two such Jewels. |
|
| Recommended affixes: 1 Added Passive Skill is Blast-Freeze 1 Added Passive Skill is Doryani's Lesson 1 Added Passive Skill is Blanketed Snow 1 Added Passive Skill is Widespread Destruction |
|
 (Jewel) Medium Cluster Jewel - Vast Power and Magnifier will increase your Area of Effect. If your AoE is good enough, look for Critical Strike Jewels with mods like Basics of Pain and Precise Retaliation. (Jewel) Medium Cluster Jewel - Vast Power and Magnifier will increase your Area of Effect. If your AoE is good enough, look for Critical Strike Jewels with mods like Basics of Pain and Precise Retaliation. |
|
| Recommended affixes: 1 Added Passive Skill is Vast Power 1 Added Passive Skill is Magnifier 1 Added Passive Skill is Basics of Pain 1 Added Passive Skill is Precise Retaliation |
|
 (Jewel) Militant Faith - The Dominus' variant shall transform one of your Keystones into Inner Conviction for 3% more Spell Damage per Power Charge with no downside. (Jewel) Militant Faith - The Dominus' variant shall transform one of your Keystones into Inner Conviction for 3% more Spell Damage per Power Charge with no downside. |
|
| Carved to glorify (2000-10000) new faithful converted by High Templar (Avarius-Dominus-Maxarius) Passives in radius are Conquered by the Templars Historic <two random mods of devotion> |
|
 (Jewel) Sublime Vision - You could go for one Maximum Power Charge with the Discipline variant of the Sublime Vision, but sacrificing all your other Auras for one that's not even good is questionable. (Jewel) Sublime Vision - You could go for one Maximum Power Charge with the Discipline variant of the Sublime Vision, but sacrificing all your other Auras for one that's not even good is questionable. |
|
| +1 to Maximum Power Charges while affected by Discipline Aura Skills other than Discipline are Disabled Auras from your Skills have (20-40)% increased Effect on you |
|
 (Jewel) Watcher's Eye - You're using Zealotry, Purity of Elements, and Hatred. Zealotry and Hatred may grant you Elemental Penetration and Crit Chance, both of which are great offensive boons, while Purity of Elements may provide you with up to 50% Chaos Resistance (Jewel) Watcher's Eye - You're using Zealotry, Purity of Elements, and Hatred. Zealotry and Hatred may grant you Elemental Penetration and Crit Chance, both of which are great offensive boons, while Purity of Elements may provide you with up to 50% Chaos Resistance |
|
| (4-6)% increased maximum Energy Shield (4-6)% increased maximum Life (4-6)% increased maximum Mana <Two or Three random aura modifiers> |
|
 (Jewel) Dying Sun - The two additional Projectiles from this Flask are very desirable. It should also help you sustain Righteous Fire. (Jewel) Dying Sun - The two additional Projectiles from this Flask are very desirable. It should also help you sustain Righteous Fire. |
|
| +40% to Fire Resistance +5% to maximum Fire Resistance (125-150)% increased Charges per use (60-40)% less Duration (10-20)% increased Area of Effect during Effect Skills fire 2 additional Projectiles during Effect |
|
 (Jewel) Bottled Faith - You will probably need some extra Critical Strike Chance to reach the 100% cap. There's also Consecrated Ground and more damage. (Jewel) Bottled Faith - You will probably need some extra Critical Strike Chance to reach the 100% cap. There's also Consecrated Ground and more damage. |
|
| 40% increased Damage Creates Consecrated Ground on Use (30-15)% reduced Duration Consecrated Ground created by this Flask has Tripled Radius Consecrated Ground created during Effect applies (7-10)% increased Damage taken to Enemies (100-150)% increased Critical Strike Chance against Enemies on Consecrated Ground during Effect |
|
|
Other suggested Flasks:
|
|
     |
|
|
If you have any other build requests please leave that in the comments below. We are always open to suggestions and constructive feedback.
Pictures used in this article are the intellectual property of Grinding Gear Games.


