Tectonic Slam of Cataclysm Juggernaut
A very interesting Setup for Juggernaut that uses General's Cry to bypass the drawback of the Tectonic Slam of Cataclysm to deal DamageTectonic Slam of Cataclysm
Juggernaut Build
Created for Patch 3.24
The Best Crafty Guides by Odealo
| Guide notes |
| July 1, 2024 -Created for Patch 3.24 |
| Build Overview | |||
| Tags: [ELEMENTAL] [WARCRY] [LIFE] [ATTACK] | |||
|
Budget: Defenses: |
|
Boss DPS: AoE: |
|
The Tectonic Slam belongs to the Slam archetype that specializes in slow but powerful Melee Attacks. The Transfigured Tectonic Slam of Cataclysm expands this concept even further by consuming all your Endurance Charges at once to greatly improve your final Damage and Area of Effect. To make it worthwhile you will need lots of Endurance Charges at your disposal. Generating all your Endurance Charges between each Attack is not quite practical, and you can't use Ralakesh's Impatience, as you need to consume those Charges in order to boost your Slams. Fortunately, there is another smart way you can use this Skill.
The General's Cry is a Warcry that creates clones that perform a single Attack of your choosing before dissipating. Those Mirage Warriors are your perfect replicas - they even spawn with the same amount of active Endurance Charges as you. They attack only once, so losing all Charges after a single Attack is not a problem, you will just Summon a new one with a maximum amount of Endurance Charges ready to be spent again. The Mirage Warriors are not exactly Minions, instead, they are based on your personal attributes.
In Patch 3.24 to instantly use a Warcry you will have to use a new Skill Gem named Call to Arms, which will automatically Trigger the General's Cry when it is ready. The clones are created from the nearby Corpses, but they do not consume them in the process. To summon the necessary Corpses and Curse your Enemies you will use a simple Cast while Channeling setup with a Cyclone. It won't deal a lot of Damage, but it will be enough to defeat weaker Enemies and Leech Life and Mana for you.
You can also check our other Path of Exile builds right over here Odealo's Crafty Guides - Full List
1. Gameplay
Channeling Cyclone will automatically Cast your utility Spells and recover Life and Mana, but you don't need to use it all the time as it slows you down. The Call to Arms will automatically resummon your Mirrage Warriors, while Automation or Cast when Damage Taken will trigger the Molten Shell in case of Danger. For Movement use the Leap Slam.
|
|
|
|

2. Build's PROS & CONS
| PROS |
|
| CONS |
|
3. Leveling tips
The General's Cry is not exactly the best leveling Skill out there. You can use it as a secondary setup, but it might not be worth the hassle. It can be used by experienced players quite early, but we recommend using a basic Melee Setup with Two-handed Axe, it will be safer and probably faster. The best Skills to use would be the Boneshatter, Molten Strike, Smite, or Bladestorm, depending on what suits you the most. You can check out our Marauder Leveling Guide for PoE to see more tips!
Bandits:
Kill all Bandits to get an additional 2 Passive Tree Skill Points, or help Alira to get an early boost.
Leveling Skill Trees:
40 Points Passive Tree
You should branch out to nearby Damage Notables to improve your Leveling Speed. Try to keep your Weapon relevant to your level.
75 Points Passive Tree
Critical Strikes will be unreliable at this stage of the game, it is better to focus on regular Physical Damage Notables instead. We recommend swapping to General's Cry around level 85 when you have all the necessary Items.
4. Final Skill Tree, Ascendancy Points, and Pantheon
Final Skill Tree:
106 Points Final Passive Tree
121 Points Path of Building (PoB) link
Ascendancy points:
Preferably in this order:
- Undeniable
- Unflinching
- Unyielding
- Unbreakable
Pantheon:
Major God: Soul of the Brine King: You cannot be Stunned if you've been Stunned or Blocked a Stunning Hit in the past 2 seconds; 100% chance to Avoid being Frozen
Minor God: Soul of Ralakesh: 25% reduced Physical Damage over Time taken while moving; Moving while Bleeding doesn't cause you to take extra Damage
5. Final Gems links
| [DPS] Tectonic Slam of Cataclysm setup | |
 |
Tectonic Slam of Cataclysm - a Slam that releases a fiery fissure in front of you, and consumes your Endurance Charges to greatly increase its Damage and Radius. |
 |
General's Cry - a Warcry that creates Mirrage Warriors from nearby Corpses. The Mirage Warriors have the same amount of Endurance Charges as you. |
 |
Call to Arms - automatically Triggers linked Warcry when it is ready to use. |
 |
Pulverise Support - slows your Attack Speed, but greatly improves your Area of Effect and Damage. |
 |
Melee Physical Damage Support - increases your base Physical Damage. The Awakened version grants you a chance to Intimidate Enemies on Hit. |
 |
Elemental Damage with Attacks Support - boosts your Elemental Damage. You can use the Endurance Charge on Melee Stun Support instead if you have more than 10 Endurance Charges. |
| [Utility] Cyclone setup | |
 |
Cyclone - a Channeling Melee Skill that allows you to deal Damage and trigger Spells while Moving at a reduced rate. |
 |
Desecrate - summon Corpses that you need to create Mirrage Warriors. |
 |
Flammability - a potent Curse that lowers the Fire Resistance of affected Enemies. |
 |
Cast while Channeling Support - you will automatically Cast linked Spells while Channeling the Cyclone. |
 |
Infused Channeling Support - after Channeling for a short time you will gain a Buff that improves your Damage and Defense. |
 |
Lifetap Support - you can pay your Mana using the Life instead. You can also use the Life Gain on Hit Support if Mana sustain is not a problem. |
| [UTILITY] Aura setup | |
 |
Determination - a defensive Aura that grants you plenty of Armour Rating and allows you to scale it further. |
 |
Herald of Purity - a very good Herald Skill that improves your Physical Damage. You can also use the Herald of Ash if you have a relevant Circle of Anguish. |
 |
Blood and Sand - a Stance Skill that improves your Area Skills. |
 |
Precision - a very important Aura that grants you a lot of Accuracy Rating and Critical Strike Chance. |
| [UTILITY] Mark setup | |
 |
Assassin's Mark - a Curse that can be applied only to one Enemy at a time, it increases your Critical Strike Chance and Damage against the target. |
 |
Mark on Hit Support - you will automatically apply this Mark to your Enemies struck by any Attack. |
| [UTILITY] Movement and Guard setup | |
 |
Leap Slam - a quick jump towards the targeted location. The first jump in a row is faster. |
 |
Molten Shell - a Guard Skill that increases your Armour Rating and absorbs part of the incoming Damage. |
|
Lifetap Support - causes you to pay Mana Costs with your Life instead. |
 |
Cast when Damage Taken Support - after taking enough Damage you will trigger the Molten Shell. You can also use the Automation instead. |
| [UTILITY] Ancestral Totem setup | |
 |
Ancestral Warchief - summons a Totem that greatly improves your Melee Damage. Use the Vaal version for an even stronger Buff. |
 |
Culling Strike Support - your Totem will kill any Enemy under 10% of its maximum Life. |
|
|
6. Gear Setup
The Build uses a few Unique Items, but none of them are necessary for the functionality. Your main way of increasing the Damage will be increasing the amount of Endurance Charges, high Physical Damage converted into Fire Damage, and Critical Strikes. The Attack Speed doesn't directly affect your DPS, but you have to ensure your clones perform their Attack before being overwritten. It is also useful to make your Leap Slam faster. Endurance Charges will also boost your defense. On top of that, you will want a lot of maximum Life, Elemental Resistance, and Armour Rating, especially on the Body Armour. While important, Endurance Charges are not as impactful as it is for other Charge stackers, since you can't apply its limit to other Charge types nor use Arn's Anguish Belt to convert them into Brutal Charges. If possible, try to use Tattoos to convert your regular Attribute Nodes into All Attribute or Resistance Nodes to ease the gearing process.
|
Stat priorities on items:
|
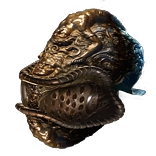 (Helmet) Abyssus - with so many Endurance Charges and Armour you can comfortably wear this Helmet without a big difference in your defense. On the other hand, your Damage will dramatically increase. (Helmet) Abyssus - with so many Endurance Charges and Armour you can comfortably wear this Helmet without a big difference in your defense. On the other hand, your Damage will dramatically increase. |
|
| +(20-25) to all Attributes Adds 40 to 60 Physical Damage to Attacks +(100-125)% to Melee Critical Strike Multiplier (100-120)% increased Armour (40-50)% increased Physical Damage taken |
|
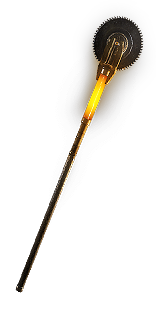 (Weapon) Rare Weapon - look for the highest Physical Damage, Critical Strike, and potentially Accuracy Rating or Elemental Penetration. The best base would be the Eventuality Rod for bonus Charges, but a regular Axe or Staff can be more cost-effective depending on the market. Remember that Attack Speed doesn't affect your DPS. (Weapon) Rare Weapon - look for the highest Physical Damage, Critical Strike, and potentially Accuracy Rating or Elemental Penetration. The best base would be the Eventuality Rod for bonus Charges, but a regular Axe or Staff can be more cost-effective depending on the market. Remember that Attack Speed doesn't affect your DPS. |
|
| Min. requirements: 700 Physical DPS 8% Base Critical Strike Chance Optional affixes: Attacks with this Weapon Penetrate #% Elemental Resistances Hits can't be Evaded Accuracy Rating |
|
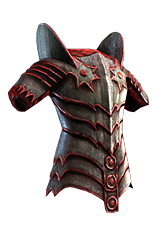 (Body Armour) Rare Armour - your Armour is a defensive piece that can grant you a lot of Damage too. The Hunter's Influence allows you to apply additional Curse and increase the base Critical Strike Chance of your Attacks. Other than that, look for a high maximum Life, Resistance, and Armour Rating. (Body Armour) Rare Armour - your Armour is a defensive piece that can grant you a lot of Damage too. The Hunter's Influence allows you to apply additional Curse and increase the base Critical Strike Chance of your Attacks. Other than that, look for a high maximum Life, Resistance, and Armour Rating. |
|
| Min. requirements: +80 to maximum Life +50% Resistance +1000 to Armour Rating Optional affixes: You can apply an additional Curse Attacks have +#% to Critical Strike Chance |
|
 (Body Armour) Dialla's Malefaction - you can disregard your defense and opt for the extra Quality for your main Setup, which will greatly improve your Damage. With the Ashes of the Stars, you will be able to Summon 9 Mirage Warriors. (Body Armour) Dialla's Malefaction - you can disregard your defense and opt for the extra Quality for your main Setup, which will greatly improve your Damage. With the Ashes of the Stars, you will be able to Summon 9 Mirage Warriors. |
|
| Gems can be Socketed in this Item ignoring Socket Colour Gems Socketed in Red Sockets have +2 to Level Gems Socketed in Green Sockets have +30% to Quality Gems Socketed in Blue Sockets gain 100% increased Experience Has no Attribute Requirements |
|
 (Belt) Rare Belt - on your Belt you should focus on maximum Life, lacking Resistances, Flask Charges, and Elemental Damage with Attacks. It should be a Stygian Vise base to use an additional Jewel. (Belt) Rare Belt - on your Belt you should focus on maximum Life, lacking Resistances, Flask Charges, and Elemental Damage with Attacks. It should be a Stygian Vise base to use an additional Jewel. |
|
| Min. requirements: +80 to maximum Life +50% Resistance +30% to Elemental Damage with Attacks Optional affixes: % increased maximum Life Flask Charges |
|
 (Jewel) Rare Abyss Jewel - on the extra Abyss Jewel you should look for maximum Life, Critical Strike Multiplier or Accuracy Rating, and cover lacking Resistances or Attributes. (Jewel) Rare Abyss Jewel - on the extra Abyss Jewel you should look for maximum Life, Critical Strike Multiplier or Accuracy Rating, and cover lacking Resistances or Attributes. |
|
| Min. requirements: +30 to maximum Life Optional affixes: Accuracy Critical Strike Multiplier Attributes Resistances |
|
 (Boots) Dawnstrider - those Boots will double the effect of the Ancestral Warchief, and make it a bit more reliable. You should Corrupt them to gain additional Endurance Charge, which should be fairly easy considering their price. (Boots) Dawnstrider - those Boots will double the effect of the Ancestral Warchief, and make it a bit more reliable. You should Corrupt them to gain additional Endurance Charge, which should be fairly easy considering their price. |
|
| +(80-100) to maximum Life 30% increased Movement Speed 100% increased Effect of Buffs your Ancestor Totems grant while Active Buffs from Active Ancestor Totems Linger for 4 seconds Maximum 1 Buff from an Active Ancestor Totem at a time |
|
| Recommended Corrupted Implicit: +1 to maximum Endurance Charge |
|
 (Boots) Ralakesh's Impatience - you can use those Boots for convenience, but you still need to generate Endurance Charges for consumption anyway. Getting the recommended Corruption will be expensive. (Boots) Ralakesh's Impatience - you can use those Boots for convenience, but you still need to generate Endurance Charges for consumption anyway. Getting the recommended Corruption will be expensive. |
|
| +(15-25)% to Cold Resistance +(15-25)% to Chaos Resistance Count as having maximum number of Endurance Charges Count as having maximum number of Frenzy Charges Count as having maximum number of Power Charges |
|
 (Gloves) Rare Gloves - use Rare Gloves with bonuses to maximum Life, Resistance, and Armour. You can also include Accuracy Rating or Attack Speed. Use the Eldritch Influence to apply Fire Exposure with your Hits. (Gloves) Rare Gloves - use Rare Gloves with bonuses to maximum Life, Resistance, and Armour. You can also include Accuracy Rating or Attack Speed. Use the Eldritch Influence to apply Fire Exposure with your Hits. |
|
| Min. requirements: +80 to maximum Life +50% Resistance Inflict Fire Exposure on Hit, applying -10 to Fire Resistance Optional affixes: Accuracy Rating Attack Speed % Increased Damage |
|
 (Amulet) Ashes of the Stars - the additional Quality from this Amulet is very powerful for this Build. It increases the amount of Mirrage Warriors you can Summon, lowers the Cooldown of the General's Cry, and improves the Endurance Charge bonus of the Tectonic Slam. (Amulet) Ashes of the Stars - the additional Quality from this Amulet is very powerful for this Build. It increases the amount of Mirrage Warriors you can Summon, lowers the Cooldown of the General's Cry, and improves the Endurance Charge bonus of the Tectonic Slam. |
|
| +(10-16) to all Attributes (5-10)% increased Experience Gain of Gems +1 to Level of all Skill Gems +(20-30)% to Quality of all Skill Gems |
|
 (Ring) Circle of Guilt - this Ring offers very powerful modifiers when you use Herald of Purity. Conveniently enough, it is also the easiest source of additional Endurance Charges via Synthesised Implicits. You can also use the Circle of Anguish with the Herald of Ash instead. (Ring) Circle of Guilt - this Ring offers very powerful modifiers when you use Herald of Purity. Conveniently enough, it is also the easiest source of additional Endurance Charges via Synthesised Implicits. You can also use the Circle of Anguish with the Herald of Ash instead. |
|
| +(10-20) to all Attributes Adds (8-10) to (13-15) Physical Damage +(350-400) to Armour <Two Random Herald of Purity modifiers> Recommended Herald modifiers: Herald of Purity has (40-60)% increased Buff Effect (40-60)% increased Physical Damage while affected by Herald of Purity |
|
 (Ring) Rare Ring - you might need to use a Rare Ring with tons of maximum Life and lacking Resistances or Attributes. Try to include bonuses to Accuracy, Elemental Damage, and Mana Cost Reduction. It also can provide you with the Endurance Charge, but it will be very expensive. (Ring) Rare Ring - you might need to use a Rare Ring with tons of maximum Life and lacking Resistances or Attributes. Try to include bonuses to Accuracy, Elemental Damage, and Mana Cost Reduction. It also can provide you with the Endurance Charge, but it will be very expensive. |
|
| Min. requirements: +80% to Elemental Resistances +50 to Maximum Life Optional affixes: Attributes +1 to Maximum Endurance Charges Critical Strike Multiplier Elemental Damage with Attacks Physical Damage to Attacks Accuracy Rating |
|
 (Jewel) Rare Jewels - on your Jewels you should look for bonuses to maximum Life, Elemental Resistances and Attributes, and at least one modifier with Critical Strike Multiplier. They can also grant you a decent amount of Accuracy Rating. (Jewel) Rare Jewels - on your Jewels you should look for bonuses to maximum Life, Elemental Resistances and Attributes, and at least one modifier with Critical Strike Multiplier. They can also grant you a decent amount of Accuracy Rating. |
|
| Recommended affixes: increased maximum Life Attribute Resistances Critical Strike Multiplier increased Accuracy |
|
 (Jewel) Large Cluster Jewel - you can source your Leech from the Feed the Fury and Fuel the Fight Notables. If you can acquire it from other sources, try to focus on Staff Notables. (Jewel) Large Cluster Jewel - you can source your Leech from the Feed the Fury and Fuel the Fight Notables. If you can acquire it from other sources, try to focus on Staff Notables. |
|
| Recommended affixes: 1 Added Passive Skill is Feed the Fury 1 Added Passive Skill is Fuel the Fight 1 Added Passive Skill is Martial Prowess 1 Added Passive Skill is Overlord 1 Added Passive Skill is Weight Advantage |
|
 (Jewel) Medium Cluster Jewel - Warcry Notables offer you amazing utility, as you will use Warcry constantly. The Mob Mentality will generate your Charges, Lead By Example grants you Onslaught Buff for better Clear Speed, Warning Call greatly improves your Armour, while the Rattling Bellow offers massive amounts of Damage. (Jewel) Medium Cluster Jewel - Warcry Notables offer you amazing utility, as you will use Warcry constantly. The Mob Mentality will generate your Charges, Lead By Example grants you Onslaught Buff for better Clear Speed, Warning Call greatly improves your Armour, while the Rattling Bellow offers massive amounts of Damage. |
|
| Recommended affixes: 1 Added Passive Skill is Lead By Example 1 Added Passive Skill is Mob Mentality 1 Added Passive Skill is Rattling Bellow 1 Added Passive Skill is Warning Call |
|
 (Jewel) Watcher's Eye - the bonuses related to Determination and Precision are very powerful, but mixing them might be quite expensive. You can also include a level 1 Vitality in your Setup to benefit from its modifiers. (Jewel) Watcher's Eye - the bonuses related to Determination and Precision are very powerful, but mixing them might be quite expensive. You can also include a level 1 Vitality in your Setup to benefit from its modifiers. |
|
| (4-6)% increased maximum Energy Shield (4-6)% increased maximum Life (4-6)% increased maximum Mana <Two or Three random aura modifiers> Recommended Aura mods: (5-8)% additional Physical Damage Reduction while affected by Determination You take (60-40)% reduced Extra Damage from Critical Strikes while affected by Determination (40-60)% increased Attack Damage while affected by Precision +(20-30)% to Critical Strike Multiplier while affected by Precision Gain a Flask Charge when you deal a Critical Strike while affected by Precision |
|
 (Jewel) Lethal Pride - this Jewel adds certain bonuses to nearby Notables you will pick anyway. There are a lot of useful modifiers, such as Melee Critical Strikes, Extra Fire Damage, or Chance to deal Double Damage. You can also use the Brutal Restraint to get bonuses to Elemental Damage, Critical Strike Chance, Accuracy, and Flask Charges. (Jewel) Lethal Pride - this Jewel adds certain bonuses to nearby Notables you will pick anyway. There are a lot of useful modifiers, such as Melee Critical Strikes, Extra Fire Damage, or Chance to deal Double Damage. You can also use the Brutal Restraint to get bonuses to Elemental Damage, Critical Strike Chance, Accuracy, and Flask Charges. |
|
| Commanded leadership over (10000-18000) warriors under (Akoya-Kaom-Rakiata) Passives in radius are Conquered by the Karui Historic |
|
 (Jewel) Sublime Vision - a noteworthy Jewel, it can raise your Endurance Charge limit by 1. Non-aura Reservation Skills such as Heralds are still available, however, you will have to invest a lot more into Accuracy Rating due to the lack of Precision. (Jewel) Sublime Vision - a noteworthy Jewel, it can raise your Endurance Charge limit by 1. Non-aura Reservation Skills such as Heralds are still available, however, you will have to invest a lot more into Accuracy Rating due to the lack of Precision. |
|
| +1 to Maximum Endurance Charges while affected by Determination Aura Skills other than Determination are Disabled Auras from your Skills have (20-40)% increased Effect on you |
|
  (Jewel) Forbidden Flame&Flesh - the Attack performed by Mirage Warriors counts as Exerted, so the War Bringer Notable from the Berserker Ascendency can grant you 50% more Damage. (Jewel) Forbidden Flame&Flesh - the Attack performed by Mirage Warriors counts as Exerted, so the War Bringer Notable from the Berserker Ascendency can grant you 50% more Damage. |
|
| Allocates <Random Ascendancy Notable> if you have the matching modifier on Forbidden Flesh Allocates <Random Ascendancy Notable> if you have the matching modifier on Forbidden Flame |
|
 (Flask) Bottled Faith - the best offensive Flask for almost any Build, it increases your Critical Strike Chance and Damage against Enemies standing on the Consecrated Ground it creates upon use. (Flask) Bottled Faith - the best offensive Flask for almost any Build, it increases your Critical Strike Chance and Damage against Enemies standing on the Consecrated Ground it creates upon use. |
|
| (30-15)% reduced Duration Consecrated Ground created by this Flask has Tripled Radius Consecrated Ground created during Effect applies (7-10)% increased Damage taken to Enemies (100-150)% increased Critical Strike Chance against Enemies on Consecrated Ground during Effect |
|
|
Suggested Flasks:
|
|
    |
|
|
If you have any other build requests please leave that in the comments below. We are always open to suggestions and constructive feedback.
Pictures used in this article are the intellectual property of Grinding Gear Games.
