Storm Burst Totem Hierophant
Storm Burst of Repulsion Totem Hierophant channels nonstop via totems, scaling cast speed and damage for strong DPS and smooth gameplay.Storm Burst of Repulsion Totem
Hierophant build
Updated for Patch 3.28
The Best Crafty Guides by Odealo
| Guide notes |
| April 11, 2026 -Updated for Patch 3.28 to include the new Transfigured option and greatly improve the Damage in the process |
| Build overview | |||
| Tags: [TOTEM] [ELEMENTAL] [LIFE] [STARTER] | |||
|
Budget: Defenses: |
|
Boss DPS: AoE: |
|
The Storm Burst is a Channelling Spell that creates Orbs jumping around during Channel, which deal Damage with every jump and explode once their Duration ends, or immediately if you stop Channeling. The explosion Damage is massively boosted by the amount of remaining Duration. The Transfigured Storm Burst of Repulsion is a strictly better version of the original Spell in almost every aspect. It deals more base Damage, it is faster to Cast, and the Orbs jump outward while Channelling, which is great for AoE Clear. It would be a problem for Single-target Damage if you were to cast it manually, but using Totems is a much more appealing option. Unlike other Totem Builds, you will continuously resummon your Totems while fighting Bosses to ensure all your Storm Bursts hit the target before running too far out. This trick is not important while fighting weaker opponents.
The Damage is very high, but slightly delayed due to Totem Placement Speed, jumping Orbs, and delayed explosions, so you will need to put more effort into survivability. Our recommendation is to cap your Block Chance against Spells and Attacks, and use Mind Over Matter Keystone and Energy Shield to protect your Life. As a Hierophant, you will also have permanent 4 Endurance Charges to reduce incoming Damage. and excellent Regeneration.
You can also check our other Path of Exile builds right over here Odealo's Crafty Guides - Full List
1. Gameplay
For regular clearing, you can simply place down Totems and let them channel Storm Burst for you. Against Bosses, you should frequently place down new Totems to overwrite previous ones and detonate created Storm Bursts. You should also use Assassin's Mark and stay inside the Frost Shield to improve your Critical Strikes.
|
|
|
|

2. Build's PROS & CONS
| PROS |
|
| CONS |
|
3. Leveling tips
Follow our in-depth leveling guide - Templar Leveling Guide using Toems.
Bandits:
Kill all Bandits or help Alira to ease gearing.
4. Final Skill Tree, Ascendancy Points, and Pantheon
Final Skill Tree:
117 Points Final Skill Tree (doesn't include Unique nor Cluster Jewels)
121 Points Path of Building (PoB) link
Ascendancy points:
Preferably in that order:
- Pursuit of Faith
- Ritual of Awakening
- Arcane Blessing
- Conviction of Power
Pantheon:
Major God: Soul of the Brine King: You cannot be Stunned if you've been Stunned or Blocked a Stunning Hit in the past 2 seconds; 100% chance to Avoid being Frozen
Minor God: Soul of Shakari: You cannot be Poisoned while there are at least 3 Poisons on you; 50% less Duration of Poisons on You
5. Final Gems links
| [DPS] Storm Burst Totem setup | |
 |
Storm Burst of Repulsion - A Channeling Spell dealing Physical Damage, half of which is converted to Lightning. It creates orbs that rapidly jump outwards and explode after Channeling ends. |
 |
Spell Totem Support |
 |
More Duration Support |
 |
Invert the Rules Support |
 |
Increased Critical Damage Support |
 |
Multiple Totems Support |
 |
Infused Channelling/Power Charge on Critical/Physical to Lightning Support - potential Imbue options |
| [UTILITY] Raise Spectre setup | |
 |
Raise Spectre - you will need two special Corpses obtainable through Ritual only - a Spirit of Misfortune and Pain Artist. They will grant you a free Wrath and Zealotry Aura, and make your Lightning Damage Lucky. |
 |
Minion Life Support |
 |
Meat Shield Support |
| [UTILITY] Aura setup | |
 |
Haste - you can use Haste or Hatred Auras to boost your Damage, or Purity of Elements, Grace, or Determination to improve defense. You can pick only one Aura. |
 |
Eternal Blessing Support |
| [UTILITY] Arcane Cloak setup | |
 |
Arcane Cloak - Arcane Cloak protects you from Hit damage by transforming the majority of your Current Mana into a shield that prevents a big portion of incoming damage. It grants Lightning Damage too. |
 |
Convocation - recalls your Spectres to your location and grants them Life Regeneration. |
 |
Automation - triggers linked instant Spells whenever they are ready to use. |
 |
Increased Duration Support |
| [UTILITY] Wrath setup | |
 |
Wrath - Wrath makes you deal more and adds Lightning Damage to your Spells |
|
Eternal Blessing - Linked Aura will reserve no Mana and be slightly less effective |
| [UTILITY] Curse setup | |
 |
Assassin's Mark - improves your Critical Strikes against a single Enemy. Use it manually against Bosses. |
| [UTILITY] Cwdt setup | |
 |
Frost Shield - greatly improves your survivability and Critical Strike Chance if you stay in its area. You can automate it or cast manually. |
 |
Cold Snap - it won't deal Damage due to the Ancestral Bond Keystone, but always Chills enemies by 10%. |
 |
Lightning Golem - improves your Cast Speed and Mana Regeneration. |
 |
Cast when Damage Taken Support |
| [MOBILITY] Frostblink | |
 |
Frostblink - a basic mobility Spell that allows you to teleport |
| [MOBILITY] Shield Charge setup | |
 |
Shield Charge - a Movement Attack that moves you towards the targeted location and scales with your Movement and Attack Speed. |
 |
Faster Attacks Support |
|
|
6. Gear Setup
The build requires a few Unique Items - Soul Mantle, Self-Flagellation, and Viridi's Veil are the most important. It's a very popular way in which you can make yourself Hexproof, make the Curses affecting you beneficial, and bear a lot of Curses at once at all times. Your Rare Items should provide Resistances, Maximum Life, and Maximum Mana - these are the most important defensive stats. For offense seek Spell Damage, Cast Speed, and Critical Strike modifiers. To convert your Damage you can use Gloves Affix, Lighting Mastery, and/or Watcher's Eye. The Gem Level of Spell Burst is important too, try to get at least two extra levels for it. Attribute Requirements are somewhat hard to meet - you will need a lot of Dexterity and a bit of Strength on your Gear to use all Gems at full potential.
|
Stat priorities on items:
|
 (Helmet) Crown of the Inward Eye - a very useful Helmet that improves all your defenses at the same time, and grants you extra Damage based on the Mana and Energy Shield increases. (Helmet) Crown of the Inward Eye - a very useful Helmet that improves all your defenses at the same time, and grants you extra Damage based on the Mana and Energy Shield increases. |
|
| 333% increased Armour and Energy Shield (9-21)% increased maximum Life, Mana and Global Energy Shield Transfiguration of Soul Transfiguration of Body Transfiguration of Mind |
|
 (Weapon) Rare Wand - your Wand should provide you with large quantities of bonuses suitable for Cast Spells, such as Spell Damage, Cast Speed, Critical Strikies, or additional Gem Levels. The more the better. (Weapon) Rare Wand - your Wand should provide you with large quantities of bonuses suitable for Cast Spells, such as Spell Damage, Cast Speed, Critical Strikies, or additional Gem Levels. The more the better. |
|
| Min. requirements: 100% increased Lightning Spell Damage +25% increased Cast Speed +1 to Level of all Lightning/Physical Spell Skill Gems Optional affixes: % chance to deal Double Damage Adds # Lightning Damage to Spells % increased Spell Critical Strike Chance % to Global Critical Strike Multiplier |
|
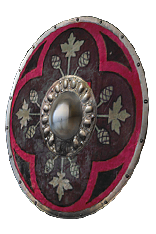 (Weapon) Rare Shield - you should always use a Shaper-influenced Shield to raise your Totem limit by 1. The rest of modifiers can be used to improve your defense or offense depending on your budget and preferences. (Weapon) Rare Shield - you should always use a Shaper-influenced Shield to raise your Totem limit by 1. The rest of modifiers can be used to improve your defense or offense depending on your budget and preferences. |
|
| Min. requirements: +1 to maximum number of Summoned Totems 30% Chance to Block Attack Damage Optional affixes: #% Chance to Block Spell Damage +1 to Level of all Lightning/Physical Spell Skill Gems % chance to deal Double Damage % increased Spell Critical Strike Chance Maximum Life Elemental Resistance |
|
 (Body Armour) Soul Mantle - this Armour allows you to use one additional Support Gem in your main Setup, greatly boosting your Damage. However, you will need to find a way to become immune to Curses. (Body Armour) Soul Mantle - this Armour allows you to use one additional Support Gem in your main Setup, greatly boosting your Damage. However, you will need to find a way to become immune to Curses. |
|
| Socketed Gems are Supported by Level 20 Spell Totem (20-25)% increased Spell Damage (100-120)% increased Energy Shield (20-30)% increased Totem Life Inflicts a random Hex on you when your Totems die |
|
 (Body Armour) Cloak of Defiance - provides a large amount of Mana and Regeneration, while also granting the Mind Over Matter Keystone, which allows you to use a Timeless Jewel in its place on the Passive Tree. (Body Armour) Cloak of Defiance - provides a large amount of Mana and Regeneration, while also granting the Mind Over Matter Keystone, which allows you to use a Timeless Jewel in its place on the Passive Tree. |
|
| (300-400)% increased Evasion and Energy Shield +(100-150) to maximum Mana Regenerate 1% of Mana per second Mind Over Matter |
|
 (Boots) Rare Boots - a basic Boots with high Movement Speed, Life, Mana, and Resistances or Strength. You can also get Ailment Avoidance here if necessary. (Boots) Rare Boots - a basic Boots with high Movement Speed, Life, Mana, and Resistances or Strength. You can also get Ailment Avoidance here if necessary. |
|
| Min. requirements: 30% Movement Speed +100 to Maximum Life 60% Total Elemental Resistances Optional affixes: maximum Mana #% increased Action Speed Gain #% of Physical Damage as Extra Lightning Damage Chaos Resistance |
|
 (Gloves) Algor Mortis - those Gloves can grant you tons of Damage, and be potentially Corrupted to raise your base Spell Critical Strike Chance for even more Damage. However, Chilling Areas can be annoying to maintain. (Gloves) Algor Mortis - those Gloves can grant you tons of Damage, and be potentially Corrupted to raise your base Spell Critical Strike Chance for even more Damage. However, Chilling Areas can be annoying to maintain. |
|
| +(50-70) to maximum Energy Shield +(15-20)% to Cold and Lightning Resistances (20-30)% chance to Sap Enemies in Chilling Areas Enemies in your Chilling Areas take (25-35)% increased Lightning Damage (15-20)% increased Effect of Non-Damaging Ailments |
|
| Min. requirements: +100 to Maximum Life 80% Total Elemental Resistances 10% of Physical Damage Converted to Lightning Damage Optional affixes: Maximum Mana % chance to Unnerve Enemies for 4 seconds on Hit Chaos Resistance Attributes |
|
 (Belt) The Tides of Time - improves your Flask sustain and makes them stronger. The improved Life Recovery is very useful for Builds without access to Leech. (Belt) The Tides of Time - improves your Flask sustain and makes them stronger. The improved Life Recovery is very useful for Builds without access to Leech. |
|
| 100% increased Life Recovery from Flasks 100% increased Mana Recovery from Flasks Flasks applied to you have 25% increased Effect Life Flasks gain (0-3) Charges every 3 seconds Mana Flasks gain (0-3) Charges every 3 seconds Utility Flasks gain (0-3) Charges every 3 seconds |
|
 (Belt) Screams of the Desiccated - the Greater Lightning Shrine grants 30% of Physical Damage as Extra Lightning, which is very powerful for this Build. You can combine it with a defensive Shrine of your choice. You can also opt for the more expensive Diamond, Acceleration, or Echoing Shrine if your Budget allows for it. (Belt) Screams of the Desiccated - the Greater Lightning Shrine grants 30% of Physical Damage as Extra Lightning, which is very powerful for this Build. You can combine it with a defensive Shrine of your choice. You can also opt for the more expensive Diamond, Acceleration, or Echoing Shrine if your Budget allows for it. |
|
| +(25-40) to maximum Life +(23-32) to Intelligence +(23-37)% to Chaos Resistance <Random shrine buff modifier> |
|
 (Amulet) Ashes of the Stars - the best Amulet for this Build, since the Quality of Storm Burst improves its base Duration, which greatly improves the Damage of exploding orbs. (Amulet) Ashes of the Stars - the best Amulet for this Build, since the Quality of Storm Burst improves its base Duration, which greatly improves the Damage of exploding orbs. |
|
| +(10-16) to all Attributes (5-10)% increased Experience Gain of Gems +1 to Level of all Skill Gems +(20-30)% to Quality of all Skill Gems |
|
 (Ring) Timeclasp - a cheap option to improve your Cast Speed and Duration of your Skills. Extra Recoup and immunity to Temporal Chains is also useful to have. Ultimately, a proper Rare Ring will be better, but also more expensive. (Ring) Timeclasp - a cheap option to improve your Cast Speed and Duration of your Skills. Extra Recoup and immunity to Temporal Chains is also useful to have. Ultimately, a proper Rare Ring will be better, but also more expensive. |
|
| +(15-25) to maximum Energy Shield (10-15)% increased Attack Speed (10-15)% increased Cast Speed (6-12)% of Damage taken Recouped as Life (6-12)% of Damage taken Recouped as Mana (-20-20)% increased Skill Effect Duration Unaffected by Temporal Chains |
|
 (Ring) Rare Ring - you will need a lot of Life, Resistance, and Attributes, ideally boosted by Catalysts too. To boost your damage, look for Cast Speed and Critical Strike Multiplier. (Ring) Rare Ring - you will need a lot of Life, Resistance, and Attributes, ideally boosted by Catalysts too. To boost your damage, look for Cast Speed and Critical Strike Multiplier. |
|
| Min. requirements: +80 to Maximum Life +60 to Maximum Mana 80% Total Elemental Resistances Optional affixes: Global Critical Strike Multiplier #% increased Cast Speed Attributes |
|
 (Jewel) Medium Cluster Jewel - the Sleepless Sentry grants you Onslaught Buff, which is great for Damage and mobility. The second Notable is more flexible; the Ancestral Echo usually grants the most Damage. (Jewel) Medium Cluster Jewel - the Sleepless Sentry grants you Onslaught Buff, which is great for Damage and mobility. The second Notable is more flexible; the Ancestral Echo usually grants the most Damage. |
|
| Recommended affixes: 1 Added Passive Skill is Sleepless Sentries 1 Added Passive Skill is Ancestral Echo |
|
 (Jewel) Militant Faith - Get the Dominus Variant. You won't be able to easily generate any Frenzy Charges, so you might as well get more Damage from the existing Power Charges. (Jewel) Militant Faith - Get the Dominus Variant. You won't be able to easily generate any Frenzy Charges, so you might as well get more Damage from the existing Power Charges. |
|
| Carved to glorify (2000-10000) new faithful converted by High Templar Dominus Passives in radius are Conquered by the Templars Historic <two random mods of devotion> |
|
 (Jewel) Sublime Vision - you will use only one Aura. This Jewel will greatly improve its effect and grant an additional bonus on top of that. (Jewel) Sublime Vision - you will use only one Aura. This Jewel will greatly improve its effect and grant an additional bonus on top of that. |
|
| 10% increased Action Speed while affected by Haste Always inflict Brittle while affected by Hatred Aura Skills other than Haste are Disabled Auras from your Skills have (20-40)% increased Effect on you |
|
 (Jewel) The Red Nightmare - this Jewel grants up to 19% Attack Block Chance when socketed near the Endurance Notable. You will also need to Tattoo nearby Strength Nodes with extra Fire Resistance. (Jewel) The Red Nightmare - this Jewel grants up to 19% Attack Block Chance when socketed near the Endurance Notable. You will also need to Tattoo nearby Strength Nodes with extra Fire Resistance. |
|
| Gain (6-10)% of Fire Damage as Extra Chaos Damage Passives granting Fire Resistance or all Elemental Resistances in Radius also grant Chance to Block Attack Damage at 50% of its value |
|
 (Jewel) The Light of Meaning - you will need the Duration Notables, so you will naturally patch through the best spot on the Passive Tree for this Jewel. It grants a lot of Damage. (Jewel) The Light of Meaning - you will need the Duration Notables, so you will naturally patch through the best spot on the Passive Tree for this Jewel. It grants a lot of Damage. |
|
| Passive Skills in Radius also grant 6% increased Lightning Damage | |
 (Jewel) Unnatural Instinct - this Jewel supplements the previous Jewel by picking up the empowered Unallocated Passives. It also catches increased AoE, Duration, and Physical Damage in its radius. (Jewel) Unnatural Instinct - this Jewel supplements the previous Jewel by picking up the empowered Unallocated Passives. It also catches increased AoE, Duration, and Physical Damage in its radius. |
|
| Allocated Small Passive Skills in Radius grant nothing Grants all bonuses of Unallocated Small Passive Skills in Radius |
|
 (Jewel) Watcher's Eye - while you are using only one Aura, your Spectres provide two extra Auras to benefit from. The Wrath modifiers are especially powerful for your Damage, but the Phasing granted by Haste is very noticeable too. (Jewel) Watcher's Eye - while you are using only one Aura, your Spectres provide two extra Auras to benefit from. The Wrath modifiers are especially powerful for your Damage, but the Phasing granted by Haste is very noticeable too. |
|
| (4-6)% increased maximum Energy Shield (4-6)% increased maximum Life (4-6)% increased maximum Mana <Two or Three random aura modifiers> You have Phasing while affected by Haste (70-100)% increased Critical Strike Chance while affected by Wrath (40-60)% increased Lightning Damage while affected by Wrath Damage Penetrates (10-15)% Lightning Resistance while affected by Wrath Gain (15-25)% of Physical Damage as Extra Lightning Damage while affected by Wrath (25-40)% of Physical Damage Converted to Lightning Damage while affected by Wrath (10-15)% increased Cast Speed while affected by Zealotry Consecrated Ground you create while affected by Zealotry causes enemies to take (8-10)% increased Damage (100-120)% increased Critical Strike Chance against Enemies on Consecrated Ground while affected by Zealotry Critical Strikes Penetrate (8-10)% of Enemy Elemental Resistances while affected by Zealotry |
|
 (Flask) Rumi's Concoction - a very useful Flask that improves your Block Chance for Spells and Attacks. A bit of Armour is useful to have too. (Flask) Rumi's Concoction - a very useful Flask that improves your Block Chance for Spells and Attacks. A bit of Armour is useful to have too. |
|
| +1500 to Armour +(8-12)% Chance to Block Attack Damage during Flask effect +(4-6)% Chance to Block Spell Damage during Flask effect |
|
 (Flask) Bottled Faith - the best Flask to improve your Damage. It boosts your Critical Strikes and makes Enemies more vulnerable. It only affects foes standing on the Consecrated Ground. (Flask) Bottled Faith - the best Flask to improve your Damage. It boosts your Critical Strikes and makes Enemies more vulnerable. It only affects foes standing on the Consecrated Ground. |
|
| Creates Consecrated Ground on Use (30-15)% reduced Duration Consecrated Ground created by this Flask has Tripled Radius Consecrated Ground created during Effect applies (7-10)% increased Damage taken to Enemies (100-150)% increased Critical Strike Chance against Enemies on Consecrated Ground during Effect |
|
|
Other suggested Flasks:
|
|
   |
|
|
If you have any other build requests please leave that in the comments below. We are always open to suggestions and constructive feedback.
Pictures used in this article are the intellectual property of Grinding Gear Games.
