Static Strike Wardstacker Gladiator Build
Static Strike build which uses Celestial Mathematics and stacks Ward to snapshot huge damage, offering insane DPS, AoE, and near immortalityStatic Strike Wardstacker
Gladiator/Olroth Bloodline Build
Updated for Patch 3.28
The Best Crafty Guides by Odealo
| Guide notes |
| March 27, 2026 -Build created |
| Build overview | |||
| Tags: [ATTACK] [ELEMENTAL] [LIFE] [WARD] | |||
|
Budget: Defenses: |
|
Boss DPS: AoE: |
|
The star of this build is Celestial Mathematics Keystone, obtainable only from Heroic Tragedy Jewel. It consumes (breaks) all your Ward when you Attack, to grant Flat Cold Attack Damage. The more Ward you have, the more damage it grants. At 30k Ward, which we expect you to achieve, it's 7.5k Flat Cold damage, added. To visualize that crazy number: that's 8 times the amount from a perfect Forbidden Shako with Ice Bite at 10 Frenzy Charges. The only catch is, you're restricted by the Ward Breaking with each Attack - you need something that doesn't need high Attack Speed to be effective, because you have to wait for the Ward to restore before swinging again. Static Strike is the soundest choice, because it requires attacking only once every 8 seconds (after allocating some passives for Increased Skill Effect Duration). It will continuously fire beams at enemies, which snapshot the bonus from Celestial Mathematics. They also snapshot the Exerted buff from Ambush. Ambush empowers your next Attack with +50% base Crit Chance and +140% Crit Multiplier. Now all that's left is to specialize further in Crit Multilpier, Cold Penetration, and increased Cold Damage. Static Strike's beams can also Chain, making it an excellent tool for mapping and quickly stabilizing Breaches.
Ward is a fragile defense layer, so we naturally choose Gladiator with More Than Skill passive and the Azadi Crest Shield. Ward will not be broken by enemies if the Attack gets Blocked, and this setup Blocks literally 99% of Attack and almost 99% of Spell hits (after Blocking in the past 4 seconds). It already makes for one of the most durable builds in the game. The Attacks that slip through your Block Chance still have to get through 30k of Ward (most of them won't). The build is less suited to deal with DoTs, so to patch up this weak point, get select Arakaali Patheon buff, Boon of the Mountain, some Life Regeneration, and maybe even DoT Mastery. The durability is enhanced by Rare gear pieces, Fortify, potential Crab Barriers, and Flesh and Stone. It's overall one of the most enjoyable, durable, fast, and deadly builds out there, as long as you remember to avoid certain game mechanics with unavoidable DoTs. The bad news is the price of some of the items. Ynda's Stand and its Body Armour are the most expensive ones. There are also Jewels and Runic equipment. We can't recommend it for a starter.
You can also check our other Path of Exile builds: Odealo's Crafty Guides - Full List
1. Gameplay
It has two buttons - Static Strike and Ambush. Use Ambush to buff Static Strike. It teleports you to an enemy, and if there is none, it does nothing. Be sure you land your Hit on an enemy with your Static Strike. You can then relax for the next 8 seconds and just run around. Assassin's Mark, Molten Shell, Stone Golem, and Hydrosphere are all triggered with each Attack (linked to Cast on Ward Break). Phase Run is automated, but do turn it off on pinnacle bosses. You should also swap the Greater Chain Support Gem for something better when picking a fight with a strong enemy.
|
|
|
|

2. Build's PROS & CONS
| PROS |
|
| CONS |
|
3. Levelling tips
Start as a Bleed Gladiator. It uses Lacerate early on, but after getting enough Block Chance and allocating More Than Skill, you can switch to Eviscerate, which is the best Skill for this role. At this point, you can start specializing in Ward, once you have your Spell Block Chance capped at over 75%. It will provide a purely defensive layer, since there is no way to scale Bleed with Cold Damage from Celestial Mathematics - don't allocate it until you have over 15k Ward. Then, get the required Unique items and switch to Static Strike.
Bandits:
We recommend killing all the Bandits for the extra Passive Point
4. Final Skill Tree, Ascendancy Points, and Pantheon
Final Skill Tree:
114 Points Final Skill Tree (does not include Jewels)
123 Points Path of Building (PoB) link
Ascendancy points:
Preferably in that order:
- Determined Survivor
- More Than Skill
- Runic Boon of the Mountain or Sun
- Enhanced Starlight (only if the difference between your Ward and Life is not too stark)
Pantheon:
Major God: Soul of Arakaali 10% reduced Damage taken from Damage Over Time
Minor God: Soul of Abberath 60% less Duration of Ignite on You; Unaffected by Burning Ground
5. Final Gems links
| [DPS] Static Strike setup | |
 |
Static Strike - Attack the enemy once every several seconds to continuously hit enemies with beams of lightning, which do count as proper Melee Attacks. |
 |
Elemental Damage with Attacks Support - More Elemental Damage with Attacks. |
 |
Hypothermia Support - Deal more damage against Chilled enemies, which they most definitely always are due to your big Cold Damage and 100% Crit Chance. |
 |
Increased Critical Damage Support - Ambush-snapshotted Static Strike always hits critically, so naturally go for Crit Multiplier. |
 |
Chain Support - Greater Chain is unparalleled when mapping, but do swap it for Cold Penetration or Close Combat when fighting pinnacle bosses, since there it does nothing. |
 |
Fortify Support - More Damage and Fortify on Hit, which you must have. You can replace it with Inspiration or Bonechill if you're fortified already. |
| [UTILITY] Reservation setup | |
 |
Herald of Ice - Explosions on kill that immensely help during mapping. Its passive buff is rather weak here. |
 |
Tempest Shield - Tempest Shield grants Spell Block Chance and Shock immunity. It will help you cap Spell Block Chance at 78%. |
 |
Precision - Adds Accuracy and increases Critical Strike Chance. |
 |
Enlighten Support - Linked Skills Reserve less Mana. |
| [UTILITY] other Reservation skills | |
 |
Flesh and Stone - Stay in Sand Stance to take reduced Physical Damage from nearby enemies. |
 |
Arctic Armour - An optional Spell granting Freeze immunity and reducing Fire and Physical Damage if standing still, which you should rarely do. |
 |
Aspect of the Crab - You lose Crab Barriers only if the hit goes through your block, exactly like it is with Ward. Use it to take even less damage from these stray hits. |
| [UTILITY] Cast on Ward Break setup | |
 |
Cast on Ward Break - Casts linked Spells when your Ward breaks, meaning also each time you use an Attack. |
 |
Transfusion Support - Linked Skills cost Life instead of Mana. Keep it at level 1 and don't add any Quality. It's better than Lifetap. |
 |
Assassin's Mark - Marked enemy takes increased damage from Critical Strikes, which is always. |
 |
Molten Shell - A Guard Spell that absorbs a portion of incoming Hit Damage. You can replace it with Steelskin if your Armour is low. |
| [UTILITY] Cast on Ward Break setup | |
|
Cast on Ward Break |
|
Transfusion Support |
 |
Summon Stone Golem - Stone Golem increases your Defences if it's alive, which includes your Ward. |
 |
Hydrosphere - Applies Exposure, which reduces Cold and Lightning Resistance. You can hit it. |
| [UTILITY] Automation setup | |
 |
Automation - Automatically triggers the linked instant Spell with a Cooldown. |
 |
Phase Run - Makes you much faster, and provides a buff that's not helpful at all. Turn it off on bosses because it eats up your Frenzy Charges for no reason there. |
| [UTILITY] Ambush setup | |
 |
Ambush - Ambush is a Spell that you cast each time before Attacking with Static Strike. It grants you so much Crit Chance that it's certainly capped, and extra Crit Multiplier. Static Strike will snapshot it for its whole duration. It requires an enemy nearby. |
 |
More Duration Support - More Duration or Cooldown Recovery Support Gems should be included here to have some more time to perform the Attack, or to have the Ambush up and ready sooner. |
| [UTILITY] Crushing Fist setup | |
 |
Crushing Fist - We don't actually use it at all. It's here to put a big indicator above our character's head after they block, so that we know we're now in the Lucky Block Chance mode, and we're (more or less) safe to Attack. |
|
|
5. Gear Setup
The build is centered around Ward (it will provide flat damage via Celestial Mathematics and will often absorb incoming damage), and there are several ways in which one can obtain it. The most important will be a combination of Ynda's Stand and a good Body Armour with around 7 to 8k Evasion and Armour. Then, there are Runic Rares (Helmet, Gloves, and Boots), high in Ward. You must also find the best Heroic Tragedy Jewel with notable replacements that boost your Ward. Use an Iron Flask with a Suffix for increased Ward during effect. The last things to look for are enhancements to Global Defences, and these come from Foulborn Le Heup of All Rings. You must cap your Spell Block Chance - find notables with this stat on Cluster Jewels (especially on Megalomaniac) and around Runebinder Keystone (which you can reach with Impossible Escape). Spell Block Chance is also found as notable replacements around the Heroic Tragedy. Maximum Life, Armour, and Resistances should be present too. Regular Life Regeneration is hard to get in reasonably high quantities, but getting it on Rares will help against DoTs. The Damage is to be improved mostly with Critical Strike Multiplier and Cold Penetration. Attack Speed does not help; Hit Rate scales up with the Gem Quality on Static Strike. Be sure you have enough Attributes and Accuracy. Reservation Efficiency is gathered from the Skill Tree and Enlighten alone.
Our recommended items will:
- Cap your resistances
- Give you enough DPS/Life to start mapping
|
Stat priorities on items:
|
 (Helmet) Rare Helmet - Ward and Maximum Life on Prefixes with Resistances, Accuracy, and Intelligence on Suffixes. For the Eldritch mods, get Pold Penetration or Physical taken as with reduced Mana Cost of Attacks. (Helmet) Rare Helmet - Ward and Maximum Life on Prefixes with Resistances, Accuracy, and Intelligence on Suffixes. For the Eldritch mods, get Pold Penetration or Physical taken as with reduced Mana Cost of Attacks. |
|
| Min. requirements: 90 Maximum Life 40% Total Elemental Resistances Ward Optional affixes: Intelligence Accuracy Rating |
|
 (Helmet) Heatshiver - Heatshiver is definitely a damage-oriented option that you can select to quickly kill pinnacles, but it lacks Ward and Maximum Life. (Helmet) Heatshiver - Heatshiver is definitely a damage-oriented option that you can select to quickly kill pinnacles, but it lacks Ward and Maximum Life. |
|
| (80-100)% increased Evasion Rating 60% increased Mana Regeneration Rate +(20-30)% to Fire Resistance +(20-30)% to Cold Resistance Gain 1% of Cold Damage as Extra Fire Damage per 1% Chill Effect on Enemy Gain 30% of Cold Damage as Extra Fire Damage against Frozen Enemies |
|
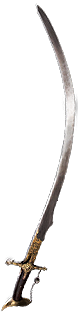 (Weapon) Paradoxica - Damage on a weapon is irrelevant, so we go for Paradoxica because it deals double damage (albeit the Crit damage bonus does not account for that). Look for Elemental penetration and Accuracy. (Weapon) Paradoxica - Damage on a weapon is irrelevant, so we go for Paradoxica because it deals double damage (albeit the Crit damage bonus does not account for that). Look for Elemental penetration and Accuracy. |
|
| +25% to Global Critical Strike Multiplier Attacks with this Weapon deal Double Damage Veiled (prefix) of the Veil (suffix) |
|
 (Weapon) Frostbreath - Some players prefer Frostbreath because it also deals double damage, and on top of that, it has Fire Resistance, and you can pair it up with Overlord notable from Cluster Jewels to Fortify yourself on Hit. (Weapon) Frostbreath - Some players prefer Frostbreath because it also deals double damage, and on top of that, it has Fire Resistance, and you can pair it up with Overlord notable from Cluster Jewels to Fortify yourself on Hit. |
|
| 15% reduced Enemy Stun Threshold Adds (26-32) to (36-42) Physical Damage Adds (26-32) to (36-42) Cold Damage (8-14)% increased Attack Speed +(40-50)% to Fire Resistance (35-50)% increased Chill Duration on Enemies Attacks with this Weapon deal Double Damage to Chilled Enemies |
|
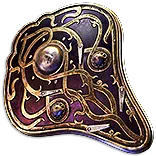 (Shield) Azadi Crest - Your Block Chance is Lucky after Blocking with More Than Skill passive, and Azadi Crest makes that luck even luckier, so you seldom get hit. You can Corrupt it for Spell Block Chance. (Shield) Azadi Crest - Your Block Chance is Lucky after Blocking with More Than Skill passive, and Azadi Crest makes that luck even luckier, so you seldom get hit. You can Corrupt it for Spell Block Chance. |
|
| 6% increased Movement Speed +(1-100) to maximum Life +(1-10)% Chance to Block (1-10)% chance to avoid Projectiles Your Lucky or Unlucky effects use the best or worst from three rolls instead of two |
|
 (Body Armour) Rare Body Armour - You will need high-quality Conquest Lamellar with three Prefixes for added and increased Armour and Evasion. You can craft one yourself by spamming Dense Fossils until it looks good, finish it up with Tailoring Orb, and Harvestcraft the Physical Damage Reduction. For Eldritch mods, go for Physical Taken as or Spell Block Chance, and Crit Multiplier for Attacks. (Body Armour) Rare Body Armour - You will need high-quality Conquest Lamellar with three Prefixes for added and increased Armour and Evasion. You can craft one yourself by spamming Dense Fossils until it looks good, finish it up with Tailoring Orb, and Harvestcraft the Physical Damage Reduction. For Eldritch mods, go for Physical Taken as or Spell Block Chance, and Crit Multiplier for Attacks. |
|
| Min. requirements: 7000 combined Armour and Evasion Optional affixes: Additional Physical Damage Reduction Resistances |
|
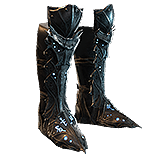 (Boots) Rare Boots - Runic Boots should have high Ward, Maximum Life, Movement Speed, and Resistances. It's the best place to get significant Chaos Resistance as well. Eldritch mods should include Cooldown Recovery for Travel Skills or some type of DoT Avoidance, and Stone Golem Buff Effect or Chaos Resistance. (Boots) Rare Boots - Runic Boots should have high Ward, Maximum Life, Movement Speed, and Resistances. It's the best place to get significant Chaos Resistance as well. Eldritch mods should include Cooldown Recovery for Travel Skills or some type of DoT Avoidance, and Stone Golem Buff Effect or Chaos Resistance. |
|
| Min. requirements: 90 Maximum Life 40% Total Elemental Resistances 30% increased Movement Speed Ward Optional affixes: more Resistances |
|
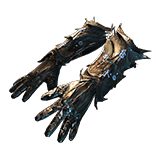 (Gloves) Rare Gloves - On Gloves search for Ward, Maximum Life, Resistances, Accuracy, and Dexterity. For the Eldritch mods: Rage on Hit or Freeze proliferation, and Exerted Attack Damage or Accuracy. (Gloves) Rare Gloves - On Gloves search for Ward, Maximum Life, Resistances, Accuracy, and Dexterity. For the Eldritch mods: Rage on Hit or Freeze proliferation, and Exerted Attack Damage or Accuracy. |
|
| Min. requirements: 90 Maximum Life 40% Total Elemental Resistances Ward Optional affixes: Dexterity Accuracy |
|
 (Belt) Ynda's Stand - Get a Ynda's Stand, combine it with a good hybrid Chest piece, and use Defence Catalysts on it to gain more Ward from it. You can even enhance it further with Volatile Vaal Orb, but be careful; these Belts are expensive. (Belt) Ynda's Stand - Get a Ynda's Stand, combine it with a good hybrid Chest piece, and use Defence Catalysts on it to gain more Ward from it. You can even enhance it further with Volatile Vaal Orb, but be careful; these Belts are expensive. |
|
| (20-30)% increased Stun Duration on Enemies Regenerate (30-50) Life per second +(20-30)% to Fire Resistance +(20-30)% to Cold Resistance Gain Ward instead of 50% of Armour and Evasion Rating from Equipped Body Armour |
|
 (Amulet) Ashes of the Stars - Ashes is the best Amulet because it grants Quality to Static Strike, which is the only way to increase your Hit Rate. Multiple other Skills you use will also benefit from that extra Quality. (Amulet) Ashes of the Stars - Ashes is the best Amulet because it grants Quality to Static Strike, which is the only way to increase your Hit Rate. Multiple other Skills you use will also benefit from that extra Quality. |
|
| +(10-16) to all Attributes (5-10)% increased Experience Gain of Gems +1 to Level of all Skill Gems +(20-30)% to Quality of all Skill Gems |
|
| Recommended Anointments: Arcane Guarding Safeguard |
|
 (Ring) Foulborn Le Heup of All - You need two of these, preferably with good rolls on all mods, but most importantly on Global Defences for increased Ward. Enhance it with Catalysts. (Ring) Foulborn Le Heup of All - You need two of these, preferably with good rolls on all mods, but most importantly on Global Defences for increased Ward. Enhance it with Catalysts. |
|
| Adds 1 to 4 Physical Damage to Attacks +(10-30) to all Attributes (10-30)% increased Global Defences (10-30)% increased Rarity of Items found +(10-30)% to all Elemental Resistances |
|
 (Jewels) Impossible Escape - You can go for the Unwavering Stance variant with Heroic Tragedy socketed next to it, as is the custom, or the Runebinder version, which allows you to allocate Sovereignty and the Safeguard Cluster with its +23% Spell Block Chance. (Jewels) Impossible Escape - You can go for the Unwavering Stance variant with Heroic Tragedy socketed next to it, as is the custom, or the Runebinder version, which allows you to allocate Sovereignty and the Safeguard Cluster with its +23% Spell Block Chance. |
|
| Passives in Radius of <random Keystone> can be Allocated without being connected to your tree Passage |
|
 (Jewels) Heroic Tragedy - The Uhtred variant grants Celestial Mathematics, which you have to have. For the notable replacements, look for all the increases to Ward, Endurance Charge on Ward Break, Frenzy Charge on Ward Break, Spell Block Chance, chance to Restore Ward when you Block, and Chaos Resistance. Socket it near Unwavering Stance or right below the starting location. (Jewels) Heroic Tragedy - The Uhtred variant grants Celestial Mathematics, which you have to have. For the notable replacements, look for all the increases to Ward, Endurance Charge on Ward Break, Frenzy Charge on Ward Break, Spell Block Chance, chance to Restore Ward when you Block, and Chaos Resistance. Socket it near Unwavering Stance or right below the starting location. |
|
| Remembrancing (100-8000) songworthy deeds by the line of <Vorana • Medved • Uhtred> Passives in radius are Conquered by the Kalguur Historic |
|
 (Jewels) The Light of Meaning - You don't actually have a lot of "increases" to damage specifically. The Light of Meaning can be a fine pick if socketed next to multiple passives. You can even socket it near the centre of the Skill Tree and overlap its radius with that of Unnatural Instinct. (Jewels) The Light of Meaning - You don't actually have a lot of "increases" to damage specifically. The Light of Meaning can be a fine pick if socketed next to multiple passives. You can even socket it near the centre of the Skill Tree and overlap its radius with that of Unnatural Instinct. |
|
| Passive Skills in Radius also grant 6% increased Cold Damage | |
 (Jewels) Unnatural Instinct - As stated, combine it with The Light of Meaning to extract some more damage. It's usually not worth its price, and a good Rare Jewel may be even better, but do consider it. (Jewels) Unnatural Instinct - As stated, combine it with The Light of Meaning to extract some more damage. It's usually not worth its price, and a good Rare Jewel may be even better, but do consider it. |
|
| Allocated Small Passive Skills in Radius grant nothing Grants all bonuses of Unallocated Small Passive Skills in Radius |
|
 (Jewels) Watcher's Eye - Your Aura is Precision, where you can find Crit Multiplier, increased Attack Damage, and Flask Charge on Critical Hit. It justifies occupying a socket if you have at least two of these mods. (Jewels) Watcher's Eye - Your Aura is Precision, where you can find Crit Multiplier, increased Attack Damage, and Flask Charge on Critical Hit. It justifies occupying a socket if you have at least two of these mods. |
|
| (4-6)% increased maximum Energy Shield (4-6)% increased maximum Life (4-6)% increased maximum Mana <Two or Three random aura modifiers> |
|
 (Jewels) Rare Jewel - The most valuable stats on a Jewel are Maximum Life and various Crit Multipliers, ones that will affect Melee Lightning Strike Attack. You can find Spell Block Chance and Reservation Efficiency here as well. (Jewels) Rare Jewel - The most valuable stats on a Jewel are Maximum Life and various Crit Multipliers, ones that will affect Melee Lightning Strike Attack. You can find Spell Block Chance and Reservation Efficiency here as well. |
|
| Recommended affixes: increased Maximum Life Critical Strike Multiplier Resistances Attributes Spell Block Chance increased Mana Reservation Efficiency |
|
 (Jewels) Large Cluster Jewel - We recommend a Shield Large Cluster Jewel containing Prodigious Defence for Spell Block Chance and Precise Retaliation for Crit Multiplier. (Jewels) Large Cluster Jewel - We recommend a Shield Large Cluster Jewel containing Prodigious Defence for Spell Block Chance and Precise Retaliation for Crit Multiplier. |
|
| Recommended affixes: 1 added passive skill is Prodigious Defence 1 added passive skill is Precise Retaliation 1 added passive skill is Heavy Hitter |
|
 (Jewels) Megalomaniac - On Megalomaniac, we recommend Mage Hunter or Mystical Ward for Spell Block Chance, Bloodscent for 2 Rage on Hit, Antivenom, Hound's Mark, Fasting, Smite the Weak, Overlord, Prismatic Heart, or something for Reservation Efficiency or Maximum Life. (Jewels) Megalomaniac - On Megalomaniac, we recommend Mage Hunter or Mystical Ward for Spell Block Chance, Bloodscent for 2 Rage on Hit, Antivenom, Hound's Mark, Fasting, Smite the Weak, Overlord, Prismatic Heart, or something for Reservation Efficiency or Maximum Life. |
|
| Adds 4 Passive Skills Added Small Passive Skills grant Nothing <3 Random notable mods> |
|
 (Flask) Bottled Faith - Your Crit Chance is already capped, but Bottled Faith also causes enemies to take increased damage, increases your damage, and creates Consecrated Ground. (Flask) Bottled Faith - Your Crit Chance is already capped, but Bottled Faith also causes enemies to take increased damage, increases your damage, and creates Consecrated Ground. |
|
| 40% increased Damage Creates Consecrated Ground on Use (30-15)% reduced Duration Consecrated Ground created by this Flask has Tripled Radius Consecrated Ground created during Effect applies (7-10)% increased Damage taken to Enemies (100-150)% increased Critical Strike Chance against Enemies on Consecrated Ground during Effect |
|
Other suggested Flasks:
|
|
     |
|
|
If you have any other build requests please leave that in the comments below.
Pictures used in this article are the intellectual property of Grinding Gear Games.
